Ramen Noodle Salad

Ramen noodle salad has been around for years. I love this dish because you can make endless varieties of it based on your favorite ingredients.

Make it for your next potluck, or serve it as a side dish for your next meal.

My complete recipe is at the bottom of this post.  Give it a try.  I think you’ll like it. 🙂

Ramen Noodle Salad

image

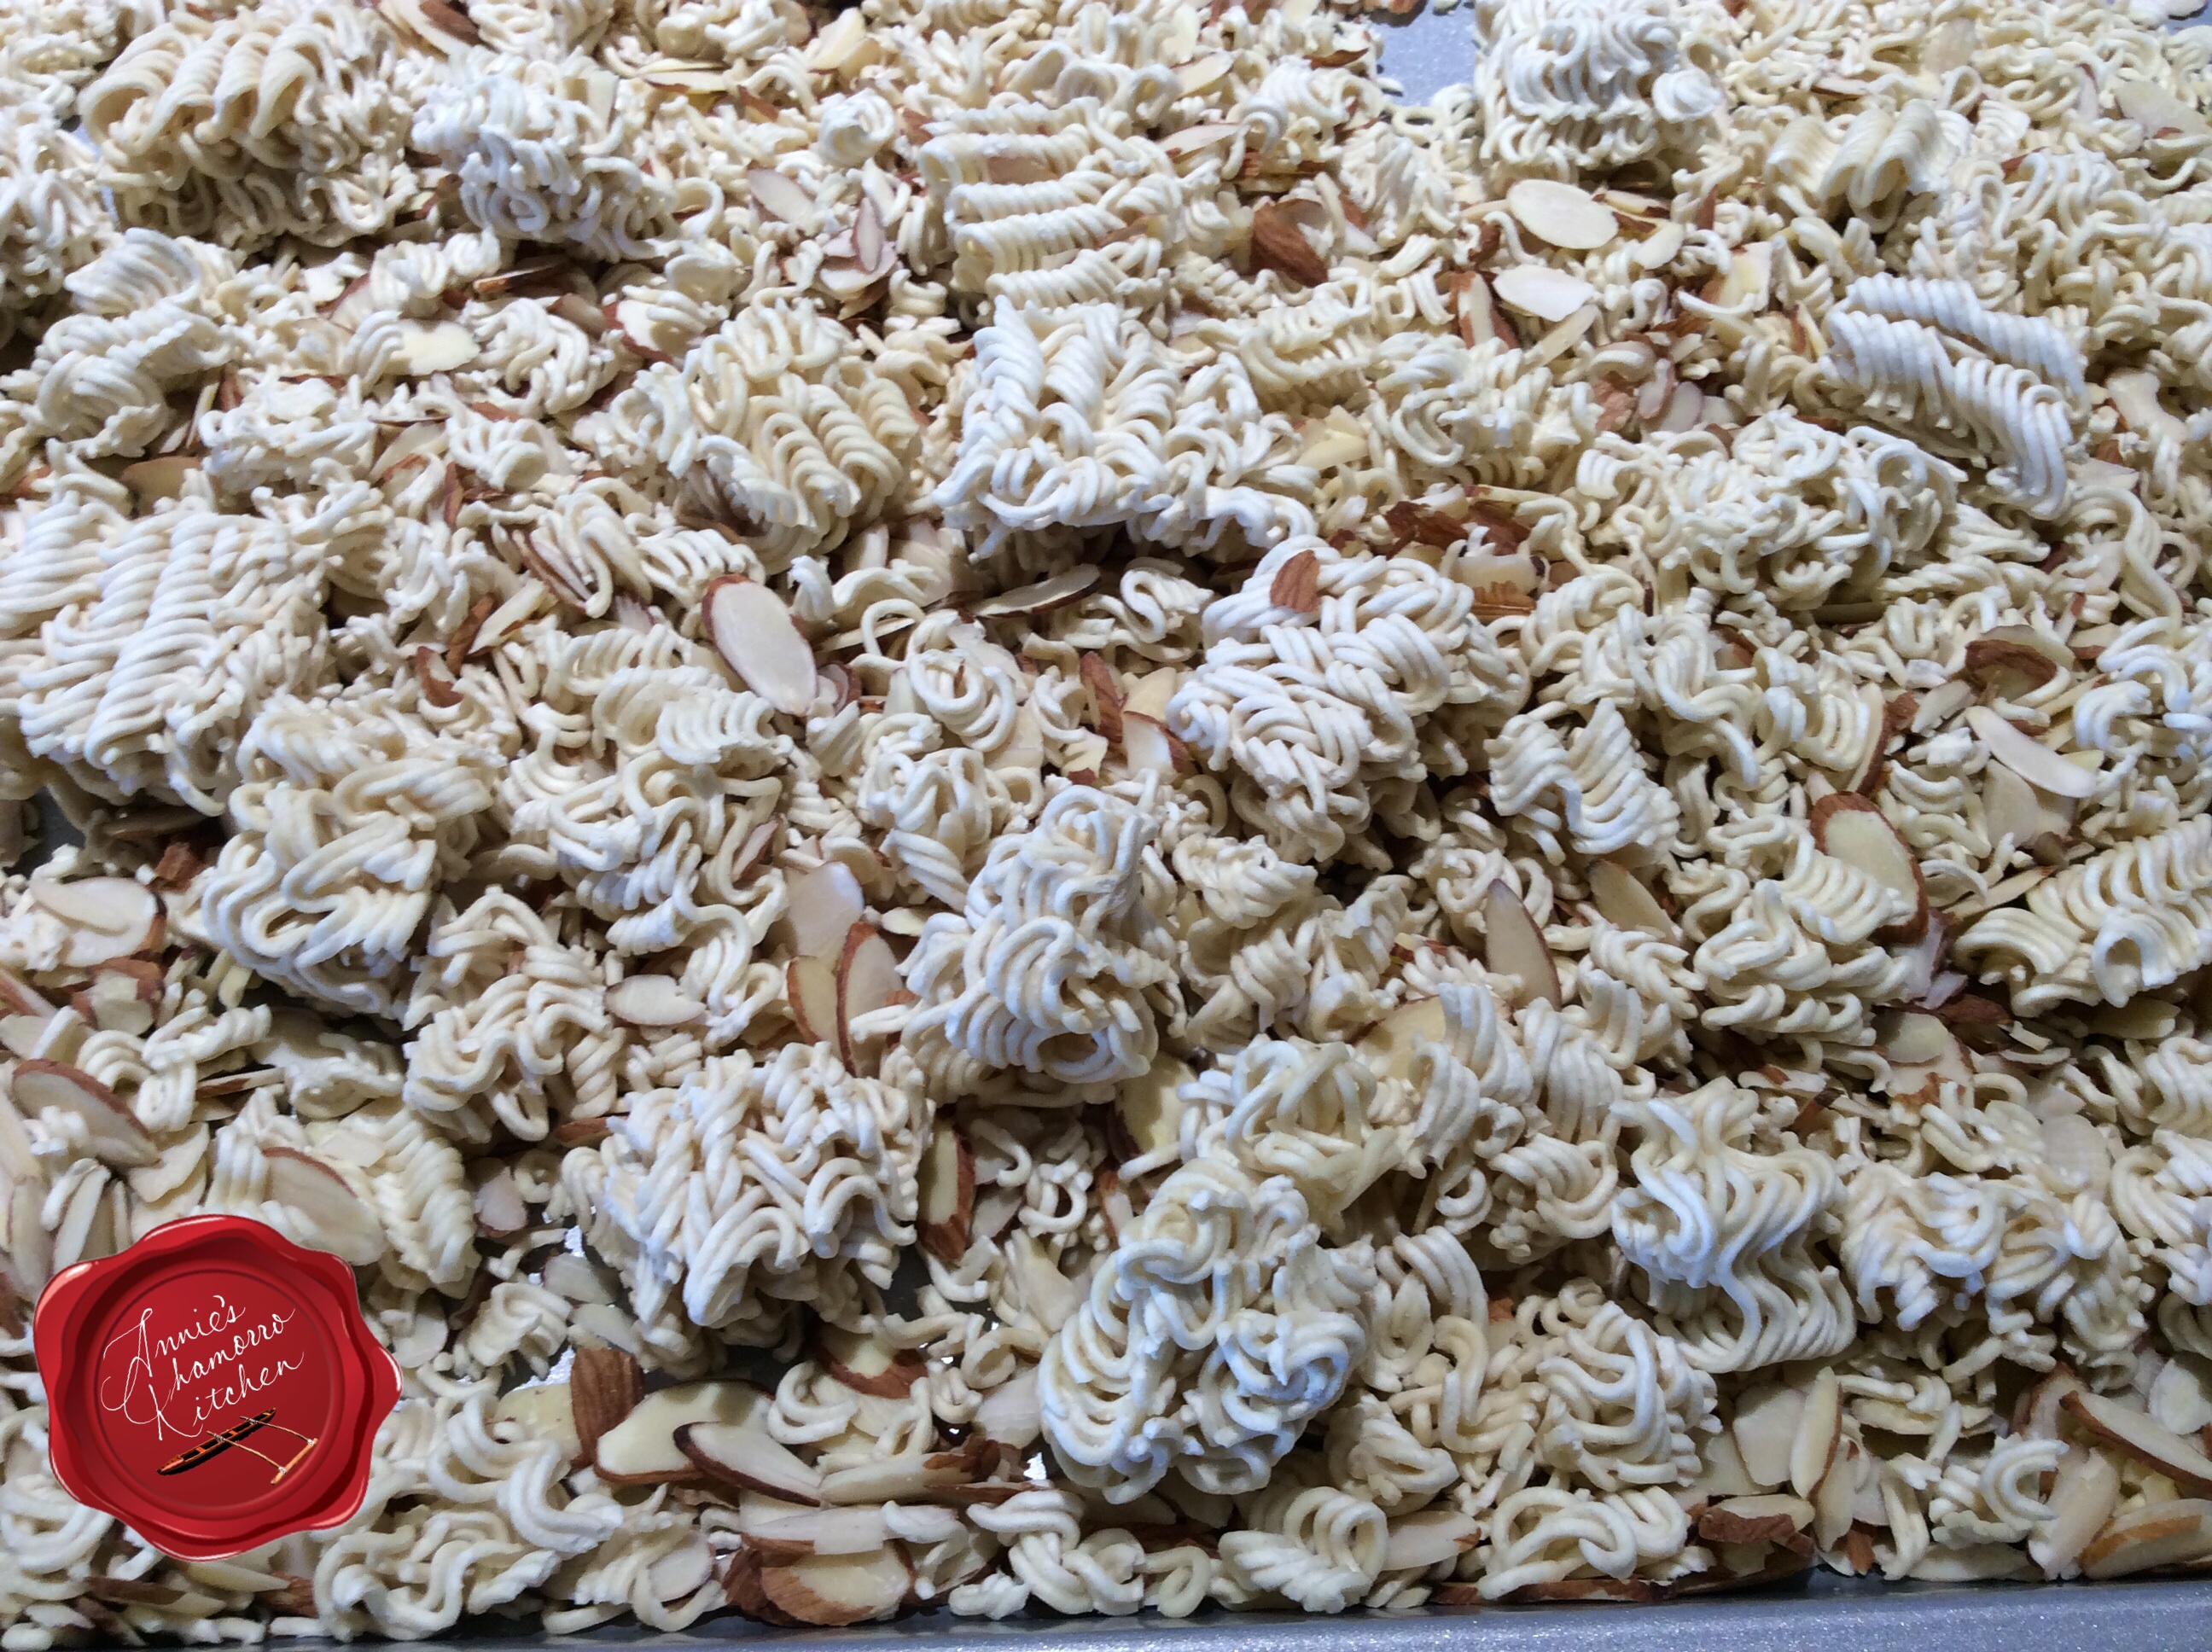
I start with the basic ramen noodles and almonds.  Toast them in the oven for a few minutes to bring out the flavorful almond oils and to get the noodles nicely browned.

image

I don’t like to use pre-packaged coleslaw mix in this salad, mainly because most of the time I buy the mixes, it already smells bad, indicating spoilage.  I buy a whole head of cabbage and slice it myself, saving the potential for food waste and sending good money down the drain.

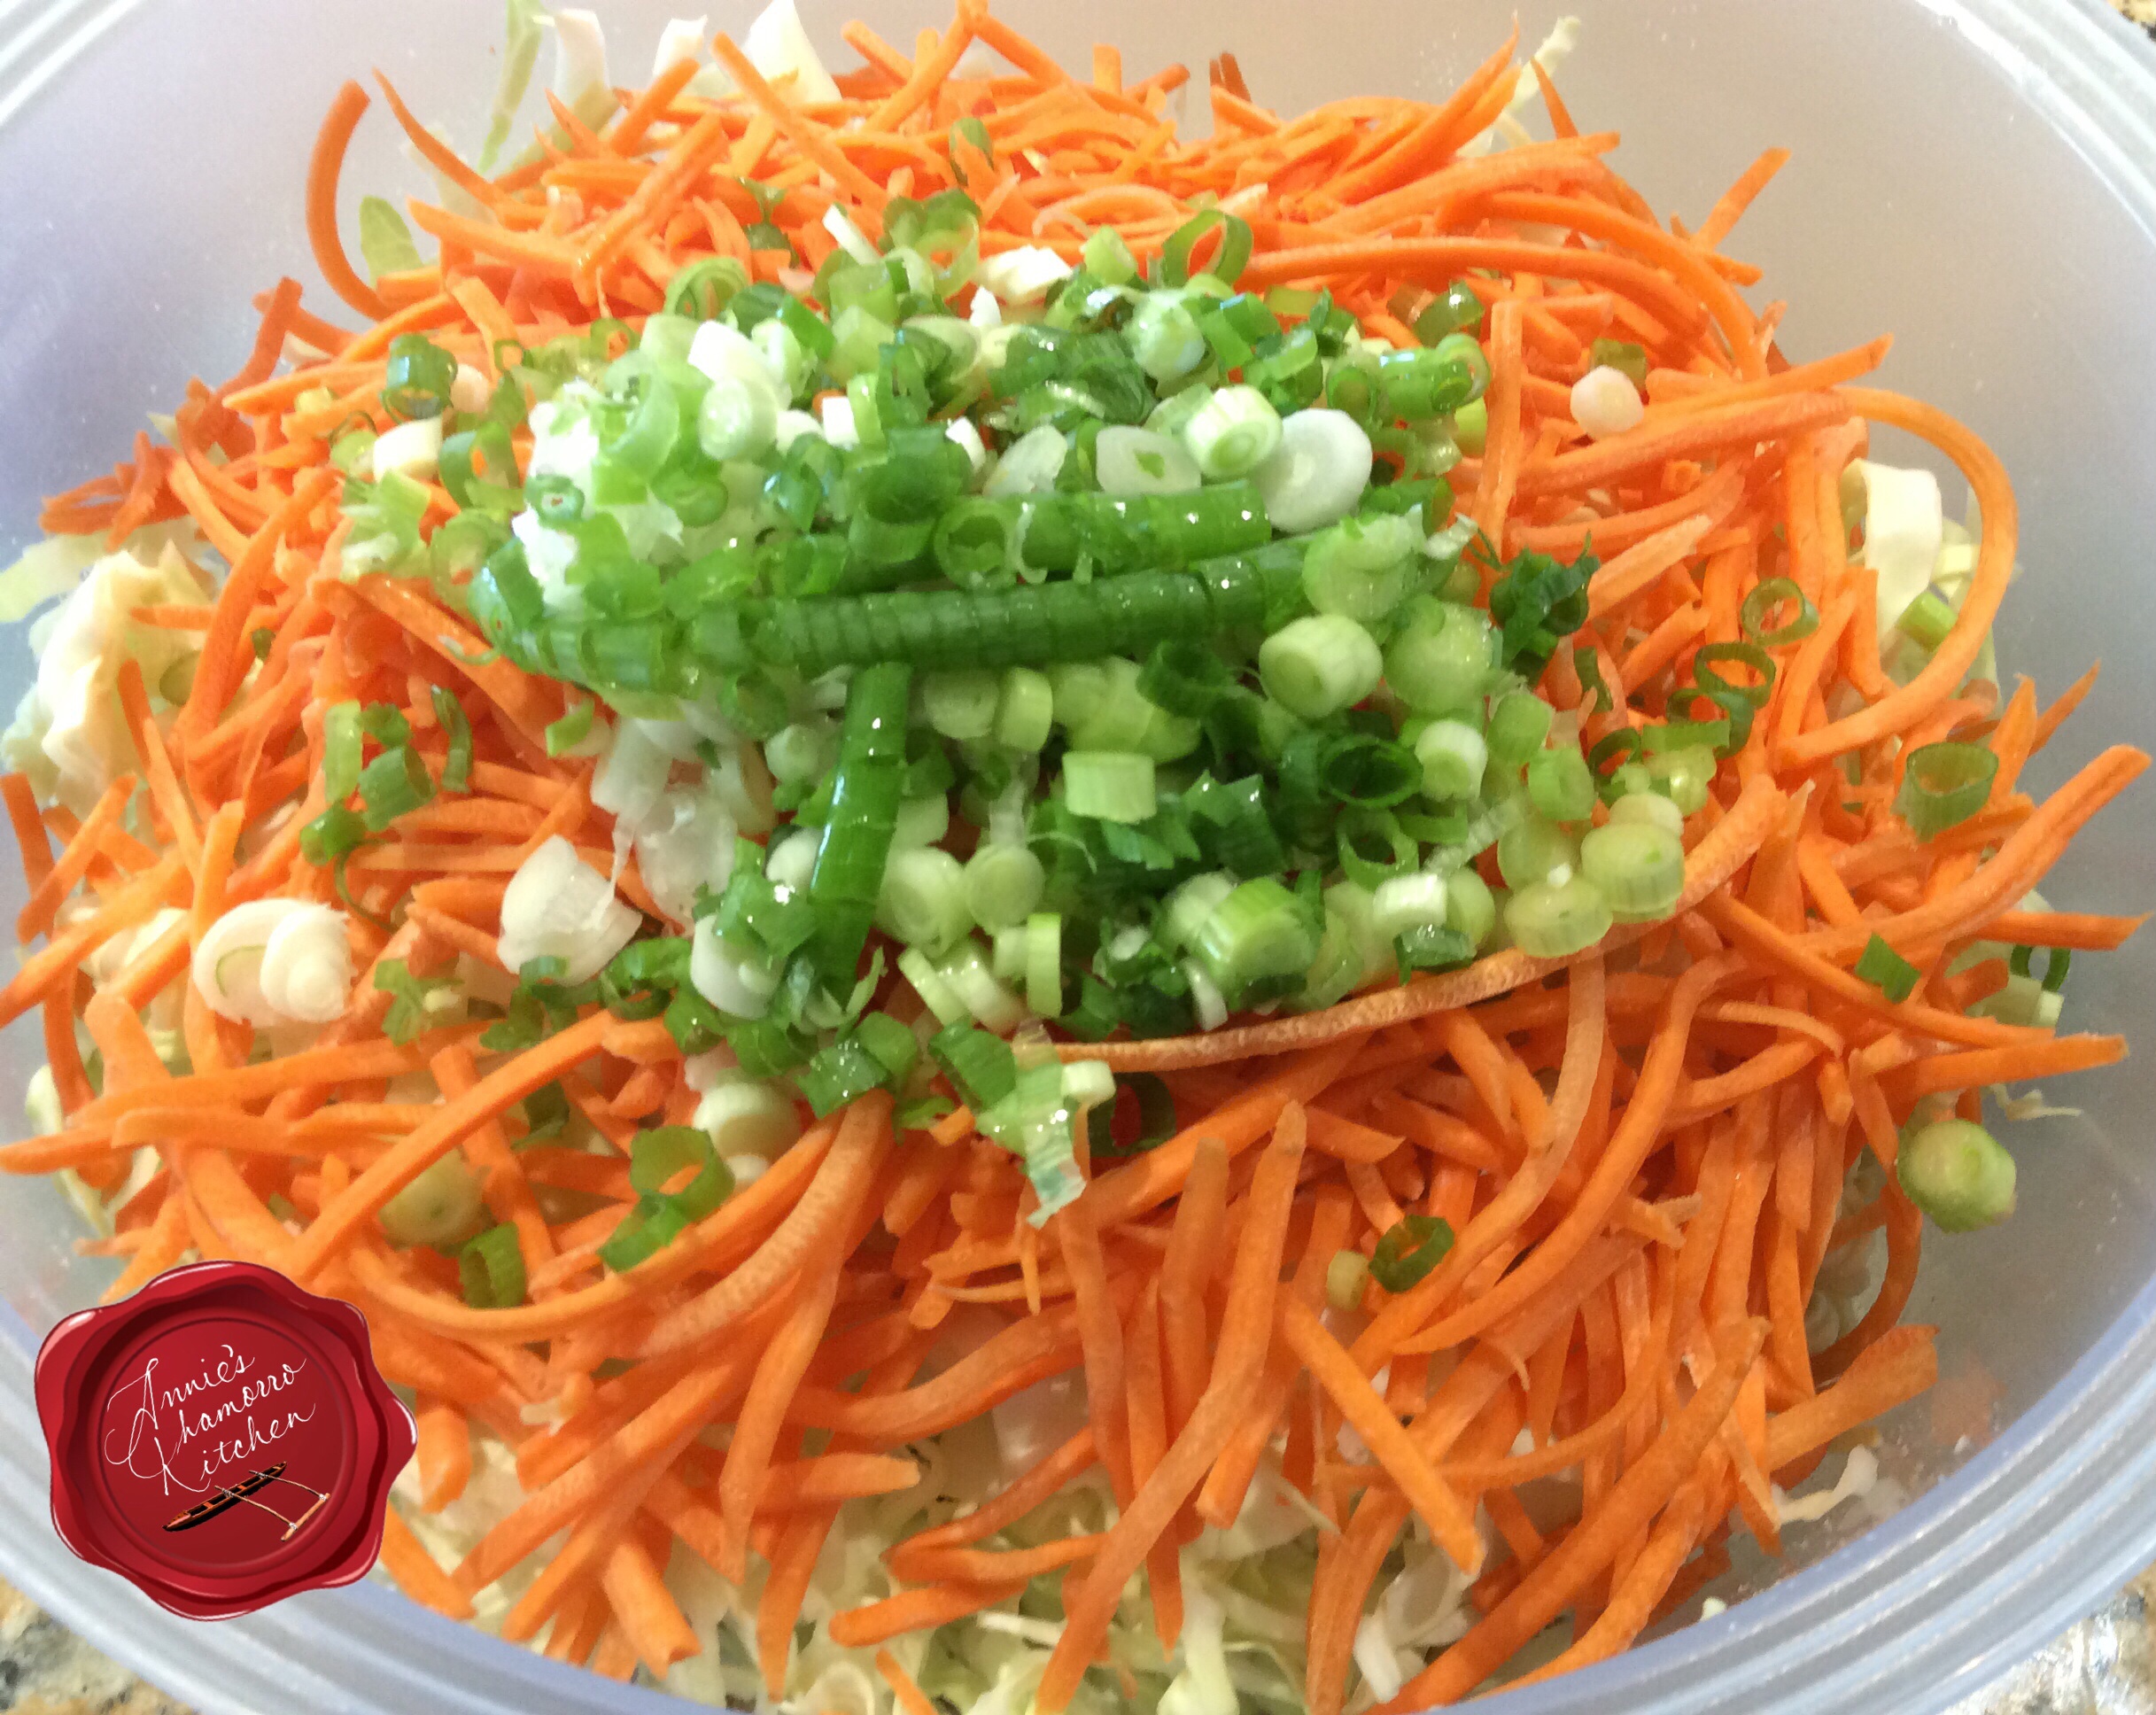
On the other hand, I buy pre-sliced carrots.  I’ve never bought a bag of bad/spoiled pre-sliced carrots.  The pre-packaged kind saves oodles of time in the kitchen.

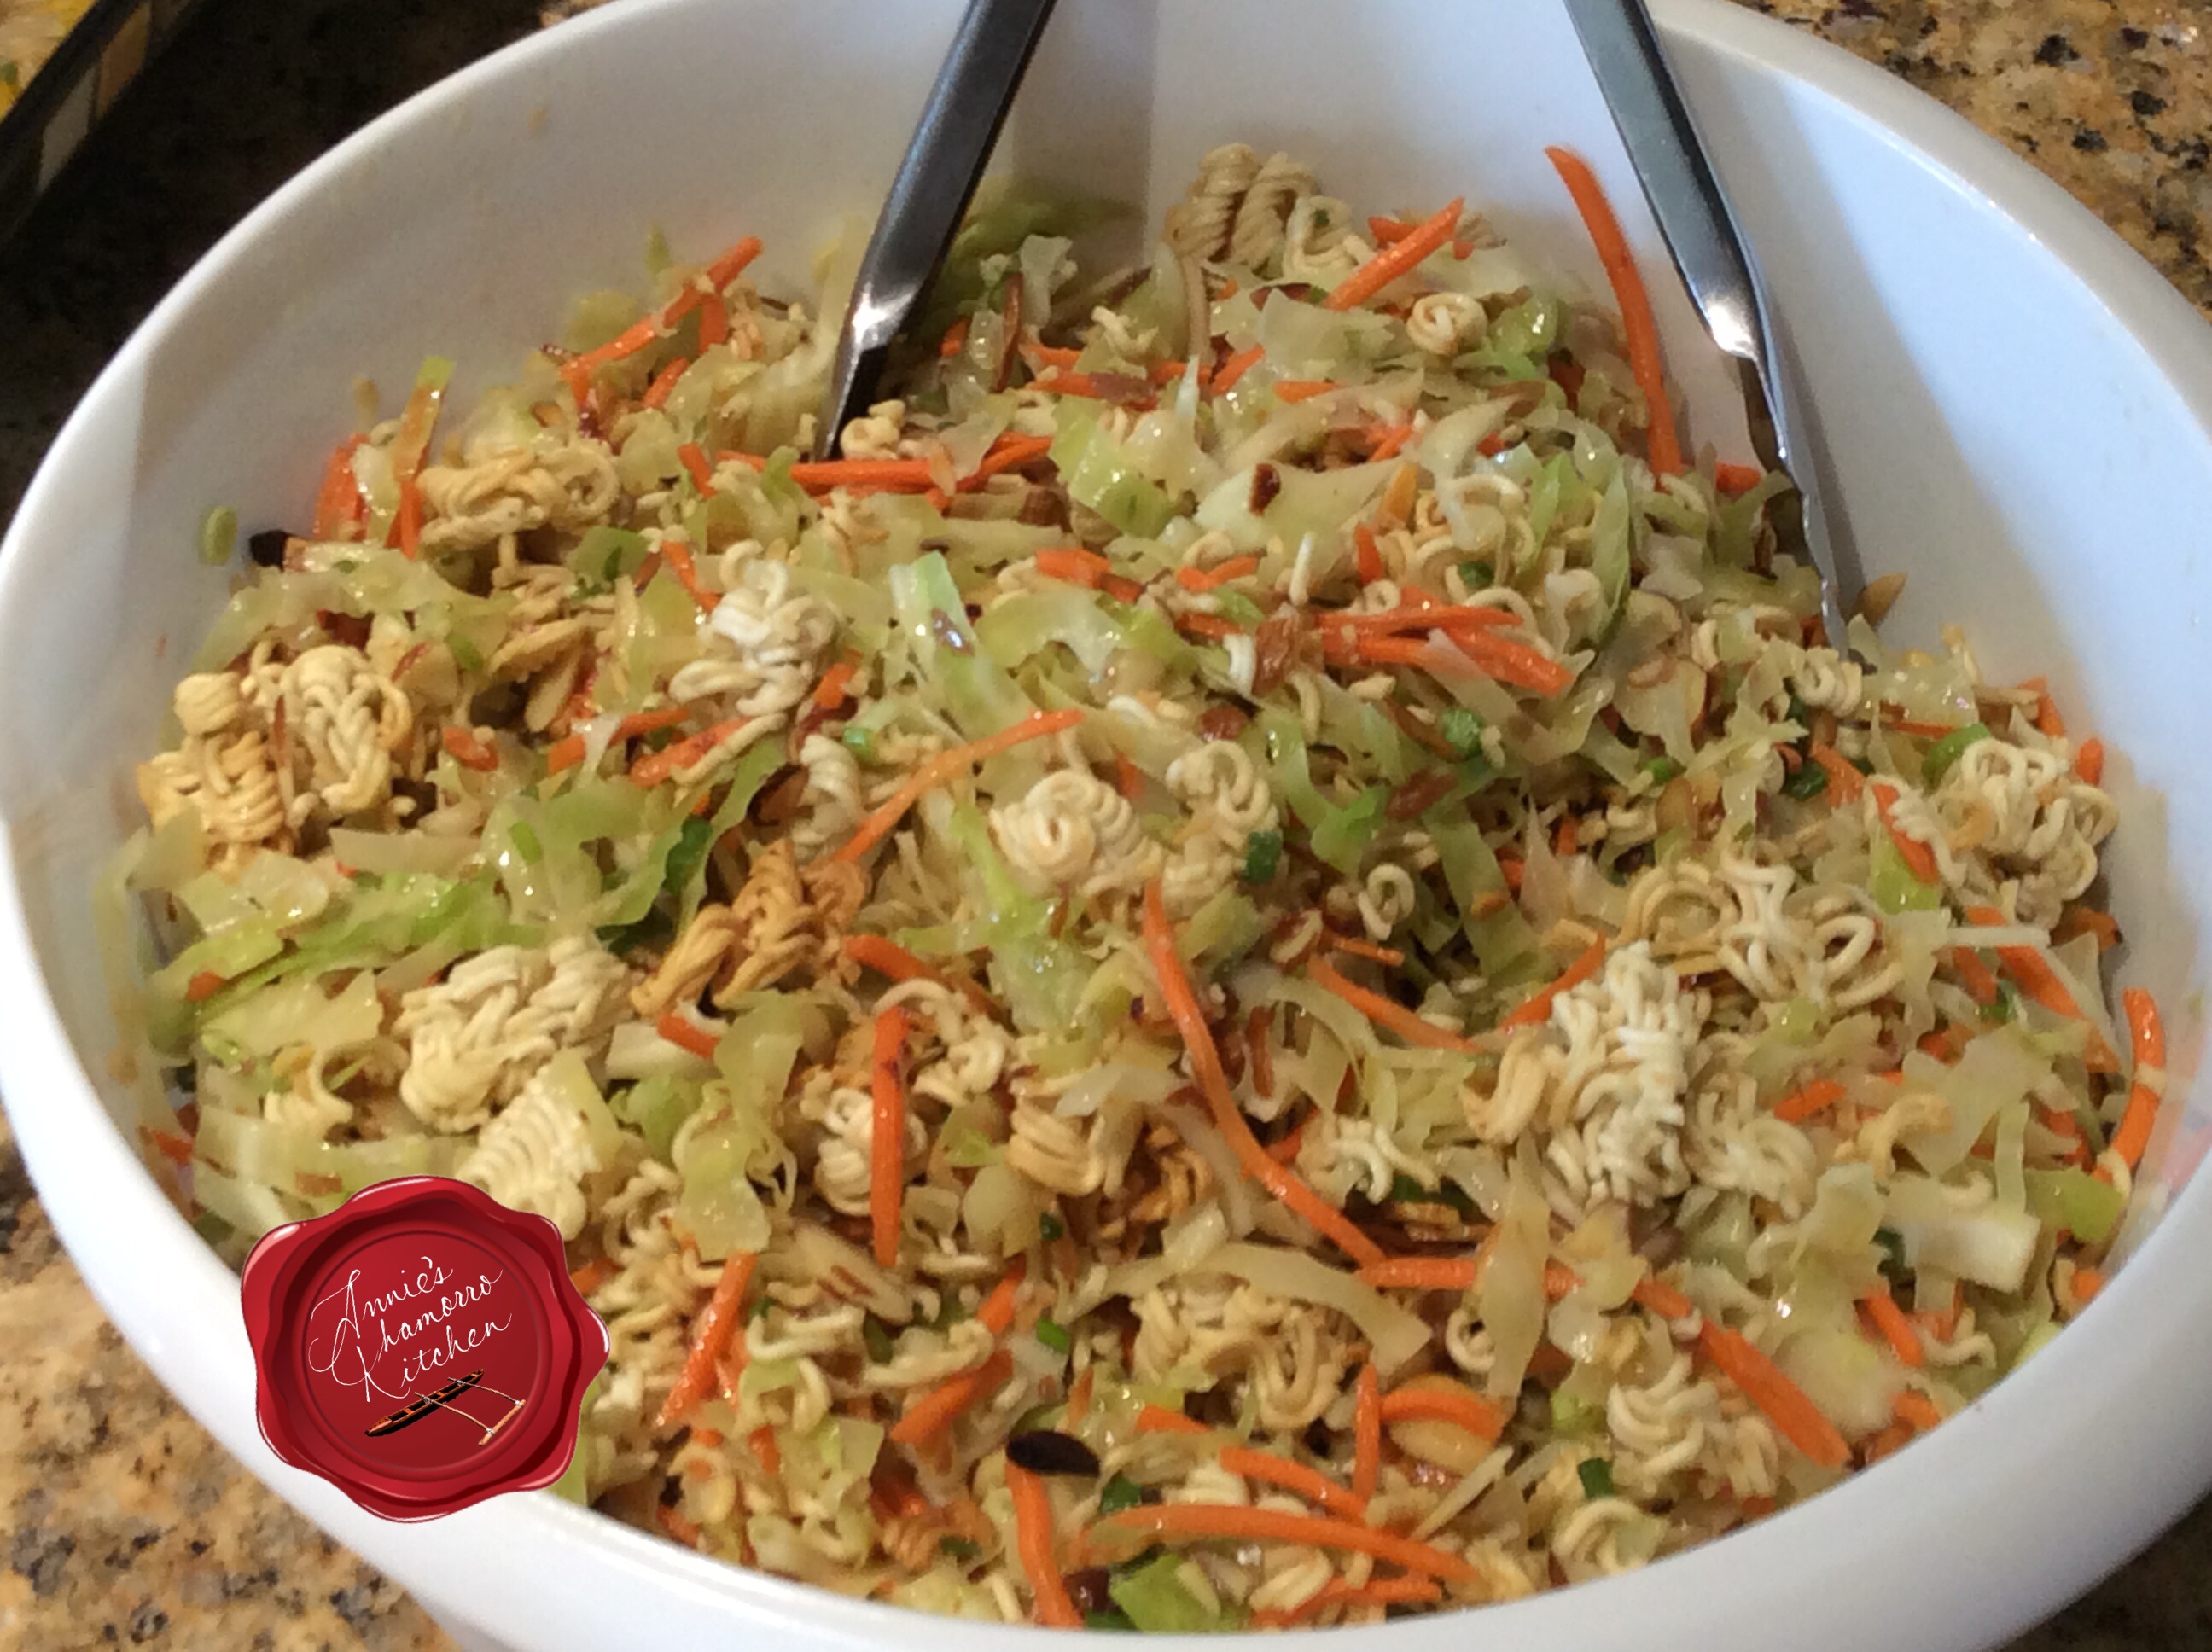
Place all of the salad vegetables in a large mixing bowl; mix in the toasted noodles and almonds.

image

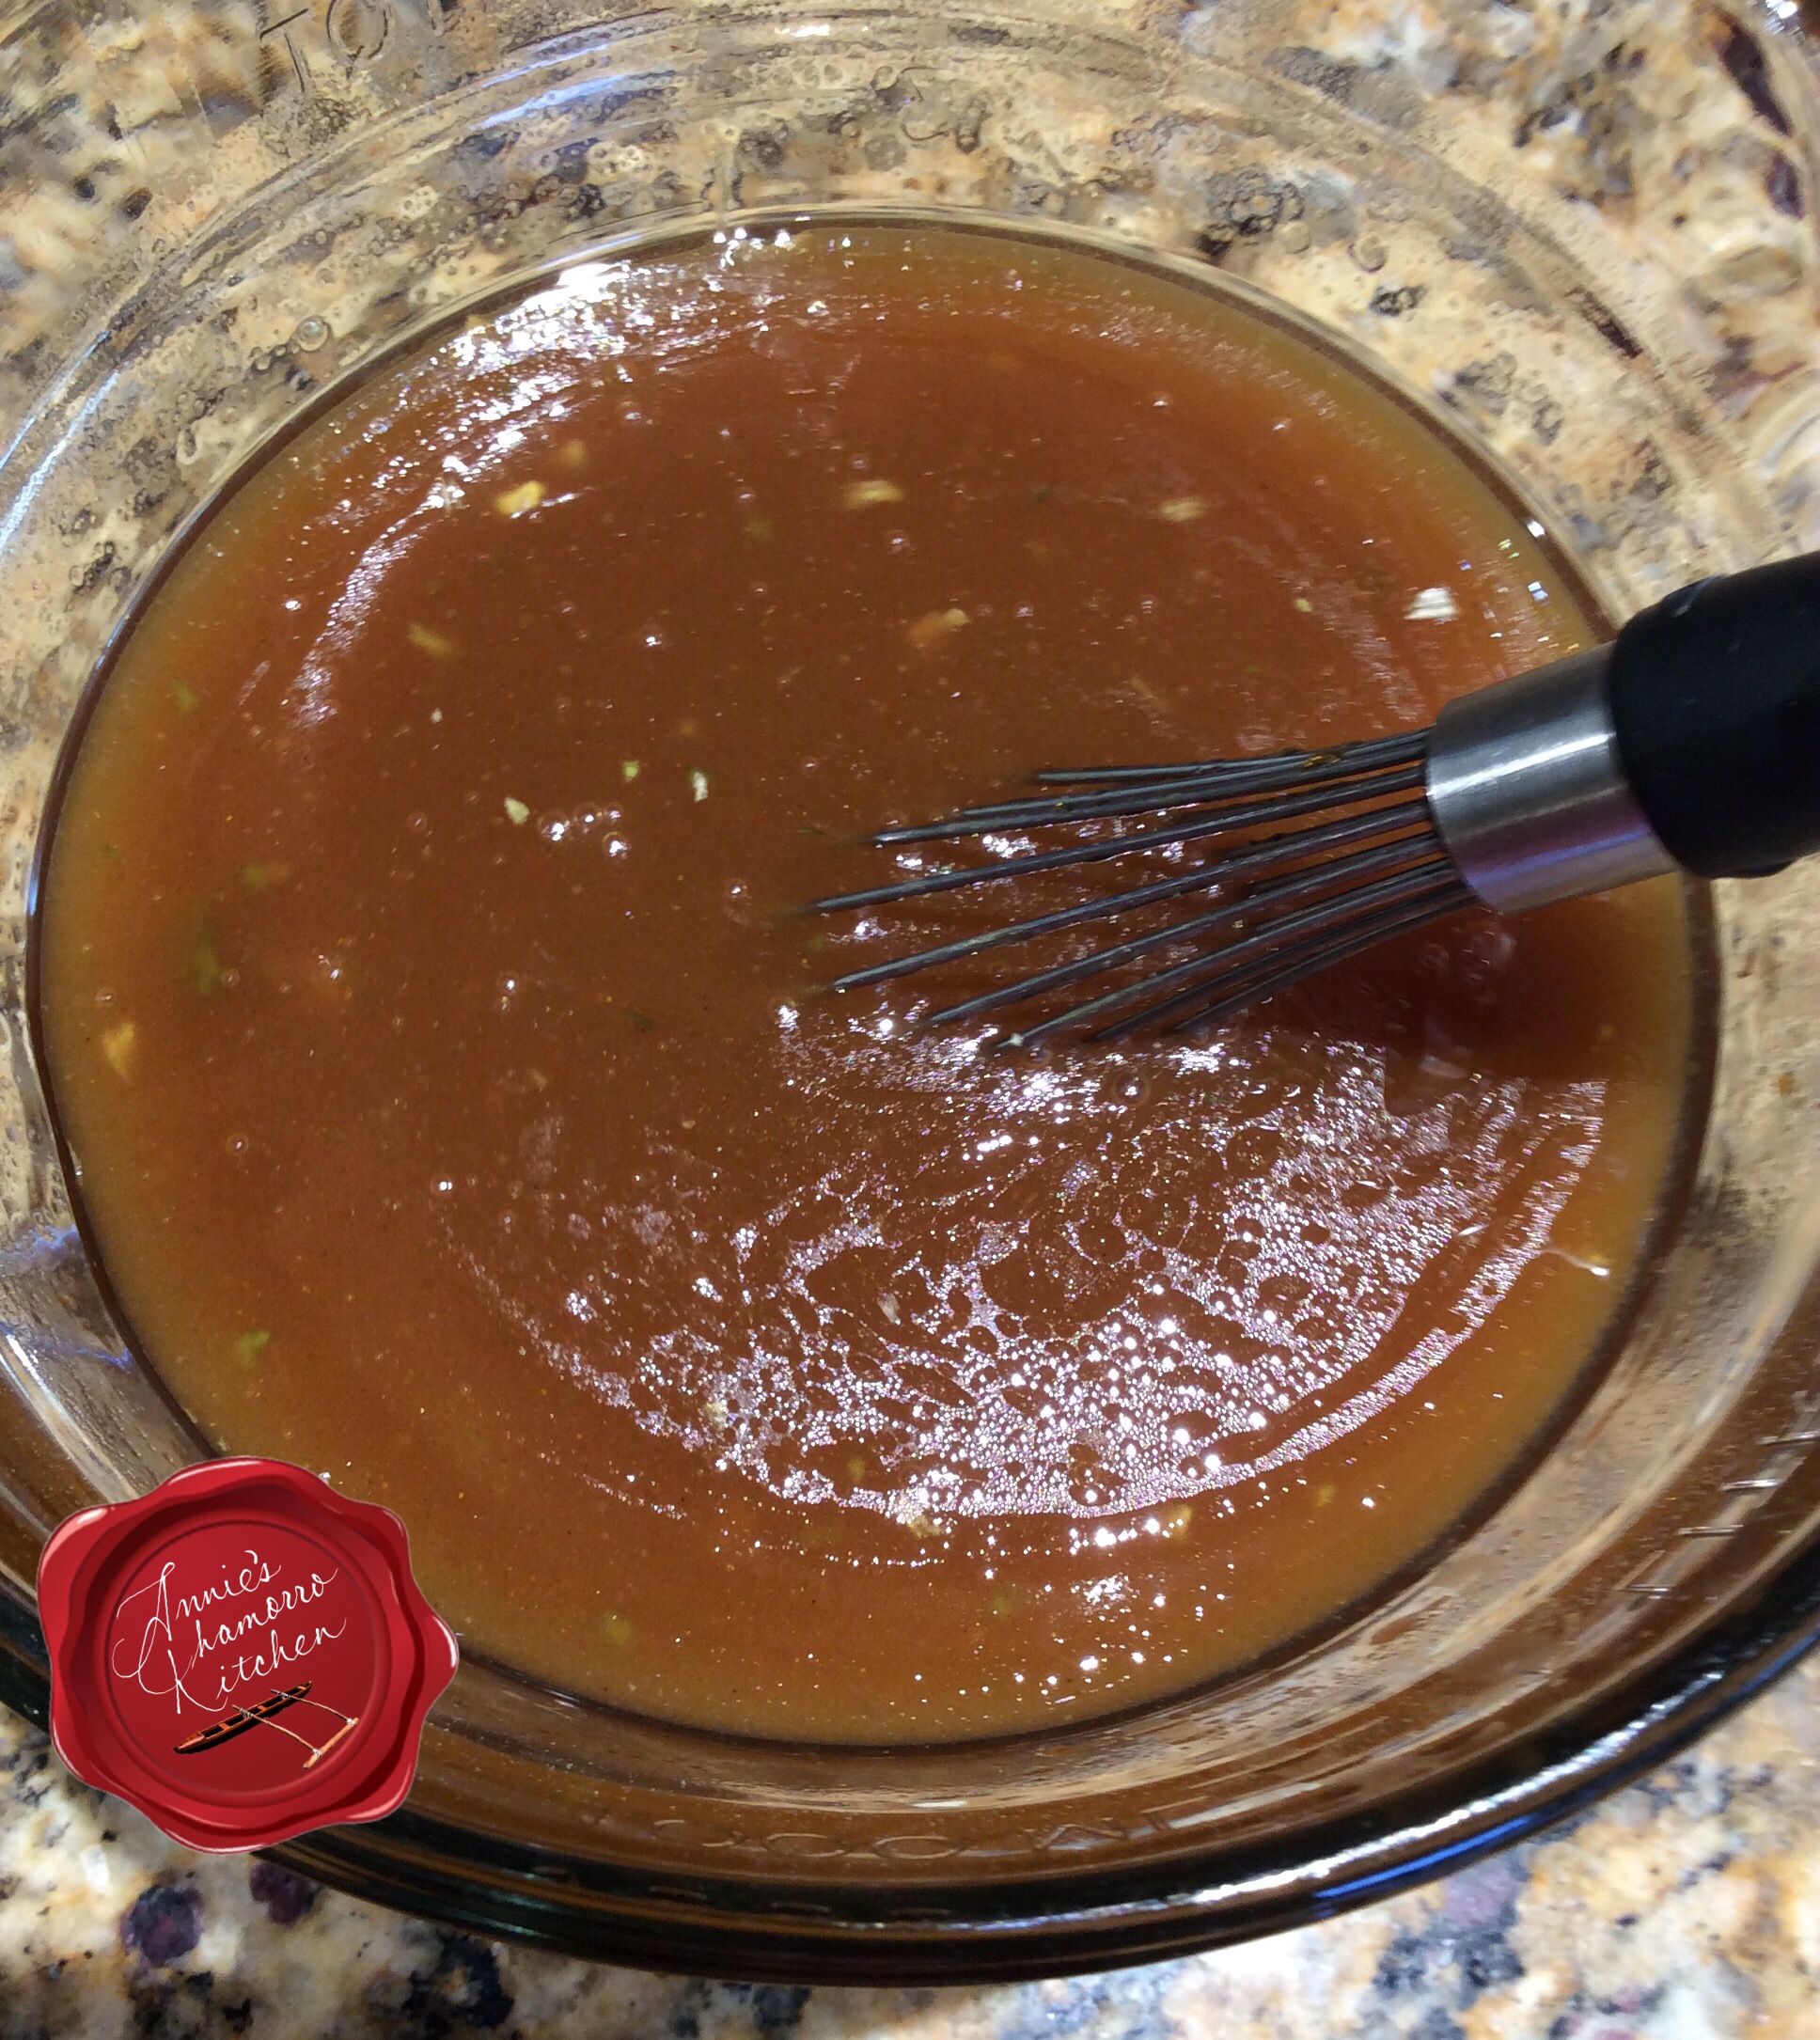
You can buy a ready-made Asian vinaigrette for this salad, but a homemade dressing takes no time at all, and you can control the quality of ingredients.  See my full recipe below for my version of this sweet and tangy dressing that makes use of the ramen noodle seasoning packets.  If you want to cut back on the sodium, use half, just one, or none of the seasoning packets.  The dressing will still pack a whole heck of a lot of flavor without them.

image

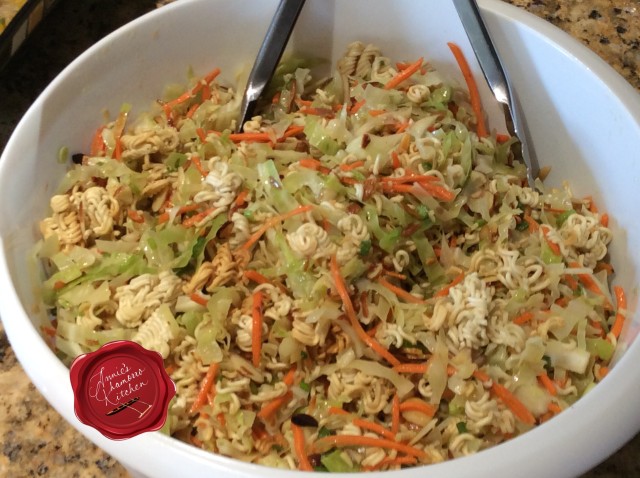
Pour the dressing into the bowl; use a pair of tongs to toss it all together.  Serve and enjoy!

image


Ramen Noodle Salad
 
Prep time
Cook time
Total time
 
A crunchy salad with ramen noodles and a sweet and savory dressing
Author:
Recipe type: Side
Ingredients
Salad:
  • 4 packages ramen noodles
  • 2 cups sliced almonds
  • 2 cups julienned carrots
  • 3 stalks green onions, sliced
Optional:
  • 2 cups mandarin orange slices
  • 4 tablespoons toasted sesame seeds
  • 1 cup shelled and steamed edamame
  • 1 cup crumbled bacon
Dressing:
  • 1 teaspoon crushed garlic
  • 1 cup vegetable oil
  • ⅓ cup sesame oil
  • ⅔ cup good quality honey
  • ⅔ cup rice vinegar
  • 2 teaspoons soy sauce
  • 4 Ramen seasoning packets (from the ramen noodles used in the salad)
Instructions
Toast the noodles and almonds:
  1. Preheat your oven to 425 degrees.
  2. Break the noodles apart while still in the original packaging. Place the broken noodles on a large rimmed baking pan. Set the ramen noodle seasoning packets aside (to be used for the dressing).
  3. Add the sliced almonds to the pan. Mix the almonds and noodles together.
  4. Bake for 5 minutes then remove from oven and let it cool. Place in a large mixing bowl.
Prepare the salad:
  1. Slice the cabbage thinly, as if to make coleslaw. Place into the large mixing bowl with the noodles and almonds.
  2. Add the carrots and greens onions to the bowl.
  3. Add any other optional salad ingredients.
  4. In a small bowl, whisk all of the dressing ingredients together. Pour the dressing over the noodle and cabbage mixture. Toss to combine all the ingredients.
Serve and ENJOY!


Kimchee Noodles

Kimchee noodles is a quick and easy side dish that is a must-have for your gatherings, and it goes especially well with BBQ meat dishes.

This is my sister-in-law, Darlene’s recipe.  It’s a tried-and-true recipe that’s requested often.  It’s a great potluck dish too.

Dar’s complete recipe is located at the bottom of this post.  Give it a try.  I think you’ll like it. 🙂

Darlene’s Kimchee Noodles

image

These are the ingredients used to make the Kimchee Noodles.  You can find them in most Asian markets.

image

image

Prepare the noodles according to the package directions.  Drain and rinse the noodles then place into a mixing bowl.  Drizzle with sesame oil (the oil adds flavor and makes it easier to mix in the kimchee sauce).

image

Stir the kimchee sauce into the noodles.

image   image

Add daigo’ and cucumbers.

Serve and Enjoy!

image


Kimchee Noodles
 
Noodles with kimchee base sauce, pickled daigo' (daikon radish), and cucumbers
Author:
Recipe type: Side
Cuisine: Korean
Ingredients
  • 1 package bean thread noodles (sometimes called Vermicelli)
  • 2 tablespoons sesame oil
  • 2 tablespoons sugar
  • 2 tablespoons kimchee base
  • 2 tablespoons rice vinegar
  • 1 English cucumber, diced small
  • 1 pickled daikon radish, or daigo', diced small
Instructions
  1. Boil the noodles until soft, about 5 minutes. Drain and rinse with cold water then place in a large mixing bowl.
  2. Add the sesame oil to the noodles; mix well to coat the noodles with the oil.
  3. In a small bowl, mix together the sugar, kimchee base, and rice vinegar. Pour over the noodles; mix to combine all of the ingredients.
  4. Mix in the diced cucumbers and daigo'.
Serve and ENJOY!


Tater Tot Casserole

If you’re looking for a stick-to-your-ribs comfort dish, this one is it.  Tater tots, seasoned ground beef and cheese sauce are all baked into a casserole that will make your tummy and taste buds happy, happy, happy.

My complete recipe is located at the bottom of this post.  Give it a try.  I think you’ll like it. 🙂

Tater Tot Casserole

image

Although the name of this dish is “Tater Tot Casserole,” the real star is the cheese sauce that ties it all together.  If you do an online search, you’ll find that quite a few tater tot casserole recipes call for cream of mushroom or chicken soup.

While I do like the canned condensed soup, I thought I’d make my own for this recipe, and I’m glad I did.  Not only can you control the quality of ingredients that go into the dish, you can also control the amount of sodium as well.

Start by placing vegetable broth into a large pot.  You’ll use this same pot to eventually make the cheese sauce, so make sure your pot is big enough to fit the sauce base and all of the cheese and other delicious ingredients that go into it.

Bring the broth to a boil over medium-high heat.

image

Add chopped mushrooms, Dashida, garlic powder, black pepper, onion powder, and thyme to the pot.  Stir to combine, then place a lid on the pot.  Reduce the heat to medium and cook until the mixture returns to a boil.

image

While the broth is simmering, whisk some flour and milk together.

image

Pour the flour mixture into the boiling liquid, whisking as you pour so as to prevent lumps from forming.

image

Turn the heat down to medium-low.  Cook for a couple of minutes to allow the base to thicken.  See, doesn’t this look better than the canned condensed soup?

It tastes better too. 🙂

image

Once you’ve got the base done, you can finish up the cheese sauce.

Whisk in some milk.

image

Add shredded cheese and sour cream to the pot.  Stir the mixture until the cheese melts.  Turn the heat off and place a lid on the pot.  Set the cheese sauce aside for now while you cook the ground beef.

image

Brown lean ground beef in a skillet over medium-high heat.  Add onions, garlic powder and Dashida; cook for 5 minutes or until the onions become translucent.

imagePreheat the oven to 400 degrees.

Place a layer of frozen tater tots in the bottom of a DEEP baking dish.  A deep roasting pan works well.

Pack those babies in there!

image

I don’t show it here, but add half of the cheese sauce to the pan, on top of the tater tots.

Add all of the ground beef to the pan, on top of the cheese sauce.

image

Pour the remaining cheese sauce over the ground beef.

image

Top with more tater tots.  Bake for 25 minutes, or until the tater tots are golden brown and crispy on top and the sauce is bubbly.

Serve and ENJOY!

image


Tater Tot Casserole
 
Prep time
Cook time
Total time
 
Delicious comfort food combining the childhood favorite, Tater Tots, with seasoned ground beef and a creamy, cheesy sauce.
Author:
Recipe type: One Dish Meal
Cuisine: American
Serves: 8
Ingredients
Meat and Potato Filling:
  • 2 pounds lean ground beef
  • ½ small onion, diced
  • 2 teaspoons garlic powder
  • 2 tablespoons Dashida (Korean beef flavored seasoning)
  • 1 large bag Tater Tots
Sauce Base:
  • 2 cups vegetable broth
  • ¾ cup chopped mushrooms
  • 2 teaspoons Dashida
  • 1 teaspoon garlic powder
  • ½ teaspoon black pepper
  • ½ teaspoon onion powder
  • ½ teaspoon dried thyme
  • ¾ cup milk
  • ½ cup flour
Cheese Sauce:
  • 2 cups milk
  • 16 ounces shredded cheddar cheese (I like to use a Mexican cheese blend)
  • 1 cup sour cream
Instructions
Prepare the Sauce Base:
  1. Bring the broth to a boil over medium-high heat.
  2. Add the mushrooms, Dashida, garlic powder, black pepper, onion powder and thyme. Return the mixture to a boil.
  3. Whisk the milk and flour in a small cup or bowl. Pour the mixture into the boiling liquid, whisking as you pour to prevent lumps from forming. Reduce the heat to medium-low; cook for a couple of minutes to thicken the base.
Make the Cheese Sauce:
  1. Whisk the remaining milk into the sauce base.
  2. Stir in the shredded cheese and sour cream. Set the sauce aside.
Brown the Meat:
  1. Brown the ground beef in a skillet over medium-high heat.
  2. Add the onions and Dashida. Cook for 5 minutes or until the onions become translucent.
Layer the Casserole:
  1. Pre-heat the oven to 400 degrees.
  2. Using a DEEP DISH pan, layer the casserole as follows:
  3. ~ Tater tots, half the cheese sauce, meat, remaining sauce, then tater tots.
  4. Bake for 25 minutes or until the top layer of tater tots are golden brown and crispy and the cheese sauce is bubbly.
Serve and ENJOY!


Asian Chicken Lettuce Wraps

These chicken lettuce wraps are a good choice if you’re looking for a quick dish to make for an appetizer or a light meal.  I created this recipe when I was craving the popular appetizer served at a famous Chinese Restaurant chain.  It’s quite easy to make.  It only takes a few minutes to chop up the chicken and vegetables; you can have this on your table in about 30 minutes.

This is also a great dish if you have picky eaters like I do.  My youngest daughter opted to eat the filling with rice instead of the “yucky green lettuce”, but boy did she devour the savory, saucy chicken and VEGETABLE-laden filling! 😉  (Shhhh….don’t tell her.)

My complete recipe is located at the bottom of this post.  Give it a try.  I think you’ll like it. 🙂

Asian Chicken Lettuce Wraps

image

Make the stir fry sauce.

In a small bowl, mix all of the sauce ingredients together EXCEPT for the water and cornstarch mixture.

image

Heat a large pan or wok over medium-high heat.  Add the sesame oil and chicken.

image

Pour the sauce into the pan with the chicken.

image

Stir occasionally, cooking until the chicken is no longer pink.

image

Add the water chestnuts, mushrooms, onion and Thai basil leaves.

image

Cook the chicken and vegetable mixture for a couple of minutes.

Stir the cornstarch-water mixture then pour into the pan, stirring the chicken mixture as you pour.  Cook for a couple more minutes, stirring constantly.  The sauce will thicken as it cooks.

Stir in half of the green onions.  Cook for a minute longer then remove from the heat.

image

Fill the lettuce leaves with the chicken mixture.  Top with more green onions and hot pepper flakes.

ENJOY!

image


Asian Chicken Lettuce Wraps
 
Prep time
Cook time
Total time
 
Crispy lettuce filled with a savory mixture of chicken, water chestnuts, ginger, garlic and hoisin sauce that make a delicious appetizer or a light lunch or dinner meal.
Author:
Recipe type: Appetizer
Cuisine: Chinese
Serves: 6
Ingredients
Chicken Stir Fry
  • 4 tablespoons sesame oil
  • 4 boneless skinless chicken breasts, diced (or 1 pound ground chicken)
  • 2 cans water chestnuts, drained and diced
  • 1 package fresh mushrooms, chopped
  • 1 small onion, diced
  • 8 Thai basil leaves, optional
  • 8 stalks green onions, sliced
Stir Fry Sauce
  • 2 tablespoons chopped garlic
  • 1-inch piece of ginger, peeled and grated
  • ¼ cup brown sugar
  • ¼ soy sauce
  • ¼ cup hoisin sauce
  • 2 tablespoons rice wine vinegar
  • ¼ cup water mixed with 2 tablespoons corn starch
Lettuce Wraps
  • 1 large head butter or iceberg lettuce, wash, dried and leaves separated
  • Red pepper flakes, optional
Instructions
Make the stir fry sauce:
  1. In a small bowl or measuring cup, mix together the garlic, ginger, brown sugar, soy sauce, hoisin sauce, and rice wine vinegar.
  2. Set aside the cornstarch and water mixture for now.
Cook the chicken:
  1. Heat a large pan or wok over medium-high heat. Add the sesame oil and chicken.
  2. Pour the sauce over the chicken. Cook until the chicken is no longer pink, stirring occasionally.
  3. Add the water chestnuts, mushrooms, onion, and Thai basil leaves to the pan. Cook for 2-3 minutes.
  4. Stir the cornstarch-water mixture the pour into the pan, stirring as you pour. Cook for another couple of minutes until the sauce thickens.
  5. Stir in half of the green onions. Cook for a minute longer then remove from the heat.
Assemble the chicken wraps:
  1. Scoop some filling into the lettuce leaves.
  2. Top with some sliced green onions and pepper flakes.
ENJOY!


Crispy Chocolate Chip Cookies

My entire family loves, loves, loves cookies!  Soft, chewy, crispy, crumbly, chocolate, butter, coconut, sugar, stuffed, double-stuffed, you name it, we’ll probably love it.

One of our favorites are a crispy cookie from Guam called Chamorro Chip Cookies.  They are crispy bite-sized cookies that are perfectly sweet and chocolaty.  I still remember requesting bags of cookies be sent to me in care packages.  I was absolutely over the moon one trip home when the airline served small packages of the delicious morsels in lieu of peanuts! 🙂

Well, gone are the days of free snacks on the airlines, but you don’t have to wait until you get to Guam or for someone to send you a care package to enjoy these delicious, sweet and crispy cookies. It takes just a few ingredients to mix up a batch, ingredients you’re likely to have on hand already.

My complete recipe is at the bottom of this post.  Give my recipe a try. I’m sure you’ll like it. 🙂

Crispy Chocolate Chip Cookies

~ My version of the beloved “Chamorro Chip Cookie”

image

These are all of the ingredients you need.  You probably have all of these on hand already.  As I mentioned above, my family loves cookies and baked goods, so I make sure I always have flour, sugar, butter, eggs, baking soda (and powder), salt, vanilla extract and chocolate chips in my pantry.

I made a double batch of cookies, which is why you see two bags of chocolate chips.  Otherwise, one batch uses only one bag of mini chocolate chip morsels.

image

Mix the flour, salt and baking soda together.

image

Place the butter and suar in a medium sized mixing bowl.

image

Use a hand-held mixer to cream the butter and sugar together.

image

Add the eggs and vanilla extract to the mixing bowl.

image

Mix until creamy.

image

Add one third of the flour mixture to the bowl.  Mix for a minute or until the dry ingredients are well-incorporated with the butter mixture.

image

Add another third of the flour mixture; mix another minute then add the remaining flour mixture.  Mix until all of the flour is well-incorporated and a thick, creamy cookie dough forms.

image

Add the entire bag of mini chocolate chips to the bowl.

image

Use a spatula to fold the chocolate chips into the cookie dough.

image

Place 1 tablespoon of cookie dough about 2 inches apart on a baking sheet.  I use a small cookie scoop to get nicely rounded scoops of dough.  These cookies will spread while baking so make sure you don’t place them too close together.

I used a Pampered Chef large round stoneware pan in the photo below.  I fit about 18 balls of dough on this pan — don’t try to fit much more than that on this size pan or your cookies will spread and touch during baking (my daughter calls those “butt cookies” when they spread and touch during baking).

I also used the rectangular stoneware pan (also Pampered Chef), fitting 20 balls of dough on it.

image

Bake the cookies in a pre-heated 400-degree oven for 12 minutes.  The cookies will be slightly brown around the edges.

image

Leave the cookies on the baking sheet for 5 minutes then place on a cooling rack to finish cooling.

Serve with a tall glass of milk and ENJOY!

image

Crispy Chocolate Chip Cookies
 
Prep time
Cook time
Total time
 
A crisp cookie loaded with mini chocolate chip morsels, reminiscent of one of Guam's favorite cookies, the "Chamorro Chip Cookie"
Author:
Recipe type: Dessert
Ingredients
  • 2⅔ cups all-purpose flour
  • 1 teaspoon salt
  • ½ teaspoon baking soda
  • 2 sticks unsalted butter, softened
  • 1½ cups white granulated sugar
  • 2 large eggs
  • 2 teaspoons pure vanilla extract
  • 1 bag (12-oz.) miniature semisweet chocolate chips
Instructions
  1. Preheat your oven to 400 degrees.
  2. Place the flour, salt, and baking soda in a medium bowl; mix together.
  3. Place the butter and sugar in a medium-sized mixing bowl. Use a handheld mixer to mix together until creamy.
  4. Mix in the the eggs and vanilla extract.
  5. Add the flour mixture to the butter mixture, one third at a time, mixing until you get a thick creamy dough.
  6. Fold in the chocolate chips.
  7. Scoop tablespoonfuls of dough onto the baking sheet, spacing them about 2-inches apart.
  8. Bake for 12 minutes or until the cookies are light brown around the edges.
  9. Leave the cookies on the baking sheet for 5 minutes then transfer to a wire rack to cool completely.
ENJOY!
This makes about 7½ dozen cookies about the size of a Chips Ahoy cookie.

« Older Entries Recent Entries »