Archive for SIDES

Daigo’ Kimchi with Rokkyo & Pickled Garlic

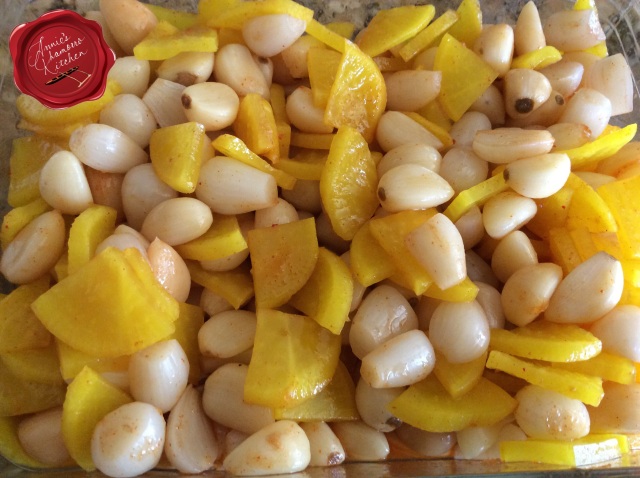
This is a very simple salad or side dish made with pickled daikon radish, pearl onions, and garlic.  This is not a dish you want to eat before venturing out into public…your pores will exude an odor that is guaranteed to chase away even the scariest of vampires.

Daigo’ (pickled daikon radish), Rokkyo’ (pickled pearl onions) and pickled garlic are popular snacks on Guam.  Visit your local village store and you’re likely to see large jars filled with these pickled delights for sale.

imageTo make an easy kimchi, mix together Kimchee Base and white vinegar, adding it to the bowl of mixed vegetables.

image

Let the mixture marinate for about 30 minutes before serving to allow the flavors to develop.  Serve and ENJOY! 🙂


Daigo' Kimchi with Rokkyo & Pickled Garlic
 
Author:
Ingredients
  • 1 package sliced pickled daikon radish
  • 1 small package (about 2 cups) pickled pearl onions
  • 1 small package (about 1 cup) pickled garlic
  • ¼ cup Kimchee Base
  • ½ cup white vinegar
  • Hot pepper, optional
Instructions
  1. Mix all ingredients together.
  2. Let the mixture marinate for 30 minutes to allow the flavors to meld.
Serve and ENJOY!


Print Friendly, PDF & Email

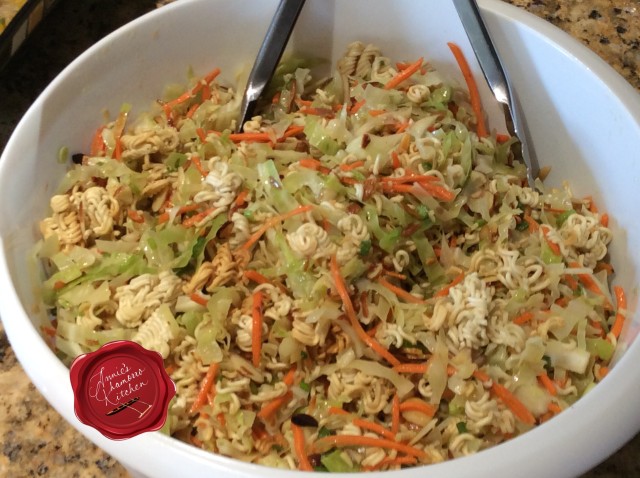
Ramen Noodle Salad

Ramen noodle salad has been around for years. I love this dish because you can make endless varieties of it based on your favorite ingredients.

Make it for your next potluck, or serve it as a side dish for your next meal.

My complete recipe is at the bottom of this post.  Give it a try.  I think you’ll like it. 🙂

Ramen Noodle Salad

image

I start with the basic ramen noodles and almonds.  Toast them in the oven for a few minutes to bring out the flavorful almond oils and to get the noodles nicely browned.

image

I don’t like to use pre-packaged coleslaw mix in this salad, mainly because most of the time I buy the mixes, it already smells bad, indicating spoilage.  I buy a whole head of cabbage and slice it myself, saving the potential for food waste and sending good money down the drain.

On the other hand, I buy pre-sliced carrots.  I’ve never bought a bag of bad/spoiled pre-sliced carrots.  The pre-packaged kind saves oodles of time in the kitchen.

Place all of the salad vegetables in a large mixing bowl; mix in the toasted noodles and almonds.

image

You can buy a ready-made Asian vinaigrette for this salad, but a homemade dressing takes no time at all, and you can control the quality of ingredients.  See my full recipe below for my version of this sweet and tangy dressing that makes use of the ramen noodle seasoning packets.  If you want to cut back on the sodium, use half, just one, or none of the seasoning packets.  The dressing will still pack a whole heck of a lot of flavor without them.

image

Pour the dressing into the bowl; use a pair of tongs to toss it all together.  Serve and enjoy!

image


Ramen Noodle Salad
 
Prep time
Cook time
Total time
 
A crunchy salad with ramen noodles and a sweet and savory dressing
Author:
Recipe type: Side
Ingredients
Salad:
  • 4 packages ramen noodles
  • 2 cups sliced almonds
  • 2 cups julienned carrots
  • 3 stalks green onions, sliced
Optional:
  • 2 cups mandarin orange slices
  • 4 tablespoons toasted sesame seeds
  • 1 cup shelled and steamed edamame
  • 1 cup crumbled bacon
Dressing:
  • 1 teaspoon crushed garlic
  • 1 cup vegetable oil
  • ⅓ cup sesame oil
  • ⅔ cup good quality honey
  • ⅔ cup rice vinegar
  • 2 teaspoons soy sauce
  • 4 Ramen seasoning packets (from the ramen noodles used in the salad)
Instructions
Toast the noodles and almonds:
  1. Preheat your oven to 425 degrees.
  2. Break the noodles apart while still in the original packaging. Place the broken noodles on a large rimmed baking pan. Set the ramen noodle seasoning packets aside (to be used for the dressing).
  3. Add the sliced almonds to the pan. Mix the almonds and noodles together.
  4. Bake for 5 minutes then remove from oven and let it cool. Place in a large mixing bowl.
Prepare the salad:
  1. Slice the cabbage thinly, as if to make coleslaw. Place into the large mixing bowl with the noodles and almonds.
  2. Add the carrots and greens onions to the bowl.
  3. Add any other optional salad ingredients.
  4. In a small bowl, whisk all of the dressing ingredients together. Pour the dressing over the noodle and cabbage mixture. Toss to combine all the ingredients.
Serve and ENJOY!


Print Friendly, PDF & Email

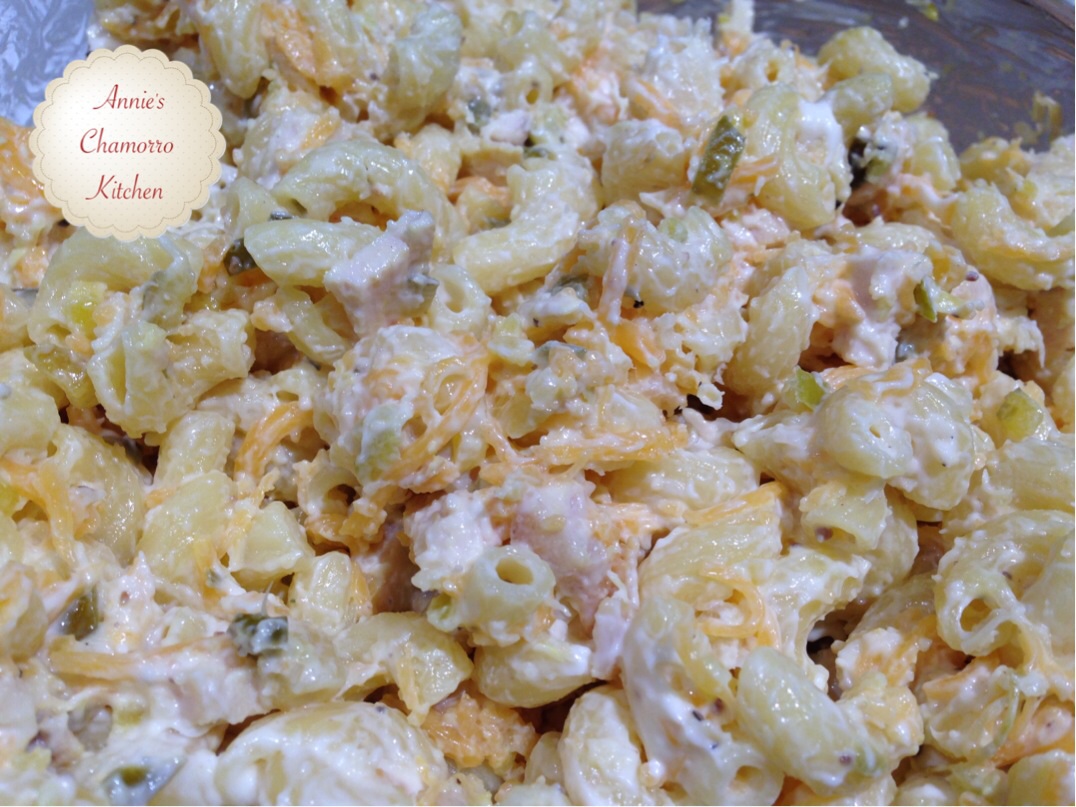
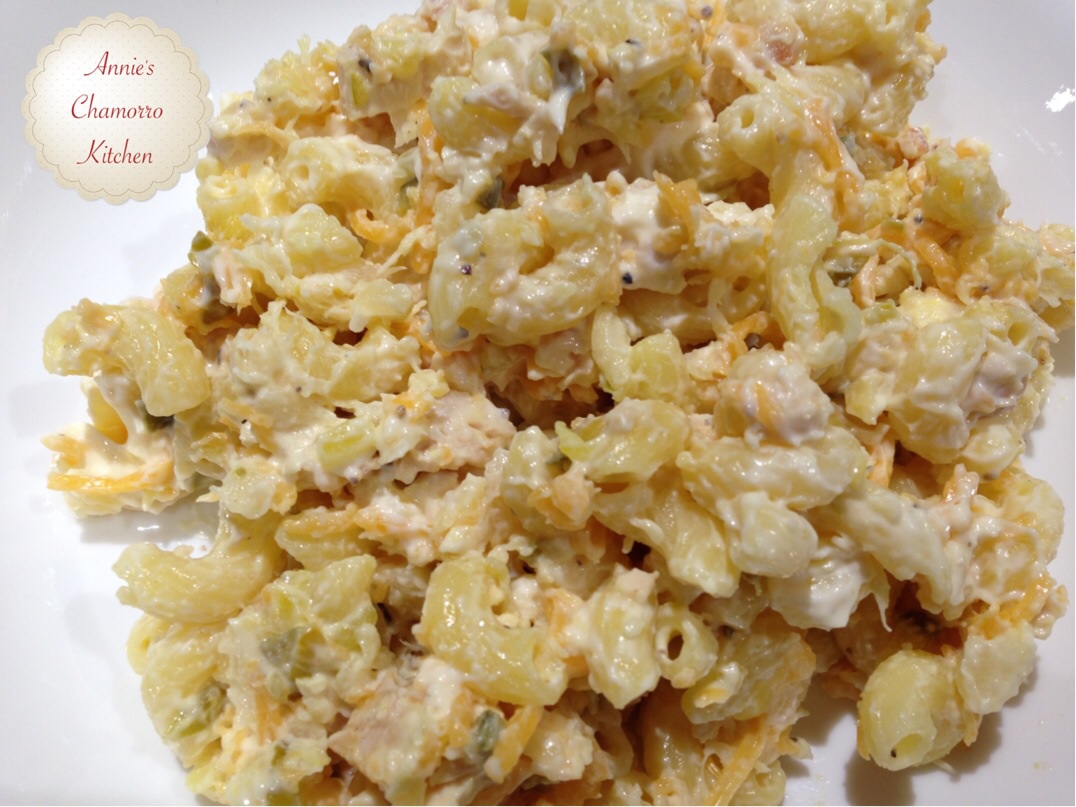
Chicken Macaroni Salad

Macaroni salad one of my family’s favorite side dishes.  There are many, many macaroni salad variations, but we’re simple…we like two specific kinds.  The first is a Hawaiian style macaroni salad and the other is Filipino style Macaroni salad.

My recipe below is for a very basic Filipino macaroni salad.  It has chicken, cheese, pineapple, and sweet relish, but you can also add other ingredients such as hard-boiled eggs, ham, and raisins.  Some of my Filipino friends also add a spoonful or more of sweetened condensed milk, but I don’t like mine too sweet (to me, the relish and pineapples add just the right amount of sweetness) so I don’t add it.

This dish is best made the night before you intend to serve it.  An overnight stay in the ‘fridge allows all the pasta to absorb all the delicious flavors.

I like to add lots of chicken (more than what I have in my recipe below) whenever I want to serve this as my main dish.  It’s great for packed lunches, and it’s also a quick and easy pot-luck dish.

Give my recipe a try.  I think you’ll like it. 🙂

Chicken Macaroni Salad

image

Ingredients:

  • 1 large chicken breast
  • Salt, black pepper, and garlic powder (for the chicken)
  • 1/4 cup all-purpose flour
  • 2 tablespoons vegetable oil
  • 5 cups cooked macaroni
  • 1 teaspoon black pepper (for the macaroni salad)
  • 1 10-ounce jar sweet pickle relish, with as much juice squeezed out as possible
  • 1 20-ounce can crushed pineapple, with as much juice squeezed out as possible
  • 7 ounces shredded cheddar cheese
  • 1 1/2 cups mayonnaise

Optional Ingredients:

  • 1/2 cup raisins
  • 2 hard boiled eggs, diced

Directions:

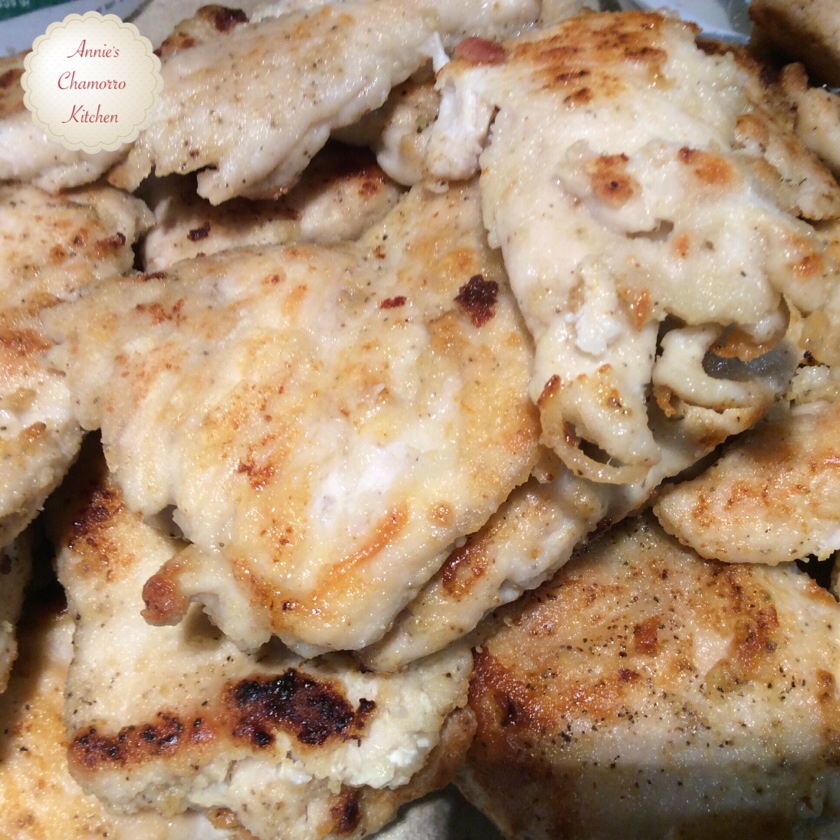
NOTE:  The photos below of the chicken show around 9 or 10 chicken breasts.  We like to cook several chicken breasts at a time so that we can use it throughout the week in various dishes.  We used one breast to make this salad; about 6 breasts were used in my daughter’s Chicken Marsala, and a couple more went into my daughter’s other dish, Mac-n-cheese with Chicken.  Cooking in bulk is a great way to save time during the week, especially if you’re pressed for time each morning.  It saves time at night too, when you’re trying to prepare dinner after a long day at work or school.

Prepare the chicken.

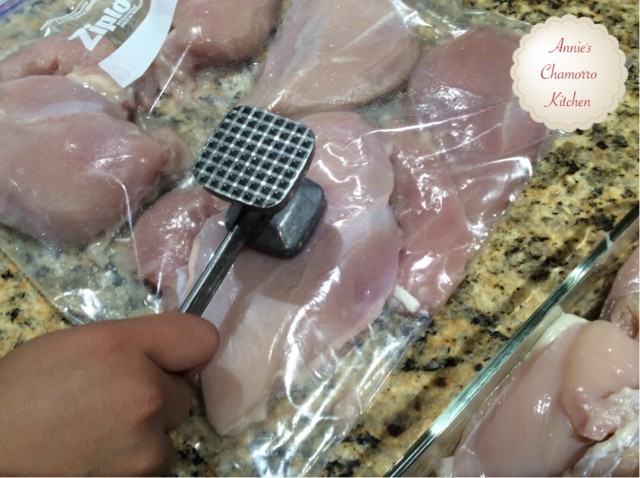
Place the chicken breast into a ziplock bag.  Use a kitchen mallet to flatten the chicken into about 1/4-inch thickness.

image

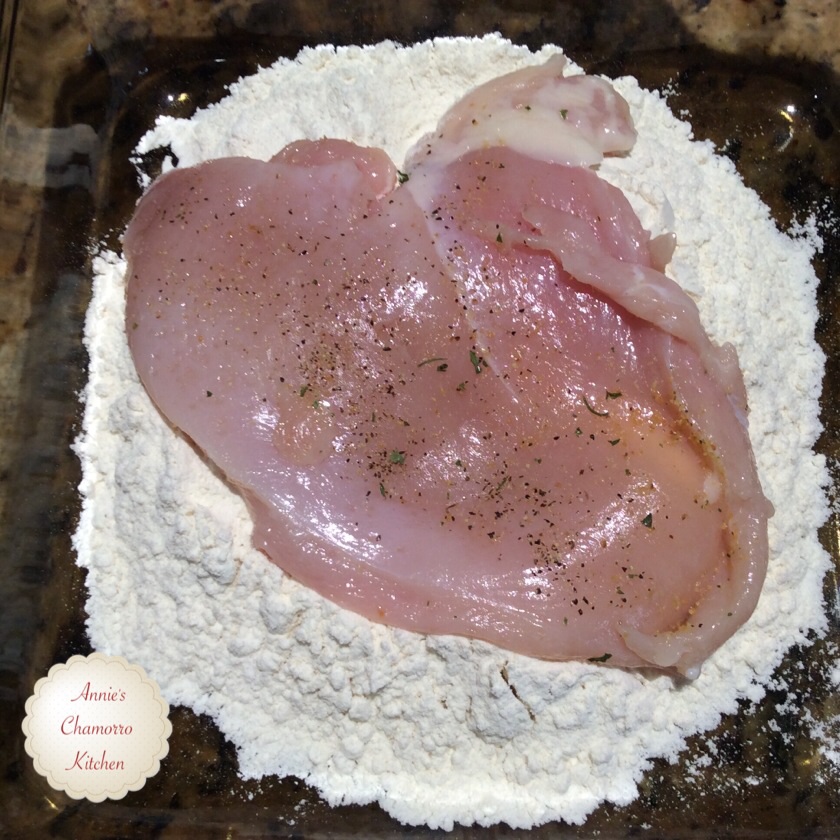
Sprinkle both sides of the chicken breast with salt, black pepper and garlic powder.

image

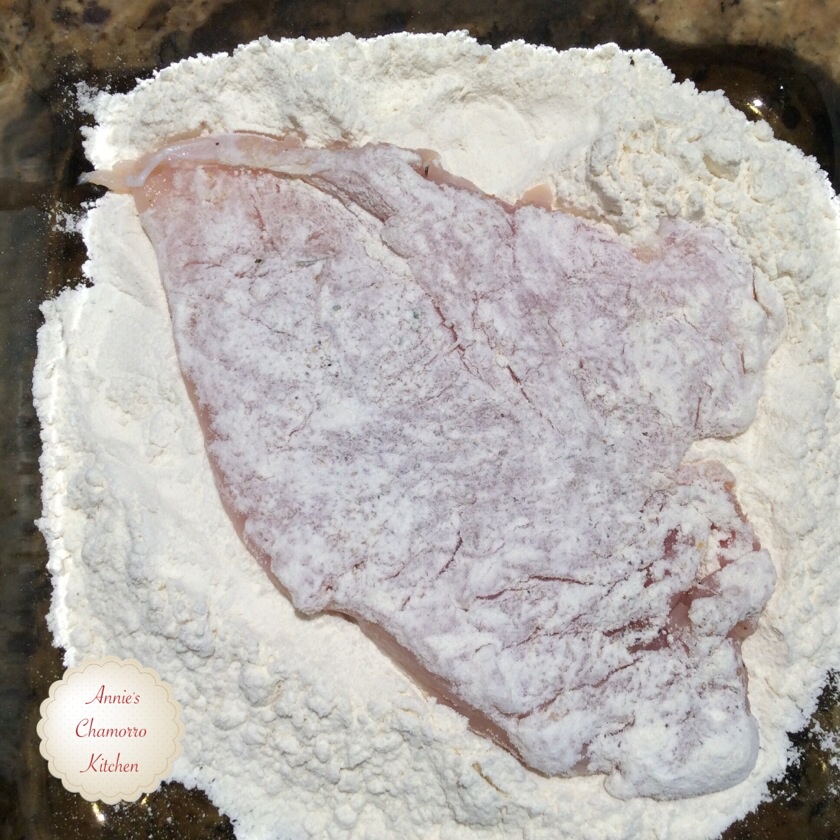
Dredge the seasoned chicken breast in the flour, covering both sides.

image  image

 Place a skillet over medium-high heat.  Add the vegetable oil to the pan.

image

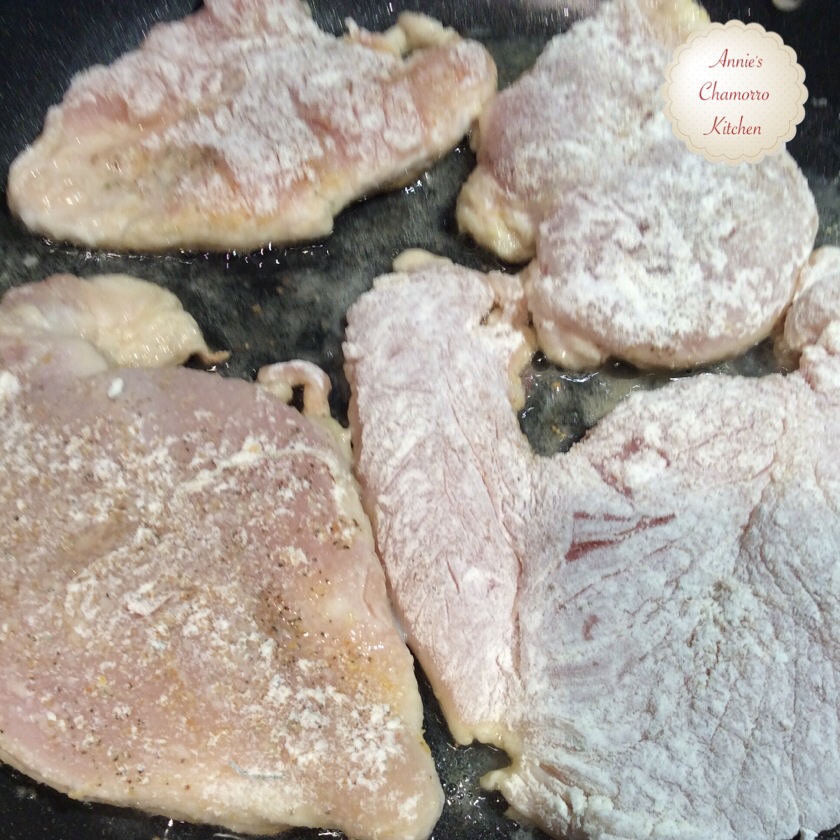
 Place the chicken in the pan when the pan and oil are hot.  Reduce the heat to medium.

image

 Cook the chicken for about 4-6 minutes on each side.

Turn occasionally to evenly brown both sides.

image

 Shred or thinly slice the cooked chicken and set it aside.

image


Prepare the macaroni salad.

Place the shredded chicken breast, cooked macaroni, black pepper, relish, crushed pineapple, cheese and mayo in a large mixing bowl.  Add in any other optional ingredients.

Gently fold all of the ingredients together.  Refrigerate for 30 minutes to an hour to allow the flavors to meld.

Serve and ENJOY!

image


Print Friendly, PDF & Email

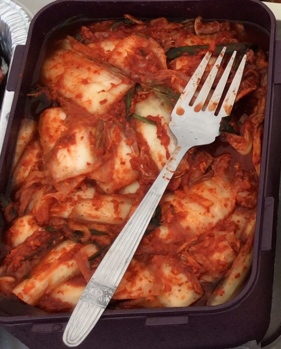
Authentic Korean Cabbage Kimchi

My Korean sister-in-law, Min, is an excellent cook.  She’s the one who taught me how to make all my favorite Korean dishes, like Jap Chae, Bulgogi,  Denjang Chigae, Kimchi Chigae, Kim Bap, Kimchi Fried Rice and lots more!

This is Min’s cabbage kimchi recipe.  She makes different kinds of kimchi — cabbage, radish (my personal favorite), and cucumber — and they are all better than the cheap jarred stuff you buy in your grocery store.

It’s a bit labor-intensive, but it’s worth it in the end.  Eat it as a side dish with your favorite meals, or let it ferment a little longer and use it in Kimchi Chigae.  A small note about kimchi fermentation — kimchi stored at room temperature will ferment faster than refrigerated kimchi.  Refrigerated kimchi still ferments, but at a slower rate.

The photos below make it appear that this makes a ton of kimchi.  Once the leaves wilt, however, you’ll end up with enough kimchi to fill a large bowl or jar (like the size of large pickle jars that are sold in wholesale grocery stores such as COSTCO).  There is a Korean store here that sells homemade kimchi in those large jars, but they are so expensive!  It’s so much more economical to make your own at home.

Don’t worry about the quantity this makes.  The great thing about kimchi is that it lasts a long time (just keep it stored in an airtight container)! 😉 Or, you can be a nice friend, family member or neighbor and share some!

Give Min’s recipe a try.  I think you’ll like it. 🙂

Authentic Korean Cabbage Kimchi

Ingredients:

Rice Glue:

  • 2 cups sweet rice grains
  • 4 cups water

Cabbage plus brine:

  • 3 large heads nappa cabbage
  • 4 cups coarse sea salt
  • 8 cups water

Kimchi sauce:

  • 4 bunches green onions (about 12-16 stalks), cut into pieces about 1 1/2″ long
  • 1 bunch chives, cut the same size as the green onions (1 1/2″ long)
  • 3- or 4-inch piece of ginger, peeled and grated
  • 18 cloves fresh garlic, mashed or very finely minced
  • 6 tablespoons anchovy sauce
  • 6 tablespoons salted shrimp or shrimp sauce
  • 6 cups Korean red pepper flakes

This is what the salted shrimp and anchovy sauce look like:
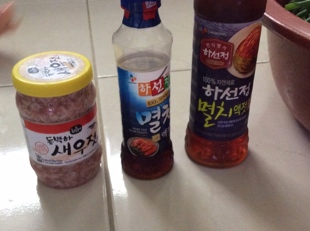
salted shrimp and anchovy sauce

Directions:

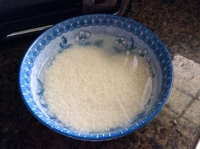
Place the grains of rice in a small bowl. Cover the rice with water (use 2 cups of water; save the other 2 cups for later). Let the rice soak for several minutes while you prepare the cabbage.  Eventually you’ll make a rice paste or glue of sorts with the soaked rice grains.  This is a necessary ingredient to help the kimchi sauce ingredients stick to the cabbage leaves.
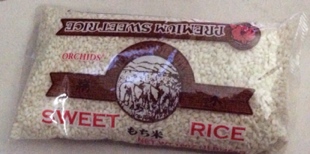
sweet rice  sweet rice

Separate and rinse the cabbage leaves.  Remove the core at the bottom of each head of cabbage.  Cut the leaves into pieces about 2″x4″.
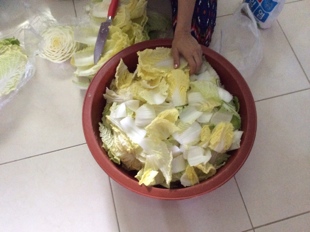
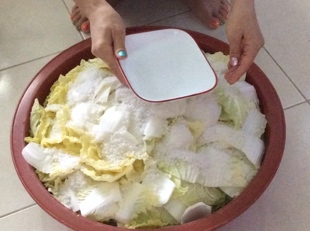
Generously salt the cabbage leaves with the coarse sea salt.  Pour the water over the salted cabbage leaves.  Soak the leaves in the brine for about 30 minutes until the leaves wilt.  After the leaves have wilted, drain out all of the water.  Place the cabbage in a large strainer basket and rinse thoroughly.
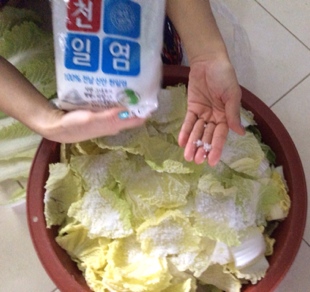
salt the cabbage  cabbage brine

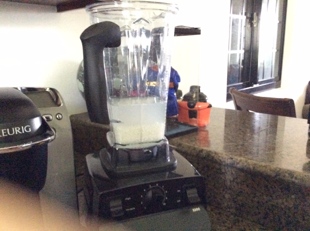
Now, let’s get back to making the rice glue.  Place the rice and water into a blender.  Min uses a VitaMix, but you can use any blender.  Here’s a tip: if your blender can grind ice (for slushy drinks), then it can probably grind rice with no issues.

You will need to add about 2 more cups of water to the blender.
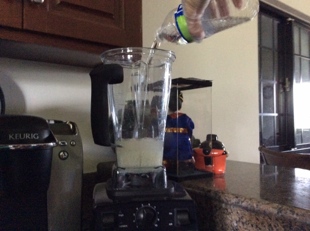
soaked rice  rice and water

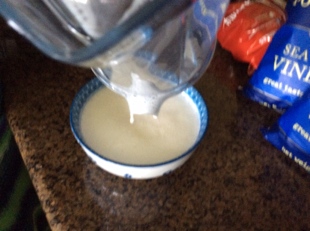
Grind the rice-water mixture until you get a smooth consistency.  Pour the rice mixture back into the bowl.
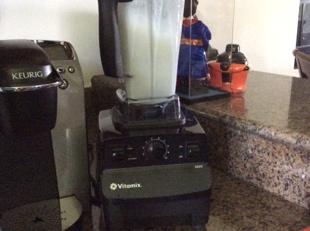
grind the rice  rice puree

Microwave the rice mixture for 2 minutes on High.  Set it aside to cool.  The rice paste will thicken slightly as it cools.
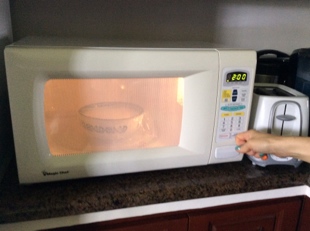
cook the rice  cook rice

Place the onions, chives, garlic and ginger into the bowl of drained and rinsed cabbage leaves.
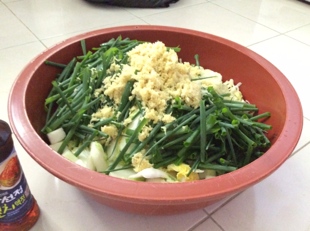
add onions chives garlic ginger

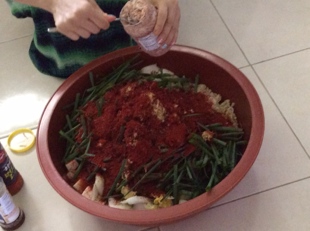
Sprinkle the ground pepper flakes into the bowl.
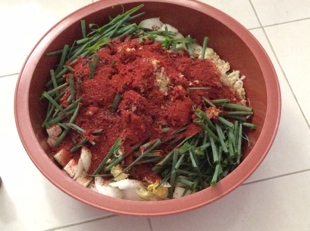
pepper

Add the anchovy sauce and salted shrimp paste.
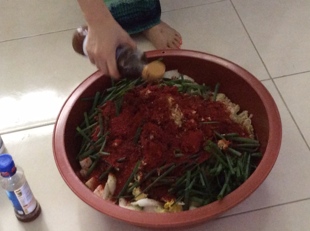
anchovy sauce  shrimp paste

Min also adds some ajinomoto (MSG), but this is optional.  If you choose to add it, sprinkle about 2 tablespoons into the bowl.
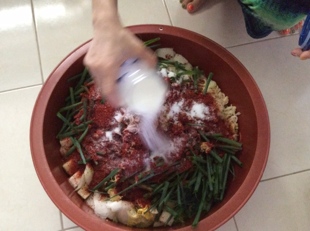
ajinomoto

Add the cooled rice paste to the bowl.
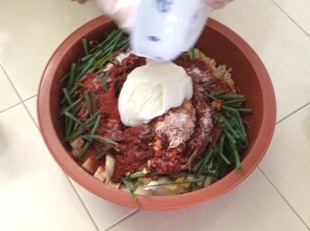
add the rice paste

Now this is important:  Put on a pair of CLEAN plastic gloves.  Don’t even think about using the same gloves you use to wash dishes with!  Buy a new pair or better yet, buy a box of disposable cooking gloves.  You are going to mix this by hand and you don’t want to get any hot pepper on your hands (trust me).  Mix it thoroughly, ensuring each piece of cabbage is covered with the kimchi sauce.
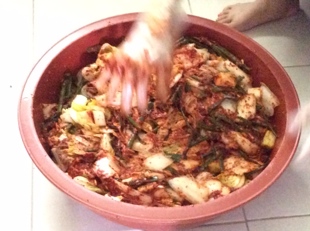
mix  mix

Place the kimchi into a resealable container.  Let the kimchi ferment for at least a day and a half before serving.  Remember, kimchi ferments faster at room temperature than if refrigerated.  The longer the fermentation time, the more sour the kimchi becomes.  I like my kimchi on the sour side, so I let mine ferment for about a week before eating.

This will keep for several weeks in the refrigerator.

ENJOY!
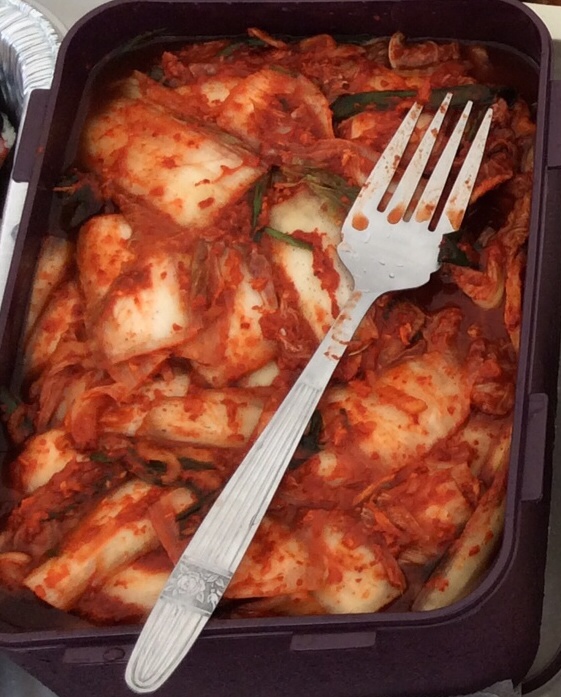
finished product


Print Friendly, PDF & Email

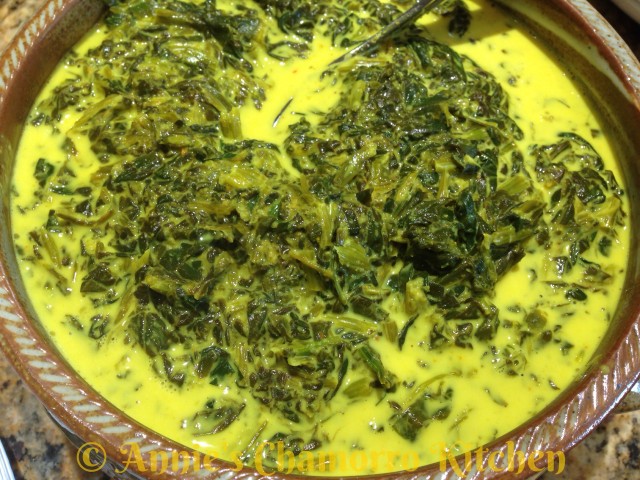
Spinach with Coconut Milk

This is a classic Chamorro dish that is a staple on most fiesta menus.

The traditional dish is called Gollai Hågun Suni, made with taro leaves rather than spinach.  I still remember watching my mom make this dish the traditional way.  She’d use a machete to cut a huge stack of taro leaves growing in our back yard.  After rinsing each leaf, mom would stack then roll them up, cigar-like, then cut the leaves into thin ribbons.  Mom then placed the taro leaves into a large pot filled with some water,  cooking them long and over low heat so that the leaves can cook down and tenderize before adding freshly pounded orange ginger or turmeric (we used a hammer back in the day to pulverize the ginger root), freshly squeezed coconut milk, the juice of lemons picked from mom’s tree, and diced hot peppers from the plants growing by the door to the outside kitchen.

In this day and age, convenience (and making necessary substitutions due to not having traditional ingredients readily available) dictates using spinach leaves rather than traditional taro in this recipe.  I buy frozen spinach that’s cooked and chopped — it saves so much time.  Just defrost and drain the spinach leaves, add the rest of the ingredients, heat, and serve!  What normally takes several hours if prepared the old Chamorro way now takes minutes.

Give my recipe a try.  It’s a great addition to your Chamorro fiesta menu. 🙂

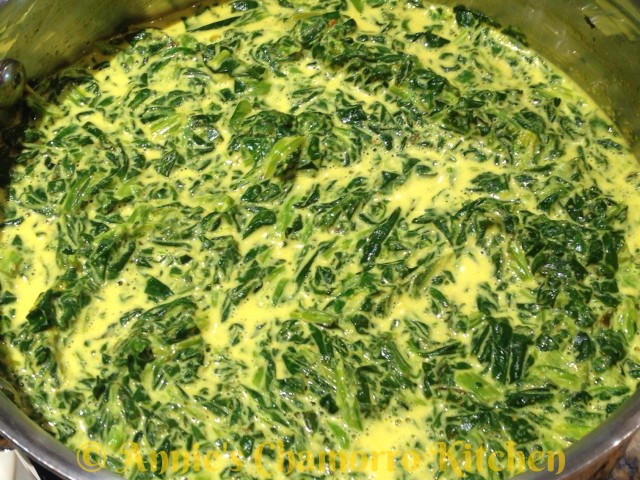
Spinach with Coconut Milk

image

Ingredients:

  • 3 (10-oz.) packages frozen, cooked, and chopped spinach
  • 3 cans coconut milk
  • 2 tablespoons ground turmeric
  • 2 teaspoons sea salt, more or less, to taste
  • 2 teaspoons onion powder (you can use fresh onions, just saute them until the onions are softened)
  • 2 teaspoons lemon powder (or use freshly squeezed lemon juice), more or less, to taste
  • 1 teaspoon hot pepper paste or diced hot peppers, optional (add more or less, to taste)

Directions:

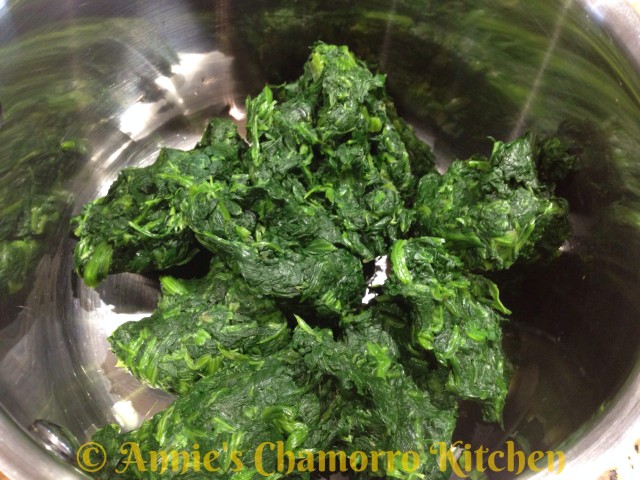
1. Place the frozen spinach in a colander (then place the colander inside a larger bowl) to thaw the spinach and allow any water to drain. After the spinach is completely thawed, squeeze the spinach to get rid of as much water as you can. Place the fully drained/squeezed spinach into a medium-sized pot.

image

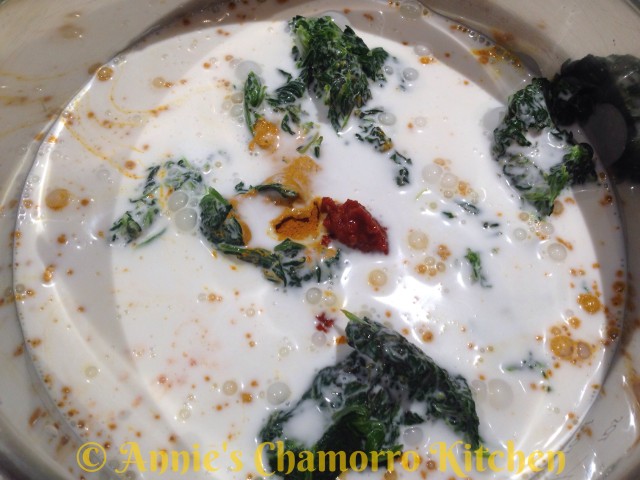
2.  Add the coconut milk, turmeric, salt, onion powder, lemon powder, and hot pepper to the pot. Stir to combine the ingredients.

image

3. Cook the spinach over low heat, just until heated through. Do NOT bring the mixture to a boil or the coconut milk will start to separate.

image

4. Taste and add adjust the amount of salt, lemon power or juice, and hot pepper to your liking.  Serve and ENJOY!

image

Print Friendly, PDF & Email
« Older Entries