Hearty Beef Stew

Beef stew is a comfort dish that everyone should know how to make.  That and chicken soup — both are recipes you should have in your cooking repertoire.  It’s not that difficult to put a beef stew together — you just brown some meat and throw in some vegetables, right?  Wrong.

While not difficult to make, the order in which you cook your stew, and the seasonings and flavorings you add make the difference between a “WOW” and an “EHH” stew.

The first layer of flavor comes from browning good quality beef.  I like using a top sirloin, but any good lean beef (a bit of marbling is okay) will do.  Don’t just throw the meat into the pot and crank up the heat.  Think of this as building a masterpiece.  Right from the get-go, you’re building up the flavorful dimensions in this classic comfort dish.

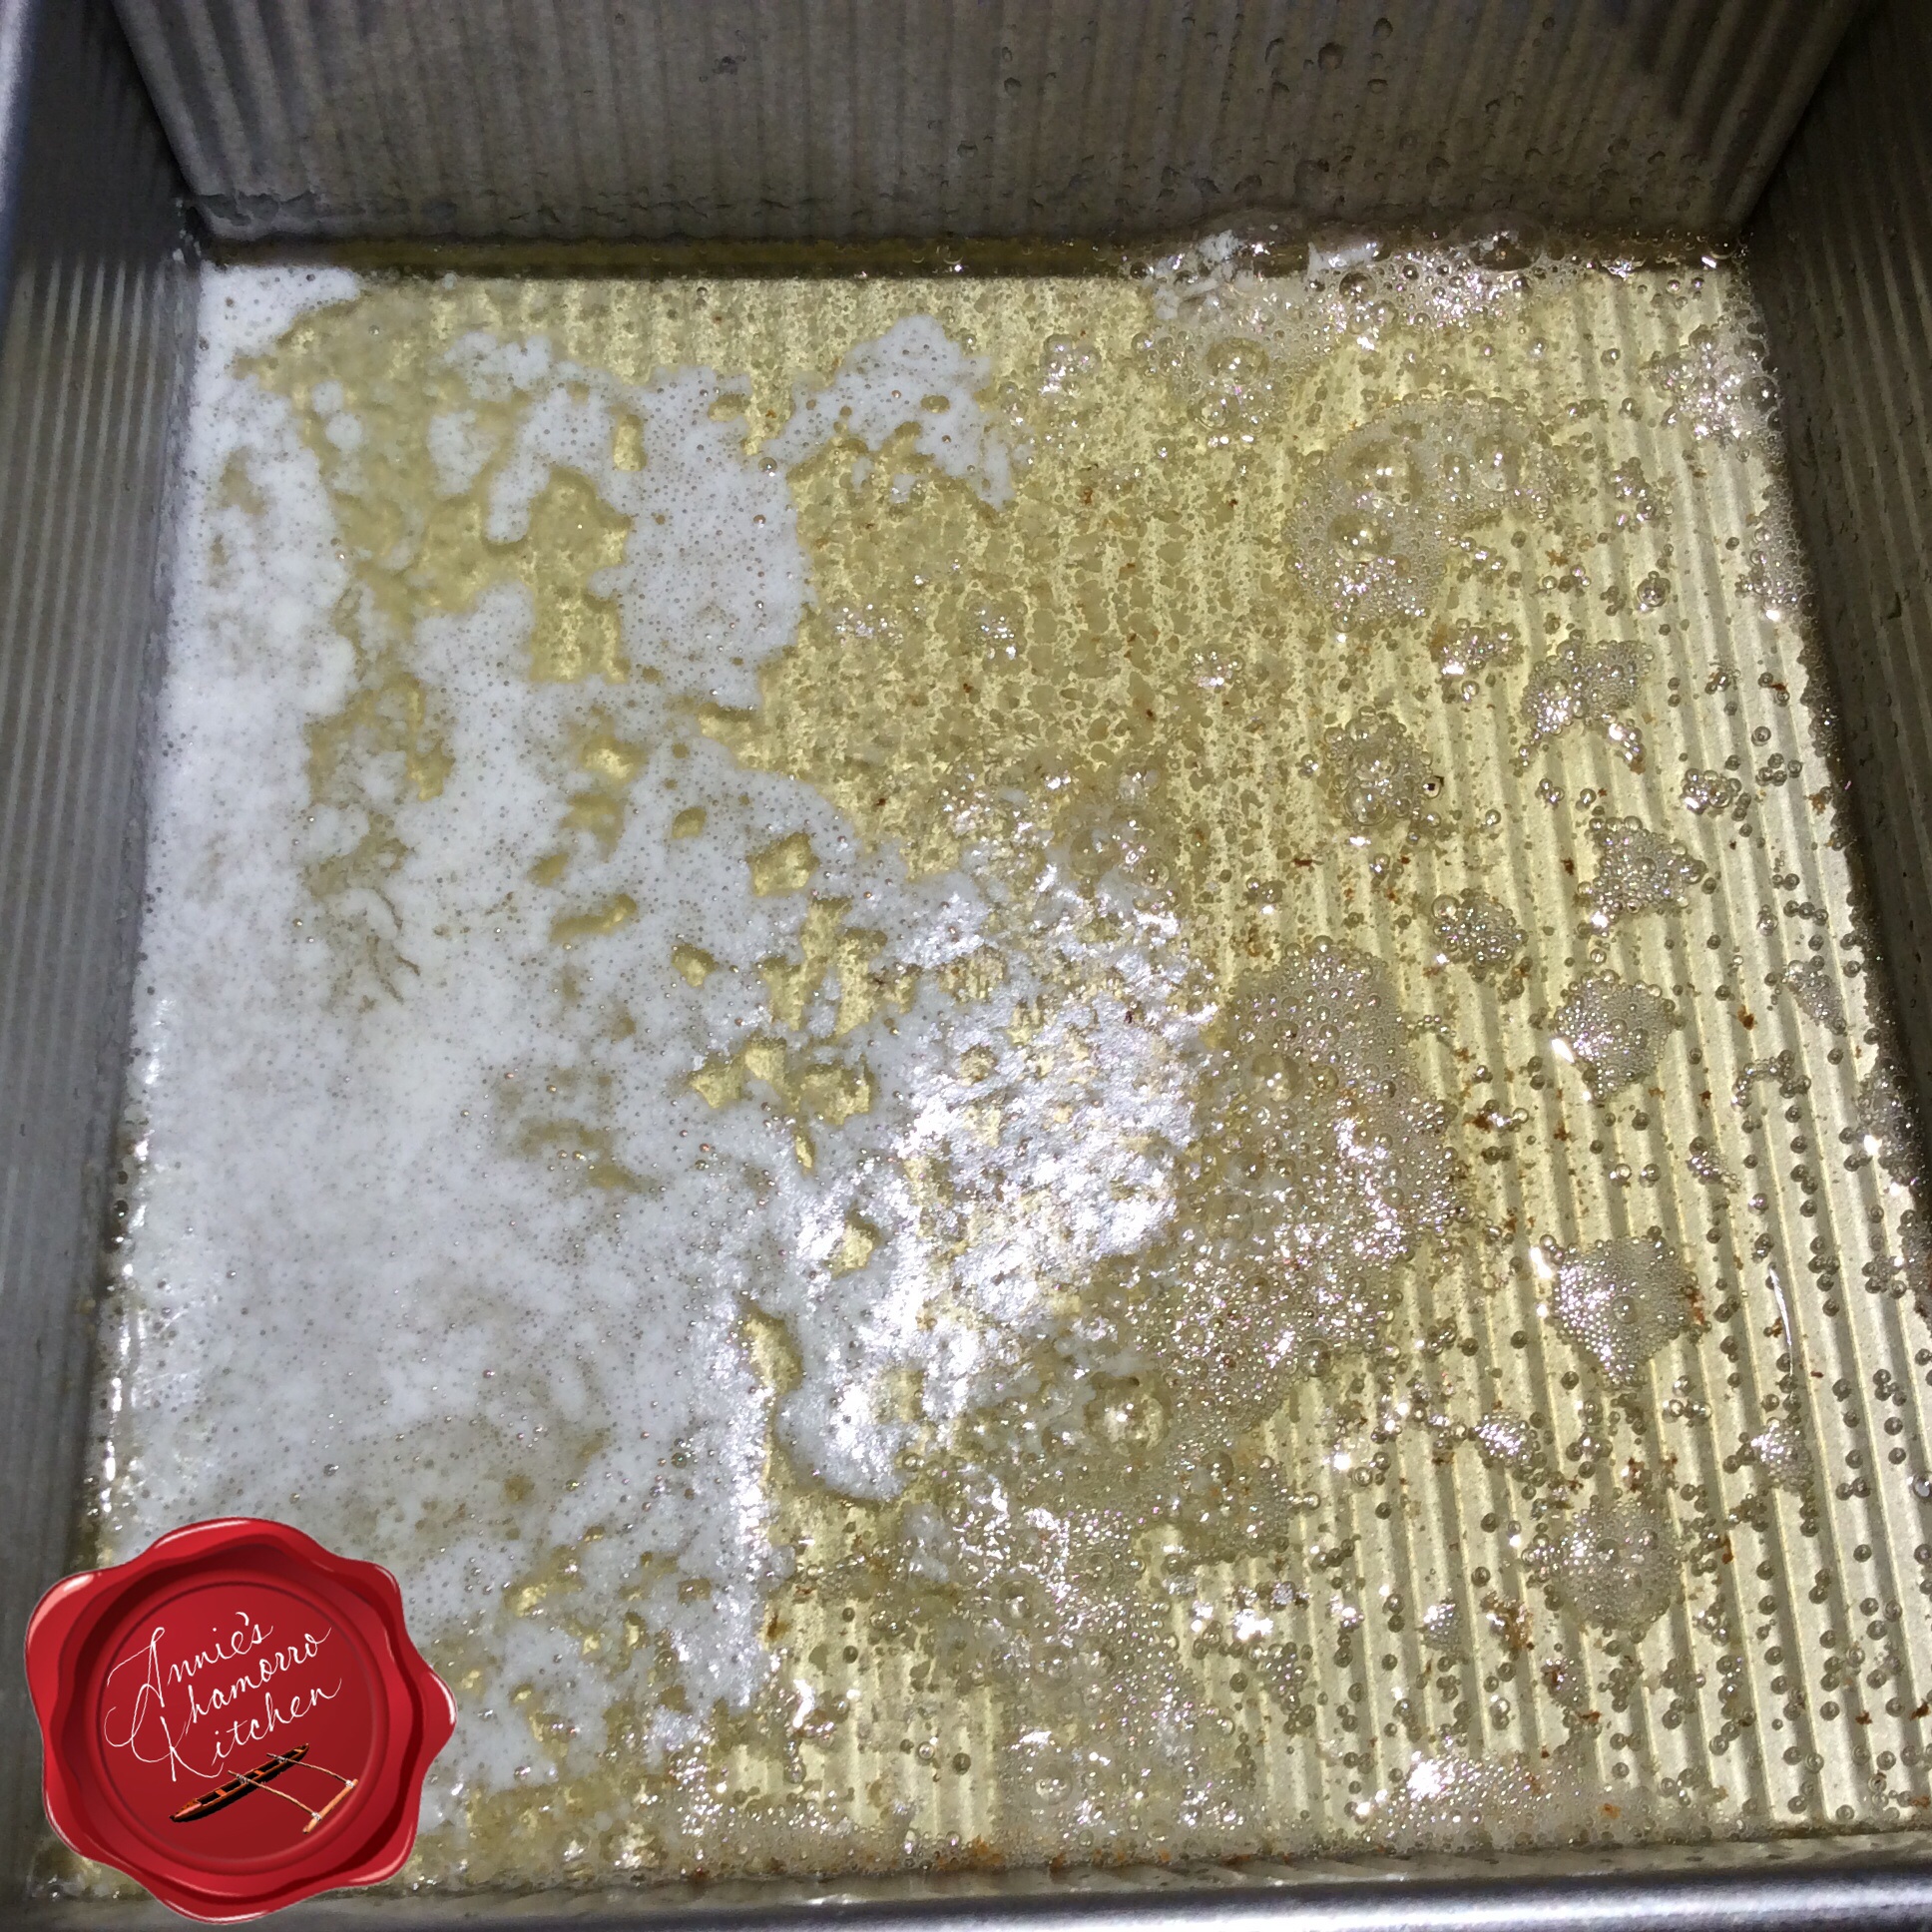
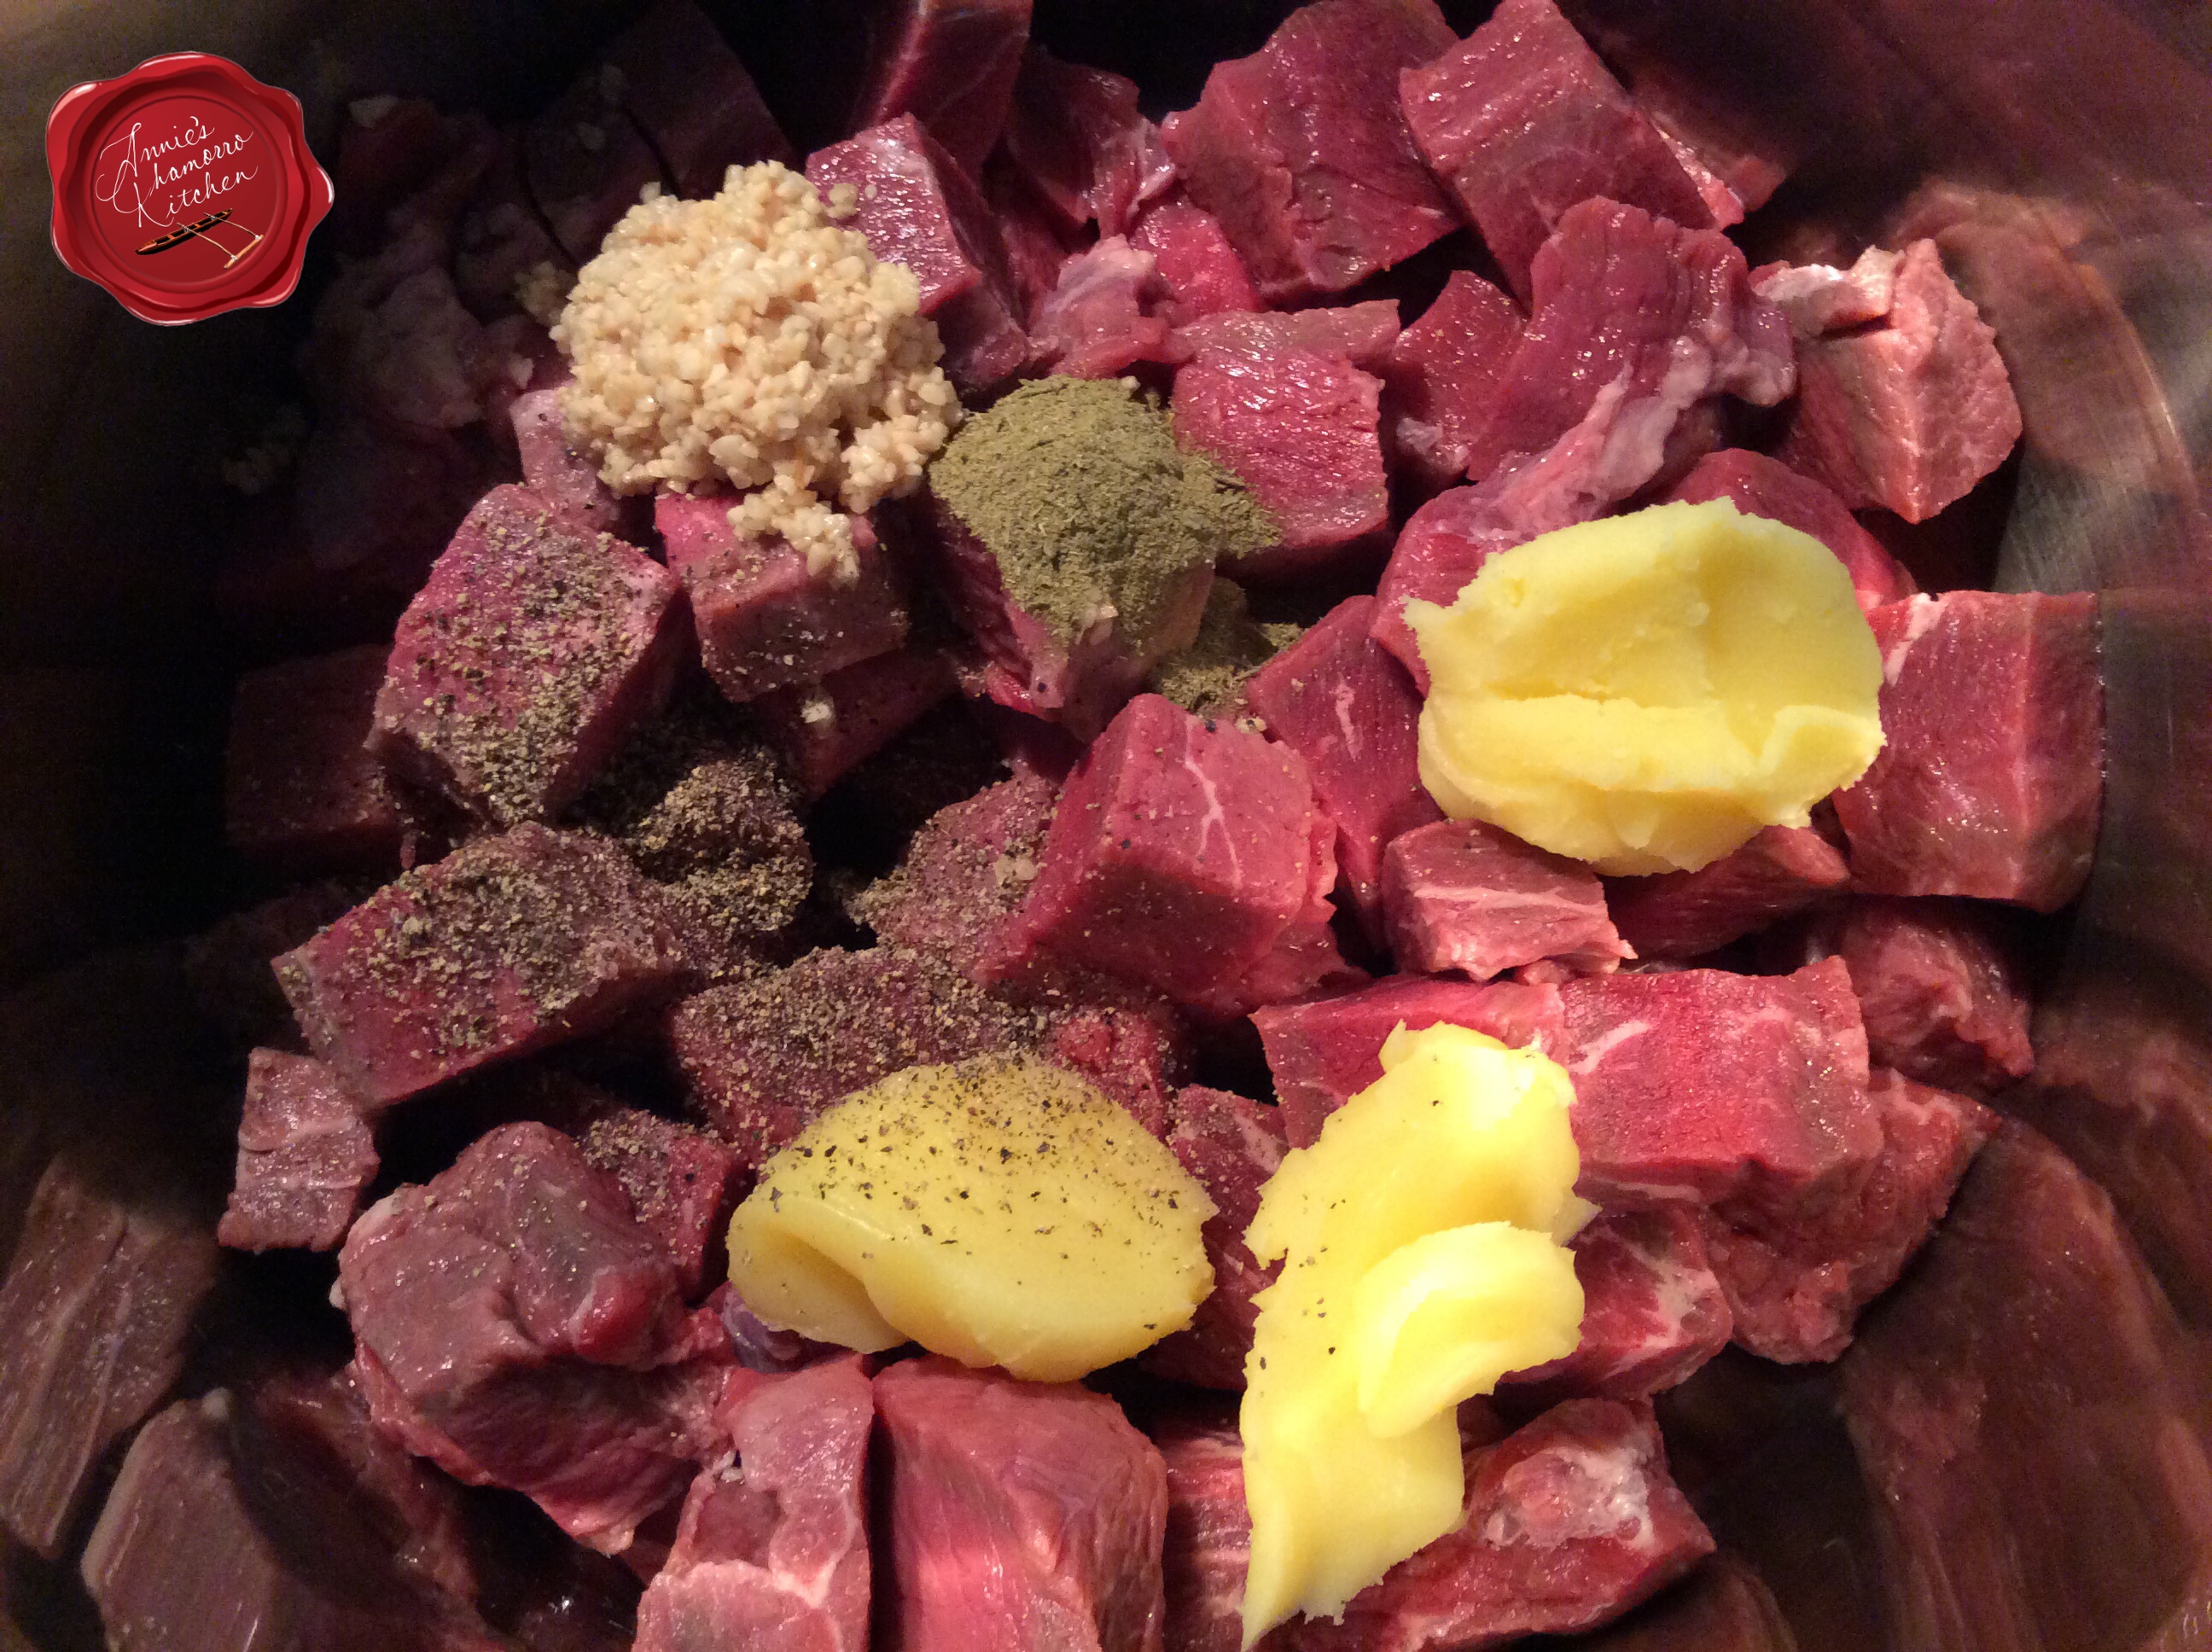
Add the meat to the pot, along with some aromatics…in this case, garlic, freshly ground black pepper, salt, ground thyme and butter.  Give the mixture a stir then let the meat and aromatics cook for 5 minutes over high heat.  The browning of the meat also adds great depth of flavor, which is what you want.  Do not add the liquid right away or you’ll have boiled meat soup instead of a rich and hearty stew.

image

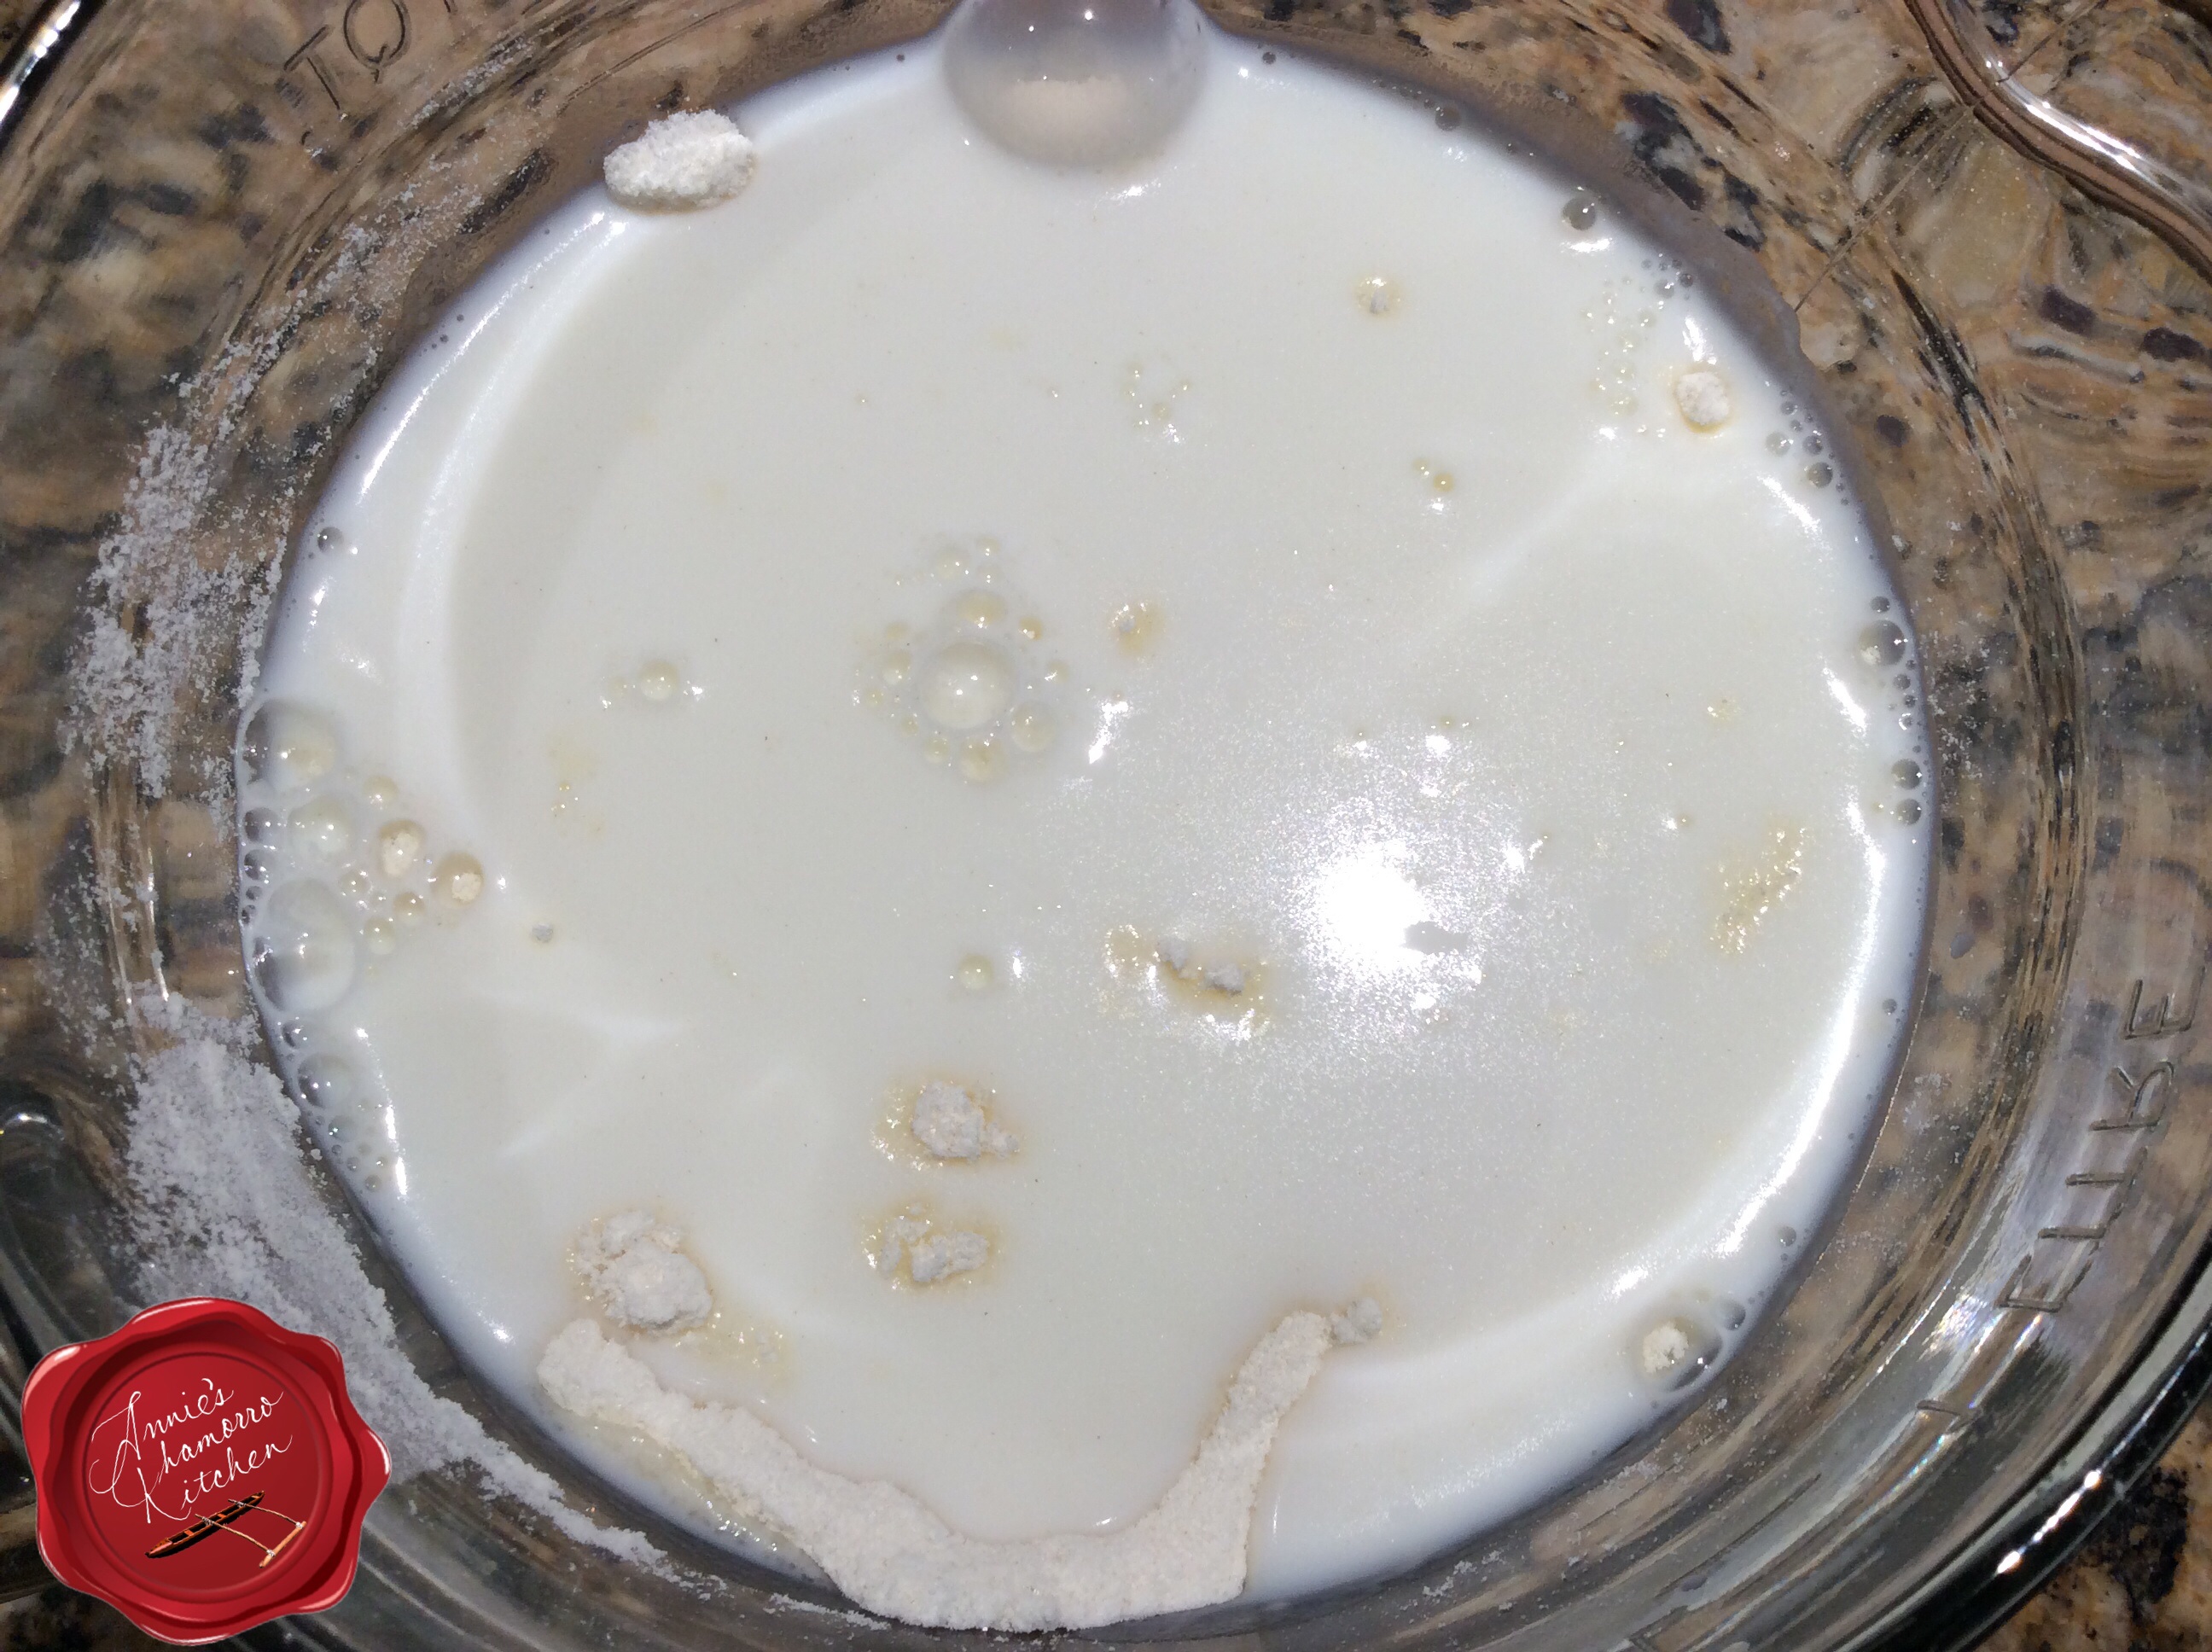
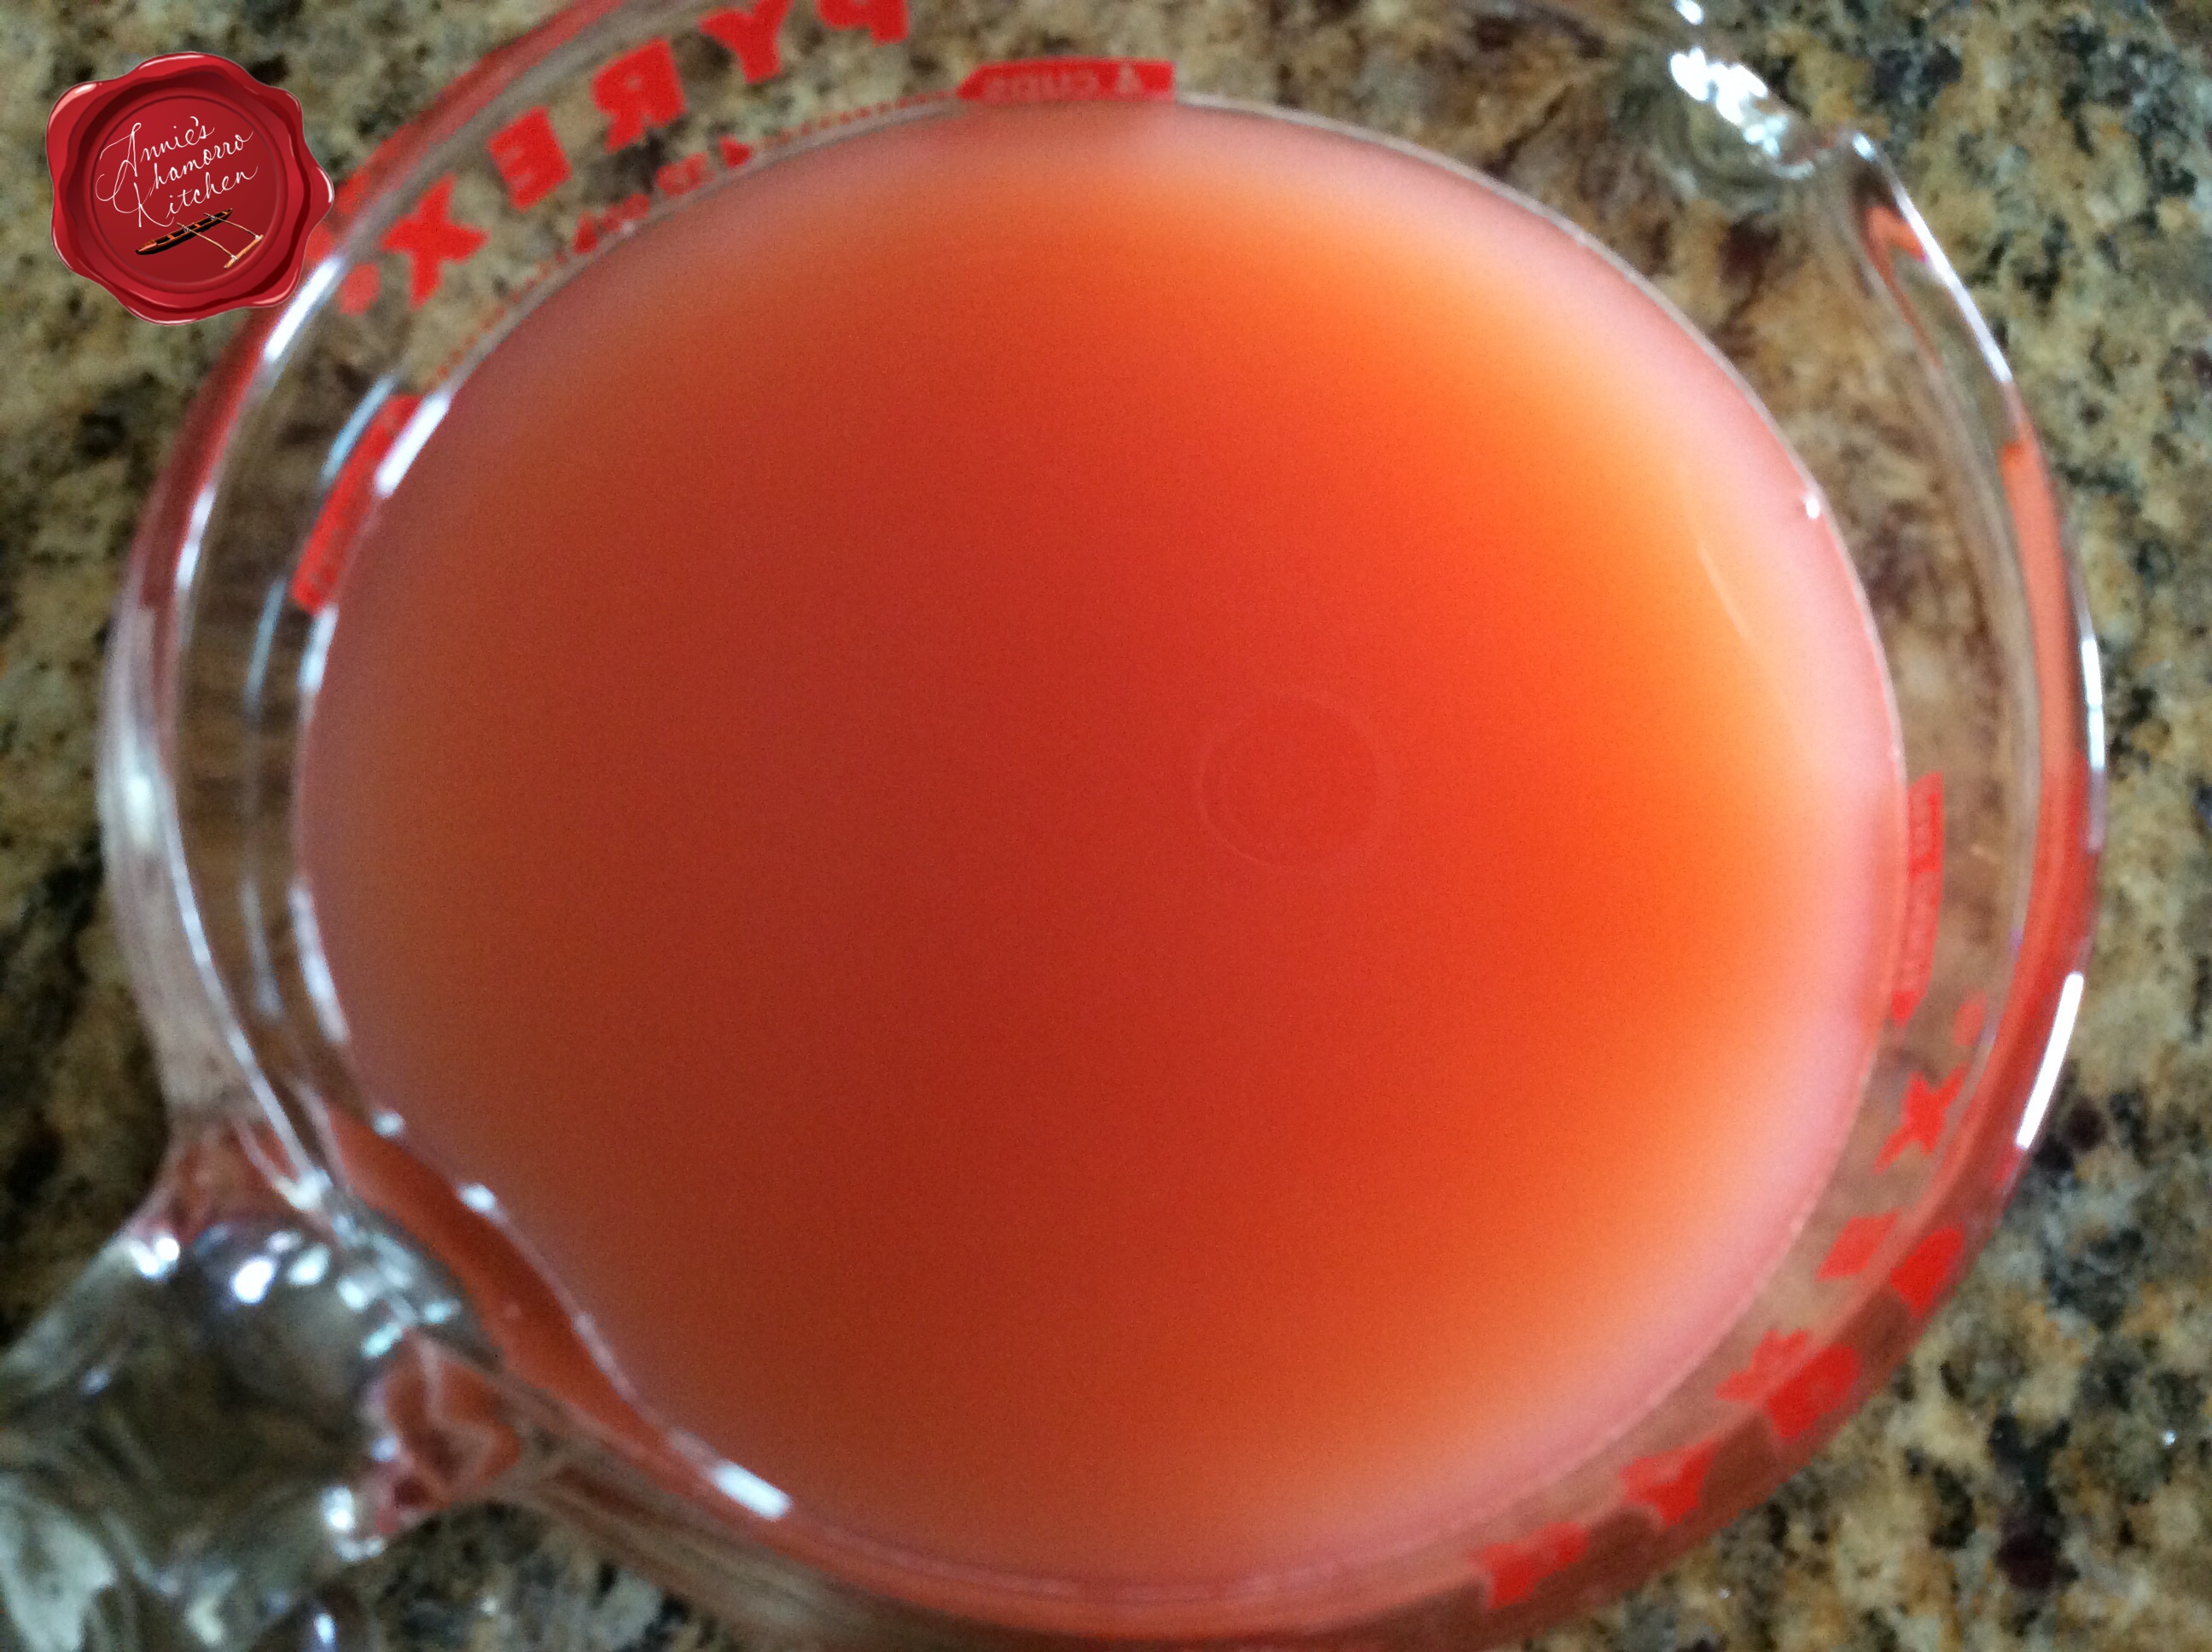
After the meat is nice and brown, and you’ve begun to build you base flavor, it’s time to add the liquids.  A good beef stew uses some sort of wine.  I recommend using a good quality red wine, burgundy if you have any.  Don’t use the “cooking wine” you find in the salad dressing section of your grocery store.  A good rule of thumb for cooking with wine is to use wine you like to drink out of a glass.   Mix together some water, wine, and my secret ingredient (shhhh…don’t tell anyone), orange juice.  See the flavor combinations going on here?  I like adding orange juice to cut back on the strong flavor of the wine (my kids don’t like too much wine in my cooking).  Add the wine mixture to the pot.

image

Now it’s time to create even more layers of flavor that will deepen with prolonged simmering.  Turn your heat down to low, place a lid on the pot, and go away for two hours.  Read a book.  Catch up on your favorite television shows.  Walk the dog.  Do something but do not uncover that pot.  Let the meat, liquid, and aromatics simmer happily, undisturbed.  In two hours, the meat will get nice and tender.

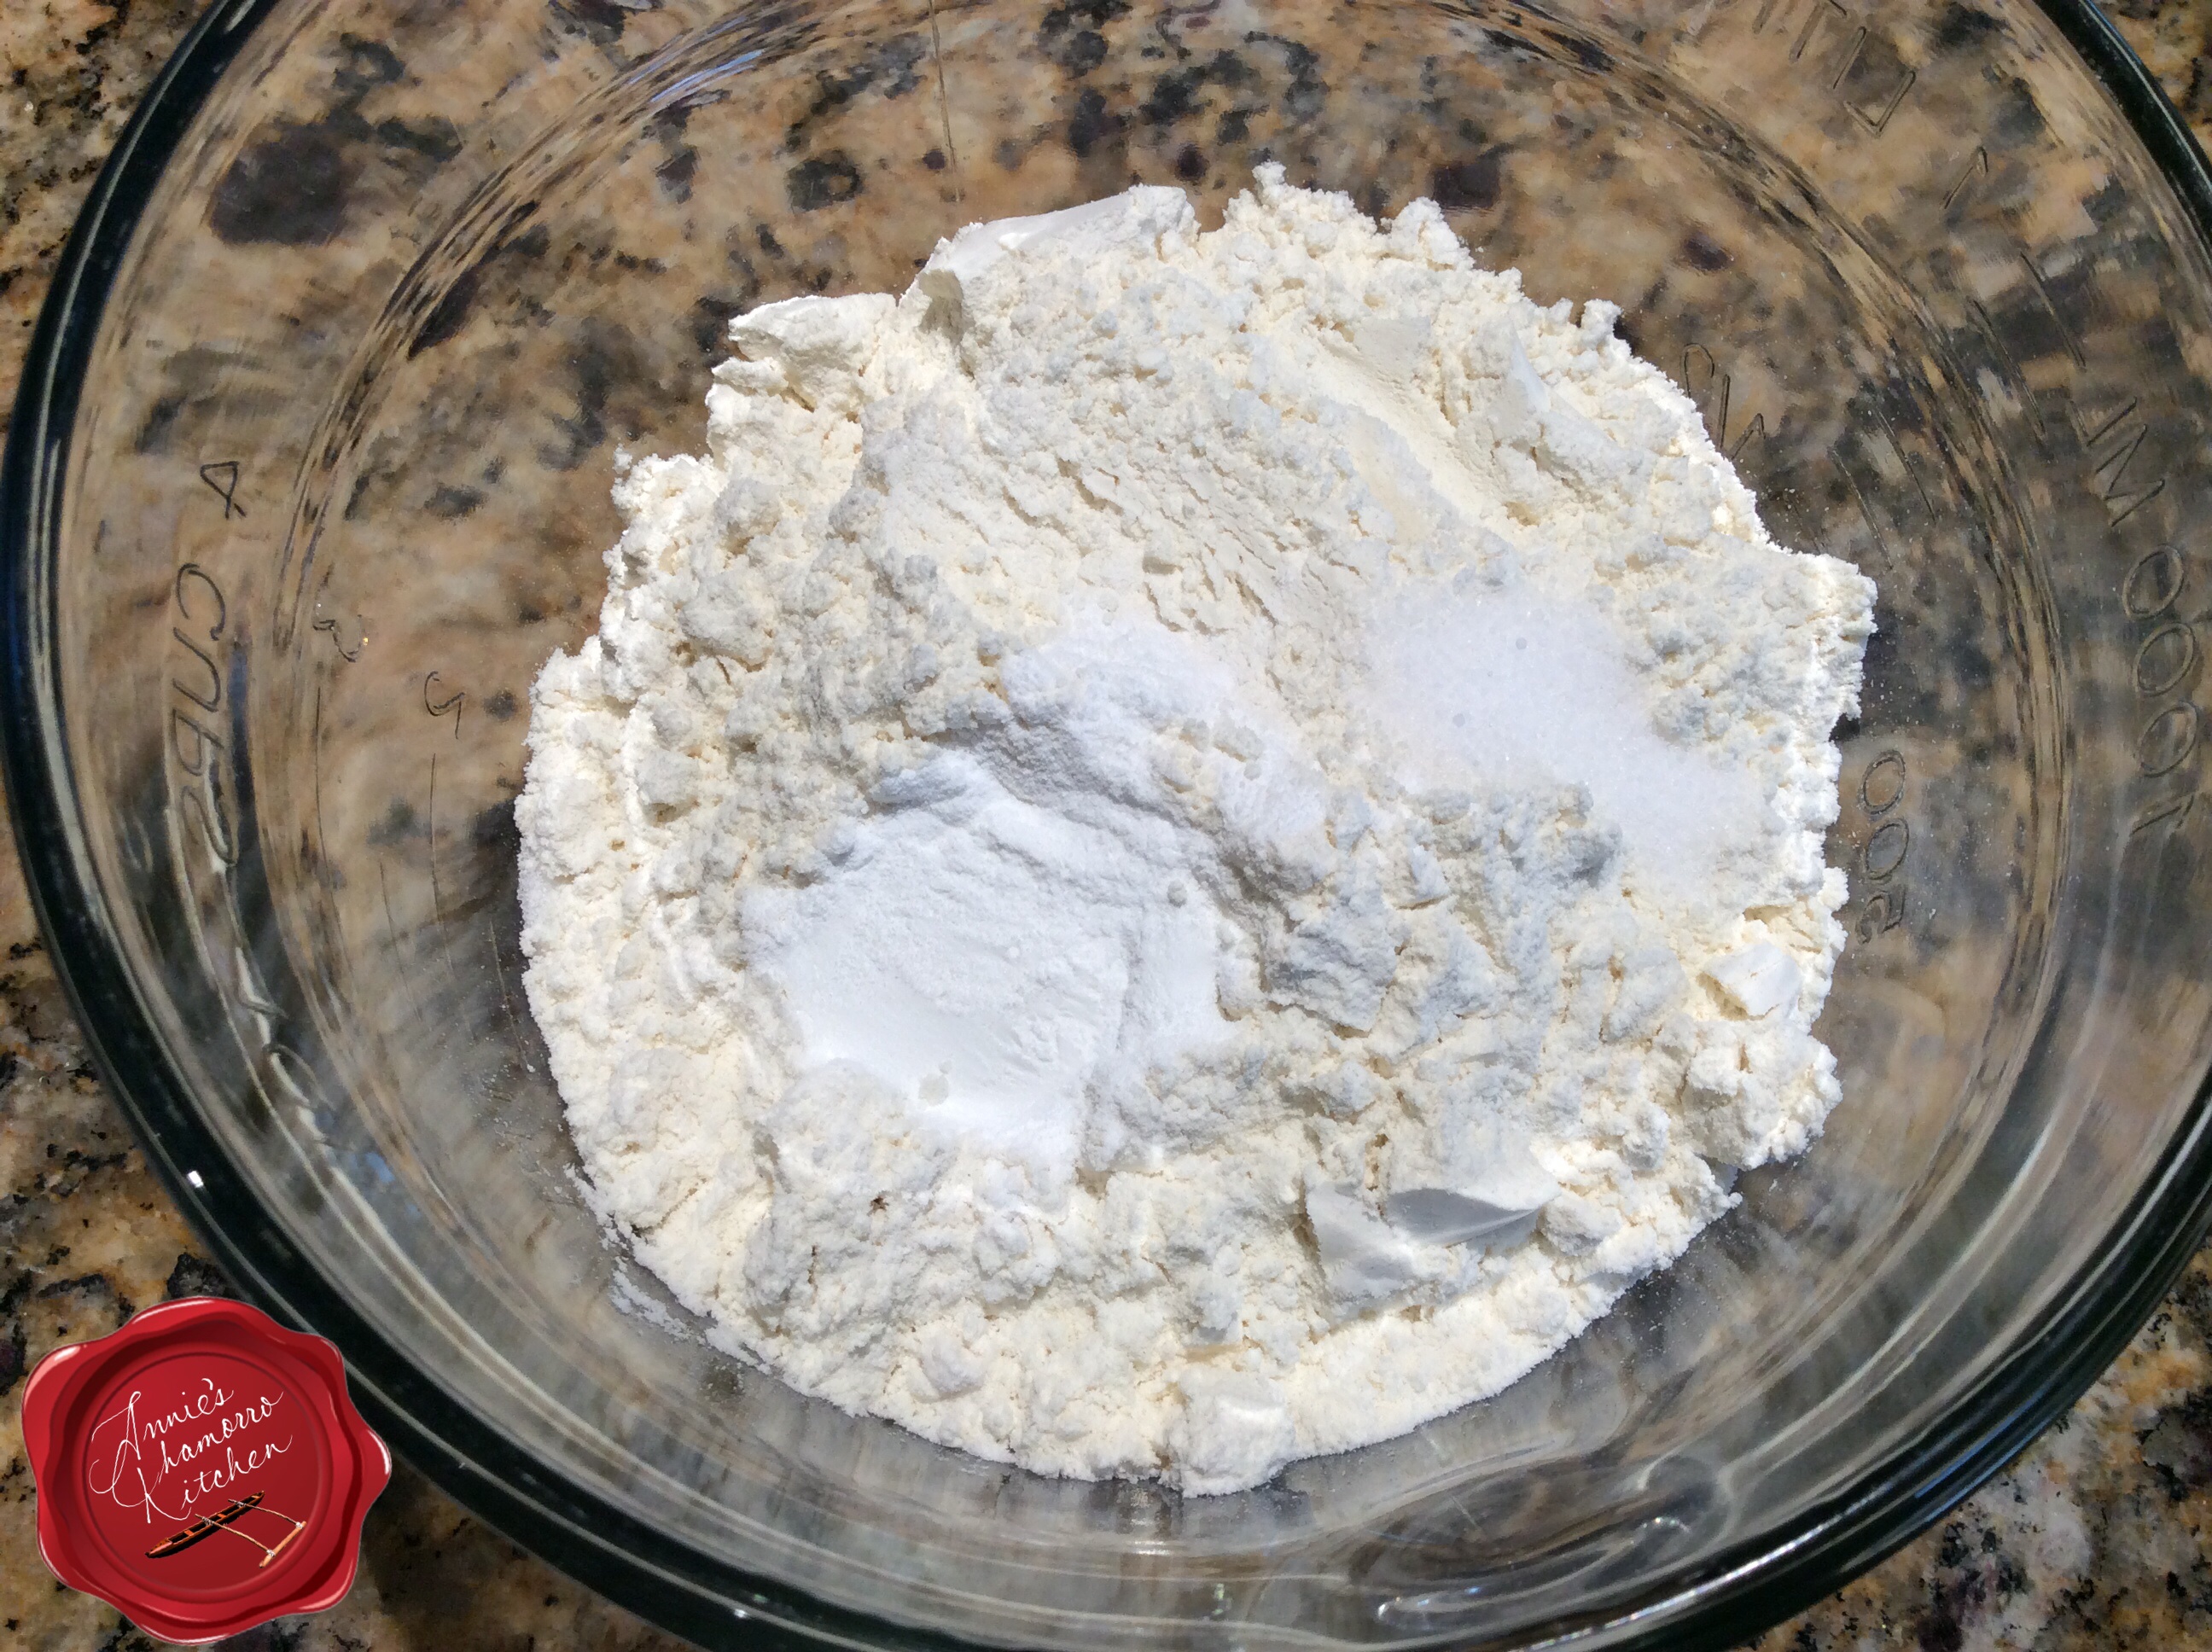
Right about the two hour mark, make the roux.  This butter-flour mixture works to thicken the broth and add a richness because of the butter.  Butta is betta.  ‘Nuff said.

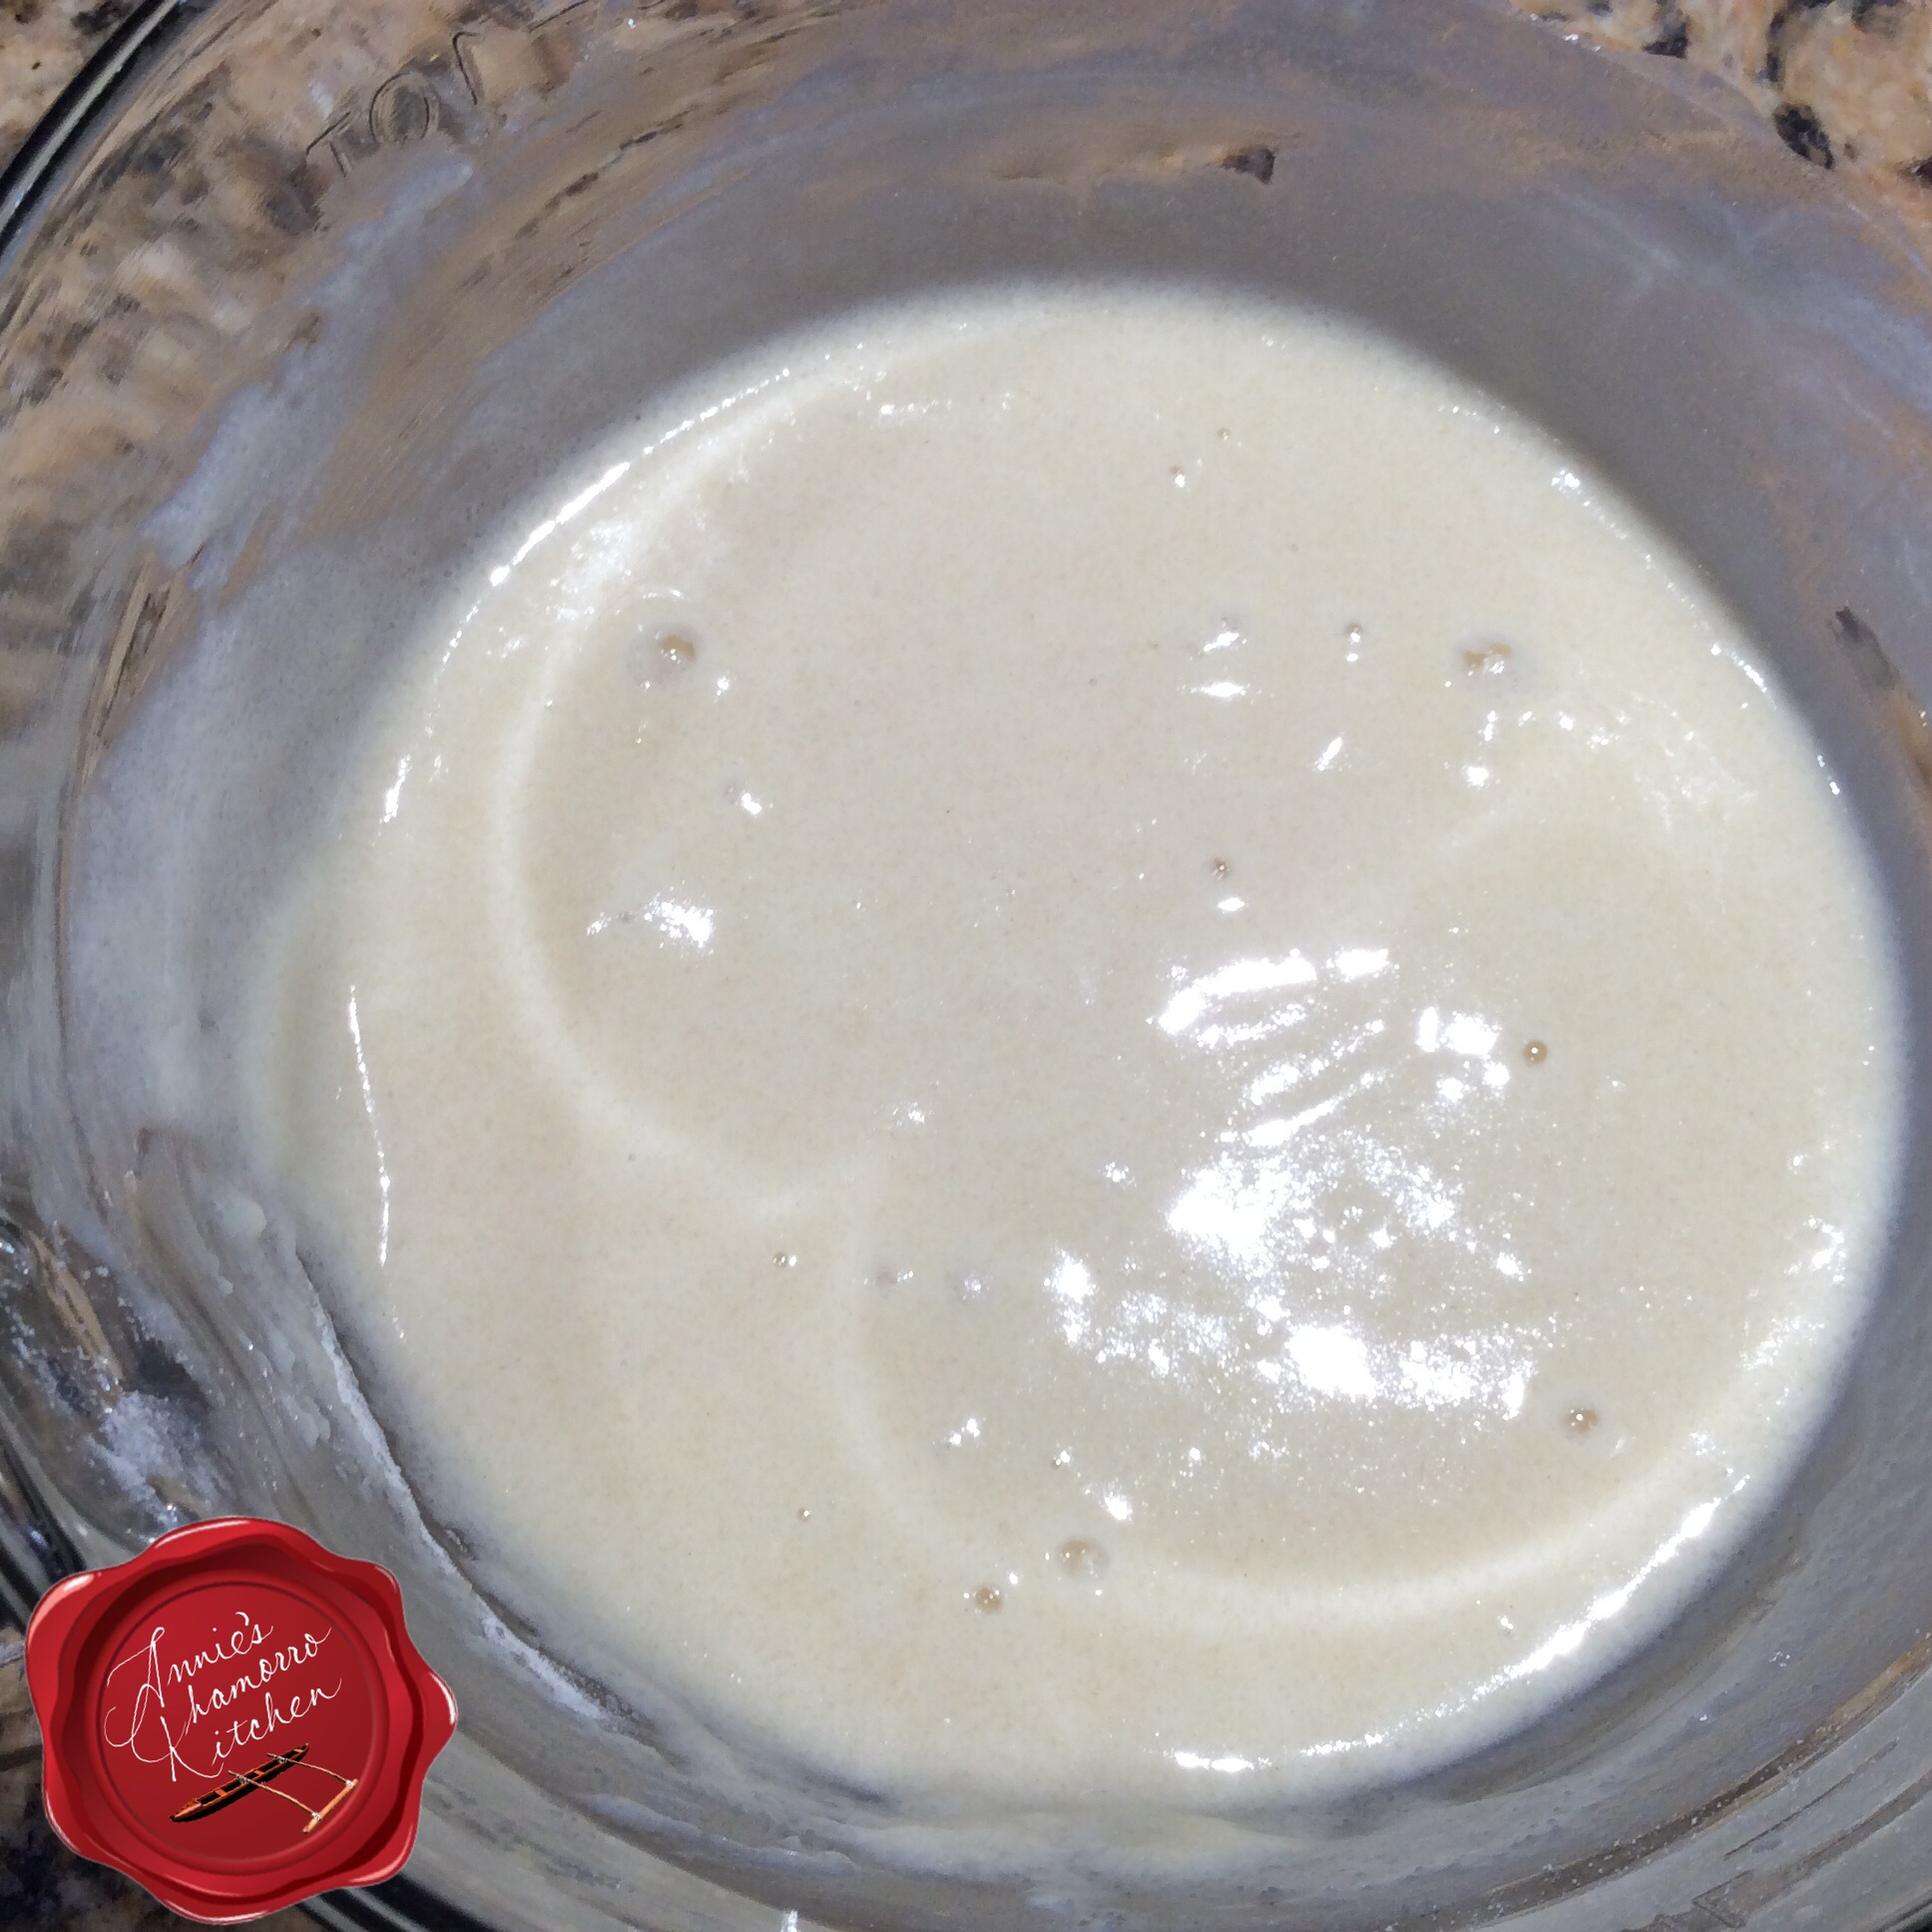
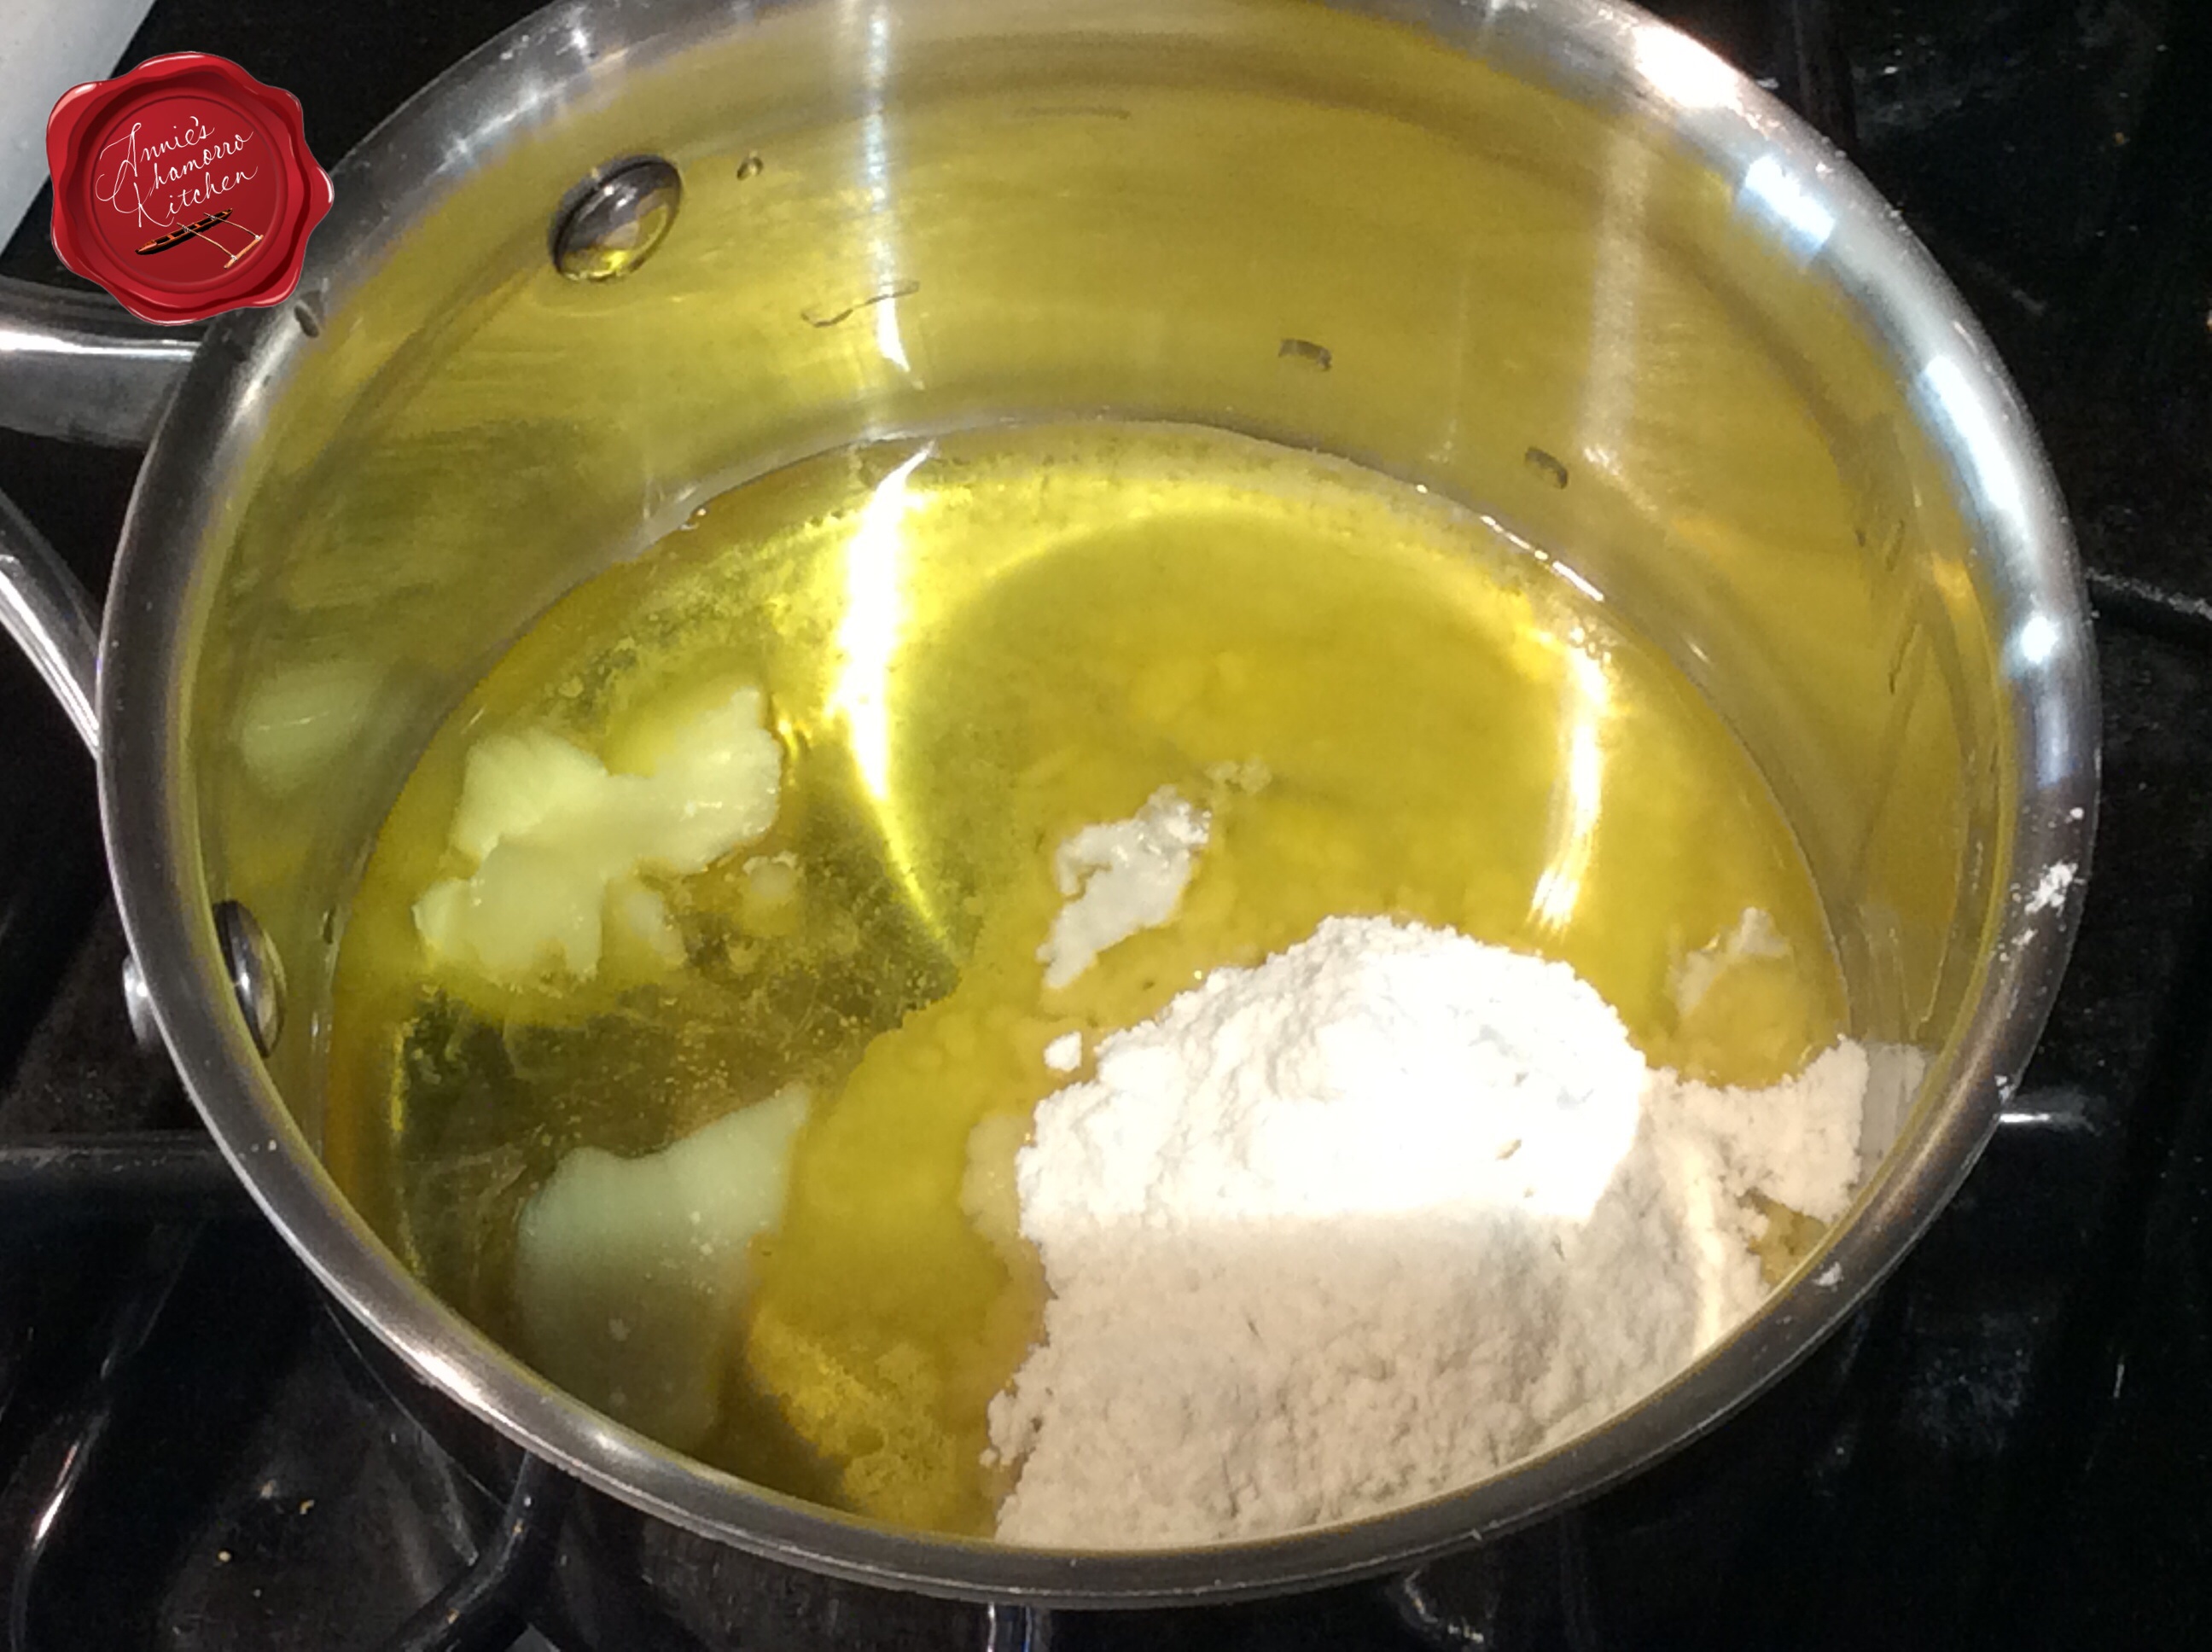
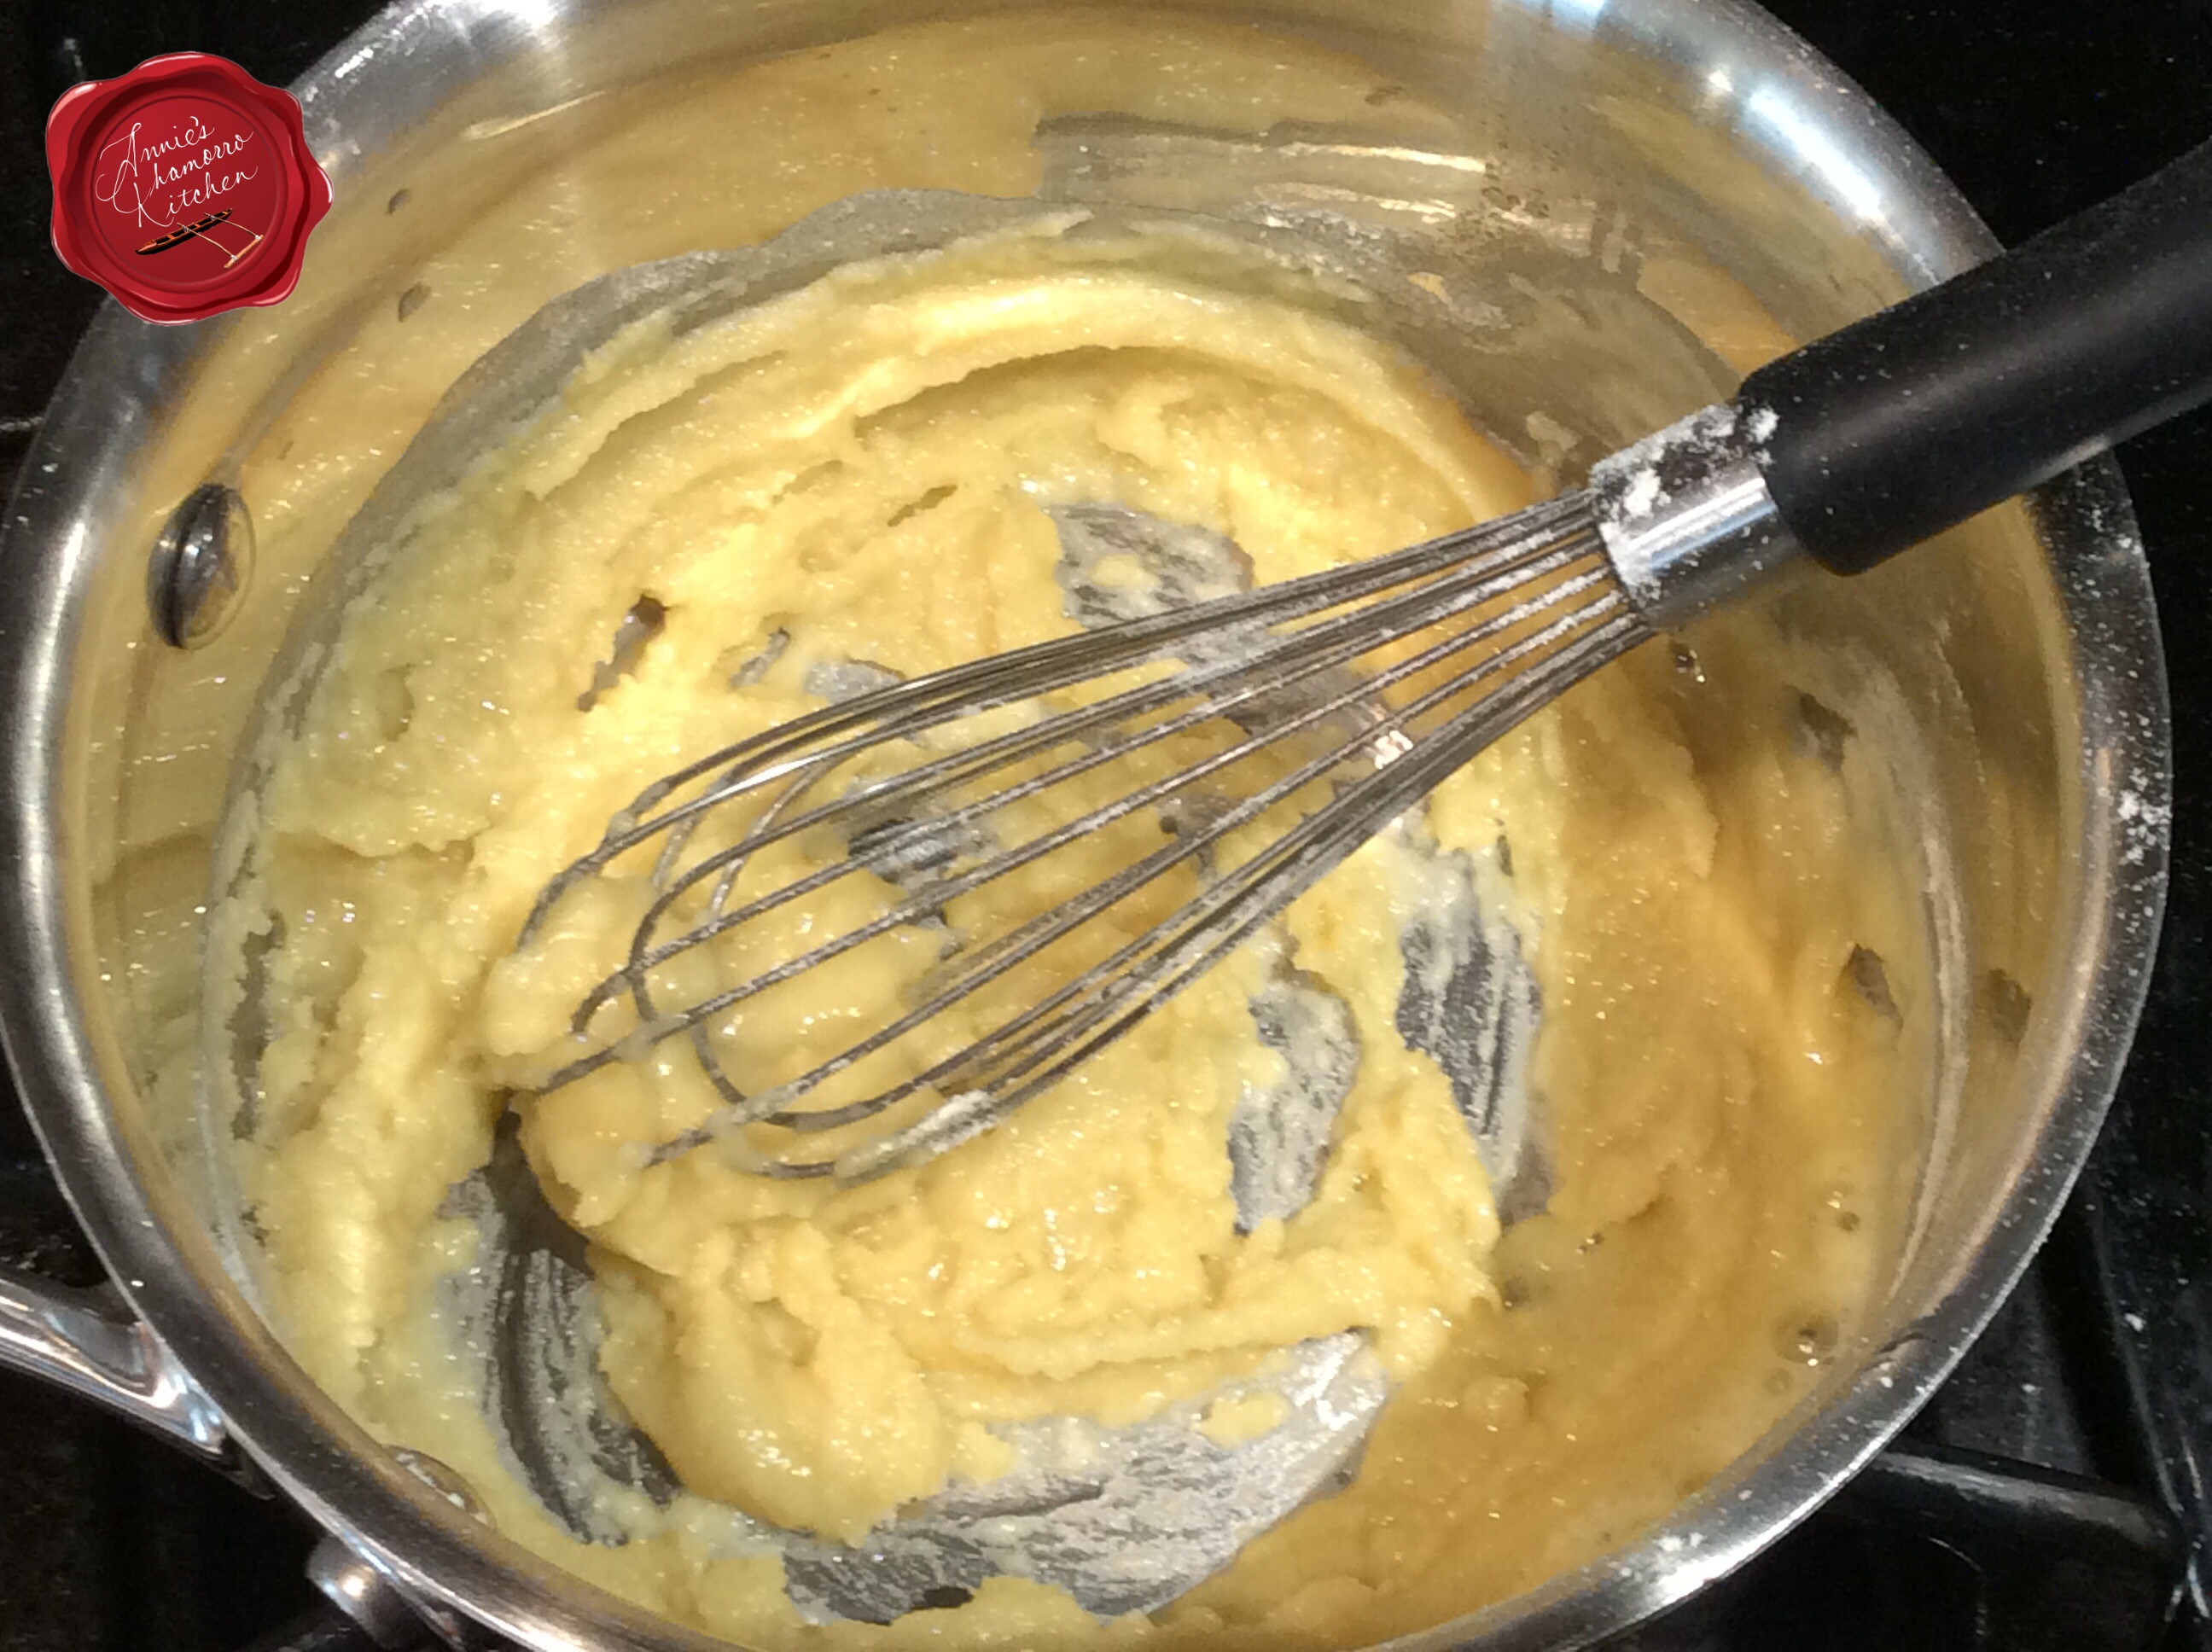
Melt some butter in a small sauce pan then add a few spoonfuls of flour.  Cook over medium-low heat, stirring constantly until the mixture begins to turn a golden brown.  Pour in some of the broth from the pot — about 1 to 2 cups will suffice — whisking constantly to prevent lumps from forming.  If the mixture seems too thick, add more broth until you get a relatively creamy mixture (the photo below, on the right, needs more broth).  Add the roux to the pot, stirring to dissolve the roux into the broth.  Add the additional beef broth.

image  image

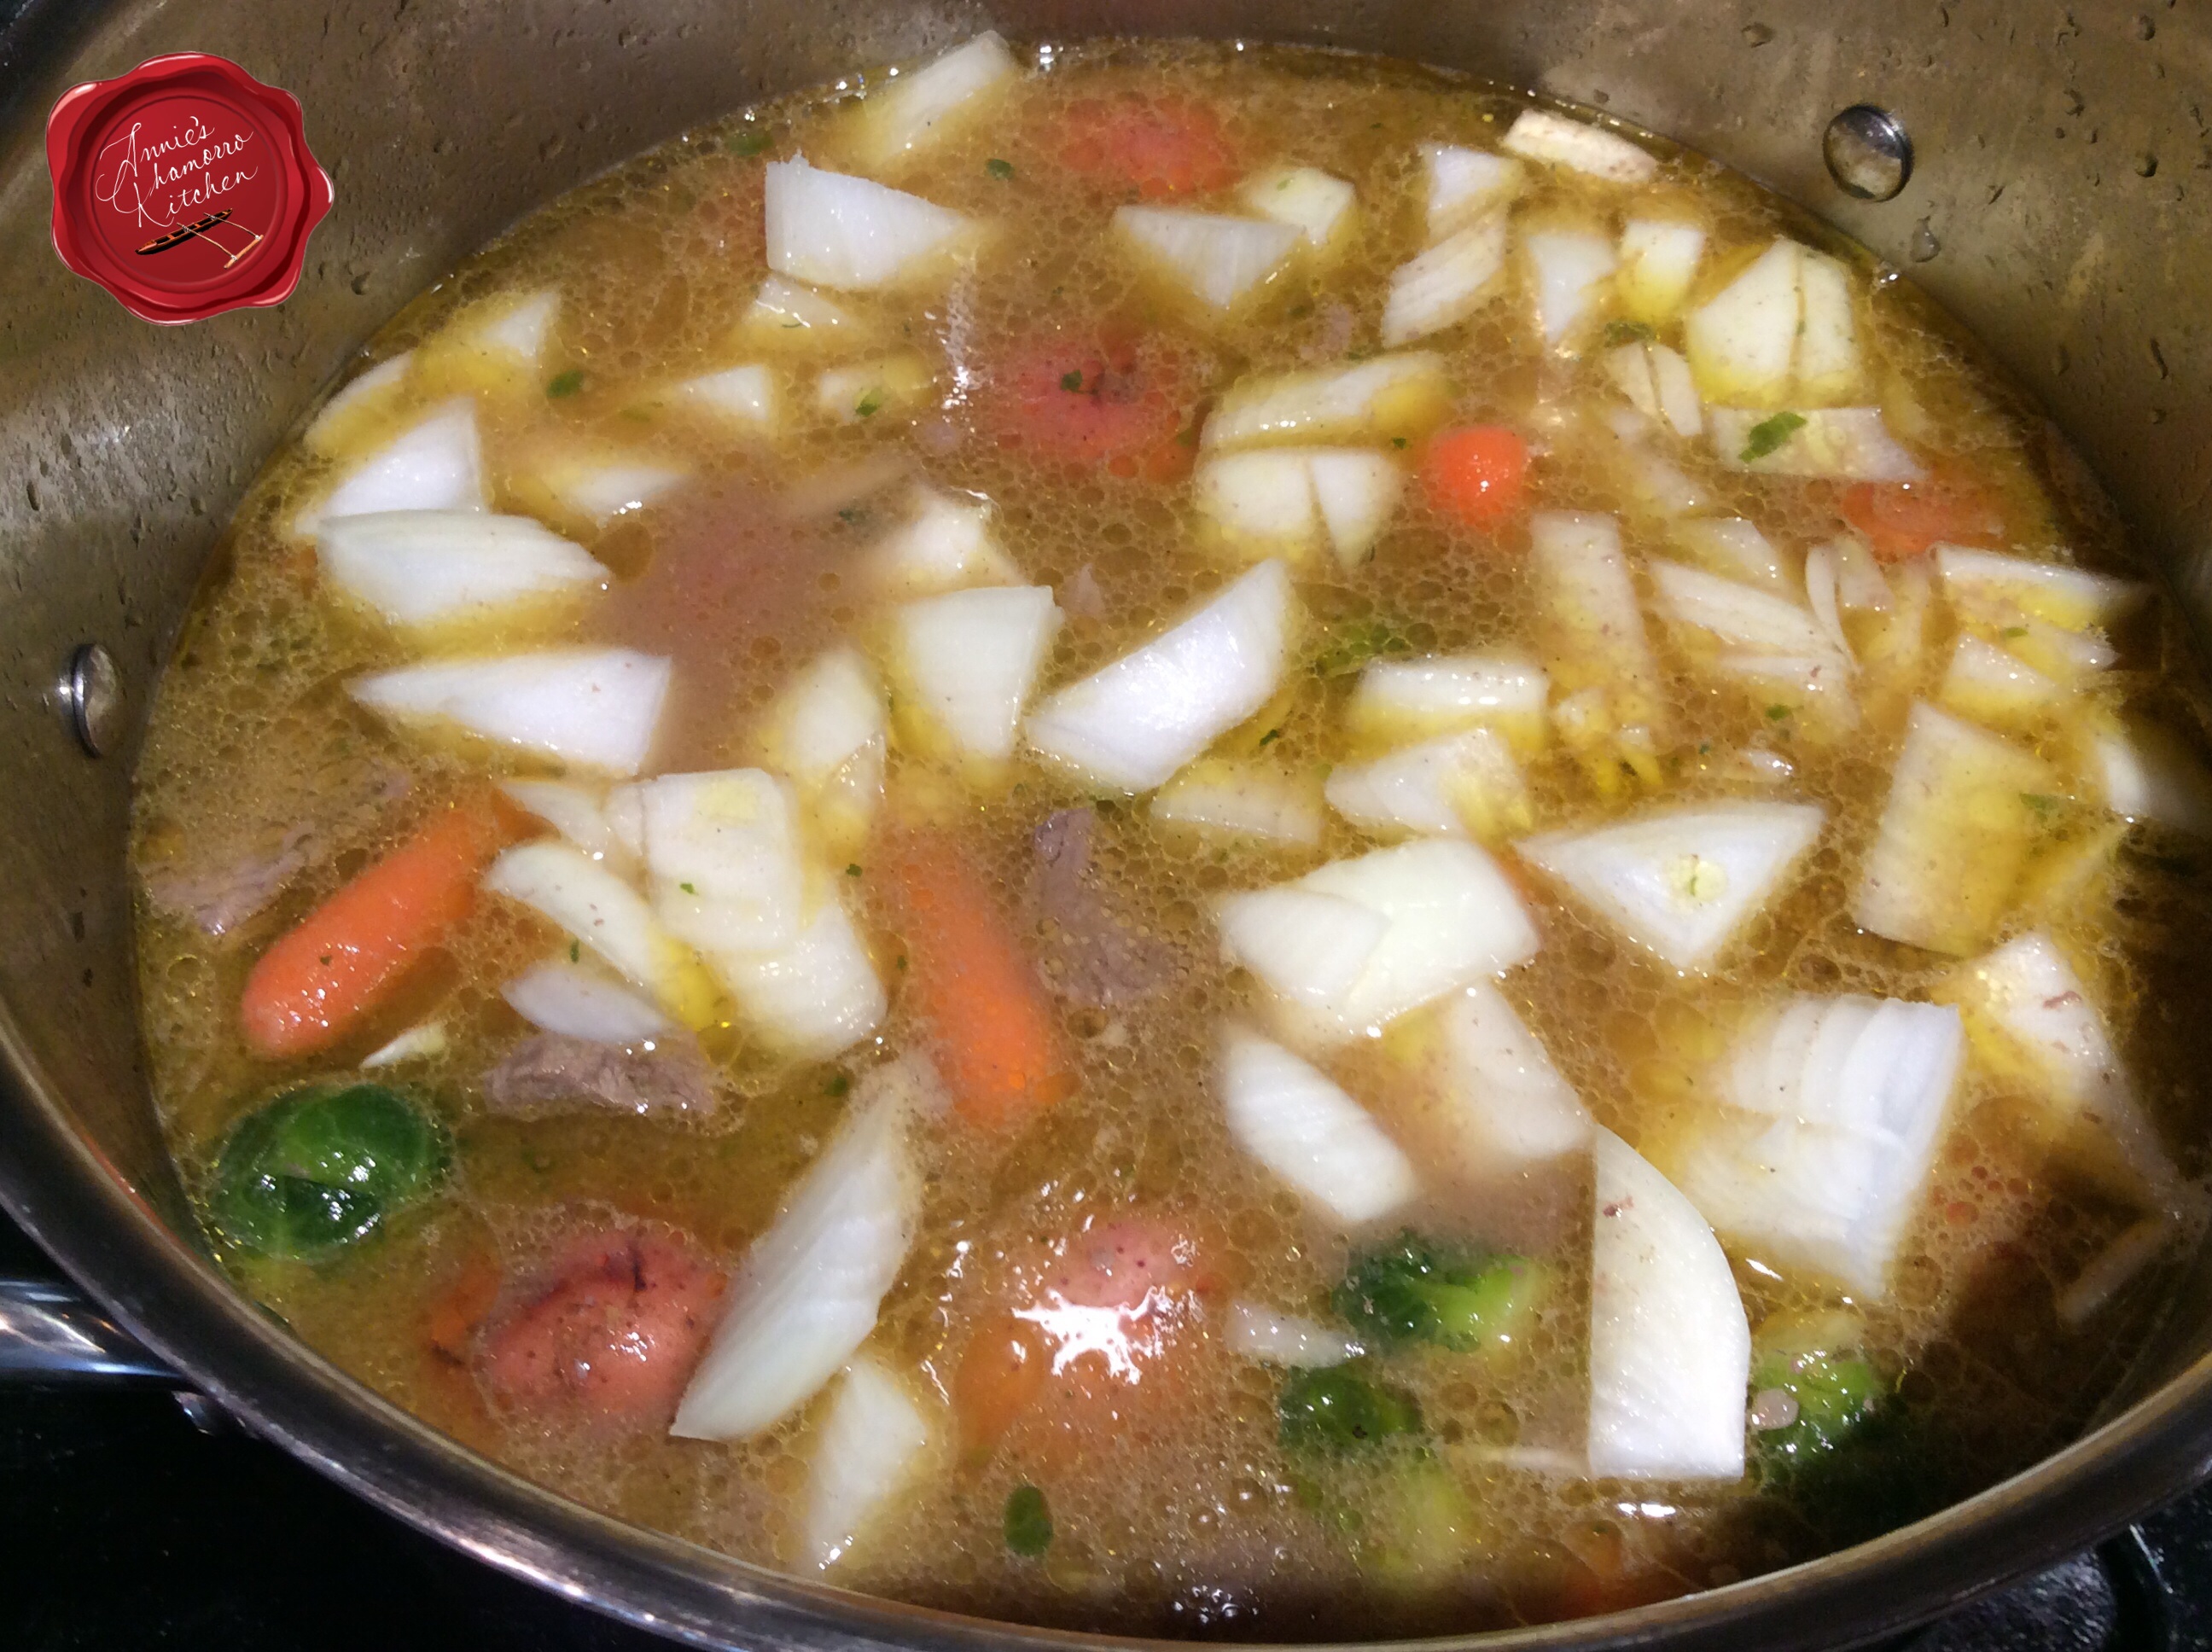
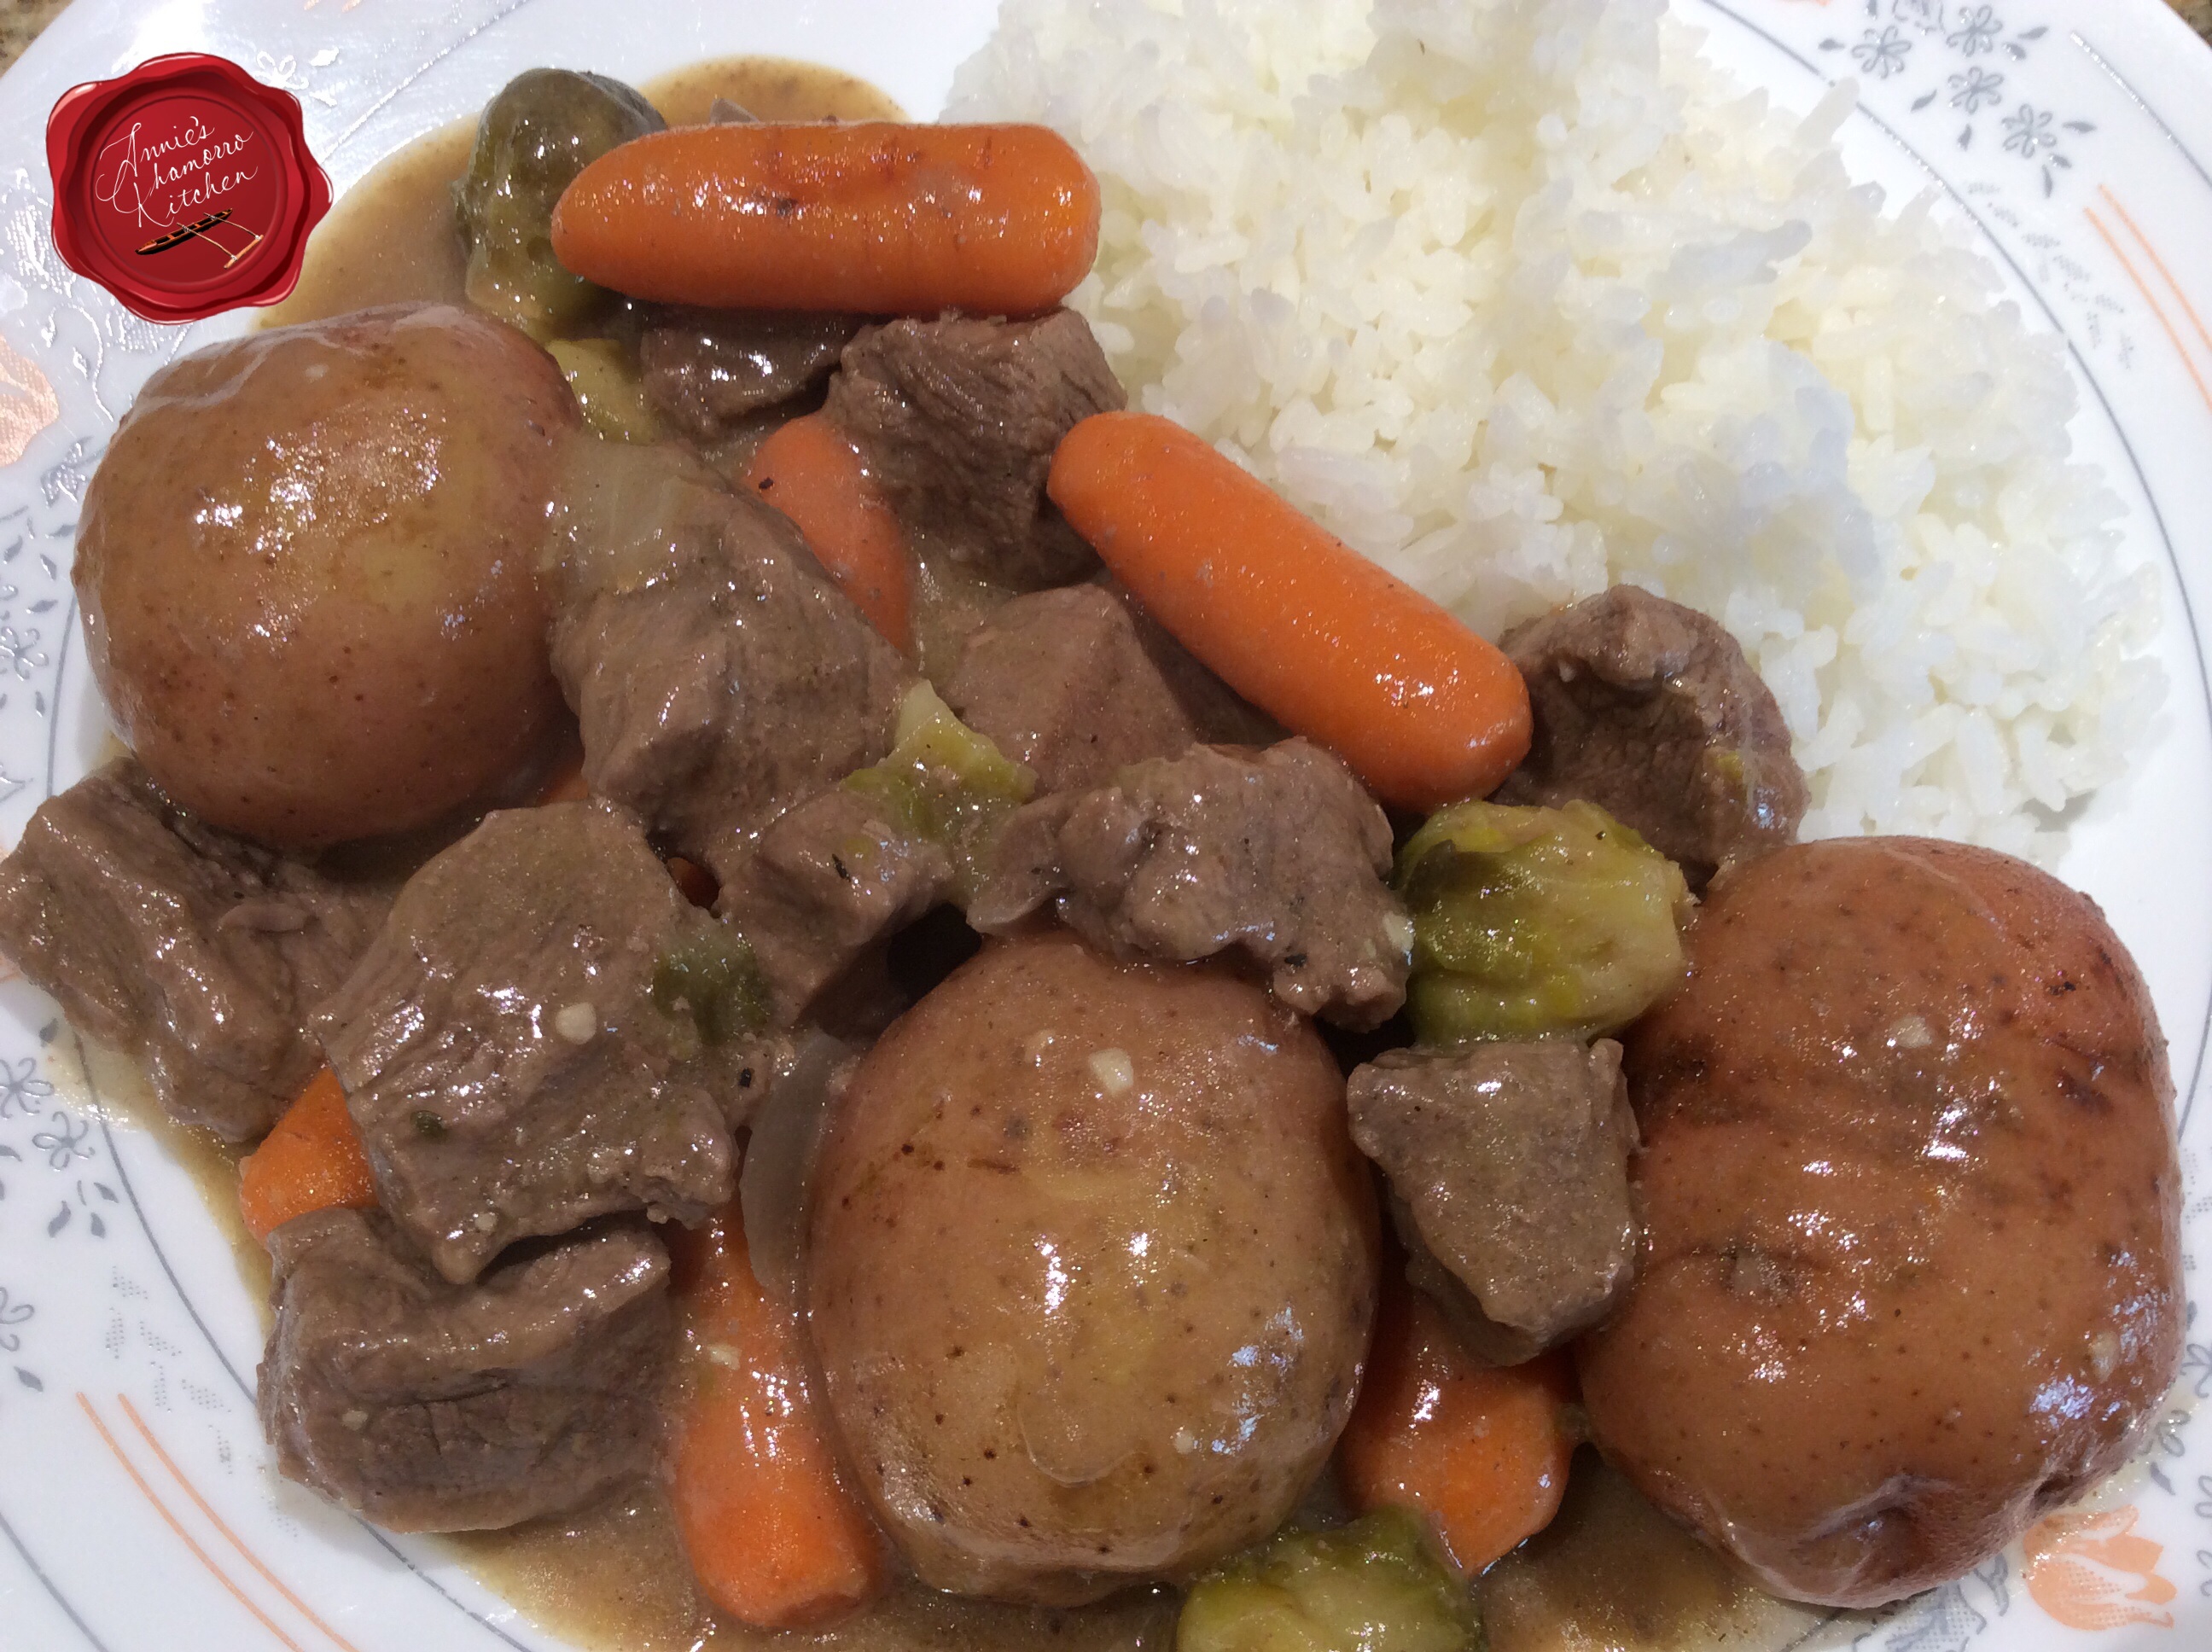
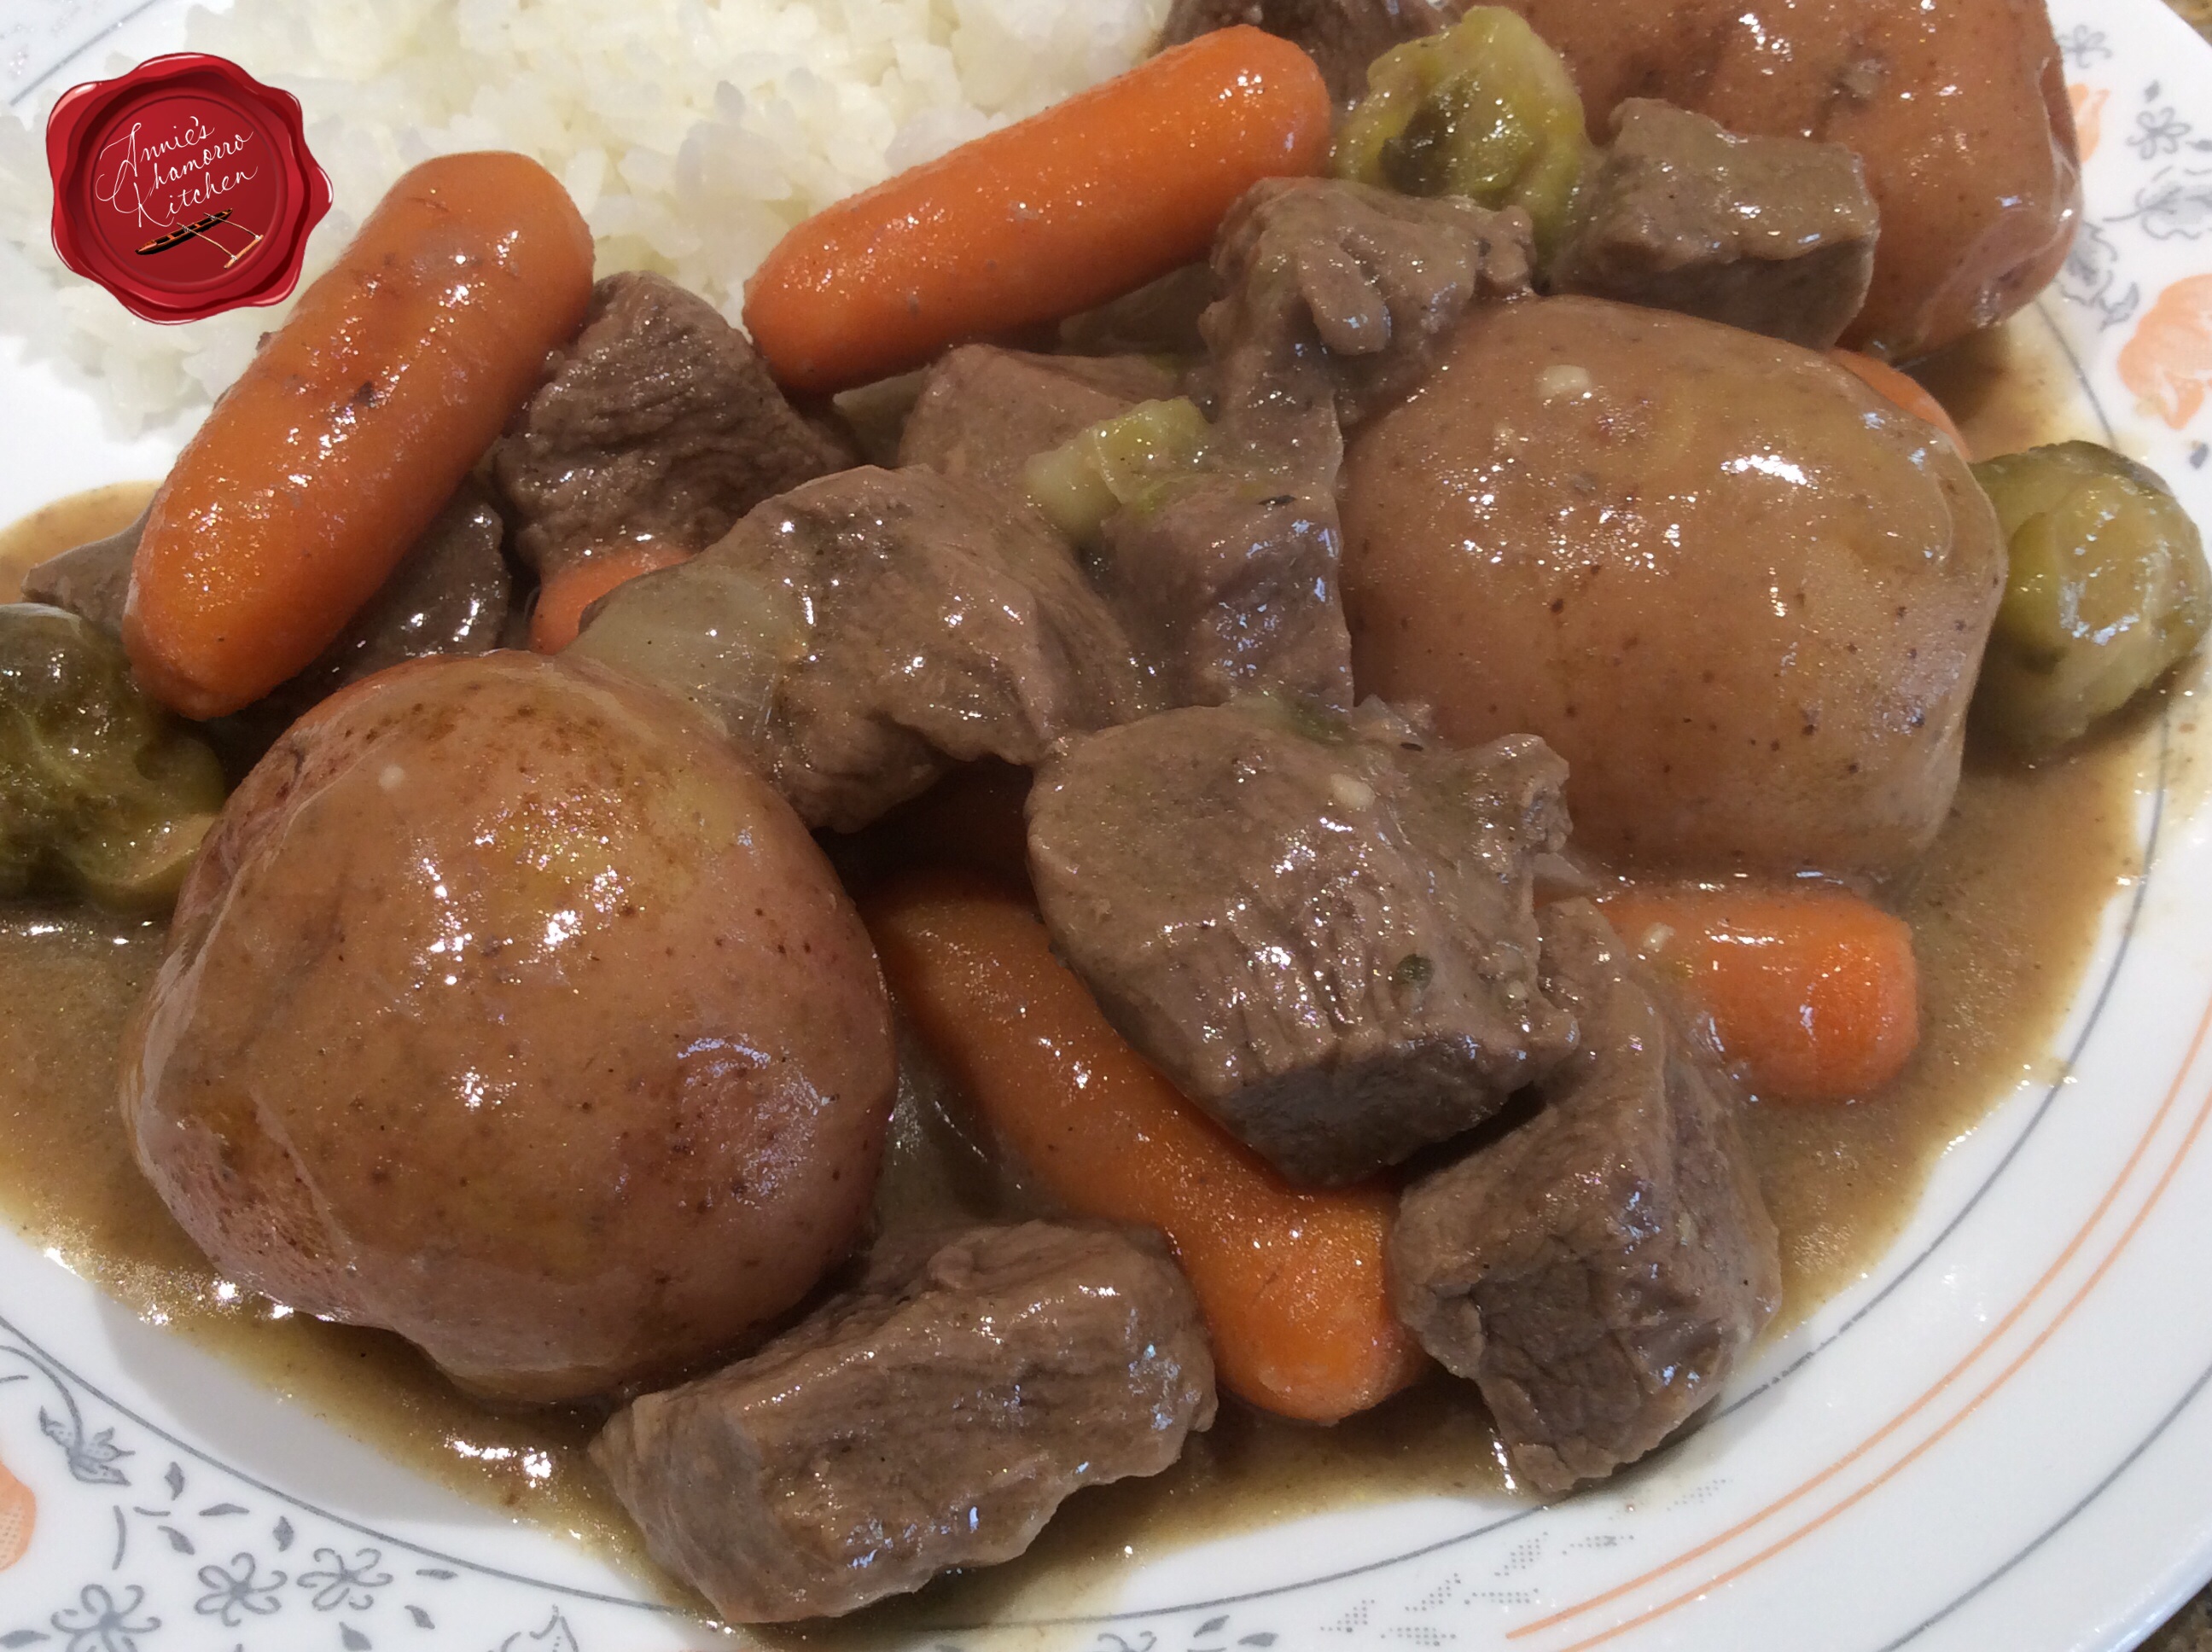
Add your vegetables to the pot.  All at once.  Go ahead.  Don’t be skurred.  Well, I take that back.  Add the root vegetables first (potatoes, carrots) and let them cook for a few minutes before adding any other vegetables that cook quickly, like onions and in my recipe below, brussels sprouts.

Turn the heat back up to high and cook for about 10 more minutes, or until the potatoes and carrots can be pierced easily with a fork.  I like using petite red potatoes because they are small enough that I just have to wash them then throw them into the pot.  You can cut them in half if you want to cut down on the cooking time, but after two hours of simmering, what’s another five minutes of cooking?

image

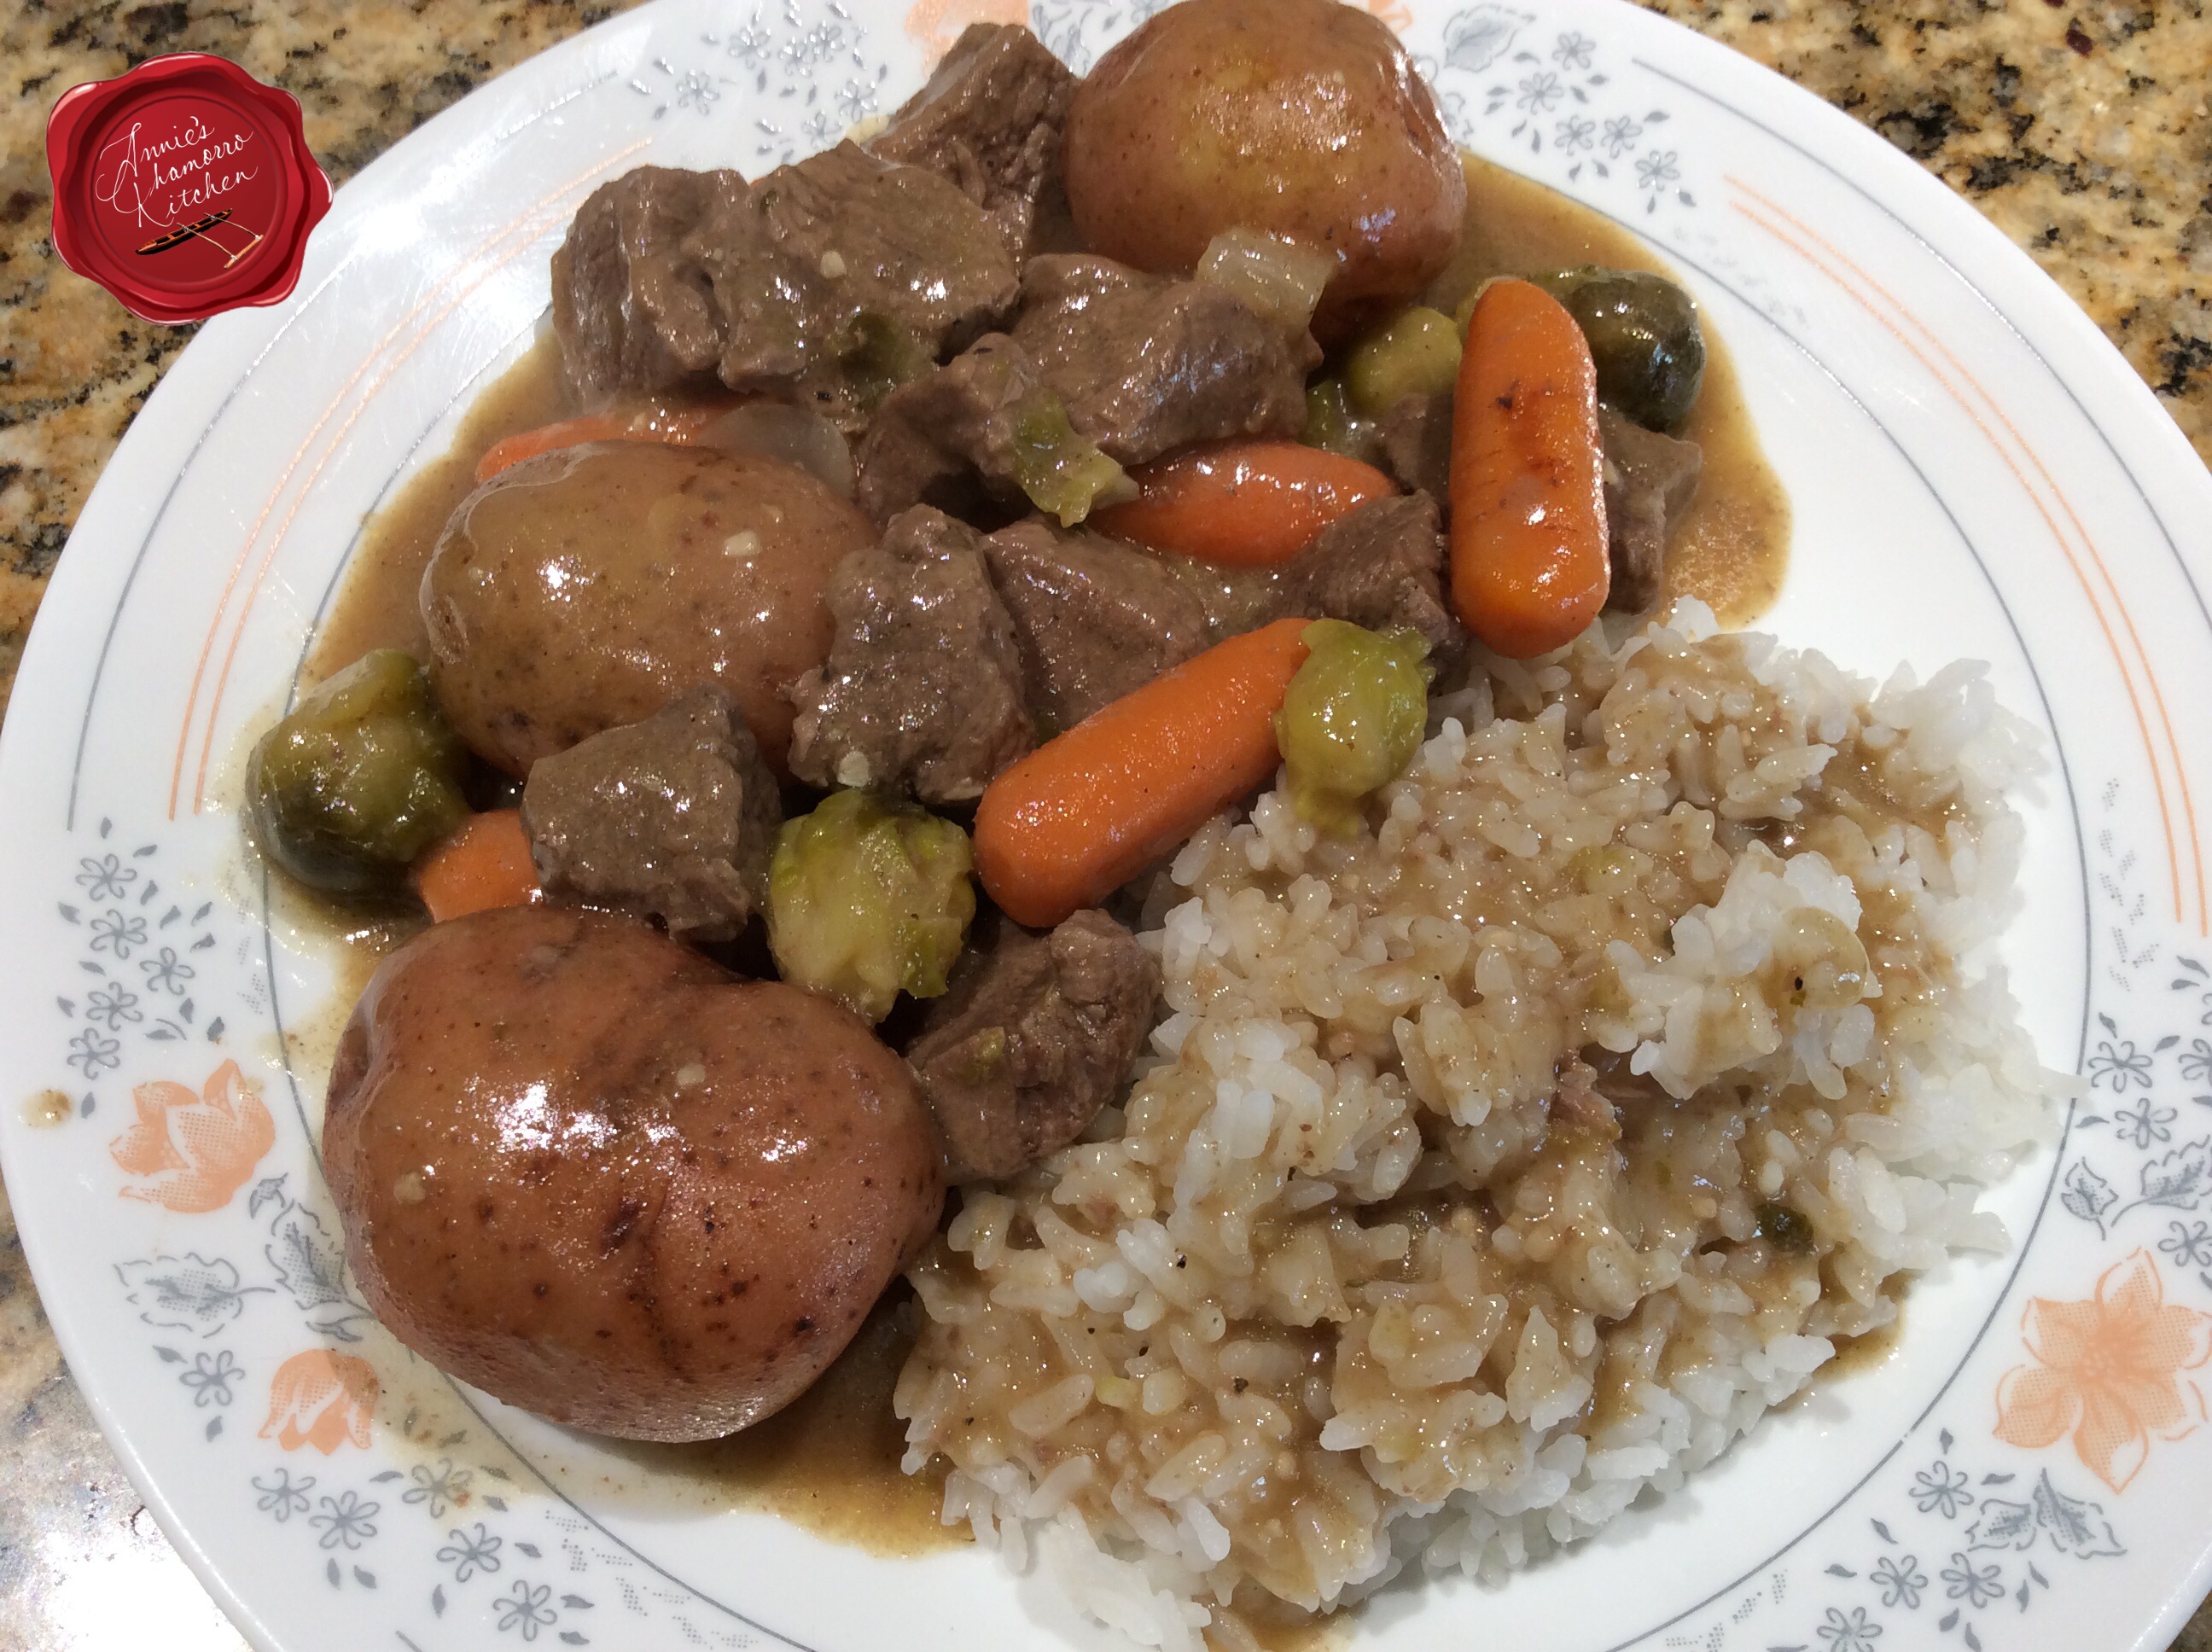
Stir occasionally; the broth should be a nicely thickened gravy by now with the addition of the roux.  Taste the gravy; add salt and pepper to taste.  I like adding Dashida beef flavored seasoning instead of salt.

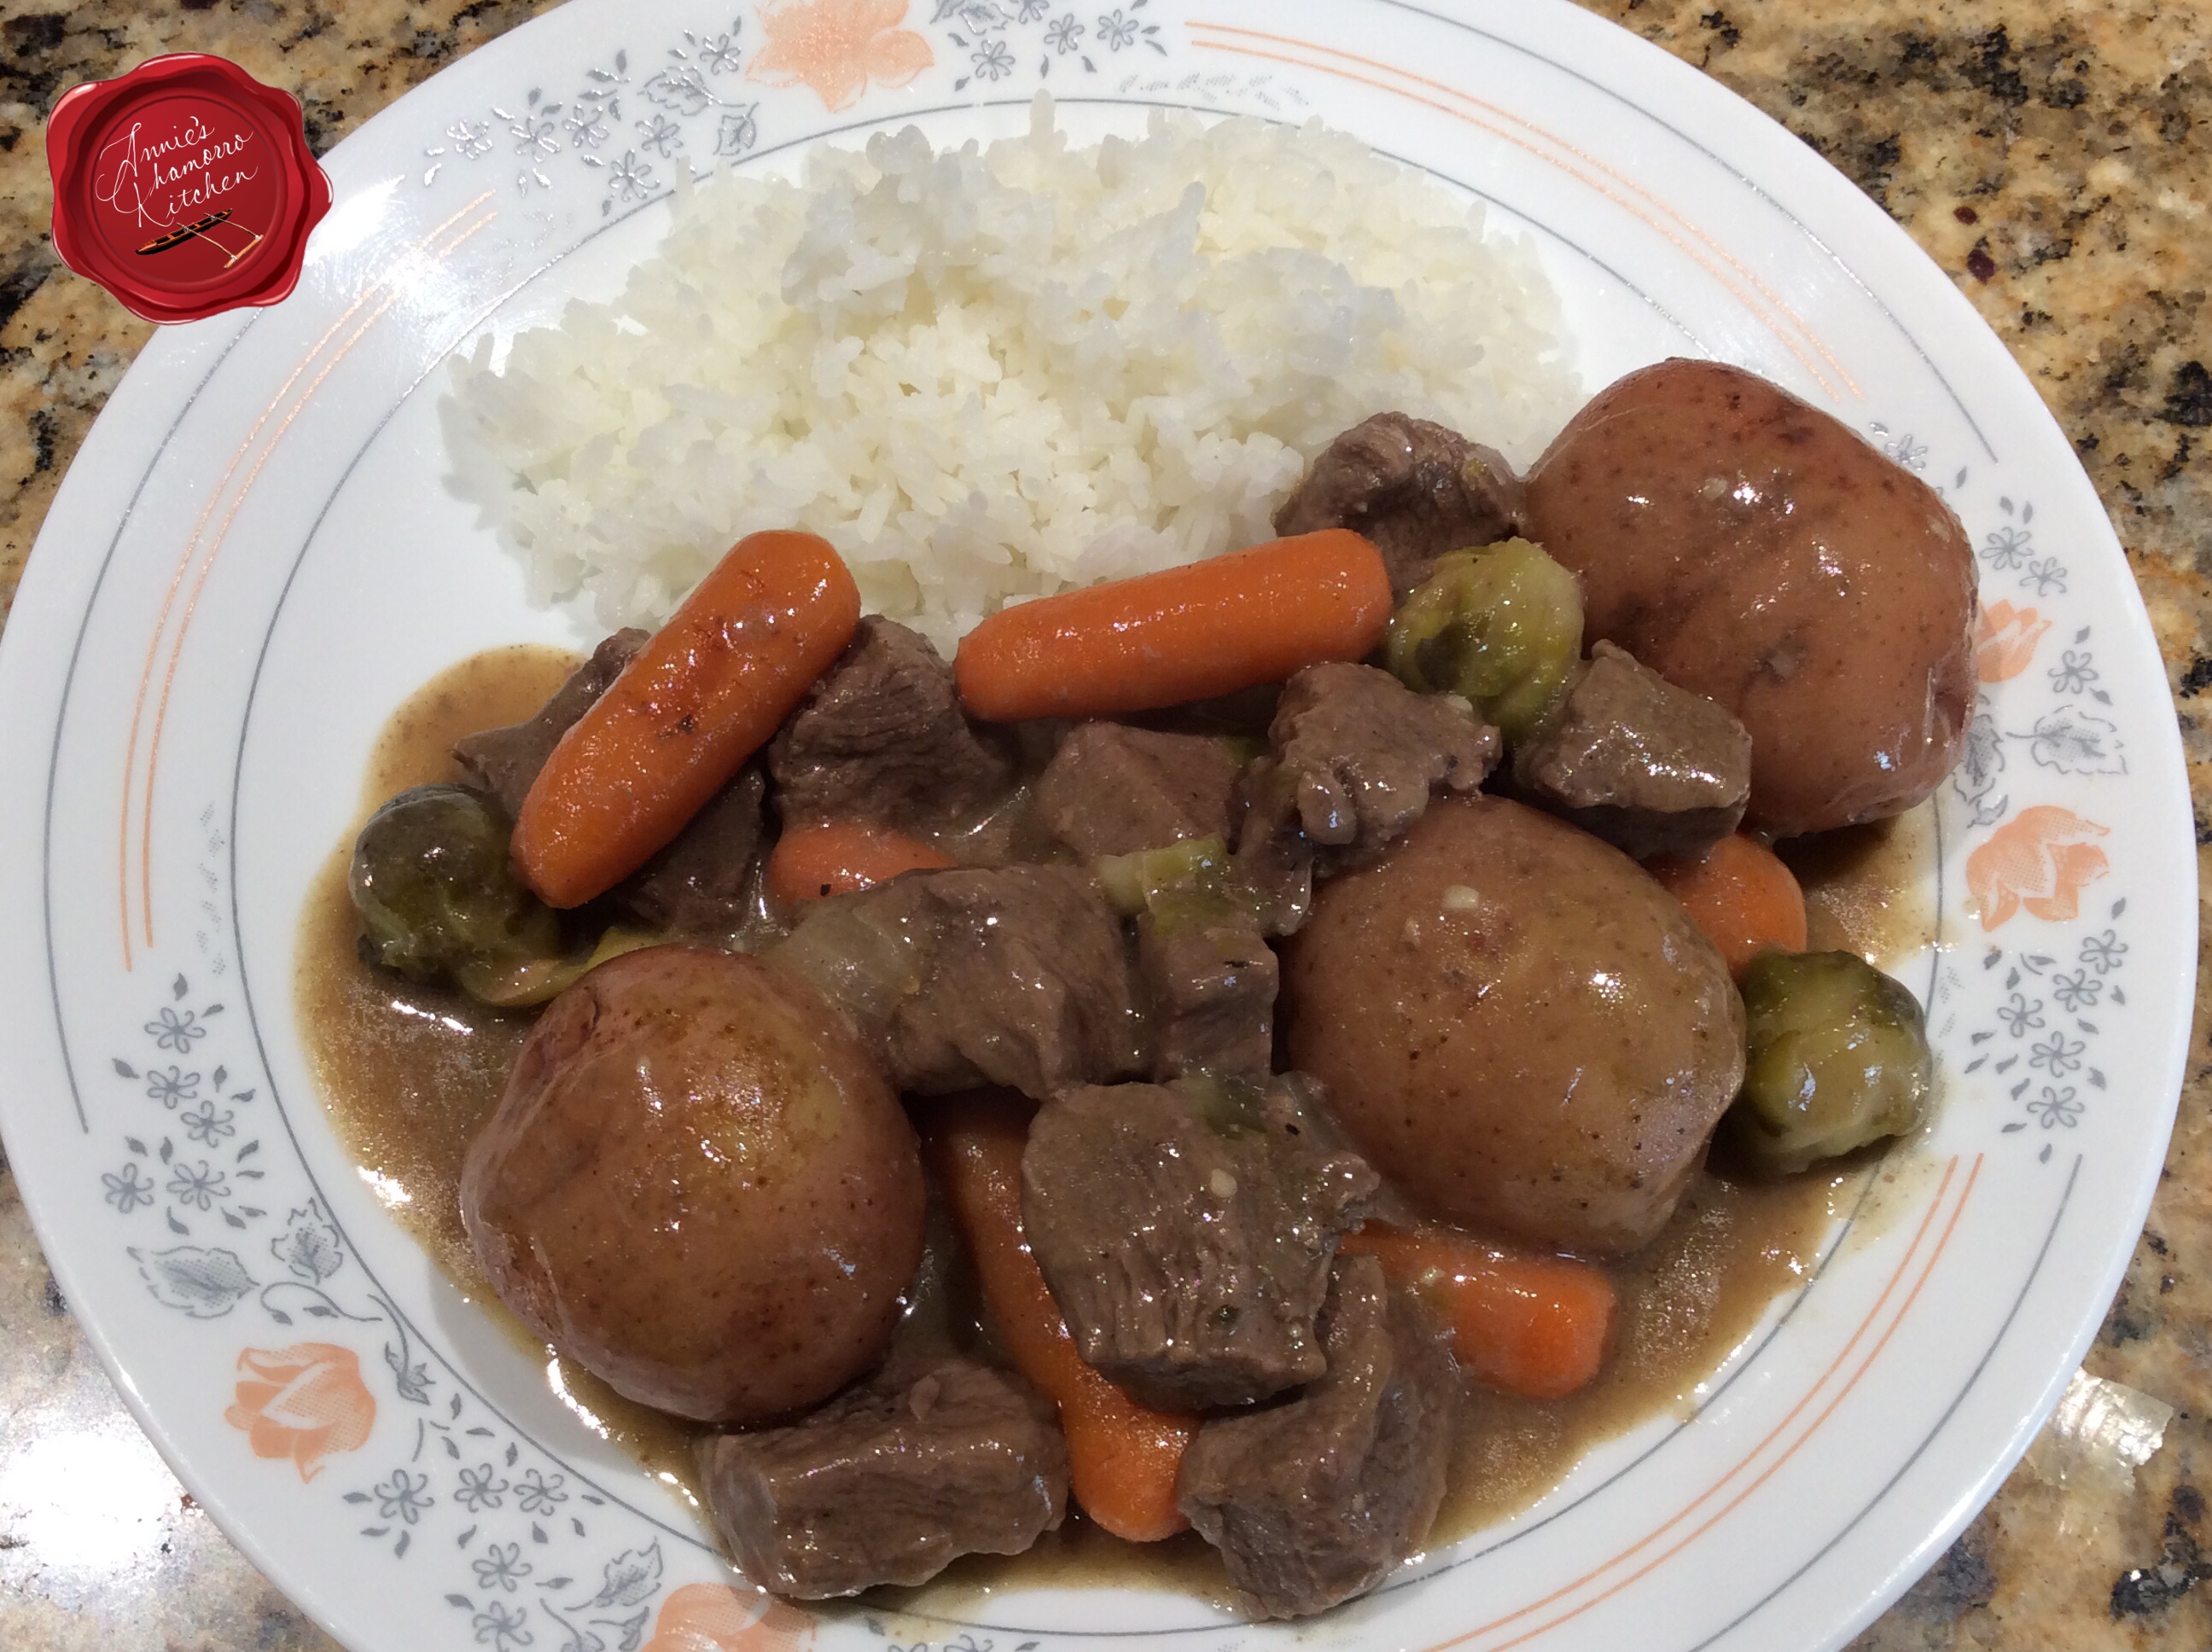
Serve with hot steamed white rice.  If you’re like me, you’ll need to drown your rice in some of the delicious gravy.

ENJOY!

imageimage

Hearty Beef Stew
 
Cook time
Total time
 
Author:
Recipe type: Stew
Ingredients
  • 3½ pounds top sirloin, cut into 1-inch cubes
  • 3 tablespoons butter
  • 1 tablespoon chopped garlic
  • ½ teaspoon ground thyme
  • ½ teaspoon freshly ground black pepper
  • 1 teaspoon salt
  • 2 cups water
  • 1 cup orange juice
  • 1 cup red wine (I recommend a burgundy)
  • 1 pound baby carrots
  • 1 bag (10-oz.) frozen brussel sprouts
  • 12 whole petite red potatoes
  • 1 medium onion, diced large
  • 2 cups beef broth
  • 4 tablespoons Dashida (or add salt, to taste)
Roux:
  • 3 tablespoons butter
  • 6 tablespoons flour
  • 1½ cups broth (use the broth from the stew)
Instructions
  1. Place the meat, butter, chopped garlic, ground thyme, black pepper and salt into a large pot. Cook over high heat until the meat browns, about 5 minutes.
  2. Add the water, orange juice, and wine; reduce the heat to low and simmer for 2 hours.
  3. After 2 hours, prepare the roux. In a small saucepan, melt the butter and add the flour. Stir constantly while cooking over medium heat until the mixture begins to brown. Whisk in the broth from the pot of stew. Turn the heat off; whisk the roux into the remaining broth in the pot.
  4. Add the beef broth; stir.
  5. Add the carrots, potatoes and onion. Let this cook for a few minutes then add the brussels sprouts.
  6. Return the heat to high and cook for 10 minutes or until the potatoes are easily pierced with a fork.
  7. Taste the gravy and add salt and pepper to taste, or add Dashida.
Serve with steamed white rice and enjoy!


Sweet Dinner Rolls ~ My Original Go-To Version

As the title for my recipe states, this is my go-to recipe when I want to whip up a tray of sweet dinner rolls.

Buttered and Sugared Dinner Rolls - 01

It’s also the same recipe I use in my tutorial videos for making dinner rolls (see below).

I’ve heard from many people who have made dinner rolls following this recipe and my instructions in my tutorial videos.  Most of them were successful at their first try, but I will tell you that baking with yeast requires PATIENCE and practice.

DSC_0049

If you don’t succeed in your first try, keep at it.  My very first attempt at baking with yeast was an epic failure — my rolls were as hard as rocks! But not anymore!  I can’t tell you how much money went down the drain, not to mention the valuable ingredients I wasted each time I tried, but tried I did until I got it right!

DSC_0055

Here are some tips when baking yeast breads:

  • Sometimes the dough is MEANT to be sticky.  Do not be tempted to add a ton of flour just to prevent it from sticking to your hands or you’ll end up with super dense and rock-hard rolls.  Instead of adding flour to the dough, flour your hands, or rub a bit of vegetable oil to your hands to prevent the dough from sticking to them.
  • Even if a recipe states to wait about an hour for dough to double in size, sometimes it takes longer depending on the temperature of your rising place.  BE PATIENT…the dough will rise and double eventually (provided your yeast is active).
  • Test the temperature of the water (or other liquid) you use to proof your yeast.  Use a thermometer if you have one.  Otherwise, use your finger to determine whether the liquid is too hot.  The perfect yeast-proofing temperature should feel like the temperature of your skin, or a low-grade fever (around 100-101 degrees).  Or, for you moms out there, if the temperature feels like it would be too hot to put in a baby’s bottle, then let it cool longer before adding the yeast.  Too hot of a temperature will KILL the yeast.
  • Yeast needs sugar to grow.  Make sure you add a tablespoon or two of sugar to the proofing liquid.  If your yeast doesn’t start to bubble after 5 minutes of proofing, chances are the liquid was too hot (and you killed the yeast), or the yeast was old, or you didn’t add any sugar to feed it.
  • Do not over knead the dough.  Hand kneading should take about 10-12 minutes, or 6-8 minutes if using a stand mixer.

Buttered and Sugared Dinner Rolls - 16

Give my recipe a try (posted beneath my tutorial videos).

Post any questions in the comment section below, or message me on Facebook at http://www.facebook.com/AnniesChamorroKitchen1/ for a quick response.

Good luck, and happy baking!

Tutorial Video, Part 1:


Tutorial Video, Part 2:


Sweet Dinner Rolls - My Original Go-To Version
 
Prep time
Cook time
Total time
 
Soft, fluffy and slightly sweet dinner rolls ~ perfect on its own, or slather with sweetened butter for a delicious dessert.
Author:
Recipe type: Yeast Bread
Serves: 28 rolls
Ingredients
  • 3 cups all-purpose flour
  • ¼ cup sugar (up to ¾ cup if you want it sweeter, but use 2 packets yeast if you add more sugar)
  • 1 teaspoon salt
  • ¼ cup butter
  • 1 large egg
  • ½ cup milk (low fat or whole milk)
  • 1 packet dry yeast
  • 1 teaspoon sugar (for proofing the yeast)
  • ¼ cup warm water (for proofing the yeast)
Instructions
  1. In a small bowl, mix together the yeast, 1 teaspoon sugar, and warm water. Stir together to dissolve the sugar and yeast. Let it stand for 5-10 to allow the yeast to proof.
  2. Meanwhile, melt together the ¼ cup butter and milk in a microwave. Let it cool slightly. Add some of the cooled milk mixture to the beaten egg (this is to temper the egg so it won't scramble when you add it to the milk mixture). Add the egg to the rest of the milk mixture. After the yeast has proofed for 10 minutes, add the milk- butter-egg mixture to the yeast. Stir to combine.
  3. In a stand mixer fitted with a dough hook, mix together 2½ cups of flour, sugar, and salt. Reserve the remaining flour (you might not need it). Pour in the yeast-milk mixture. Turn the mixer to medium, mixing until the dough pulls away from the sides. If the dough still looks very sticky and is not pulling away from the side of the mixing bowl, add in more flour, a few spoonfuls at a time until the dough pulls away from the sides of the bowl. (See NOTE below.) Once the dough pulls away from the sides, turn the mixer to medium high and knead for 5 minutes.
  4. After 5 minutes of kneading, remove the dough to a clean and greased bowl (you can use cooking spray). Cover with plastic wrap and place in a warm place to let the dough rise and double in size, about 1 hour. After the dough has doubled, take it out of the bowl and gently punch it down. Cut the dough into 28 small pieces then roll them out into balls. Place the balls of dough in a greased 9x13 pan (7 rolls across and 4 rolls down). Cover with plastic wrap and let it rise again until doubled.
  5. After the rolls have doubled in size, remove the plastic wrap and brush the tops with melted butter. Bake at 375 degrees for 20-25 minutes or until golden brown on top. Remove from the oven and brush with more butter.
NOTE:
In most types of yeast bread recipes, the ratio of flour to total liquid should be 3:1. For instance, this recipe calls for just over 1 cup of liquid (including the egg); therefore, use only about 3 c. flour. Start out by mixing in a little less flour than the recipe calls for; If your dough seems too sticky, use only a little more flour just to allow you to knead it, but resist the urge to keep adding flour just so the dough won't stick. Too much flour (and kneading too long and too roughly) will make your finished bread come out tough/hard.


Baked Yeast Donuts

I love making fried yeast donuts for my family, but in an effort to make this indulgent dessert a bit healthier, I decided to bake them instead.

Give my recipe a try.  I think you’ll like it.


Baked Donuts and Donut Holes

Baked Yeast Donuts - 05

Chocolate Frosted with Coconut (my favorite!)

Baked Yeast Donuts - 15

Cinnamon Sugar

Baked Yeast Donuts - 13

Chocolate Frosted (my kids’ favorite)

Baked Yeast Donuts - 16

Vanilla Glaze

Baked Yeast Donuts - 14

Donut Holes with Chocolate, Vanilla Glaze, Cinnamon Sugar, and Sprinkles

Baked Yeast Donuts - 12

Baked Yeast Donuts
 
Prep time
Cook time
Total time
 
Baked, not fried yeast donuts...all the indulgence with a little less guilt. 🙂
Author:
Recipe type: Dessert
Serves: 20 donuts
Ingredients
Yeast Mixture:
  • 1 package active dry yeast
  • 1 tablespoon sugar
  • ¼ cup warm milk (between 98-105 degrees)
Dough Mixture:
  • 2 tablespoons butter, melted
  • ½ cup warm milk
  • 1 egg
  • ⅓ cup sugar
  • ½ teaspoon salt
  • 2½ to 3 cups all-purpose flour (you might not need it all)
Chocolate Glaze: (this makes enough to glaze about 10 donuts)
  • 2 tablespoons butter
  • 2 tablespoons milk
  • ¼ teaspoon vanilla extract
  • 1 tablespoon light corn syrup
  • ¼ cup semi sweet chocolate chips
  • ¼ cup powdered sugar
Vanilla Glaze: (this makes enough to glaze about 10-12 donuts)
  • 1 cup powdered sugar
  • ½ teaspoon vanilla extract
  • 2 tablespoons milk
Cinnamon Sugar topping:
  • 2 tablespoons butter, melted
  • ¼ cup sugar
  • 1 teaspoon cinnamon
Honey Butter:
  • ¼ cup butter
  • ¼ cup honey
Other ingredients/items:
  • Sweetened coconut flakes
  • Sprinkles
  • Butter cooking spray
  • Plastic Wrap
Instructions
MAKE THE DOUGH (DONUTS):
  1. In a mixing bowl, mix together the yeast, 1 tablespoon sugar, and ¼ cup warm milk. Stir together to dissolve the sugar and yeast. Let it stand for 5 minutes to allow the yeast to proof (it will get very bubbly).
  2. Meanwhile, mix together the 2 tablespoons melted butter and warm milk. Mix in the egg, ⅓ cup sugar and salt. After the yeast has proofed for 5 minutes, add the milk-butter-egg-sugar-salt mixture to the yeast. Using your mixer's dough hook, turn the mixer on to medium low speed to combine. *Note, if you don't have a large stand mixer, you can use a sturdy mixing spoon or spatula to combine the ingredients.
  3. Add 2½ cups of the flour to the mixing bowl. Reserve the remaining ½ cup flour. Turn the mixer to medium speed, mixing until the dough pulls away from the sides of the mixing bowl. After mixing for about 2 minutes, if the dough still looks very sticky and is not pulling away from the side of the mixing bowl, add in more flour, a few spoonfuls at a time until the dough pulls away from the sides of the bowl.

    **DO NOT add more than the remaining ½ cup of flour, even if the dough is still sticky.**
  4. Once the dough pulls away from the sides, turn the mixer to medium high and mix for 5 minutes to knead the dough. *Note: if you are doing this by hand, mix the flour with the wet ingredients. Once all of the flour is incorporated, turn the dough out onto a very lightly floured surface (use some of the remaining ½ cup flour to flour the surface) and knead the dough for 8-10 minutes. If the dough sticks to your hand while kneading, use whatever remaining flour is left from the ½ cup of flour. If the dough is still sticking to your hands, spray your hands with butter cooking spray (DO NOT add more flour or your resulting donuts will come out hard as a rock).
  5. After kneading, place the dough into a clean bowl that has been sprayed with butter cooking spray (you can use softened butter as well). Cover the bowl with plastic wrap and place in a warm place to let the dough rise and double in size.
  6. After the dough has doubled, take it out of the bowl and gently punch it down. Using a rolling pin, roll the dough out onto a lightly floured surface, rolling the dough until it's about ½ inch thick. Use a donut cutter to cut out donuts (and donut holes).
  7. Place the cut donut shapes (1 inch apart) onto a baking pan that has been sprayed with butter cooking spray. Spray the tops of the donuts then cover with plastic wrap and let it rise again until doubled.
  8. After the donuts have doubled in size, remove the plastic wrap. Bake at 375 degrees for 7 minutes. DO NOT overcook the donuts, even if the dough still looks "white". Remove from the oven and let the donuts sit on the pan for 5 minutes then remove them to a baking rack to finish cooling.
  9. While the donuts are cooling, make your glazes.
MAKE THE CHOCOLATE GLAZE:
  1. In a microwave-safe bowl, heat the butter, milk, vanilla extract and corn syrup for one minute. Remove from the microwave. Stir in the chocolate chips to the heated mixture; continue stirring until the chocolate chips have melted. Using a whisk, mix in the powdered sugar. Continue whisking/mixing until there are no more lumps from the powdered sugar and the glaze is smooth and shiny. Dip the donuts into the glaze while the glaze is still warm. If the glaze thickens up, reheat it for 10-15 seconds in the microwave.
MAKE THE PLAIN GLAZE:
  1. In a small bowl, mix together the powdered sugar, vanilla extract, and milk. Mix until there are no lumps and the glaze is smooth and creamy. Dip your donuts into the glaze.
MAKE THE CINNAMON SUGAR TOPPING:
  1. In a small bowl, place the melted butter.
  2. In a separate bowl, mix together the sugar and cinnamon.
  3. Dip the donuts first into the melted butter, then dip them into the cinnamon-sugar mixture.
MAKE THE HONEY BUTTER:
  1. In a small microwave-safe bowl, place the butter and honey; heat for 30-45 seconds, or long enough for the butter to soften and just begin to melt. Stir to combine the mixture; mix until you get a creamy, spreadable consistency. Spread honey butter on top of the donuts.
Optional:
  1. Top the glazed donuts with sweetened coconut flakes, sprinkles, or any other topping you like (nuts are good too).


Spanish Rolls

Spanish Rolls are one of my favorite things to eat!
They are a soft, sweet bread dough rolled flat and filled with sweetened butter, then rolled jelly-roll style.  The rolled dough is brushed with melted butter then topped with a sprinkling of a sugar-breadcrumb mixture and baked to golden brown perfection.

DSC_0072

Eat them as a snack, dessert, or have a roll or two or three 😉 for breakfast with
a steaming cup of your favorite coffee.

DSC_0065

It’s not that difficult to make.  Follow my complete recipe below and mix up a batch of sweet bread dough.  Flatten pieces of dough and brush with a butter-sugar mixture.  Roll up the dough, jelly-roll style and let the dough rise.

DSC_0056

Spread more butter on top of the rolls and top with a sugar-breadcrumb topping before baking.  Use turbinado sugar, also called sugar in the raw, to top the rolls.

DSC_0057

The sugar-breadcrumb mixture bakes up into a sweet and crunchy topping that compliments the soft and incredibly fluffy, buttery rolls.

Don’t you wish you could just reach into your computer and pull one of these
scrumptious rolls right off that pan?

Give my recipe a try.  I know you’ll like it. 🙂

DSC_0060


Spanish Rolls
 
Prep time
Cook time
Total time
 
Soft, fluffy rolls with a buttery sugar filling and topped with a crunchy, sweet sugar-bread crumb topping
Author:
Recipe type: Yeast Bread
Serves: 24
Ingredients
Dough:
  • 1¼ cup milk
  • ½ cup sugar
  • 2 packets active dry yeast
  • 6 tablespoons butter, melted
  • 1½ teaspoons salt
  • 1 large egg
  • 2 large egg yolks
  • 4½ cups all-purpose flour
Filling:
  • 2 sticks softened butter
  • 1 cup white sugar
Topping:
  • 1 cup bread crumbs
  • ¼ cup turbinado sugar (also called sugar in the raw)
Instructions
  1. Place the milk into a microwave-safe bowl. Microwave on high for 1 minute and 15 seconds. Pour the hot milk into the bowl of an electric mixer fitted with the paddle attachment. Add the sugar to the milk, mixing until the sugar is dissolved, about one minute.
  2. Add the yeast to the milk-sugar mixture then mix until dissolved. Let the yeast stand for about 10 minutes to proof (the mixture should become very foamy).
  3. Let the melted butter cool down a bit then mix it with the salt, egg and egg yolks. Pour the butter mixture into the mixing bowl with the yeast mixture.
  4. Mix in the flour, a half cup at a time until you've used four cups of flour.
  5. Change the paddle to the dough hook then add the last half cup of flour. Knead with the dough hook for about 5 minutes, or until the dough pulls away from the side of the bowl.
  6. Spray the ball of dough with butter cooking spray then cover the mixing bowl with plastic wrap. Allow the dough to rise in a warm place until doubled (about 45 minutes to an hour).
  7. After the dough has doubled in volume, punch it down then place it onto a clean countertop. Knead gently for 1 minute. Divide the dough into 24 pieces. Roll out each piece of dough into ovals.
  8. Prepare the filling by mixing the softened butter and sugar together until creamy.
  9. Evenly spread about a tablespoon of the butter and sugar mixture over each piece of flattened dough (you will have some of the mixture leftover; save this for use later).
  10. Roll the dough, jellyroll-style. Place onto a baking sheet about one inch apart. Cover loosely with plastic wrap; place the pan in a warm place to rise for about 20 minutes.
  11. While the rolls are rising, mix the breadcrumbs and turbinado sugar together.
  12. After the rolls have risen, gently spread some of the remaining butter-sugar mixture on top of the rolls. Sprinkle the breadcrumb mixture on top of the buttered rolls.
  13. Bake at 350 degrees for 18 minutes or until golden brown.
Serve warm from the oven and ENJOY!


Fresh Peach Cobbler

Peach Cobbler is the ultimate summer dessert.  I like using fresh peaches when they are in season, but canned peaches (in juice, not syrup) will do in a pinch.

image

This is a very easy dessert to make.  The hardest part is peeling and slicing the peaches.  However, if you ask my kids, the hardest part is actually waiting for the cobbler to finish baking! 😉

My complete recipe is at the bottom of this post.  Give it a try.  I think you’ll like it. 🙂

Fresh Peach Cobbler

image

Place the sliced peaches into a large mixing bowl.  If you’re using canned peaches, be sure to drain all the liquid.  12 fresh peaches yields about 10 cups of peaches.

image

 Add sugar, cinnamon, vanilla extract and lemon juice to the bowl.

image

Gently stir to combine all of the ingredients.

image

In a small mixing bowl, whisk together the flour, sugar, salt and baking powder.

image

Add milk to the flour mixture.

image

Stir or whisk, just until a batter forms.  A few small lumps in the batter are okay.

image

Pour the melted butter into the pan.

image

Pour the batter over the melted butter.  DO NOT STIR. 

image

image

Place the peaches on top of the batter.  Again, DO NOT STIR.

Bake for 45-50 minutes or until the batter (that seep through to the top) is golden brown.

image

I love how the some of the batter rose through the peaches and sweet cinnamon sauce and settled on top.  If you want more of the batter to seep through to the top, save some of the batter, placing dollops of it on top of the peaches before baking.

image

The peaches are perfectly cooked, not mushy at all.  The batter is fluffy on the inside and just slightly crisp on the outside where the sugar caramelized on top.

image

What’s better than warm peach cobbler?  Why, peach cobbler with ice cream, that’s what!

Top with vanilla ice cream or whipped cream and ENJOY!

image


Fresh Peach Cobbler
 
Prep time
Cook time
Total time
 
Fresh, juicy sweet peaches mixed with sugar, cinnamon, and vanilla extract, baked with a buttery batter to create the summer dessert favorite.
Author:
Recipe type: Dessert
Cuisine: American
Ingredients
Peach filling:
  • 12 ripe peaches, peeled, pitted and sliced
  • 1½ cups sugar
  • 1 tablespoon ground cinnamon
  • 1 tablespoon pure vanilla extract
  • 1 tablespoon lemon juice
Batter:
  • 2 cups all-purpose flour
  • 2 cups sugar
  • 2 teaspoons baking powder
  • ½ teaspoon salt
  • 2 cups milk
  • 2 sticks unsalted butter, melted
Instructions
Preheat the oven to 375 degrees.
Prepare the filling:
  1. Place the sliced peaches in a large mixing bowl. Add the sugar, cinnamon, vanilla extract, and lemon juice. Stir gently to combine all of the ingredients.
Prepare the batter:
  1. In a medium-sized mixing bowl, whisk together the flour, sugar, baking powder and salt.
  2. Pour in the milk; mix together until a batter forms.
Layer the cobbler:
  1. Pour the melted butter into a 9x13 pan.
  2. Pour the batter over the melted butter. DO NOT STIR.
  3. Pour the peach mixture over the batter. DO NOT STIR.
  4. Bake for 45-50 minutes or until the top is golden brown.
Serve with vanilla ice cream or whipped cream and ENJOY!
« Older Entries Recent Entries »