Archive for HEALTHY ALTERNATIVES

Buns in a Bowl

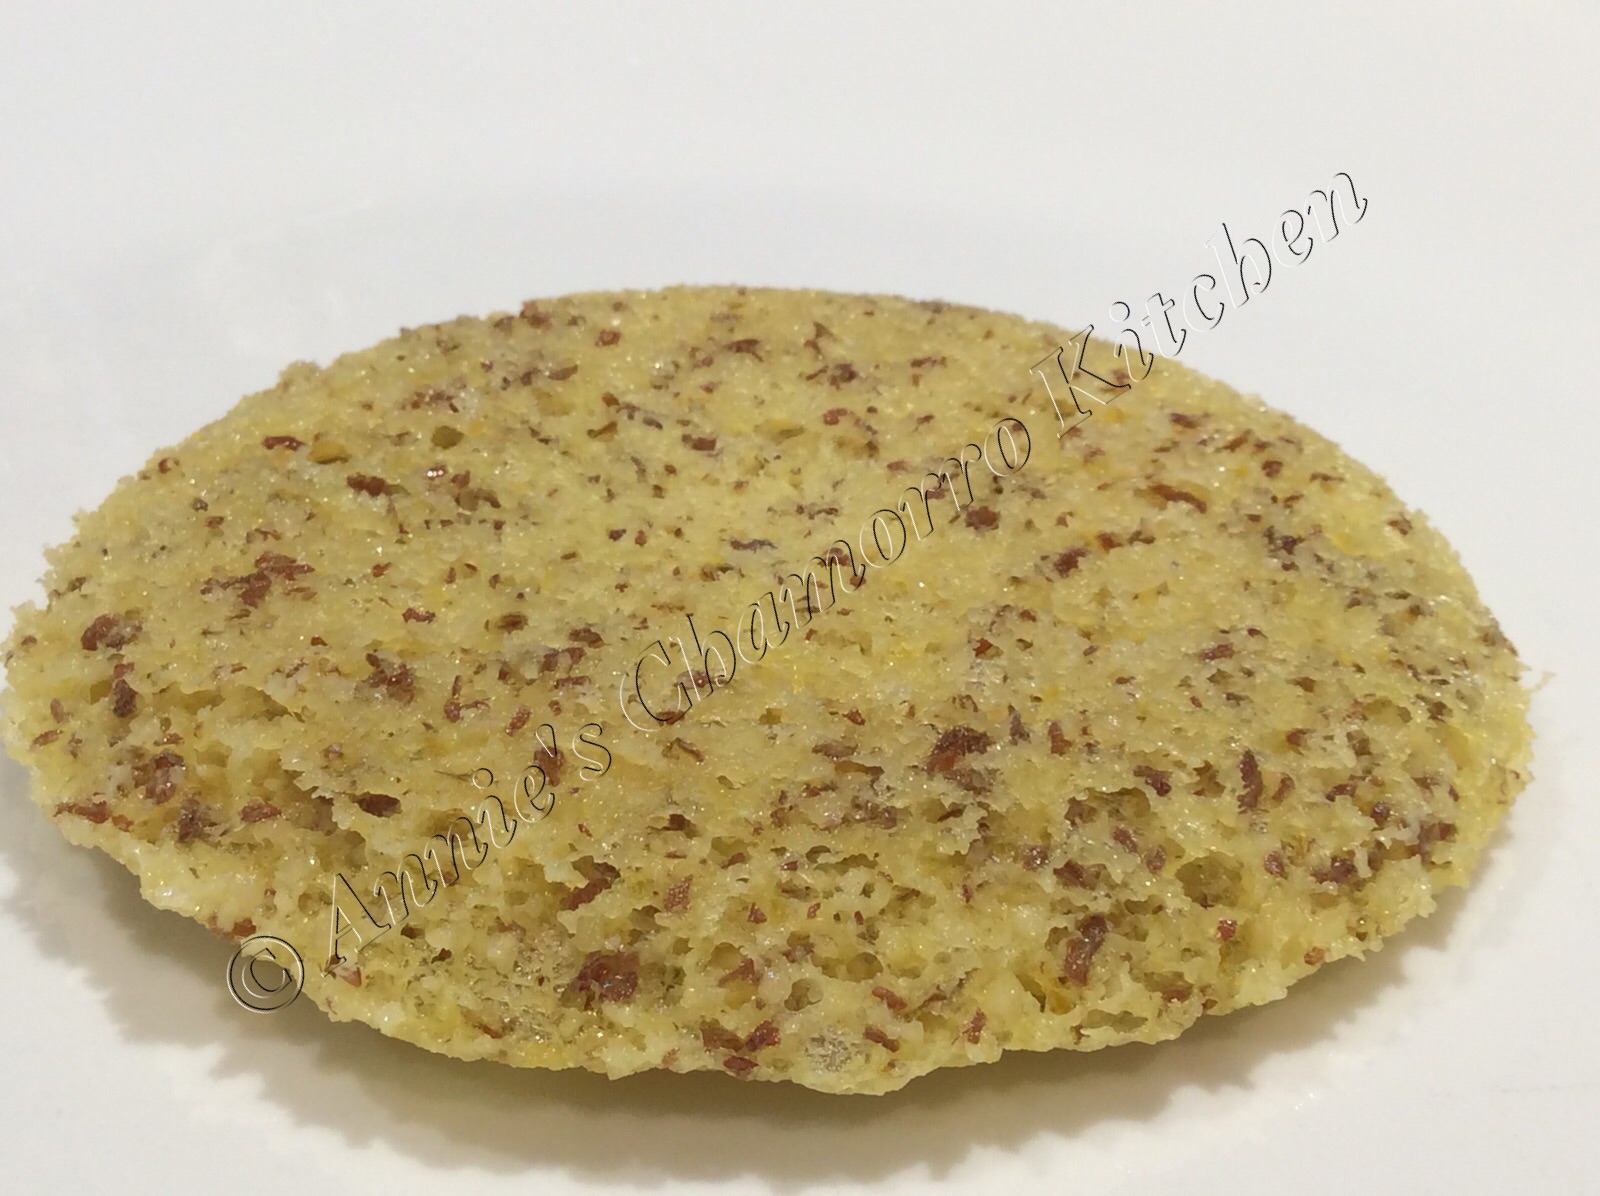
These gluten free “Buns in a Bowl” cook in just 40 seconds in the microwave.

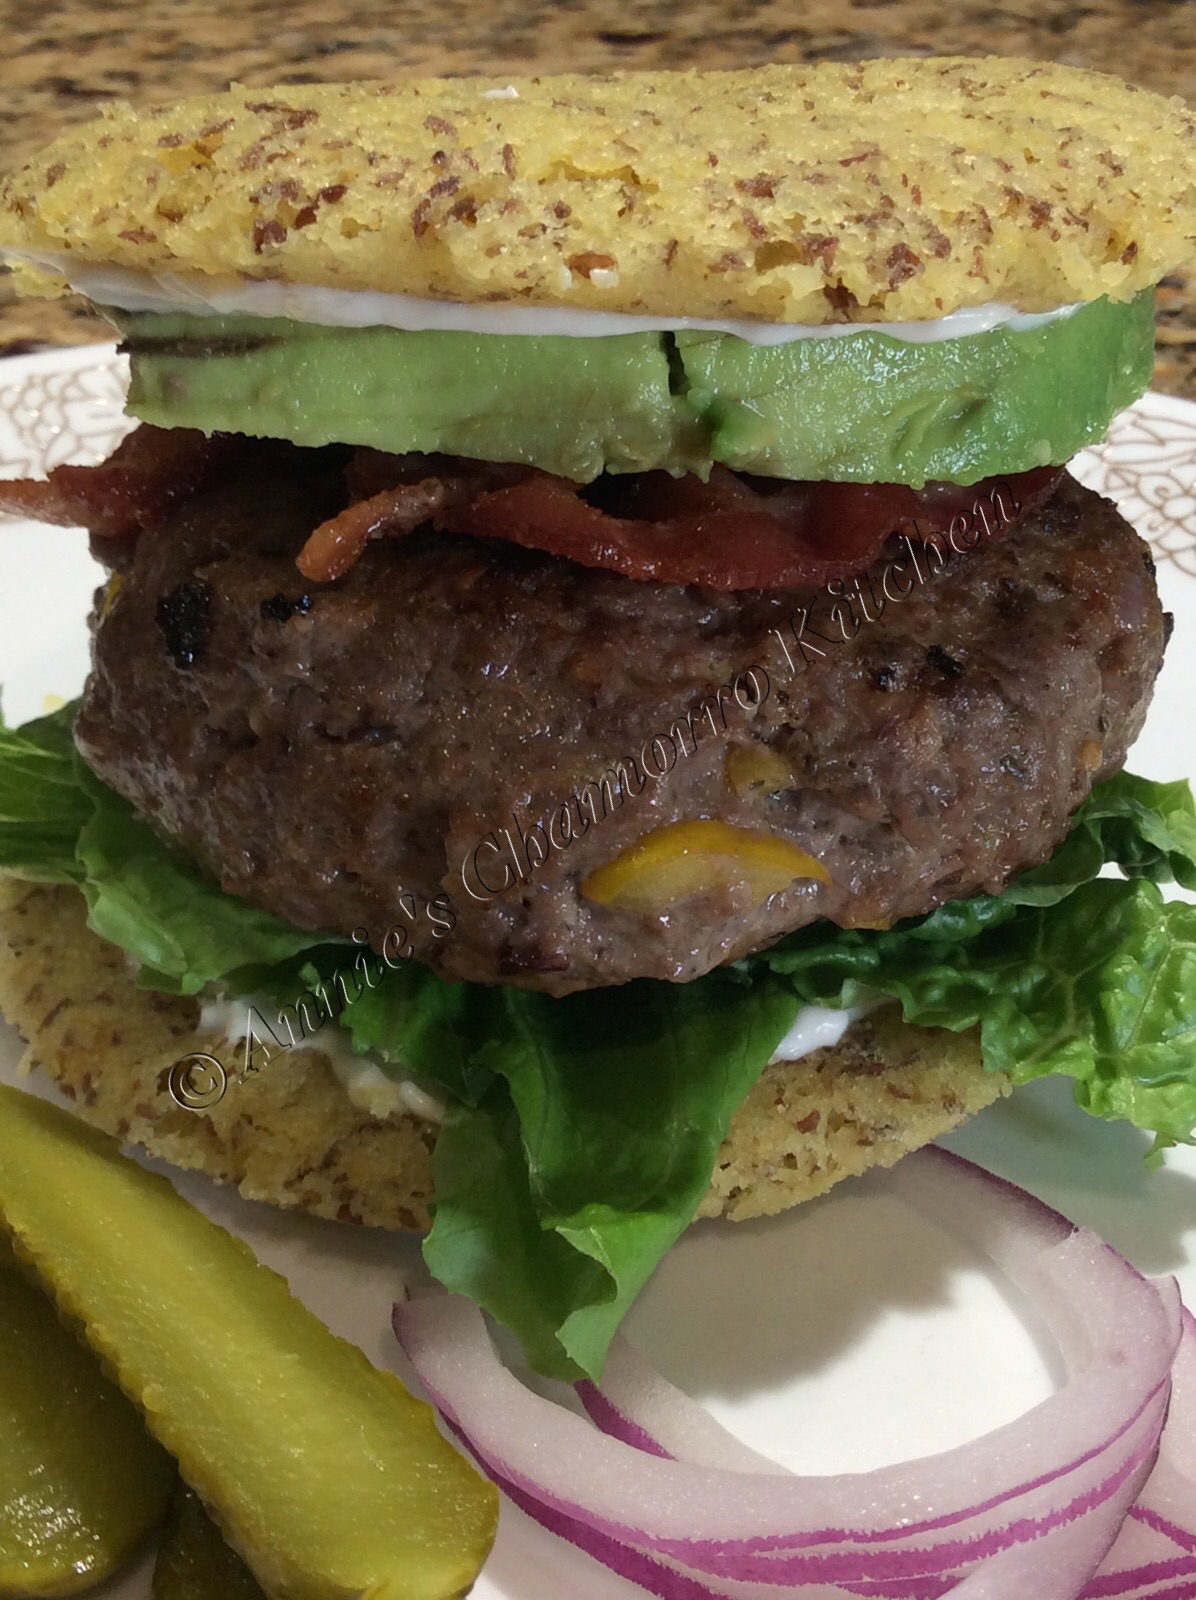
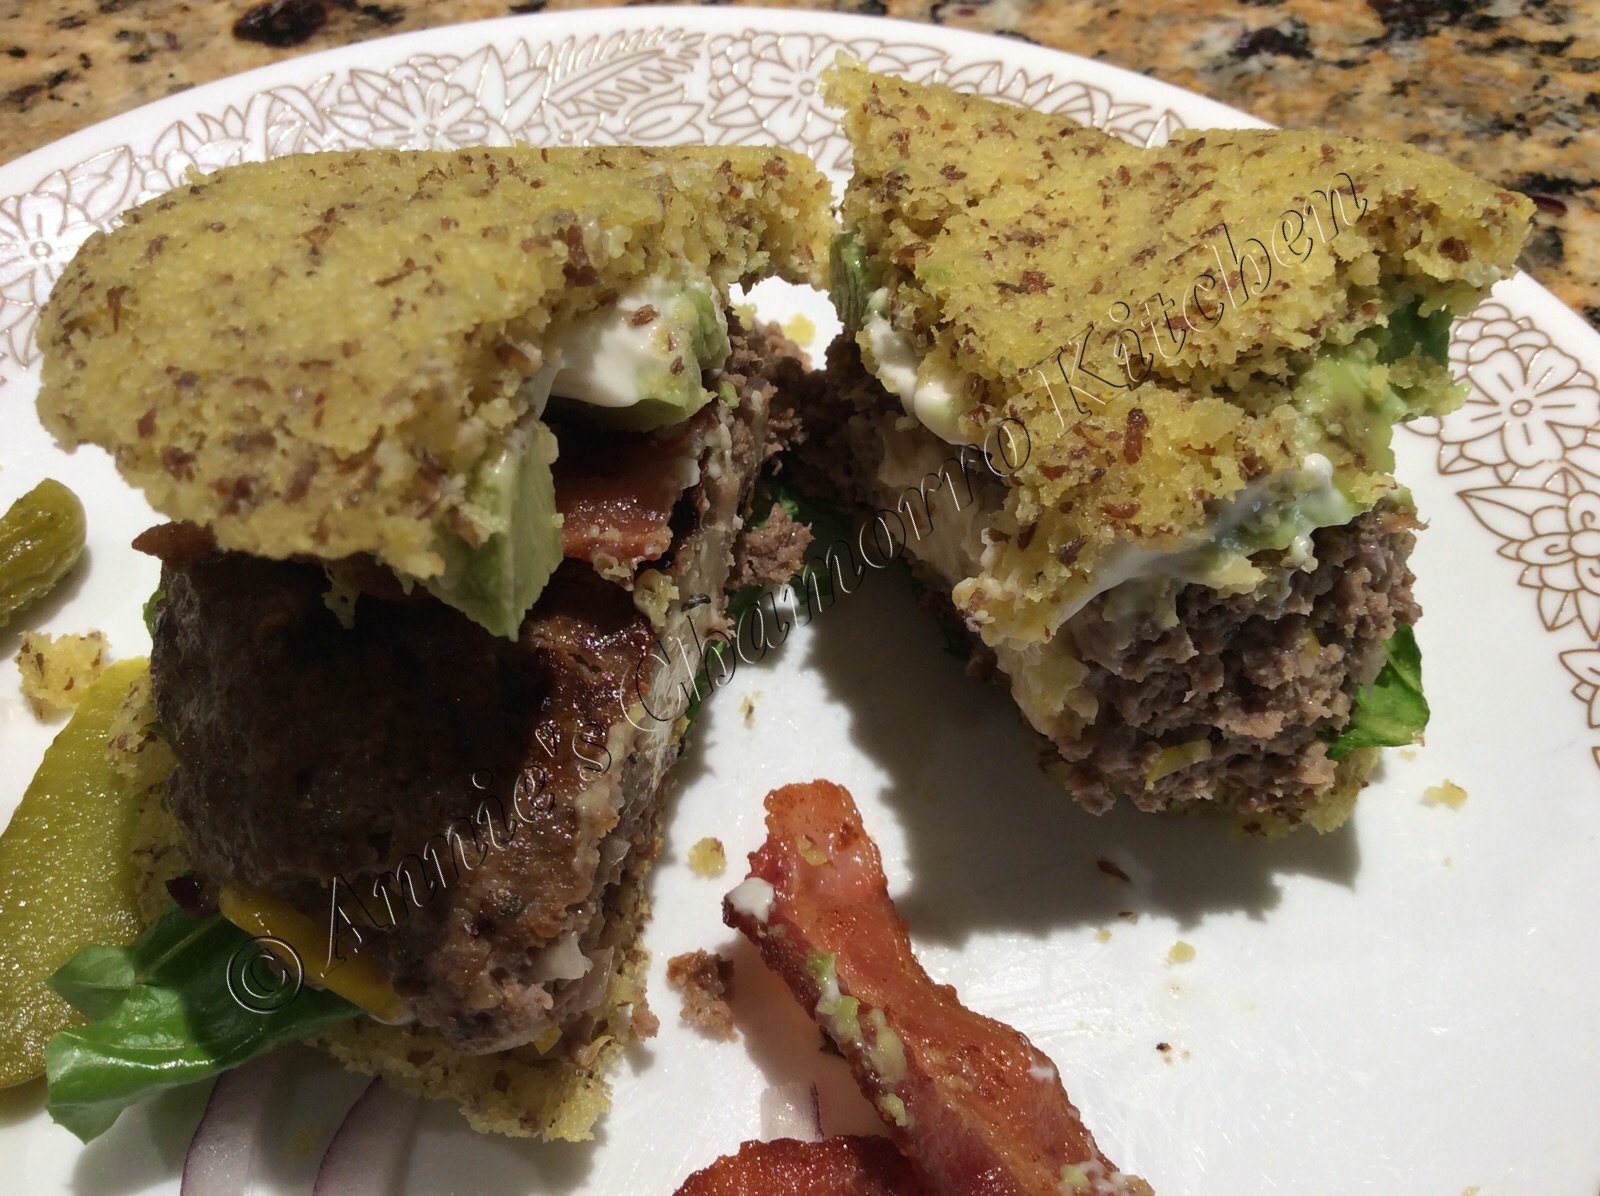
This is a sturdy bread bun that I created just for eating burgers, but they’d be great for regular sandwiches.  I needed a bun that could hold up to all the fixins’ my family loves in a burger — a thick and juicy patty, lettuce, tomatoes, avocados, onions, and pickles.

image

To make them bun-shaped, I used an ordinary cereal bowl.   This is also a good size for sandwiches, although if you want a more traditional shape to your bread, you can use a container like the one pictured below.

image

I don’t usually microwave plastic containers, so if I want a larger piece of bread (larger than what my cereal bowl makes), I use a larger bowl or plate.

image

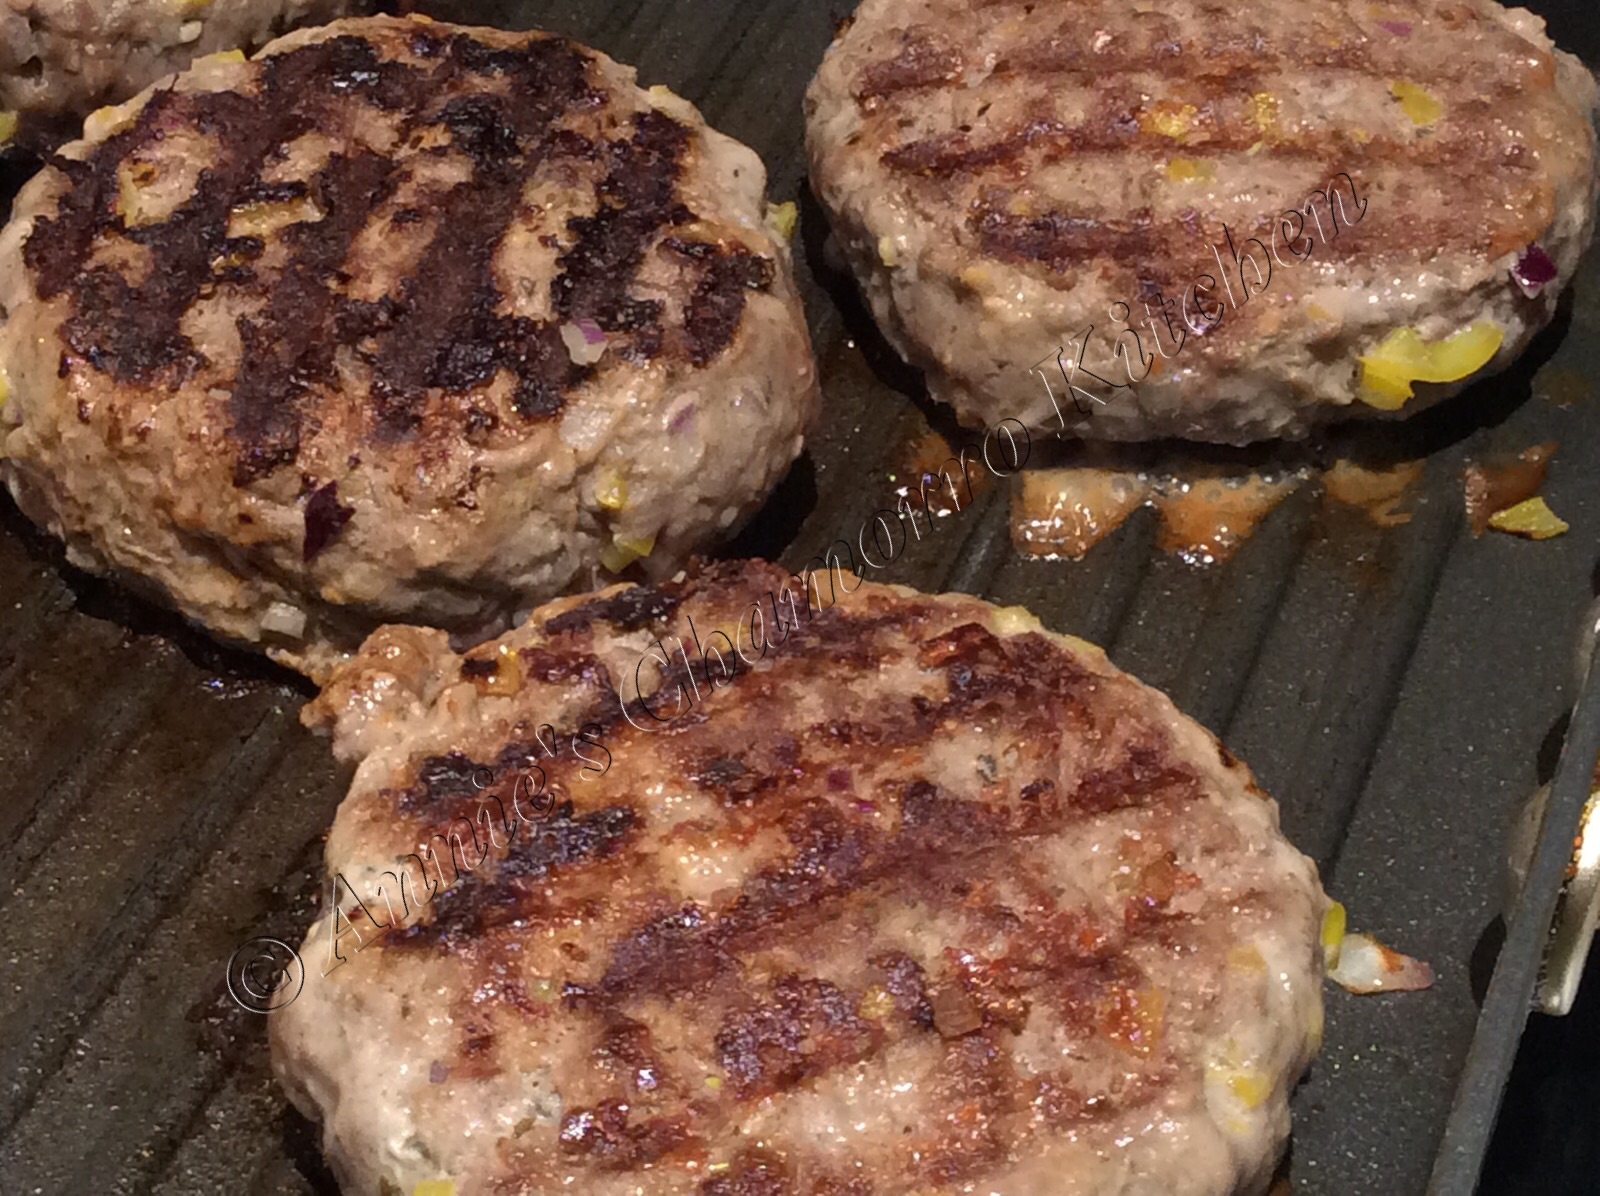
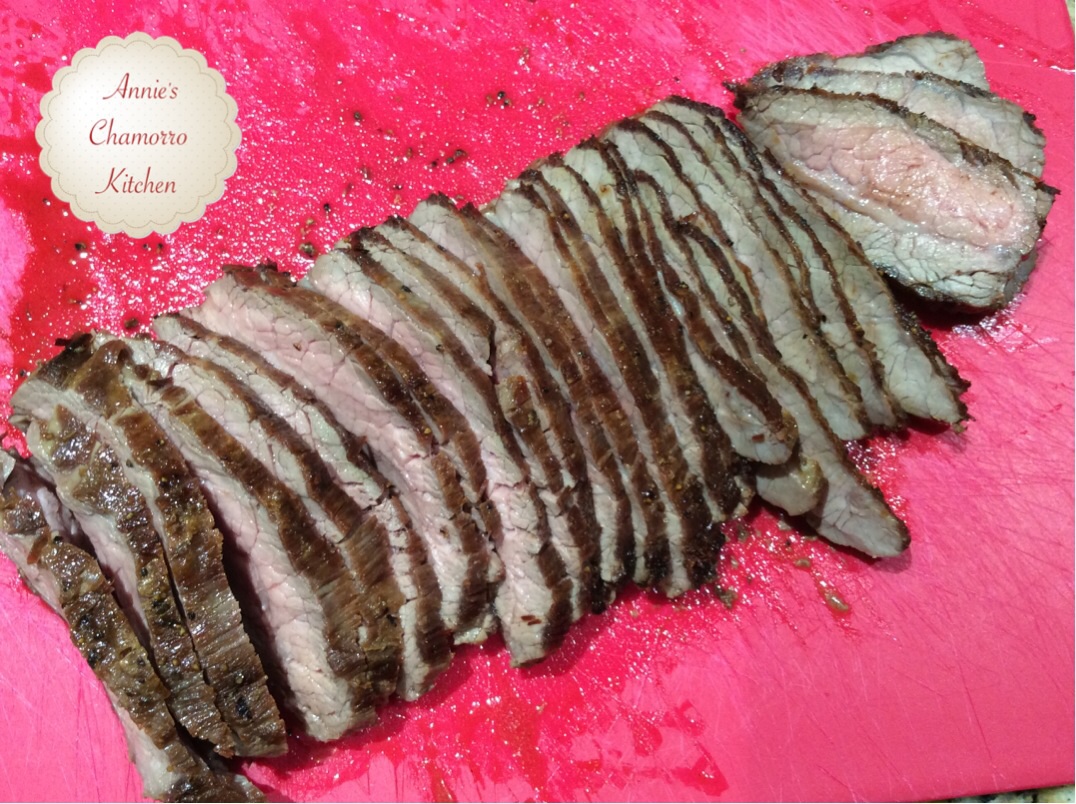
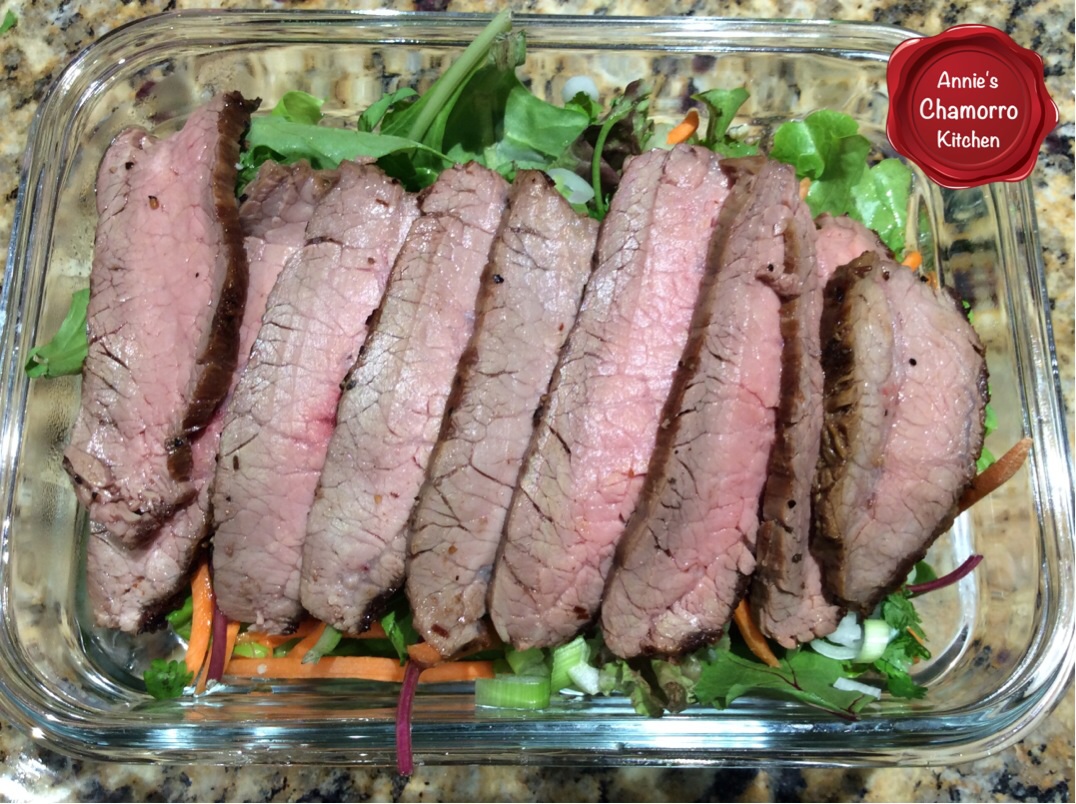
This recipe makes eight buns, enough for four burgers or sandwiches.  If you’d like my recipe for juicy burgers, click here.

image

I included my easy, step-by-step process below.  My complete recipe is at the bottom of this post.  For THMs, this is an “S” recipe.

Give it a try and let me know what you think. 🙂

Here’s how to make it:

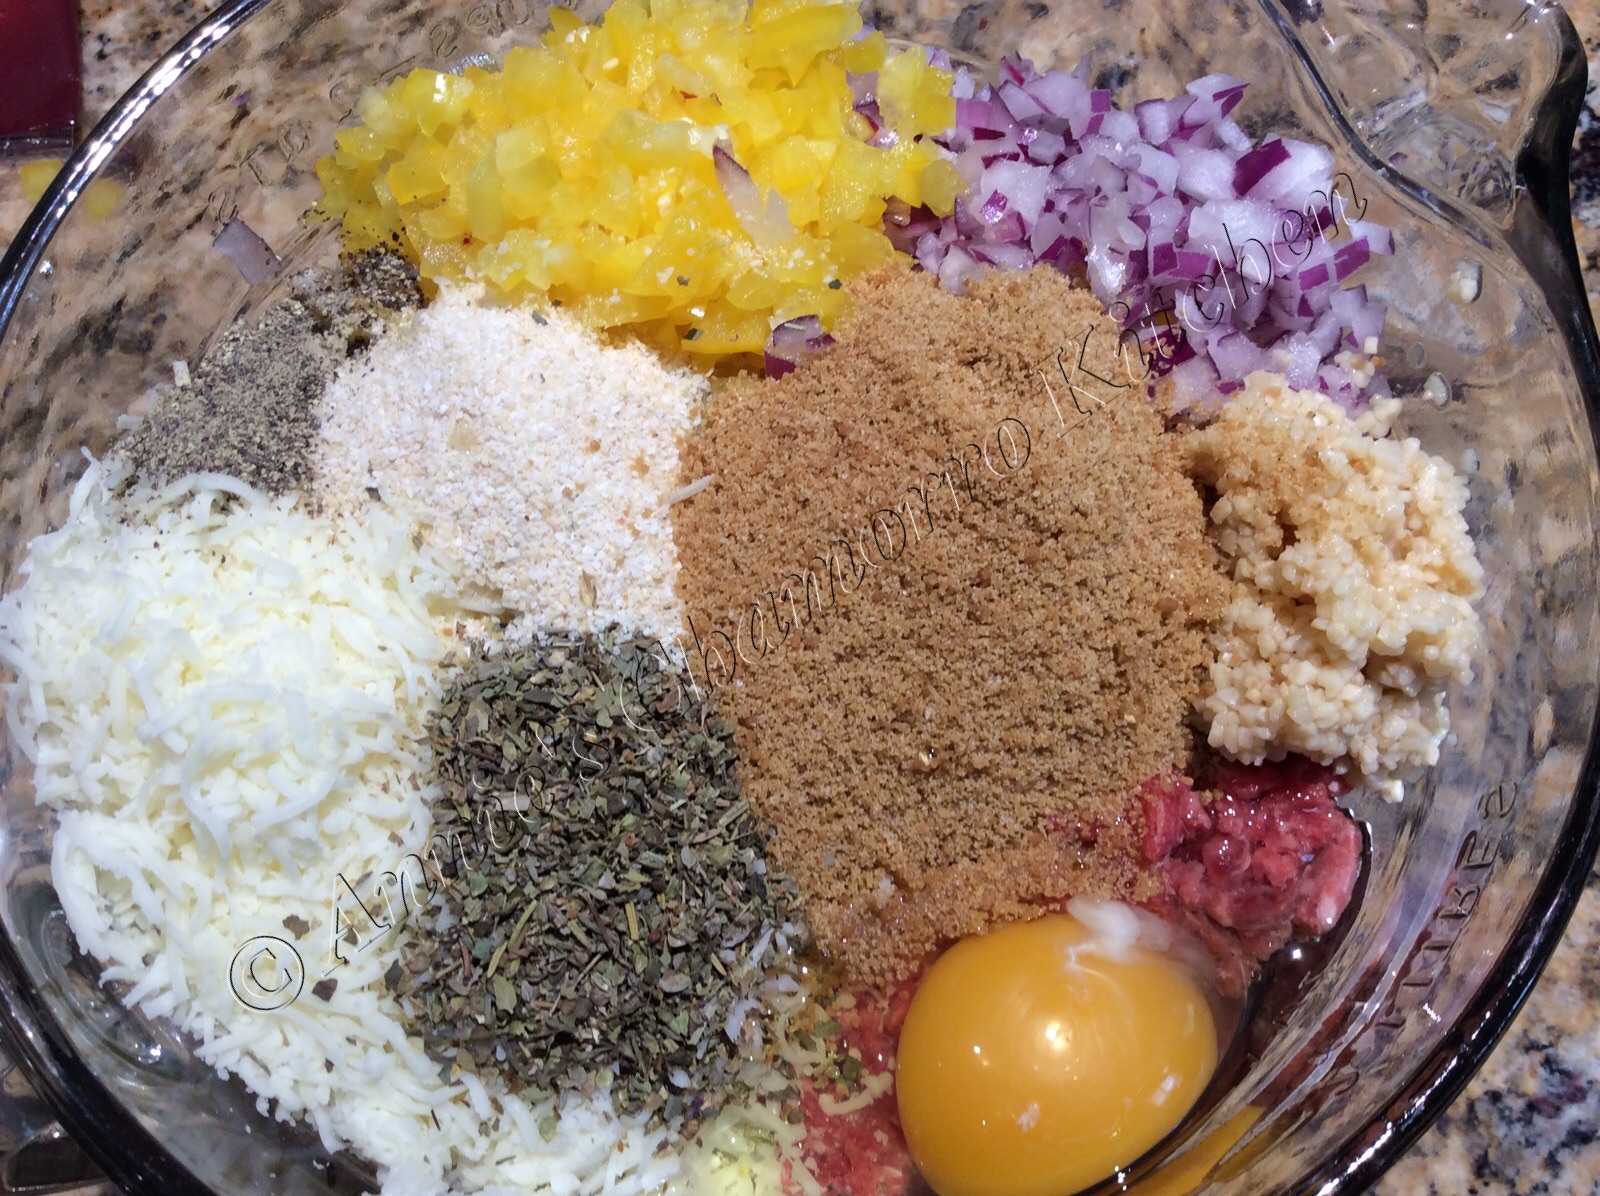
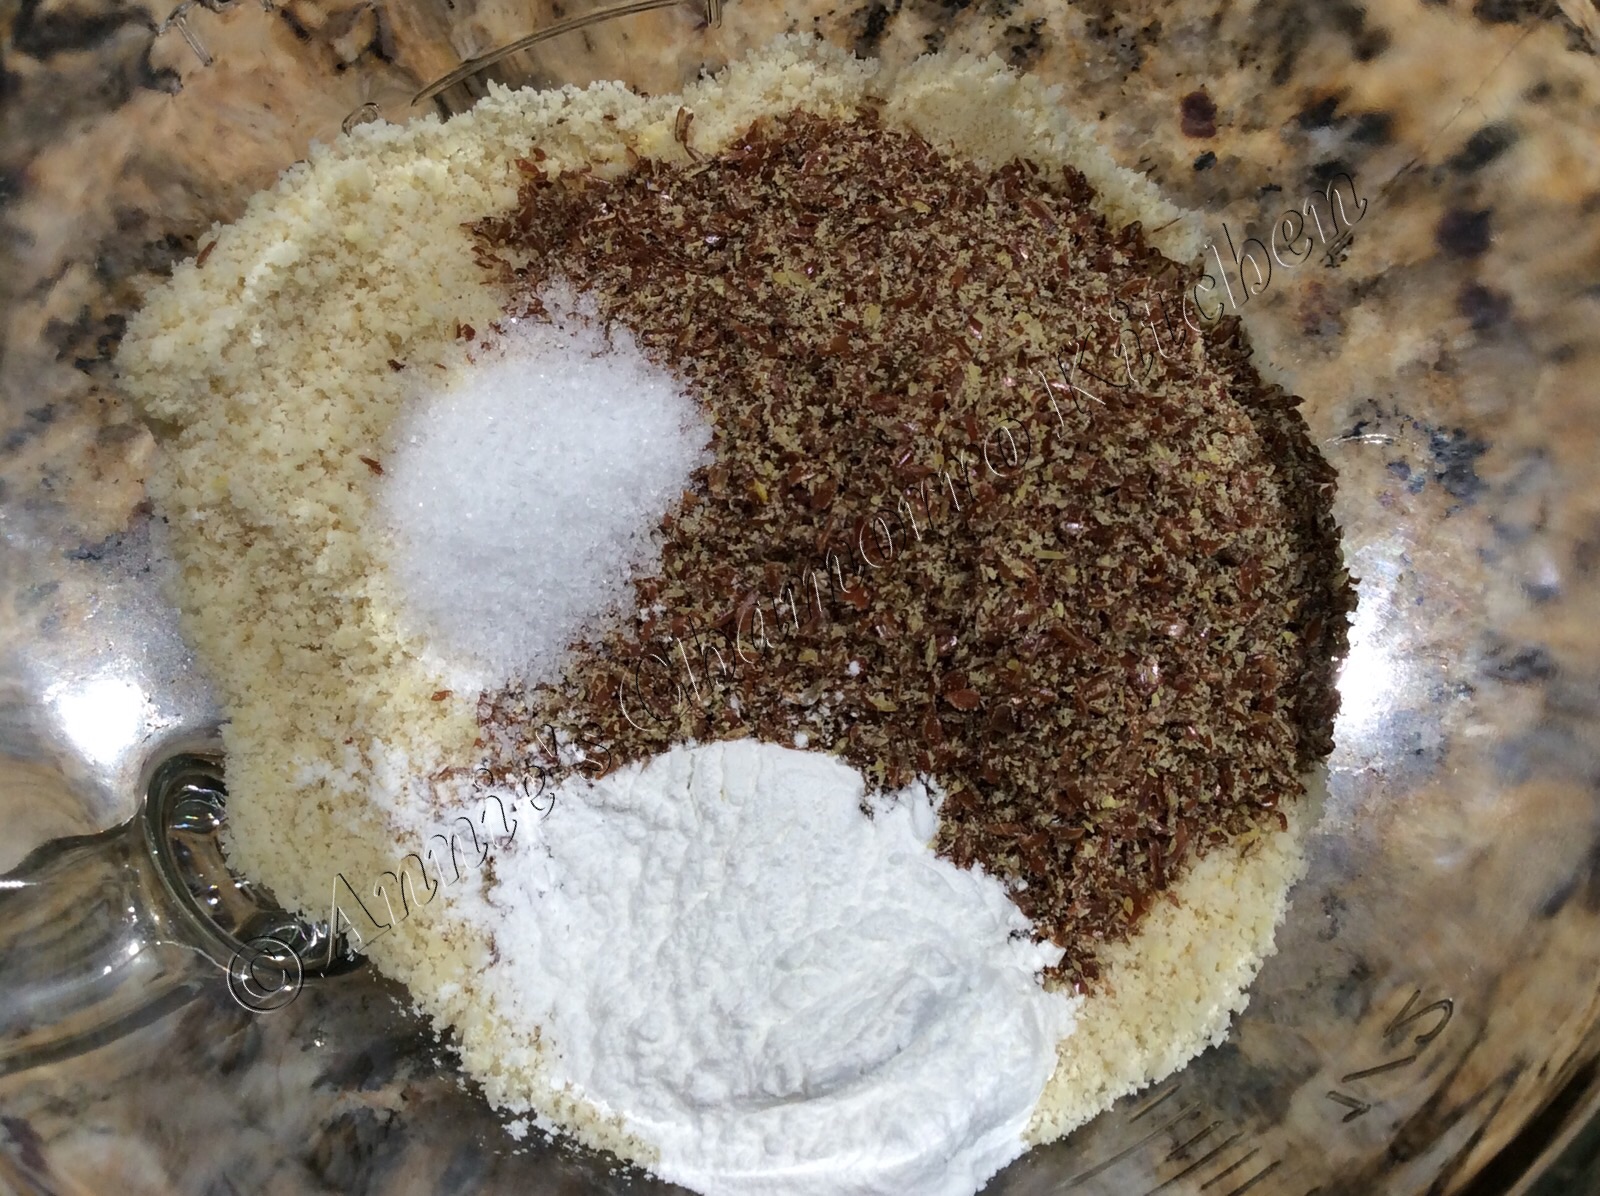
In a small mixing bowl, place almond flour, flaxseed meal, baking powder, truvia, salt and nutritional yeast.  Adding a sweetener is completely optional, but I find I like this bread better with just a hint of sweetness.  I had truvia packets on hand so that’s what I used here (one packet), but you can use stevia, THM sweet blend, or your favorite brand of sweetener.

image

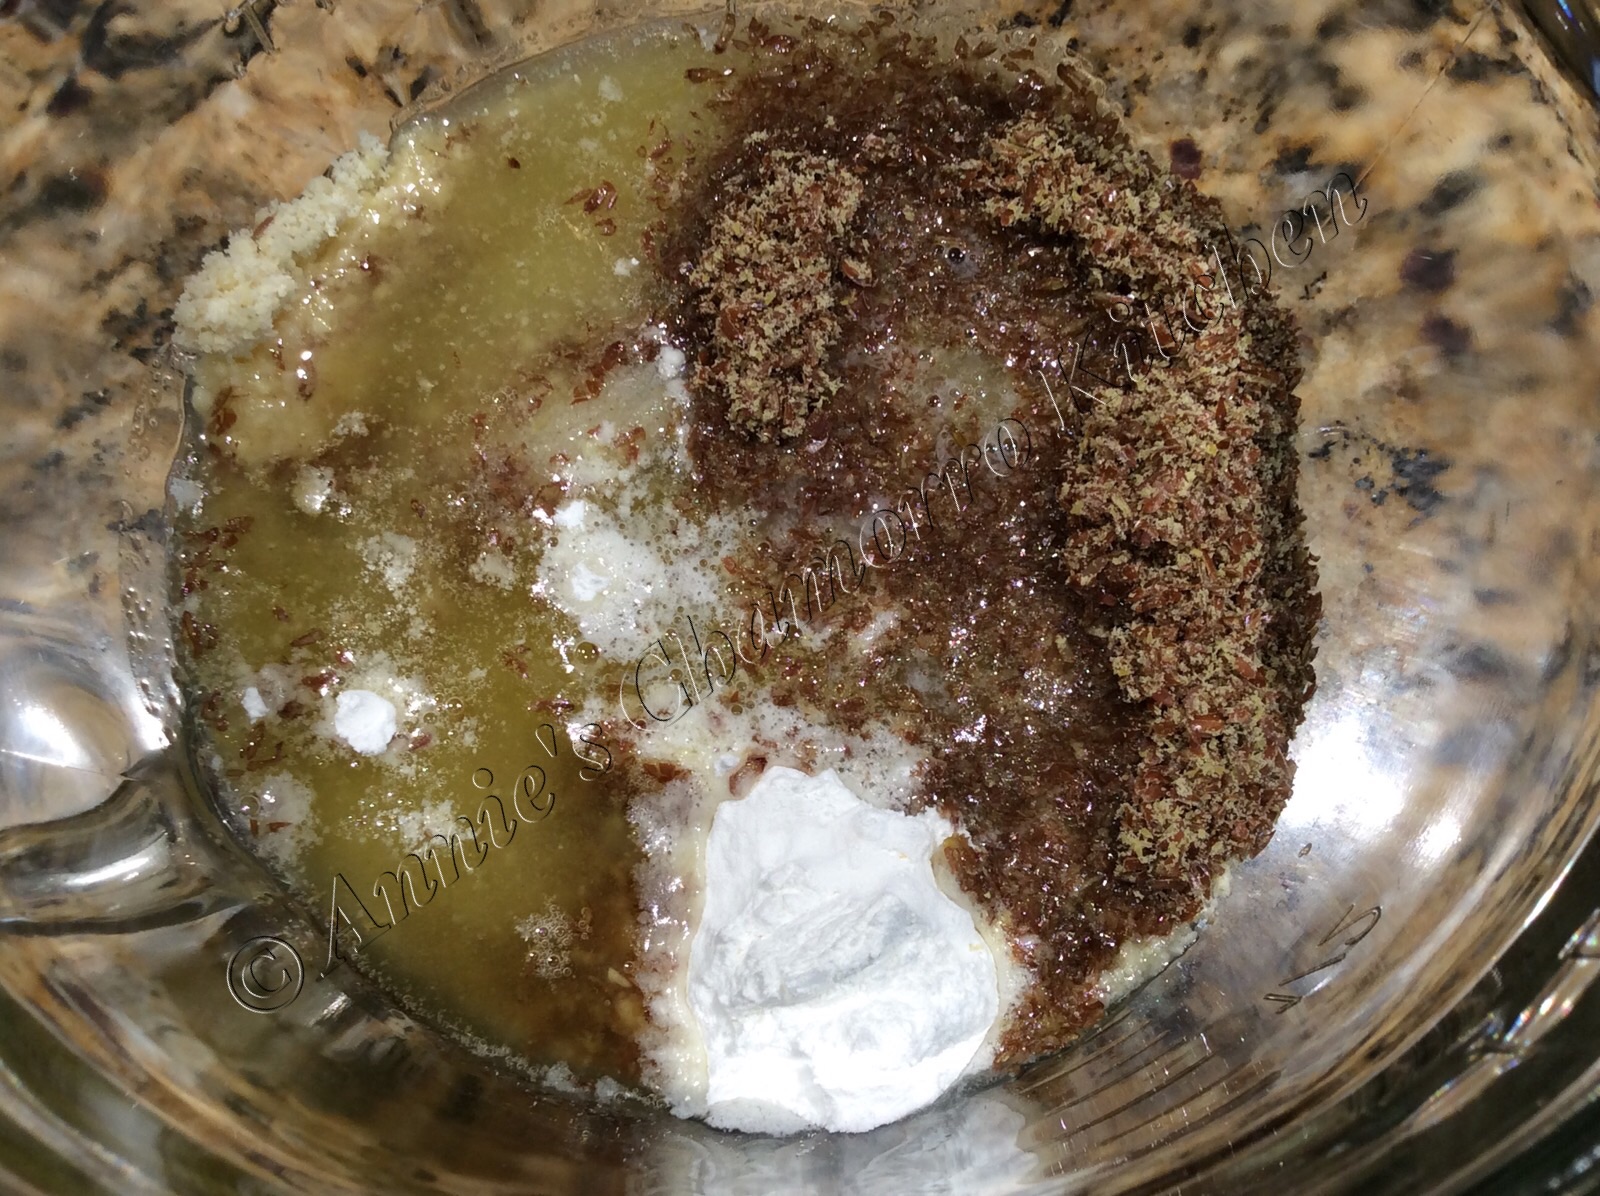
Next, mix in some melted butter.

image

I mix in the eggs last — and separate from the hot melted butter — so that they don’t scramble in the hot butter.

image

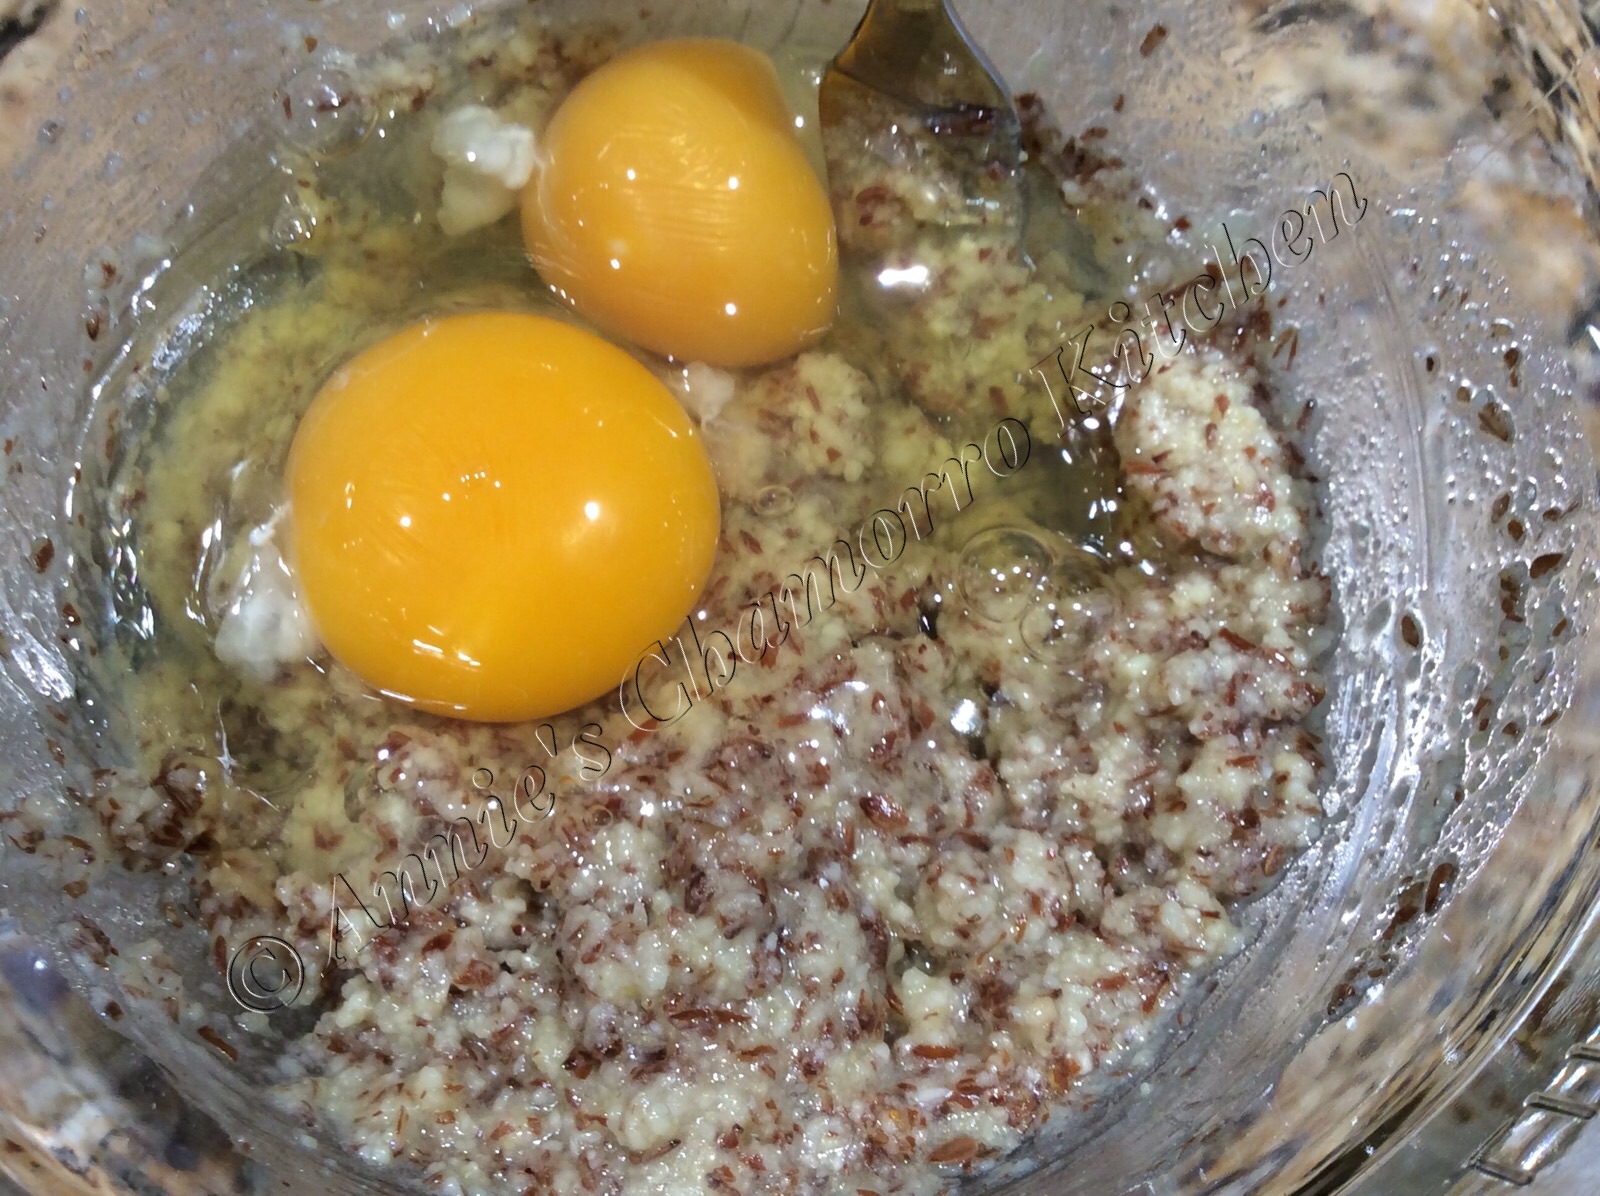
You don’t need a whisk to mix this together.  A fork will do just fine.

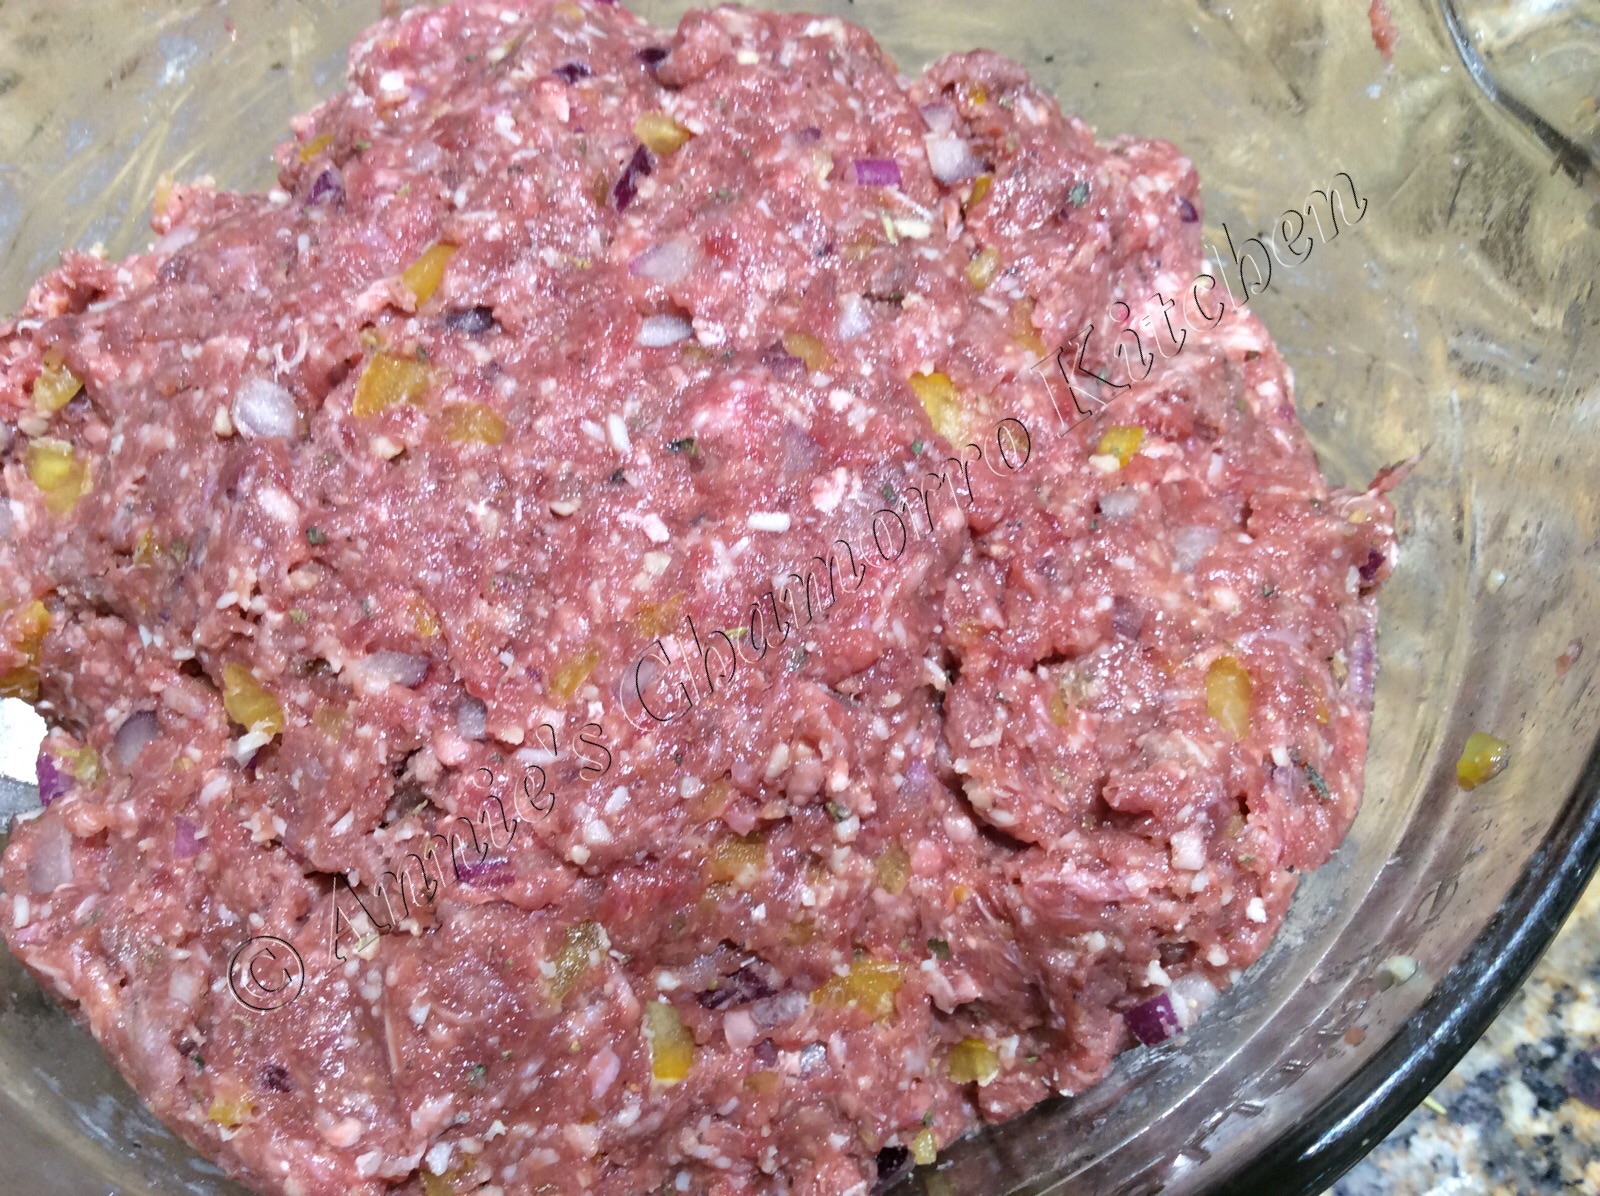
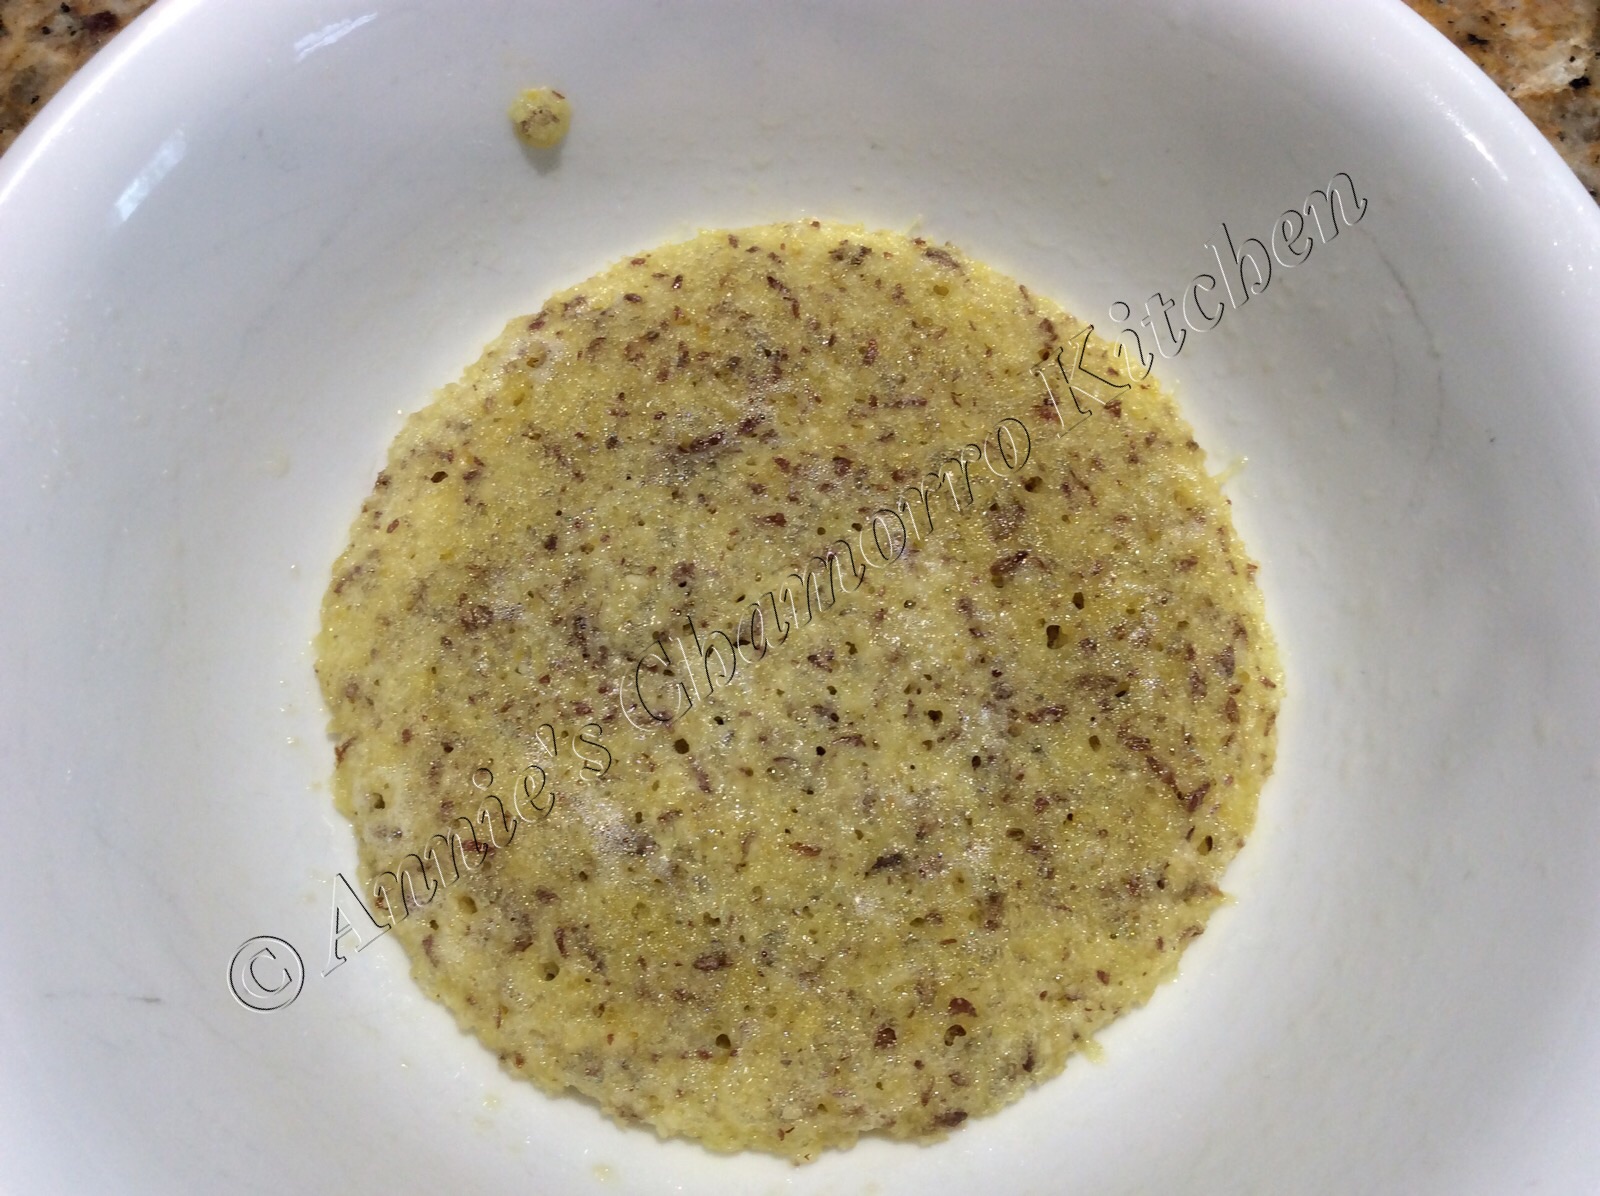
Let the batter sit for a few minutes to allow the almond and flaxseed flours to soak up the liquid and thicken up a bit.

image

One of my favorite — and most used — kitchen gadgets is a cookie scoop.  I have many different sizes.  For this recipe, I used a two-tablespoon scoop.  One scoop is the perfect amount for one bun.  As you can see below, I slightly underfill the scoop in order to keep the buns slightly thin.  For taller/higher buns, fill the scoop to the rim (and maybe even a bit above the rim).

image

Spread the batter evenly in the bottom of a cereal bowl.  It doesn’t look like much now, but once cooked, it’s the perfect size to hold a burger.

image

Microwave on high for 40 seconds.

image

Flip the bun out of the bowl and onto a plate to cool.

image

Continue cooking the buns until all the batter is used up.  Depending on how full you fill your scoop, you can get anywhere between six and eight buns.

image

Add your favorite burger fixins’ and ENJOY!  If you’d like my recipe for juicy burgers, click here. 🙂

image


Buns in a Bowl
 
Author:
Serves: 8
Ingredients
  • ¾ cup almond flour
  • ½ cup flaxseed meal
  • 1 tablespoon baking powder
  • 1 packet truvia
  • 1 teaspoon salt
  • 2 teaspoons nutritional yeast
  • 6 tablespoons butter, melted
  • 2 large eggs
Instructions
Make the batter:
  1. Place the almond flour, flaxseed meal, baking powder, truvia, salt and nutritional yeast into a small mixing bowl. Stir to combine.
  2. Add the melted butter; stir.
  3. Add the eggs; stir to combine. Let the mixture sit for a few minutes.
Make the buns:
  1. Place two tablespoons of batter in a cereal bowl.
  2. Microwave on high for 40 seconds. Flip the bun out of the bowl and onto a plate to cool.


Print Friendly, PDF & Email

Tender and Juicy Burgers

I love grilled ribs and steaks, but occasionally I crave a really good, juicy burger.

image

I’m not talking about those flat, plain, frozen patties you can buy in bulk, and taste like cardboard after cooking.  Rather, I’m talking about thick, juicy and tender burgers packed full of flavor.

image

My family and I are trying to eat healthier, so I created this burger that added quality (and healthy) ingredients without sacrificing flavor.

You can find my complete recipe at the bottom of this post.  For THMs, this is an “S” recipe.

To start off, I used lean grass-fed beef.  Now, this can be a bit pricey, so if this is not an option for you (or if you can’t find grass-fed beef in your grocery store), use “regular” ground beef.  I also used 98% lean beef in this recipe.  Now, I know what you’re thinking — how can beef that lean make juicy burgers?  Well, read on and I’ll tell you.  In the meantime, place the ground beef into a large mixing bowl.

image

Most people start off with beef that’s no less than 85% lean (that means that 15% of what you buy is GROUND FAT).  Additionally, something called a panade — a mixture of bread and milk used to keep the cooked meat tender — is also added to the mixture.

Not in my kitchen.  Some fat is okay, but I still stick to no less than 95% lean when I buy ground beef.  98% lean is even better.

The juiciness come from my secret ingredient (shhhh…don’t tell anyone).  I add low-fat, part skim mozzarella cheese…yes, cheese…to the mix.  Don’t worry…if you’re mentally counting the fat and carb numbers in your head right now, I’ll save you the trouble.  Adding part skim mozzarella cheese to my recipe only adds <1g of carbs and 4.5g of fat per serving (one burger). 🙂

I like adding lots of flavor in the form of herbs, spices and vegetables.  I usually use whatever is in my fridge and pantry at the time, but the staples are diced onions (I used red here, but white or yellow onions are fine), garlic, black pepper, and an egg (use one egg for two pounds of beef).  Today, I also added onion powder, Italian seasoning, and rather than salt, I used a few tablespoons of powdered beef bouillon (look for one that has <1g of carbs per serving).  I also added a finely diced yellow bell pepper.

image

There’s no good way to mix this using a utensil, so wash your hands, use that elbow grease and get right in there.  Mix, mix, mix.

image

Separate the mixture into eight large meatballs.

image

These are ready right now, as is, to flatten and cook.  However, by my count, I’ve added just a little more than 2g of carbs per burger with the addition of part skim mozzarella and beef bouillon, so I’m thinking we can afford one more gram of carb per burger.

Can you guess what that’ll be?  Yes!!  MORE cheese!  (I love cheese, if you haven’t figured that out yet.)  Not just ANY cheese, mind you, but Creamy Light Laughing Cow brand cheese.  It adds just one more teeny, tiny gram of carbohydrates to the burger, so we’re up to 3g now…still within “safe” numbers per serving (and these make HUGE burgers).

Take one meatball and make an indentation in the middle with your thumb.

image

Make the indentation large enough to fit one wedge of Light Laughing Cow cheese.  Don’t make the bottom or sides too thin or the cheese will ooze out when you cook the burger.  You can leave the wedge like this but I recommend pressing it and spreading it out within the indentation you just made.

image

Cover the cheese with the mixture, smoothing all around the sides to ensure the cheese is well-sealed within.

image

Because of the low fat content in the ground beef, these burgers don’t shrink much during cooking.  However, slightly flatten it before cooking.  Cook on a hot grill pan over medium-high heat, about 5-8 minutes on each side.

image

The burgers are done when clear juices start oozing out.  Do NOT poke or stab the burgers to check for clear juices…that will make your burgers dry out.  Slightly press the top of the burger with your finger; it’s done if the burger feels slightly firm when you press on it.

image

Top with your favorite burger add-ons such as sliced avocado, lettuce, tomatoes, onions, pickles, mayo, mustard, and bacon (hey, we cut back on fat so a little bacon won’t hurt). 🙂

Dig in and ENJOY!

image

In case you’re wondering what type of bun that is in the photo above, it’s my gluten free, “Bun in a Bowl”.  You can find my recipe for it here.  For THMs, it’s an “S” recipe.


Tender and Juicy Burgers
 
Author:
Ingredients
  • 2 pounds 98% lean ground beef
  • ½ red onion, finely diced
  • 1 bell pepper, finely diced
  • 1 tablespoon chopped garlic
  • 1 cup finely shredded, part skim mozzarella cheese
  • 1 tablespoon dried Italian seasoning
  • 1 tablespoon onion powder
  • 3 tablespoons powdered beef bouillon
  • 1 teaspoon black pepper
  • 1 large egg
  • 8 wedges Light Swiss Laughing Cow Cheese (optional)
Instructions
  1. Place the ground beef into a large mixing bowl. Add the onion, bell pepper, garlic, mozzarella cheese, Italian seasoning, onion powder, beef bouillon, black pepper, and egg. Mix well. Separate into eight large meatballs.
  2. Make a small indentation in the middle of one meatball. Place one wedge of Laughing Cow cheese. Smooth the meat mixture around the cheese, sealing it in. Repeat for the remaining meatballs.
  3. Slightly flatten each ball into a burger patty. Cook in a grill pan over medium-high heat, about 5-8 minutes on each side, or until nicely browned all around.
Serve with your favorite burger add-ons and ENJOY!


Print Friendly, PDF & Email

Eggs with Ham and Greens

This is not Green Eggs and Ham, mind you, but eggs cooked your favorite way on a bed of lean ham and tasty mixed greens. 😉

“Tasty greens?  Ich!” said my super picky 12 year old.  YES…TASTY GREENS.  Cook these nutrition-packed greens in a tiny bit of butter (everything’s better with butter, I always say) and garlic and it’s guaranteed to please a picky palate.

This is a healthy breakfast alternative for those mornings when you have a bit of time to actually cook something nutritious AND DELICIOUS.  Trust me, as a full-time working mom (and Soldier, by the way), breakfasts in my house consists of leftovers from dinner, or a cup of coffee and a piece of toast…not very healthy if you as me.

My family is slowly coming around to incorporating healthier eating habits.  This breakfast is getting us on our way.  It consists of two over-medium eggs (cooked on a well-seasoned cast iron skillet so no grease was necessary) on a bed of wilted spinach and baby kale and a slice of low-fat ham. Delicious!

Cook the eggs your favorite way; we like over-medium eggs.

image

For the greens: Sauté 6 cups of mixed greens in just a pat of butter, and add a teaspoon of chopped garlic and a pinch of salt. Cook the greens until they wilt then place them on a plate. This makes enough for 3 people.

image

Add a slice of lean ham and voila! You have a delicious and healthy breakfast that’s the perfect start to your day.

Enjoy!

Print Friendly, PDF & Email

Asian Chicken Lettuce Wraps

These chicken lettuce wraps are a good choice if you’re looking for a quick dish to make for an appetizer or a light meal.  I created this recipe when I was craving the popular appetizer served at a famous Chinese Restaurant chain.  It’s quite easy to make.  It only takes a few minutes to chop up the chicken and vegetables; you can have this on your table in about 30 minutes.

This is also a great dish if you have picky eaters like I do.  My youngest daughter opted to eat the filling with rice instead of the “yucky green lettuce”, but boy did she devour the savory, saucy chicken and VEGETABLE-laden filling! 😉  (Shhhh….don’t tell her.)

My complete recipe is located at the bottom of this post.  Give it a try.  I think you’ll like it. 🙂

Asian Chicken Lettuce Wraps

image

Make the stir fry sauce.

In a small bowl, mix all of the sauce ingredients together EXCEPT for the water and cornstarch mixture.

image

Heat a large pan or wok over medium-high heat.  Add the sesame oil and chicken.

image

Pour the sauce into the pan with the chicken.

image

Stir occasionally, cooking until the chicken is no longer pink.

image

Add the water chestnuts, mushrooms, onion and Thai basil leaves.

image

Cook the chicken and vegetable mixture for a couple of minutes.

Stir the cornstarch-water mixture then pour into the pan, stirring the chicken mixture as you pour.  Cook for a couple more minutes, stirring constantly.  The sauce will thicken as it cooks.

Stir in half of the green onions.  Cook for a minute longer then remove from the heat.

image

Fill the lettuce leaves with the chicken mixture.  Top with more green onions and hot pepper flakes.

ENJOY!

image


Asian Chicken Lettuce Wraps
 
Prep time
Cook time
Total time
 
Crispy lettuce filled with a savory mixture of chicken, water chestnuts, ginger, garlic and hoisin sauce that make a delicious appetizer or a light lunch or dinner meal.
Author:
Recipe type: Appetizer
Cuisine: Chinese
Serves: 6
Ingredients
Chicken Stir Fry
  • 4 tablespoons sesame oil
  • 4 boneless skinless chicken breasts, diced (or 1 pound ground chicken)
  • 2 cans water chestnuts, drained and diced
  • 1 package fresh mushrooms, chopped
  • 1 small onion, diced
  • 8 Thai basil leaves, optional
  • 8 stalks green onions, sliced
Stir Fry Sauce
  • 2 tablespoons chopped garlic
  • 1-inch piece of ginger, peeled and grated
  • ¼ cup brown sugar
  • ¼ soy sauce
  • ¼ cup hoisin sauce
  • 2 tablespoons rice wine vinegar
  • ¼ cup water mixed with 2 tablespoons corn starch
Lettuce Wraps
  • 1 large head butter or iceberg lettuce, wash, dried and leaves separated
  • Red pepper flakes, optional
Instructions
Make the stir fry sauce:
  1. In a small bowl or measuring cup, mix together the garlic, ginger, brown sugar, soy sauce, hoisin sauce, and rice wine vinegar.
  2. Set aside the cornstarch and water mixture for now.
Cook the chicken:
  1. Heat a large pan or wok over medium-high heat. Add the sesame oil and chicken.
  2. Pour the sauce over the chicken. Cook until the chicken is no longer pink, stirring occasionally.
  3. Add the water chestnuts, mushrooms, onion, and Thai basil leaves to the pan. Cook for 2-3 minutes.
  4. Stir the cornstarch-water mixture the pour into the pan, stirring as you pour. Cook for another couple of minutes until the sauce thickens.
  5. Stir in half of the green onions. Cook for a minute longer then remove from the heat.
Assemble the chicken wraps:
  1. Scoop some filling into the lettuce leaves.
  2. Top with some sliced green onions and pepper flakes.
ENJOY!


Print Friendly, PDF & Email

Thai Beef Salad

This popular Thai beef salad can serve as an appetizer or a meal.  It’s quick and easy to prepare so you can have it on your table in just a few minutes.  Toss your favorite salad greens together then add thinly sliced grilled beef and a drizzle of my delicious Thai-style dressing for a perfect side salad, quick lunch or light dinner meal.

My complete recipe is located at the bottom of this post.  Give it a try.  I think you’ll like it. 🙂

Thai Beef Salad

image

Prepare the salad dressing.  Place all of the dressing ingredients into a small mixing cup, whisking together until you dissolve the sugar.  Set aside.

Next, grill your favorite cut of beef.  I like to use flank steak.  It only takes a few minutes to cook this cut of meat to what I consider perfection — slightly pink on the inside.  You can fire up the grill for this, but I usually use a grill pan and cook it on top of the stove over medium heat.  Season both sides of the meat with some salt and pepper.  Sprinkle some oil in the hot pan then cook the meat for 10 minutes on each side.  Once you place the meat onto the grill pan, LEAVE IT ALONE to cook.  Do not stab or poke at it.  The only time your utensils touch the meat is when you flip it.

image

See how nicely browned it got? 🙂

Don’t worry about the sides not being browned.

Don’t slice the meat right away or all the juices will run out and leave the meat dry.  Once done, remove the meat from the pan and let it rest while you prepare the vegetables for the salad.

imageIt’s time to layer the vegetables. Place the cucumbers at the bottom.  I do it this way so that the salad dressing can start to pickle the cucumbers.

One note about my photos.  As you can see, I’m making individual servings for packed lunches for my husband, daughter and me.

image

Add the leafy greens next.  I like using hearts of romaine, but any mixed leafy greens will do.

image

I like adding pre-sliced carrots to add some color and crunch.  Pre-sliced carrots cost a little more but it saves a lot of time in the kitchen too.  My older daughter loves to cook, and I’m still quite leery about letting her use a sharp knife to cut thin slivers of carrots. Pre-cut carrots saves me from worrying about her losing some fingers!

image

The cilantro leaves get added to the salad next; add as much or as little as you like.  Cilantro is one of those herbs that you either love or hate.  I happen to love it so my salad gets a healthy handful of cilantro. 😉

image

Thinly slice the red onions and add them to the salad.  I didn’t have any red onions on hand when I made these, so I added sliced green onions instead.

image

The beef rested long enough by now.  Use a sharp knife to cut thin slices of beef, being sure to cut across the grain.
image

Add the sliced beef to the top of the salad.

ENJOY!
image

image

image


Thai Beef Salad
 
Prep time
Cook time
Total time
 
Fresh salad with a spicy and savory salad dressing. Serve with sliced beef for a complete meal.
Author:
Cuisine: Thai
Serves: 4
Ingredients
SALAD DRESSING
  • The juice of 2 medium limes
  • 4 tablespoons fish sauce (I like the Three Crabs brand)
  • 4 tablespoons water
  • 2 tablespoons sugar
  • 1 teaspoon salt (omit if the fish sauce is salty enough for you)
  • 1 tablespoon chopped garlic
  • 2 hot chili peppers, diced, optional
SALAD GREENS
  • 1½ pound flank steak
  • Salt and pepper, to season the steak
  • 4 tablespoons vegetable oil, for the grill pan
  • 2 English cucumbers, sliced
  • 8 cups mixed salad greens
  • 2 small carrots, julienned
  • 1 bunch cilantro, stems removed
  • 1 small red onion, thinly sliced
  • Any other salad vegetables you like
Instructions
Make the Dressing
  1. Place all of the ingredients for the dressing in a small mixing bowl or measuring cup. Whisk together until the sugar dissolves. Set aside.
Grill the Meat
  1. Season the meat on both sides with salt and pepper. Place a grill pan over medium heat. Add the oil to the heated pan then cook the meat for 10 minutes on each side. Once the meat is done, set it aside to rest before slicing. After resting for about 15 minutes, thinly slice the meat against the grain.
Make the Salad
  1. Layer the cucumbers, salad greens, carrots, cilantro, and any other vegetables you like in a small salad bowl or plate.
  2. Add the thinly sliced beef to the top of the salad.
  3. Drizzle some salad dressing over the beef and salad greens.
Serve and enjoy!


Print Friendly, PDF & Email
« Older Entries