Pineapple BBQ Sauce

This sweet and tangy sauce is perfect with pulled pork. Try it on my Hawaiian Pulled Pork. I think you’ll like it. 🙂

Pineapple BBQ Sauce

image

Ingredients:

  • 3/4 cup pineapple juice
  • 1/4 cup soy sauce
  • 1/2 cup ketchup (you can also use chili sauce)
  • 1/4 cup plus 1 tablespoon dark brown sugar
  • 1/2 teaspoon ground ginger
  • 1 tablespoon chopped garlic
  • Pinch of ground black pepper
  • 1/4 cup pineapple juice mixed with 1 tablespoon corn starch

Directions:

1.  Place all of the ingredients into a small sauce pan, EXCEPT FOR the pineapple juice-corn starch mixture.  Bring the mixture to a boil.

image

2.  Whisk in the pineapple juice-corn starch mixture.  Cook for a minute or two, just until the sauce thickens.

image   image

Serve with my Hawaiian Pulled Pork and ENJOY!

IMG_4659

Hawaiian Pulled Pork

This is a cross between two of my family’s favorites — Kahlua Pork and traditional pulled pork with BBQ sauce.

The pork has that hint of smokiness like with Kahlua Pork, thanks to a bit of liquid smoke.  The addition of pineapple juice and brown sugar gives the pork a touch of sweetness, but not too much sweetness that you can’t eat the roast pork with our Chamorro standard fare of steamed rice and fina’denne if that’s what you prefer. 😉

In fact, my household is split in how we eat this succulent, fall-apart, fork-tender pork roast.  My oldest daughter and I like to create pulled pork sandwiches topped with my sweet and tangy Pineapple BBQ Sauce.  My husband and youngest daughter prefer it without the sauce — hubby likes it with rice, fina’denne’ and Tabasco, and daughter dearest likes it as a sandwich with a side of the broth (au jus) to dip her sandwich into.

If you’re as busy as I am, you’re usually looking for quick meals to prepare.  One of the last things I want to do when I come home from work is figure out what to cook for dinner.  Thankfully, this is a very easy recipe to prepare.  The pork itself cooks for several hours in a slow cooker or crock pot, and the sauce takes only minutes to cook.  Start cooking the roast in your crock pot when you wake up in the morning, and you’ll have dinner ready by the time you get home from work later in the day.

If you have any leftover pork and sauce, mix them together for the perfect filling for siopao.

Give my recipe a try.  I think you’ll like it. 🙂

Hawaiian Pulled Pork

IMG_4659

Ingredients:

  • 9-10 pounds boneless pork butt or shoulder
  • 1 medium onion, chopped
  • 2 tablespoons SEA salt (do not use regular table salt or it will be too salty)
  • 1/2 cup dark brown sugar
  • 1 cup pineapple juice
  • 1/4 cup soy sauce
  • 1 tablespoon liquid smoke
  • 2 tablespoons chopped garlic
  • 1 teaspoon whole black peppercorns

Directions:

1.  Rinse the pork and trim off any excess fat.  Poke holes over the entire piece of pork (or pierce it with a sharp knife).  Place the pork into a crock pot with the remaining ingredients for the roast.  Give it a stir to roughly mix the ingredients together.  Set the crock pot to it’s medium-high setting (I use “auto-shift” on mine).  Cook the pork for at least 8 or 9 hours, 10 if you have the time.

image

2.  After 8-9 hours of cooking, the pork will be tender enough to shred.  Skim off the fat from the broth and discard.

IMG_4657

3.  Serve with rolls and top with Pineapple BBQ Sauce or with some broth in a small dish on the side to dip your sandwich in.

 IMG_4660    IMG_4658

ENJOY!


Pineapple BBQ Sauce

image

Ingredients:

  • 3/4 cup pineapple juice
  • 1/4 cup soy sauce
  • 1/2 cup ketchup (you can also use chili sauce)
  • 1/4 cup plus 1 tablespoon dark brown sugar
  • 1/2 teaspoon ground ginger
  • 1 tablespoon chopped garlic
  • Pinch of ground black pepper
  • 1/4 cup pineapple juice mixed with 1 tablespoon corn starch

Directions:

1.  Place all of the ingredients into a small sauce pan, EXCEPT FOR the pineapple juice-corn starch mixture.  Bring the mixture to a boil.

image

2.  Whisk in the pineapple juice-corn starch mixture.  Cook for a minute or two, just until the sauce thickens.

image   image

Serve with my Hawaiian Pulled Pork and ENJOY!

IMG_4659


If you have any leftover pulled pork (about 4 cups of meat), use it to make my Pork Siopao.  Find my recipe here.

Rich and Creamy Custard Pie

Rich, creamy, sweet and luscious Custard Pie…are you drooling yet?

Egg custard pie is so easy to make. Chances are you already have most of the ingredients in your refrigerator and pantry, so why not bake up one of these sweet and creamy pies for your dessert tonight?

Custard Pie - 30

This is not a pie that is a bake-and-eat option.  Because it’s a baked custard, you must let the pie fully set (cool) before serving.  Therefore, if you want this for your dessert after dinner, I advise making this pie in the morning or early afternoon (or even the night before).

I’ve tried many recipe variations for custard pie, most of which are good, but I wanted a really creamy filling.  Some recipes I’ve tried included butter in the custard filling — this is not necessary at all.  Other recipes I’ve tried use variations of milk — skim, low-fat, or whole milk.  I found that using rich heavy cream or half-and-half makes a custard filling that is out-of-this-world rich and creamy, just what I want in a custard pie!  My recipe below uses half-and-half.

I’ve also used store-bought/ready-made pie crusts before.  I am very picky about my pie crusts.  Most commercial brands taste too bland for me.  It’s so easy to make homemade pie crusts, so why buy the pre-made stuff?  I include a recipe for homemade pie crust as well.  Give it a try, but if you prefer the packaged kind, I recommend you still pre-bake (also called blind-baking) the crust before baking the custard.

One note about the pie crust and filling — my recipe below makes enough for one DEEP-DISH, 9-inch pie.  Make sure you use a deep dish pie plate (or buy a deep dish pie crust) when making this recipe or you’ll have leftover pie dough and filling that you’ll end up throwing out (it would be a shame to waste your ingredients).

Give my recipe a try.  I think you’ll like it. 🙂

Rich and Creamy Custard Pie

Custard Pie - 31

Ingredients:

Pie Crust:

  • 1 1/2 cups all-purpose flour
  • 1 stick COLD unsalted butter, cut into small pieces
  • 2 tablespoons sugar
  • 1/4 teaspoon salt
  • 1/2 cup ICE-COLD water

Custard Filling:

  • 3 cups half-and-half
  • 3/4 cup sugar
  • 4 large eggs
  • 1 teaspoon vanilla extract
  • 1/4 teaspoon salt

Other Items:

  • 1 9-inch deep dish pie pan
  • Dried, uncooked beans (any kind), about 3 cups
  • Parchment paper

Directions:

MAKE THE CRUST:

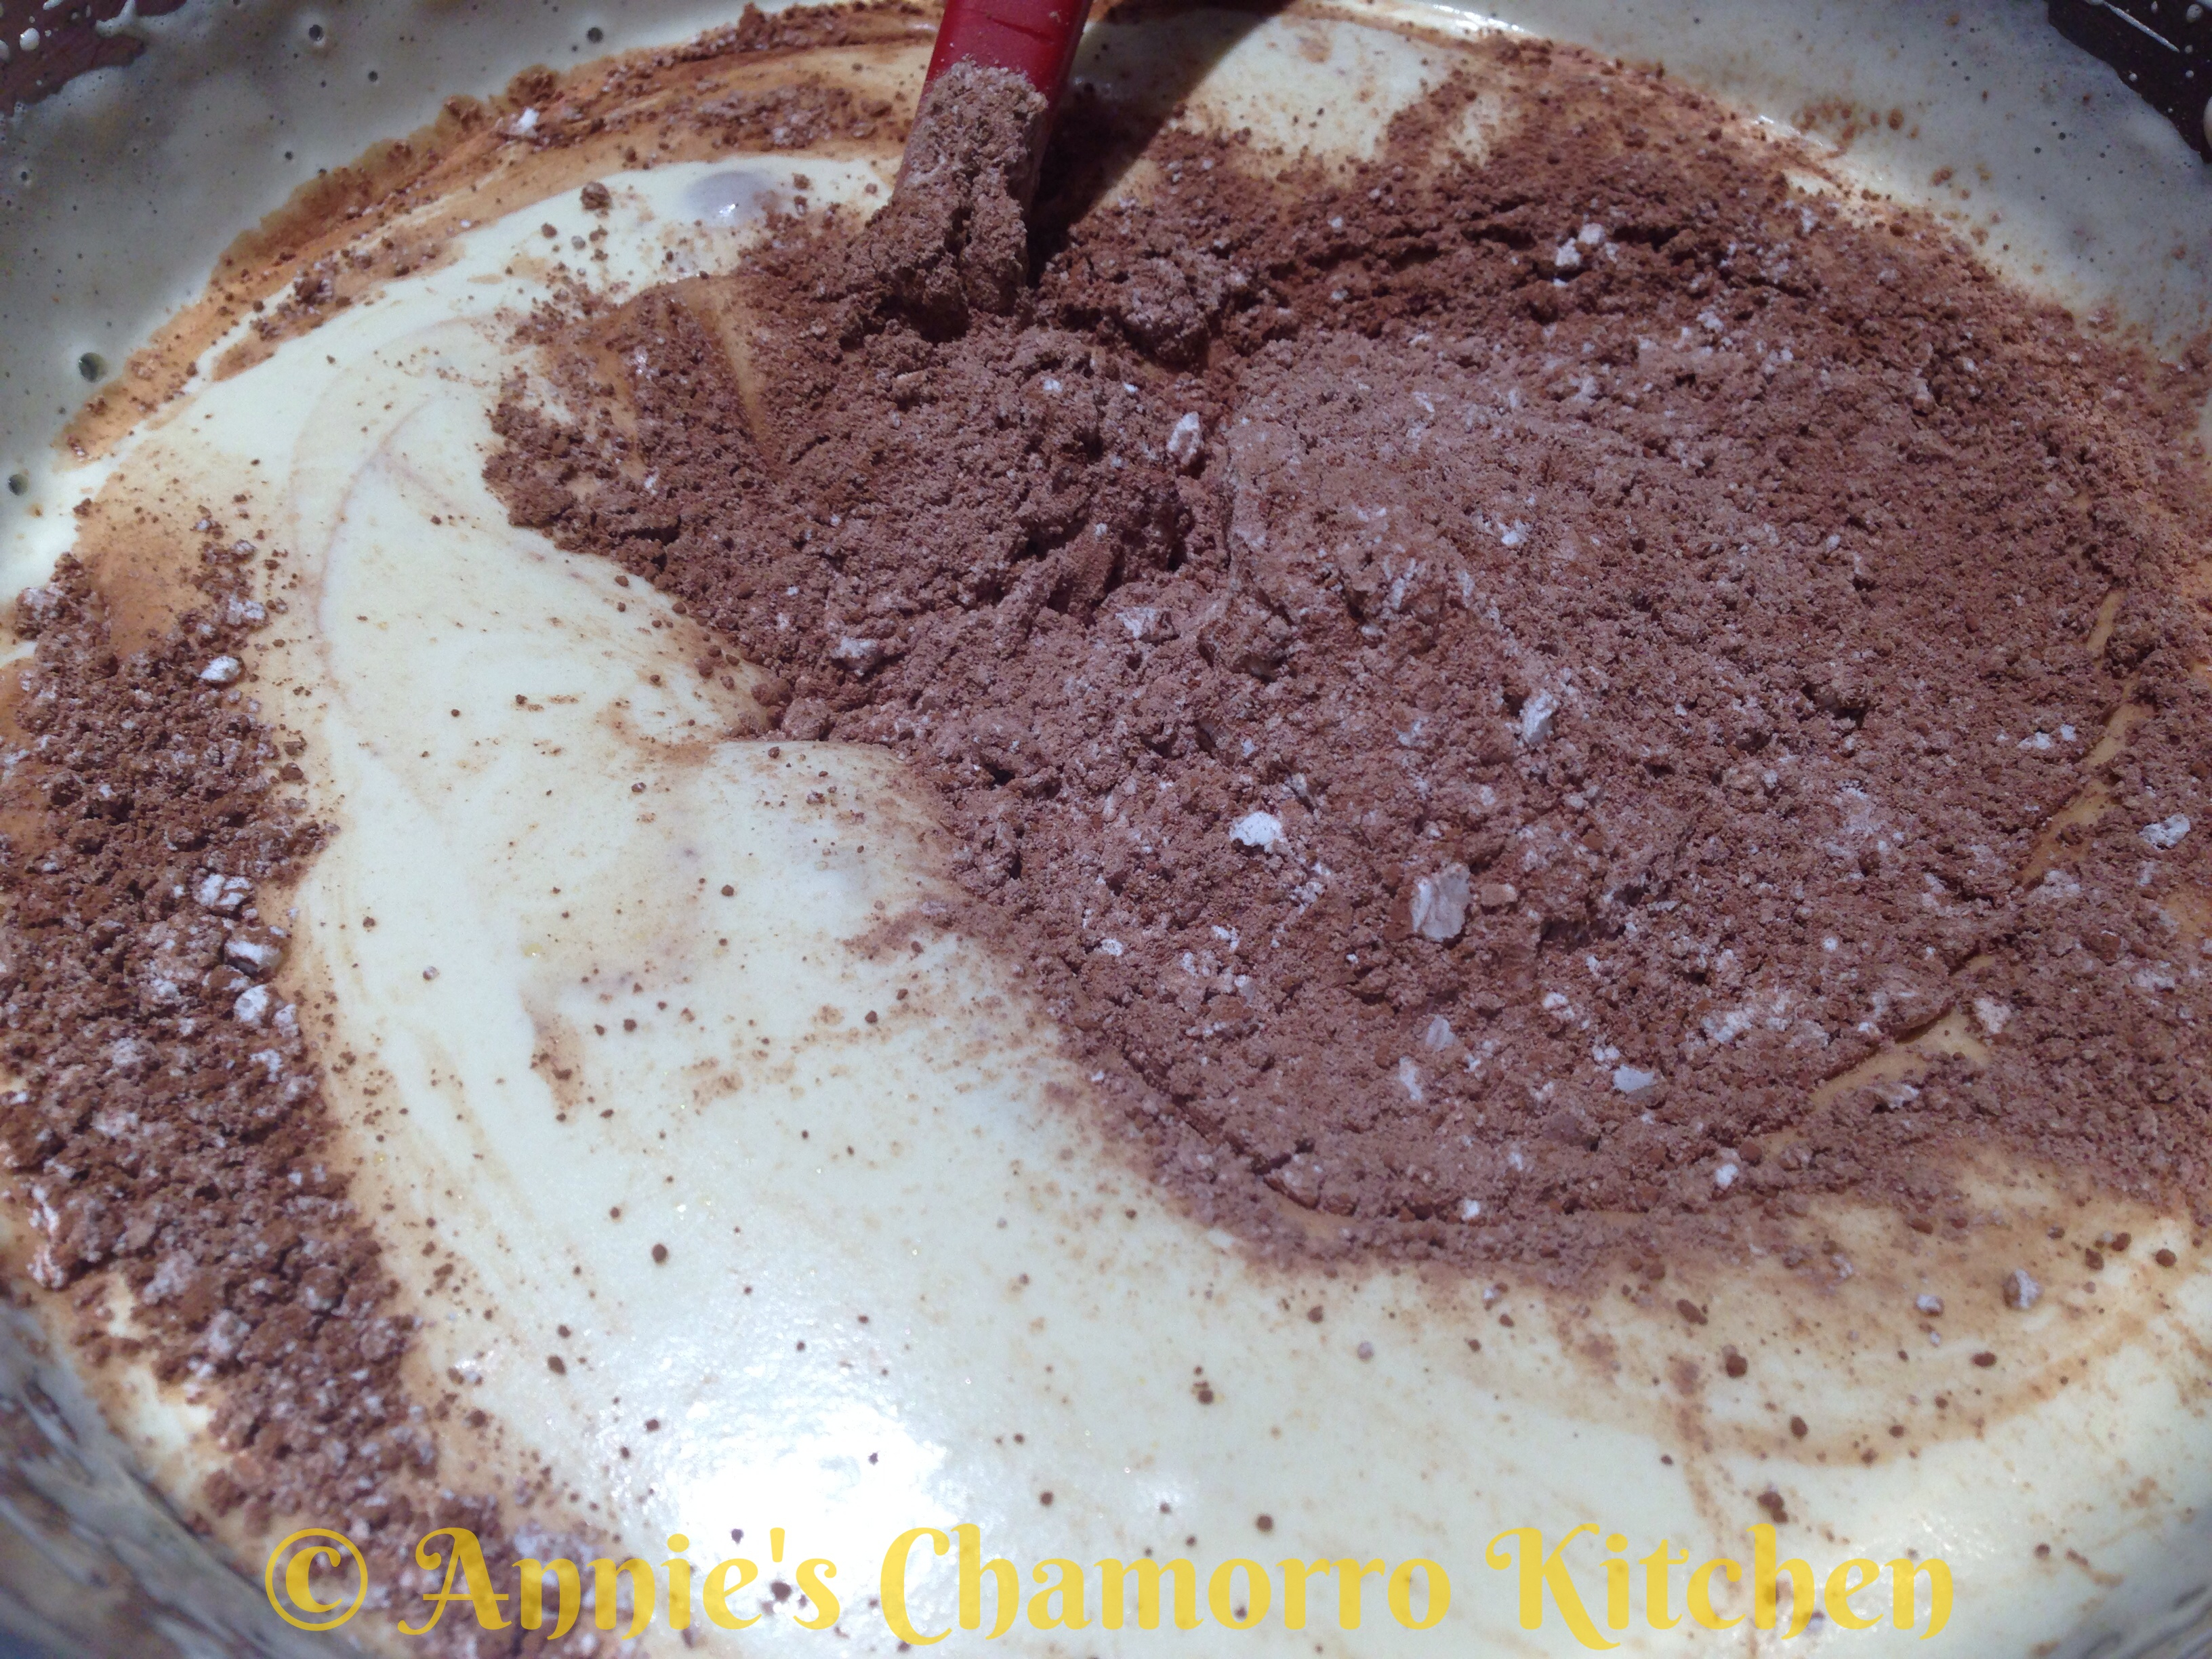
1.  In a large mixing bowl, place the flour, sugar, salt, and butter.

Custard Pie - 01

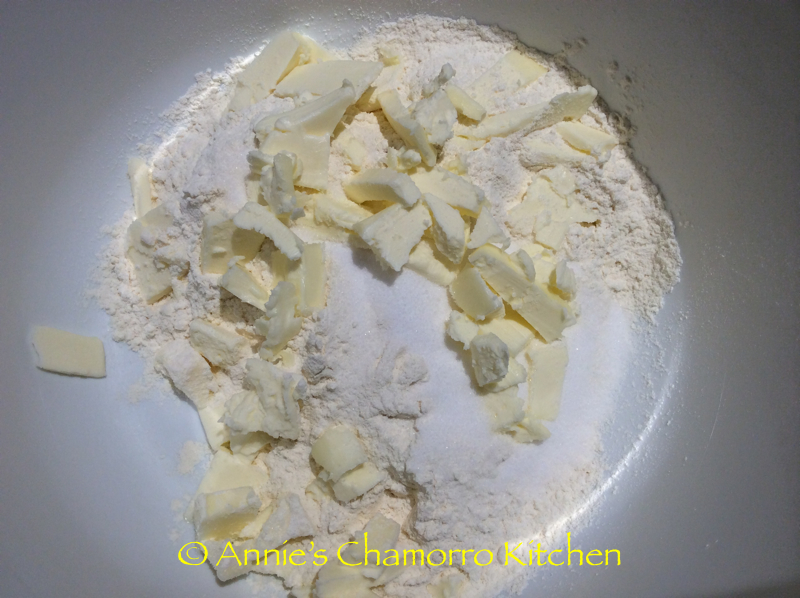
2.  Stir the ingredients together briefly, just enough to mix the flour, sugar and salt together.  Use a dough cutter (or you can use a food processor) to “cut” the butter into the flour.  You want to see very small pieces of butter (about the size of a pea).

Custard Pie - 02

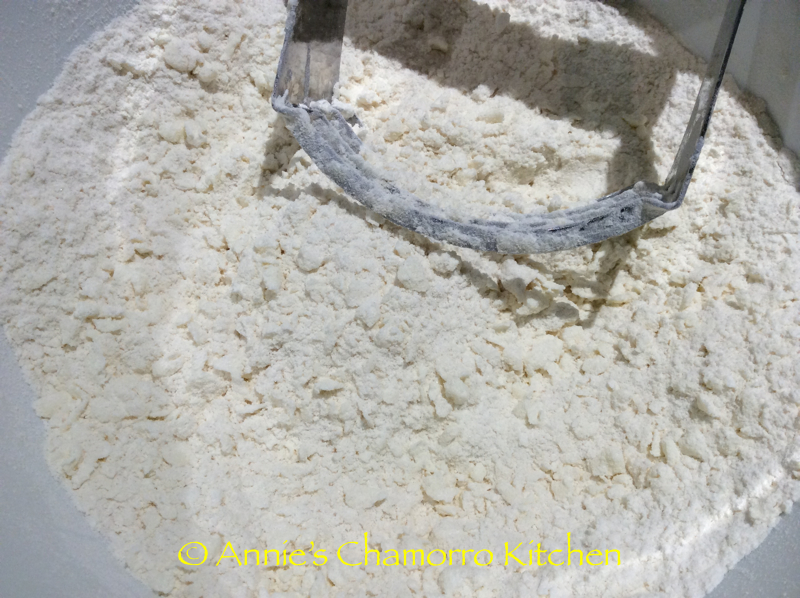
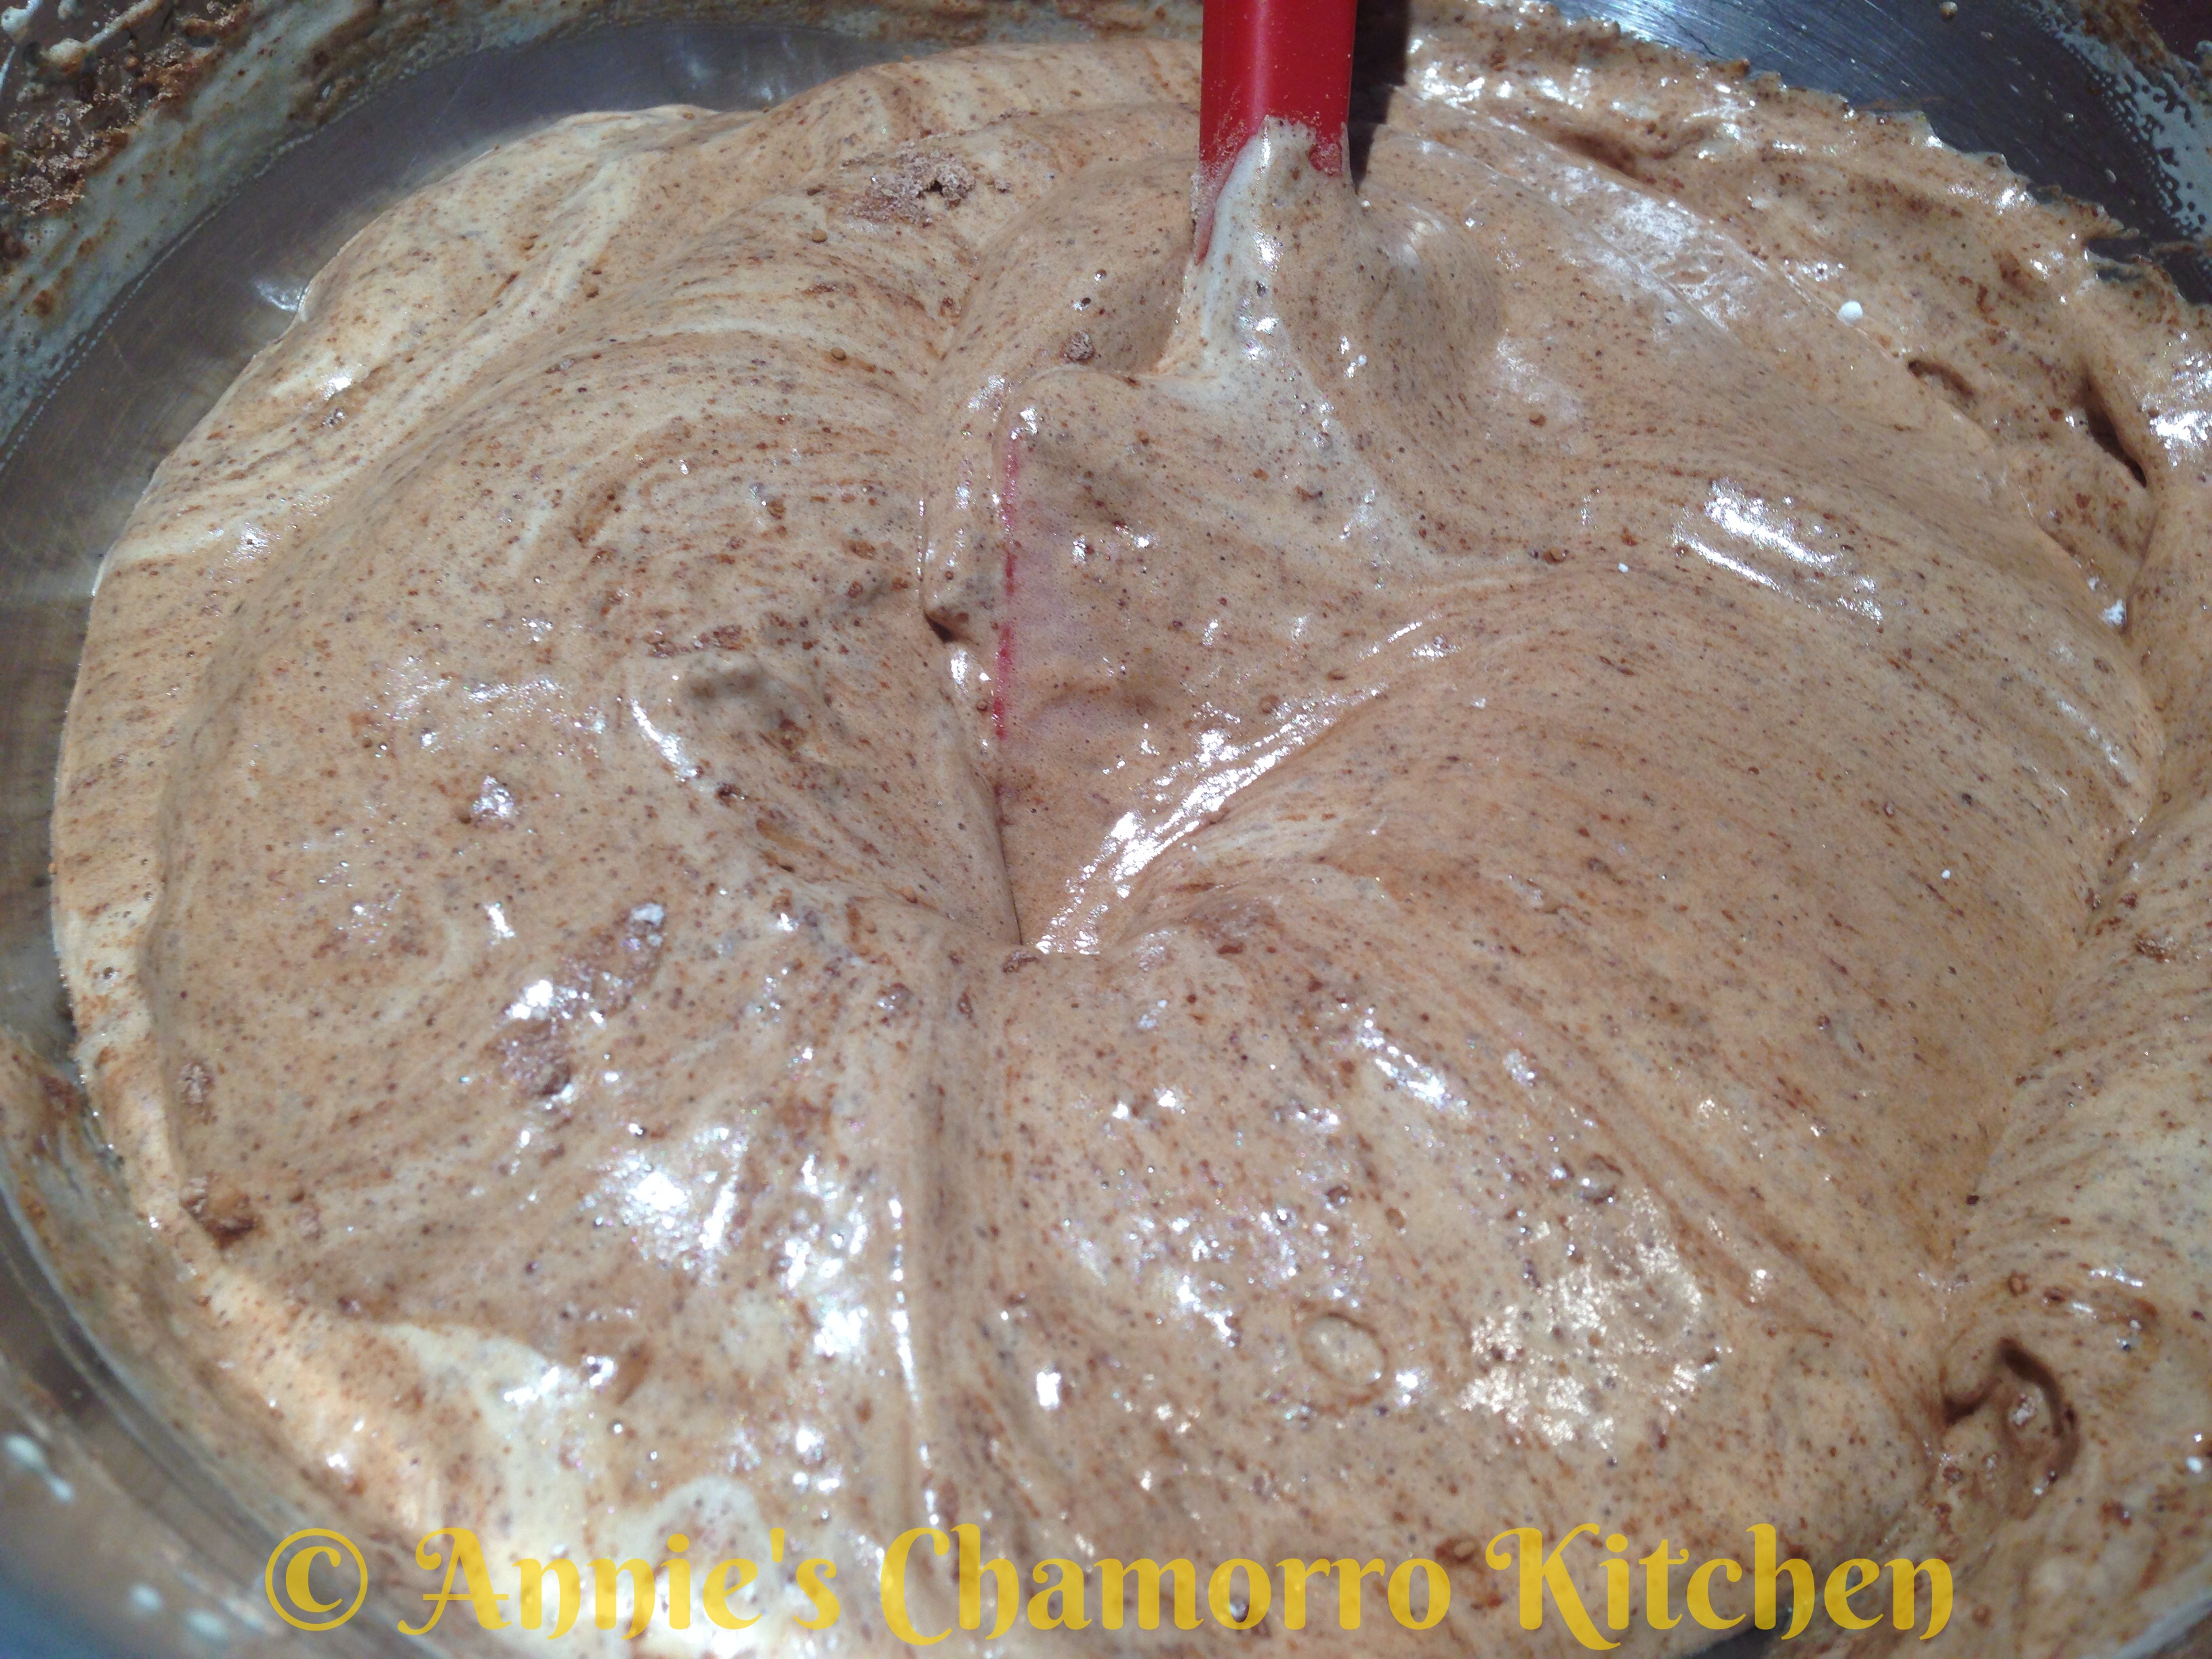
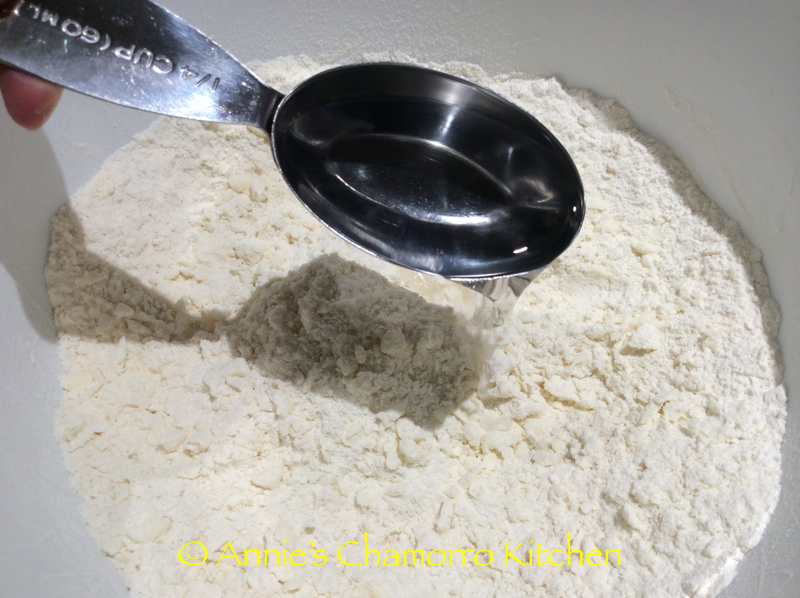
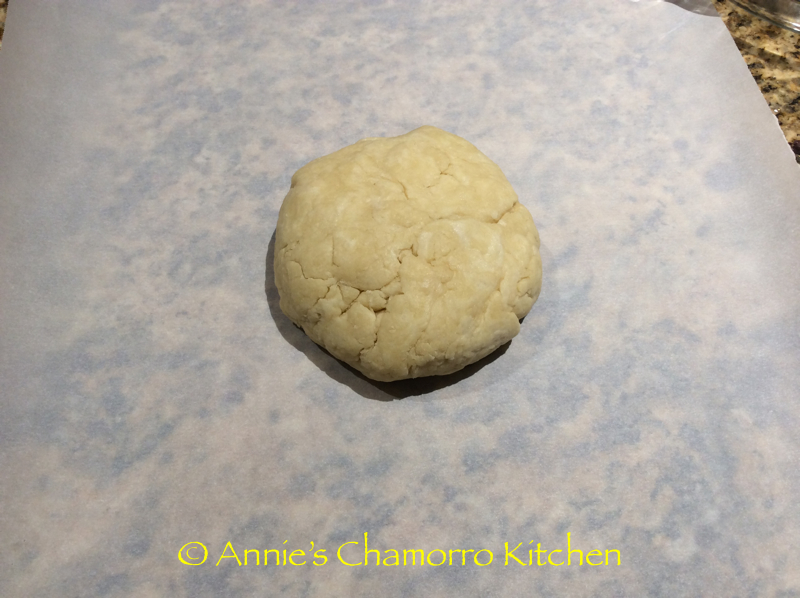
3.  Pour the ice water over the flour mixture, starting with 1/4 cup of ice water.  Gently mix the water into the flour, forming a shaggy, loose dough.  Add more water, a spoonful at a time, until the dough comes together.  You should not need more than 1/2 cup of ice water.

Custard Pie - 03  Custard Pie - 06

This is what it looks like after the initial mixing of water and flour.  You can still see some dry bits at the bottom of the bowl, but this is the perfect consistency — you do not need any more water at this point.

Custard Pie - 08

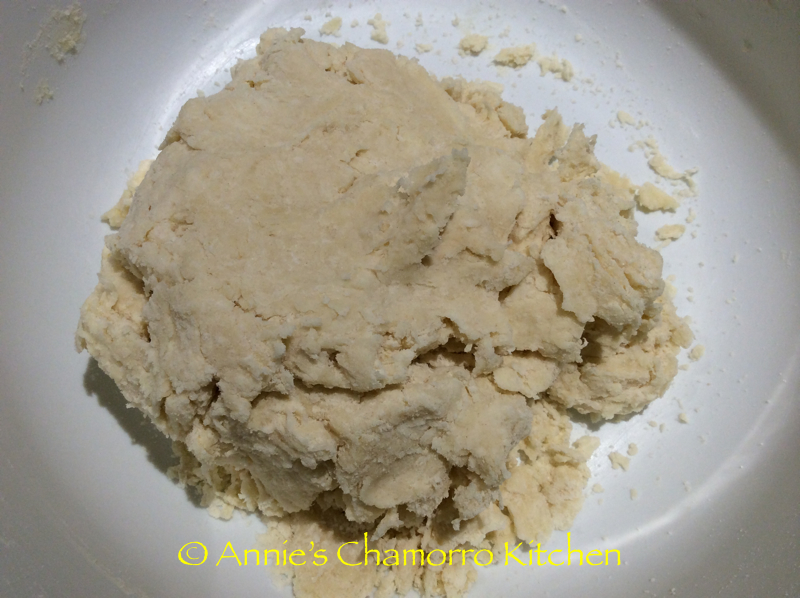
Give it another minute or so of kneading and the dough will come together.

Custard Pie - 09

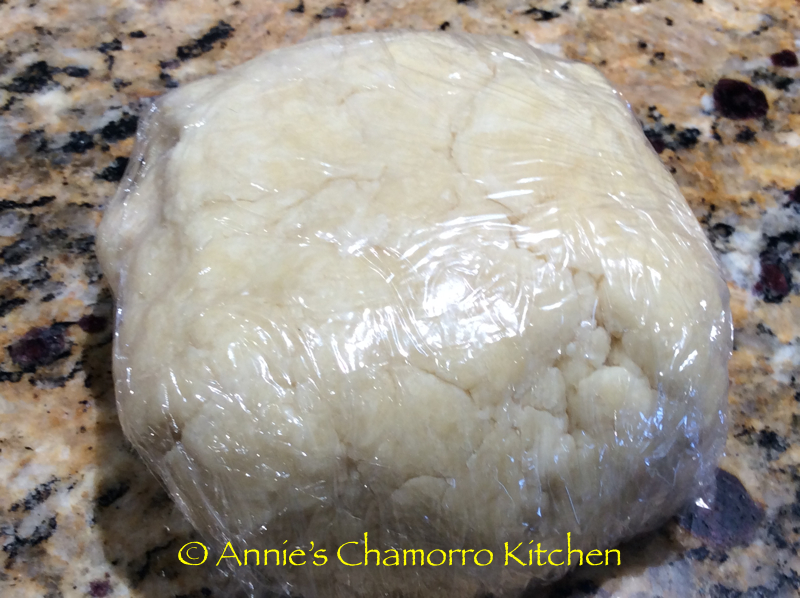
4.  Wrap the dough in plastic wrap and place in the refrigerator to rest for at least 15 minutes.  I actually place my dough in the freezer.  Don’t worry — the dough won’t freeze solid.  The goal is to get the butter very cold again (since the butter softened during the mixing process).  You want to still see chunks of butter when you roll out the dough and eventually bake it.  During the baking process, the melting butter creates steam, which is what makes your dough nice and flaky.

Custard Pie - 10

5.  After 15  minutes, remove the dough from the refrigerator (or freezer).  Place the dough between two large sheets of parchment paper.

Custard Pie - 11

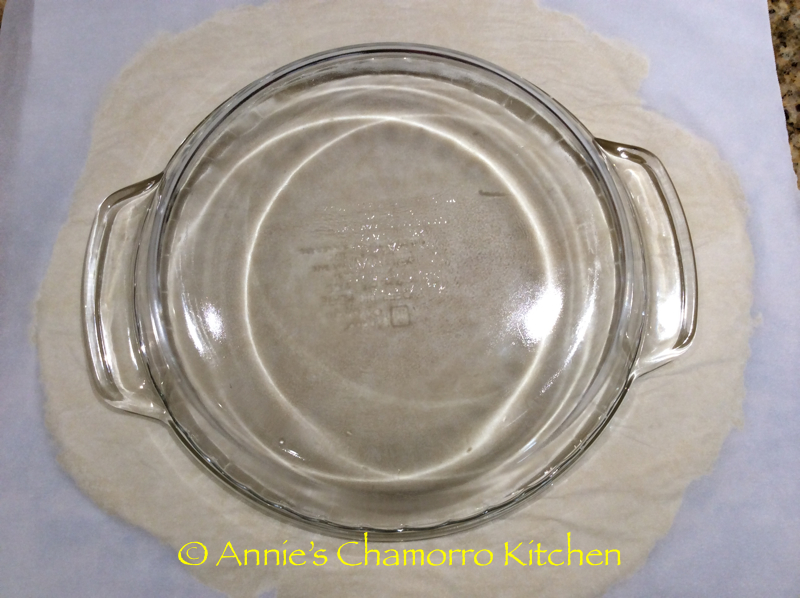
6.  Roll the dough into a circle, about 1/8 inch thick and two inches larger in diameter than the width of your pie pan.  Turn the pie pan upside down on top of the parchment paper to measure.

Custard Pie - 13

7.  To place the dough in the pie pan, remove one sheet of parchment paper.  Turn the pie pan upside down over the dough.  Carefully slide your hand beneath the parchment paper and flip the dough and pie pan right-side-up.  Gently push the dough down into the pie pan.

Custard Pie - 14

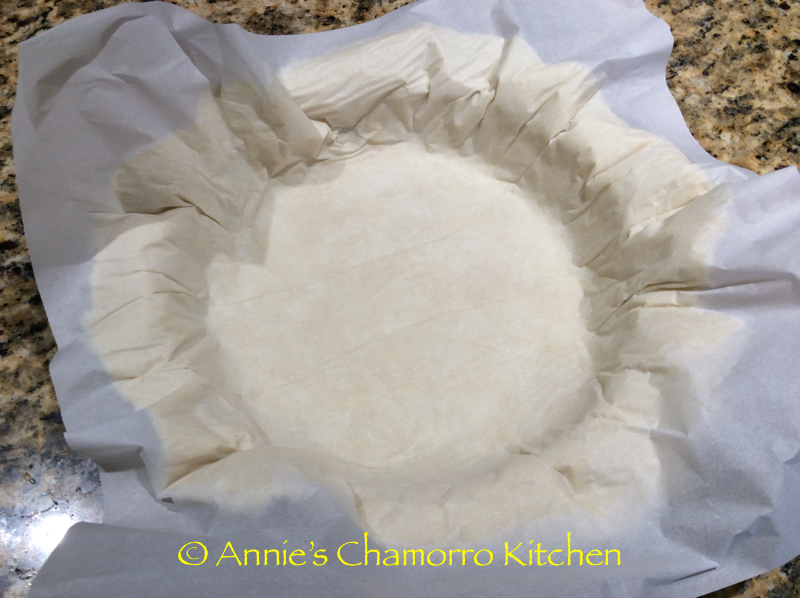
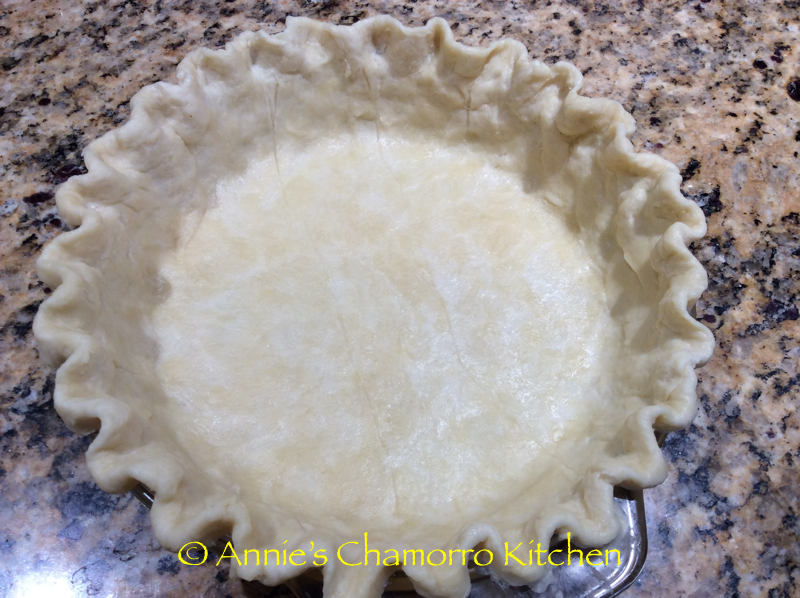
8.  Carefully peel the parchment paper off the dough (save the paper for use later).  Push the dough into the sides of the pan (and pinch the dough to close any holes), if necessary.

Custard Pie - 15

9.  Trim off some of the dough around the edge, leaving a little bit of dough hanging over the side.  Use whatever method you like to flute the edge of the dough.  I just use my fingertips to create a fluted edge like you see below.

Custard Pie - 16

10.  It’s time to blind-bake the pie crust.  Pre-heat your oven to 425 degrees.  Place one sheet of parchment paper inside the pie pan.  Place the dried beans over the parchment paper.  I like to place my dried beans in oven cooking bags; this way I can reuse the beans the next time I bake a pie.

Custard Pie - 17

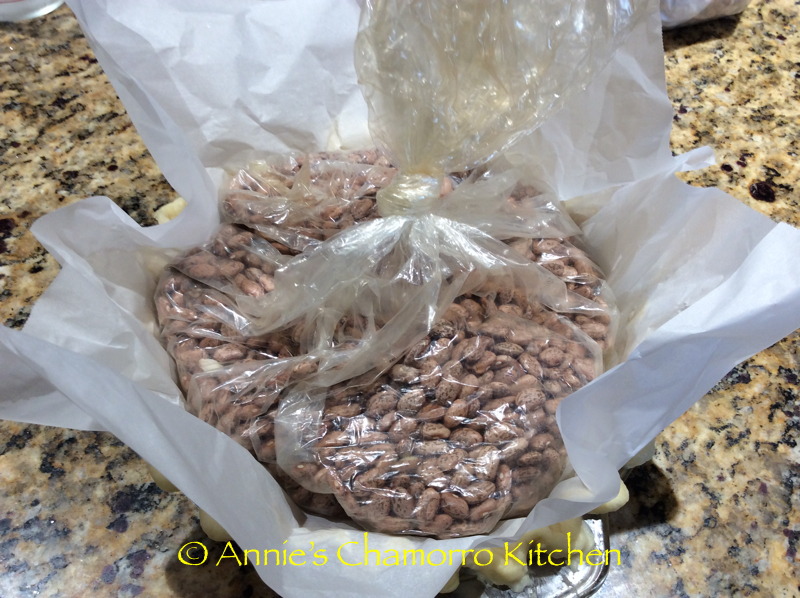
11.  Bake the pie crust for 15 minutes then remove it from the oven.  Remove the beans and parchment paper and return the pie crust to the oven to bake for 5 more minutes.

Custard Pie - 20

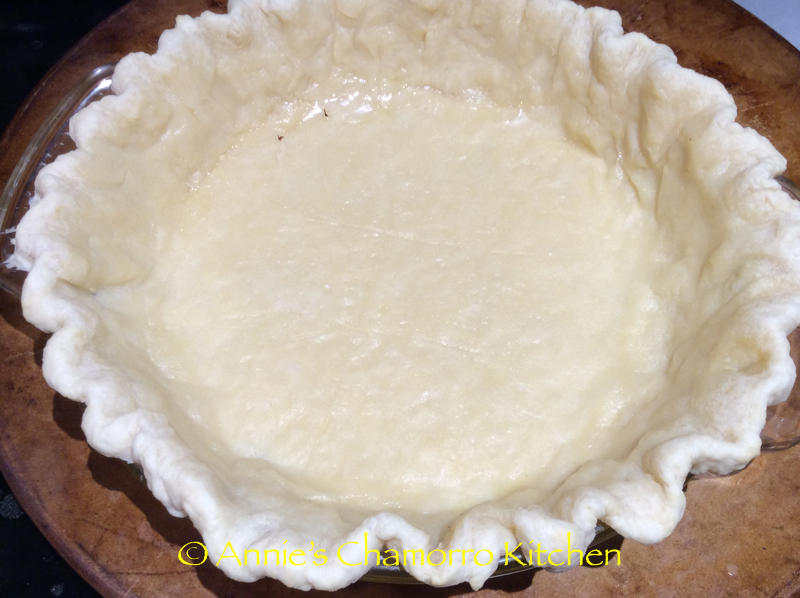
12.  During the last 5 minutes of baking, the bottom of the pie crust will very likely bubble up.  Do not panic.  After you remove the crust from the oven, immediately (but very gently) push down on the bubble to release the steam.  The bottom of the pie crust will flatten again once all of the steam is released.

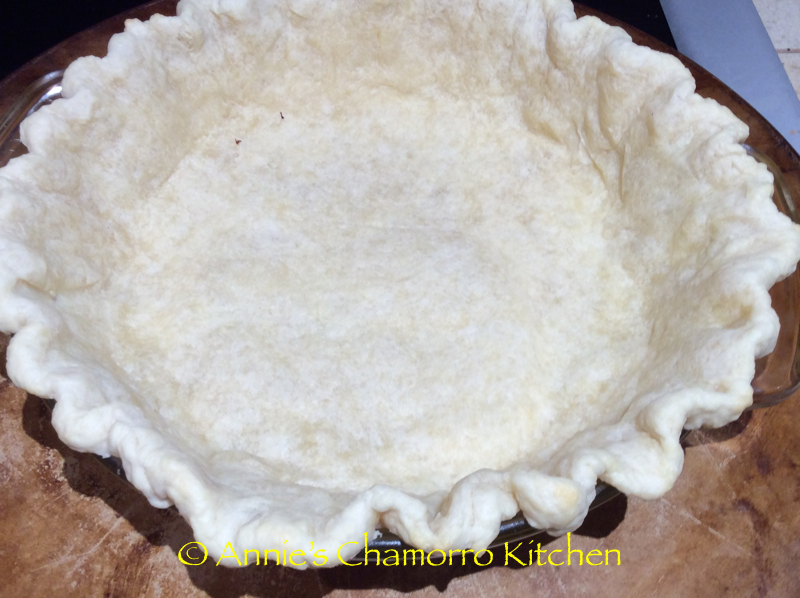
Set the pre-baked crust aside while you prepare the custard filling.

Custard Pie - 21

MAKE THE FILLING:

1.  Decrease your oven temperature to 350 degrees.

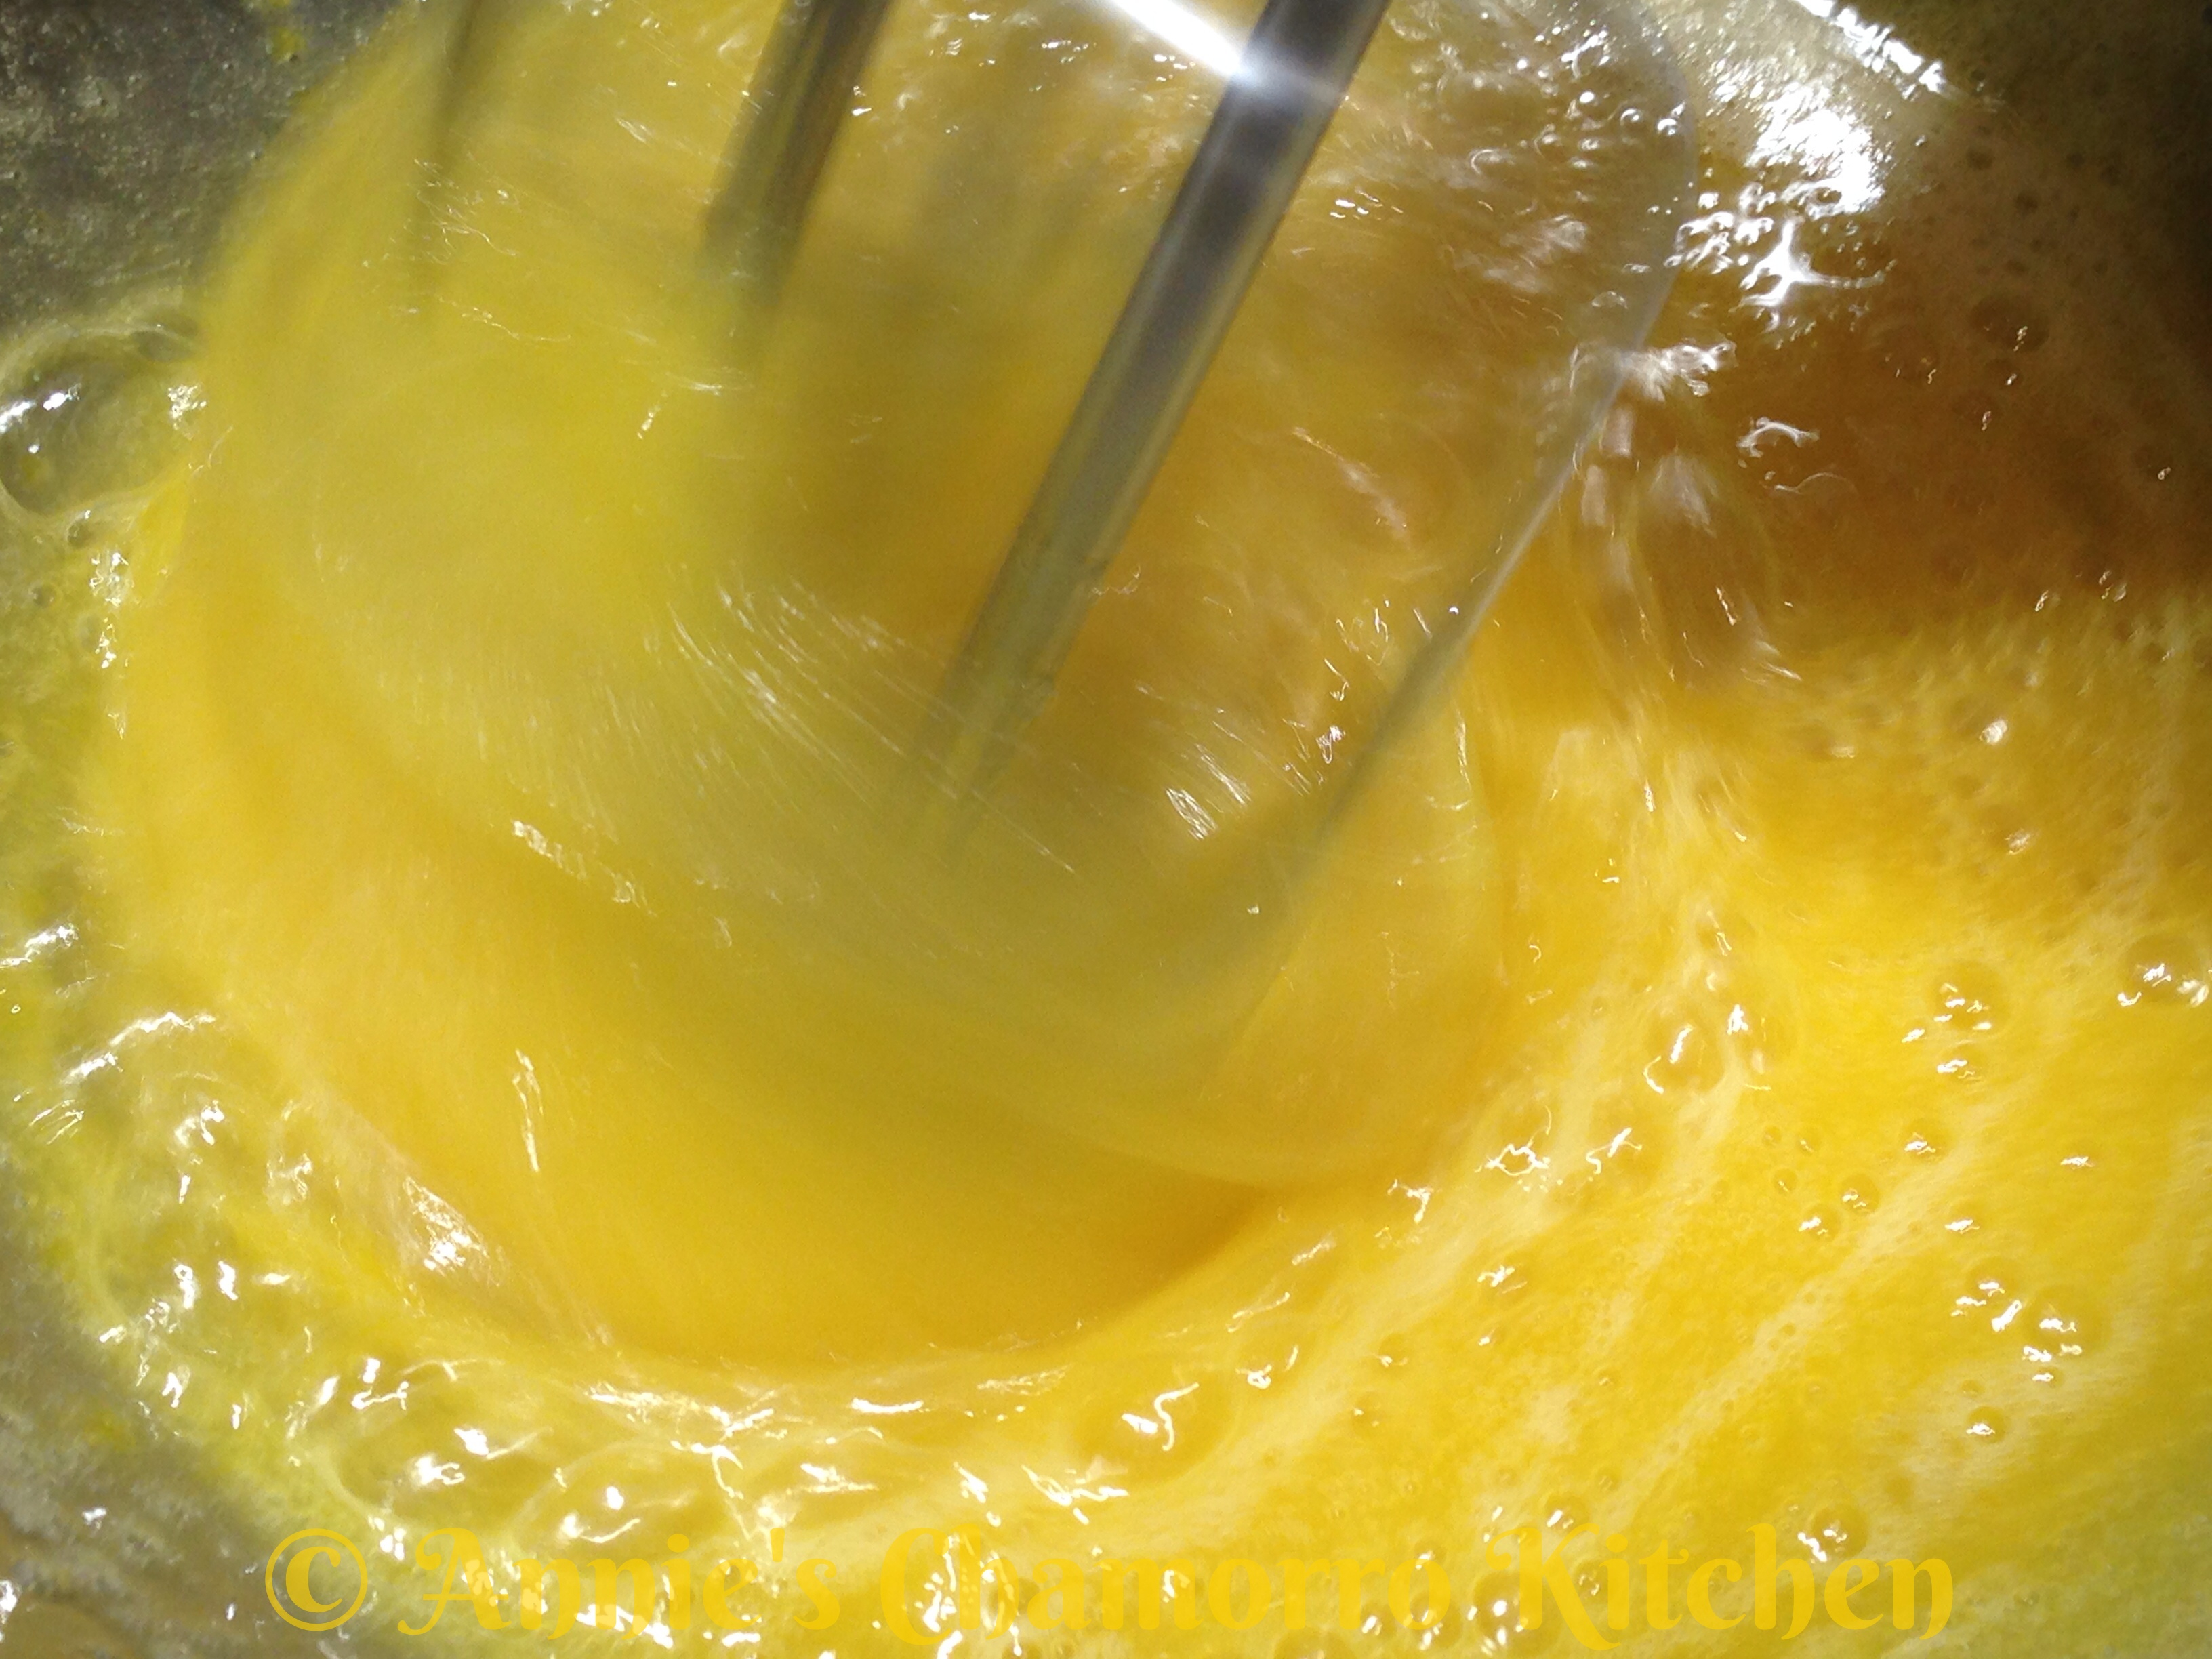
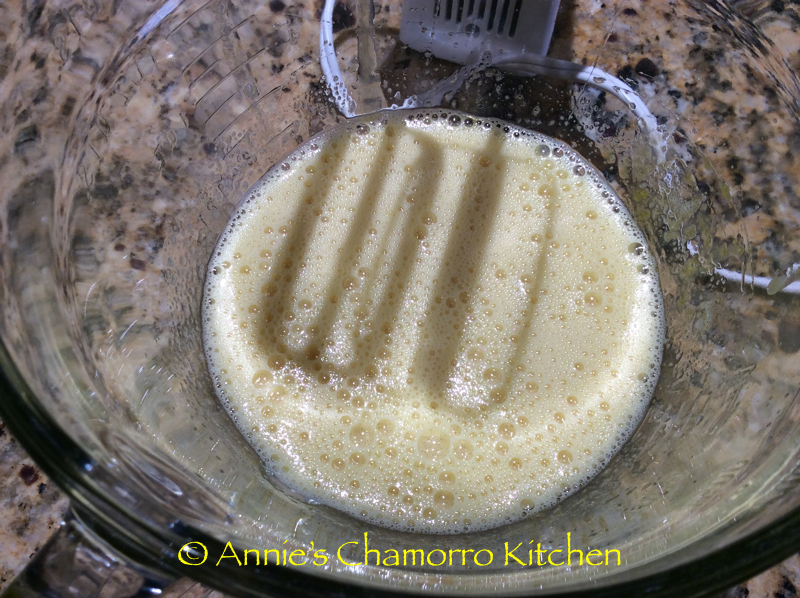
In a small mixing bowl, place the sugar, eggs, vanilla extract and salt.  Use a hand mixer on low speed (or a whisk) to mix the ingredients together; mix for a couple of minutes only.  Do not over-mix or your resulting custard will turn out grainy.

Custard Pie - 18

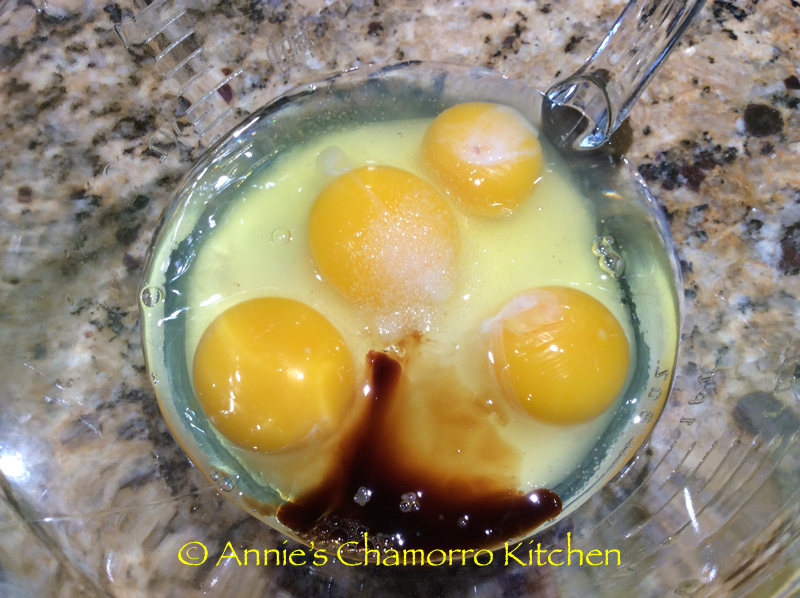
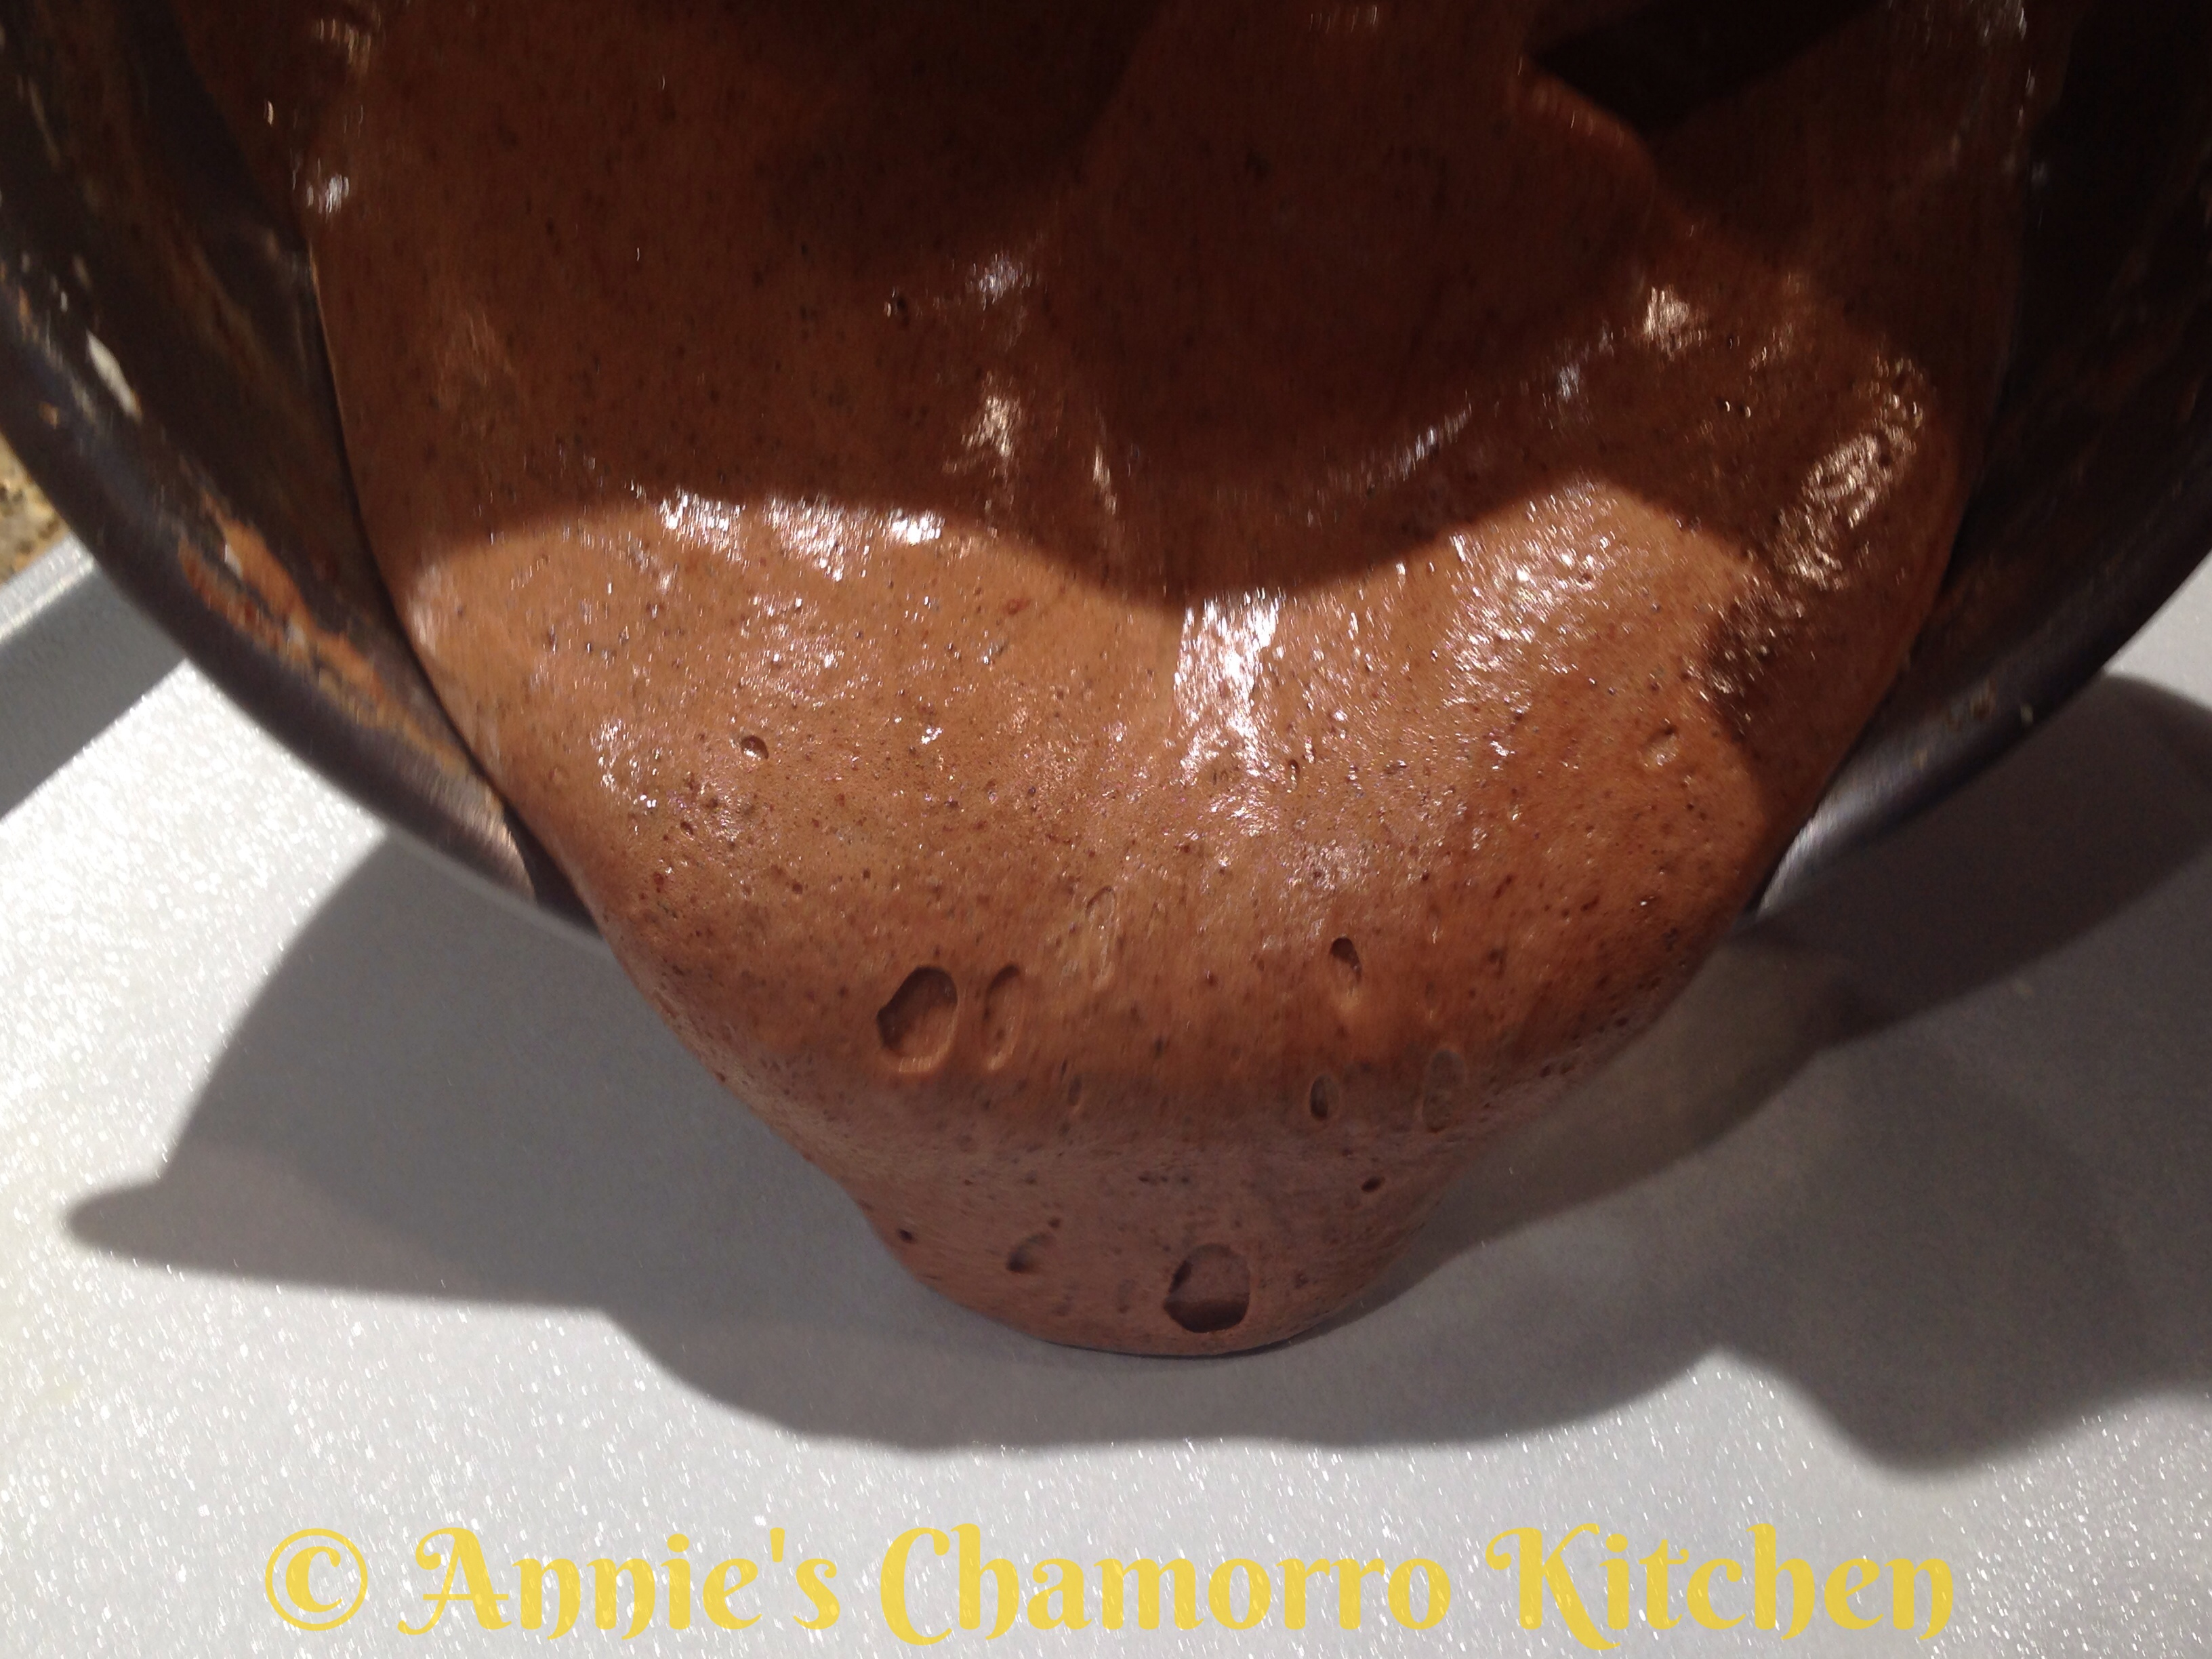
2.  In a separate microwave-safe bowl, heat the half-and-half in the microwave on high for two minutes.  Mix the hot half-and-half — 1/2 cup at a time — into the egg mixture.  DO NOT add the hot liquid all at once or you will end up scrambling your egg mixture!  Adding the hot liquid a little at a time tempers the egg mixture.  Continue mixing in the hot liquid, a little at a time, until all the liquid is mixed with the egg mixture.

Custard Pie - 19

BAKE THE PIE:

1.  Place your oven rack in the bottom half of your oven.  Place a baking pan in the oven, then place the un-filled and pre-baked pie crust on top of the baking pan.

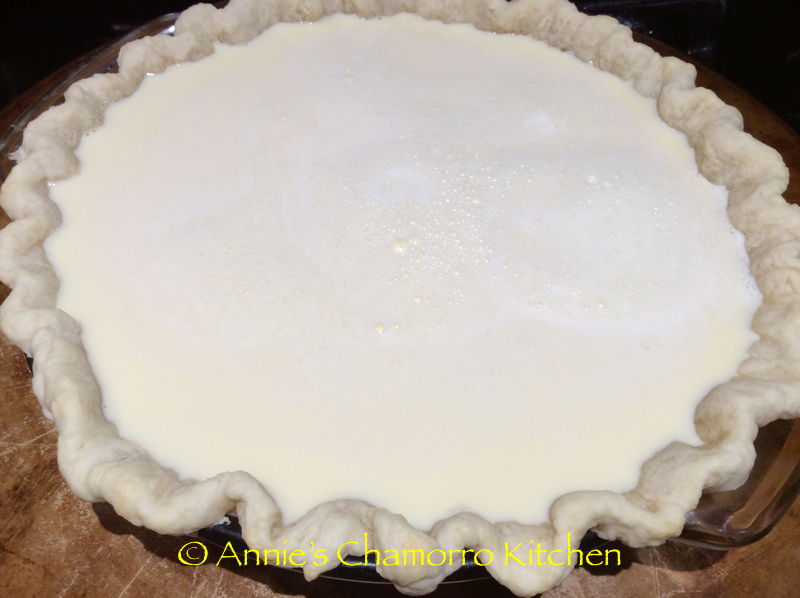
Carefully pour the filling mixture into the pie crust.  Be careful not to touch the hot oven with your arms or hands as you pour the liquid into the pie crust.

I do it this way because the filling will come to the very brim of the pie crust — it is much easier doing it like this than trying to fill the crust outside of the oven, then carrying the full crust to the oven without spilling it (yeah, that’s a mess waiting to happen). 😉

Custard Pie - 22

2.  Bake the pie for a total of 50 minutes.  After 40 minutes, if you need to, wrap a piece of foil (or use a pie shield) around the edge of the pie (to prevent the crust from burning or browning too much).  Bake for 10 more minutes then remove the pie from the oven.

The pie will be jiggly still when you take it out of the oven.  It will look something like jello, with the top surface of the pie rippling as you gently shake it.  You may think the pie is under-cooked, but TRUST ME, it is DONE.  Resist the urge to bake it longer.

You really don’t want to over-bake custard pies.  Have you ever had custard pies that tasted way too much like eggs?  That’s due to OVER-BAKING the custard — a real no-no.

Custard Pie - 26

3.  Now comes the hard part.  You MUST let the pie cool at room temperature for at least 2 or 3 hours before cutting into it.  As the pie cools, the filling is still “cooking.”  The pie will set (firm up) once completely cooled.

Ideally, after cooling at room temperature for a few hours, you want to refrigerate the pie another hour or so to finish cooling and allow the pie to set fully.

Custard Pie - 29

Of course, after the requisite 3 hours of room-temperature cooling, I just could NOT wait to eat this pie.  I went ahead and cut a small slice — to give it a taste test, you see.  As our family’s resident home chef, I just HAD to ensure this pie was fit for consumption! And it was. 🙂

As you can see, the pie is mostly set at this point, but another hour or longer of cooling in the refrigerator will be better.

Custard Pie - 27

This is the pie after cooling in the refrigerator overnight.  Make sure the pie is completely cooled at room temperature before placing in the refrigerator or else condensation will collect on the top of the pie as it cools in the fridge.  If that happens, don’t worry — just use a paper towel to soak up any accumulated condensation on top of the pie.

Custard Pie - 32

This makes the BEST breakfast!

Serve up a slice — or two — and ENJOY!

Custard Pie - 35


Chocolate Ice Cream Cake

Some of my favorite desserts are chocolate cake, coffee ice cream, and toffee candy.  This dessert combines all three in one very decadent dessert.

I combined my love of these three sweet indulgences into one rich and luscious ice cream cake.

If you’ve read through my directions below, you may be thinking that this is a difficult desert to make.  Don’t let the number of steps fool you, however.  This is actually very simple to make; just follow each step as I’ve described them below and before you know it, you’ll be enjoying this heavenly dessert!  The only hard part is waiting for the ice cream to re-harden! 🙂

Give my recipe a try.  I know you’ll love it. 🙂

Chocolate Ice Cream Cake

10352789_700854603304696_2410885298969090088_n Ingredients: Cake:

  • 1/4 cup cocoa powder
  • 1/3 cup plus 2 tablespoons cake flour
  • 1 tablespoon instant espresso powder
  • 1/8 teaspoon salt
  • 1/2 stick unsalted butter, melted
  • 3 large eggs
  • 2 large egg YOLKS
  • 1/2 cup white, granulated sugar

Filling:

  • 1 cup milk chocolate chips
  • 1/2 cup half-and-half (or heavy cream)
  • Half gallon coffee ice cream (or your favorite flavor)
  • 1/2 cup toffee bits

Ganache:

  • 1 1/2 cups semisweet chocolate chips
  • 1 cup half-and-half (or heavy cream)

Topping:

  • 1/2 cup toffee bits

Directions:

1.  In a small mixing bowl, sift together the cocoa powder and cake flour.  Add the instant espresso powder and salt to the bowl.  Whisk to combine.

Chocolate Ice Cream Cake - 02

2.  In a microwave-safe bowl, melt the butter.  Set aside to cool.

Chocolate Ice Cream Cake - 14

3.  Place a small pot filled with about 2 inches of water over medium heat; bring to a simmer.  In a large heat-safe mixing bowl, place the eggs, egg yolks, and sugar.  Place the egg and sugar mixture over the simmering water, whisking constantly until the mixture is warm to the touch.

Chocolate Ice Cream Cake - 06

4.  Switch to a hand-held mixer.  Mix on high speed until the mixture thickens and turns a very pale yellow.

Chocolate Ice Cream Cake - 08  Chocolate Ice Cream Cake - 10

Chocolate Ice Cream Cake - 22

5.  Fold the dry ingredients into the thickened egg mixture.

Chocolate Ice Cream Cake - 26  Chocolate Ice Cream Cake - 28

6.  Drizzle the cooled melted butter down the side of the bowl.  Gently FOLD the butter into the batter.  Do NOT overmix; the batter will be very airy and light.

Chocolate Ice Cream Cake - 30

7.  Line a large baking pan (a jelly-roll pan works well) with parchment paper.  Pour the batter onto the lined pan.  Gently and evenly spread batter out over the pan (be careful not to over-handle the batter as you spread it out; you do NOT want to deflate the air bubbles).

Chocolate Ice Cream Cake - 38  Chocolate Ice Cream Cake - 44

8.  Bake at 450 degrees for 7 minutes.

Chocolate Ice Cream Cake - 46

9.  While the cake is still warm, flip it out onto a clean dish cloth that’s been dusted with cocoa powder.  Peel the parchment paper off the cake.

Chocolate Ice Cream Cake - 50 Chocolate Ice Cream Cake - 51

10.  Sprinkle more cocoa powder over the cake.  Roll the cake — including the dish cloth — starting at the short edge.  Set aside until the cake is completely cooled.

Chocolate Ice Cream Cake - 54

11.  After the cake is completely cooled, carefully unroll it.

Chocolate Ice Cream Cake - 64

12.  Make the ganache for the filling.  In a small microwave-safe bowl, heat the 1/2 cup of half-and-half for about a minute.  Add the milk chocolate chips to the heated half-and-half,  whisking until the chocolate melts and the mixture is smooth.

Chocolate Ice Cream Cake - 62

13.  Spread the ganache over the cake, staying about 1 inch from the edge.

Chocolate Ice Cream Cake - 68 Chocolate Ice Cream Cake - 70

14.  Spread the ice cream over the cake.  I found it easier to use a spatula to “slice” pieces of ice cream, then I placed the slices of ice cream over the cake, staying about 1 1/2 inches from the edge.

Chocolate Ice Cream Cake - 74

15.  Sprinkle 1/2 cup of toffee bits over the ice cream.

Chocolate Ice Cream Cake - 76

16.  Re-roll the cake, jell-roll style, starting from the short edge.  Be careful not to squeeze too tightly or all of the ice cream and chocolate ganache will ooze out of the cake.

Chocolate Ice Cream Cake - 78

17.  Tightly wrap the rolled cake with plastic wrap.  Place in the freezer and freeze until the ice cream firms up.

Chocolate Ice Cream Cake - 80

18.  To finish the cake, prepare more ganache using the remaining half-and-half and semisweet chocolate chips.  Once again, heat the half-and-half in the microwave for a minute.  Add the semisweet chocolate chips to the hot half-and-half, whisking until smooth and creamy.  Pour the ganache over the cake.  Sprinkle with the remaining 1/2 cup of toffee bits.

10372293_700854569971366_398318341041389409_n

19.  Slice the cake, serve and ENJOY! 😀

Chocolate Ice Cream Cake - 82


@untie R’s Gluten-Free Blueberry Cheese Pancakes

I’m happy to feature my friend, Arlene Sablan Aguon’s healthy recipes.

This particular recipe is a healthy alternative to regular pancakes. It’s gluten-free, delicious, and packed with nutrients that not only taste good but are good for you too!

Give Arlene’s recipe a try.  I think you’ll like it! 🙂

Yield: 4 pancakes

@untie R’s Gluten-Free Blueberry Cheese Pancakes

Gluten Free Blueberry Cheese Pancakes


Ingredients:

  • 2 cups gluten-free flour
  • 2 teaspoons baking powder (or 1 teaspoon of Xanthan Gum powder)
  • 1/4 teaspoon baking soda
  • 1/4 teaspoon salt
  • 2 tablespoons sugar
  • 2 tablespoons wheat germ or steel cut oats
  • 1 1/2 cups flax or soy milk
  • 1 cup small curd cottage cheese.
  • 1 large egg, lightly beaten (see notes below)
  • 1/4 cup coconut oil
  • 1 cup fresh or frozen blueberries

Directions:

Gluten Free Blueberry Cheese Pancakes

Sift together the flour, baking powder, baking soda and salt. Stir in sugar and wheat germ/oats; set aside.

Combine the milk, cottage cheese, and coconut oil.

Pour the flax or soy milk mixture all at once into the flour mixture; stir until moist. Add additional milk, a little at a time, if the batter is too thick (the batter should pour easily). Gently stir in the berries.

Pre-heat a skillet/grill over medium heat; lightly grease the skillet. Pour the mixture onto the skillet to the size you prefer. Cook until the tops are bubbly and appear dry; flip over to finish cooking.

Serve and enjoy!

NOTE from Arlene: I didn’t use the egg. The small curd cottage cheese acts as your binder with the coconut oil. Yummy too.

NOTE from Annie: You can use a “chia egg” in place of the regular egg. Mix 1 tablespoon ground chia seeds with 3 tablespoons water. Let the mixture sit until it forms a gel. Use the chia gel/egg in the recipe instead of the egg.


« Older Entries Recent Entries »