Tomato-Braised Pork Ribs

One of my family’s favorite ways for me to cook pork ribs (other than Chamorro BBQ) is to braise it in a thick and sweet tomato sauce.

My mom used to make this for us growing up, only she used tomato ketchup (I still make it this way sometimes).

What is braising, you ask? Braising is a form of cooking with liquid so that the moist heat breaks down connective tissues in tough cuts of meat, leaving them quite tender and fall-off-the-bone good.

I usually cook this dish in a large soup pot (I start it a couple of hours before I intend to serve it), but if you’re pressed for time, you can easily prepare this in a pressure cooker.

Give my recipe a try. I think you’ll like it. 🙂

Tomato-Braised Pork Ribs

image

Ingredients:

  • 2 slabs baby back pork ribs
  • 1 cup soy sauce
  • 1/2 cup white vinegar
  • 2 tablespoons chopped garlic
  • 1 medium onion, chopped
  • 2 cups water
  • 1 can (28 ounces) crushed tomatoes
  • 1/2 cup blackstrap molasses

Directions:

Rinse each slab of ribs, then trim off any excess fat. Separate each rib then place into a large pot over medium high heat.

image

Add the soy sauce, vinegar and garlic to the pot. Stir to evenly coat each rib with the liquid and garlic. Cook for about 5 minutes, stirring occasionally to ensure even browning.

image

Add the onions and water to the pot.

image

Stir in the crushed tomatoes and molasses. Blackstrap molasses is not too sweet, but adds just the right amount of sweetness for this dish. If you don’t have molasses, you can add a couple of tablespoons of brown sugar.

image

Now it’s time to start the braising process. Cooking the ribs in this delicious tomato sauce, long and over medium-low heat, is the key to creating fall-off-the-bone yumminess. Bring the sauce to a boil then reduce the heat to medium-low. Place a sheet of heavy duty aluminum foil over the top of the pot, tightly sealing it. Place a lid over the foil. Simmer the ribs for at least 2 hours.

This is what the ribs looked like before braising.

image

This is the “after” photo. Notice how the sauce reduced and thickened (it’s so good poured over steamed white rice!).

image

Serve with hot white rice (don’t forget the sauce, too) and ENJOY!

image

The Best Buttermilk Pancakes

Pancakes are a favorite breakfast in our house. Fluffy, buttery, and dripping with thick maple syrup — it’s a great way to start the day.

My oldest daughter started her love for cooking by making a basic recipe for pancakes. She was only four years old. She’d wake up after a good night’s sleep, find her way into my room, and pull me into the kitchen. She’d climb up on her step stool and pull out her little Mickey Mouse mixing bowl then proceed to tell me the ingredients she’d need to make pancakes.

Get your kids into the kitchen and let them have their hand at making breakfast for your family. With my recipe, you won’t need to buy packaged pancake mix after you see how easy it is to make delicious, fluffy buttermilk pancakes from scratch.

image

image

Give my recipe a try. I think you’ll like it. 🙂

The Best Buttermilk Pancakes

Ingredients:

  • 1 cup buttermilk
  • 1 large egg
  • 1 tablespoon sugar
  • 1 teaspoon vanilla extract
  • 1 tablespoon real maple syrup
  • 1 tablespoon unsalted butter, melted and cooled
  • 1 cup flour
  • 1/2 teaspoon baking powder
  • 1/2 teaspoon baking soda
  • 1/4 teaspoon salt

Directions:

In a small mixing bowl, whisk together the buttermilk, egg, sugar, vanilla, maple syrup and butter. Mix in the remaining ingredients.

Heat a non-stick skillet (I use a cast-iron skillet and butter it) over medium heat.

Pour slightly less than 1/2 cup of batter onto the heated skillet. When you see small bubbles on the surface and around the sides of the pancake, flip it over. Cook until the edge of the pancake is no longer wet-looking.

Look how tall it rose! 🙂

Top with butter and maple syrup and ENJOY! 🙂

Berry-licious Blueberry Muffins

I love blueberry muffins, but I absolutely hate the packaged blueberry muffin mix which turns the batter a bluish-purple after you add canned (and tiny) blueberries.

Blueberries are my favorite when it comes to fruit muffins, but you can easily make this into a loaded berry muffin by mixing you favorite berries — a combination of raspberries, cranberries, and of course, blueberries are delicious too.

I use frozen berries for this recipe. While fresh berries are delicious, frozen sweet berries are always available and “in season.”

I also top these muffins with a sweet mixture of lemon zest and sugar. The perfumy, aromatic oils in the lemon zest gives these muffins a hint of lemon flavor that compliments the berries so well.

This recipe makes a little more than a dozen muffins. You’ll have just a bit of batter leftover after filing the muffin tin. Make mini loaves or use a second muffin tin to use up the extra batter.

Berry-licious Blueberry Muffins

image

Ingredients for the Muffins:

  • 2 1/2 cups all-purpose flour
  • 2 1/2 teaspoons baking powder
  • 1 teaspoon salt
  • 2 tablespoons dry Buttermilk Powder (you can find this in the baking section of your grocery store)
  • 2 large eggs
  • 1 cup plus 2 tablespoons white, granulated sugar
  • 1 stick unsalted butter, melted
  • 1/4 cup vegetable oil
  • 1 cup water
  • 1 1/2 teaspoons vanilla extract
  • 2 cups frozen blueberries

Ingredients for the Topping:

  • 1 cup frozen blueberries plus 1 teaspoon white, granulated sugar
  • The zest of one large lemon plus 1/2 cup white, granulated sugar

Directions:

Make the toppings:

1. Make a blueberry sauce by placing 1 cup of frozen blueberries with 1 teaspoon sugar in a small saucepan over medium heat. Bring the berries to a simmer. As the berries begin to soften, use the back of a cooking spoon to slightly mash the berries. Cook the mixture for about 5-8 minutes, or until the sauce reduces and thickens. Remove the pan from the heat and set aside.

image

image

2. In a small bowl, mix the lemon zest and 1/2 cup sugar together. Set aside.

When you zest the lemon, make sure to get only the yellow lemon rind, not the white pith. After zesting the lemon, chop the zest into smaller pieces then mix with the sugar.

image

image

Mix the batter:

1. Pre-heat the oven to 425 degrees. Spray a muffin tin with baking spray or non-stick (butter flavored) cooking spray. Or, line each cup with a muffin liner.

2. In a large mixing bowl, mix together the dry ingredients (flour, baking powder, salt, buttermilk powder).

image

3. In another mixing bowl, place the eggs and sugar. Using a hand mixer on medium speed, beat the eggs and sugar until creamy. Mix in the butter, oil, water and vanilla extract.

image

4. Mix the wet ingredients with the dry ingredients, mixing only until the batter is moistened (a few lumps are okay). Do not overmix.

image

5. Fold in the blueberries.

image

image

6. Fill each muffin cup 3/4 full. These muffins really rise high, so don’t overfill each muffin cup.

image

7. Place a heaping teaspoonful of the blueberry sauce on top of the batter in each muffin cup.

image

8. Using the handle of a spoon (a chopstick works really well here), swirl the blueberry sauce into the batter.

image

9. Evenly sprinkle the lemon-sugar mixture over each muffin.

image

10. Bake at 425 degrees for 18-20 minutes or until golden brown. A toothpick inserted into the center should come out clean (a few crumbs sticking to the toothpick is okay). Let the muffins cool in the tin for 5 minutes then transfer to a wire rack to finish cooling.

image

If you have a mini loaf pan, you can make mini loaves with the extra muffin batter. You should have enough batter left (after filling the muffin tin) to make 3 mini loaves. I doubled this recipe so I made 6 mini loaves with the extra batter (after filling 2 muffin tins).

image

Serve and ENJOY!

image

image

Escabeche

Escabeche is a dish made with fried fish and vegetables with a ginger-vinegar sauce. It’s usually prepared for special occasions, but since we’re in the middle of the Lenten season, this is a great dish to prepare for meatless Friday meals.

The traditional Chamorro version uses tuba vinegar and orange ginger (mango’, in Chamorro). I prefer using fresh ginger for this dish, but I rarely find it in the Asian stores where I live. Ground tumeric makes a great substitute for fresh ginger.

I remember how my mom would go to the back yard and pull up some orange ginger roots. She’d clean and peel the ginger, place the pieces in heavy duty aluminum foil, then she’d pound the heck out of the ginger with a hammer. 😉

I love fried fish, and this dish is usually made with fried fish. I’m trying to eat healthier these days, so I opted to bake instead of fry my fish. Use any good white fish like tilapia, parrot fish, or one of my favorites–orange roughy.

Give my recipe a try. I think you’ll like it. 🙂

Escabeche

wpid-Photo-20140320193526.jpg

Ingredients:

  • 1 large broccoli head, cut into little “trees” about 3 inches long
  • 1 medium cabbage, cut into large pieces (I like using Chinese cabbage for this dish)
  • 1 large eggplant or 4 medium long (Japanese or Chinese) eggplants, sliced lengthwise, 1/4 inch thick
  • 3 to 4 cups water
  • 1 to 1 1/3 cups white vinegar
  • 1 1/2 teaspoons salt (plus more for seasoning the fish)
  • 6 to 8 teaspoons tumeric (plus more for seasoning the fish)
  • 1 tablespoon chopped garlic
  • 3 pounds white fish (tilapia and orange roughy are good for this dish)
  • 1 tablespoon garlic powder
  • Black pepper, about a teaspoon
  • Optional: Other vegetables of your choosing, like sliced onions or leafy greens

Directions:

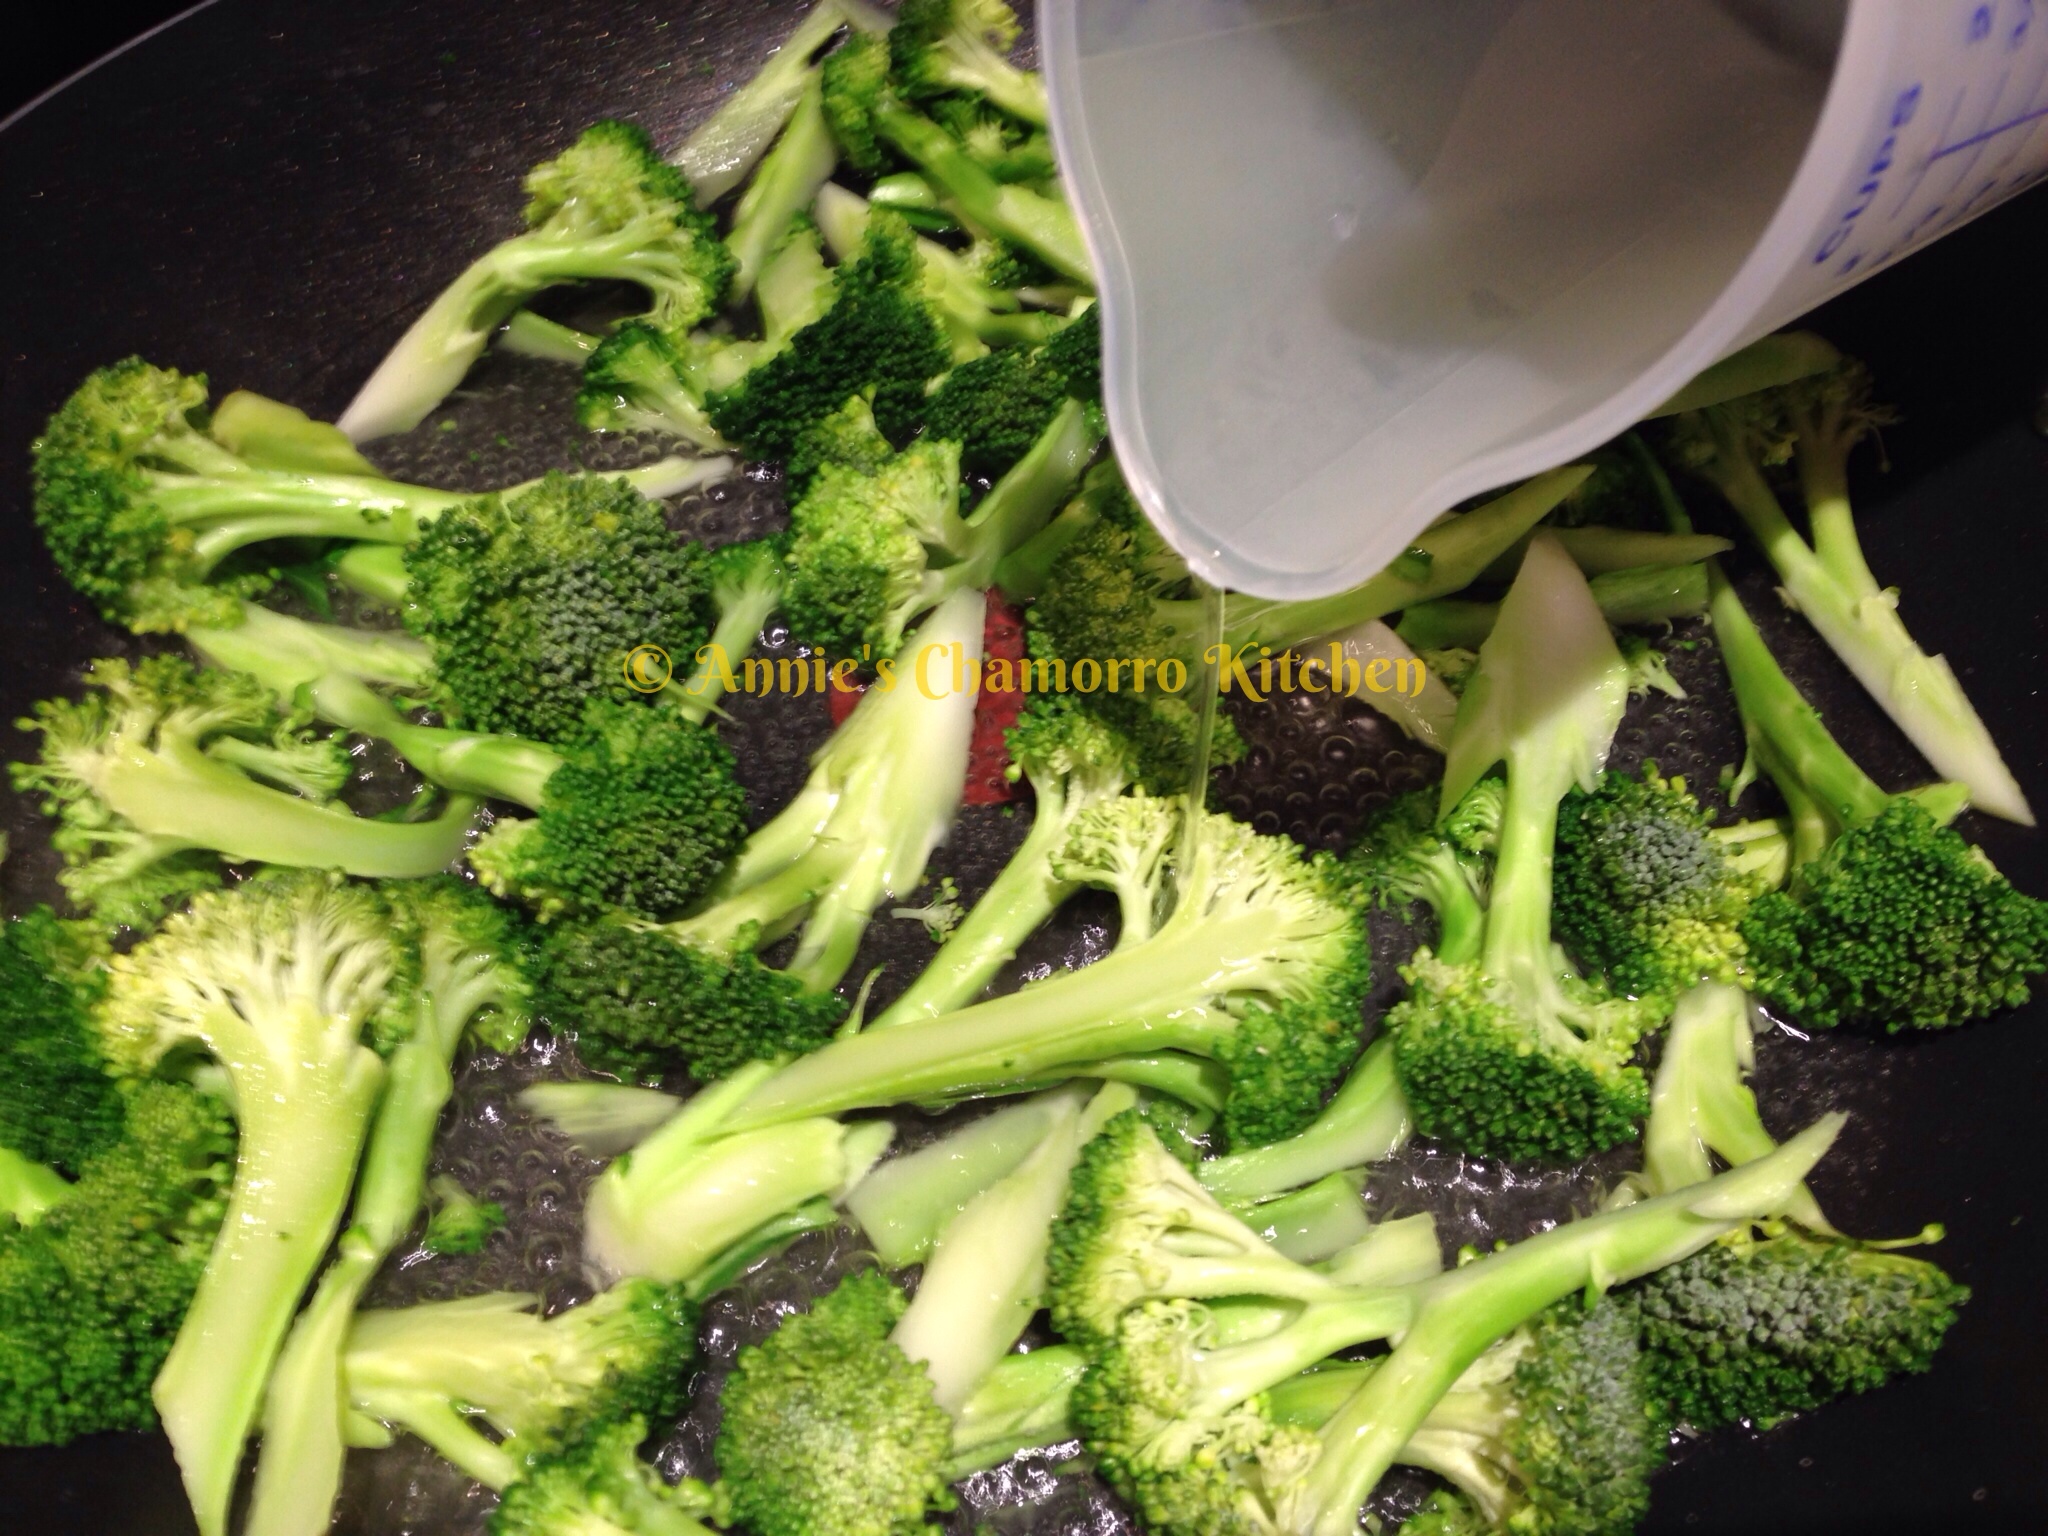
Place a large skillet or wok over medium high heat. I have a 14″ skillet that I love to use for making fried rice, stir-fried dishes, or making dishes like escabeche. You want a fairly large pot that is wide across the top so that you can somewhat steam the vegetables, not boil them.

Pour 1 cup of water into the pan and bring it to a boil.
wpid-Photo-20140320192521.jpg

Add 1/2 teaspoon salt to the boiling water.
wpid-Photo-20140320192521.jpg

Add the broccoli to the pan.
wpid-Photo-20140320192521.jpg

Pour 1/3 cup of vinegar into the pan.
wpid-Photo-20140320192521.jpg

Sprinkle 2 teaspoons of tumeric over the broccoli.
wpid-Photo-20140320192521.jpg

Use a pair of tongs to gently stir the mixture around in the pan, just until the tumeric is mixed into the liquid.
wpid-Photo-20140320192521.jpg

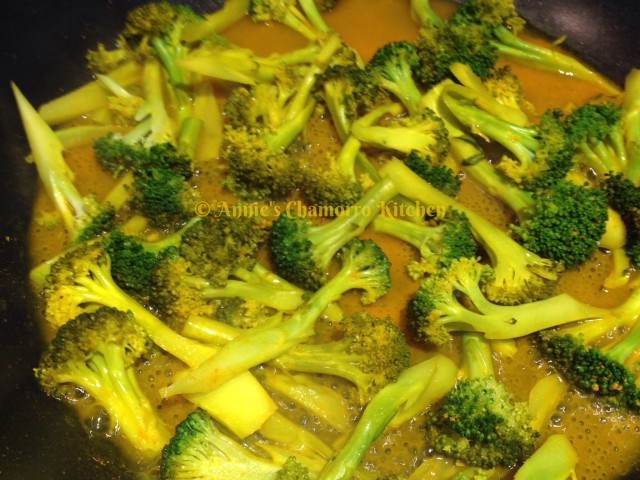
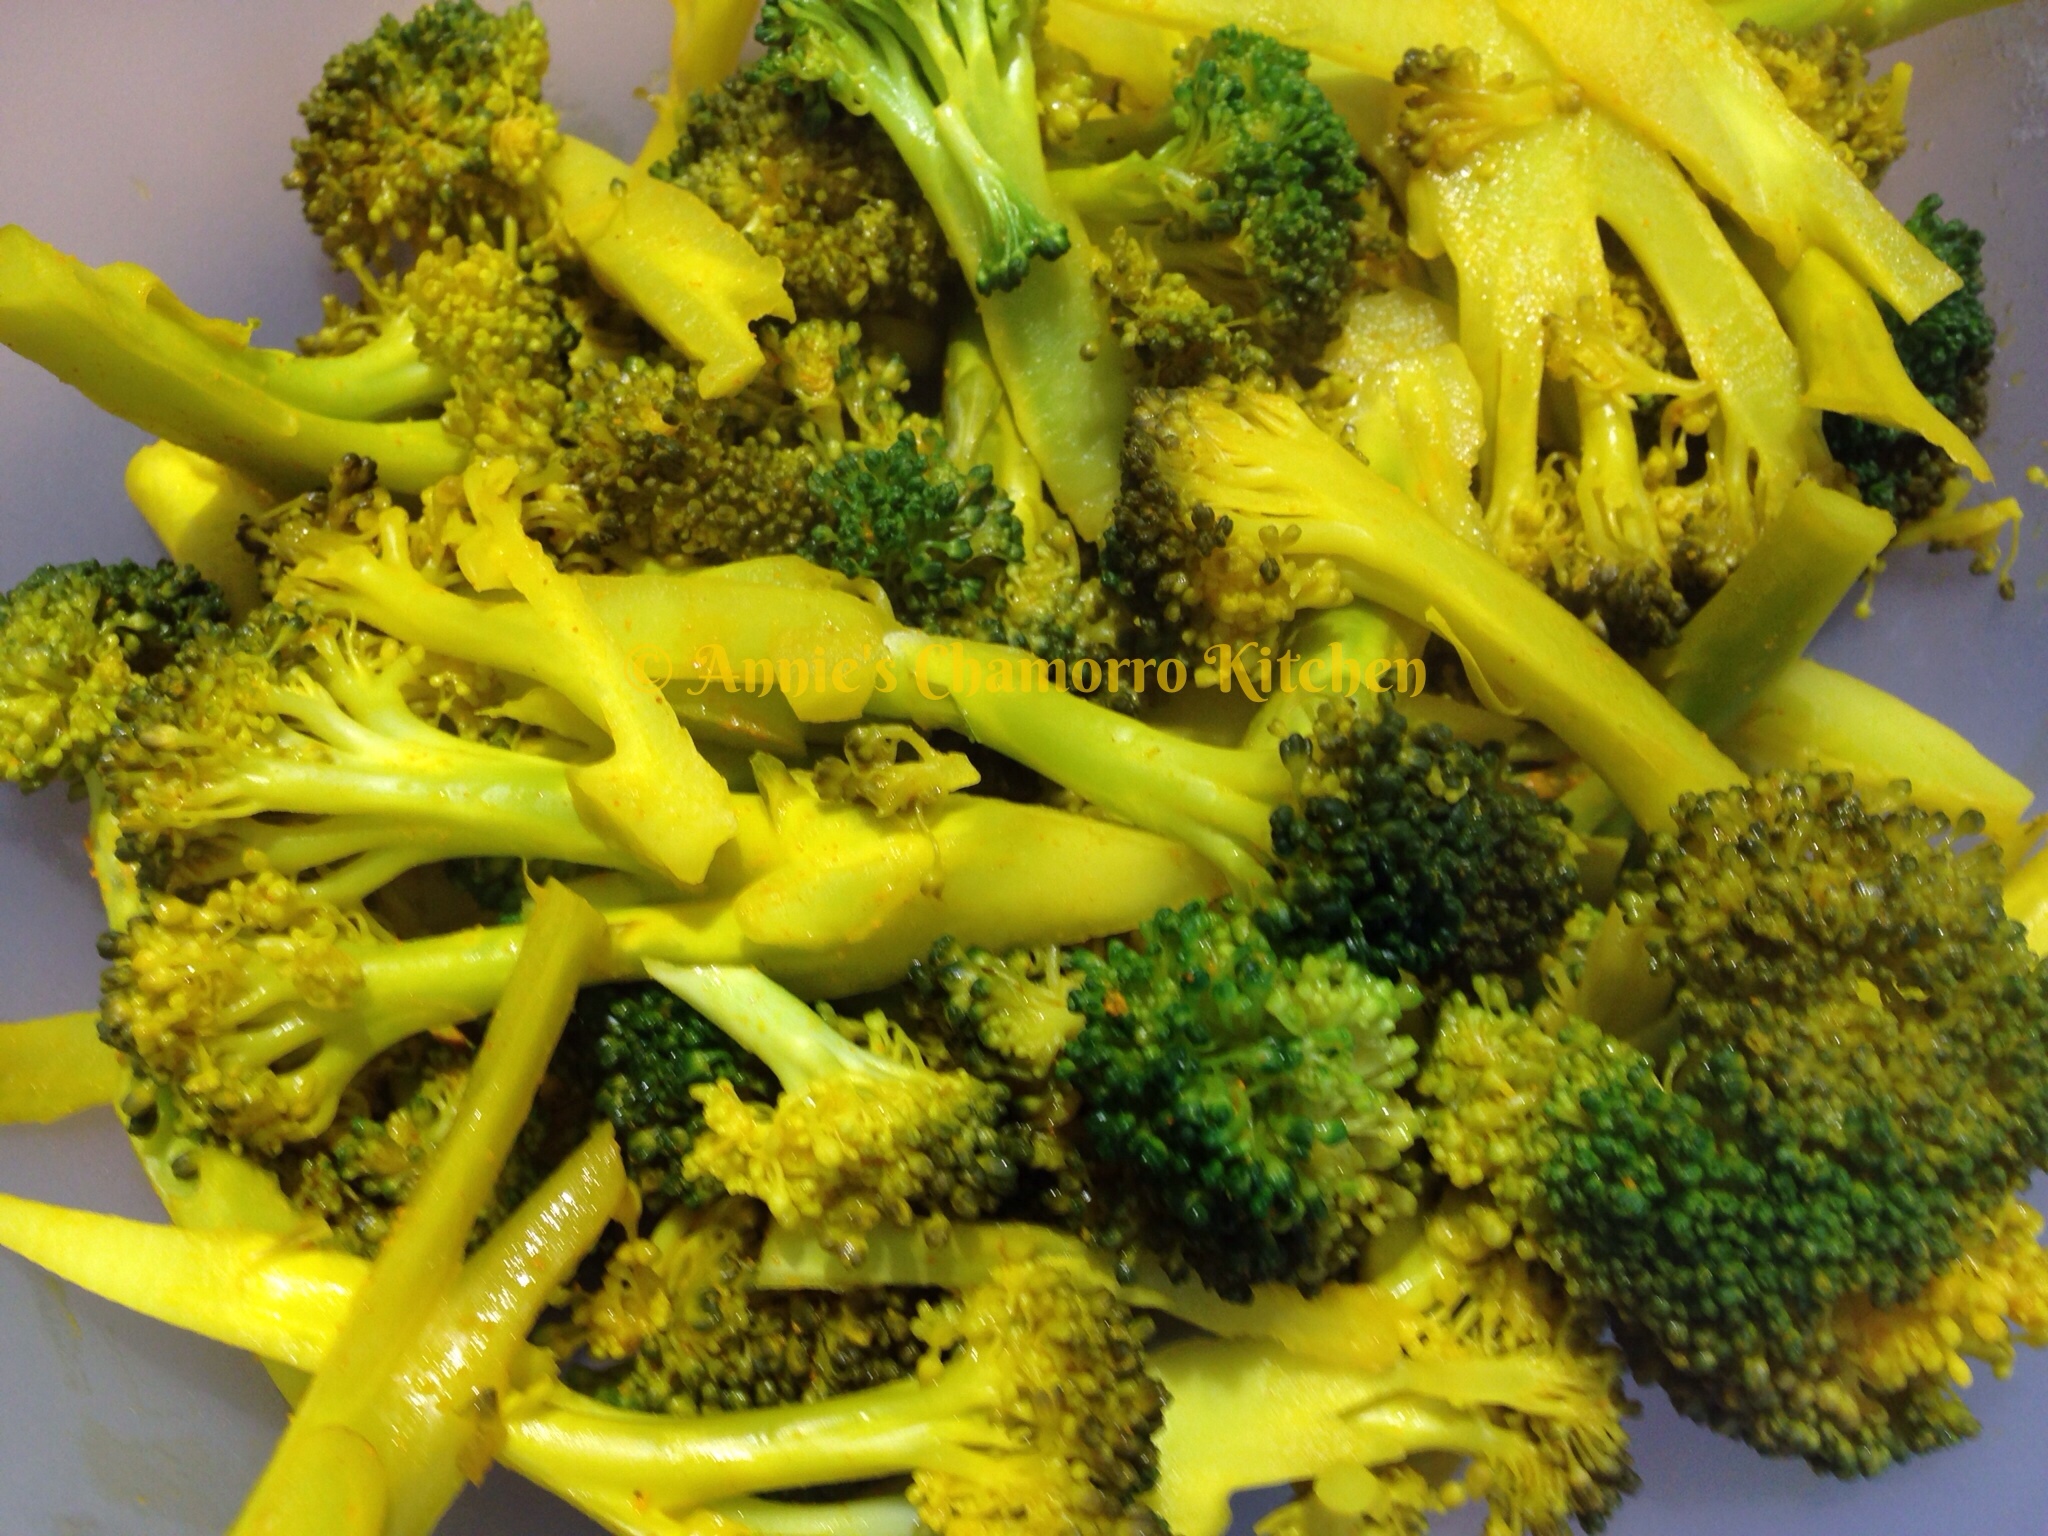
Cook the broccoli just until it is slightly wilted, or cooked to your liking. Place the broccoli into a medium sized mixing bowl, leaving the tumeric sauce in the pan.
wpid-Photo-20140320192521.jpg

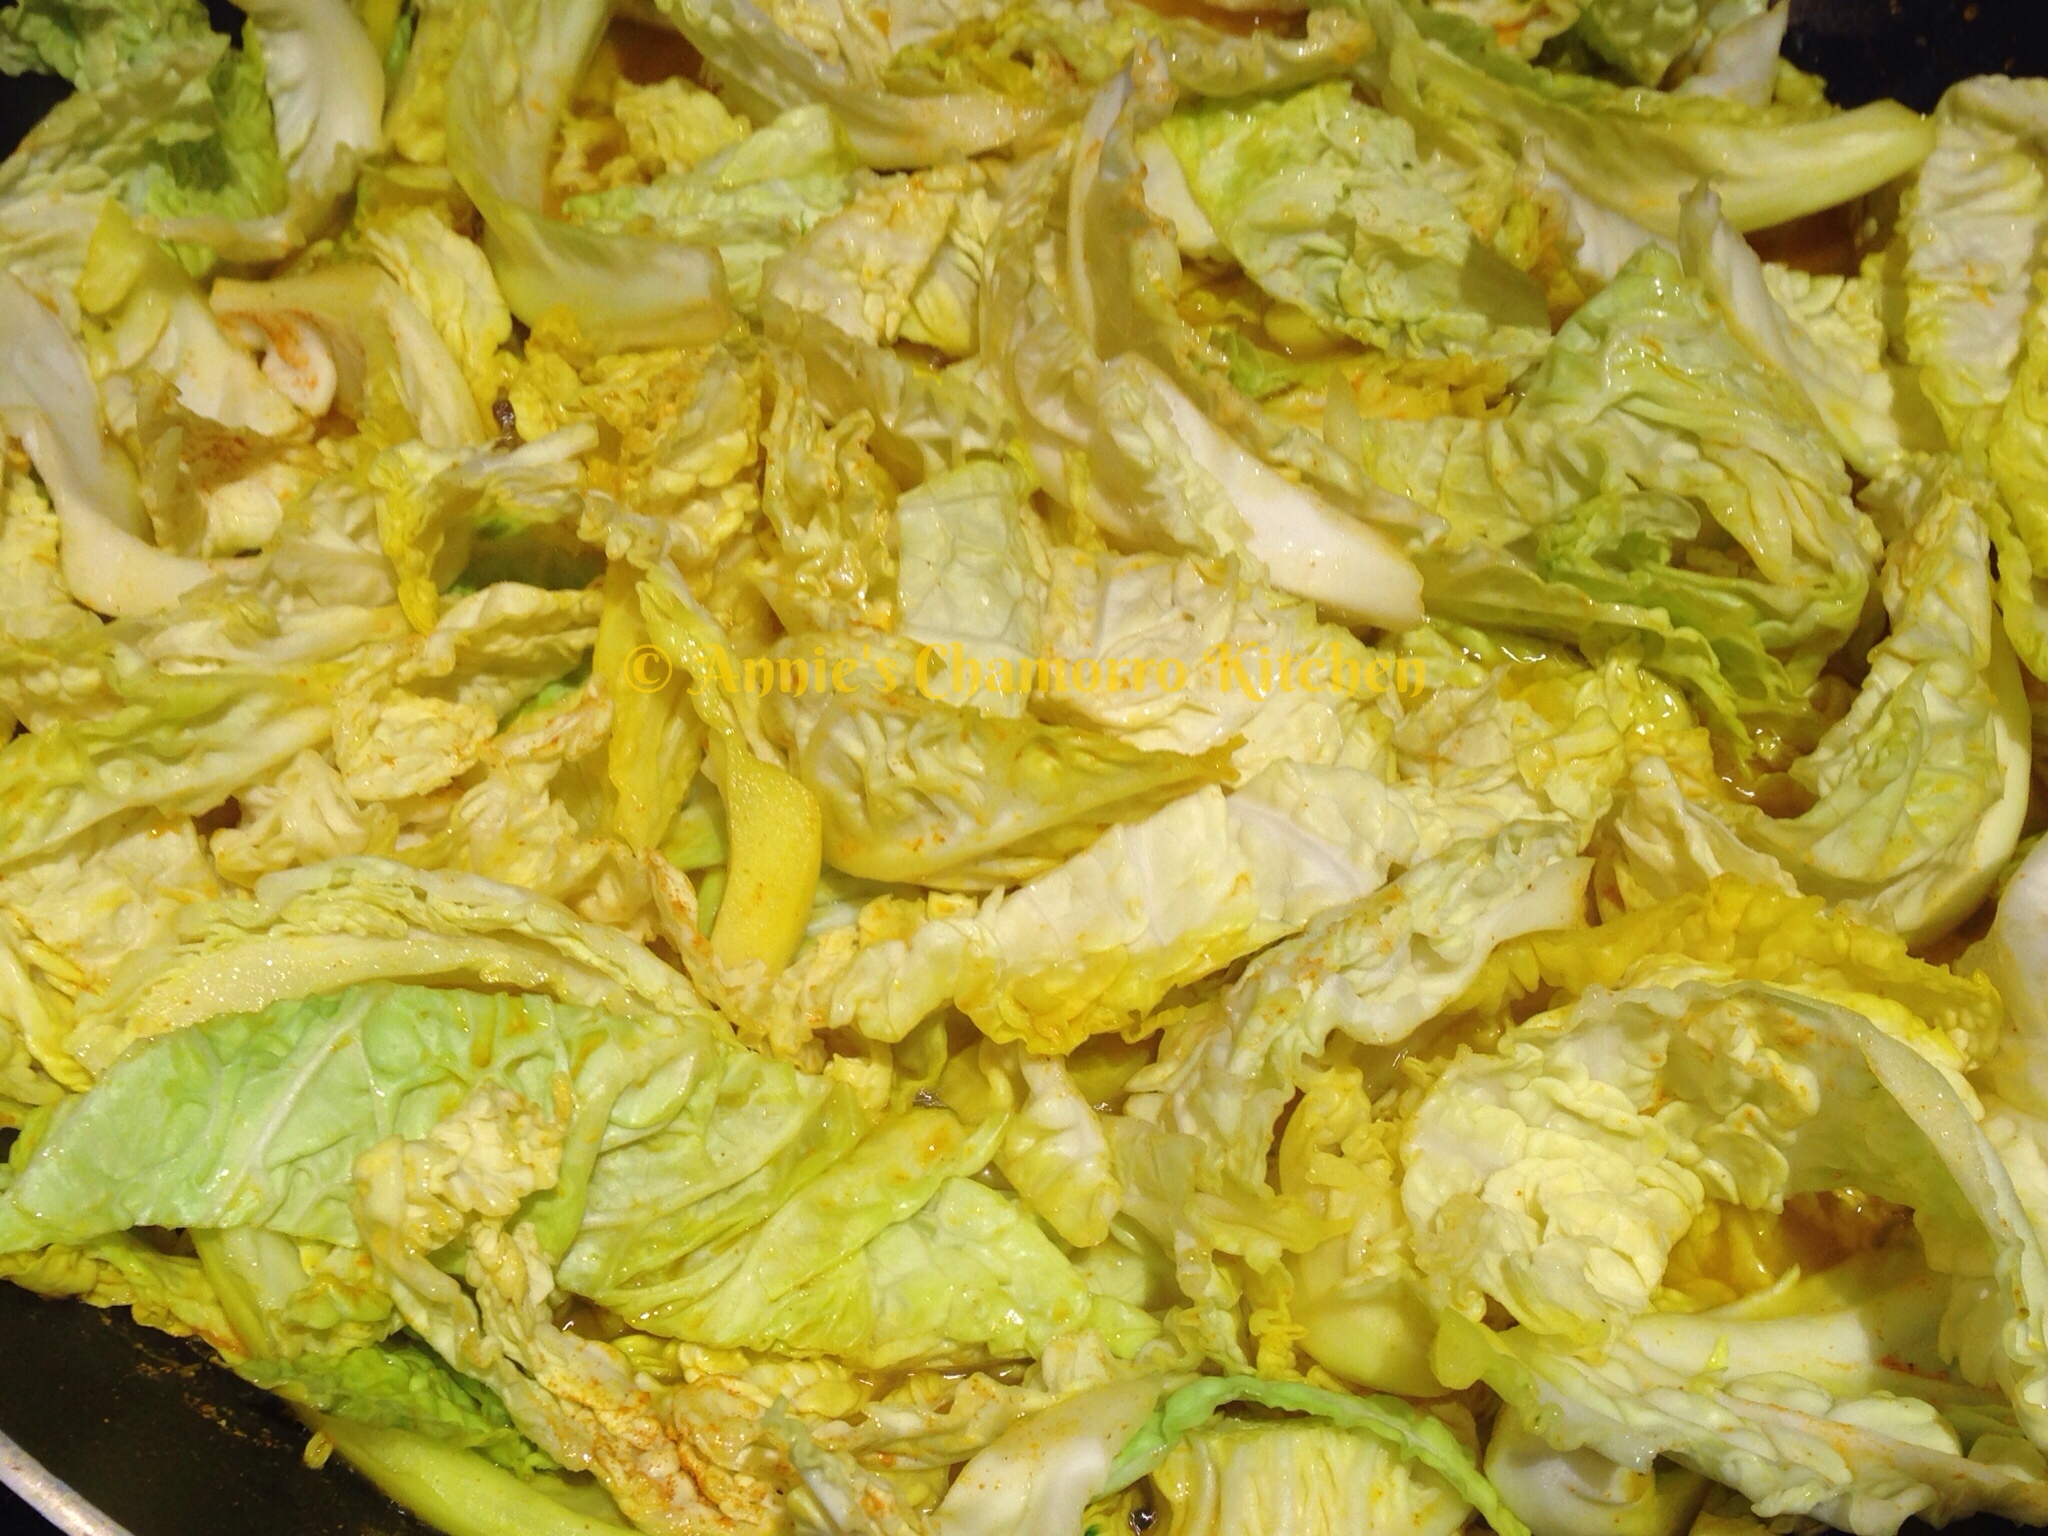
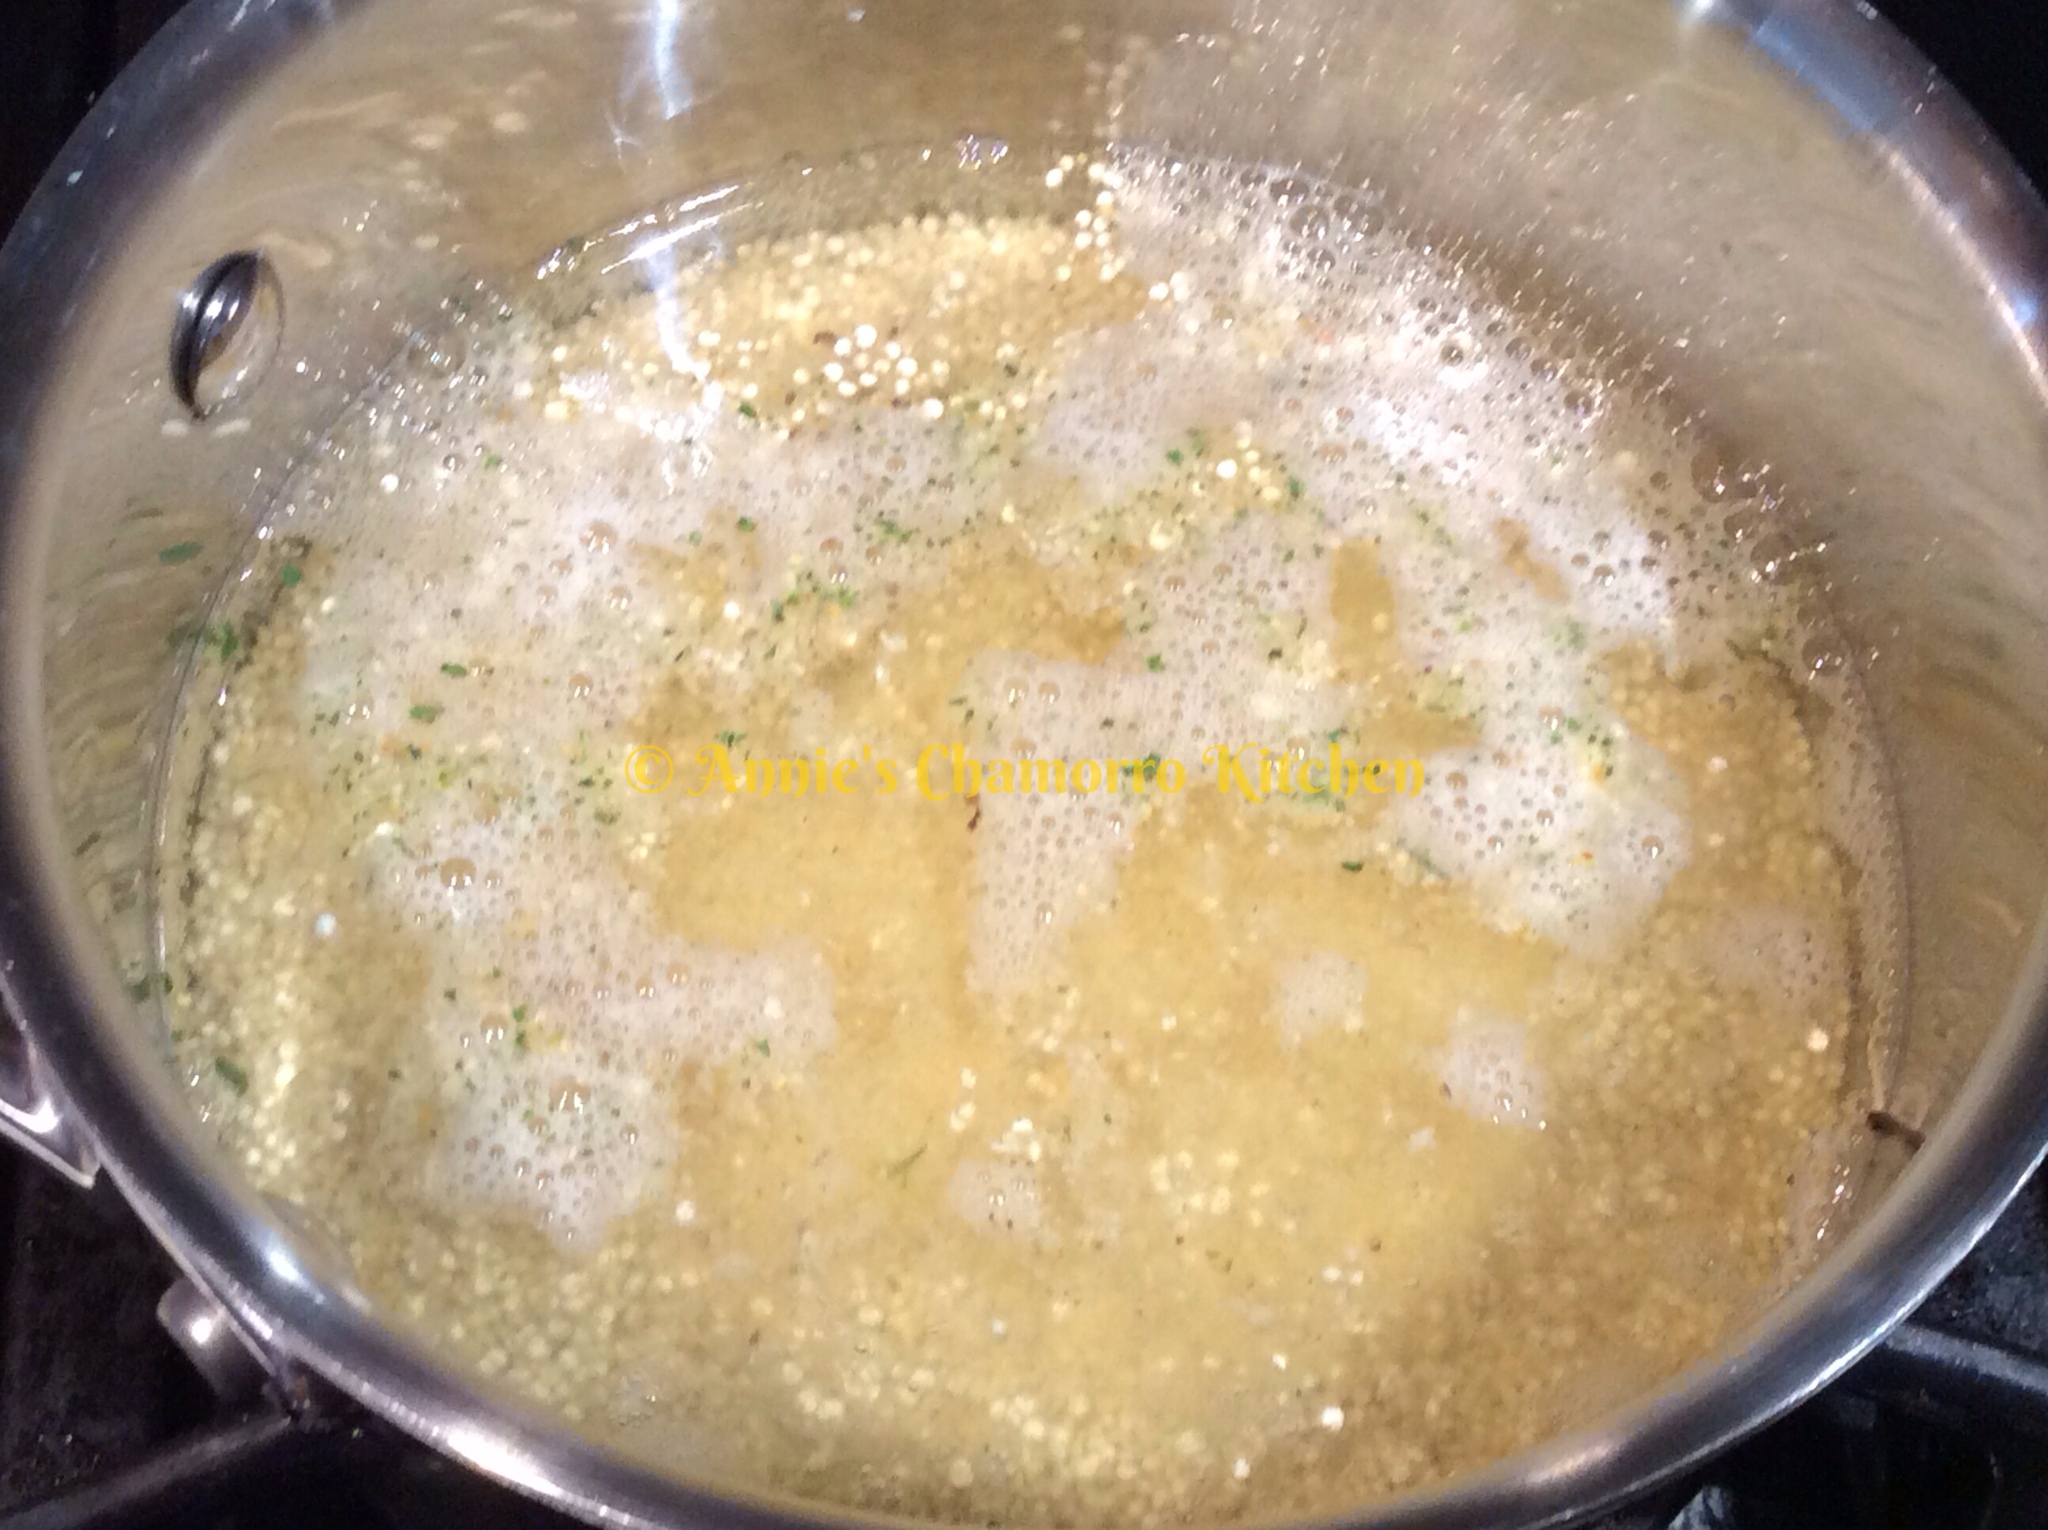
If you don’t have much liquid in the pan, add another cup of water and 1/3 cup of vinegar, 1/2 teaspoon salt and 2 more teaspoons of tumeric. Bring the liquid back up to a boil then add the cabbage leaves.
wpid-Photo-20140320192521.jpg

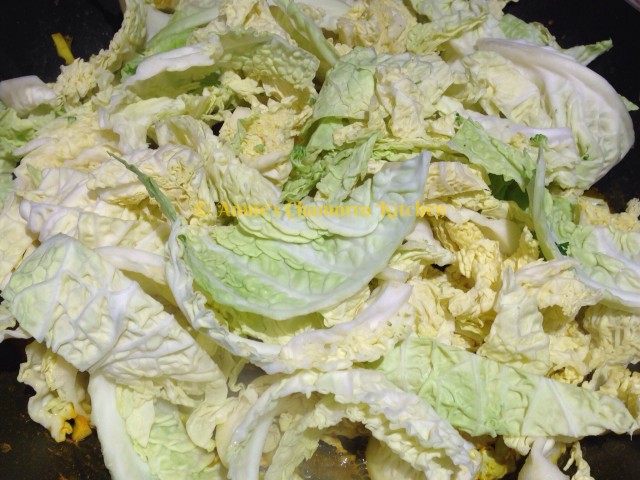
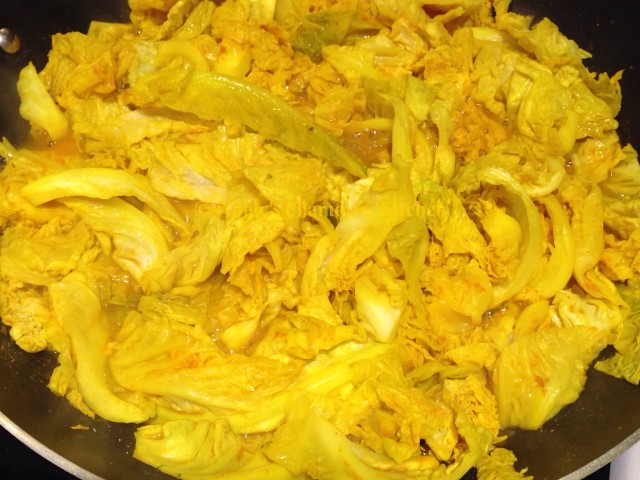
Use the tongs to turn the cabbage, evenly coating each leaf in tumeric sauce. Cook until the leaves begin to wilt.
wpid-Photo-20140320192521.jpg

Place the cooked cabbage into the bowl of broccoli, leaving the liquid in the pan once again.
wpid-Photo-20140320192522.jpg

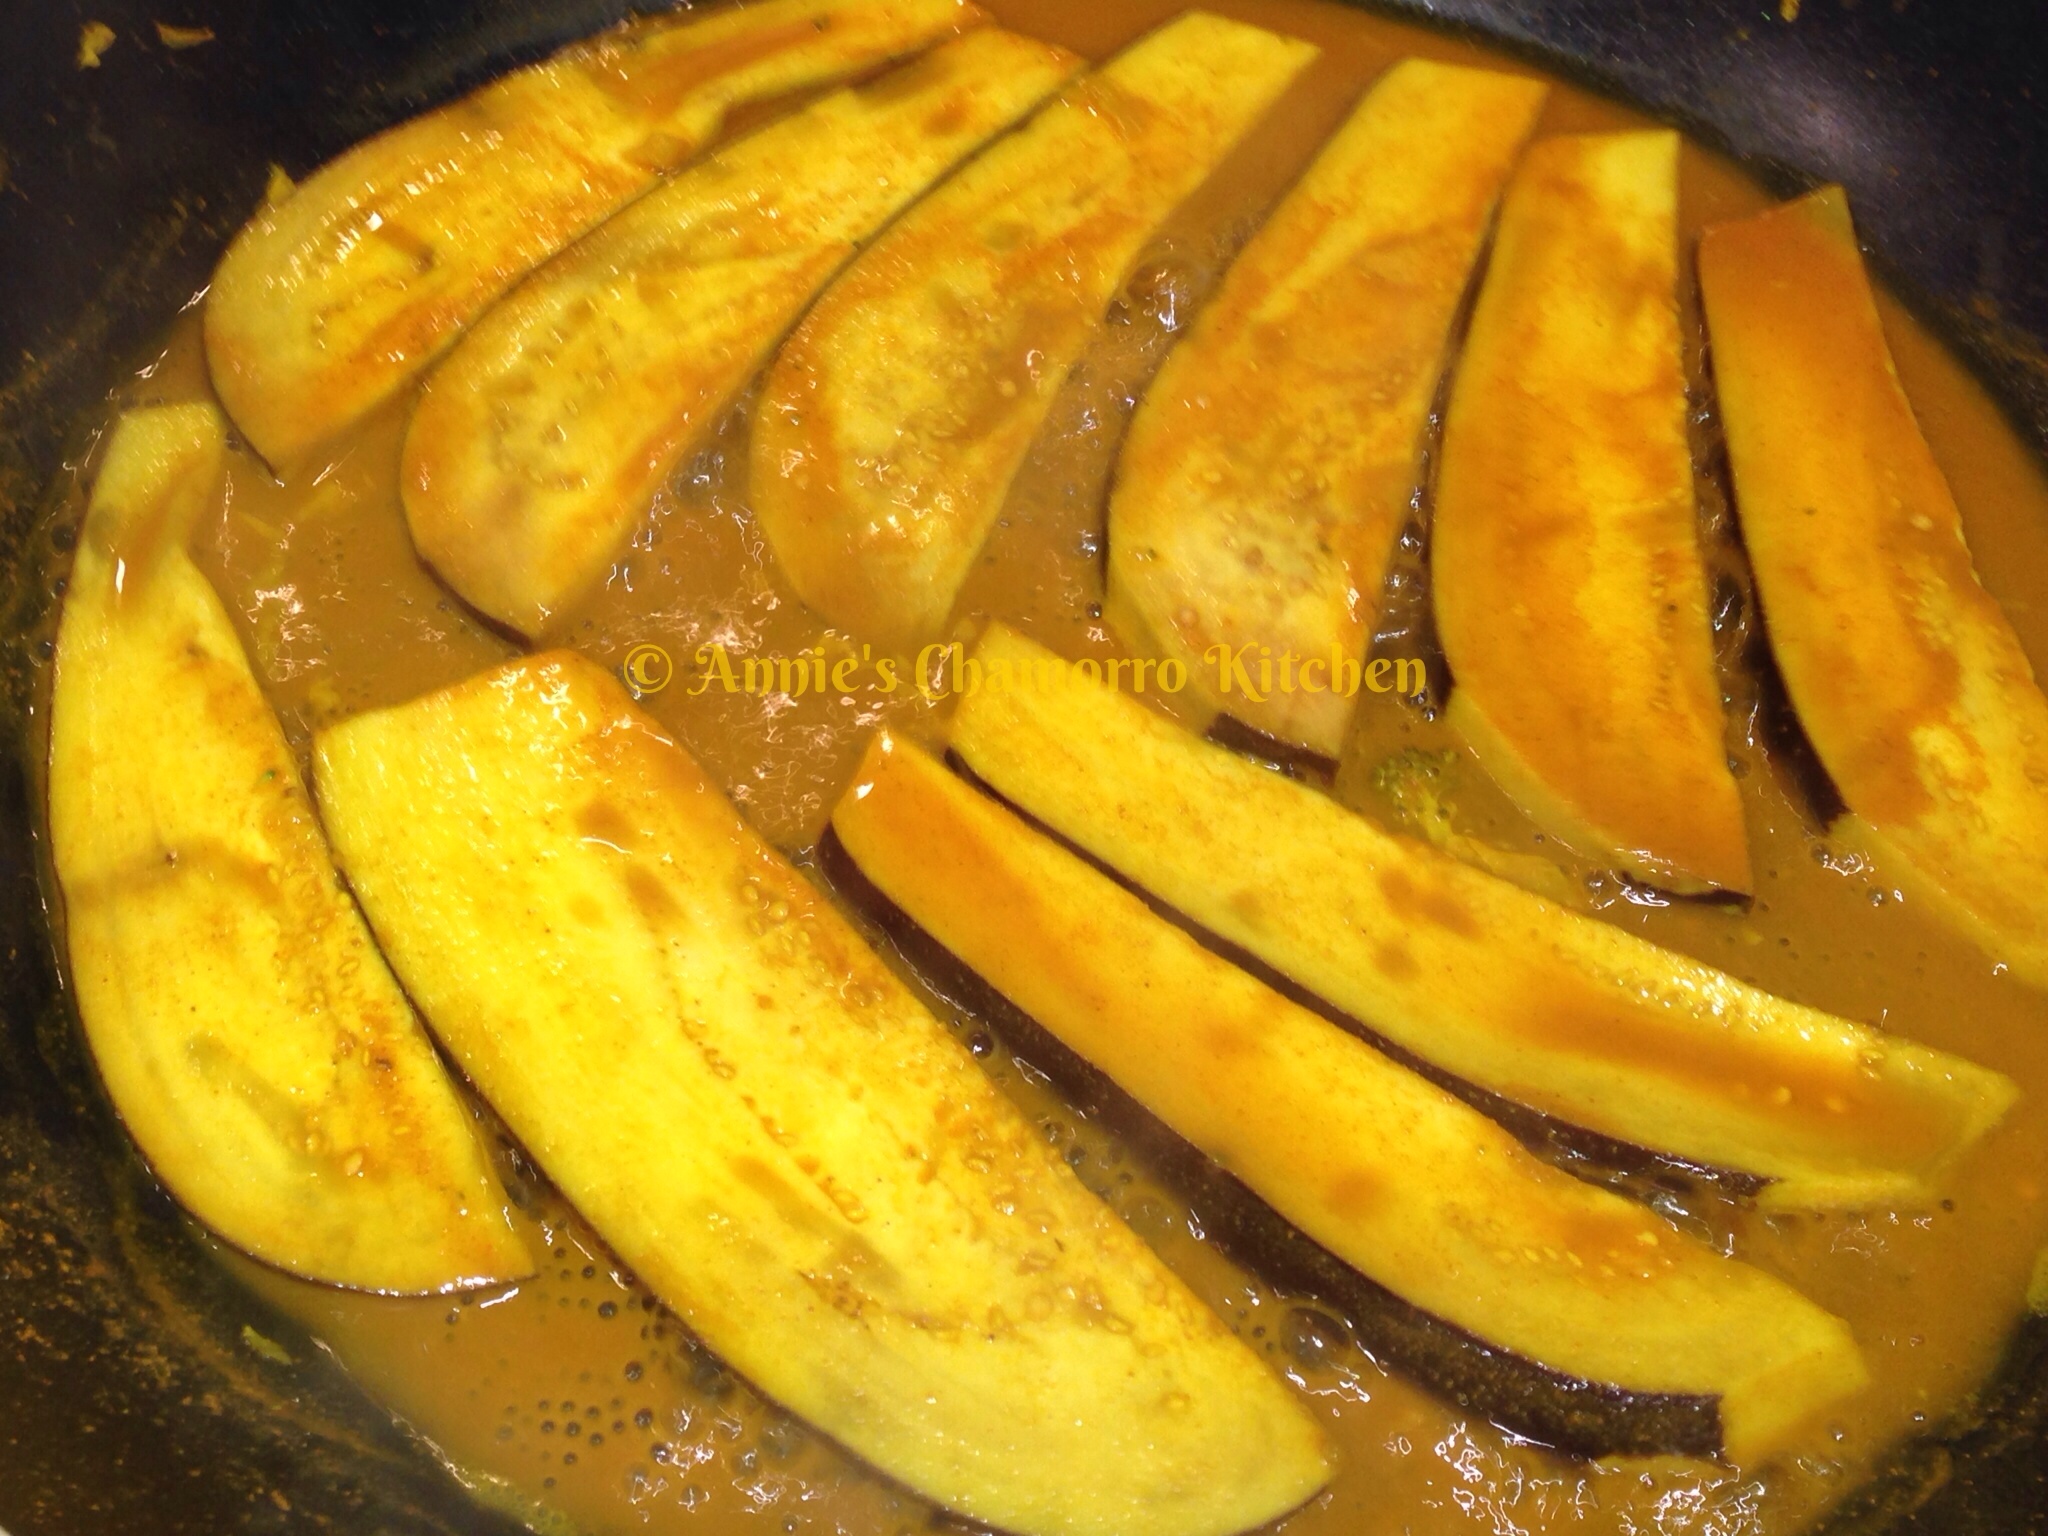
As with the step before, if you don’t have much liquid in the pan, add another cup of water, 1/3 cup vinegar, 1/2 teaspoon salt, and 2 more teaspoons tumeric.

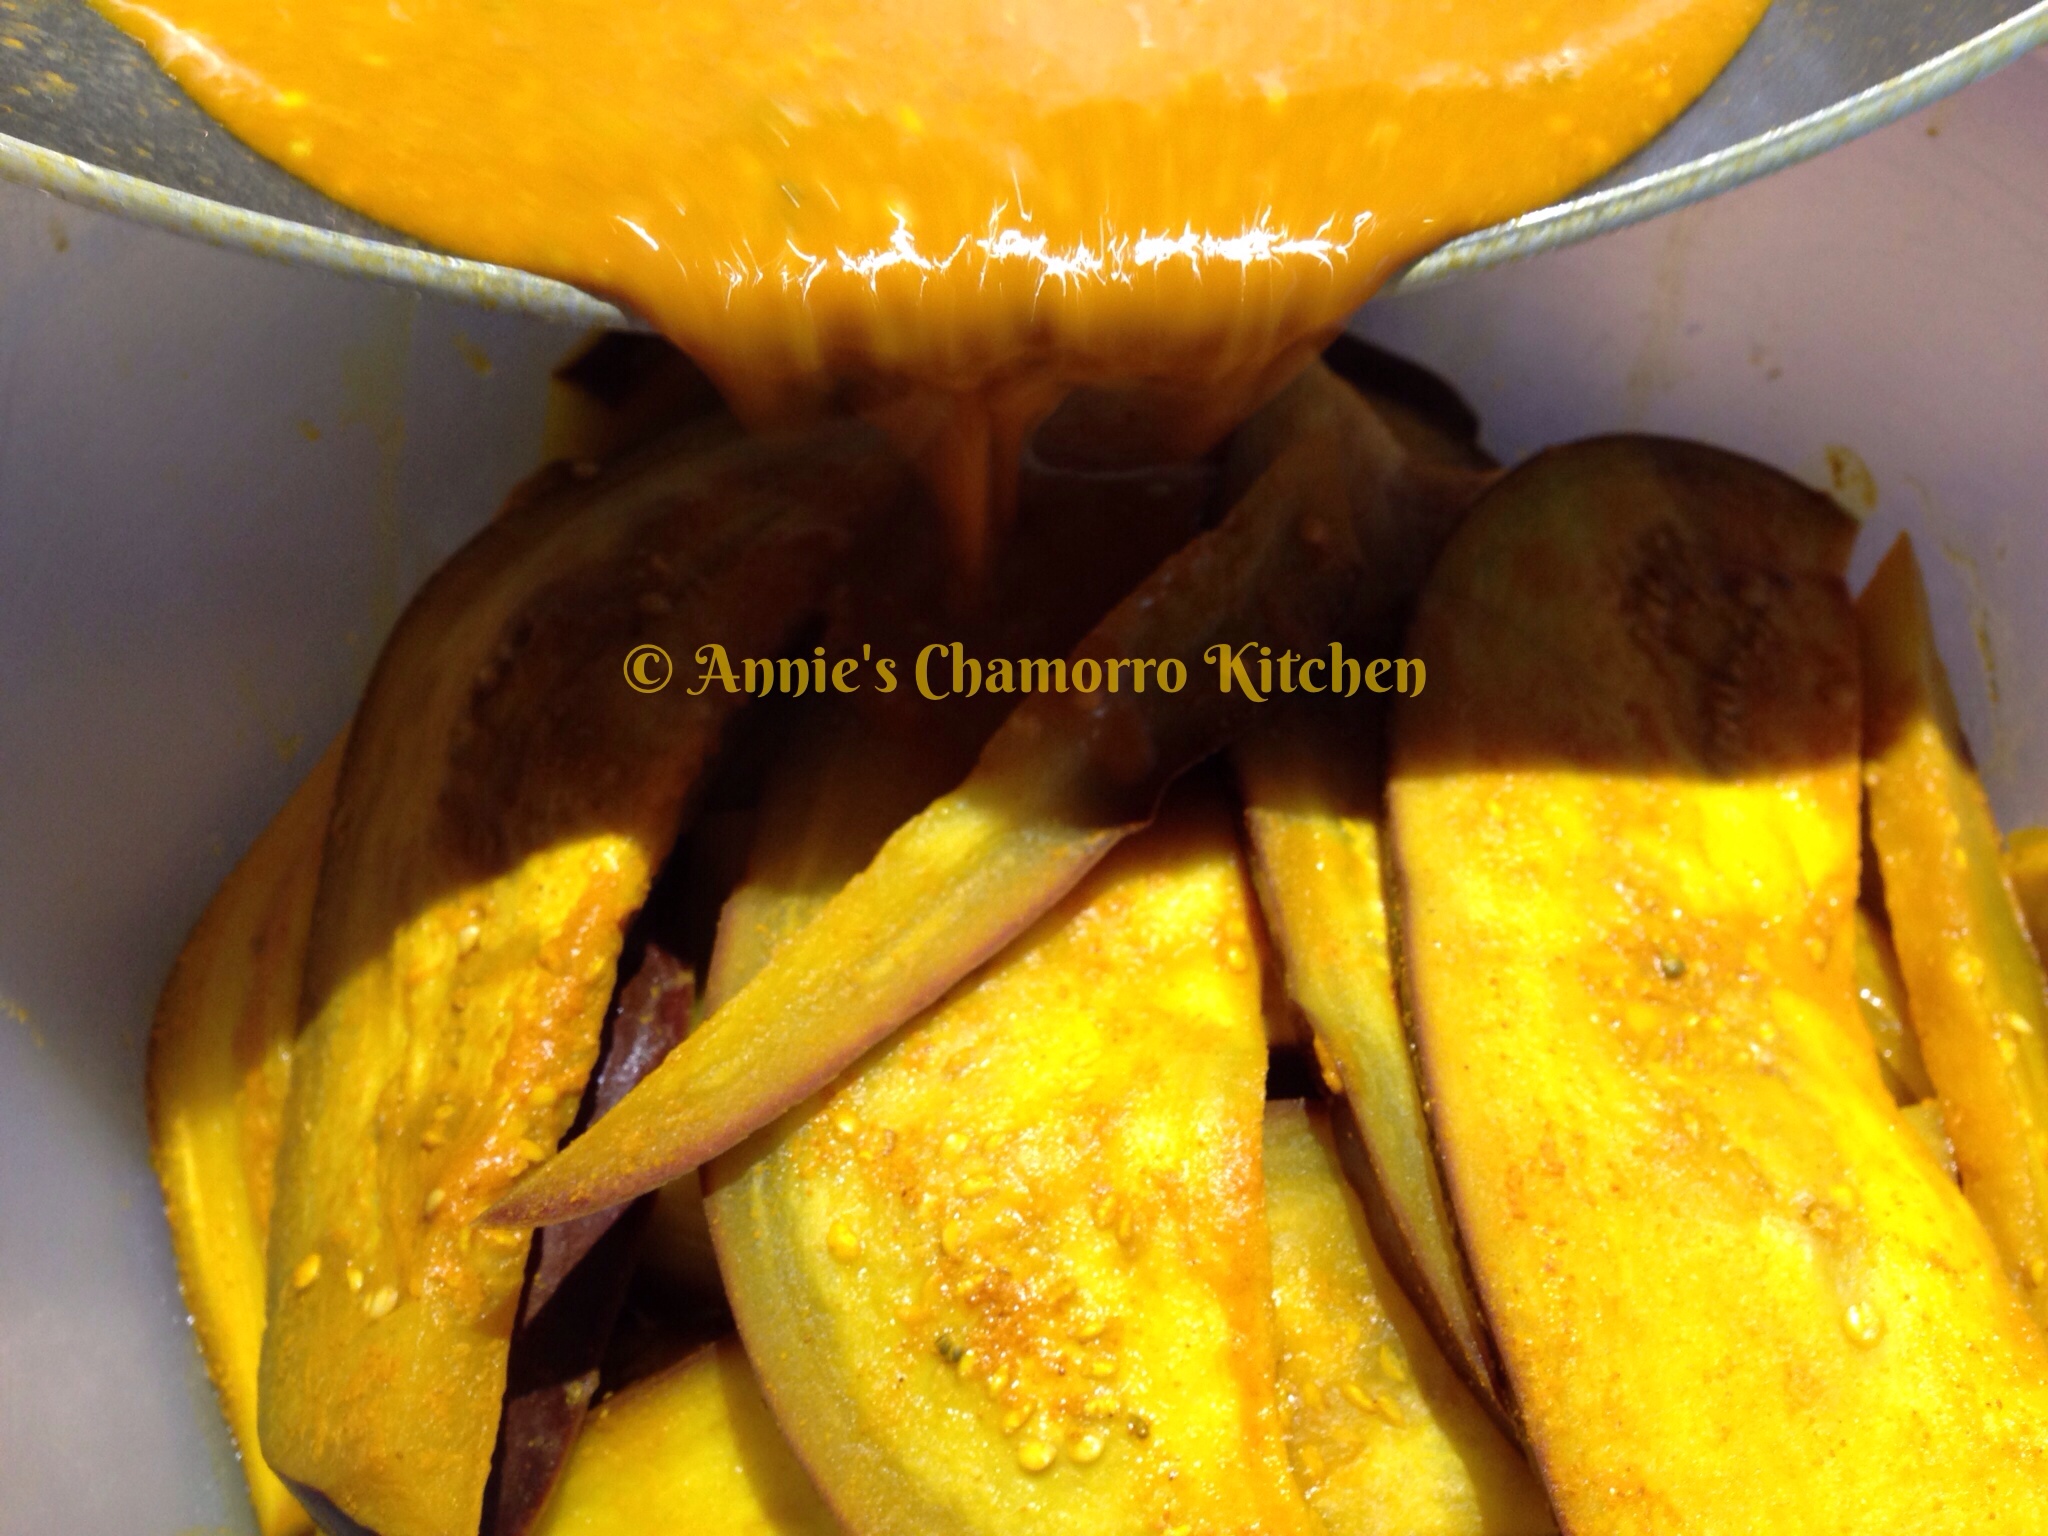
Bring the liquid to a boil then add the sliced eggplant to the pan. Turn the heat down to medium low (the eggplant takes longer to cook and your liquid may dry up completely as the eggplant cooks). Cook the eggplant for about 4 minutes then flip the slices over and cook the other side for another 4 minutes (or cook until the eggplant softens).
wpid-Photo-20140320192522.jpg

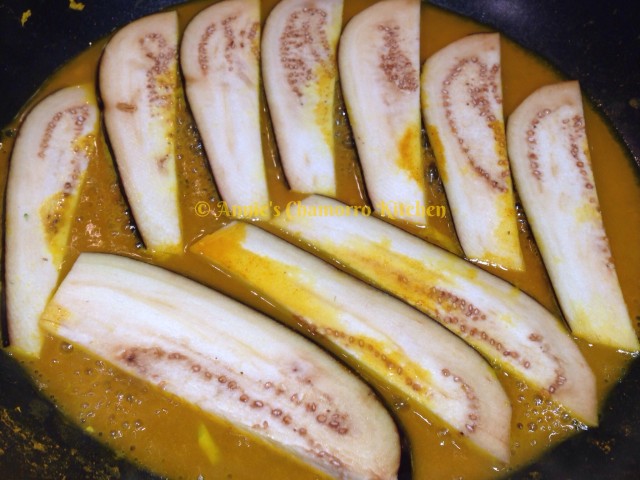
When the eggplant is done, remove it from the pan and place it into the bowl with the other cooked vegetables.
wpid-Photo-20140320192522.jpg

Repeat this process (of cooking the vegetables) for any remaining vegetables you are adding to the dish (like onions or kangkun leaves).

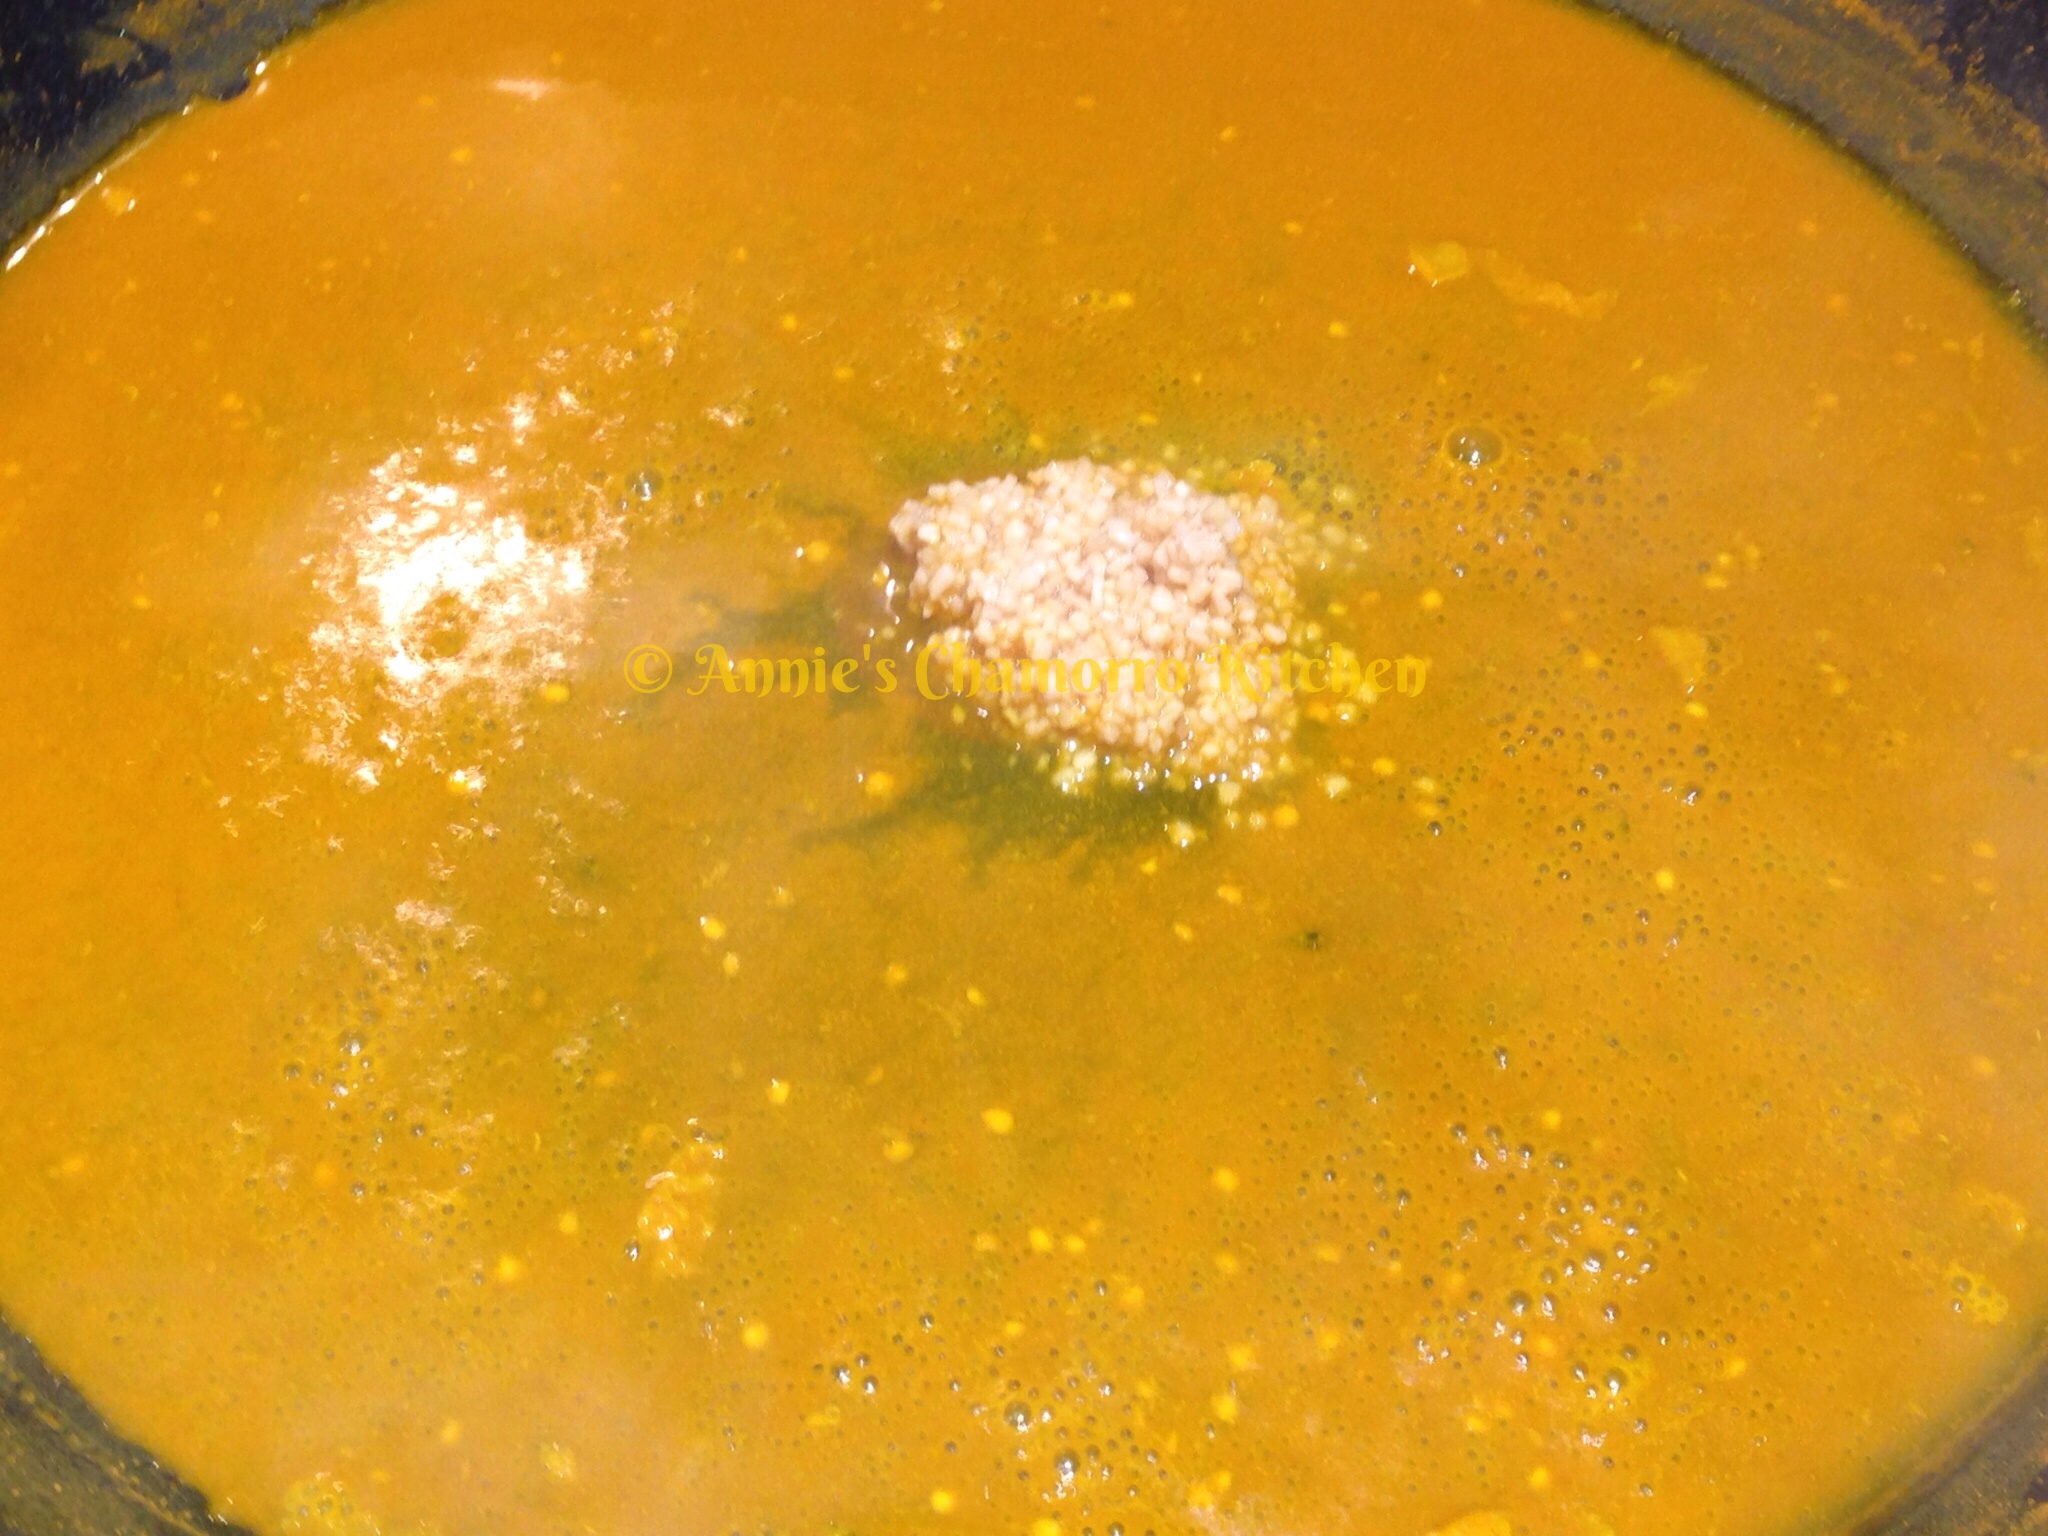
If your liquid dries up, add another cup of water, 1/3 cup vinegar, 1/2 teaspoon salt, and 2 teaspoons tumeric. Add the garlic to the pan. Turn the heat back up to medium high. Cook the garlic sauce for a couple of minutes.
wpid-Photo-20140320192522.jpg

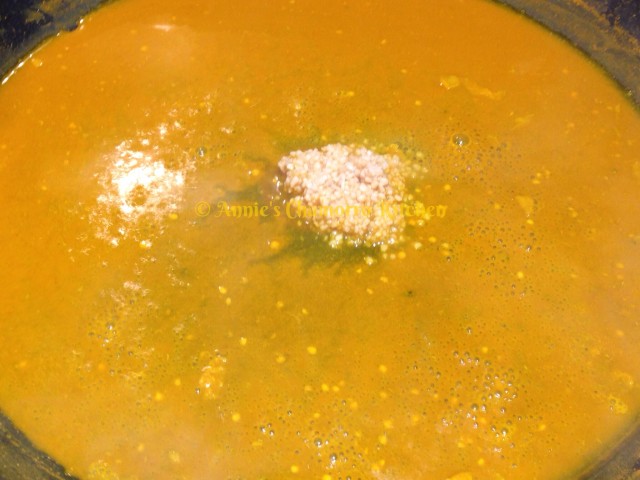
Pour the sauce over the cooked vegetables. Set aside until the fish is done.
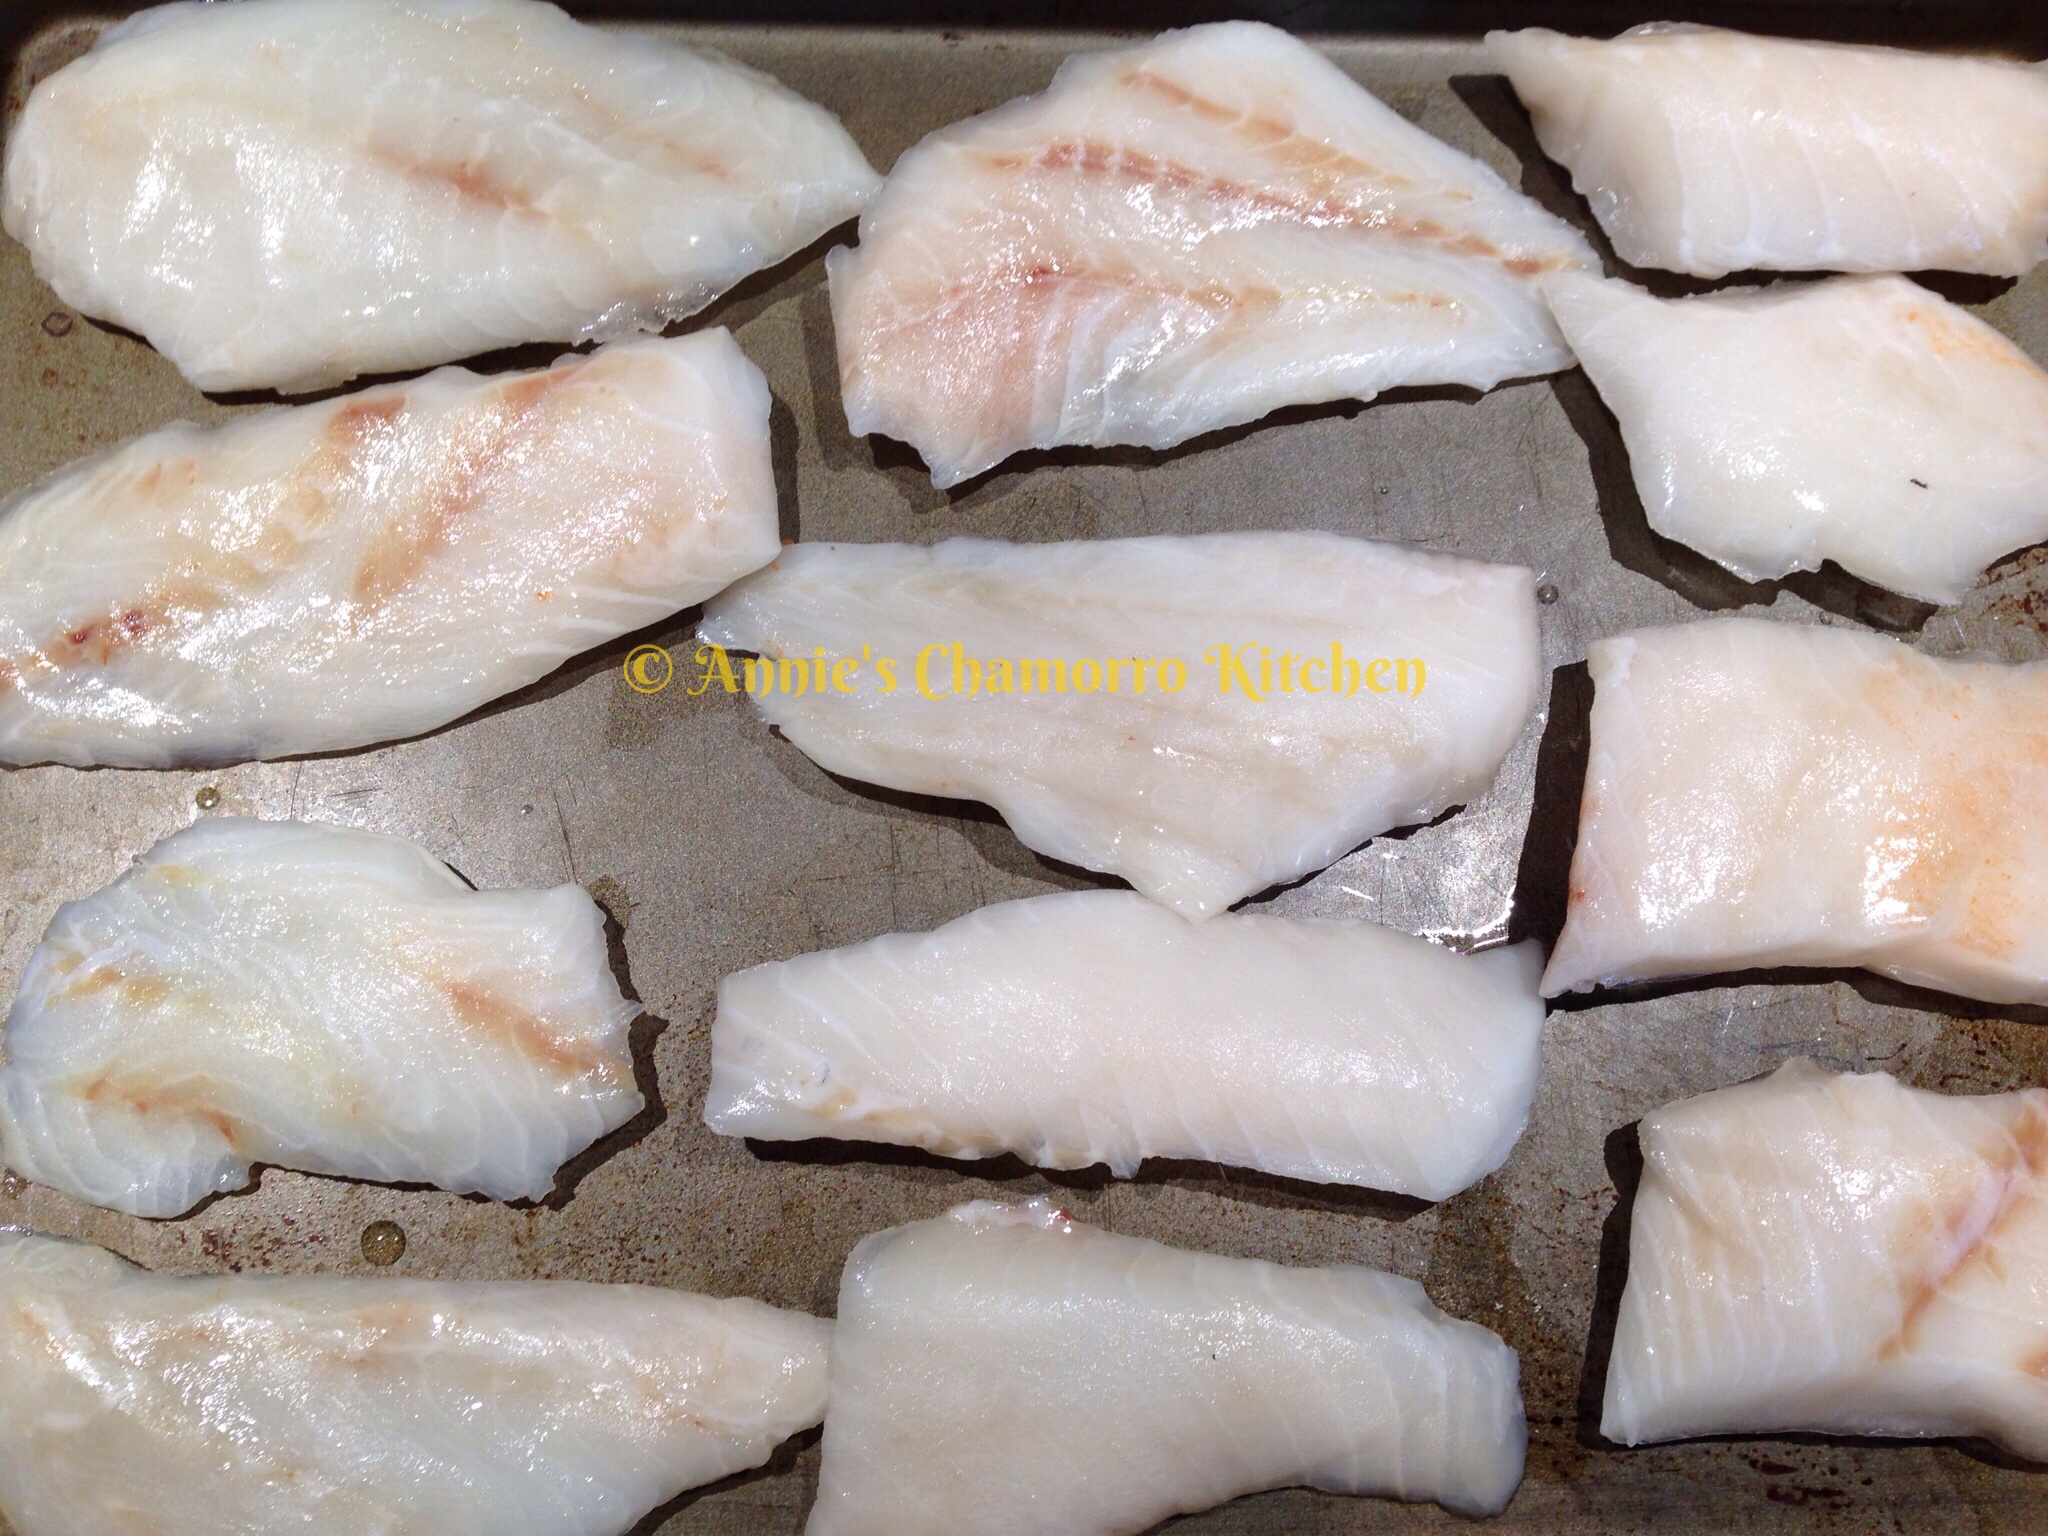
wpid-Photo-20140320193527.jpg

Prepare the fish.

Preheat the oven to 400 degrees. Place the fish filets on a large rimmed baking sheet.
image

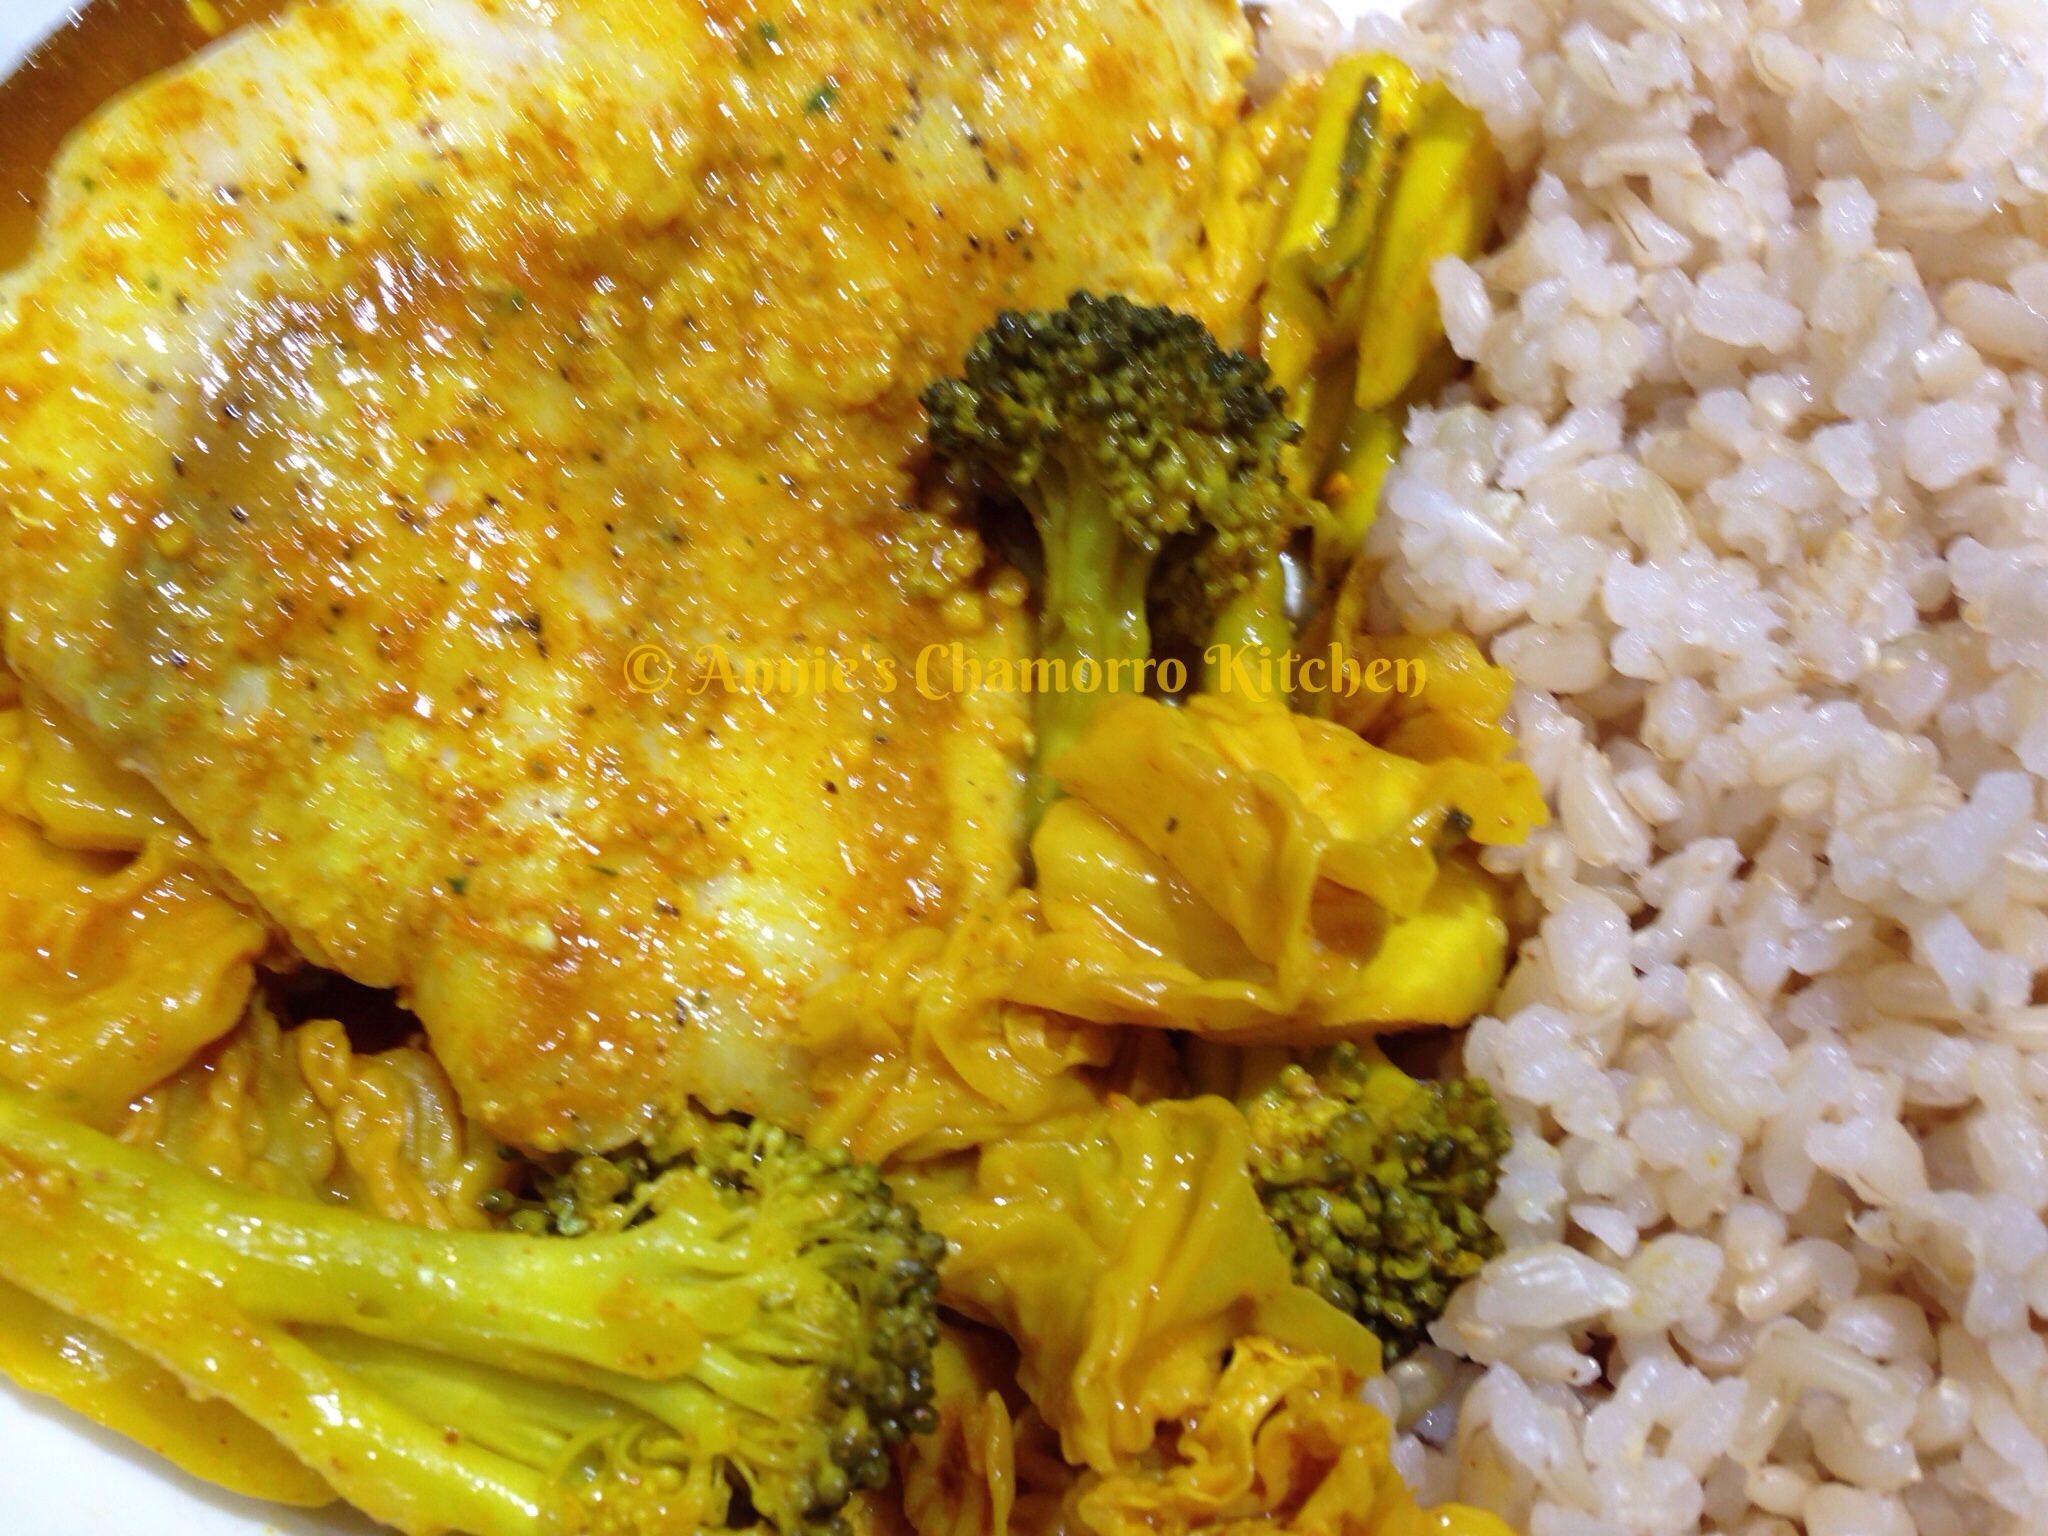
Sprinkle salt, black pepper, garlic powder, and tumeric on both sides of the fish. Bake at 400 degrees for 15-20 minutes. Use a fork to check for doneness (the fish should flake easily with a fork).
image

When the fish is done, it’s time to layer the escabeche.

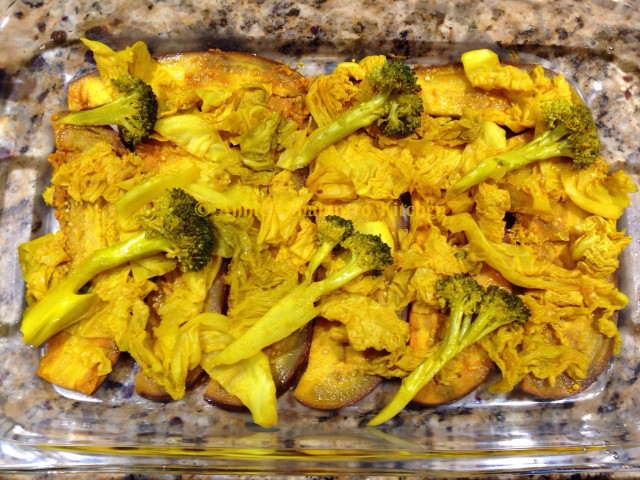
In the bottom of a 9×13 pan, place a even layer of eggplant, half of the cabbage leaves and broccoli.
image

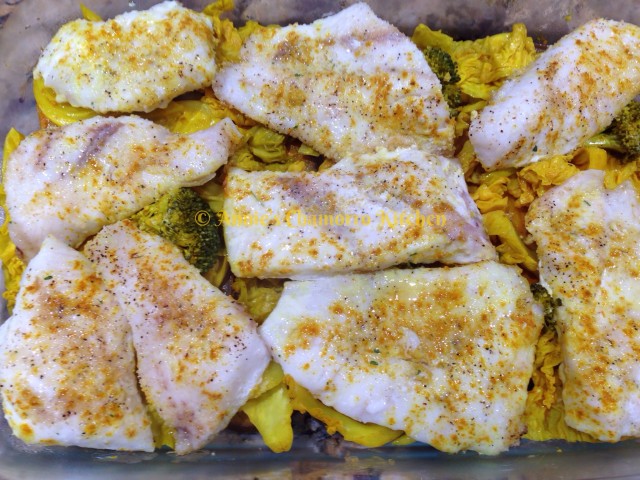
Carefully place each of the baked fish filets on top of the bottom layer of vegetables.
wpid-Photo-Mar-20-2014-725-PM.jpg

I don’t have a photo of these next steps (I don’t know how I forgot to take photos!), but layer the remaining vegetables on top of the layer of fish.

Pour any remaining sauce over the vegetables.

While you can eat this immediately, this dish is best if made the day before and allowed to “marinate” overnight. Cover the dish tightly with aluminum foil then place in the refrigerator to allow the flavors to meld.

The next day, after all the sauce soaked into the fish and vegetables, the escabeche is now perfect and ready to enjoy. Reheat individual portions, or bake the entire pan (covered with foil) at 350 degrees for about 20-25 minutes.

Serve with hot steamed rice and fina’denne’. ENJOY!
wpid-Photo-20140320193526.jpg

Quinoa Salad

Are you looking for a different side dish to serve with your meals? Try making Quinoa Salad. It is a delicious side dish that is healthy as well as tasty.

You can get creative with this dish by adding your favorite vegetables. I used tomatoes, cucumbers, green onions, cilantro and garbanzo beans in my recipe. You can also add diced avocados, olives or red onions. For a totally different take on this dish, try sprinkling some feta cheese on top too!

TMH NOTE: This is an E recipe without the optional olive oil, olives or avocados.  Adding olive oil, olives and avocados will make it a crossover.

Give my recipe a try. I think you’ll like it. 🙂

Quinoa Salad

Ingredients:

  • 1 cup uncooked white quinoa
  • 2 cups water
  • 1 teaspoon garlic powder
  • 1 teaspoon sea salt
  • 1 English cucumber, peeled and seeded (plus about 1 tablespoon salt)
  • 1 cup cherry tomatoes
  • 2 stalks green onions, thinly sliced
  • 1 cup chopped cilantro
  • 1 can garbanzo beans, drained
  • 2 tablespoons extra virgin olive oil, optional
  • The juice of one lemon
  • Salt and pepper, to taste

Directions:

1. Place the uncooked quinoa into a strainer. Rinse the quinoa under running water. Place the rinsed quinoa, water, garlic powder and sea salt into a medium-sized sauce pan. Cook over medium high heat until the water begins to boil. Turn the heat to low then place a lid on the pot; cook for 15 minutes then turn off the heat. Let the quinoa sit in the covered pot for 5 more minutes (do not remove the lid). After the 5 minutes, remove the lid then fluff the quinoa with a fork. Set aside.

2. Peel and seed the cucumber. Dice the cucumber then place into a plastic strainer or colander. Sprinkle the tablespoon of salt over the cucumber; stir to ensure the cucumber pieces are evenly salted. Place the strainer over a bowl to catch the cucumber liquid that will drain. Let the salted cucumbers drain for about 10 minutes. After 10 minutes, rinse the salt off the cucumbers then drain out any excess water. Set aside.

3. Cut the cherry tomatoes into quarters. Place into a small mixing bowl.

4. Add the onions and cilantro to the bowl.

5. Add the drained garbanzo beans to the bowl.

6. Add the cucumbers to the bowl.

7. Add the quinoa to the bowl.

8. Add the olive oil (omit the oil to keep this recipe low fat) and lemon juice to the bowl. Stir to combine the ingredients, taste and adjust the seasonings (salt and pepper) to your liking. I wanted a bit more garlic flavor, so I added more garlic powder.

9. Stir once more, then serve and ENJOY!


« Older Entries Recent Entries »