Spam Kelaguen

Spam is a staple on Guam.  In fact, Spam has been called the “poor man’s steak” by many, although a can of Spam is not cheap!  I have a friend who lives in an area where Spam sells for about $5.00 per can!  At that price, I’d rather buy real steak! 😀

Chamorros can be quite innovative when it comes to creating Spam dishes.  An easy and classic dish is Spam Kelaguen.  This is my sister’s version.

Give it a try; I think you’ll like it. 🙂

Spam Kelaguen

Spam Kelaguen - Carol's

Ingredients:

  • 1 can Spam, cut into thin strips
  • 4-6 stalks green onions, thinly sliced
  • 1 cup freshly grated coconut
  • Lemon juice, to taste
  • Salt, to taste
  • Hot pepper, to taste

Directions:

1.  Lightly pan-fry the spam (for only 1-2 minutes) then place in a bowl.

2.  Add green onions, coconut, lemon juice, salt, and hot pepper.  Mix, taste, and adjust seasonings and lemon juice, to taste.

3.  Serve with titiyas or hot steamed white rice.

ENJOY!


Chamorro Potu (Sweet Rice Cake)

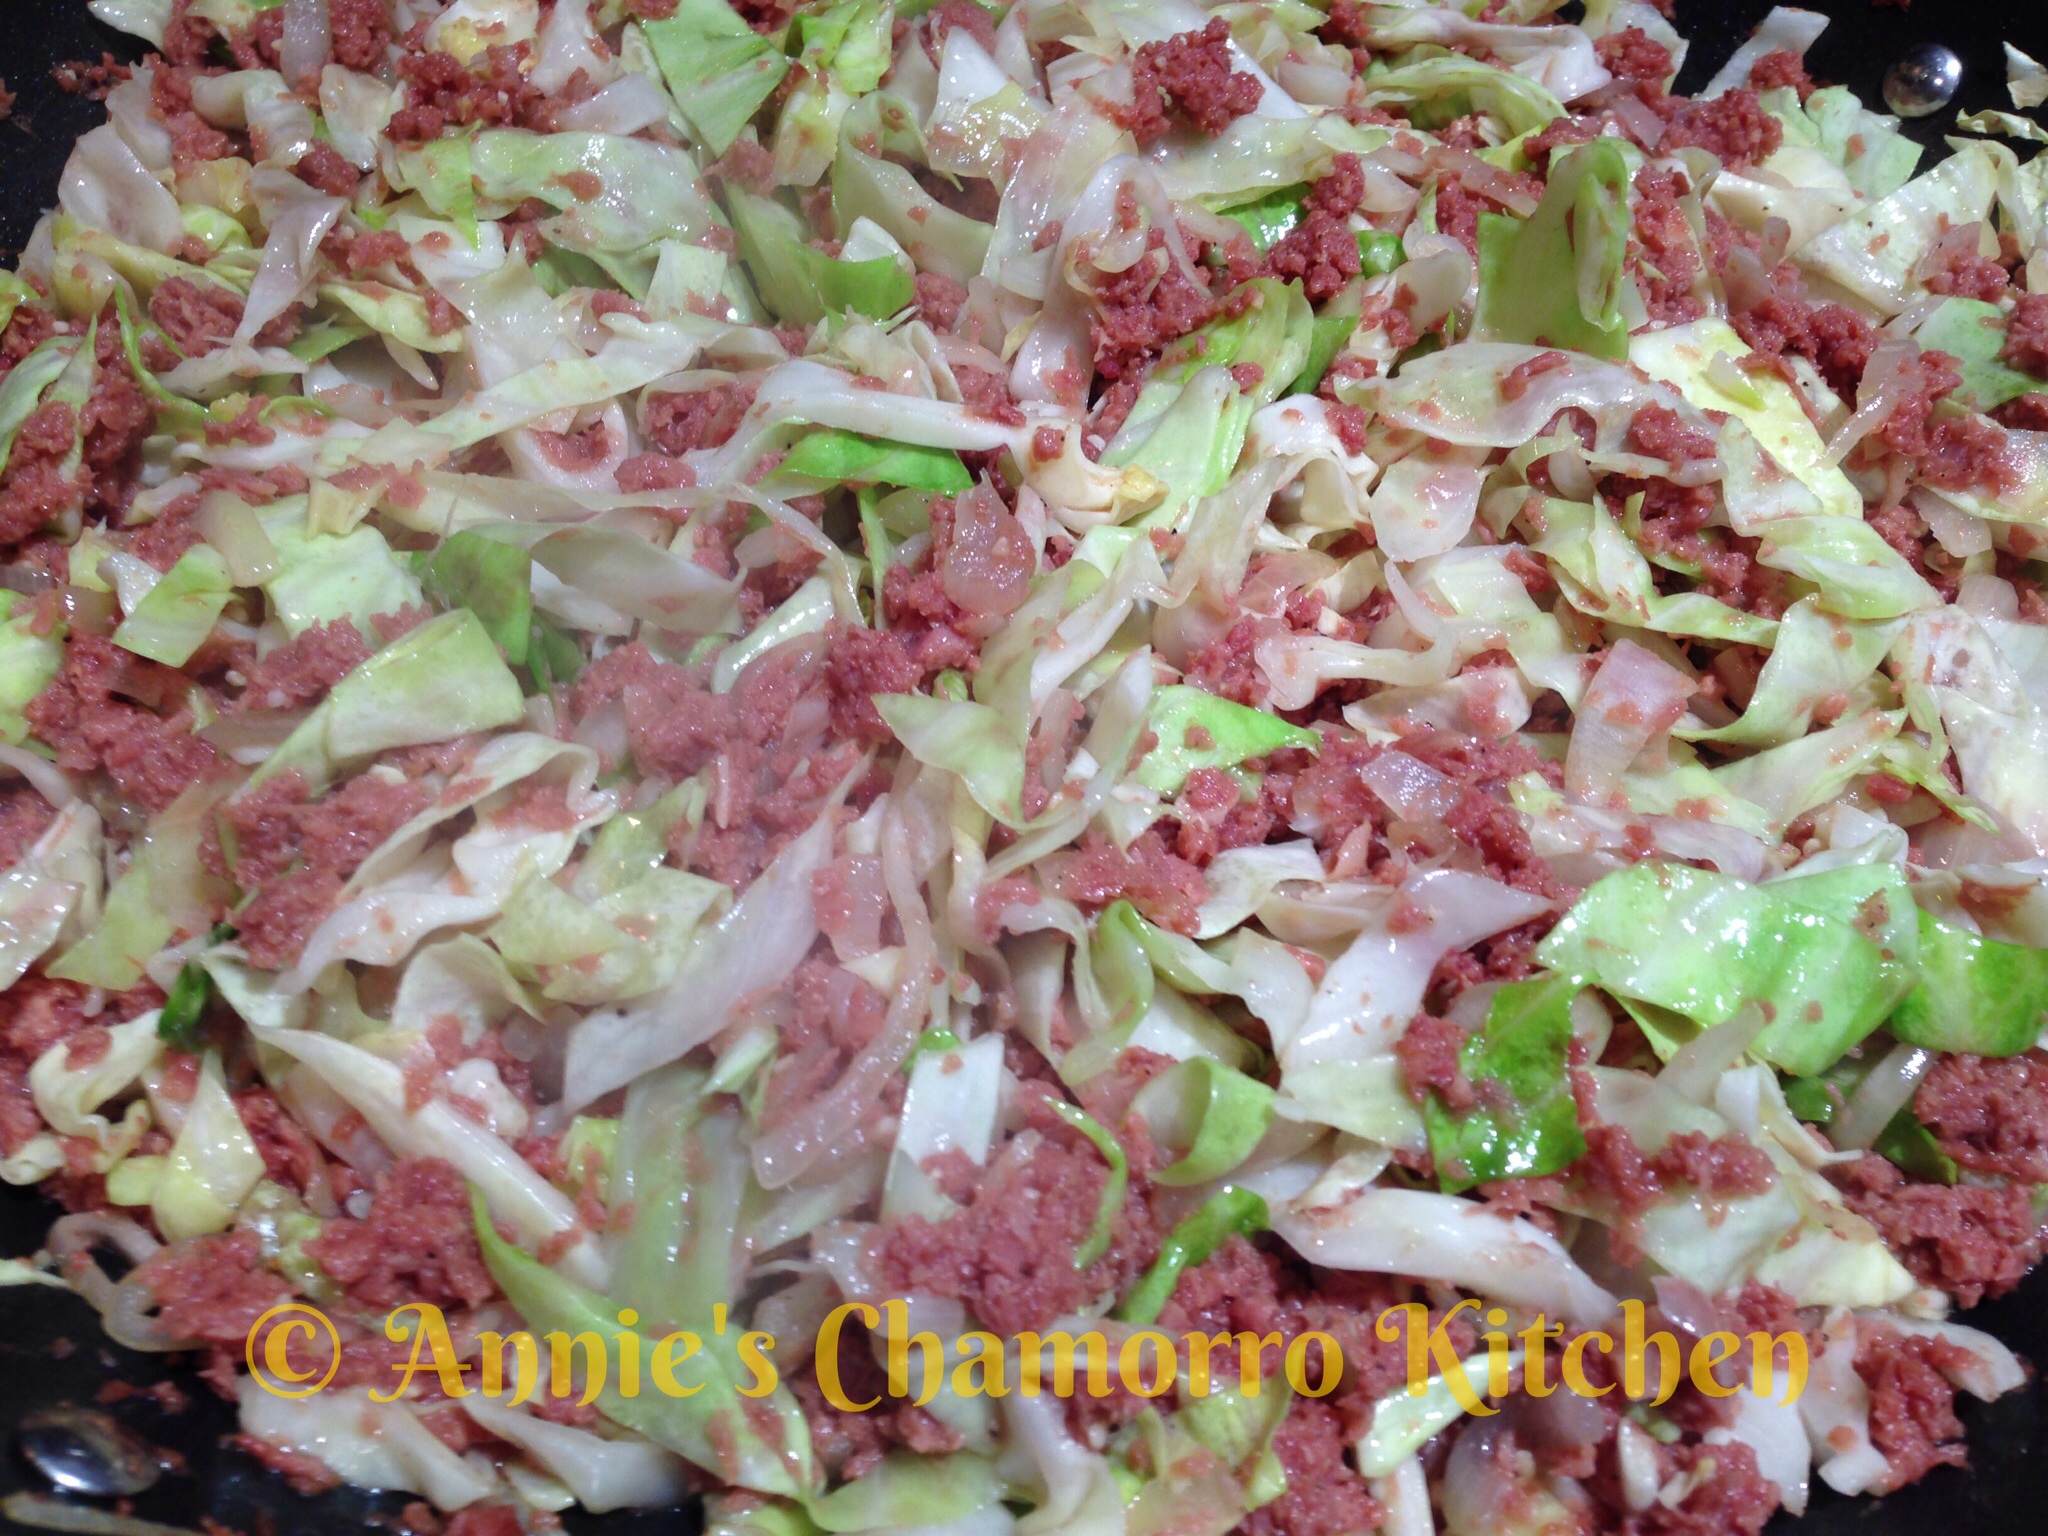
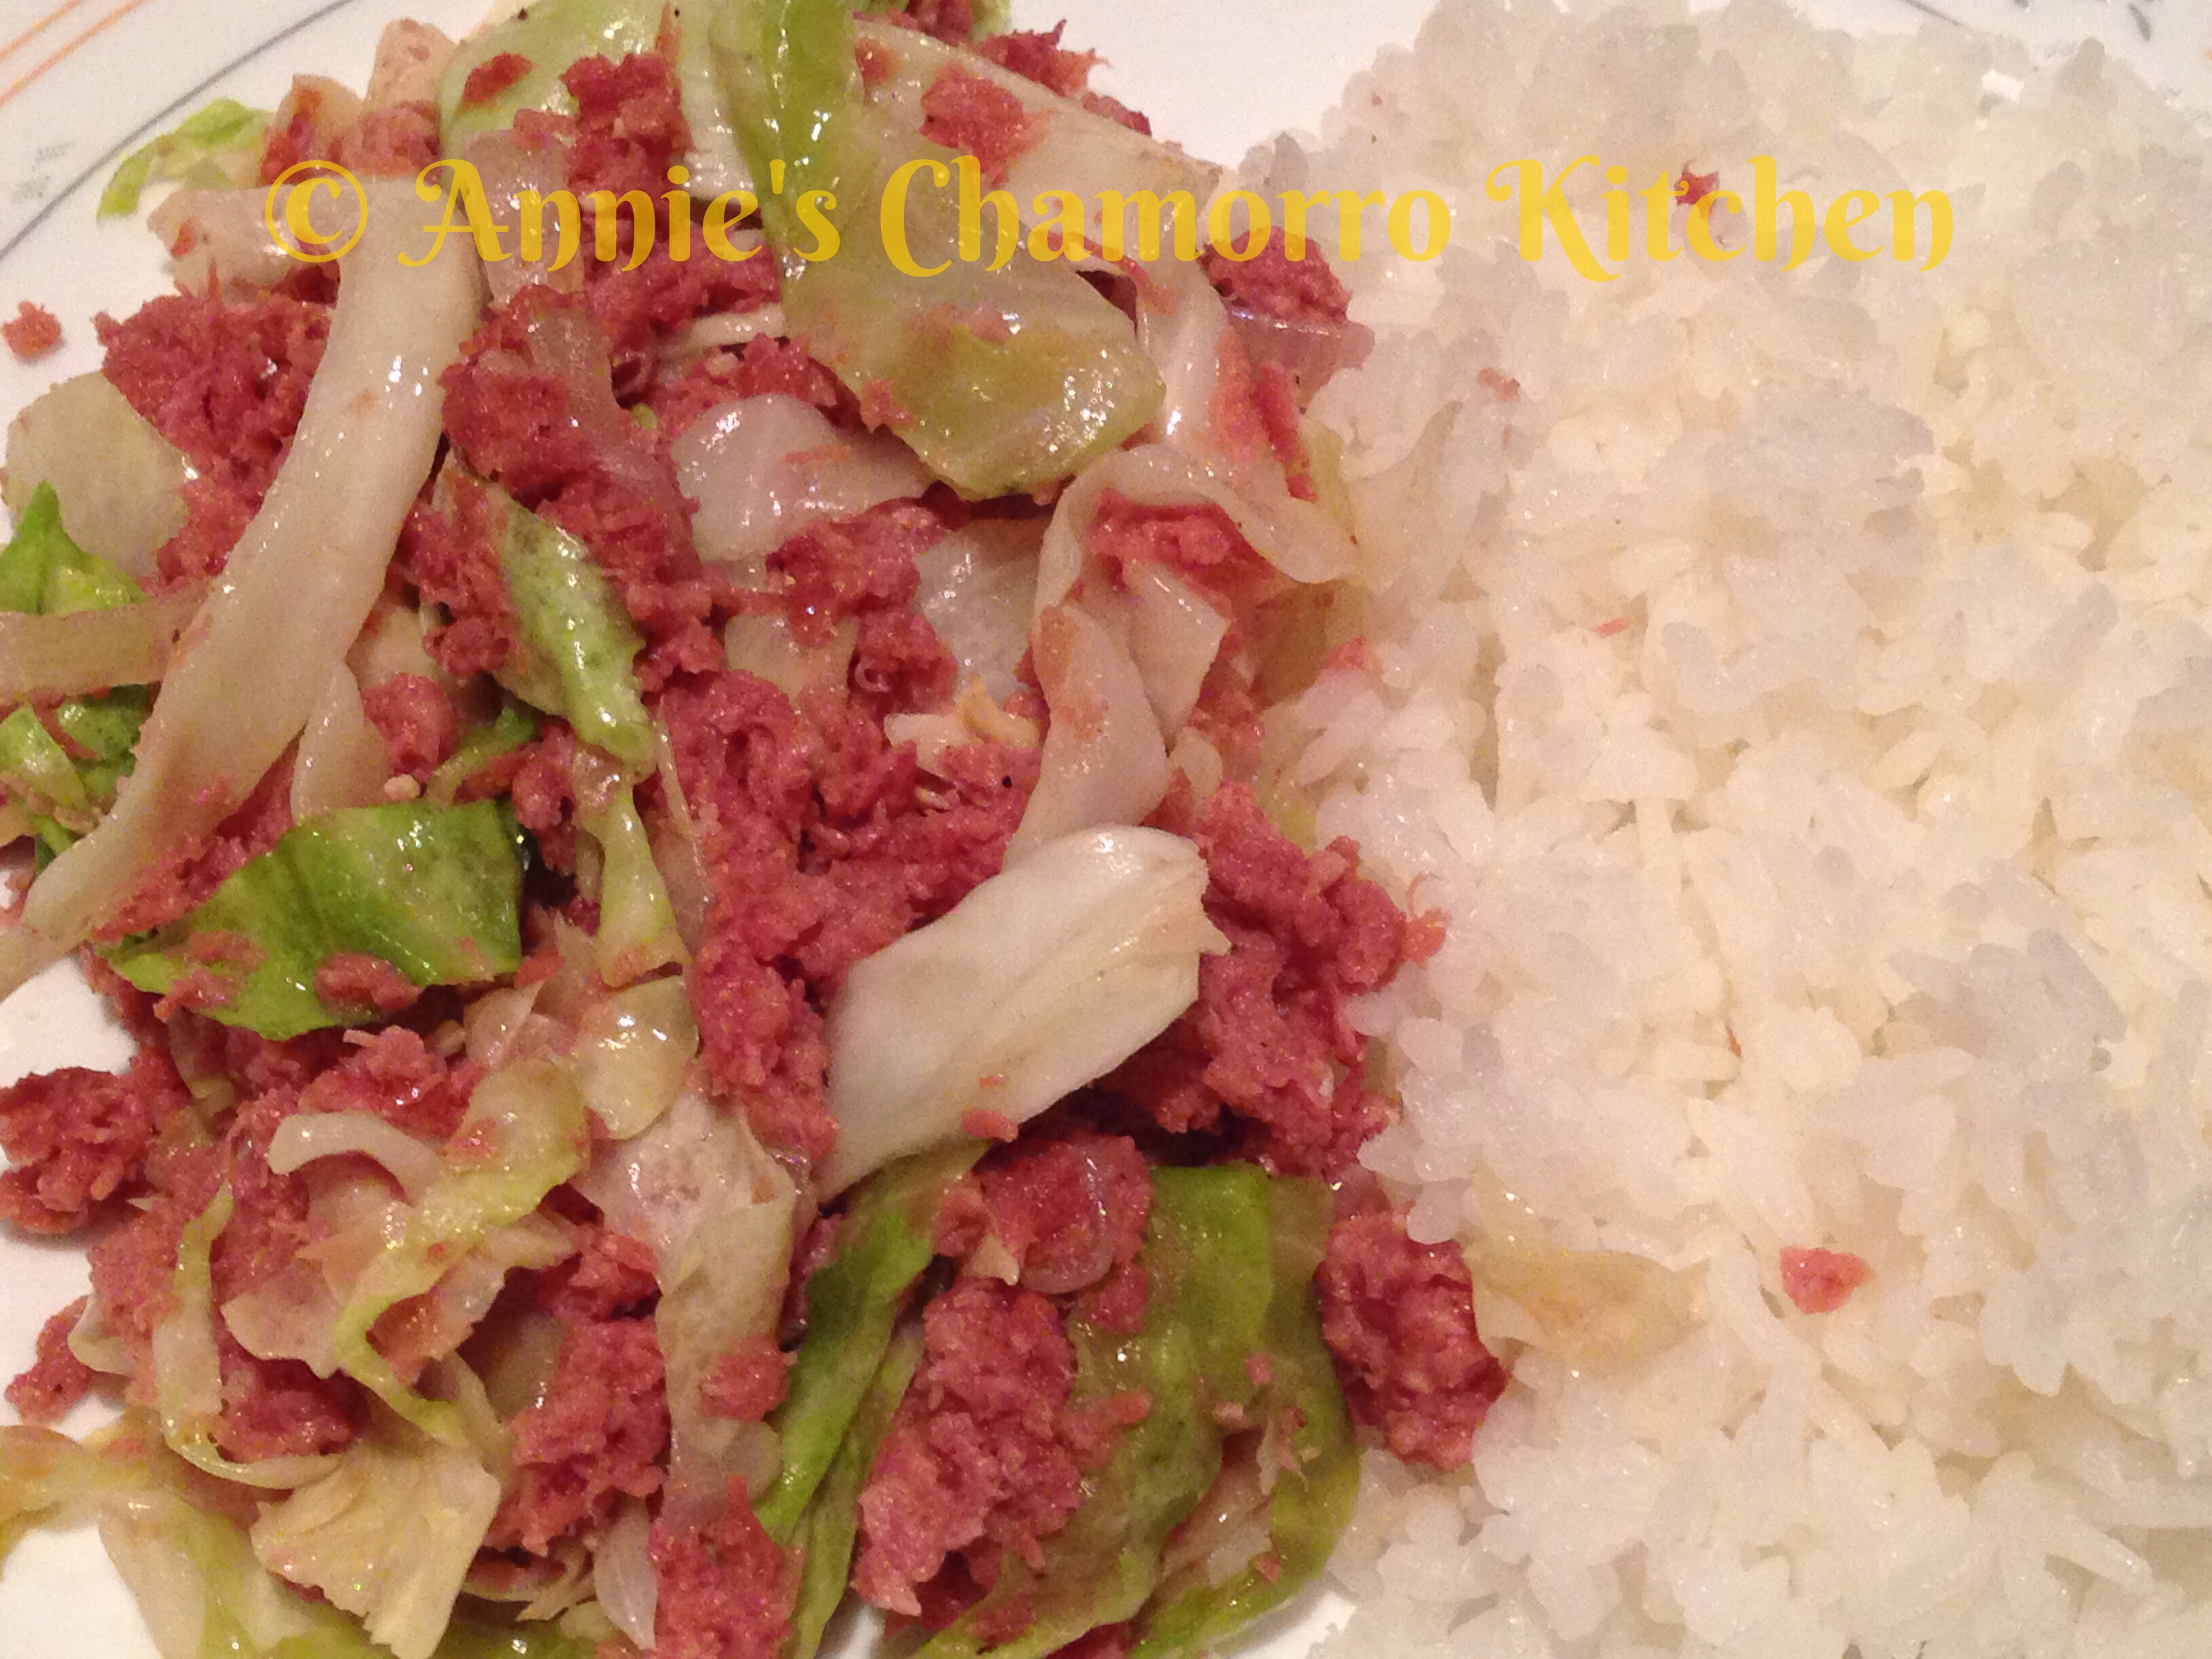
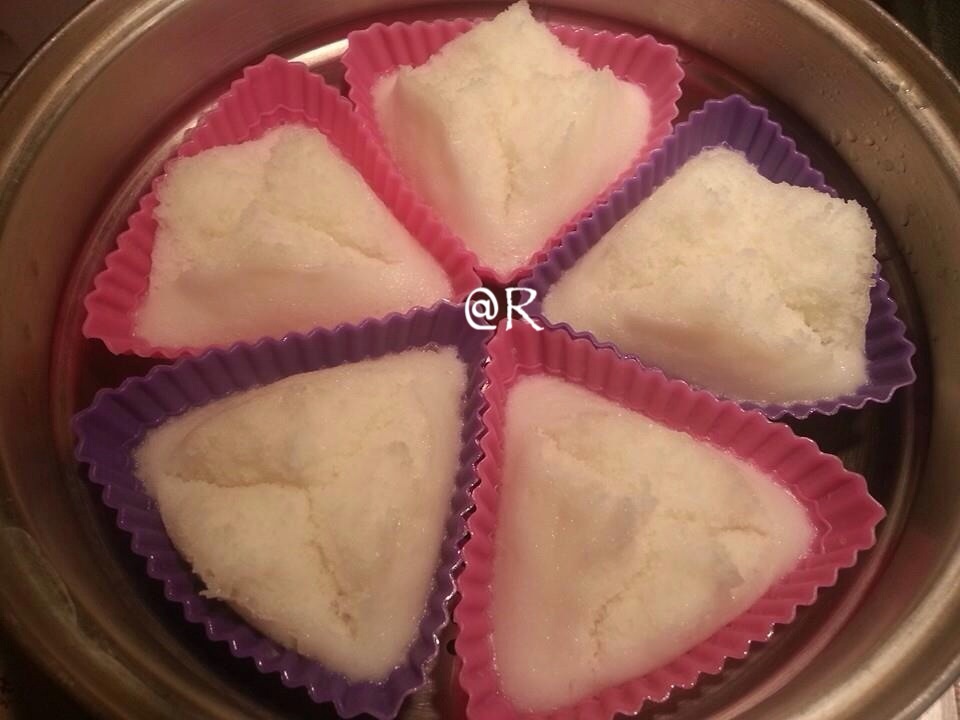
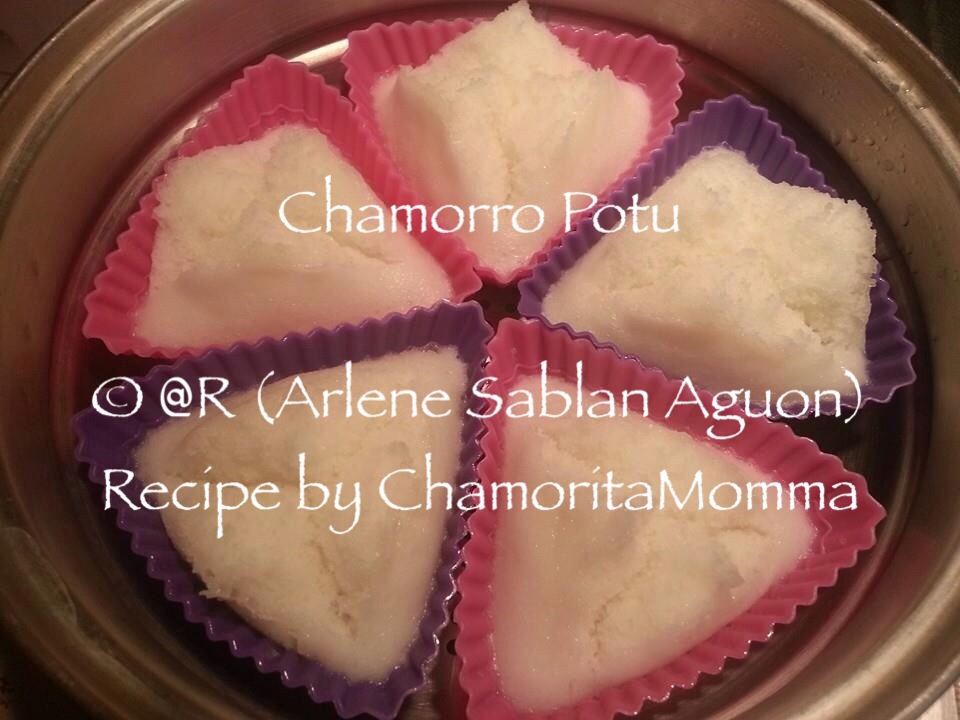
Chamorro rice cakes, or Potu, are rice cakes that are made by soaking grains of rice in tuba, or a sweet fermented coconut sap.  The soaked rice is then ground and sweetened then steamed into a light and fluffy cake.

Living in the mainland U.S., I’ve had to learn to make substitutions for those ingredients not commonly found or sold here.  A key ingredient for potu as I mentioned above is tuba.  Since coconut trees don’t grow where I live, I’ve had to figure out a substitute for this potent potable.

I use a combination of palm or coconut vinegar and coconut water when I make my potu.  I also use non-glutinous rice flour for ease in preparation.  I’ll post my easy-peasy shortcut potu recipe soon, but until then, this post features my good friend, Rose Camacho’s recipe.

Rose doesn’t use rice flour when she makes her potu.  Instead, she soaks grains of jasmine rice then grinds it.  She also uses palm vinegar in her recipe.

Rose’s recipe is “tried and true” and loved by many.

Her original post is below.  Give it a try.  I know you’ll like it. 🙂


image

Rose’s original post and recipe for Chamorro Potu (Sweet Rice Cake):

Hmmm? How does one describe these pure white puff pillows of steamed ground rice?  Light, soft, sweet, and sticky!  Growing up, this has been many a childhood’s favorite.  Although the ingredients are simple, this recipe is pretty prized amongst the native Chamorro women and no one would share theirs.  It was a guarded secret recipe, and some have literally taken it to their grave!!

In my quest to find a GOOD recipe, because it is one of my husband’s favorite desserts, I’ve tweaked and wasted, and tweaked and wasted countless ingredients trying to perfect this recipe. I remember my sister-in-law, Mona and I, and mind you, she’s an EXCELLENT cook, I remember us mixing, beating, steaming and without any close results, have failed trying to perfect it.  I gave up! I just prayed that a passer by relative who’s flying in, stops and delivers some of these cakes, made all the way from the islands, to us.  I’d freeze them, steam them as we needed, and then one day our stash of sweet rice potu was G-O-N-E, gone!

With this recipe, I believe I’ve come close to, as close to can get, especially since one of the “main” ingredients is TUBA, which is not available in my area.  Because I have no access to this sweet “drink”,  I’ve had to improvise and use store bought jarred “Coconut vinegar OR Palm vinegar”.  Their flavor “ALMOST” mimics the taste of sweet Tuba, but of course, if you can get sweet Tuba, please use it.  This is how “I” make Chamorro Potu.  Please Please, pass on your comments and POSITIVE critiques, I would love to hear from you.  Until then, HAPPY COOKING, BAKING, and STEAMING! 😉

Ingredients:

1 cup Jasmine rice  (pictured below)
1 cup water
3 to 4  tablespoons Palm Vinegar (pictured below)
1/4 to 1/3 cup Sugar (I prefer less sweet)
2 teaspoons baking powder

Directions:

Because the rice kernels HAVE TO soak,  you need to start the night before you’re planning on serving it.  The brand of rice I use is pictured below.  If you decide to use another brand or type of rice, I will not be held responsible if you fail with this recipe.   I’ve only used this brand whenever I make my recipe.  The palm vinegar I used is also pictured below.  I’m sure other brands can be used.  I’ve also tried using coconut vinegar and it works fine.


Measure out 1 cup of the dry rice.  Wash the rice in water until the water runs clear!  Drain well.  Place into a container, add the  1 cup of water and cover.  Set this aside and allow to soak for a minimum of 8 hours but preferably overnight.

potu18    potu19

When you’re ready to prepare the recipe, start heating up the water in your steamer.  In the container that your rice is in, there may still be some water left from the soaking.  DO NOT drain this water.  Place the rice into a heavy duty blender container (I use my Vitamix Professional 750) for this process since it’s pretty heavy duty.  Add the sugar and palm vinegar to the rice and water.  NOTE:  If you do not have a heavy duty mixer, you may have to do this step in smaller increments.  Just process the rice in batches, rather than one whole time.  Although, I’ve never done it this way, if you have a heavy duty food processor, such as a KitchenAid,  I’m sure you could also use that.  The key is to grind the rice FINE!

potu7    potu6

Process this in your blender, until the rice kernels are finely ground.  Shut the blender off and add the baking powder.  Now process again for a minute or 2 being careful that the mixture doesn’t heat up.

potu21    potu22

While the mixture is still processing, line up your silicon cups in the steamer basket.   For easier handling, pour the batter into a smaller container and pour  3/4 of the way into each baking cup.  This mixture makes about 12 potu cakes OR more if you use smaller silicon cups.

potu24

Place the steamer basket into the steamer pot, which should already be producing heavy steam.  Place a CLEAN kitchen towel over the top of the steamer basket to catch any condensation that will occur during the steaming process.  Place the lid onto the pot.  The lid will also hold the towel taught so that it doesn’t fall onto the potu.  Steam this for a minimum of 20 minutes and up to 30 minutes, depending on the heat that’s produced.

potu17

After about 20 minutes, CAREFULLY lift the lid and towel away, to see how the process is going.  I get excited when I see that little “crack” in the center of my potu.  It tells me it’s gonna be PERFECT!  When done, the potu should spring back a bit, with a slight stickiness to the tops.

potu23

Remove from the steamer pot and allow them to cool before removing them from the basket.  Set them aside to cool completely before removing them from the silicon cups.

SERVE!  Place the leftovers in a plastic bag to keep them fresh.

potu25


Thank you, Rose Camacho (aka Chamorita Momma) for allowing me to repost and share your Tried and True Potu recipe!

Baklava Truffles

Baklava is one of my favorite desserts.  I’ve seen many variations of this rich, sweet dessert, from chocolate drizzled to baklava cheesecake, and believe me, they all taste incredible!

I’m usually pressed for time, and lately I’ve been creating healthier meals for my family. When it comes to healthy eating, I will admit that Baklava doesn’t immediately come to mind.  Why would it?  Traditional baklava is made with a syrup or honey, and lots and lots of butter.  This recipe, while not right up there in the health-food category, does cut back on a lot of the calories from butter, phyllo dough, and sugar.  It’s a good energy snack, and the thing I love best about it is that it’s a no-bake (aka quick and easy) recipe.

If you look at my list of ingredients below, you’ll notice an ingredient not common in traditional baklava recipes…almond butter.  I use almond butter partially to add another type of nut to this recipe, but it also serves as a way to bind everything together without using too much honey.

If you’re not familiar with almond butter, all it is are almonds ground until creamy, like peanut butter.  You can make your own almond butter — it’s really quite easy, if you have some patience and a good food processor, that is.  It’s more economical to make it yourself, as a small jar of almond butter sells for about $12.00!  I like adding pure maple syrup or honey to my almond butter to sweeten it up a bit.  To make your own almond butter, all you need are 3 cups of raw almonds and 1/4 cup maple syrup or honey (that’s if you want it sweet — the maple syrup and honey are completely optional).  Process only the almonds in your food processor — here’s where your patience comes into play as it takes a good 30 minutes of processing before the almonds turn into a creamy consistency.  Add the maple syrup or honey at the end, just so you can blend it with the almond butter.  Place in a resealable container (I use a mason jar or an empty peanut butter jar).

ghee
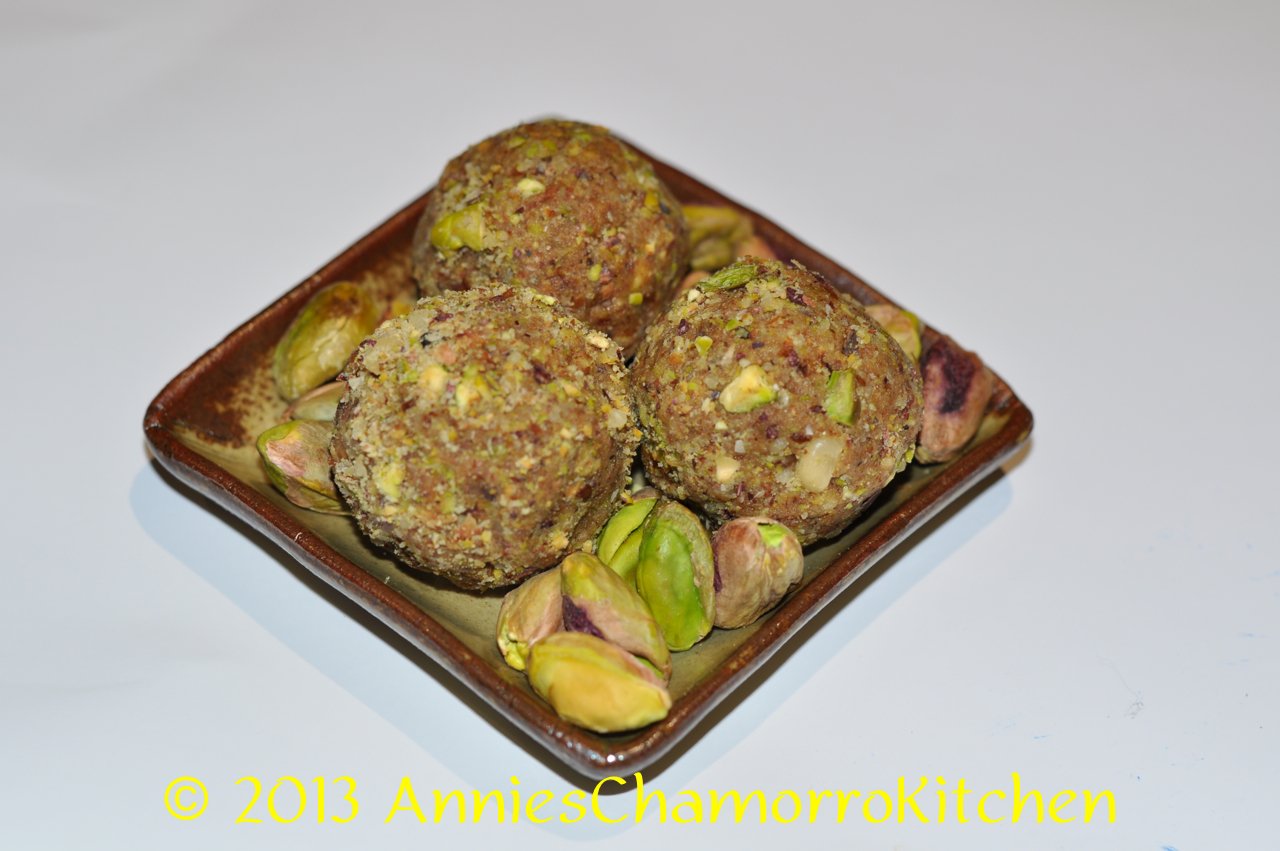
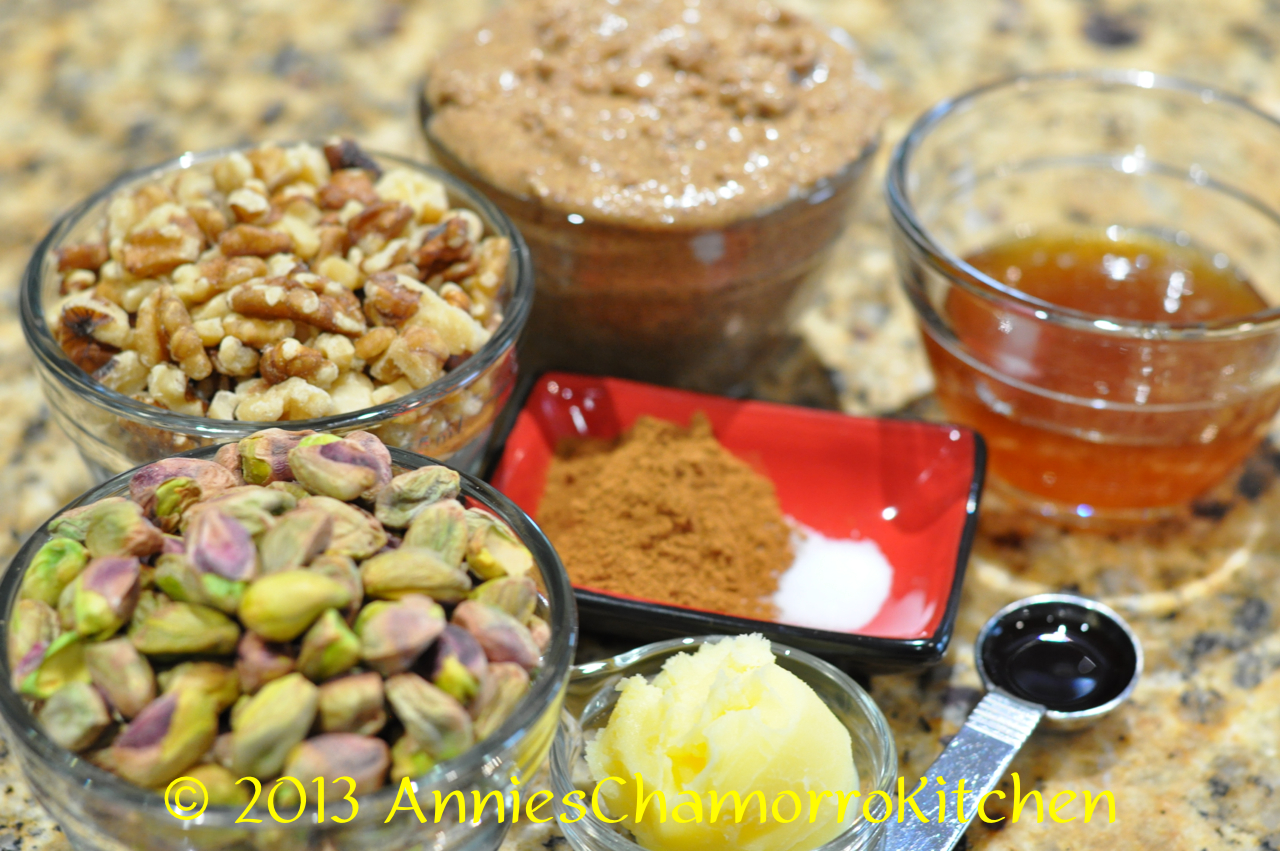
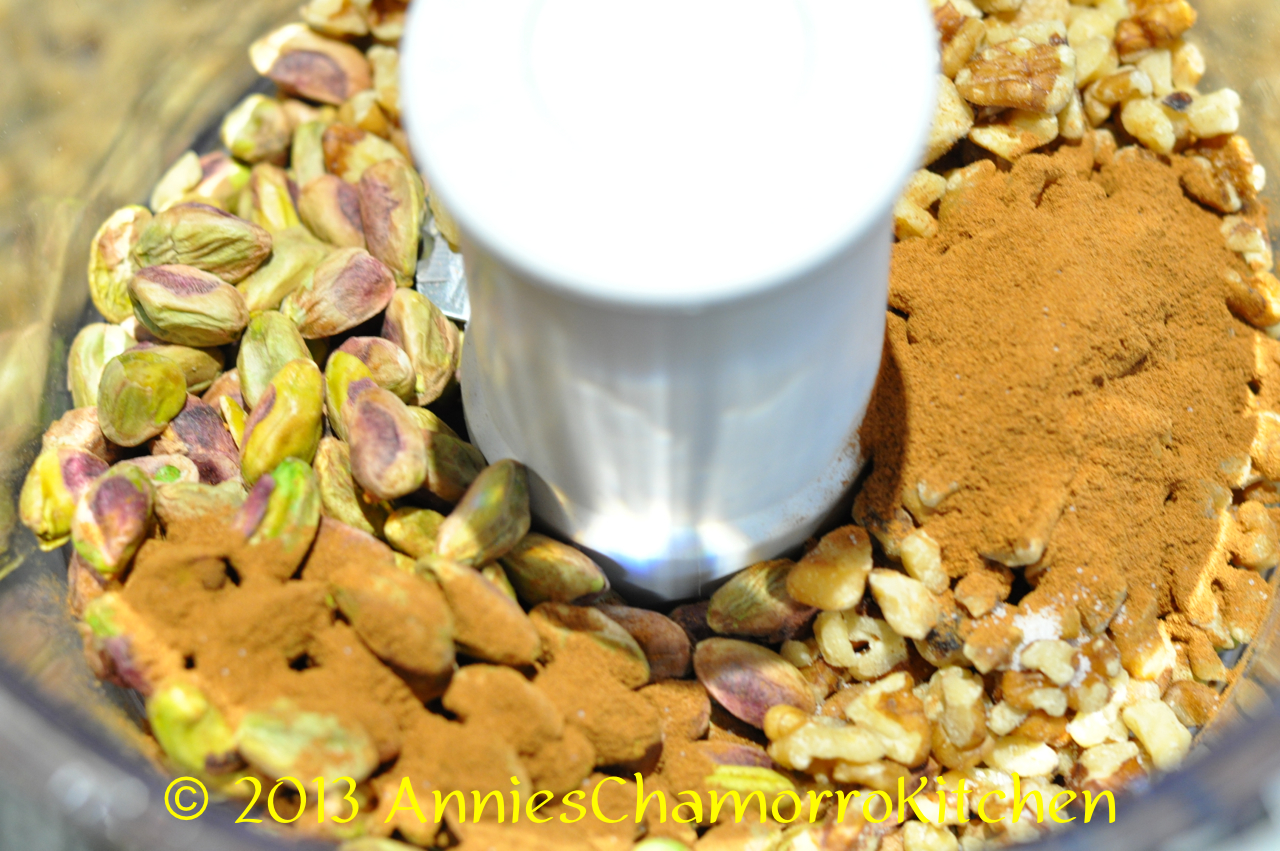
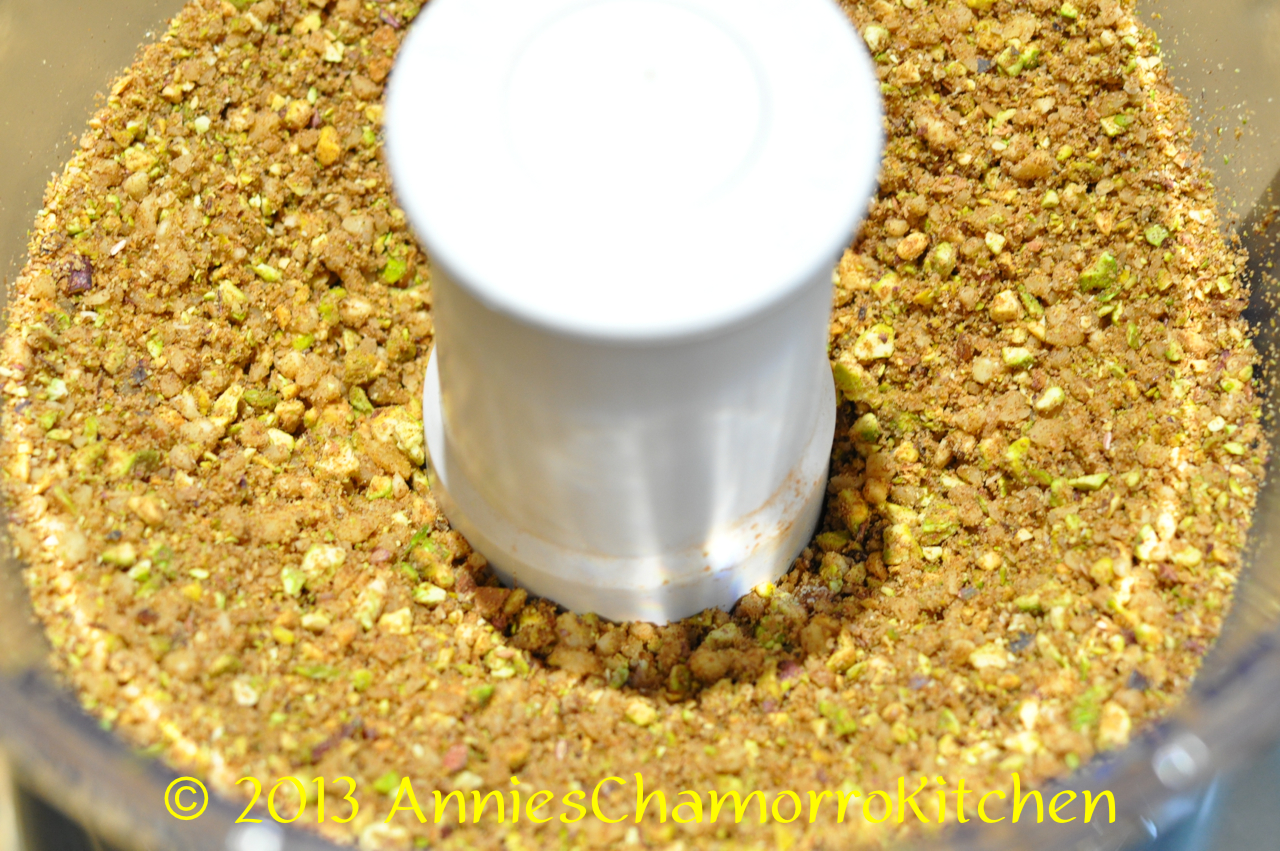
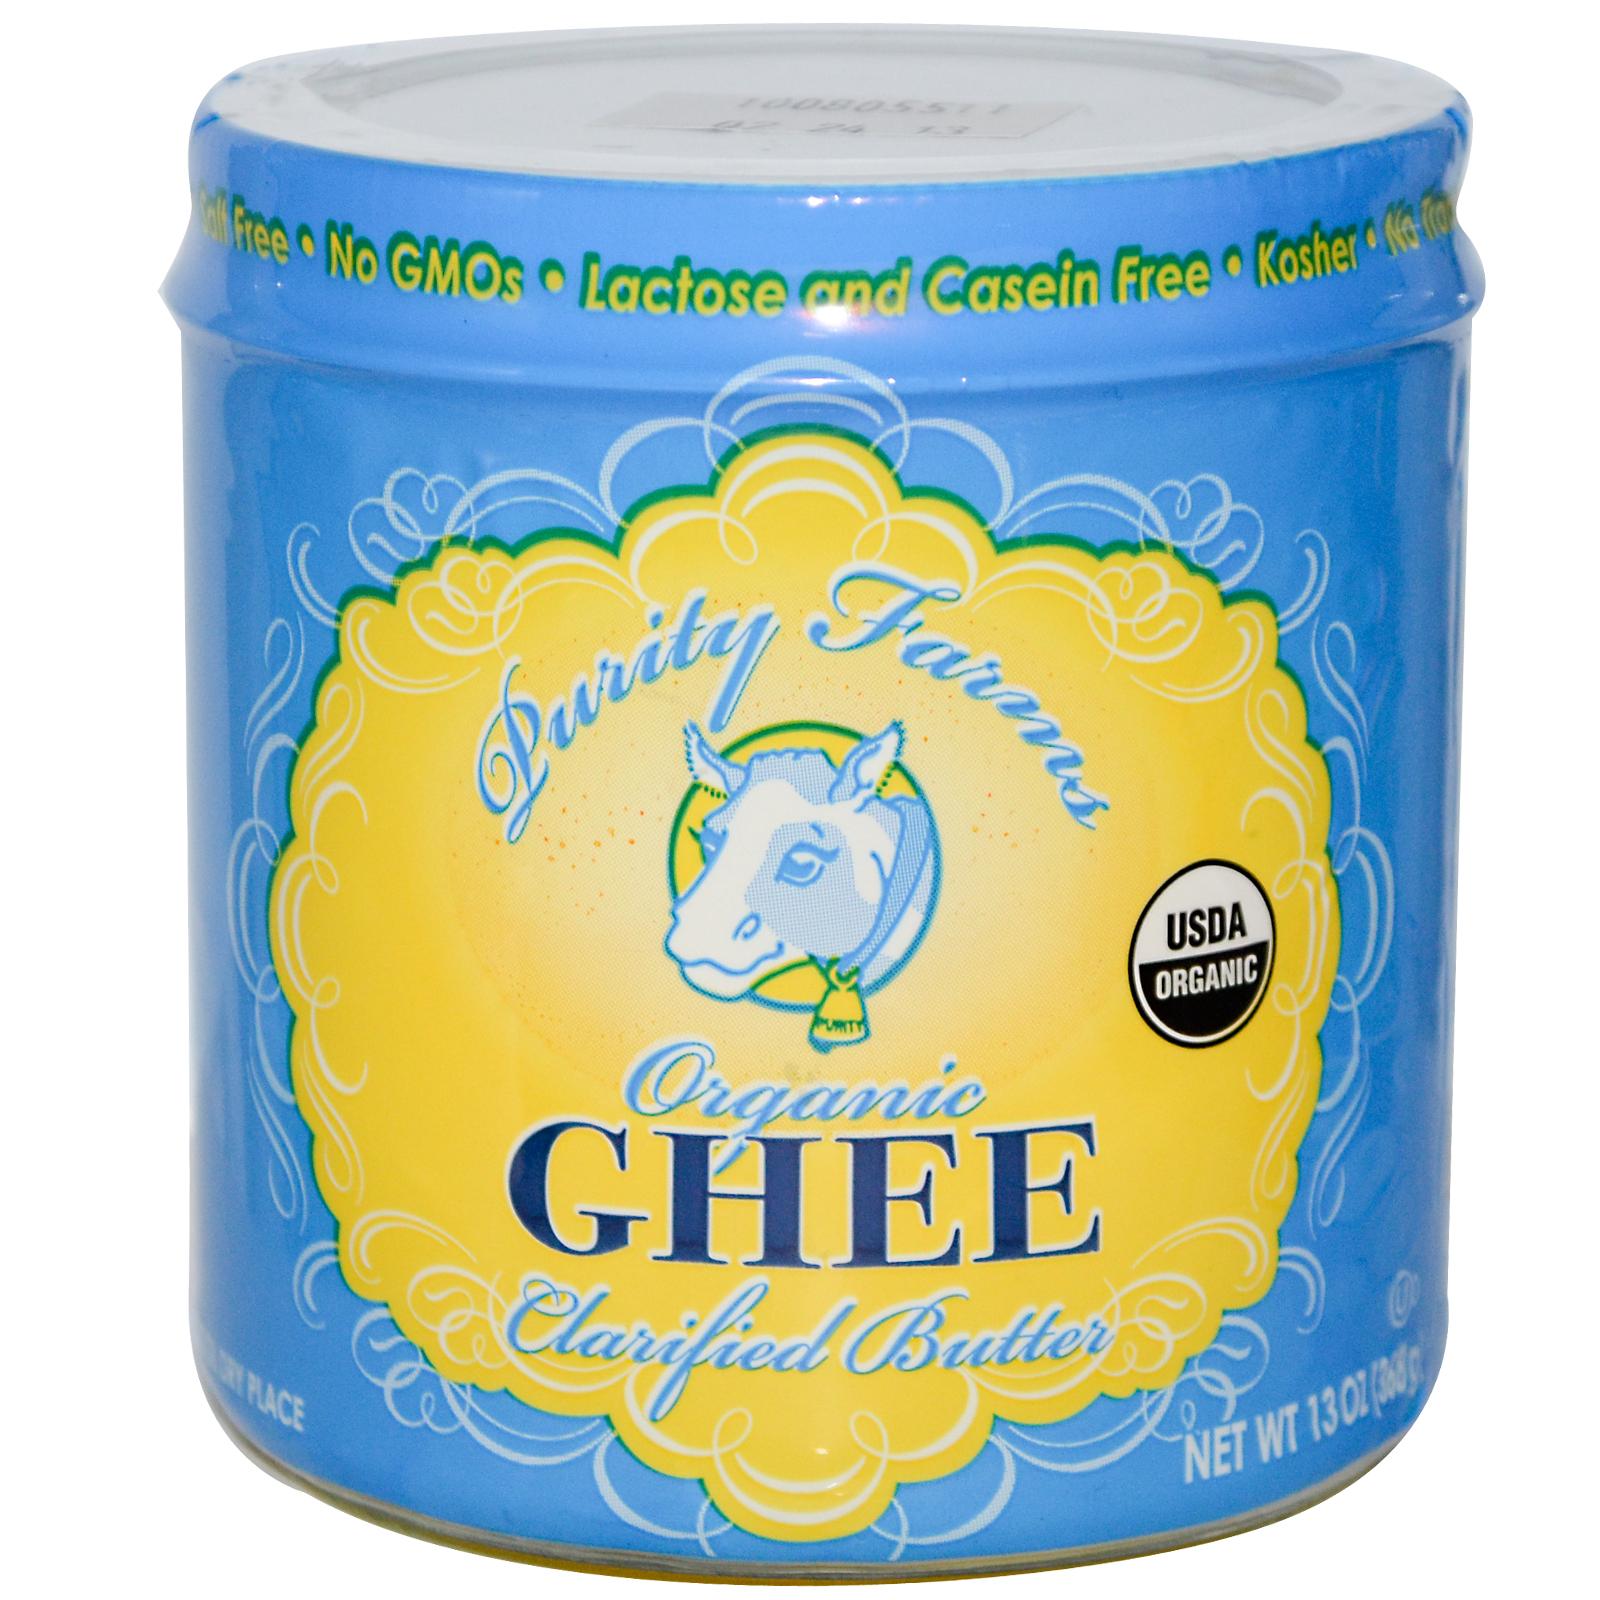
Since you’ve just perused my list of ingredients, you’ll also notice I use ghee in my recipe.  Ghee is clarified butter — butter that’s been melted so that the milk solids separate from the butter fat, then cooked to boil out the moisture (butter has 15% to 20% moisture content while ghee has nearly 100% butter fat). Several traditional baklava recipes use ghee, lots and lots of it. You can find ghee in the international aisle of your grocery store, or you can make it yourself.

To make ghee, melt 1 pound (or 4 sticks) of butter in a medium-sized sauce pan over medium heat.  When the butter starts frothing, turn down the heat to low.  Keep cooking the butter until it starts to turn a dark golden color; the curds on the bottom of the pan will start to brown.  Use a clean, dry spoon to scoop away the frothy stuff on top.  When the melted butter looks clear, it’s done.  Remove it from the heat.  Strain the liquid through a cheesecloth or fine mesh strainer.  Place in a clean container.  You can store ghee at room temperature (no refrigeration needed).

Make up a batch of these delicious truffles to take along with you for road trip snacks, snacks at work, or when you’re planning an outdoor trek and need some snacks for a quick energy boost.

Give my recipe a try.  I think you’ll like it. 🙂

No-Bake Baklava Truffles

DSC_0076

Ingredients:

DSC_0335

  • 1 cup pistachios
  • 1 cup walnuts
  • 1 cup almond butter
  • 1/4 cup good quality honey
  • 1 tablespoon cinnamon
  • 1/8 teaspoon sea salt
  • 2 tablespoons ghee (clarified butter)
  • 1 teaspoon vanilla extract


Directions:

1.  Place the pistachios, walnuts, cinnamon and salt into a food processor.  Pulse it on high speed until the nuts are chopped into small pieces.

DSC_0341  DSC_0345

2.  In a separate microwave-safe mixing bowl, place the honey and ghee (you can use regular butter instead of ghee).  Heat for about 30-60 seconds or until the ghee melts.  Add the almond butter and vanilla extract to the bowl.  Stir to combine.

DSC_0342

3.  Add the chopped nut mixture to the almond butter mixture.  Use a spatula to mix it all together.

DSC_0347

4.  Use a small cookie scoop to form small balls.  Place on a plate, cover with plastic wrap and refrigerate for 30 minutes to allow the truffles to set.

DSC_0349

Optional:  Roll the truffles in chopped nuts before refrigerating.

ENJOY!

DSC_0076

Chaplet of Divine Mercy ~ Chamorro Translation

I started compiling my recipes when my daughters were very young, intending to pass them on to them when they got older and took an interest in cooking.  I wanted them to learn about their Chamorro heritage, a large part of which centers around cooking.

Our language is another priceless treasure I want to pass on to them.  While not a very fluent speaker of our Chamorro language myself, I do know basic conversational words and phrases, most of which I’ve passed on to my  kids.  I’m now in the process of teaching them various prayers in Chamorro.

This post focuses on the translation of the Chaplet of Divine Mercy.  Feel free to share it with your friends and family. 🙂

Note:  If you scroll all the way to the bottom of this post, you can listen to/watch two videos of the Chaplet of Divine in Song (in English).

Chaplet of Divine Mercy (0)

Chaplet of Divine Mercy (1)

Chaplet of Divine Mercy (2)

Chaplet of Divine Mercy (3)

Chaplet of Divine Mercy (4)

Chaplet of Divine Mercy (5)

Chaplet of Divine Mercy (6)

Chaplet of Divine Mercy (7)

Chaplet of Divine Mercy (8)

Chaplet of Divine Mercy (9)

Chaplet of Divine Mercy (10)

Chaplet of Divine Mercy (11)

Corned Beef with Cabbage and Onions

This is another classic Chamorro comfort dish.  Most Chamorros grew up eating corned beef, maybe because it used to be inexpensive.  Now, it’s become something our family eats only once in a while since a can of corned beef has become quite pricey!

Made with canned corned beef, sliced cabbage and onions (and a few seasonings), this is another one of those quick and easy dishes that you can prepare and serve within minutes.

Feel free to substitute the cabbage with (or add) your favorite vegetables.  I like sliced eggplant and fresh green beans in this dish in addition to the cabbage.

Comment below to let me know how you like my recipe, or let me know your favorite way to prepare canned corned beef. 😉

Corned Beef with Cabbage and Onions

image

Ingredients:

  • 2 cans corned beef
  • 1 medium onion, sliced
  • 1 tablespoon chopped garlic
  • 1 teaspoon Dashida seasoning (or you can use salt)
  • 1/2 teaspoon black pepper
  • 1 small head cabbage, sliced

Directions:

1.  Sauté the corned beef in a large pan over medium high heat.

image

2.  Add the onions, garlic, Dashida, and black pepper.  Cook for a few minutes until the onions become translucent.

image

3.  Add the sliced cabbage to the pan.  Cook over medium heat until the cabbage wilts and softens enough to your liking, about 10 minutes.

image

image

4.  Serve with hot white rice and enjoy!

image

« Older Entries Recent Entries »