Archive for ETHNIC

Mexican Street Corn

There’s something about eating grilled corn that makes it feel like summer as well as making a BBQ all that more exciting and delicious!

One of my favorite ways to eat corn on the cob is what’s called elotes or Mexican street corn. It’s grilled corn slathered with a mixture of Mexican crema and mayo, then covered in salty, yummy cotija cheese.  There are a few restaurants and local vendors here in town that make this, but why go out and buy it when you can make it right in your own kitchen?

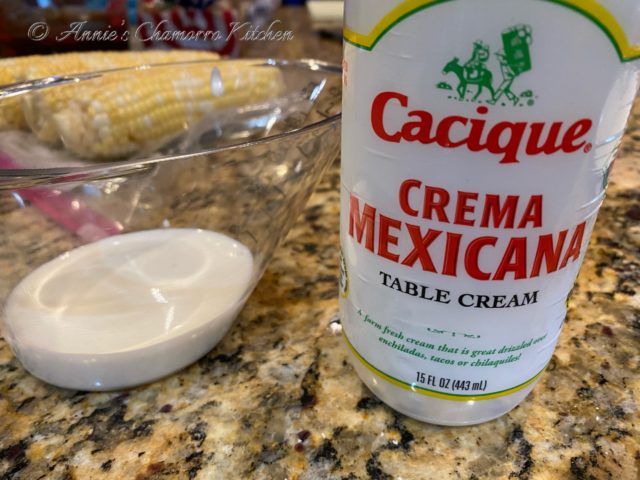
Crema looks like a more watery version of sour cream, bit it is actually similar to Crème fraiche as it has a higher butterfat content than sour cream and is less acidic.

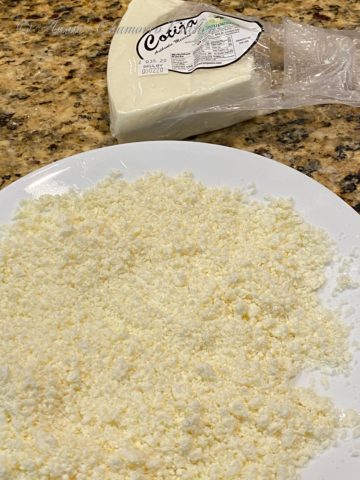
Cotija is a hard, crumbly Mexican cheese that is made from cow’s milk that resembles feta cheese.

To make this deliciousness, start by cooking your corn.  You want it cooled enough so that the crema-mayo mixture adheres to it without melting from the heat of the corn.

Add the crema to a small bowl.


Add the mayo.
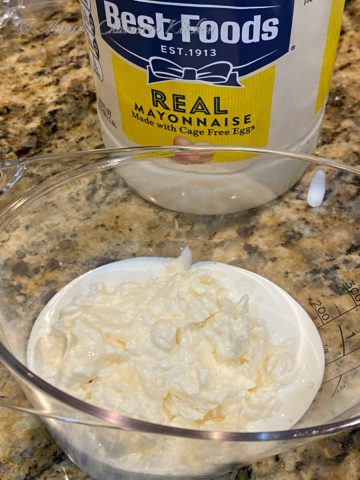


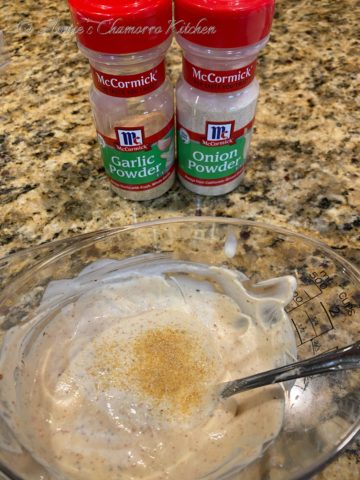
Add the garlic and onion powders.


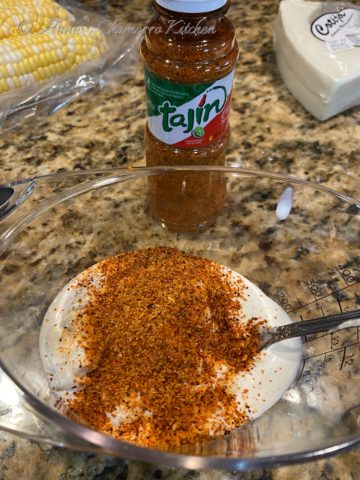
Add the tajin.


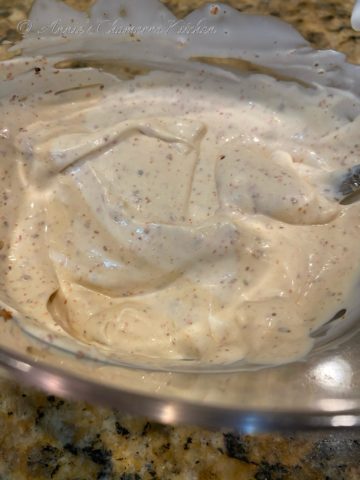
Stir to mix.  Set aside.


If your cotija cheese comes in a block or wedge, you need to crumble it.  You can use a food processor to do this, or if you’re like me and don’t want to dirty extra dishes or utensils, crumble it with a fork.


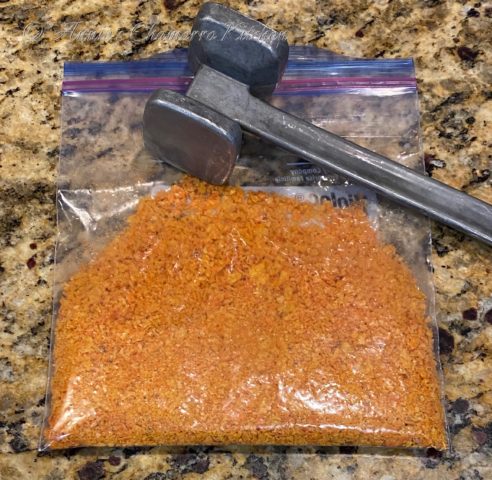
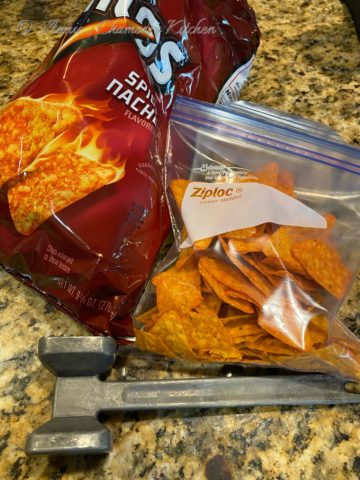
If you want an extra special touch to your corn, try adding your favorite crushed chips.  I used Doritos here.  Place the chips in a quart-sized resealable bag, about 3/4 full.  Use whatever you have on hand to crush the chips — a mallet, a can of soup, your fist — whatever works.  You want small crumbs, but don’t pulverize it into a powder.


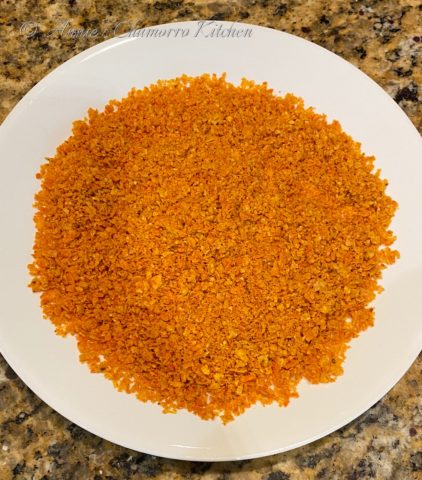
Pour the chips out onto a plate (it makes for easier coating if on a flat surface).


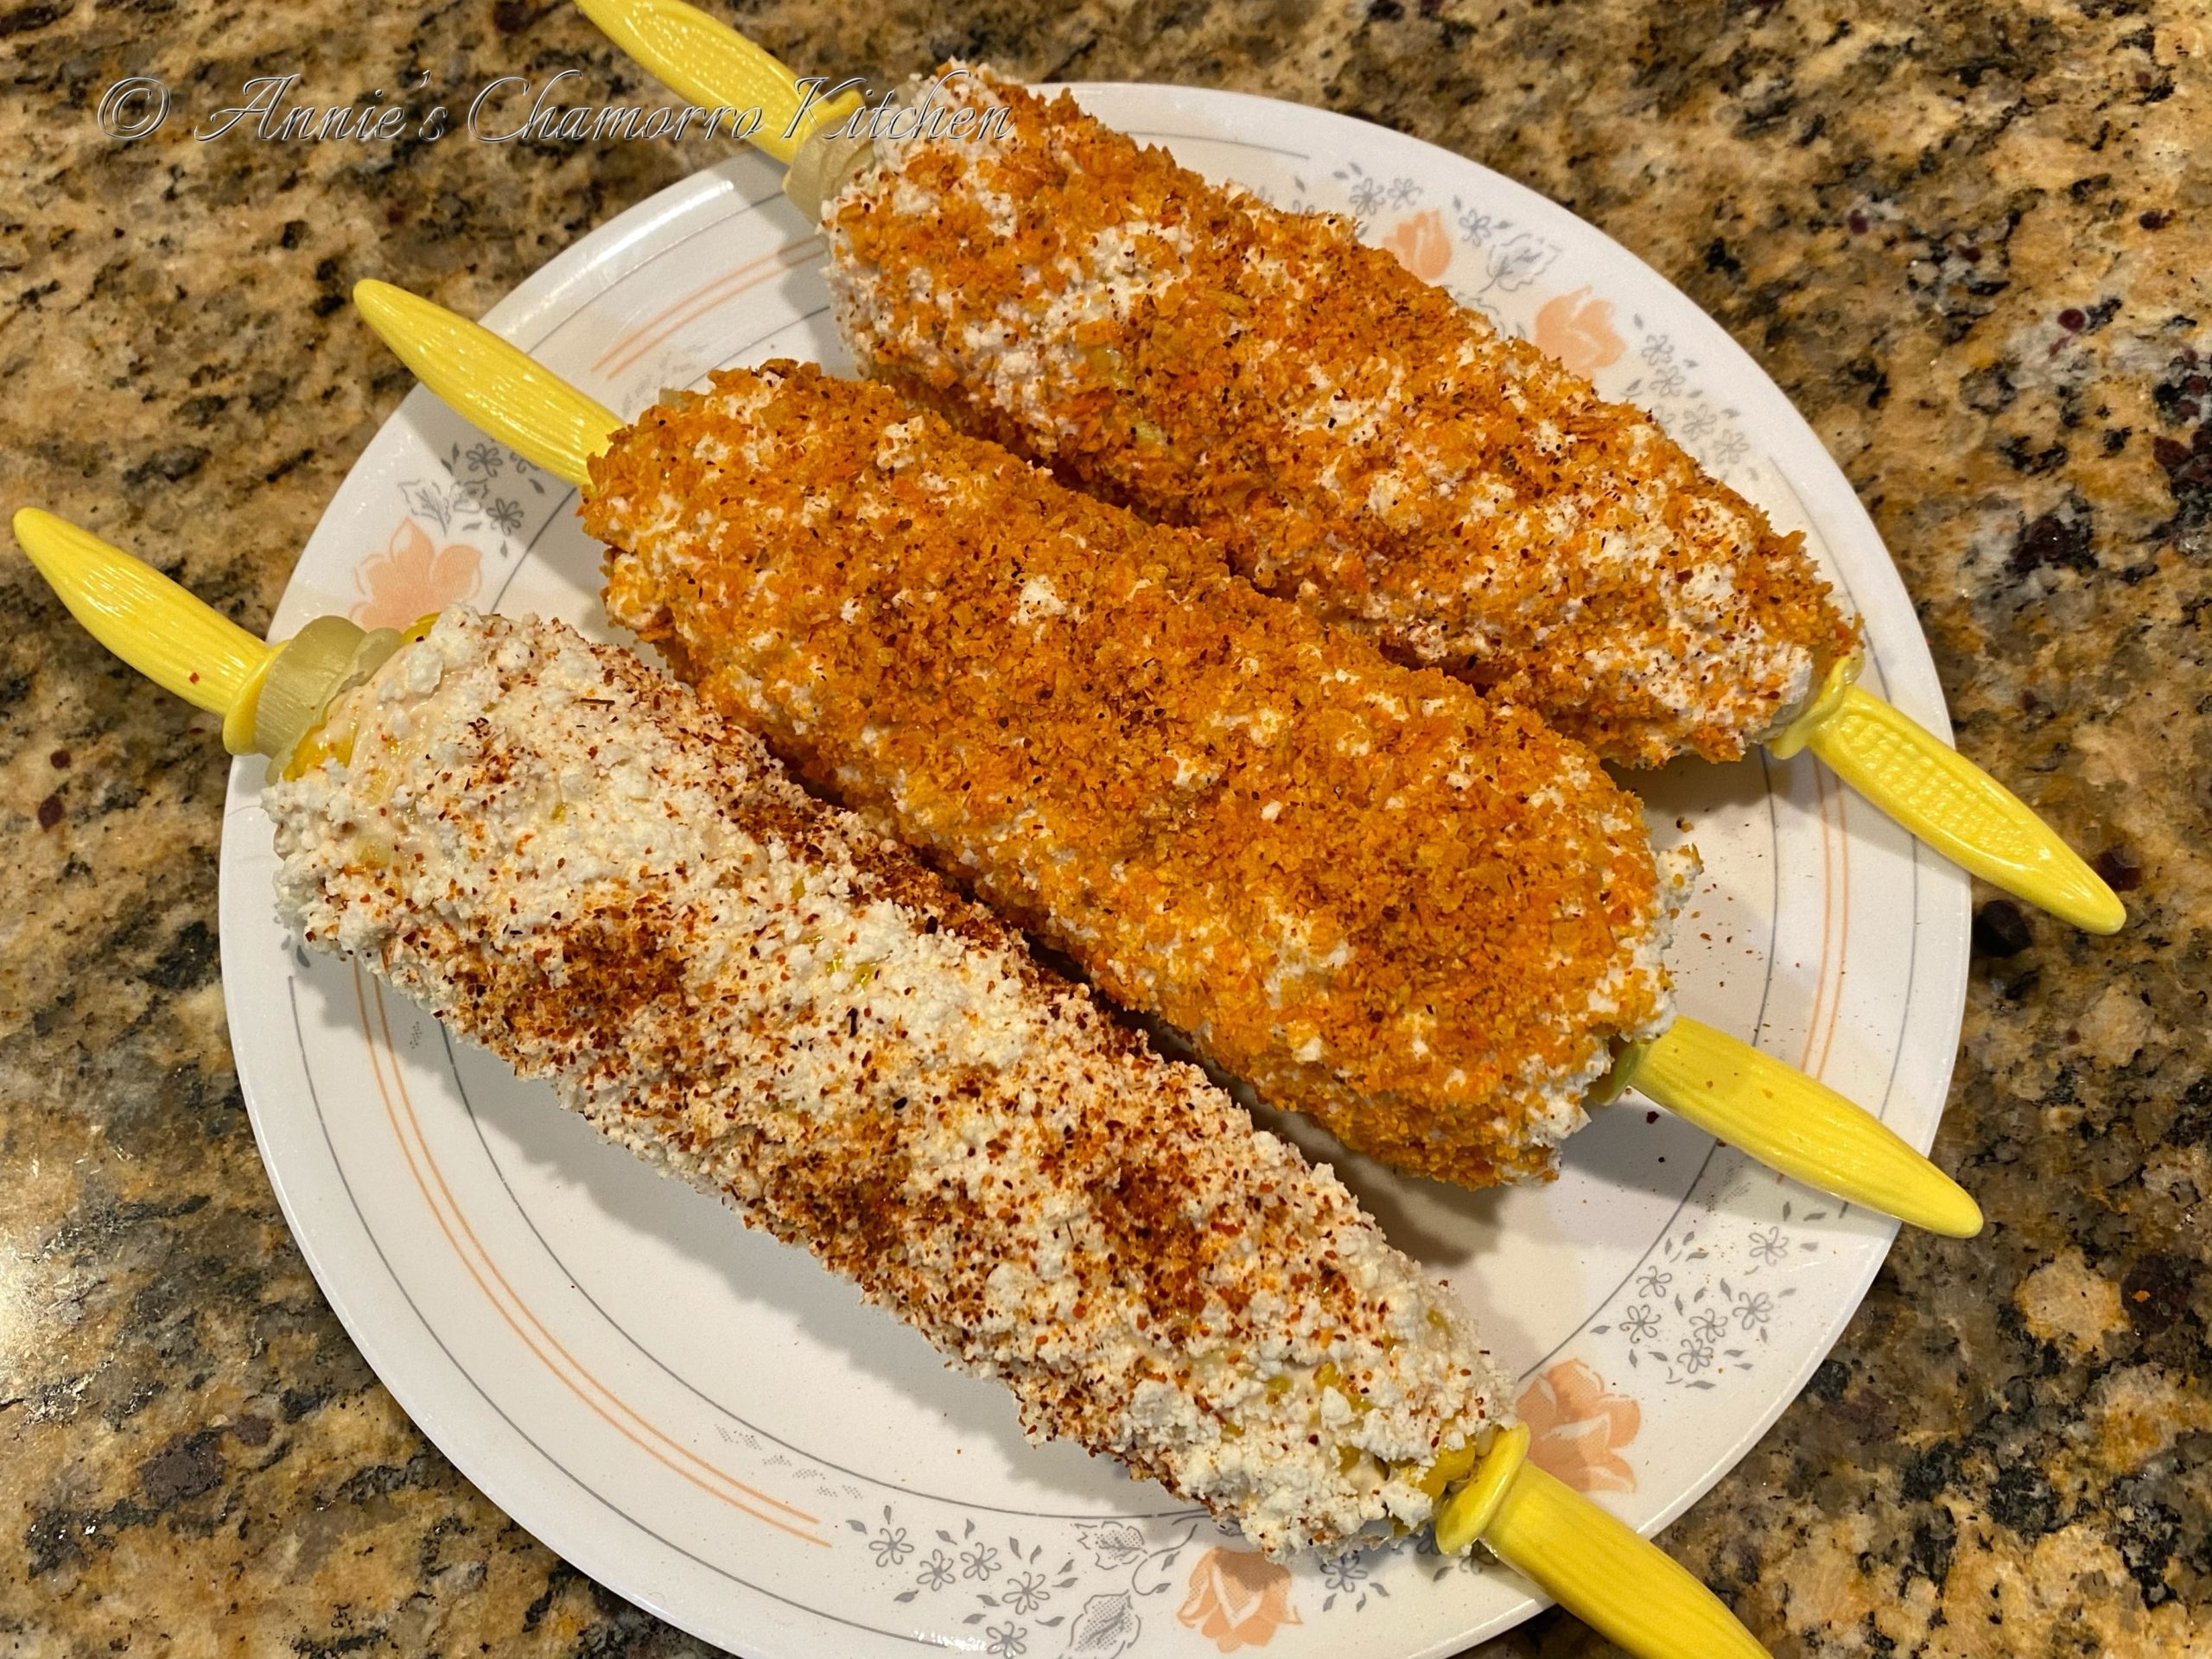
Now the fun part begins.  Take one ear of corn and slather it liberally with the crema-mayo mixture.
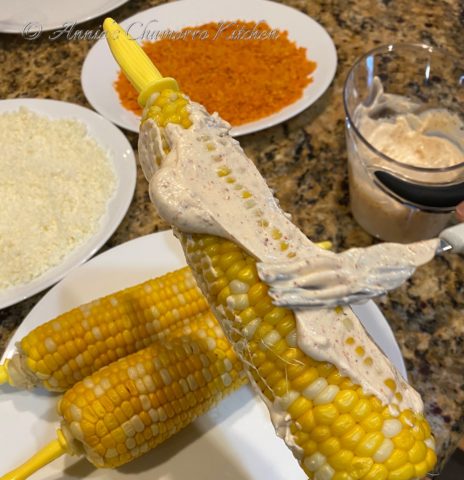


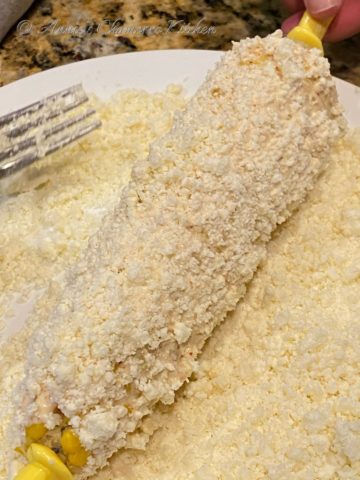
Roll the covered corn in the crumbled cotija cheese.  Use a fork to really get the cheese stuck onto the crema-mayo.
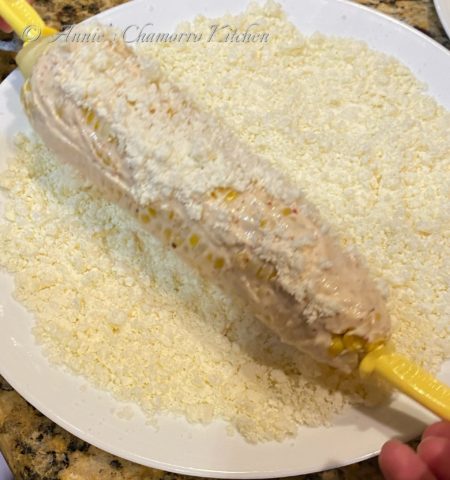


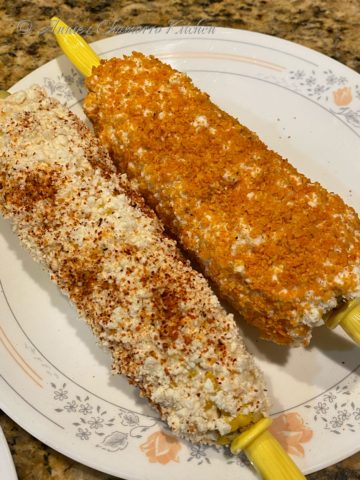
If you’re not feeling adventurous and don’t want to add crushed chips, that’s perfectly fine.  You can sprinkle on more tajin and call it good.
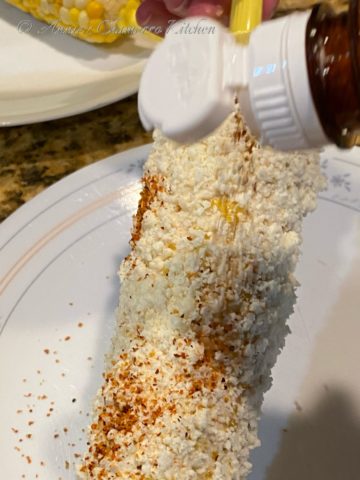


Or, go all-in and roll your elotes in some chips! Yeah, baby!  This is some good stuff, right here!
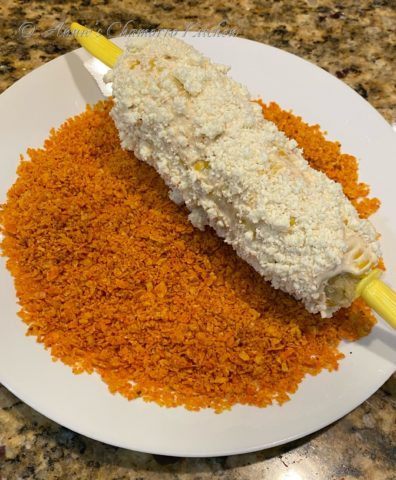


My recipe is enough to make four elotes.  Give it a try.  I think you’ll like it.
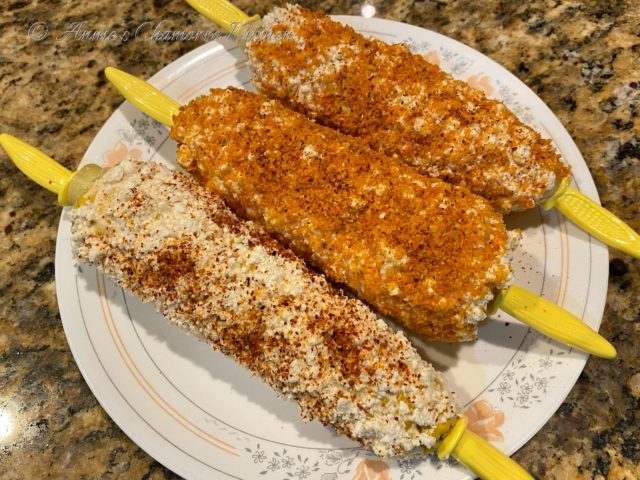


Mexican Street Corn
 
Prep time
Total time
 
Author:
Serves: 4
Ingredients
  • ⅓ cup Mexican crema
  • ⅓ cup mayonnaise
  • 2 teaspoons tajin
  • 1 teaspoon onion powder
  • 1 teaspoon garlic powder
  • 1 cup cotija cheese, crumbled
  • 1 cup crushed chips, optional
Instructions
  1. In a small bowl, stir together the crema, mayo, tajin, onion powder, and garlic powder.
  2. Slather the crema-mayo mixture over cooked and cooled ears of corn.
  3. Roll the crema-mayo covered corn in the crumbled cotija cheese.
  4. Roll the cheese-covered corn in the crushed chips if desired.


Print Friendly, PDF & Email

Banana Lumpia

Banana lumpia is a super simple dessert to make.  It requires just a few ingredients — cooking bananas, sugar, cinnamon, and lumpia wrappers.

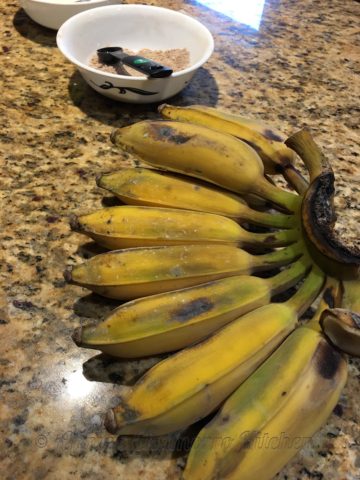
These are the kind of cooking bananas I like to use.  There are several varieties you can buy.  The one I see at most Asian stores (you can also find them in Hispanic markets as well) are a variety called Burro bananas.  Thai bananas also work well here.  The bananas pictured below are the Thai variety.

You want to make sure the bananas are fully ripe before making your banana lumpia.  They should be a deep yellow with a few black spots.  The bananas will still be slightly firm as well.

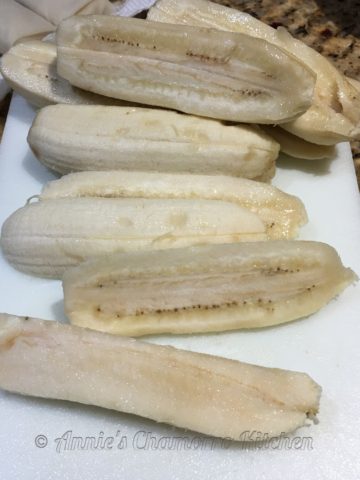
To prepare the bananas, peel and slice 6 bananas in half, lengthwise.  Cut each half in half again, lengthwise, giving you four long pieces.  Each piece should be about four inches long.

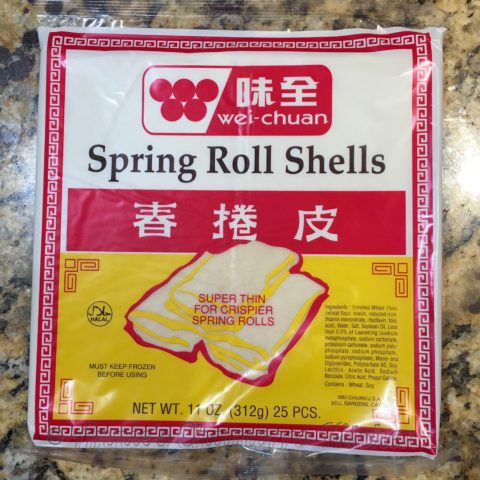
Set the bananas aside for now while you prepare your lumpia wrappers.  The brand I prefer is Wei-Chuan spring roll shells.  I find they stay crisp longer, and they are very easy to separate, even when partially frozen.

Separate the wrappers, then cover with a clean cloth to keep them from drying out.

To assemble the lumpia, place brown sugar and cinnamon in a small bowl.  Use a fork to mix it all together.

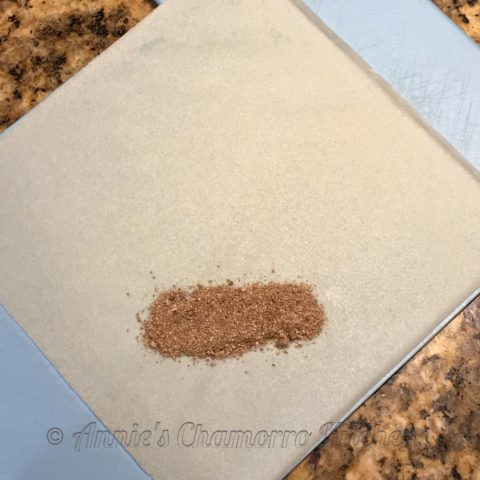
Spread about a tablespoon of the cinnamon-sugar mixture on one corner of the lumpia wrapper.

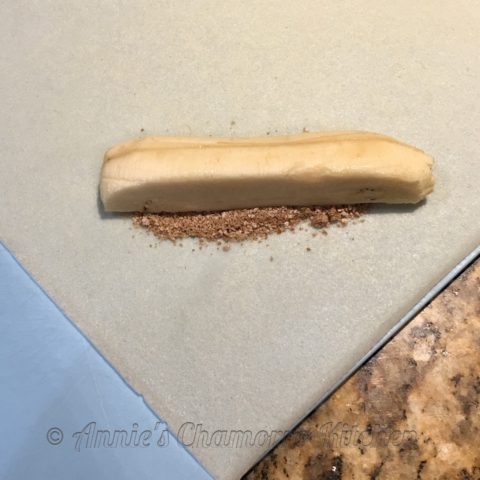
Lay one piece of sliced banana on top of the cinnamon-sugar mixture.  Another option is to roll each banana slice in the sugar mixture then place the coated banana on the lumpia wrapper.

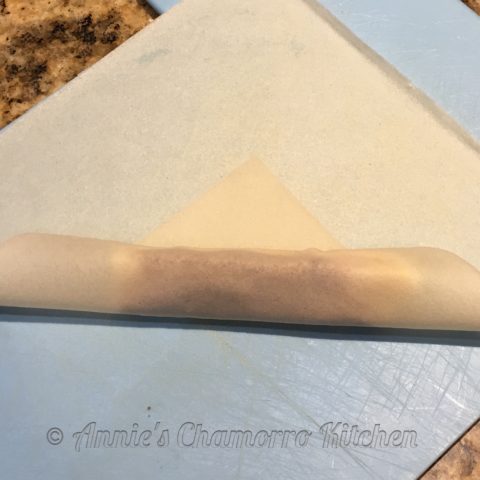
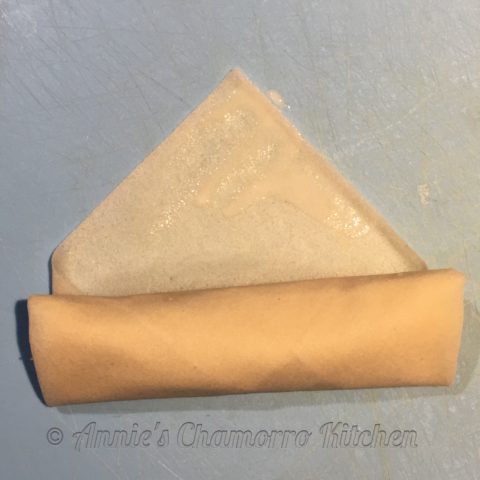
To roll the lumpia, begin by folding the bottom corner up and over the banana.  Slowly roll upward, sort of like forming a cigar shape.

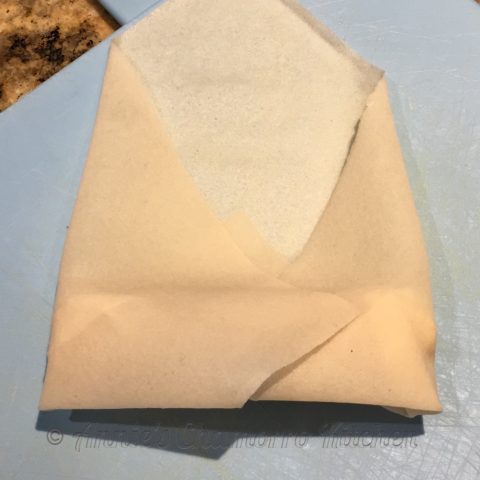
Fold each side inward, as if you were making an envelope.

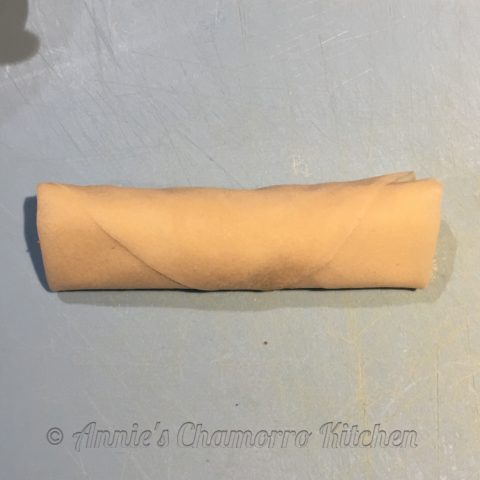
Continue rolling the lumpia, as tight as you can, until there are about two inches left of the top corner.

Dip your fingertip in some water then wet the top corner along the edges.  Finish rolling the lumpia over the moistened edge, pressing slightly to seal.

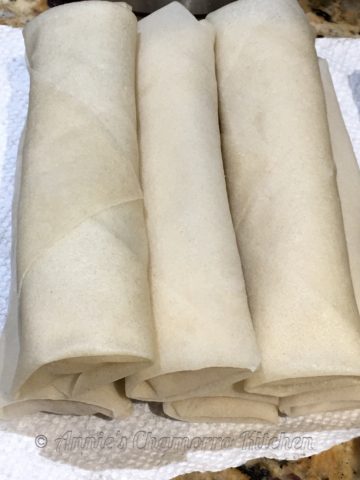
Finish rolling the lumpia.  If you plan on frying them right away, leaving them out is fine.  Otherwise, place rolled lumpia in an airtight container (a resealable bag also works well) and place in the refrigerator or freezer.

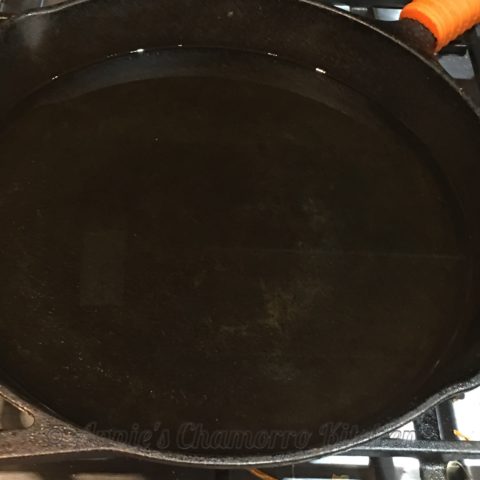
To fry the lumpia, heat oil in a large skillet to 350 degrees F.

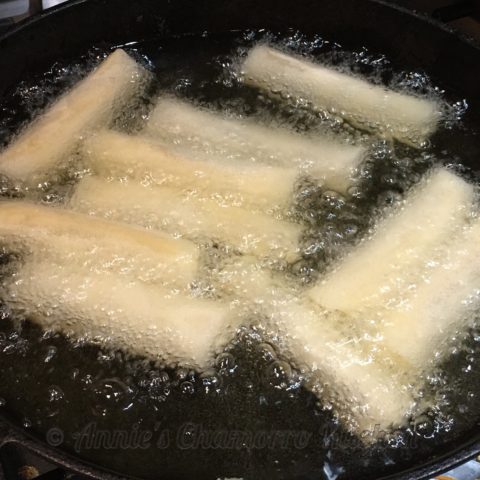
Carefully add the lumpia to the hot oil, making sure not to crowd the oil.

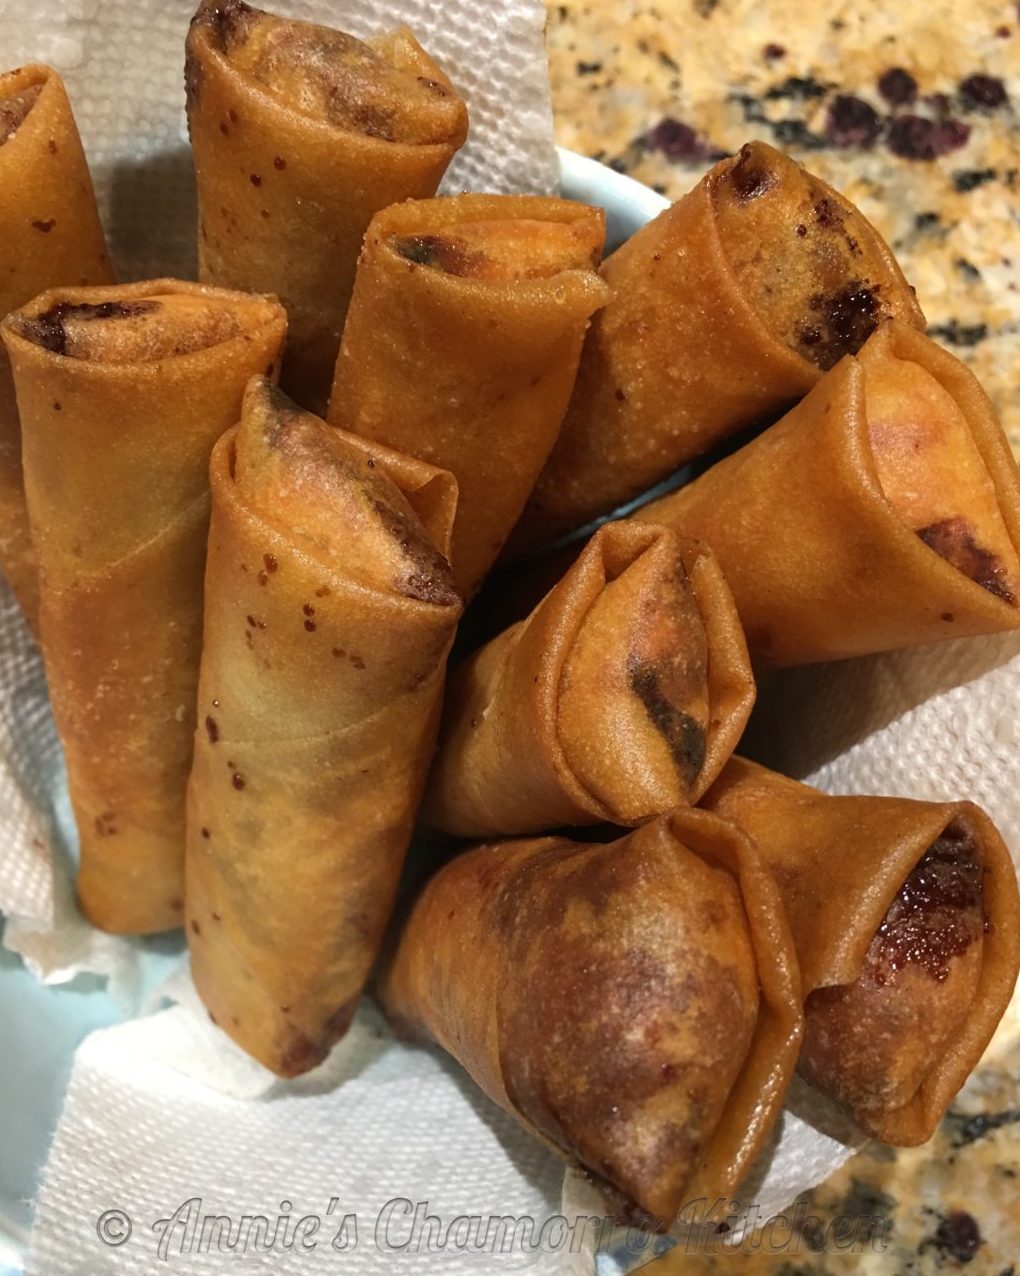
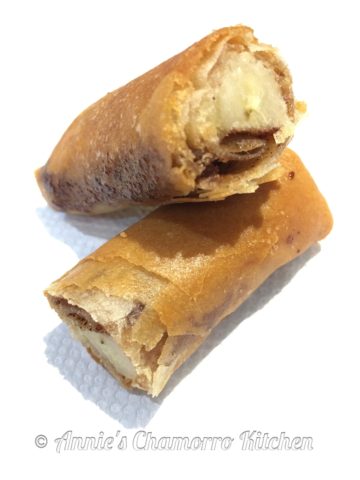
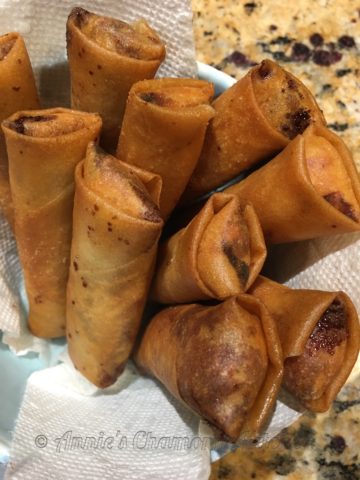
Fry the lumpia until golden brown. They are ready at this point—as shown in the photo below.  One popular cooking option is to create a caramelized coating by sprinkling sugar over the lumpia as it fries.  I don’t particularly care for this as it makes a huge mess in the oil.  If you’d like, you can serve up your lumpia with some caramel sauce on the side (caramel sauce used for ice cream sauce works well) for drizzling or dipping.

Enjoy!


Banana Lumpia
 
Prep time
Cook time
Total time
 
A delicious, crispy dessert made with bananas and cinnamon-sugar, rolled in a lumpia wrapper and fried until golden brown and crispy.
Author:
Recipe type: Dessert
Cuisine: Chamorro, Filipino
Serves: 24
Ingredients
  • 6 cooking bananas, such as Burro or Thai variety
  • 1½ cups brown sugar
  • 1 tablespoon cinnamon

    Other:
  • Water, for sealing
  • Vegetable oil, for frying
Instructions
  1. Slice each banana in half, lengthwise, then slice each half in half again, lengthwise, giving your four pieces per banana.
  2. Separate the lumpia wrappers.
  3. In a small bowl, mix the cinnamon and sugar together.
  4. Place a tablespoon of the cinnamon-sugar mixture close to the bottom of a lumpia wrapper. Place one slice of banana over the cinnamon-sugar. Roll upward, like a cigar. Fold in the two edges, then continue rolling upward. Rub some water along the top edge of the lumpia wrapper; press to seal.
  5. Fry the lumpia in oil heated to 350 degrees until golden brown. Serve while hot and crisp.
  6. Option: serve with a side of caramel sauce for drizzling or dipping.

Print Friendly, PDF & Email

Ahi Tuna Poki Salad

image

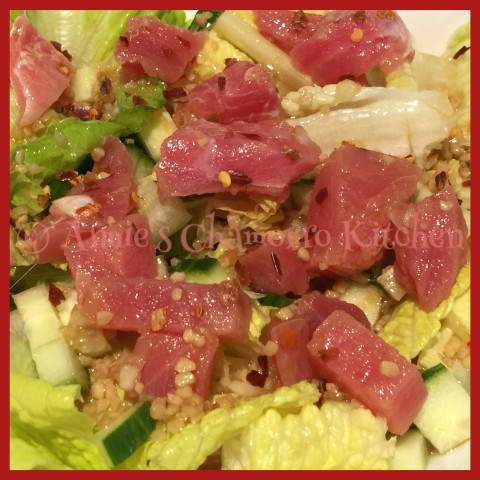
This is a new twist on Ahi Tuna Poki. Marinate good quality cubes of ahi tuna in my Japanese Vinaigrette dressing and serve with your favorite salad greens and diced cucumbers.

It’s oh-so-good, trust me.  🙂

You can find my Japanese Vinaigrette recipe here.

Give it a try. I think you’ll like it. 🙂

image


Ahi Tuna Poki Salad
 
A new take on Ahi Tuna Poki that's served in my tangy and slightly sweet dressing with your favorite salad vegetables
Author:
Recipe type: Seafood, Salad
Cuisine: Japanese
Serves: 1 serving
Ingredients
  • Lettuce leaves (I like hearts of Romaine), as much as you like
  • ½ cup diced cucumbers
  • ½ cup diced red onions
  • ½ cup julienned carrots
  • 1 cup diced ahi tuna
  • ½ cup Japanese Vinaigrette
Optional:
  • Red pepper flakes
Instructions
  1. Make my Japanese Vinaigrette as directed in my recipe (see the link above).
  2. Marinate the ahi tuna in the vinaigrette for 10-15 minutes. Pour the tuna and dressing over the salad greens and other vegetables. Sprinkle red pepper flakes over the salad (optional).
Serve and enjoy!


Print Friendly, PDF & Email

Japanese Vinaigrette

I love salads, but it’s all about the dressing for me. I’ve been experimenting with various salad dressings but I always seem to migrate toward vinegar and oil mixtures.

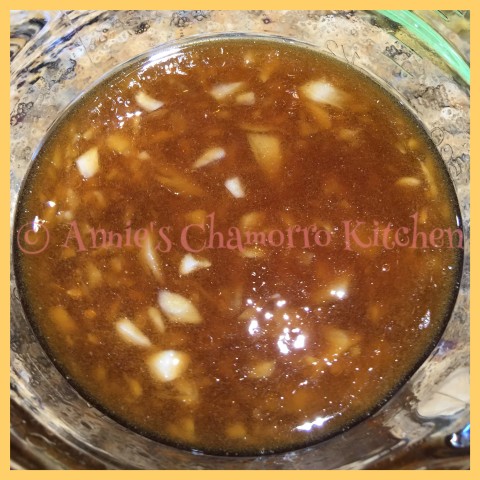
I call this a Japanese vinaigrette because of the addition of rice wine vinegar and aji mirin seasoning. Traditional Japanese dressings, however, usually use plain vegetable oil, but I love the flavor sesame oil imparts, so that’s my oil of choice in this version.

This is a quick and easy recipe. Throw all of the ingredients into a bowl, whisk, and serve.

This dressing is delicious with mixed salad greens, over cucumbers, or use it to make one of my many versions of Ahi Tuna Poki.

image

Give it a try. I think you’ll like it. 🙂

Japanese Vinaigrette
 
A tangy and slightly sweet dressing perfect for salads, seafood, or used as a marinade.
Author:
Recipe type: Sauces and Dressings
Cuisine: Japanese
Serves: 2.5 cups
Ingredients
  • 1 cup rice vinegar
  • ½ cup aji mirin sweet cooking rice seasoning
  • ¼ cup white, granulated sugar
  • ¼ cup sesame oil
  • ¼ cup finely chopped onions
  • ¼ cup soy sauce
  • 1 teaspoon salt
  • 1 tablespoon chopped garlic
Instructions
  1. Place all ingredients into a small bowl. Whisk to combine.
  2. Pour over salad greens, cucumbers, or use as a marinade. This is also a delicious dressing for my version of Ahi Tuna Poki.


Print Friendly, PDF & Email

Thai BBQ Pork

My Thai BBQ Pork is one recipe you’ll definitely want to try.  The secret is really in the marinade and basting sauce.  Cilantro, soy sauce, lots of garlic and fish sauce form the base for this yummy marinade.  Lime juice not only adds wonderful flavor to the meat, but the acid also serves to break down the meat, allowing the marinade to work its magic.

image

The basting sauce, a mixture of rich coconut milk and some of the reserved marinade mixture gives you an added layer of flavor.  The heat from the grill caramelizes the basting sauce as the meat cooks, creating beautifully browned and juicy pork with a slightly sweet and savory coating.

image

Now that I’ve got you drooling, here’s how to do it.

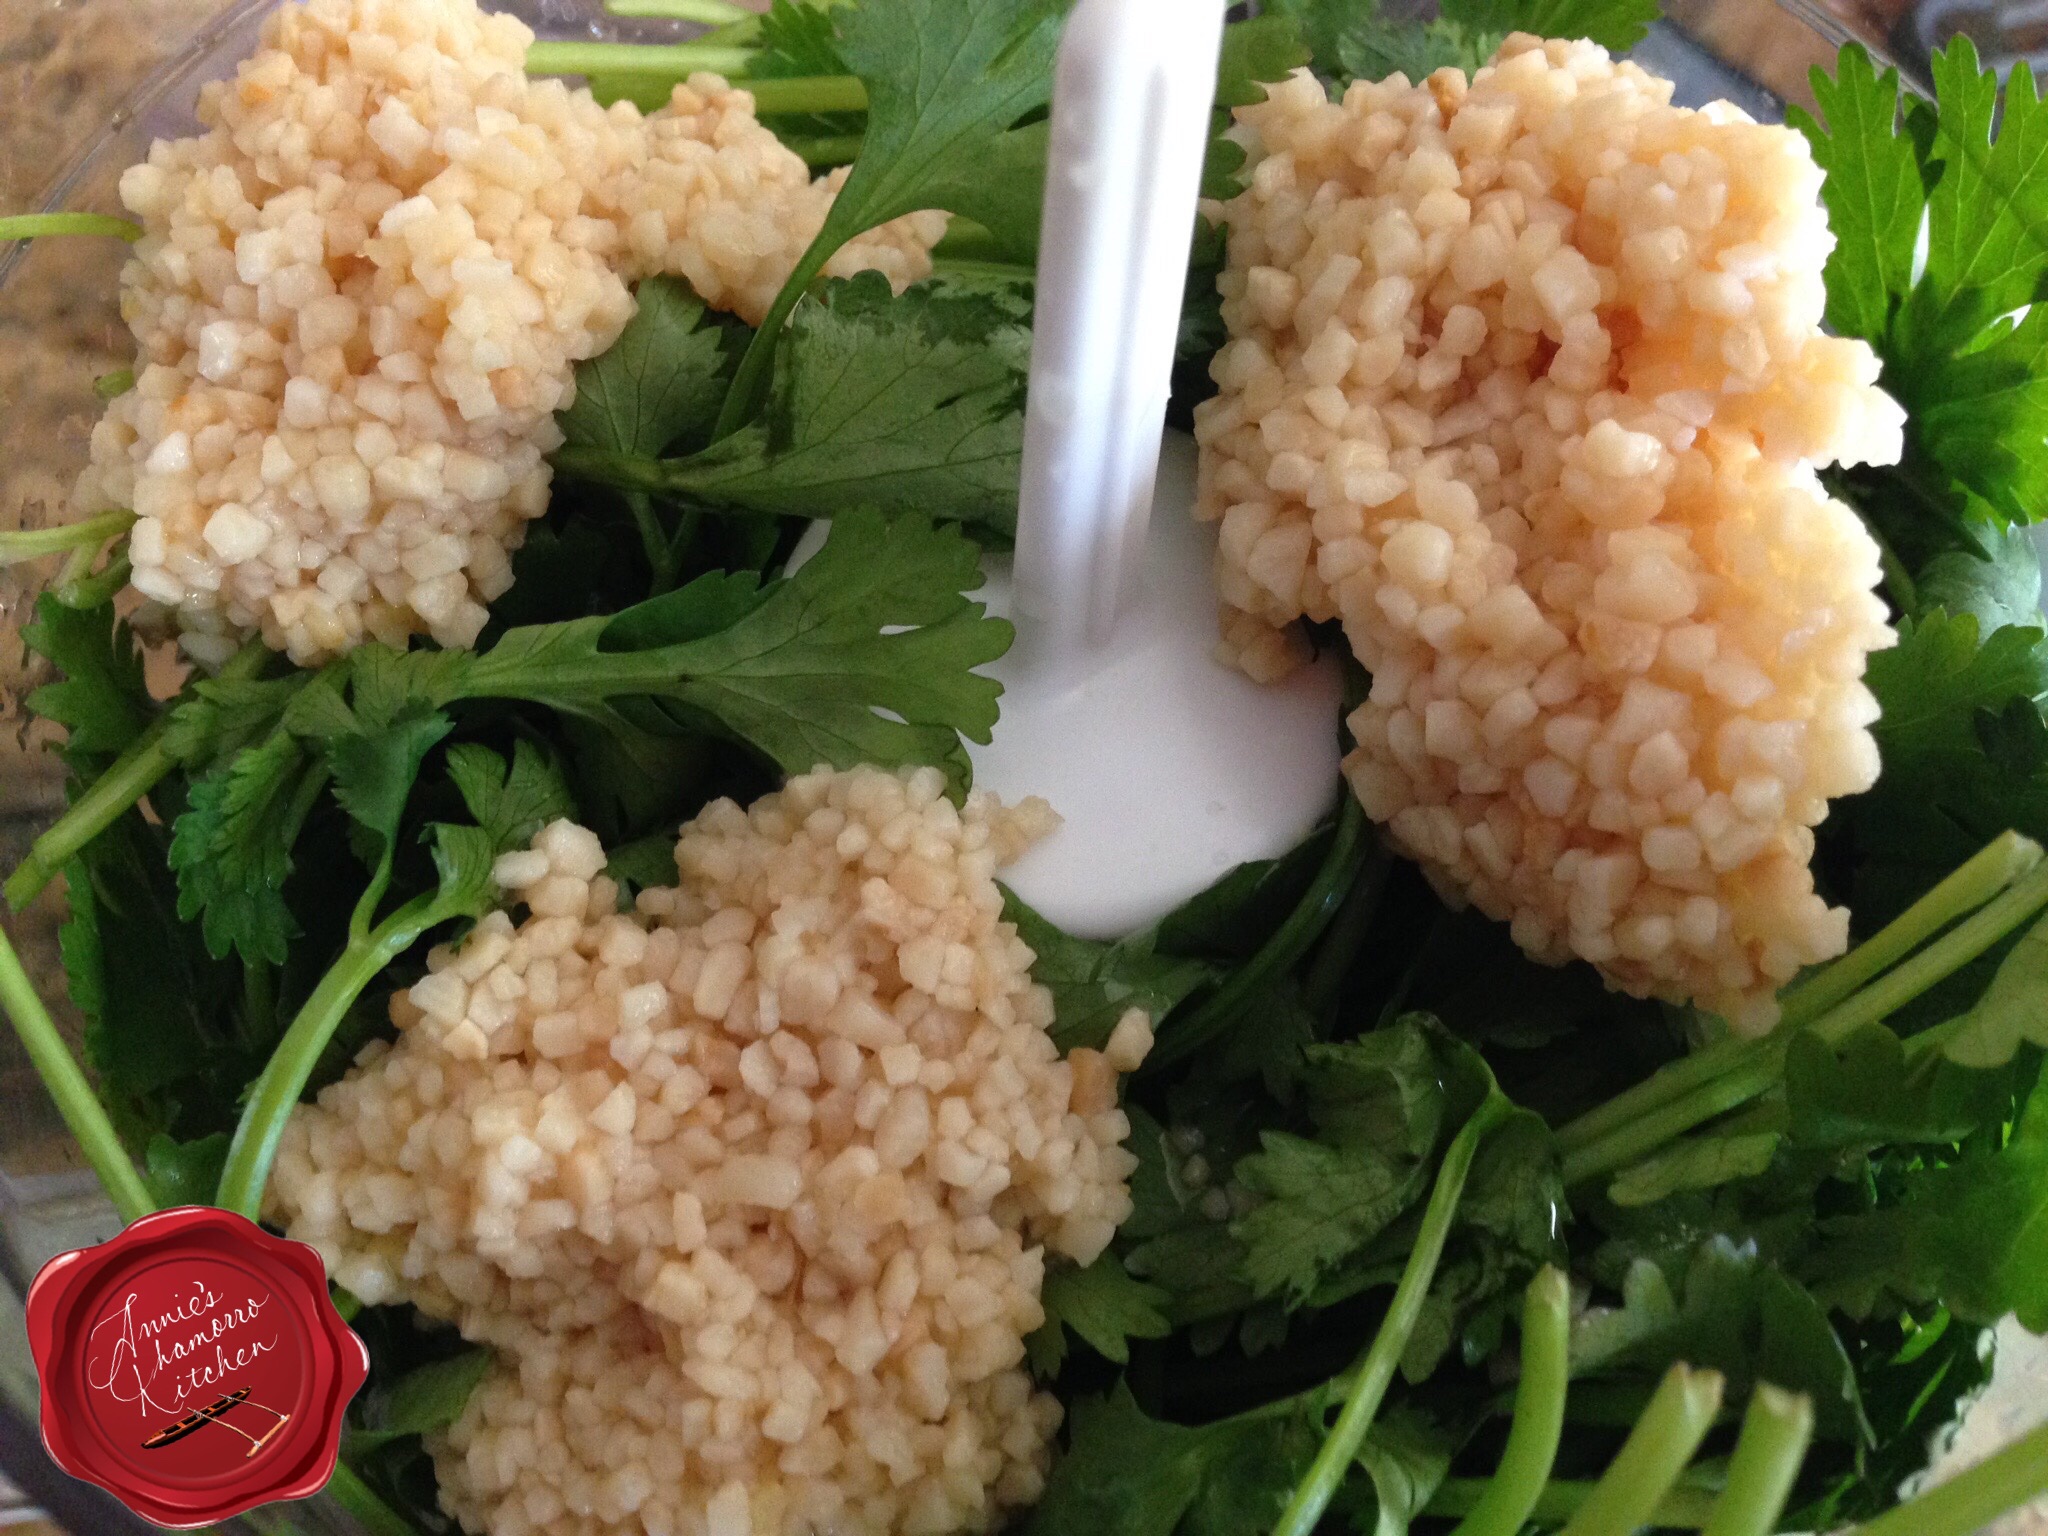
Place the cilantro (leaves AND stems) and garlic in a food processor along with the soy sauce.  You’ll need the liquid in there to help break down the cilantro.

image

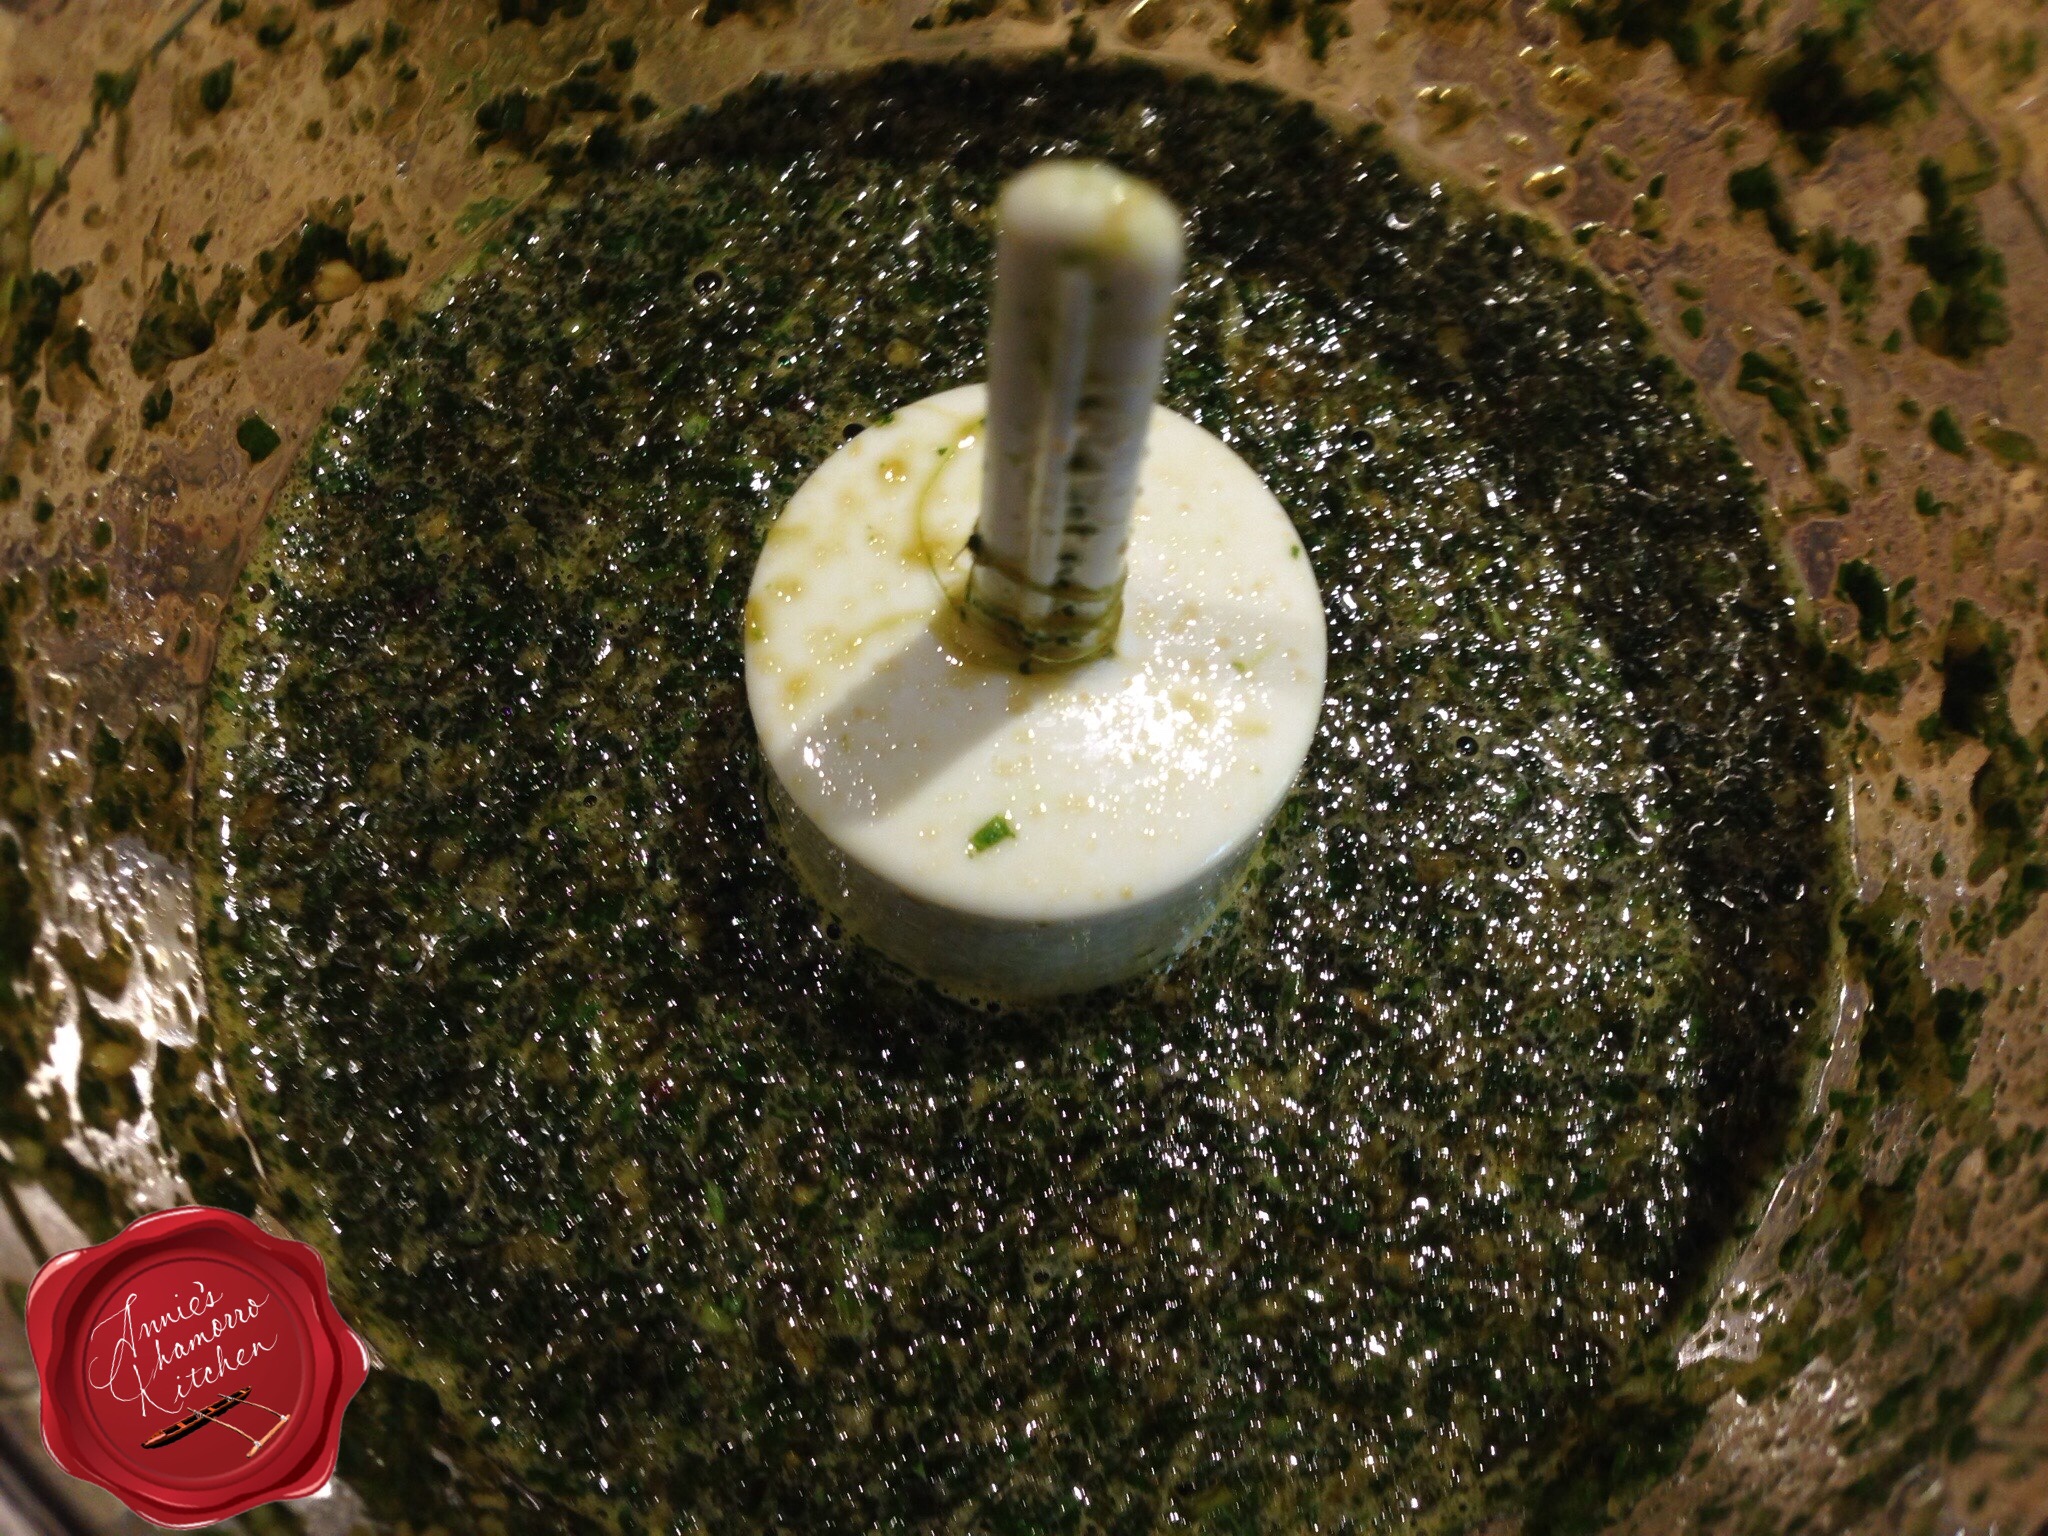
Pulse or grind the mixture until your mixture looks like the photo below.  You want the cilantro chopped as finely as possible.

image

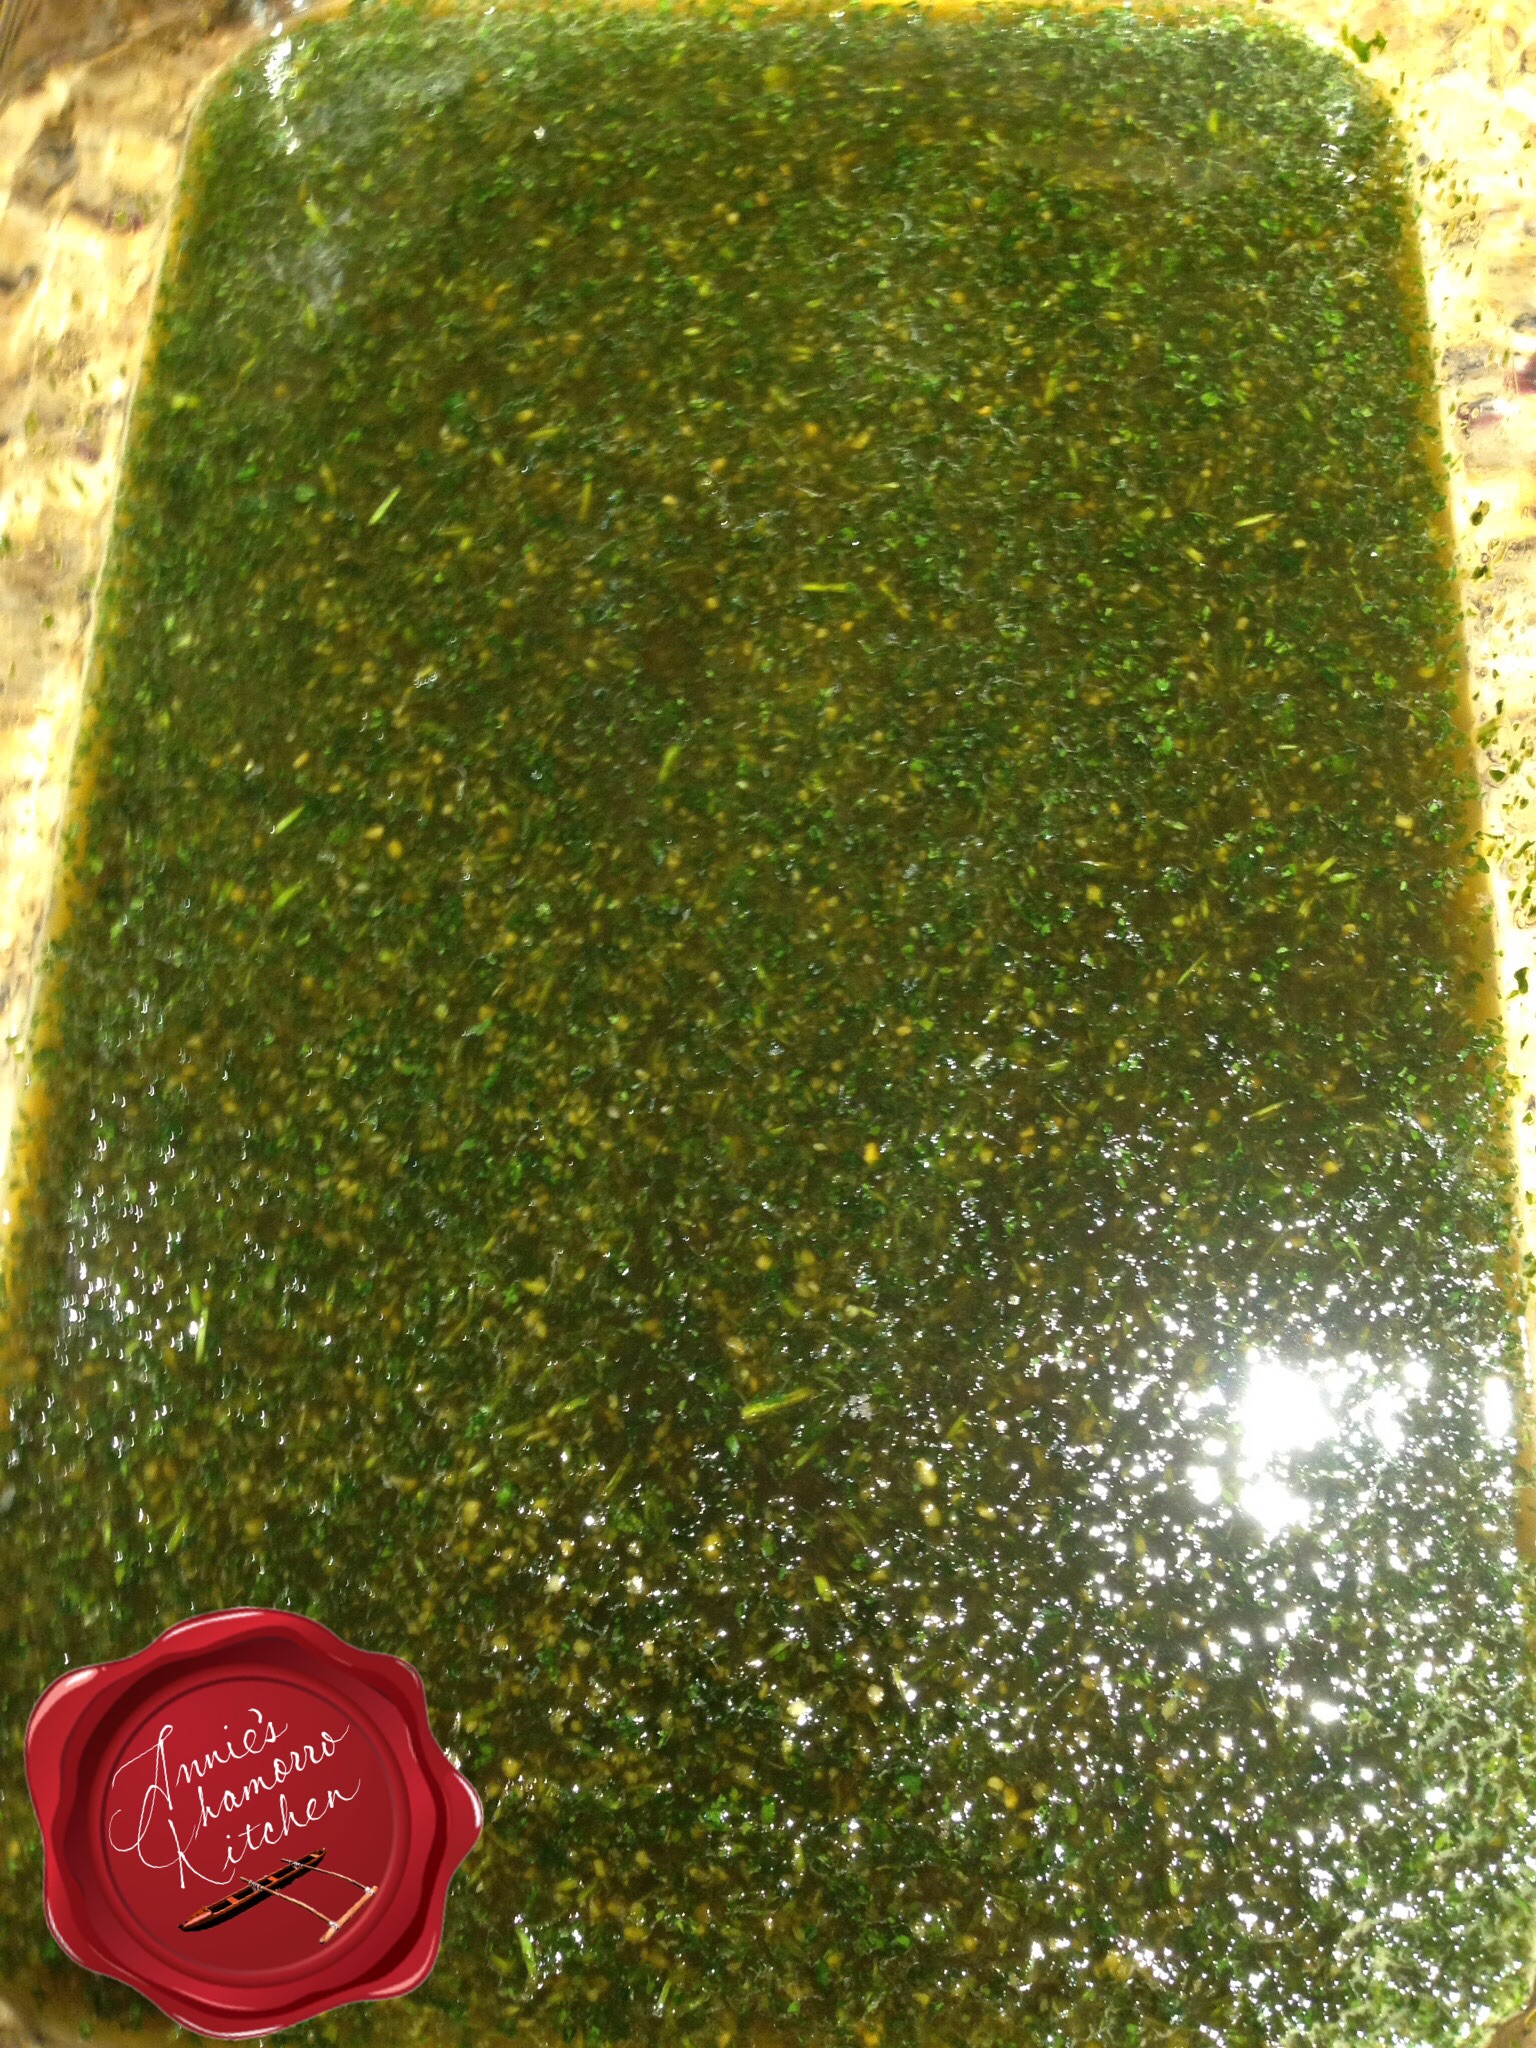
Place the cilantro mixture into a large bowl or pan.  Add the rest of the marinade ingredients to the bowl, stirring to combine it all.

Remove about 1/4 cup of the marinade mixture; place it into a small bowl along with coconut milk. This will be your basting sauce.

image

Place the pork into the marinade.  Use your favorite cut of pork, but make sure you use something that has some fat; lean pork will dry out too quickly for this dish.  I like using pork shoulder or pork butt, cut into strips or cubes (for shish kabobs).  Let the pork marinate for 2 or 3 hours, longer if desired.  Keep the mixture refrigerated if you don’t plan on grilling this right away.
image

To make shish kabobs, place several pieces of cubed pork onto a skewer.  I have metal skewers so there’s no soaking required.  If you use bamboo or wooden skewers, be sure to soak the skewers for several hours (overnight is good too) before grilling.

image

Skewer the meat AFTER it’s been marinated.

image

Place on a hot grill and baste immediately.

Grill the meat over relatively high heat.  I have a Traeger grill that has a temperature gauge built into it.  I grilled this at 325 degrees for about 1 1/2 hours, basting and turning every 15 minutes.

image

Turn the meat over occasionally, basting each time.

image

image

The coconut milk mixed with the reserved marinade caramelizes into a lip-smacking coating that will have you oooh-ing and ahhh-ing (trust me, it’s that yummy). 🙂

image

I know some people who absolutely won’t eat charred BBQ, but that little piece of charred goodness in the photo below was TO-DIE-FOR-delicious!!!

image

Mmmmmm…soooo good served with hot steamed white rice and fina’denne’.

The next time I make this, I’m going to make just a little bit more marinade, reserving some to use as a dipping sauce when the pork is done.

image

Give my recipe a try.  I think you’ll like it. 🙂


Thai BBQ Pork
 
Author:
Ingredients
  • 1 bunch cilantro
  • ½ cup soy sauce
  • 3 tablespoons chopped garlic
  • ½ cup brown sugar
  • ¼ cup fish sauce (I like Three Crabs brand)
  • ½ cup lime juice
  • 1 cup coconut milk
  • 4 pounds pork (preferably boneless pork shoulder), cut into strips or cubes
Instructions
Make the Marinade:
  1. Place the cilantro, soy sauce and garlic in a food processor. Pulse until well blended. Pour the mixture into a large bowl or pan.
  2. Add the brown sugar, fish sauce, and lemon juice to the cilantro mixture. Stir to mix the ingredients together.
Make the Basting Sauce:
  1. Remove ¼ cup of the marinade mixture and place into a small bowl. Add the coconut milk; mix to combine and set aside.
Grill the Meat:
  1. Place the meat in the marinade mixture. Let the meat marinate for 2 to 3 hours (longer if you like, but refrigerate the mixture).
  2. Place the meat on the grill. Immediately baste with the reserved coconut basting sauce. Turn the meat occasionally, basting each time. Stop basting when the meat has started to caramelize and is a rich brown in color.
  3. Grill until the meat is done and nicely caramelized.
Serve and ENJOY!


Print Friendly, PDF & Email
« Older Entries