Tender and Juicy Burgers

I love grilled ribs and steaks, but occasionally I crave a really good, juicy burger.

image

I’m not talking about those flat, plain, frozen patties you can buy in bulk, and taste like cardboard after cooking.  Rather, I’m talking about thick, juicy and tender burgers packed full of flavor.

image

My family and I are trying to eat healthier, so I created this burger that added quality (and healthy) ingredients without sacrificing flavor.

You can find my complete recipe at the bottom of this post.  For THMs, this is an “S” recipe.

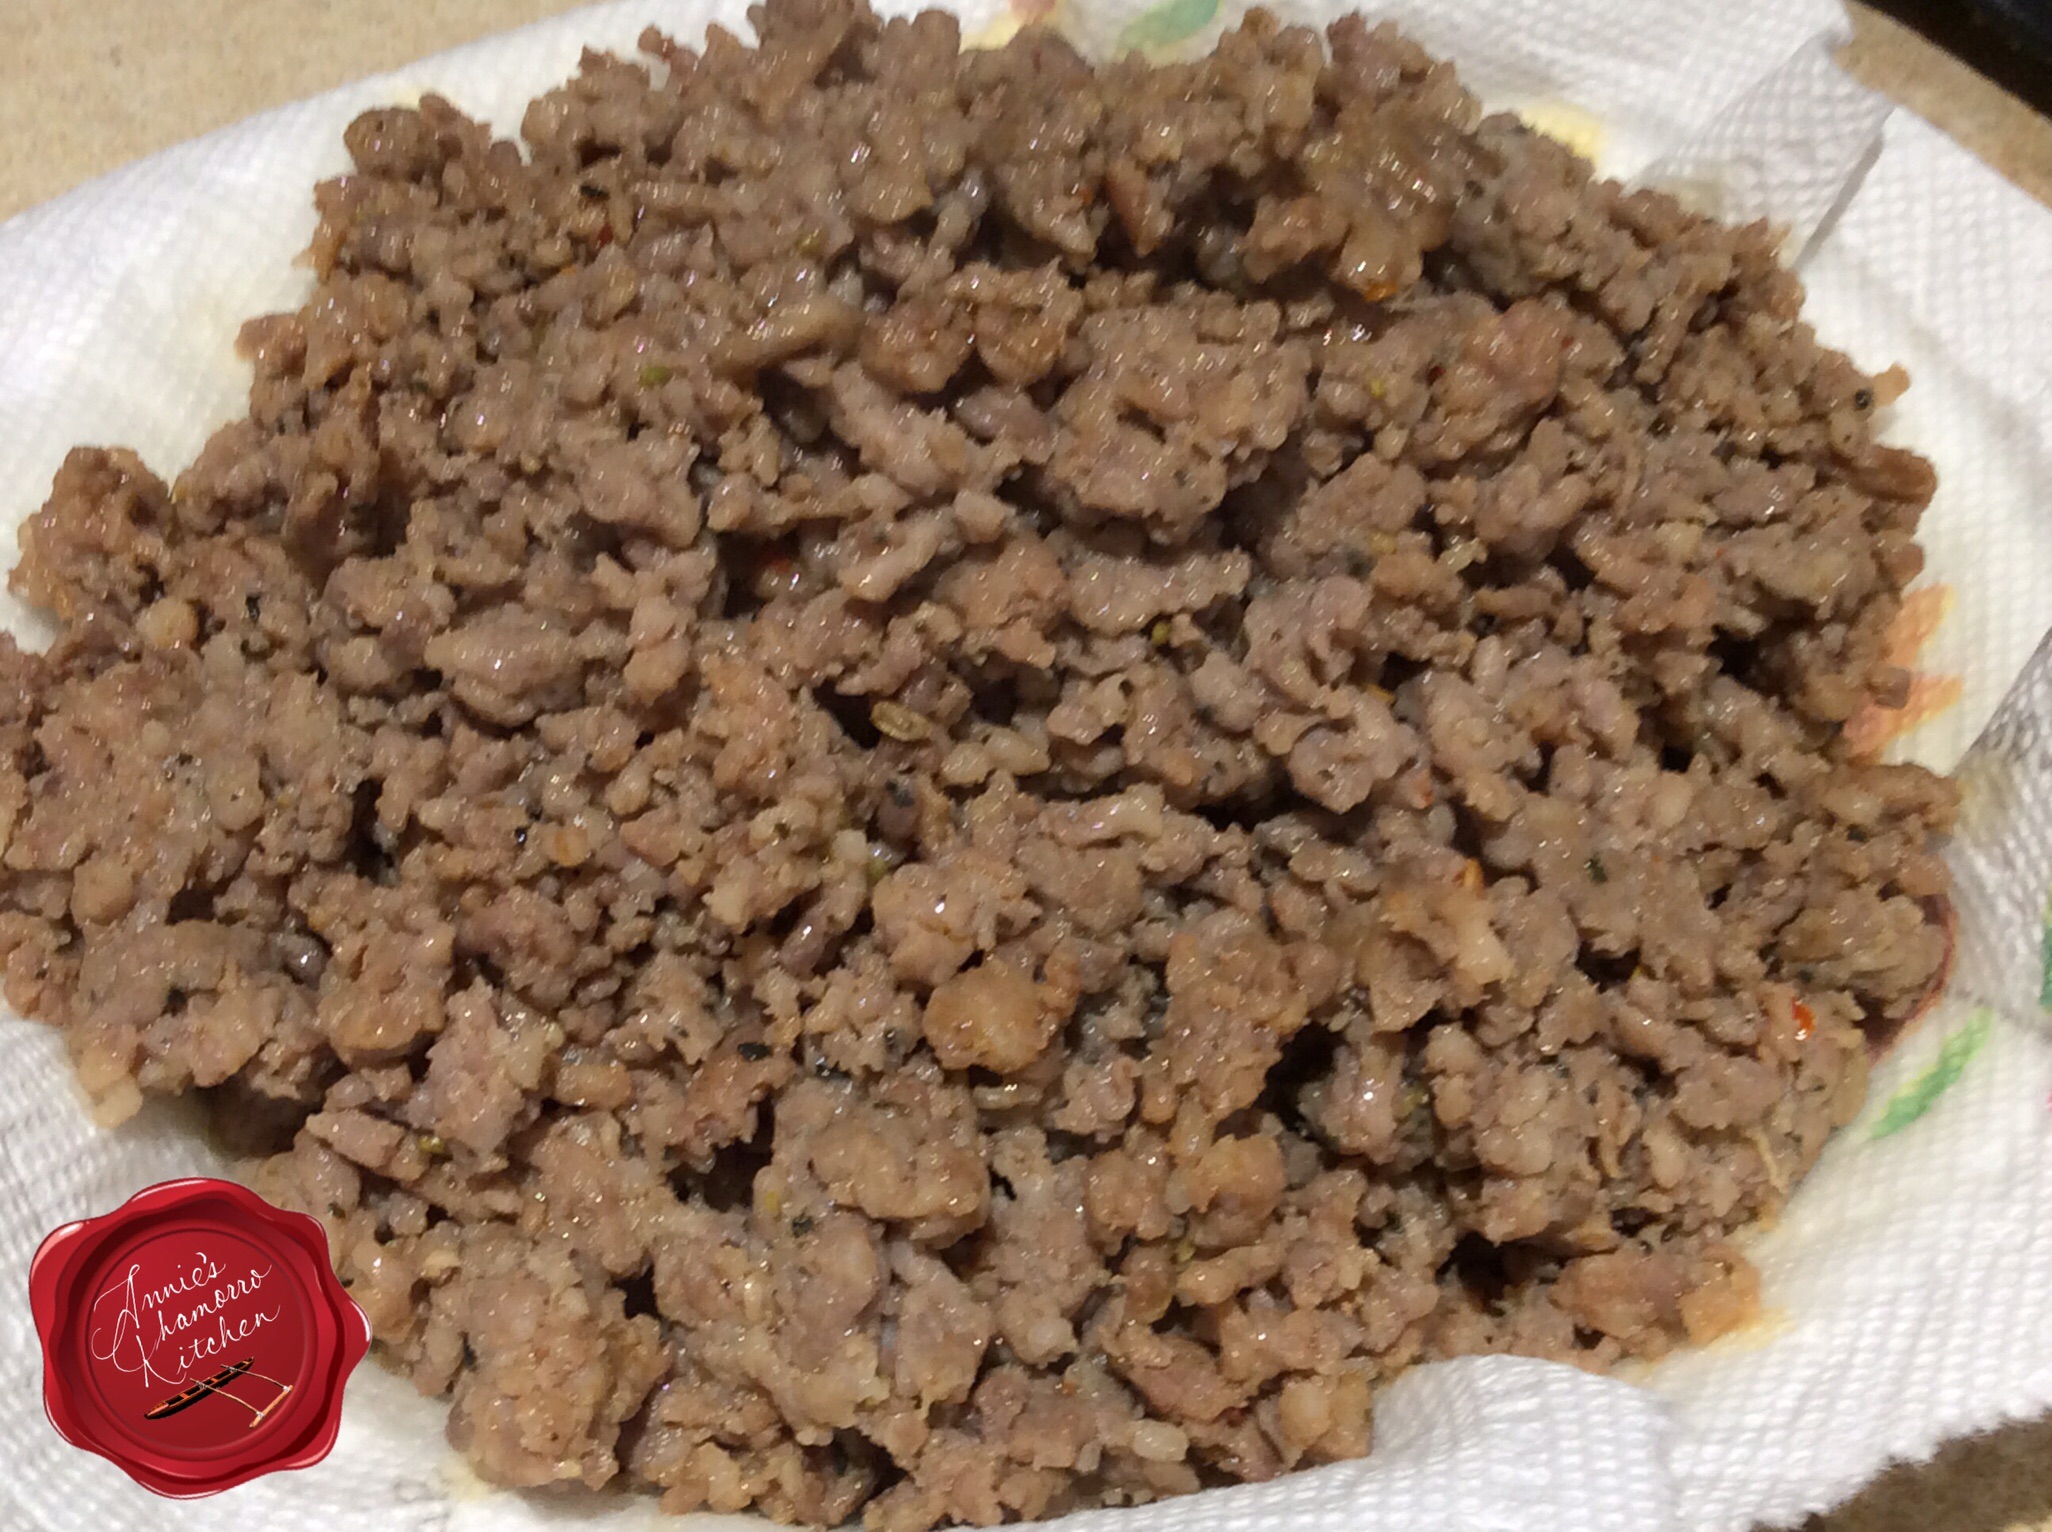
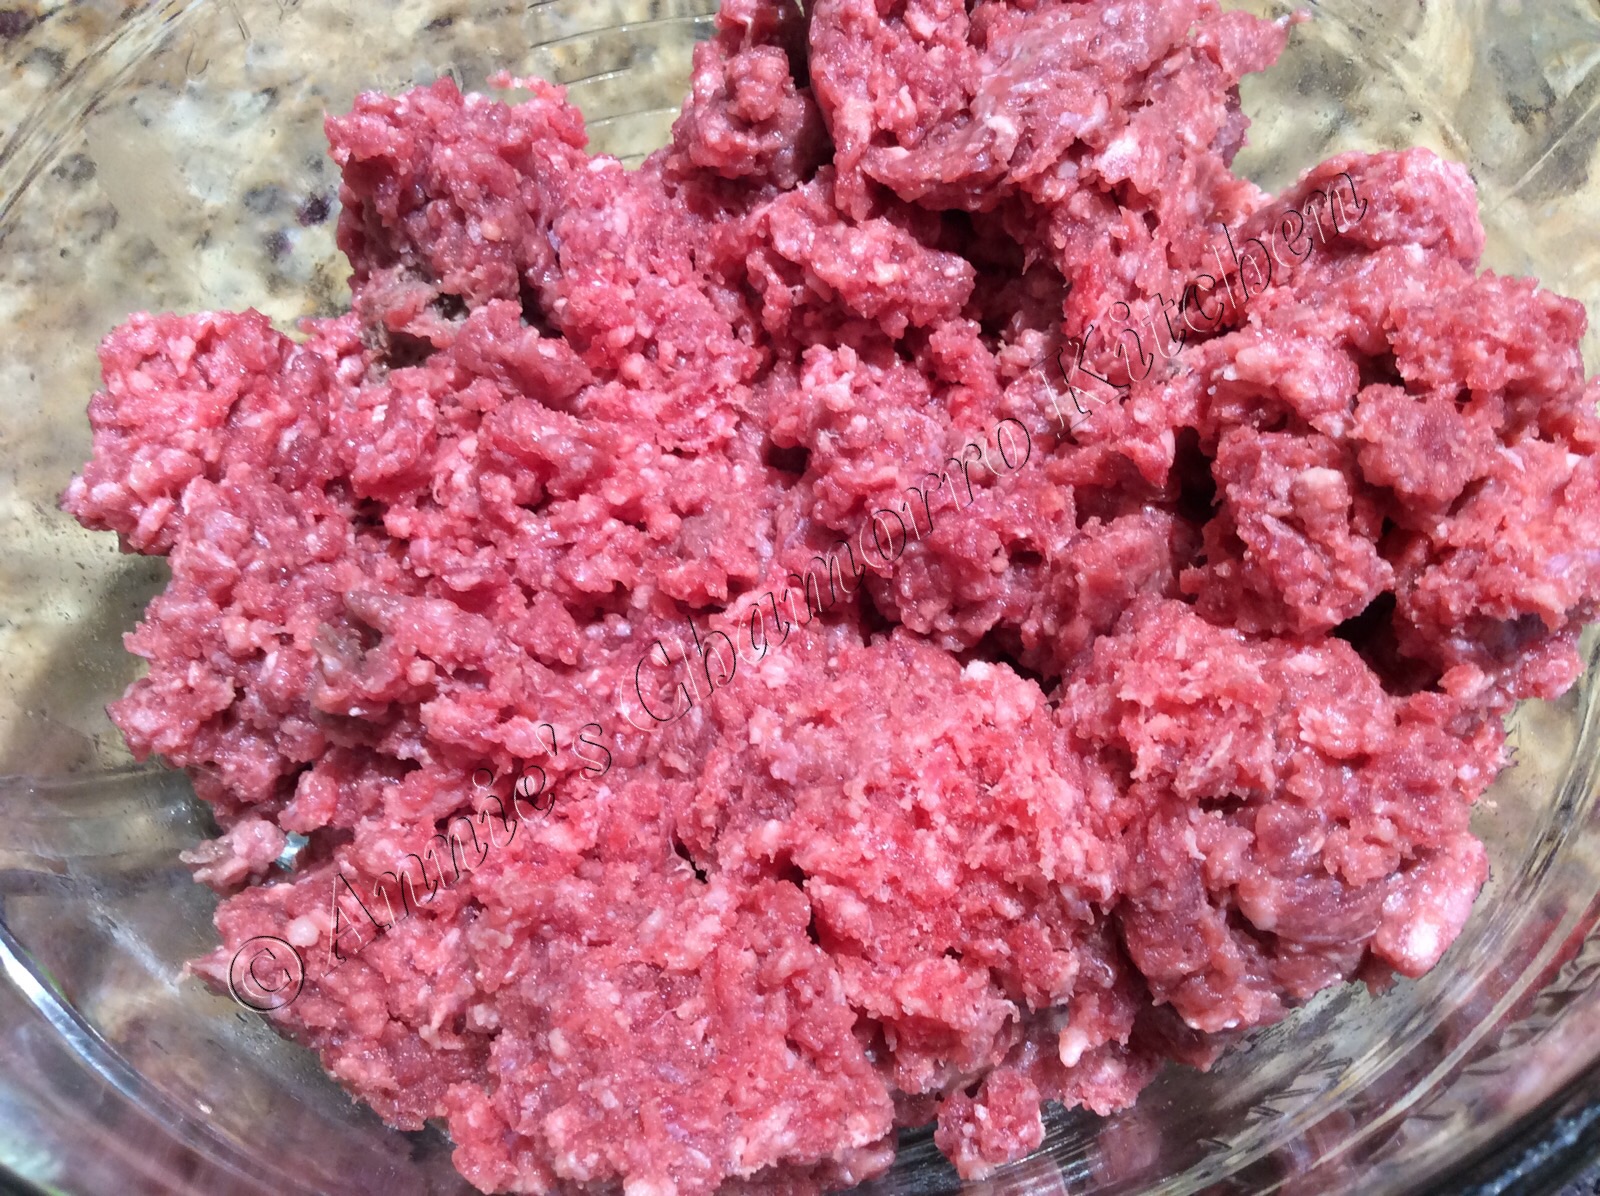
To start off, I used lean grass-fed beef.  Now, this can be a bit pricey, so if this is not an option for you (or if you can’t find grass-fed beef in your grocery store), use “regular” ground beef.  I also used 98% lean beef in this recipe.  Now, I know what you’re thinking — how can beef that lean make juicy burgers?  Well, read on and I’ll tell you.  In the meantime, place the ground beef into a large mixing bowl.

image

Most people start off with beef that’s no less than 85% lean (that means that 15% of what you buy is GROUND FAT).  Additionally, something called a panade — a mixture of bread and milk used to keep the cooked meat tender — is also added to the mixture.

Not in my kitchen.  Some fat is okay, but I still stick to no less than 95% lean when I buy ground beef.  98% lean is even better.

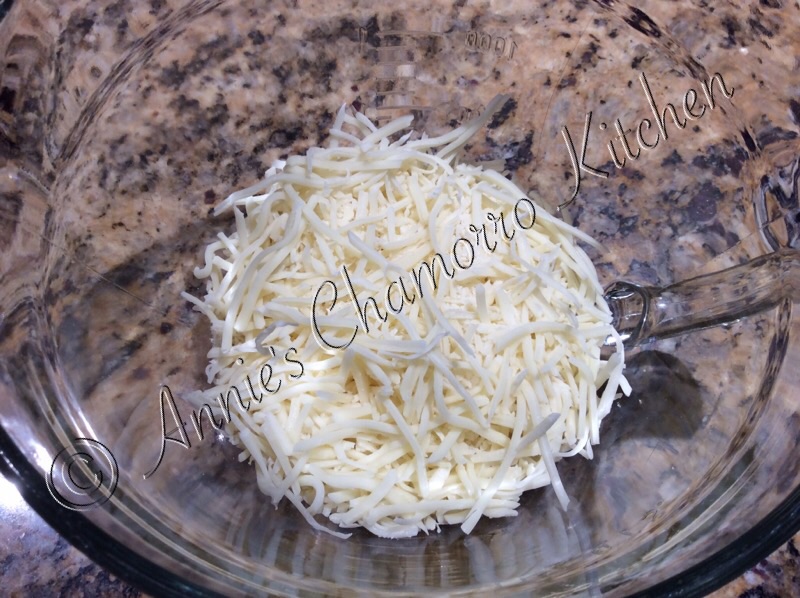
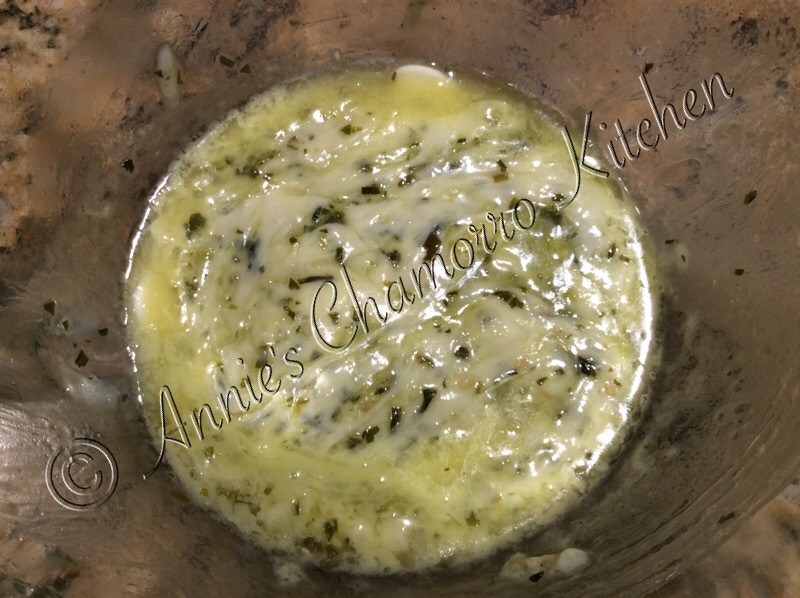
The juiciness come from my secret ingredient (shhhh…don’t tell anyone).  I add low-fat, part skim mozzarella cheese…yes, cheese…to the mix.  Don’t worry…if you’re mentally counting the fat and carb numbers in your head right now, I’ll save you the trouble.  Adding part skim mozzarella cheese to my recipe only adds <1g of carbs and 4.5g of fat per serving (one burger). 🙂

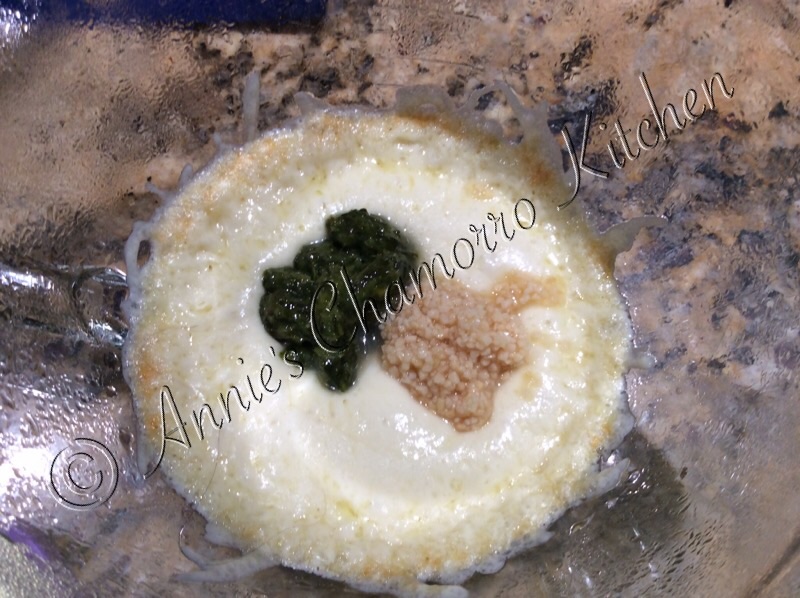
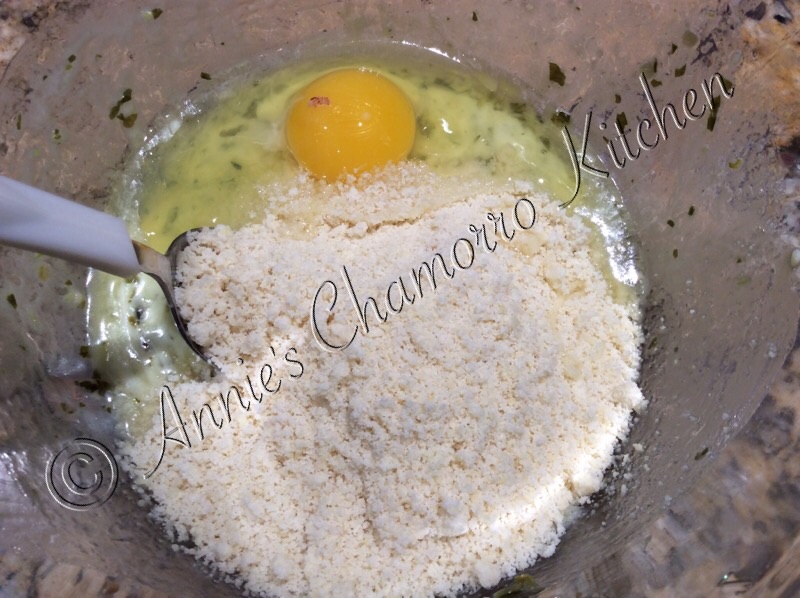
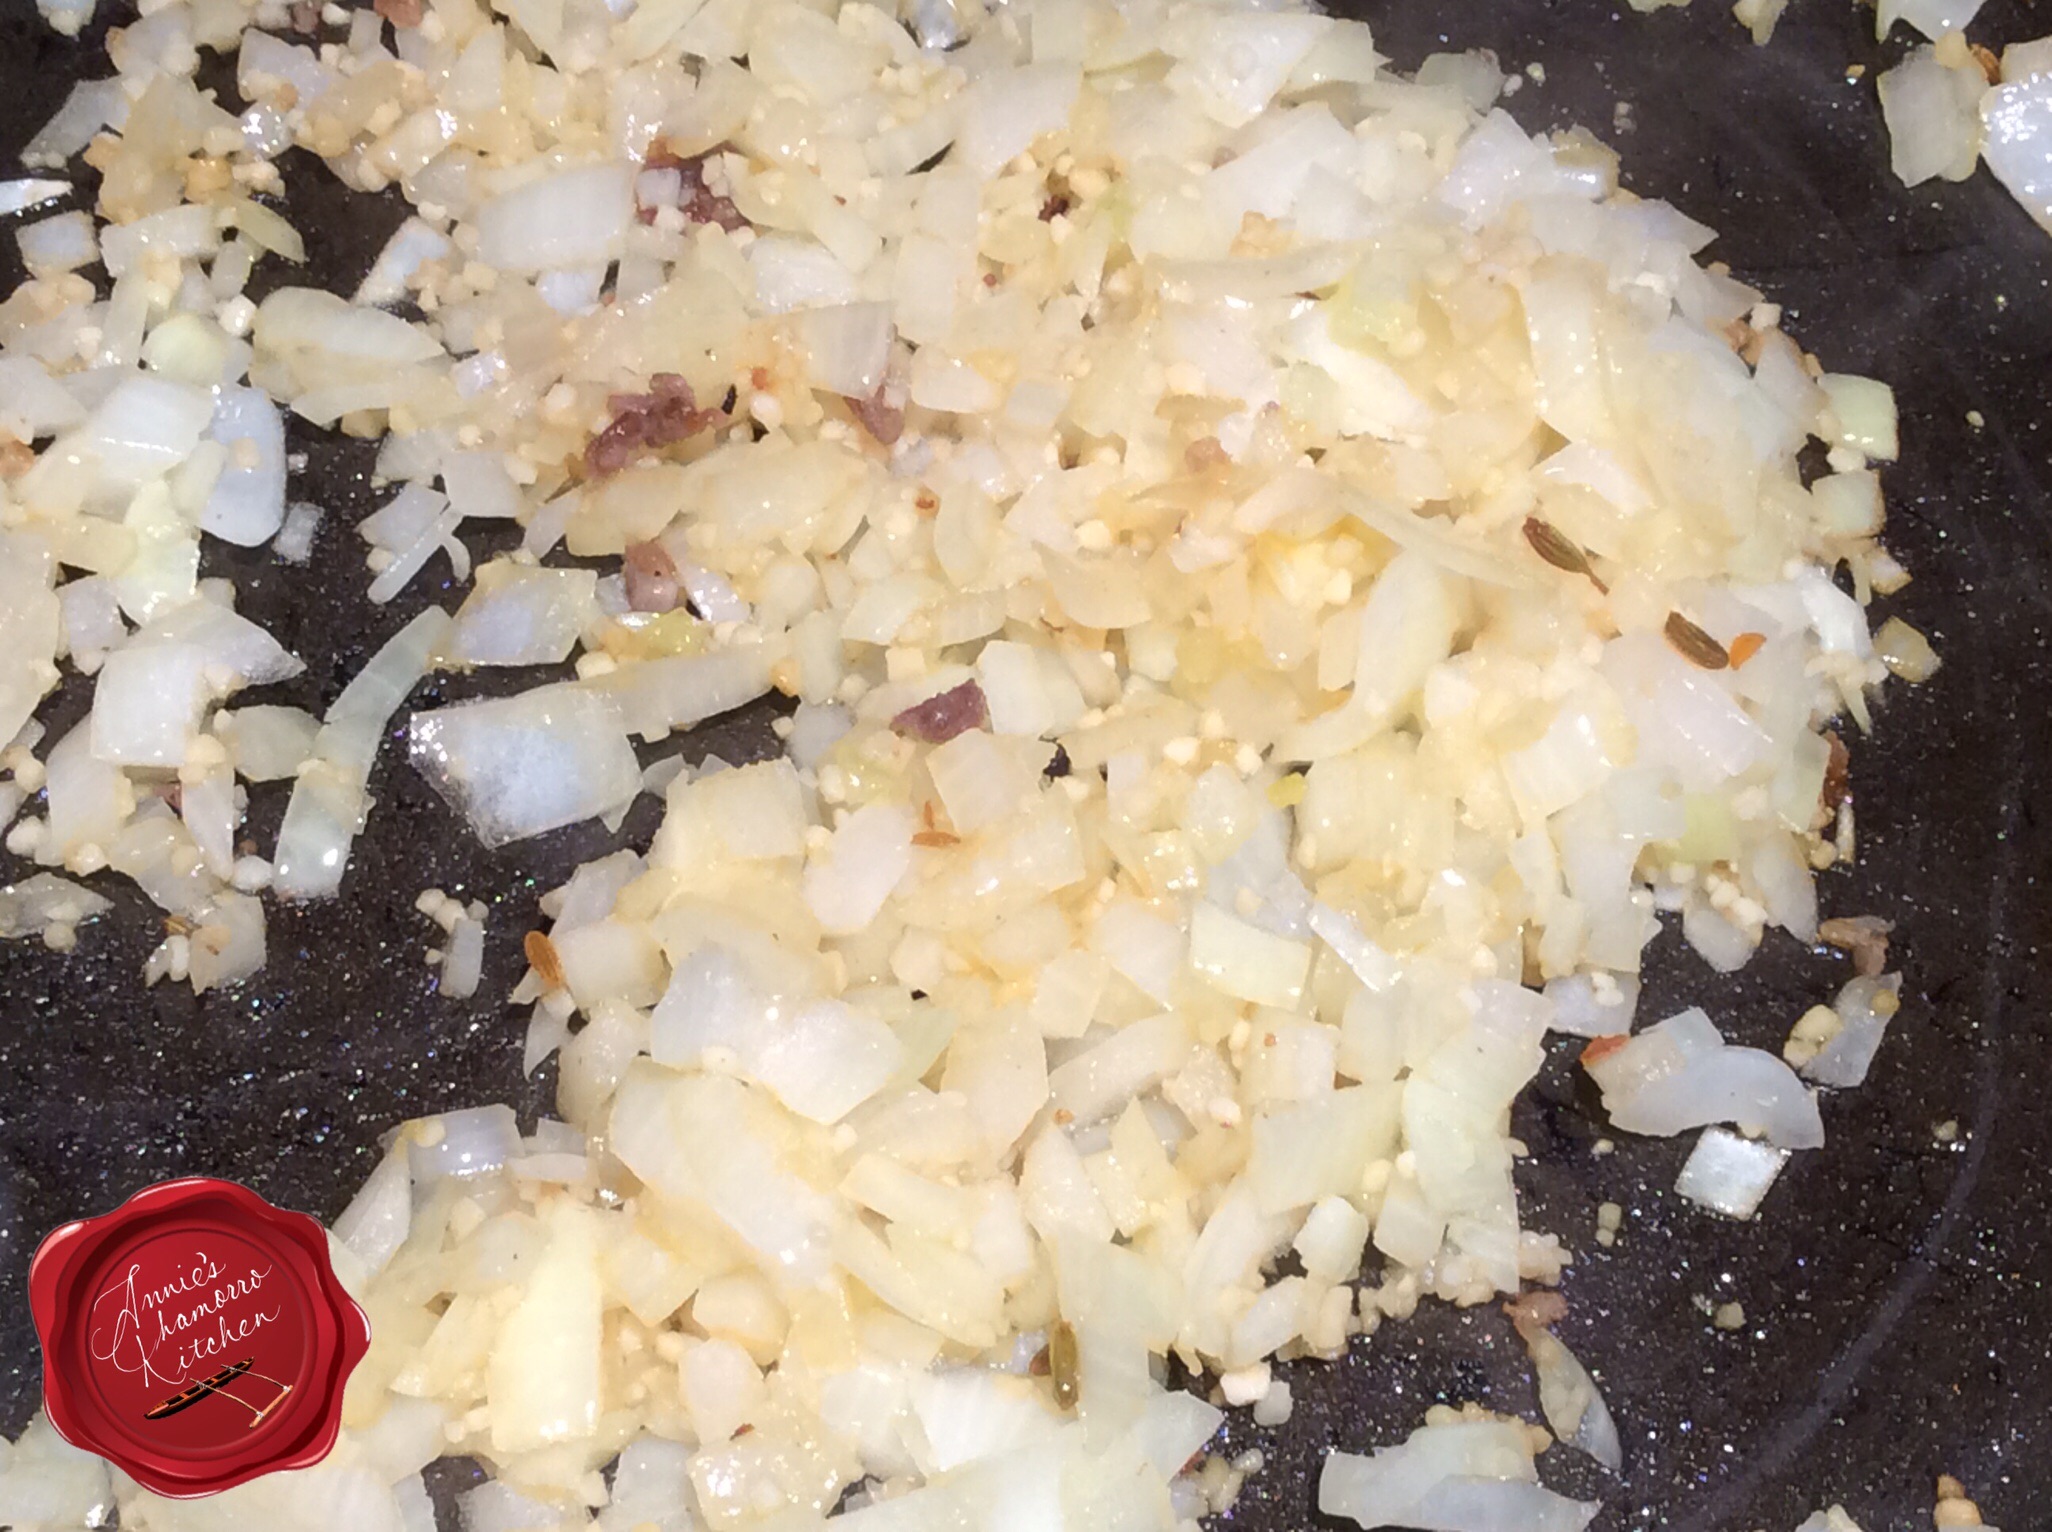
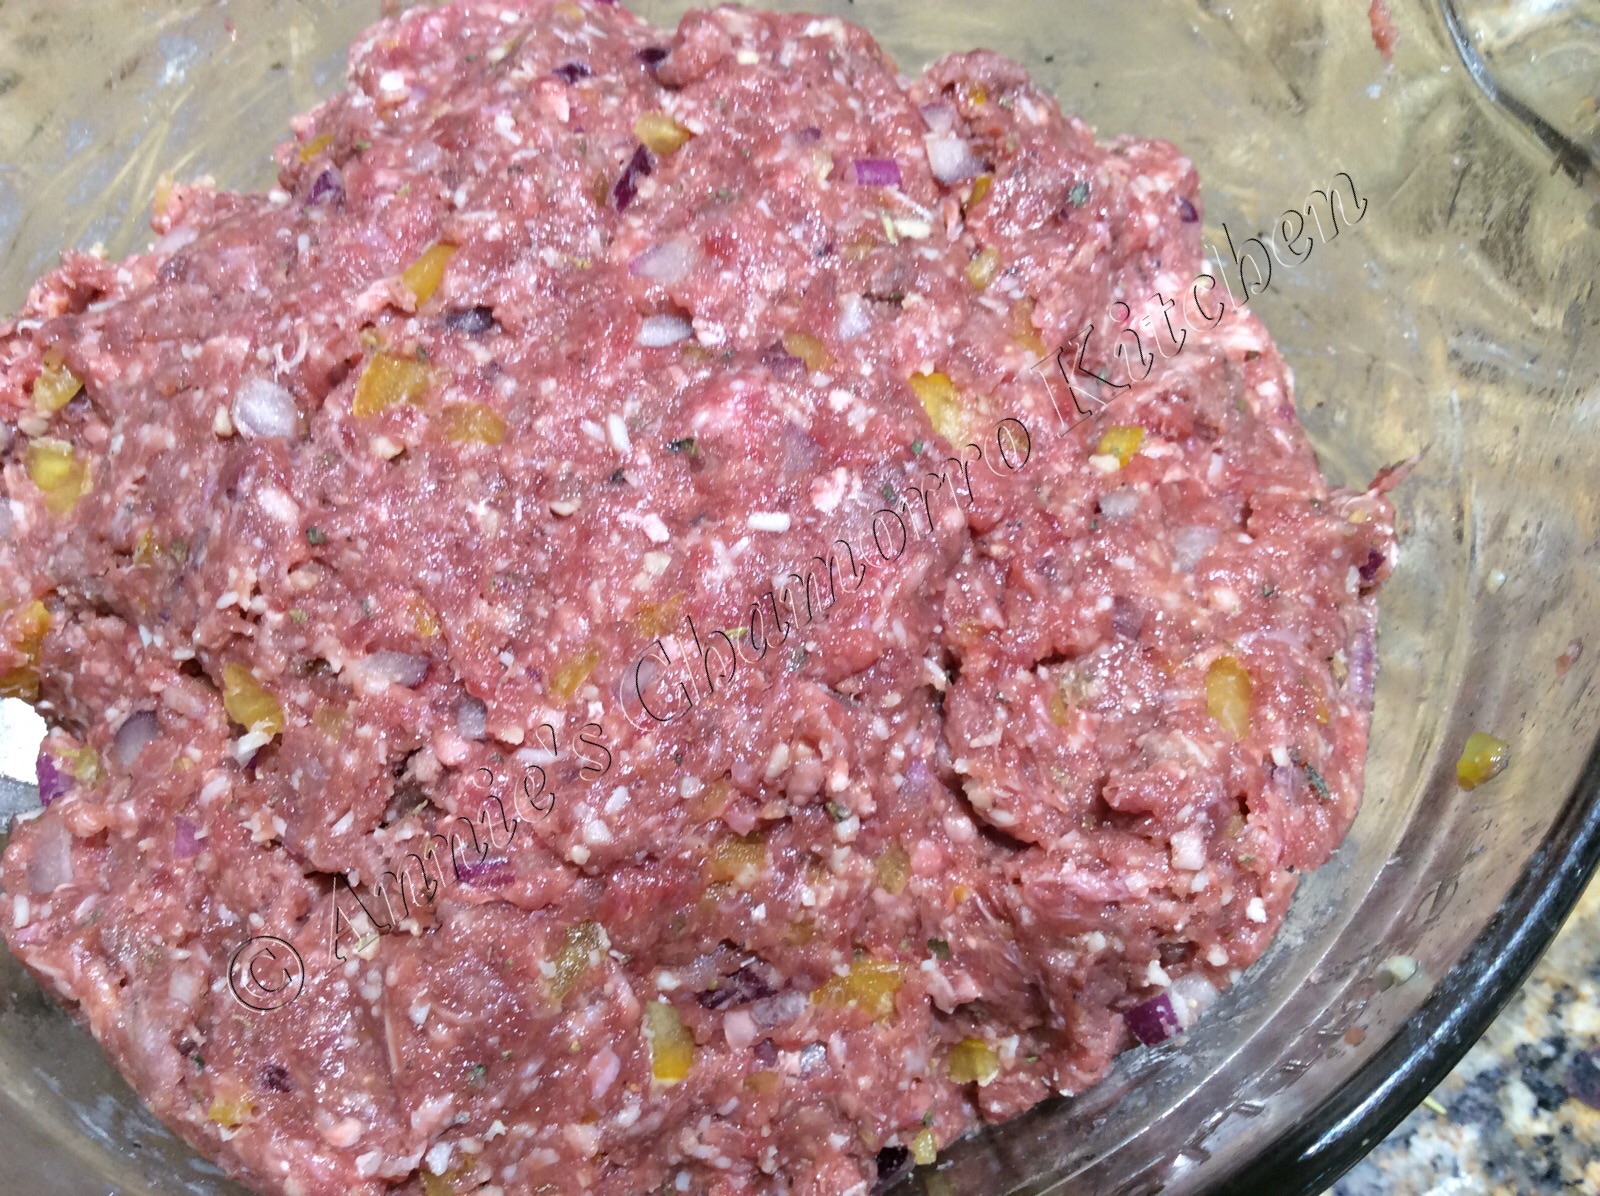
I like adding lots of flavor in the form of herbs, spices and vegetables.  I usually use whatever is in my fridge and pantry at the time, but the staples are diced onions (I used red here, but white or yellow onions are fine), garlic, black pepper, and an egg (use one egg for two pounds of beef).  Today, I also added onion powder, Italian seasoning, and rather than salt, I used a few tablespoons of powdered beef bouillon (look for one that has <1g of carbs per serving).  I also added a finely diced yellow bell pepper.

image

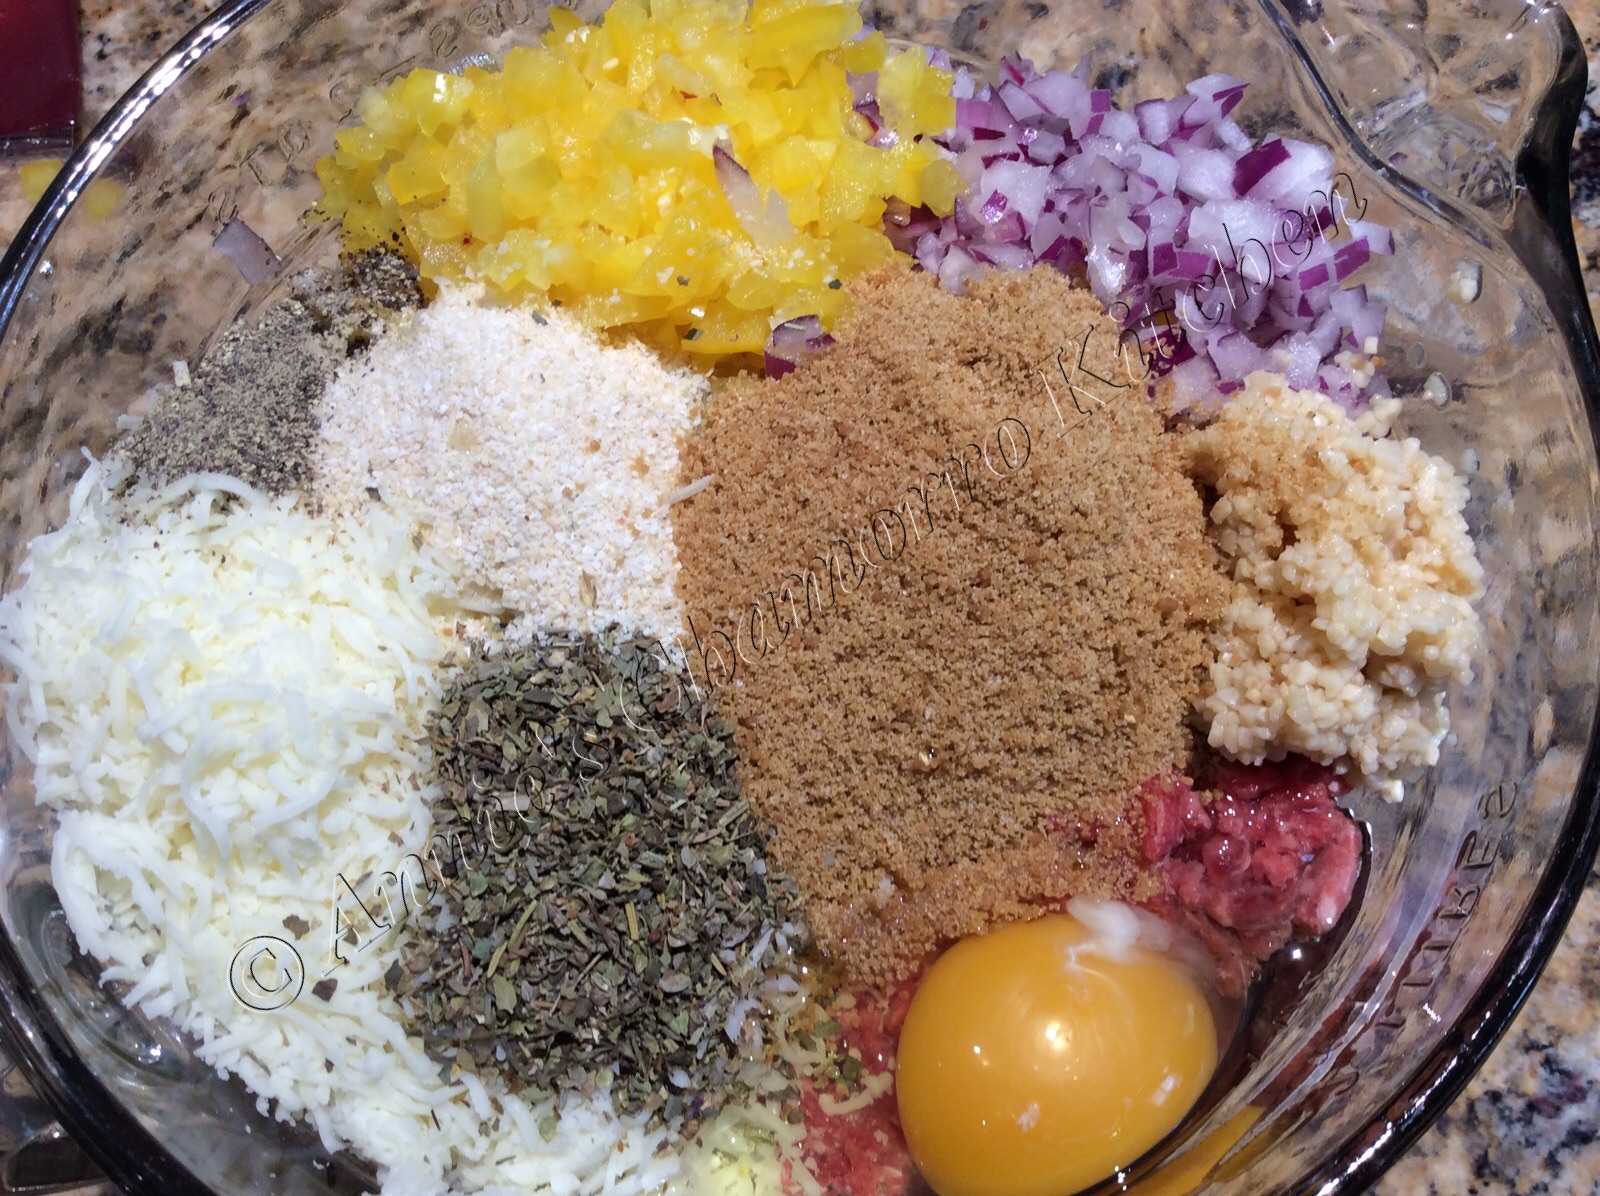
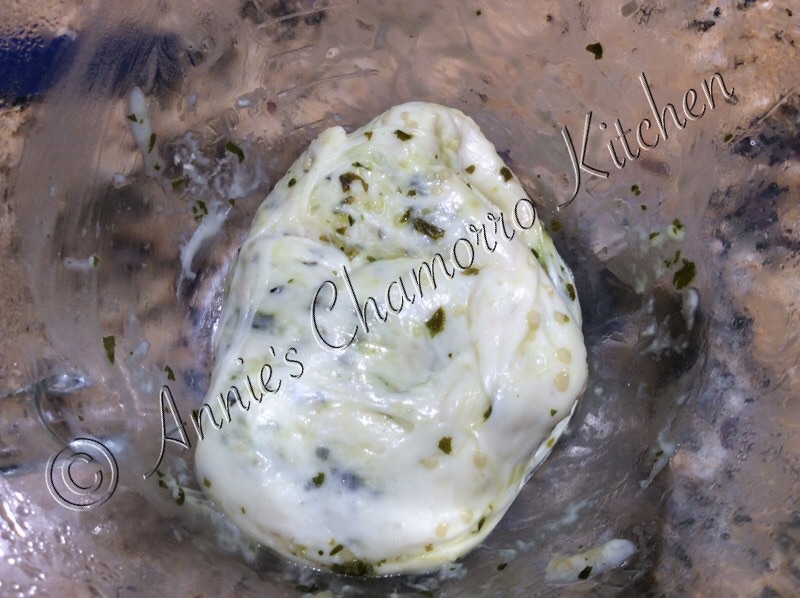
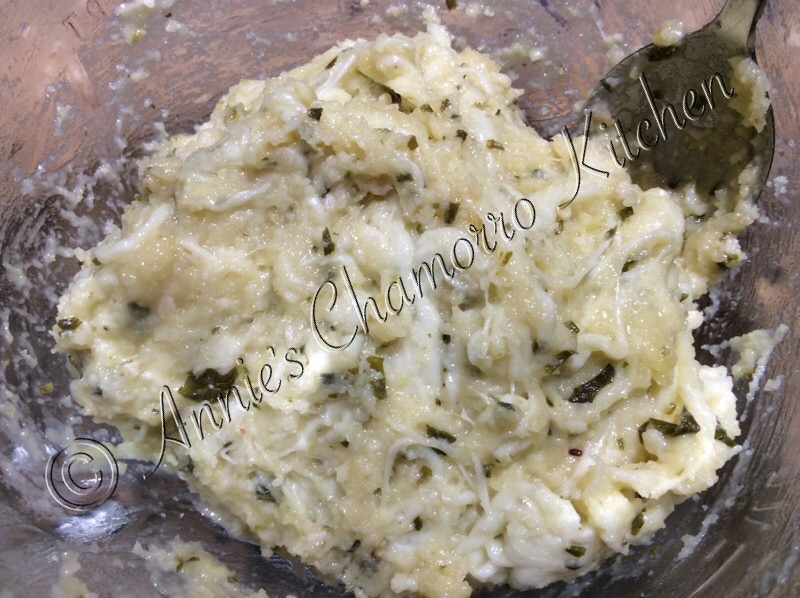
There’s no good way to mix this using a utensil, so wash your hands, use that elbow grease and get right in there.  Mix, mix, mix.

image

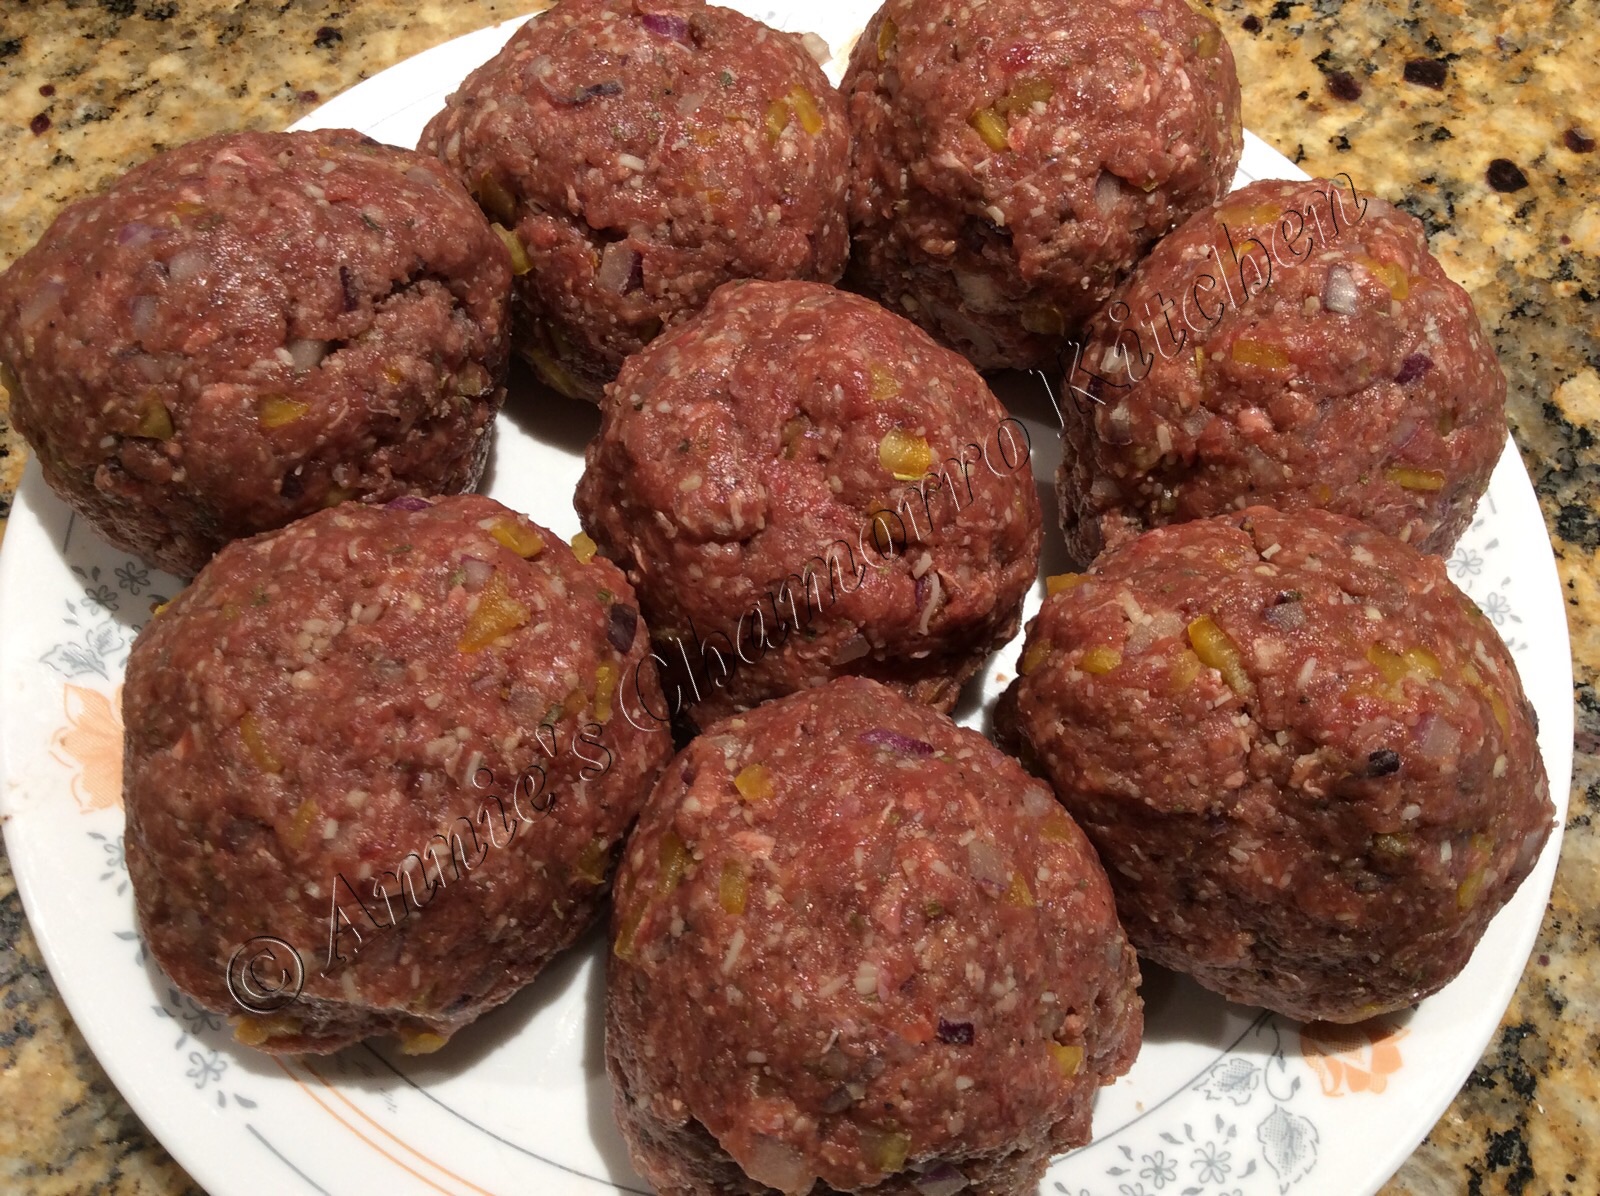
Separate the mixture into eight large meatballs.

image

These are ready right now, as is, to flatten and cook.  However, by my count, I’ve added just a little more than 2g of carbs per burger with the addition of part skim mozzarella and beef bouillon, so I’m thinking we can afford one more gram of carb per burger.

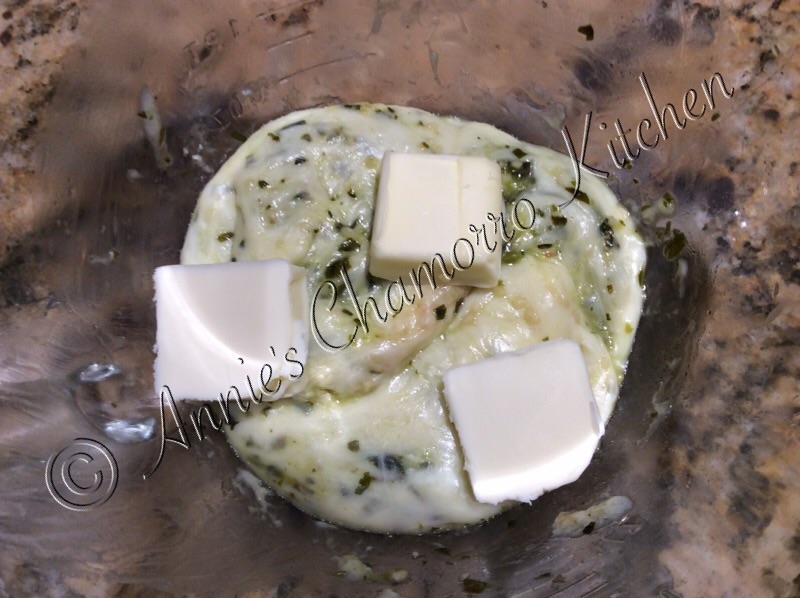
Can you guess what that’ll be?  Yes!!  MORE cheese!  (I love cheese, if you haven’t figured that out yet.)  Not just ANY cheese, mind you, but Creamy Light Laughing Cow brand cheese.  It adds just one more teeny, tiny gram of carbohydrates to the burger, so we’re up to 3g now…still within “safe” numbers per serving (and these make HUGE burgers).

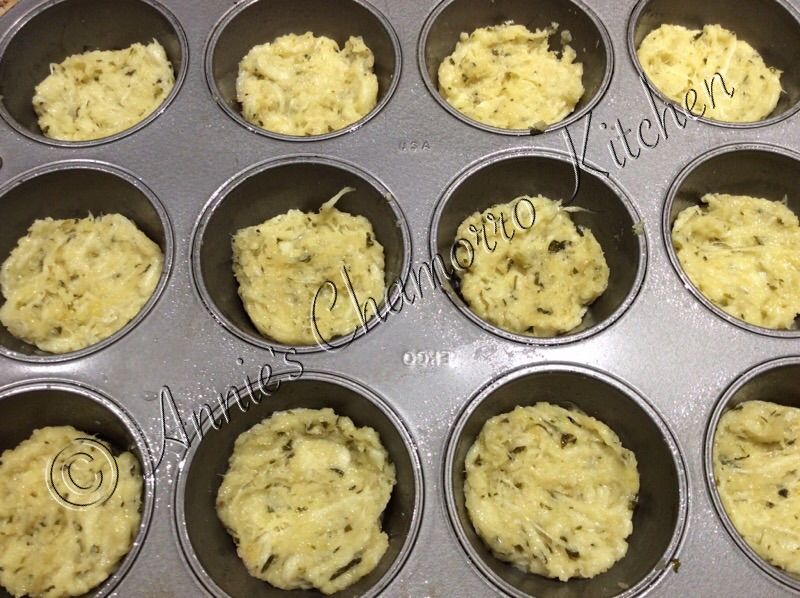
Take one meatball and make an indentation in the middle with your thumb.

image

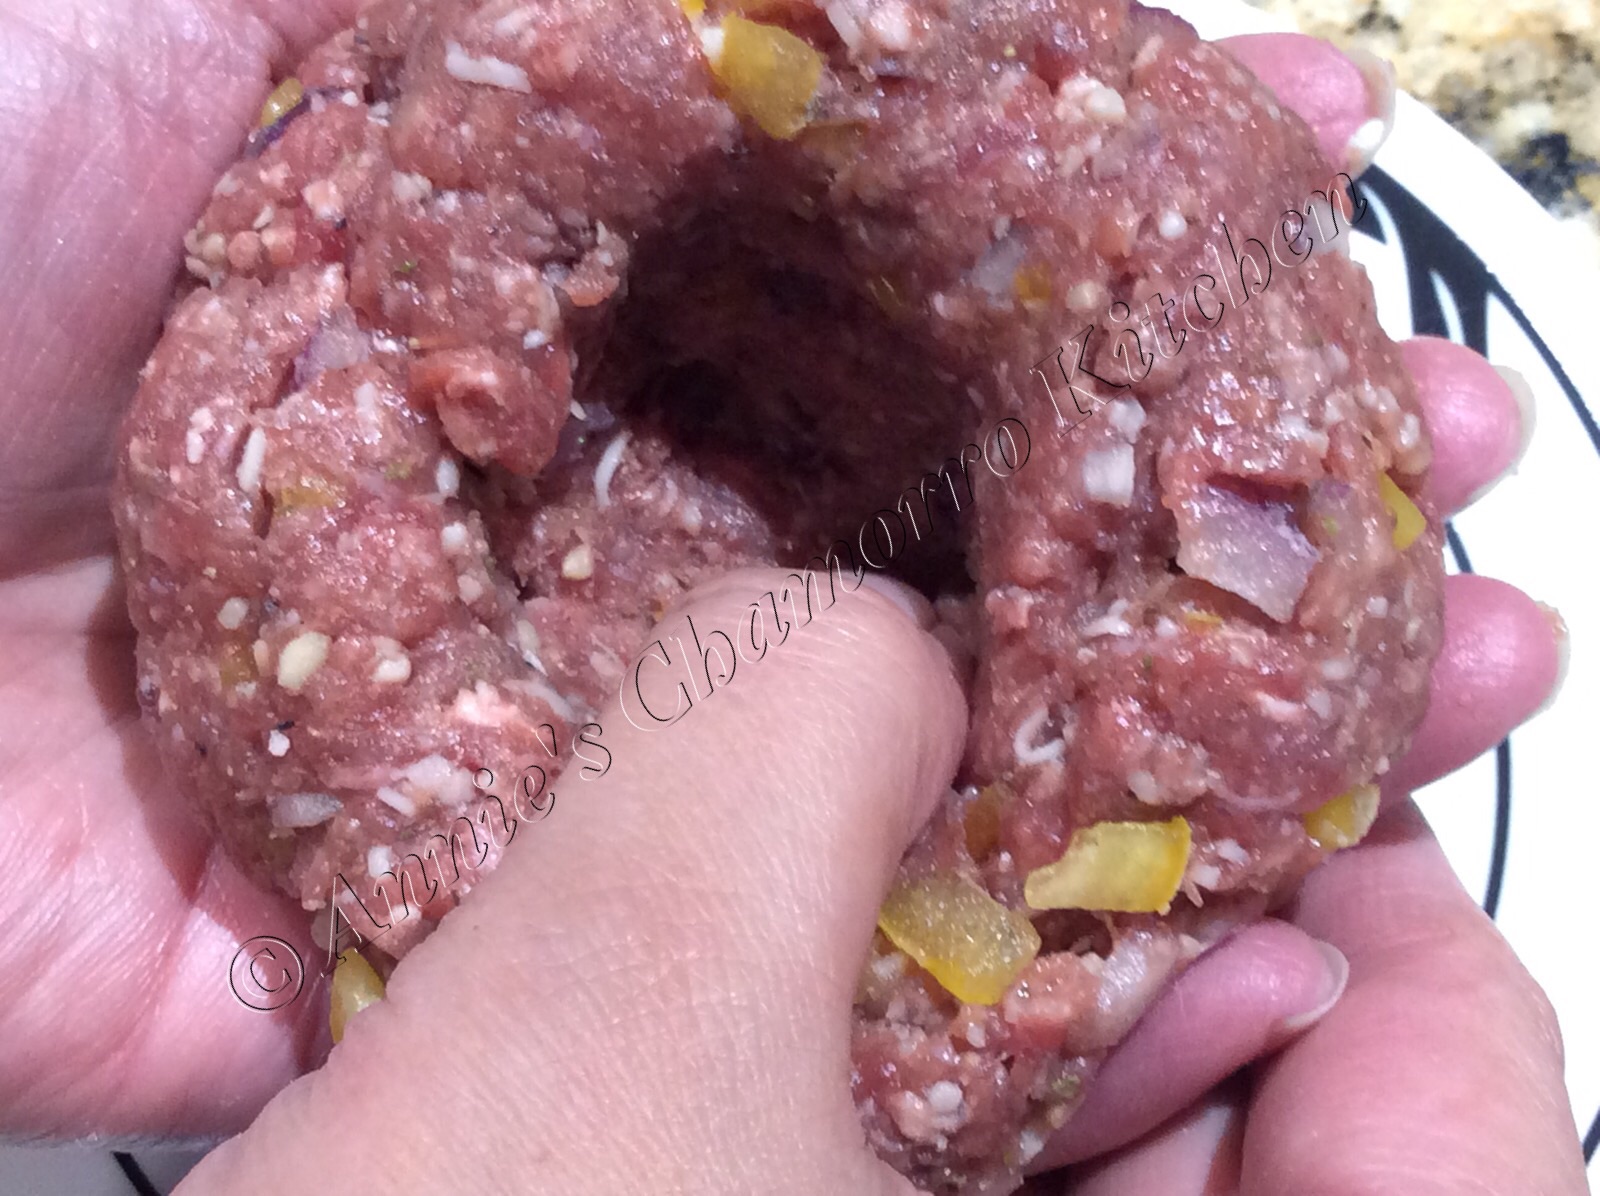
Make the indentation large enough to fit one wedge of Light Laughing Cow cheese.  Don’t make the bottom or sides too thin or the cheese will ooze out when you cook the burger.  You can leave the wedge like this but I recommend pressing it and spreading it out within the indentation you just made.

image

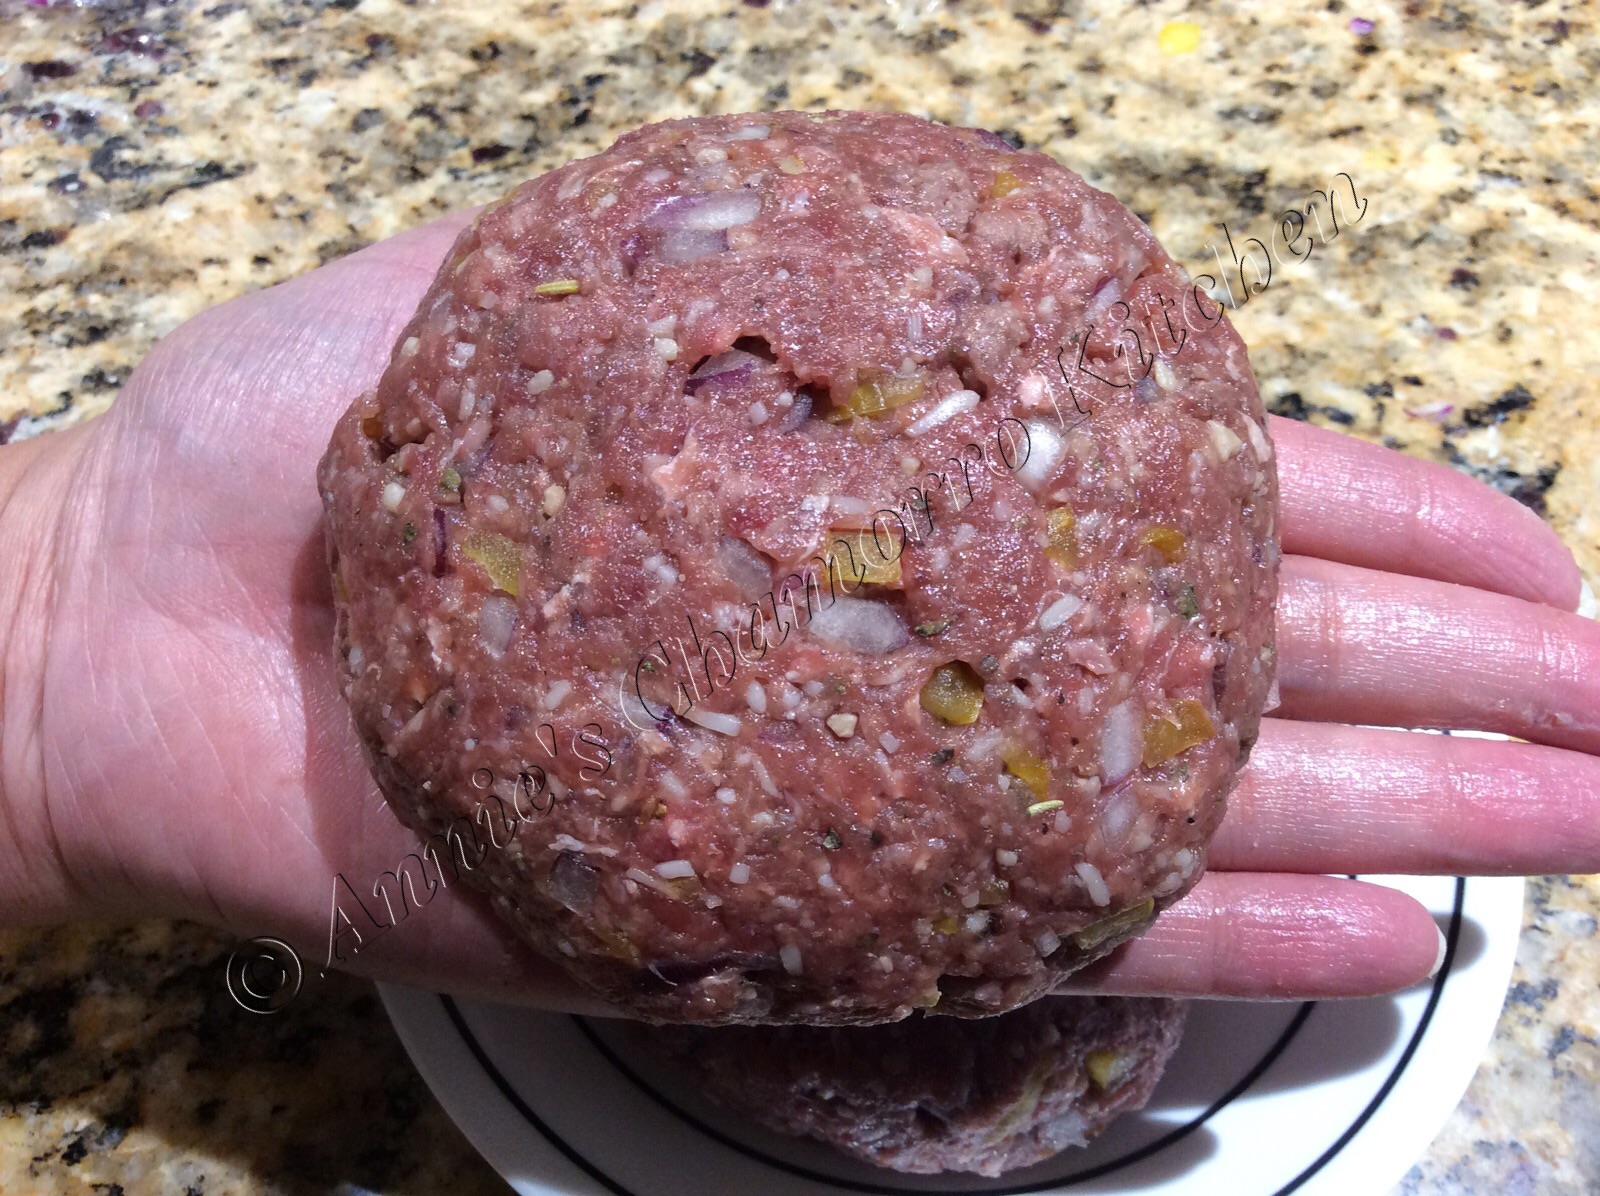
Cover the cheese with the mixture, smoothing all around the sides to ensure the cheese is well-sealed within.

image

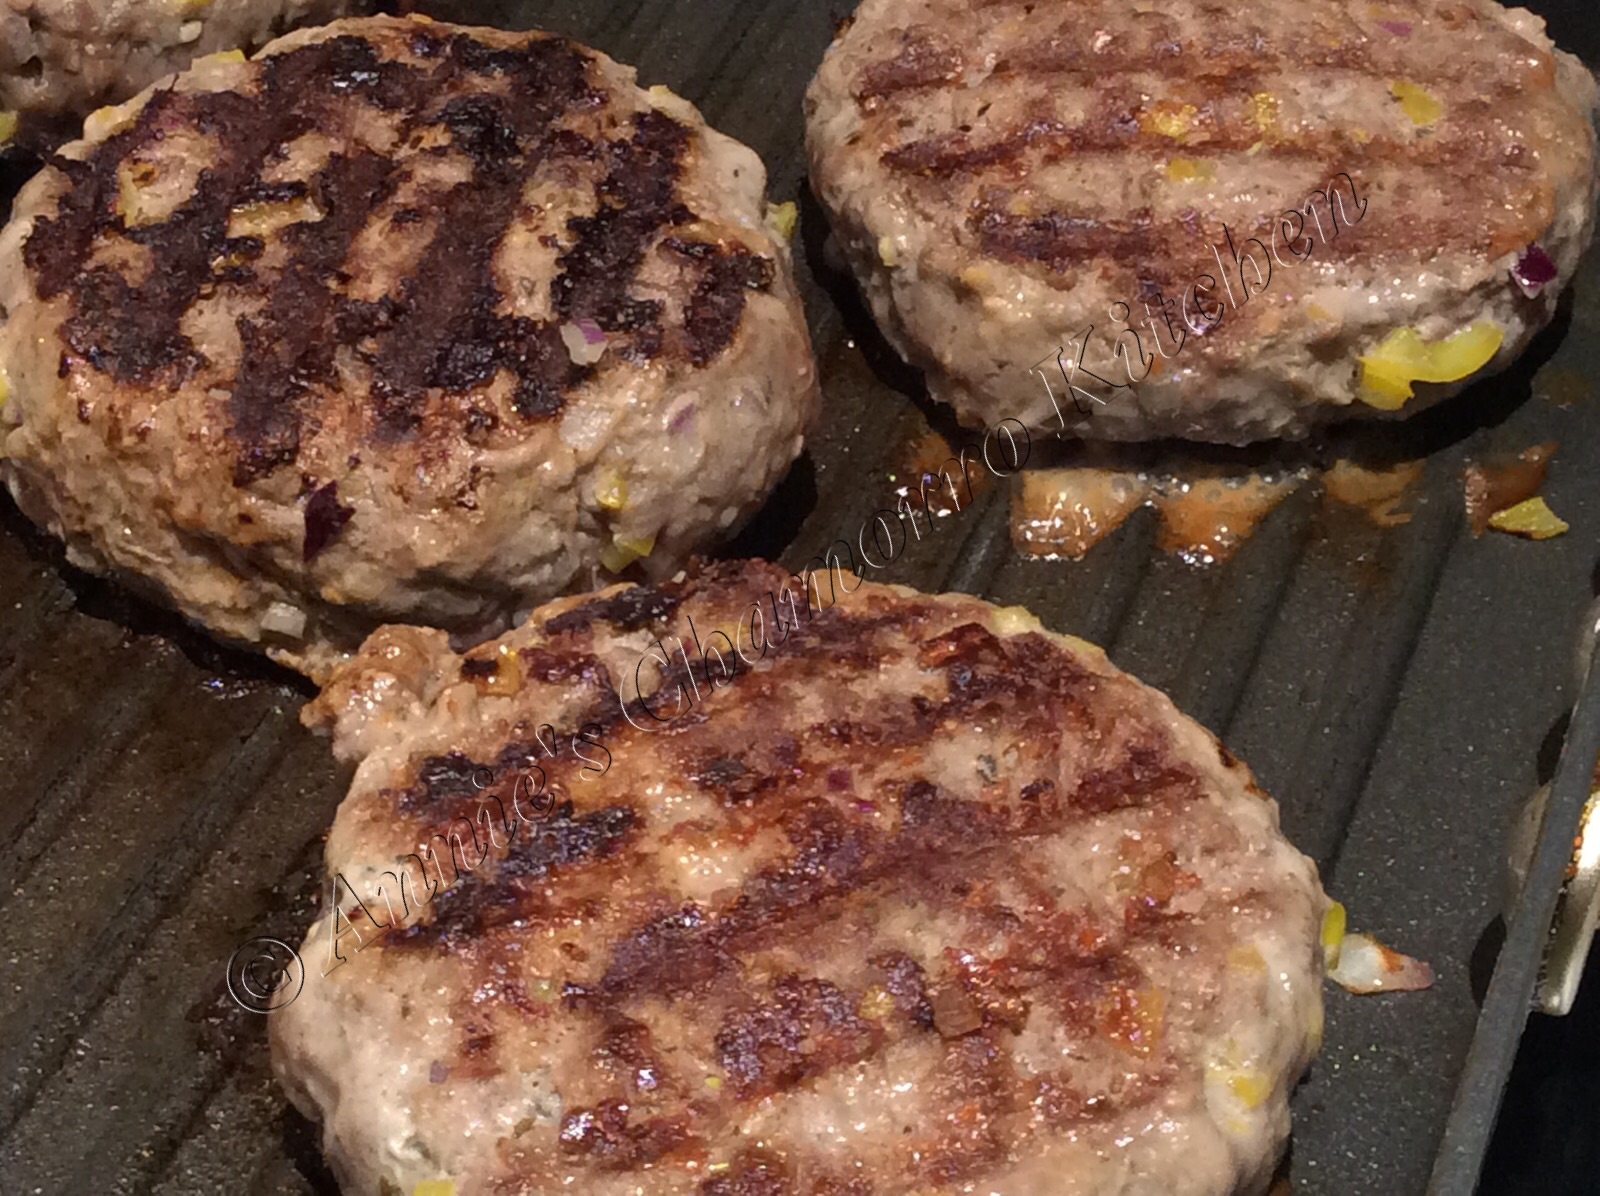
Because of the low fat content in the ground beef, these burgers don’t shrink much during cooking.  However, slightly flatten it before cooking.  Cook on a hot grill pan over medium-high heat, about 5-8 minutes on each side.

image

The burgers are done when clear juices start oozing out.  Do NOT poke or stab the burgers to check for clear juices…that will make your burgers dry out.  Slightly press the top of the burger with your finger; it’s done if the burger feels slightly firm when you press on it.

image

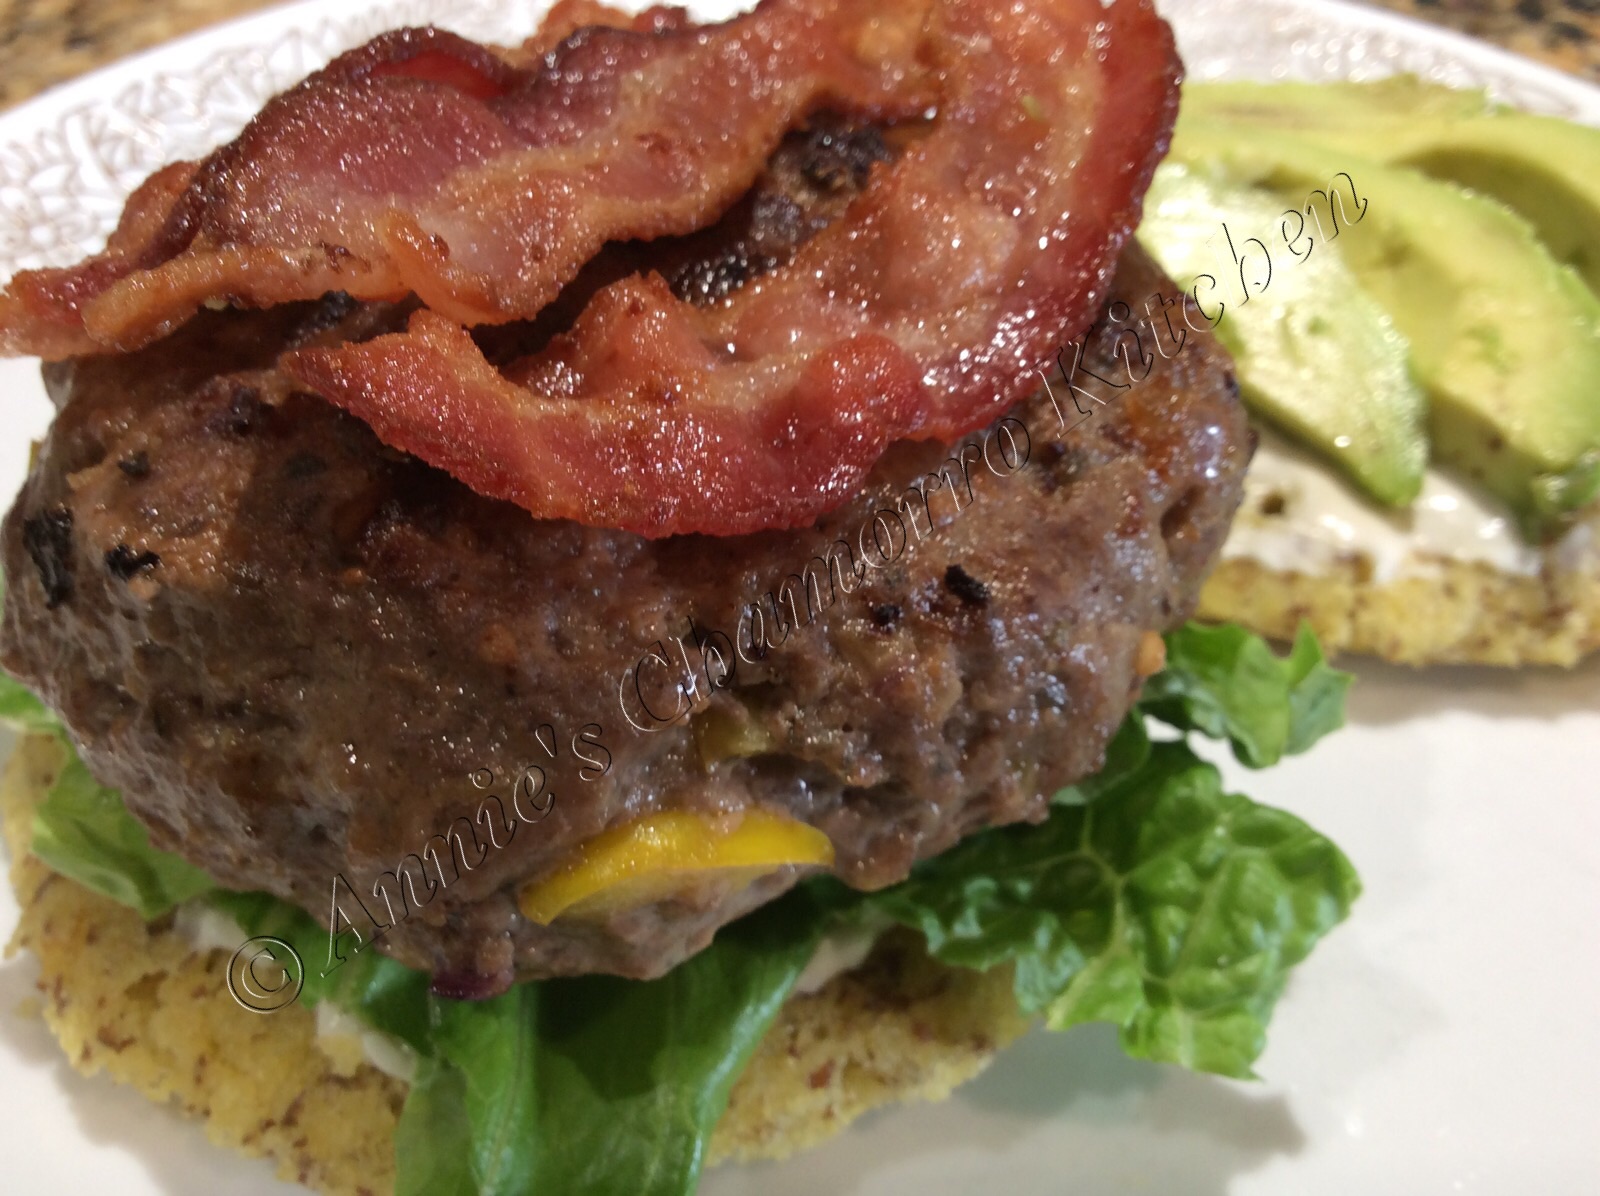
Top with your favorite burger add-ons such as sliced avocado, lettuce, tomatoes, onions, pickles, mayo, mustard, and bacon (hey, we cut back on fat so a little bacon won’t hurt). 🙂

Dig in and ENJOY!

image

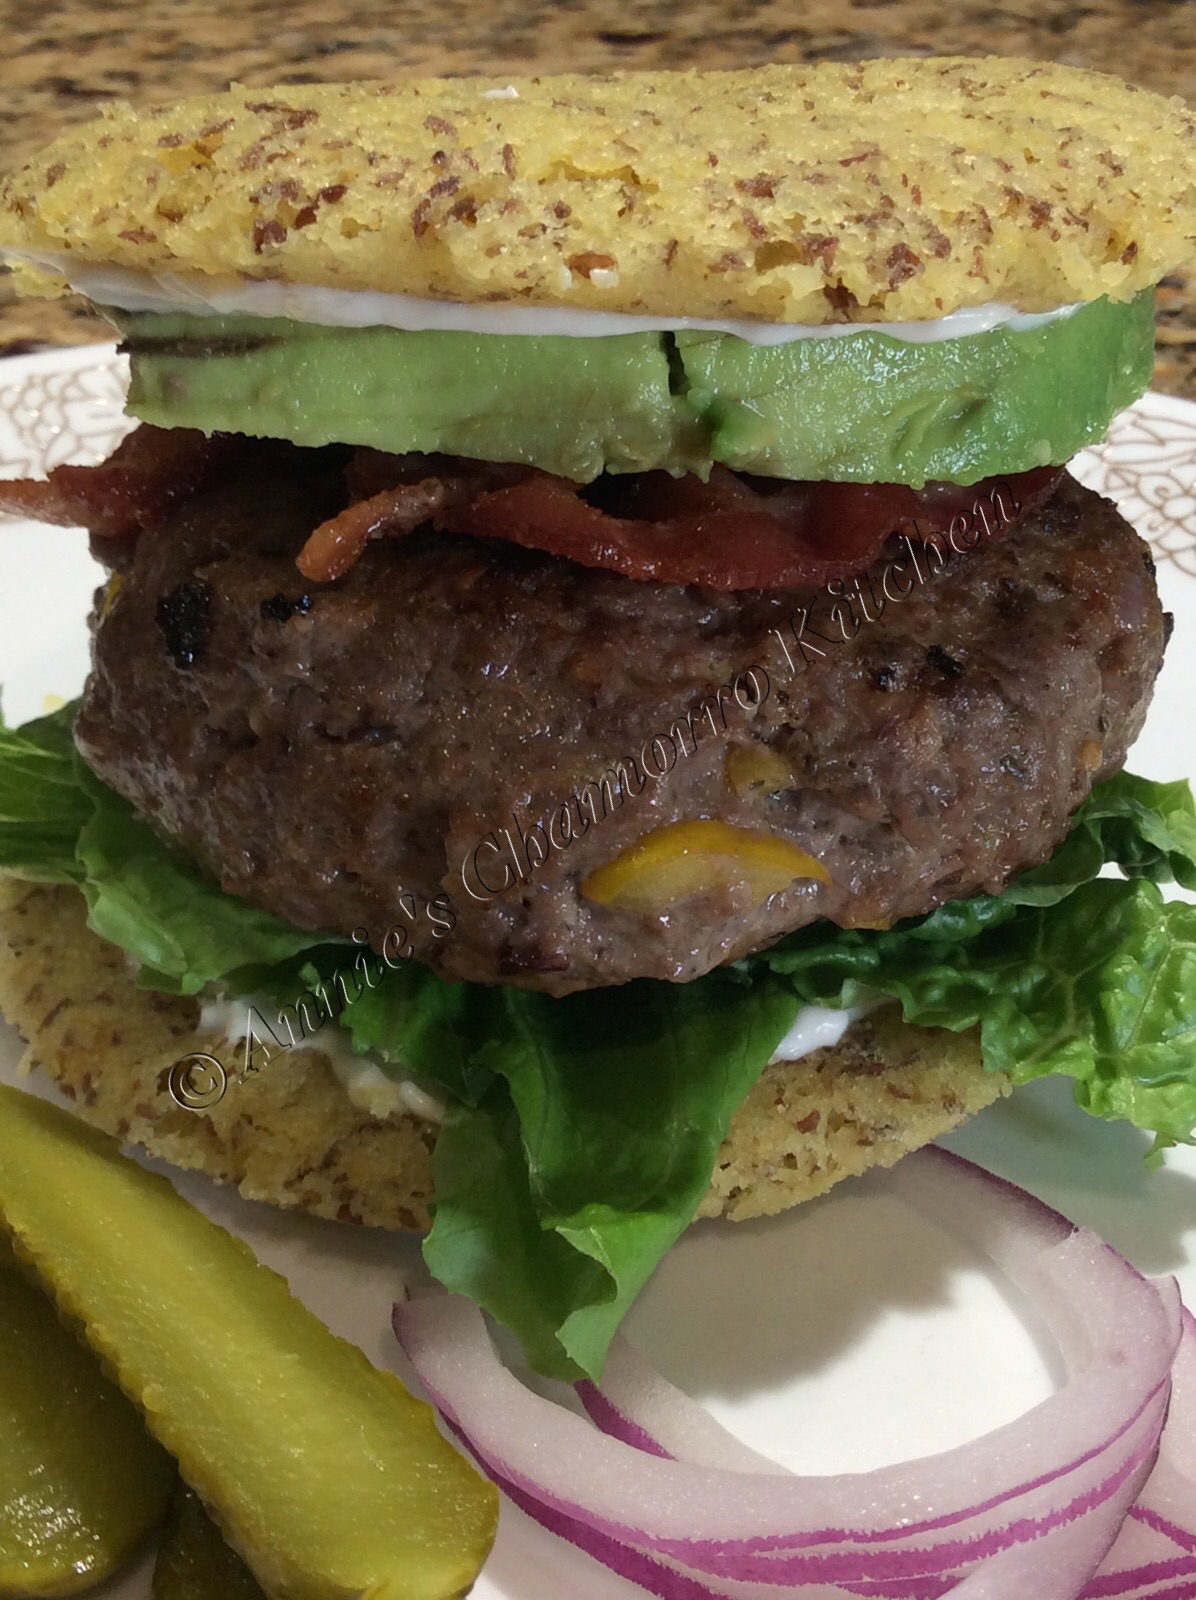
In case you’re wondering what type of bun that is in the photo above, it’s my gluten free, “Bun in a Bowl”.  You can find my recipe for it here.  For THMs, it’s an “S” recipe.


Tender and Juicy Burgers
 
Author:
Ingredients
  • 2 pounds 98% lean ground beef
  • ½ red onion, finely diced
  • 1 bell pepper, finely diced
  • 1 tablespoon chopped garlic
  • 1 cup finely shredded, part skim mozzarella cheese
  • 1 tablespoon dried Italian seasoning
  • 1 tablespoon onion powder
  • 3 tablespoons powdered beef bouillon
  • 1 teaspoon black pepper
  • 1 large egg
  • 8 wedges Light Swiss Laughing Cow Cheese (optional)
Instructions
  1. Place the ground beef into a large mixing bowl. Add the onion, bell pepper, garlic, mozzarella cheese, Italian seasoning, onion powder, beef bouillon, black pepper, and egg. Mix well. Separate into eight large meatballs.
  2. Make a small indentation in the middle of one meatball. Place one wedge of Laughing Cow cheese. Smooth the meat mixture around the cheese, sealing it in. Repeat for the remaining meatballs.
  3. Slightly flatten each ball into a burger patty. Cook in a grill pan over medium-high heat, about 5-8 minutes on each side, or until nicely browned all around.
Serve with your favorite burger add-ons and ENJOY!


Eggs with Ham and Greens

This is not Green Eggs and Ham, mind you, but eggs cooked your favorite way on a bed of lean ham and tasty mixed greens. 😉

“Tasty greens?  Ich!” said my super picky 12 year old.  YES…TASTY GREENS.  Cook these nutrition-packed greens in a tiny bit of butter (everything’s better with butter, I always say) and garlic and it’s guaranteed to please a picky palate.

This is a healthy breakfast alternative for those mornings when you have a bit of time to actually cook something nutritious AND DELICIOUS.  Trust me, as a full-time working mom (and Soldier, by the way), breakfasts in my house consists of leftovers from dinner, or a cup of coffee and a piece of toast…not very healthy if you as me.

My family is slowly coming around to incorporating healthier eating habits.  This breakfast is getting us on our way.  It consists of two over-medium eggs (cooked on a well-seasoned cast iron skillet so no grease was necessary) on a bed of wilted spinach and baby kale and a slice of low-fat ham. Delicious!

Cook the eggs your favorite way; we like over-medium eggs.

image

For the greens: Sauté 6 cups of mixed greens in just a pat of butter, and add a teaspoon of chopped garlic and a pinch of salt. Cook the greens until they wilt then place them on a plate. This makes enough for 3 people.

image

Add a slice of lean ham and voila! You have a delicious and healthy breakfast that’s the perfect start to your day.

Enjoy!

Mini Breakfast Pizzas

I’m a firm believer that breakfast is the most important meal of the day.  These pizzas are gluten-free and absolutely yummy, and make a great start to your day.

image

I found the original recipe here, and adapted it just a bit based on the ingredients my family likes (not to mention using what I had on hand).

The crust is a magic crust, in my opinion.  It’s made with cheese (we love cheese), an egg, a tiny bit of butter, and almond flour — that’s it!  No gluten flours here!  I flavored it up a bit by adding pesto (I also keep a tube of pesto in the fridge) and chopped garlic.  This bakes up into a delicious crust, believe it or not.

image

The original recipe made these into mini pizzas using a cupcake pan, so that’s what I did too.  You can spread the dough out into one larger pan and make a breakfast casserole as well.  This dough is so versatile, however, that you don’t need to limit yourself to breakfast pizzas.  Make this into a dinner pizza by adding a small amount of your favorite sauce and pizza toppings on top of the cooked dough (I’d double the recipe for the dough, however).

image

Here are my step-by-step photos with instructions. The complete recipe is at the bottom of this post.  Give it a try and let me know what you think. 🙂

image

Place the cheese into a small microwave-safe bowl. Melt in the microwave for about a minute.

image

Add pesto and garlic to the melted cheese.

image

Stir to mix the pesto and garlic into the cheese.

image

Add butter.

image

Microwave for another 30 seconds to a minute, or just long enough for the butter and cheese to melt.

image

Mix in an egg and some almond flour.

image

Stir to create the pizza dough.

image

Press the dough into the wells of a cupcake pan.

image

Bake the dough for 10 minutes at 425 degrees.

image

Lightly beat 3 eggs; pour onto the baked crusts.

image

Sprinkle more cheese on top of the egg.

image

Top with crumbled bacon and sausage.

image

I like using this brand of cooked sausage crumbles. This particular bag already had bacon bits in it.

image

Bake for 6 minutes at 425 degrees (you’re really only cooking the raw eggs during this step).

image

Serve and ENJOY!


Mini Breakfast Pizzas
 
Prep time
Cook time
Total time
 
A very satisfying breakfast made with a cheesy gluten-free crust and delicious breakfast toppings (eggs, bacon, and sausage)
Author:
Recipe type: Breakfast
Serves: 12
Ingredients
Crust:
  • 1 bag (8 oz) part skim mozzarella cheese, shredded
  • 1 tablespoon chopped garlic
  • 1 tablespoon pesto
  • 1 tablespoon butter
  • 1 large egg
  • ¾ cup almond flour
Topping:
  • 3 large eggs
  • 1 package bacon, cooked and crumbled
  • ½ bag sausage crumbles
  • ¾ cup part skim shredded mozzarella cheese
Instructions
Make the crust:
  1. Place the cheese into a microwave-safe mixing bowl. Heat on high for about a minute, or until the cheese begins to melt.
  2. Add the pesto and garlic to the melted cheese; stir to combine. If the cheese is too thick (not soft and melted enough) to stir, don't worry about it. It'll be better once you add melted butter.
  3. Place the butter into the bowl; heat in the microwave for about 30 seconds or until the butter melts. Stir to combine.
  4. Add the egg and almond flour to the bowl. Stir to combine. I used a small spoon to mix it together, but a sturdy cooking spoon works too if it's too difficult to stir the mixture.
  5. Separate the dough into 12 pieces. Lightly spray a muffin or cupcake pan with cooking spray. Press the dough into the bottom of each section of the pan.
  6. Bake the dough for 10 minutes at 425 degrees. Remove from the oven when done, but keep the oven on (you'll be baking the topping next).
Prepare the topping:
  1. In a separate bowl, slight beat the three eggs. Pour the beaten eggs onto each of the 12 cooked pizza crusts.
  2. Top with more shredded cheese.
  3. Top with sausage and bacon crumbles.
  4. Return the pan to the oven and bake for 6 minutes (still at 425 degrees).
Serve and ENJOY!


Chocolate Caramel Coconut Cake

image

Okay friends, if there was ever a recipe of mine you ought to try, this one is it!

This is my homage to my favorite Girl Scout Cookies, the Caramel Delites or Samoas.

My version of this cake combines all the things I love about the classic cookie — sweet coconut, rich chocolate and luscious caramel.

The super moist and fudgy cake gets a generous topping of my caramel cream cheese frosting.  Toasted sweet coconut gets pressed into the frosted cake, followed by drizzles of melted chocolate and MORE caramel!

Do I have you drooling yet and ready to bake this cake RIGHT THIS MINUTE??? 😉

My super easy recipe is made even more simple by using boxed cake mix. While you can certainly make a cake from scratch, there are several brands that bake up a very moist and delicious cake.

image

My complete recipe is at the bottom of this post. Give it a try and let me know how you like it. 🙂

Here’s how to make it.

I used a box of chocolate fudge cake mix.  You can use any brand you prefer, but I like Betty Crocker brand mixes.

Follow the instructions on the back of the box to make the cake.  This particular mix calls for adding 1 1/4 cups water, 1/2 cup vegetable oil, and 3 large eggs.  I also added 1 teaspoon of coconut extract to the batter to really amp up the coconut flavor.

image

Generously spray a bundt pan with baking spray (the one that also has flour in it).  Pour the batter into the prepared pan.

imageBake the cake for 50-55 minutes at 350 degrees.  Insert a thin skewer (or knife) into the middle of the cake to test if it’s done (no crumbs should stick to the skewer or knife).

Invert the cake onto a serving dish then let it cool completely.

imageWhile the cake cools, and while the oven is still hot, toast the coconut.

Spread out sweetened coconut flakes on a large baking pan.

image

Bake the coconut for 3 minutes at 350 degrees; use a spatula to stir the coconut around.  Bake for another 3 minutes; stir again to ensure even browning.

If the coconut is still too light, bake for 3 more minutes, but watch it carefully at this point.  Once browned, remove the coconut from the pan and allow to cool.

image

While the cake and coconut cool, prepare the frosting.

Using an electric handheld mixer, mix the softened cream cheese with the caramel sauce.  You can use the same caramel sauce that you pour over ice cream.  I used salted caramel sauce for this recipe, but any thick caramel sauce will do.  Beat until creamy.

This is the caramel sauce I used:

image

This tastes great already!  For future reference, this is the base for a delicious fruit dip — just mix in some marshmallow creme to the cream cheese-caramel mixture.

imageSo, back to the frosting.  Mix in up to 4 cups of powdered sugar, 1 cup at a time.  I used only 3 cups of powdered sugar, but if you want a very thick layer of frosting on top of your cake, use all 4 cups of powdered sugar.

image   image

Once the cake has cooled sufficiently, it’s time to frost it.

Spread the frosting all over the cake, covering it entirely.

imageImmediately sprinkle the coconut over the frosted cake.  To add the coconut to the sides, grab a handful of coconut and press it into the sides of the cake.  Shake off any excess coconut.

image

Now for the chocolate sauce.

Melt a cup of chocolate chips for 30 seconds in a microwave-safe glass bowl or cup.  Stir the chocolate — it might not be melted at this point, however, but stir it nonetheless.

image

Melt the chocolate for 30 more seconds then stir again.  Once again, it may not appear as if the chocolate is melted, but trust me — the chips are already mostly melted, and will continue to melt with the heat of the glass.  Do not microwave the chocolate any more or it will seize and become stiff, lumpy and unworkable.

imageScoop out the melted chocolate and place it into a sandwich bag.

image

Twist the top of the bag to keep the melted chocolate in one corner of the bag.  Use a pair of scissors to snip off a tiny piece of one corner of the bag.

Squeeze the melted chocolate over the top of the cake.  I’m sure you can decorate your cake a lot nicer than I did mine. 😉

Drizzle some caramel over the cake, in the spaces between the chocolate.

image

Oh my goodness…this cake is D E L I C I O U S!!!

Serve a large slice of this incredible edible with a cup of coffee or a tall glass of milk. 🙂

image

Mmmmmm mmmmmm good!  Look how moist the cake is!

imageCare for a slice?  I’ll eat this one for you. 😉

image

Not convinced yet?  How about now? 😉

imageGive my recipe a try.  I KNOW you’ll like it. 🙂


Chocolate Caramel Coconut Cake
 
Moist chocolate fudge cake topped with a decadent caramel cream cheese frosting, toasted coconut, and drizzled with melted chocolate and caramel sauce.
Author:
Recipe type: Dessert
Cuisine: American
Ingredients
Cake:
  • 1 box Betty Crocker Chocolate Fudge cake mix
  • 1¼ cups water
  • ½ cup vegetable oil
  • 3 large eggs
  • 1 teaspoon coconut extract
Toasted Coconut:
  • 2 cups (packed) sweetened coconut flakes
Frosting:
  • 1 (8-oz) package cream cheese
  • ½ cup caramel sauce
  • 3 to 4 cups powdered sugar
Drizzled Sauces:
  • 1 cup semisweet chocolate chips
  • 4 tablespoons caramel sauce
Instructions
Bake the cake:
  1. Mix all of the ingredients for the cake together using a whisk. Mix just until combined and most of the lumps disappear. Do not over mix.
  2. Pour the batter into a bundt pan sprayed with baking spray. Bake for 50-55 minutes at 350 degrees. Invert the cake onto a serving plate. Let it cool completely.
Toast the coconut:
  1. Spread the coconut onto a large baking pan. Bake at 350 degrees for 8-10 minutes, stirring every 3 minutes to ensure even browning. Bake until golden brown.
  2. Remove the toasted coconut from the hot pan; allow to cool completely.
Make the Frosting:
  1. Beat the cream cheese and caramel sauce until creamy. Add the powdered sugar, one cup a time, mixing until thick and creamy. Use all four cups of powdered sugar if you like your cakes frosted with a thick layer of frosting, otherwise, three cups of sugar will suffice.
Drizzle on the Goodness:
  1. Place the chocolate chips into a microwave-safe glass cup or bowl. Microwave for 30 seconds then stir. Microwave for 30 more seconds then stir again. Place the melted chocolate into a small sandwich bag. Snip a tiny piece off one corner of the bag. Squeeze the melted chocolate over the top of the cake.
  2. Drizzle the caramel sauce over the top of the cake.
SERVE AND ENJOY! 🙂


Penne with Sausage and Pumpkin Cream Sauce

Pumpkin in pasta sauce?!  Why, YES! 🙂

My daughter, Hannah, loves pasta.  Actually, my entire family loves pasta.  She wanted to make something off the beaten path of the usual alfredo or meat sauce so she browsed several websites and recipes and found one (by Rachael Ray I think) and wanted to give it a try.  I must say that it’s absolutely delicious (thank you, Rachael).

This is Hannah’s take on Rachael’s recipe (original recipe found here).

Give it a try.  I think you’ll like it. 🙂

image

Cook the pasta according to the package directions.  Hannah made enough pasta for dinner for our family of four, plus enough for everyone to pack lunch the next day, so she cooked two boxes of penne pasta.

Drain the water from the pot; keep the cooked pasta in the pot (no need to dirty another serving bowl).  Set aside for now.

Meanwhile, brown the sausage in a large frying pan.  Hannah used sweet/mild Italian sausage, but if you like a spicier pasta, use spicy sausage.  Remove the browned sausage from the pan and place on top of paper towels to soak up any excess fat.

image

Using the same pan you used to brown the sausage, cook the onions and garlic until the onions are translucent and beginning to caramelize.  To save on cooking time, we usually buy a jar of chopped garlic.  We like LOTS of garlic, so Hannah added a couple of HEAPING tablespoons of chopped garlic to the pan.

There was enough grease in the pan from cooking the sausage so there is no need to add more oil to cook the onions and garlic.

image

Roughly cut the sage leaves and toss them into the pan.

Bay leaves are savory herbs used often in Italian cooking.  The photo below doesn’t look as if she did it, but Hannah slightly crushed the bay leaves before adding them to the pan.  Crushing bay leaves brings out more of its natural oils and intense flavors.  Be careful that you don’t crush the leaves and maket them too small; you want to remove them from the pan after cooking (don’t eat the leaves).

image

Add the wine to the pan.  Hannah used a Pino Grigio for this recipe.  Because my kids are eating this (even though a lot of the alcohol cooks off), I wanted her to use a light-bodied wine with a clean and fresh taste — Pino Grigio was it.

Turn the heat up to high and bring the mixture to a boil, cooking until the wine reduces by half.

image

Add the chicken broth to the pan once the wine reduced.

image

Stir in the pureed pumpkin.  Pumpkin in pasta, you ask???  Don’t fret; you won’t even notice the pumpkin is in there.  The taste is not overpowering at all, but it’s just enough for you to ask, “hmmm…what IS that that tastes so good?” 😉

Since Hannah made a large pot of pasta, she used a good amount of pumpkin, about 2 cups.

image

Add the cinnamon and nutmeg to the sauce.  The nutmeg and cinnamon compliment the pumpkin flavor quite nicely.

image

Stir in the heavy whipping cream.

image

Reduce the heat to medium.  Bring the sauce back to a simmer; cook for a few minutes (about 5 or so).  Taste the sauce; add salt to taste.  Hannah added about 2 tablespoons of Dashida powdered beef seasoning instead of salt.  Don’t add too much, however; you’ll be adding cheese to the pasta, which also has salt.

image

Sprinkle the shredded cheese over the cooked pasta.  Hannah used LOTS of cheese here.  The cheese will melt when your pour the hot pasta sauce over the noodles, helping to thicken the sauce.

image

CAREFULLY pour the hot sauce over the pasta and cheese.  Stir to combine.  It may seem very saucy at this point but the noodles will soak up some of the sauce (we love saucy pastas in our house).

image

Serve with a side of cheesy garlic bread and more shredded Parmesan cheese and ENJOY! 🙂

image


Penne with Sausage and Pumpkin Cream Sauce
 
Author:
Ingredients
  • 2 pounds bulk sweet Italian sausage
  • 1 medium onion, diced
  • 2 tablespoons chopped garlic
  • 8 fresh sage leaves, roughly chopped
  • 2 bay leaves
  • 2 cups white wine
  • 2½ cups chicken broth
  • 2 cups 100% pure pumpkin
  • ½ teaspoon cinnamon
  • 1 teaspoon nutmeg
  • 1 pint heavy whipping cream
  • 2 tablespoons Dashida seasoning
  • 1 teaspoon black pepper
  • 1 box Penne Pasta, cooked per package directions
  • 1½ cups grated Parmesan cheese
Instructions
  1. Cook the pasta according to the directions on the package. Pour out the cooked pasta into a colander to drain out all the water. Return the cooked pasta to the now-empty pot. Set aside.
  2. Brown the sausage in a large frying pan. Remove the cooked sausage from pan; place in a paper towel-lined bowl to allow the excess fat to drain off.
  3. Cook the onions and garlic in the same pan used to cook the sausage. Cook until the onions begin to caramelize.
  4. Add the sage and bay leaves. Slightly crush the bay leaves before adding them to the pan.
  5. Add the wine to the pan. Turn the heat up to high and bring the mixture to a boil, cooking until it reduces by half.
  6. Stir in the chicken broth, pumpkin, cinnamon and nutmeg. Stir to combine.
  7. Stir in the whipping cream. Reduce the heat to medium. Bring the sauce back to a simmer; cook for a few minutes (about 5 or so).
  8. Sprinkle the shredded cheese over the cooked pasta. Pour the sauce over the pasta and cheese. Stir to coat the pasta with the sauce.
Serve with more shredded cheese and ENJOY!


« Older Entries Recent Entries »