Easy Lemon Garlic Aioli

My super simple aioli is tangy from fresh lemon juice and packed full of flavor from chopped garlic and cajun seasoning.

It takes a few short minutes to make.  It’s perfect with my Salmon Cakes or as a dipping sauce for fish sticks.

Give it a try today. 🙂

Salmon cake

Here’s how to make my super-simple lemon-garlic aioli.  Mix all of the ingredients in a small bowl and set aside until ready to use.  Refrigerate any unused aioli.

Enjoy!

image


Easy Lemon Garlic Aioli
 
Prep time
Total time
 
Author:
Ingredients
  • 1 cup mayo
  • 2 tablespoons chopped garlic
  • 1 tablespoon Cajun seasoning
  • 2 tablespoons lemon juice
  • 1 teaspoon salt
Instructions
  1. Mix all of the ingredients together in a small bowl.


Salmon Cakes

Salmon cakes are my take on one of my favorite seafood dishes — crab cakes.  These savory patties are crisp on the outside, thanks to a quick pan-frying, and moist and flavorful on the inside. To finish it off, top with a dollop of lemon-garlic aoili and a sprinkling of green onions. Mmmm mmmm mmmm…these are soooooo good!

Salmon cake

I usually make this for a meal, but you can easily make these into appetizer-sized portions.  This recipe makes between 10-12 salmon cakes, depending on how big you make them.

image

This is a quick and easy version, using canned salmon. I’ve also made this using fresh salmon.  To prepare fresh salmon, bring about 2 cups of broth (seafood or chicken) to a boil in a small saucepan.  Add boneless, skinless salmon pieces to the boiling broth.  Cook until done, about 6-8 minutes, depending on the size of the salmon pieces.  Let the salmon cool then use a fork to break the salmon apart into small chunks.  You’ll need about 1 1/2 pounds of fresh salmon for this recipe.

This is an easy recipe that your kids can help with.  There is something about forming the patties that appeal to kids, or at least it appeals to my kids.  Maybe it’s because they get to “play” with food. 😉

You can find my complete recipe at the bottom of this post.  Give it a try.  I’m sure you’ll like it. 🙂

Start out by making my super-simple lemon-garlic aioli.  Mix all of the aioli ingredients in a small bowl and set aside.

image

Once the aioli is prepared, start making the salmon cakes.  Place all of the ingredients for the salmon cakes into a medium-sized mixing bowl.

Salmon cake

Use a spatula to fold the ingredients together.  Be gentle…the salmon breaks apart easily.  You want to still see small chunks of salmon after mixing.

Salmon cakes

The mixture will be a little “wet.”  This is perfectly okay and is key to creating tender and juicy salmon cakes after frying.

Place the remaining panko bread crumbs into a small bowl.  Form patties out of the mixture then generously coat in bread crumbs. Place the coated salmon cake on a plate or tray; finish forming/coating the rest of the mixture.

Because the mixture is quite moist, I find that refrigerating the coated salmon cakes for about 30 minutes BEFORE frying makes them easier to lift from the plate to the frying pan.

Salmon cakes

When you’re ready to fry the cakes, place a couple of tablespoons of vegetable oil on a heated non-stick skillet.  I actually prefer to use a cast-iron skillet when I make this.

Pan fry over medium-high heat for about 4 minutes on each side, or until golden brown and crisp.

Serve with garlic aioli and ENJOY! 😀

image


Salmon Cakes
 
Prep time
Cook time
Total time
 
Savory salmon patties seasoned with cajun seasoning, topped with a delicious lemon-garlic aoili
Author:
Serves: 10-12 patties
Ingredients
Cajun Garlic Aoli
  • 1 cup mayo
  • 2 tablespoons chopped garlic
  • 1 tablespoon Cajun seasoning
  • 2 tablespoons lemon juice
  • 1 teaspoon salt
Salmon Cakes:
  • 3 cans boneless salmon (6-oz each)
  • ½ cup panko bread crumbs
  • ½ cup mayo
  • 2 teaspoons Dijon mustard
  • 4 stalks green onions, sliced
  • 2 teaspoons Cajun seasoning
  • 1 teaspoon garlic powder
Other:
  • 2 cups panko bread crumbs, for coating
  • Vegetable oil, for frying
Instructions
Make the Aoili:
  1. Mix all of the ingredients together in a small bowl. Set aside.
Make the Salmon Cakes:
  1. Drain the water out of the cans of salmon then place into a mixing bowl.
  2. Add the ingredients for the salmon cakes to the bowl. Fold the ingredients together until combined.
  3. Form the mixture into patties, coating each one with the remaining 2 cups of bread crumbs.
  4. Heat a non- stick or cast-iron pan over medium high heat. Lightly coat the pan with vegetable oil (a couple of tablespoons will do). Pan fry the salmon cakes for 3 to 4 minutes on each side. Add more oil to the pan if needed.
Serve with aioli and enjoy!


Baked Sushi Casserole

My family loves, LOVES, LOVES sushi.  We love both the sushi with cooked ingredients (especially those with tempura shrimp — YUM!) as well as the ones with raw fish (spicy tuna is a fave).

We especially love the sushi that is either baked or fried and is served piping hot with the saucy filling practically oozing out of the wrapper.  OMG — I’m drooling as I type this.

image

Rather than make one sushi roll then bake sliced pieces, this recipe is made casserole style in a 9×13 baking dish.  Serve the baked casserole with sushi wrappers and you have a quick and easy — not to mention inexpensive (or at least not as expensive as buying sushi at a restaurant) — and delicious dish.  This is also great for potlucks too.

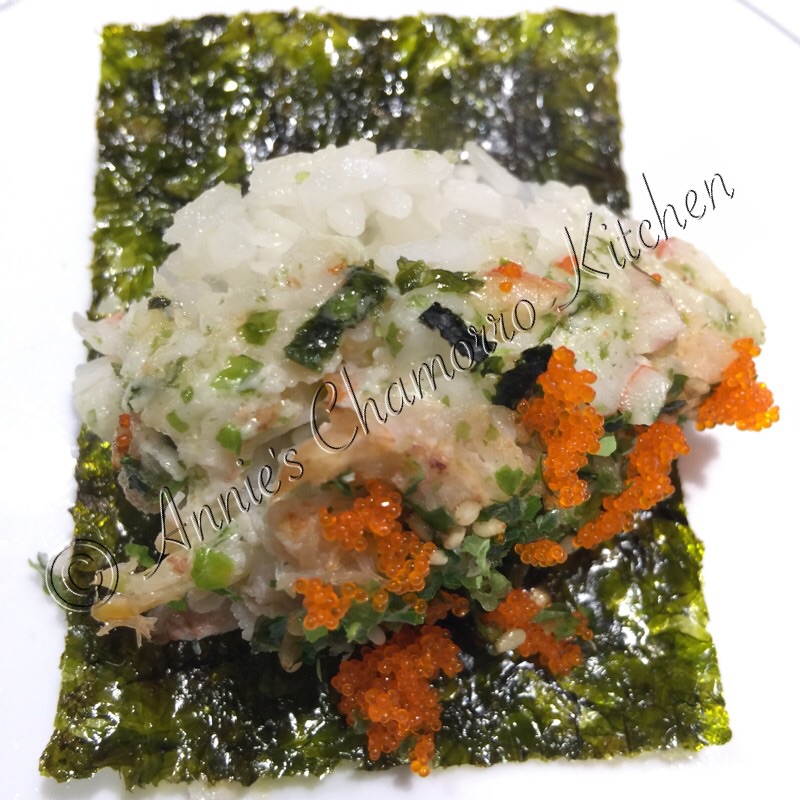
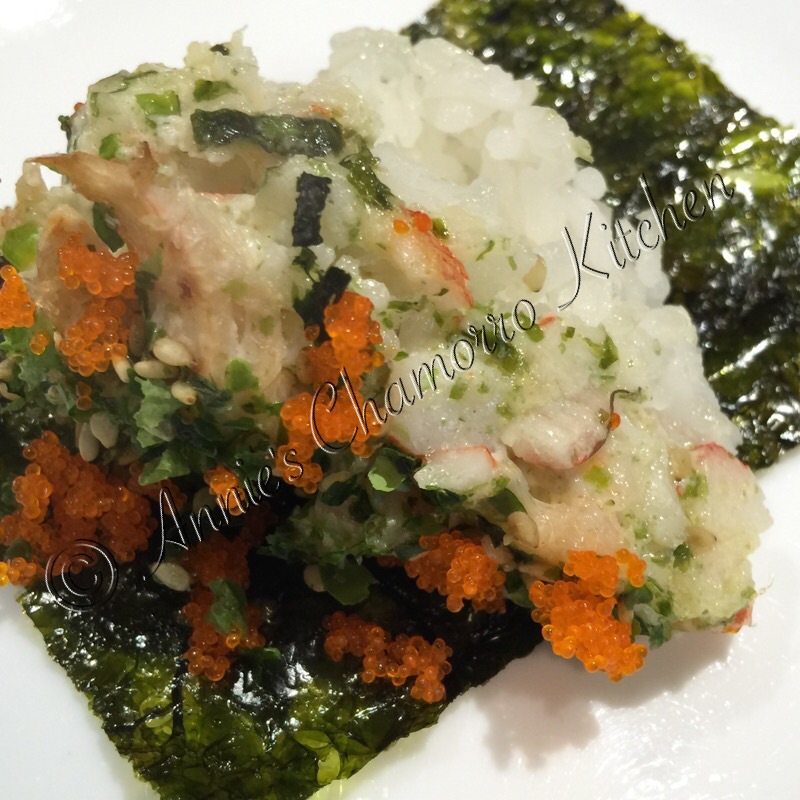
While you can use the large sushi wrappers with this dish, my family prefers serving it with the “snack sized” seasoned seaweed wrappers (pictured below).  You can find the smaller wrappers in the Asian aisle of most grocery stores.

image

Very little preparation is needed to make this yummy casserole.  Step-by-step instructions and photos follow.  See my complete recipe at the bottom of this post.

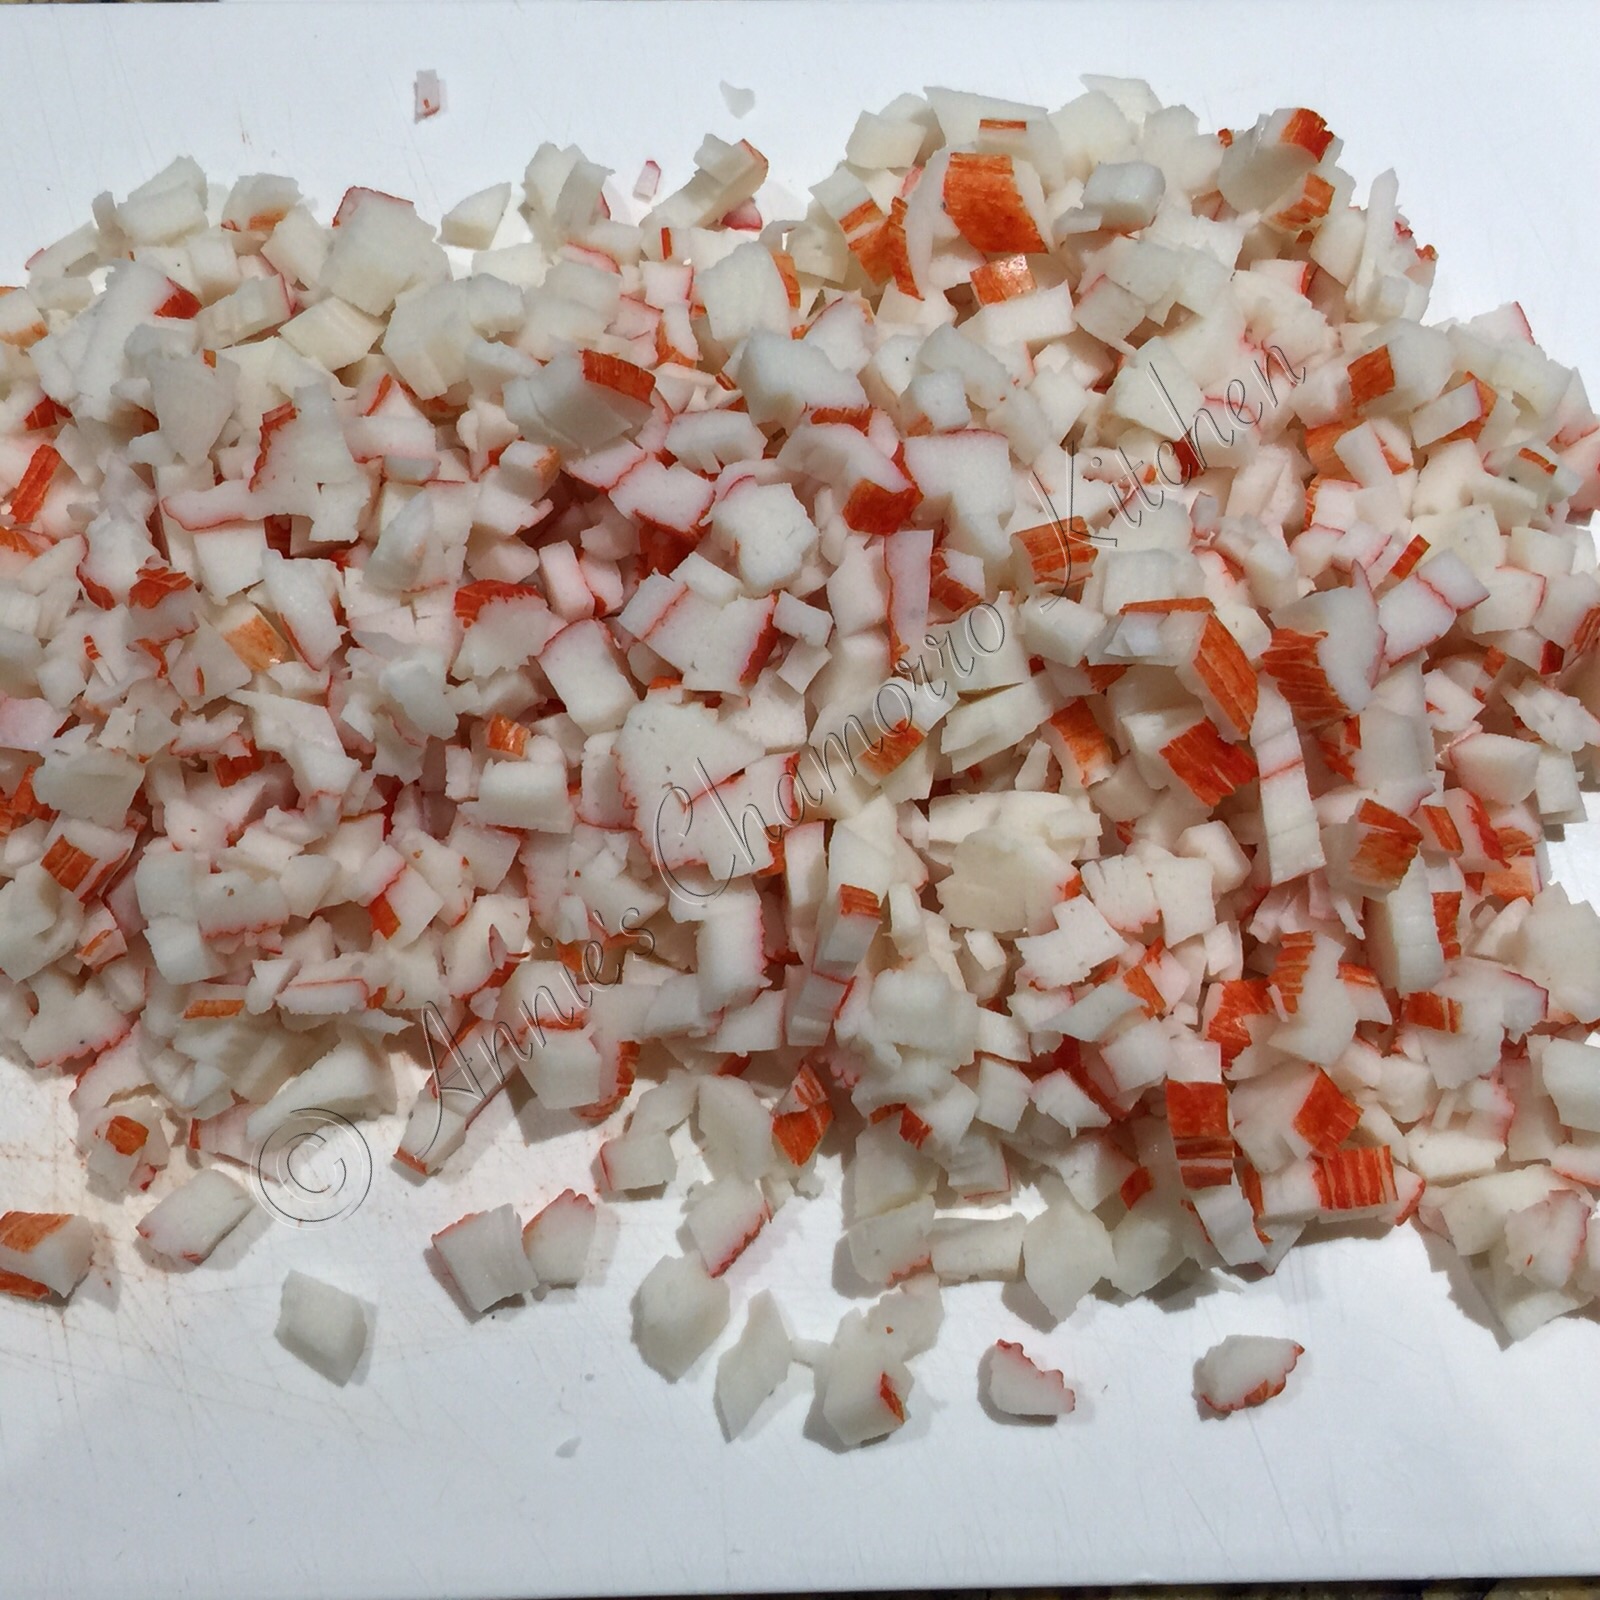
First, chop up some imitation crab meat.

image

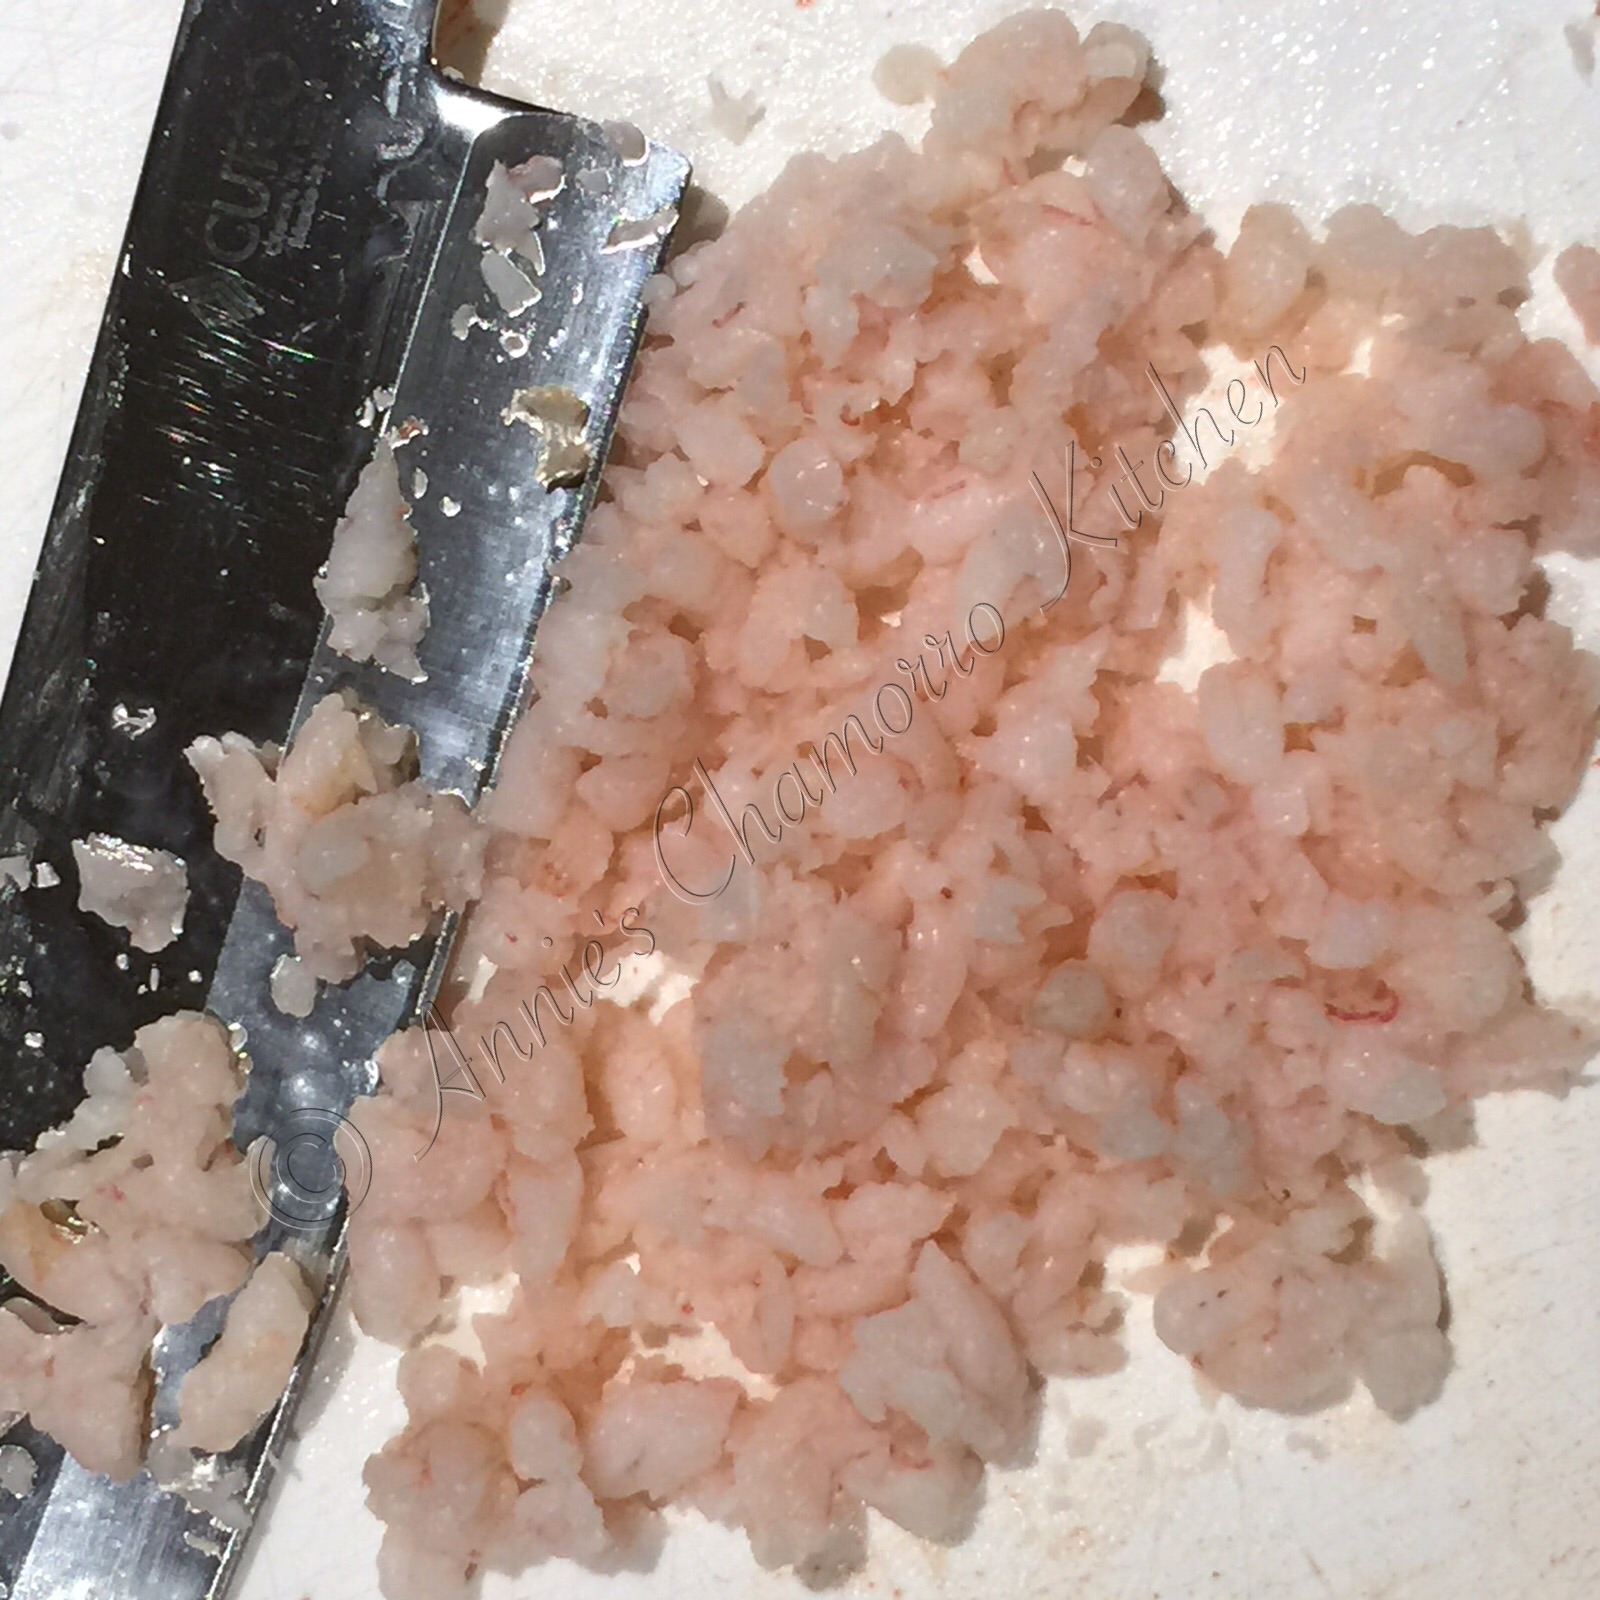
Pre-cooked salad shrimp also cuts on the preparation time.  I prefer to chop these up as well, but you can certainly use them whole since they are rather tiny.

image

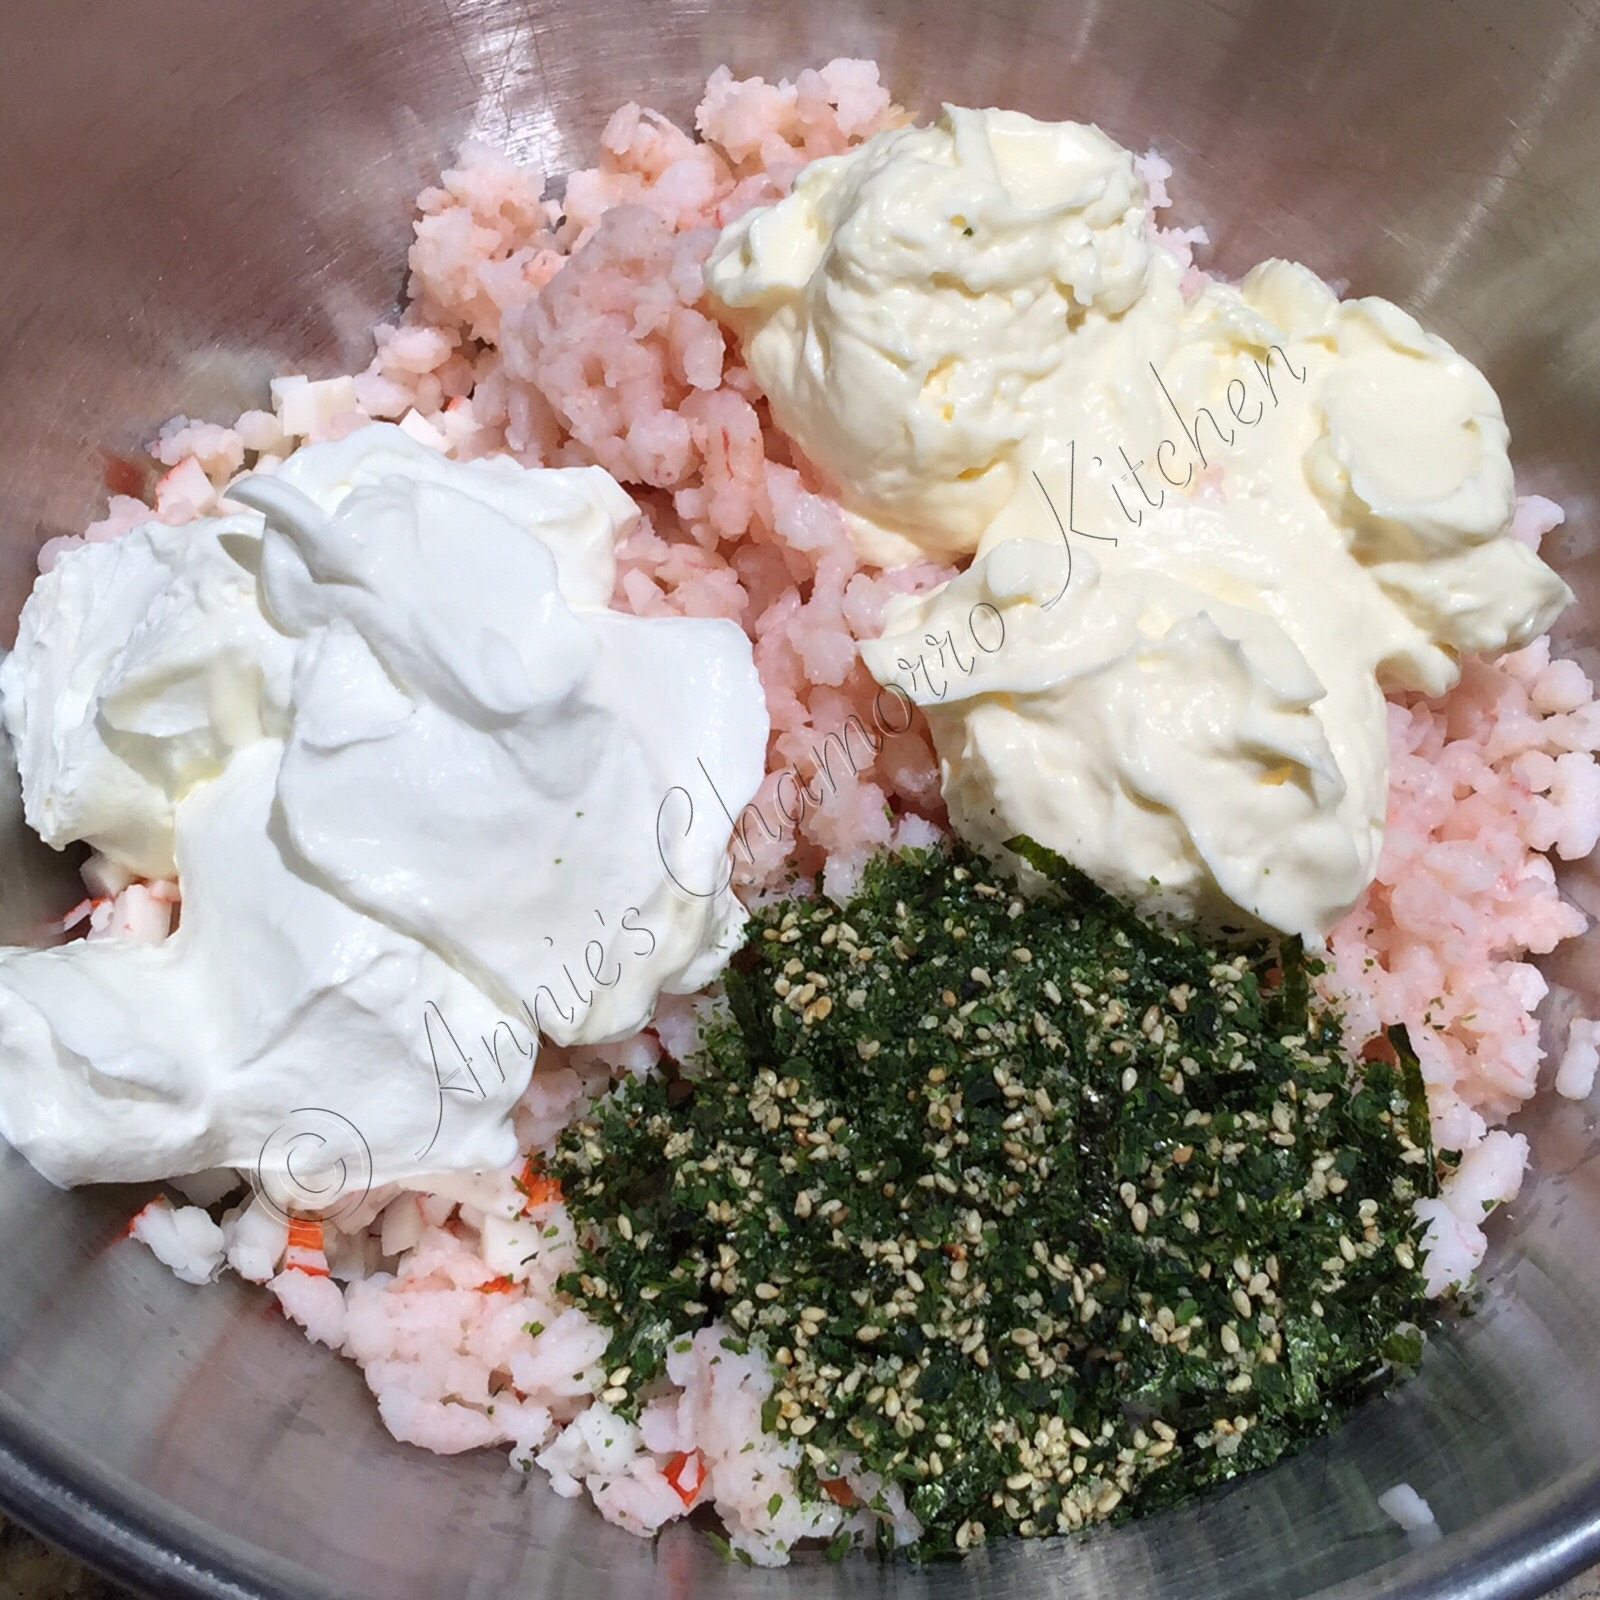
Place the chopped imitation crab and shrimp into a large mixing bowl.

image

Add sour cream, mayo, and furikake to the bowl.

image

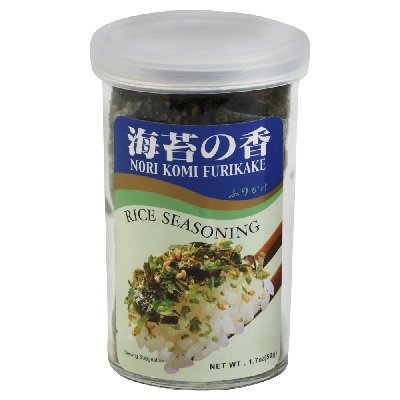
Furikake is a seasoning consisting of chopped seaweed, sesame seeds, sugar, and a few other spices.  It comes in different flavors; I use the “regular” furikake pictured below.  You can find this in the Asian aisle of your grocery store as well.

furikake

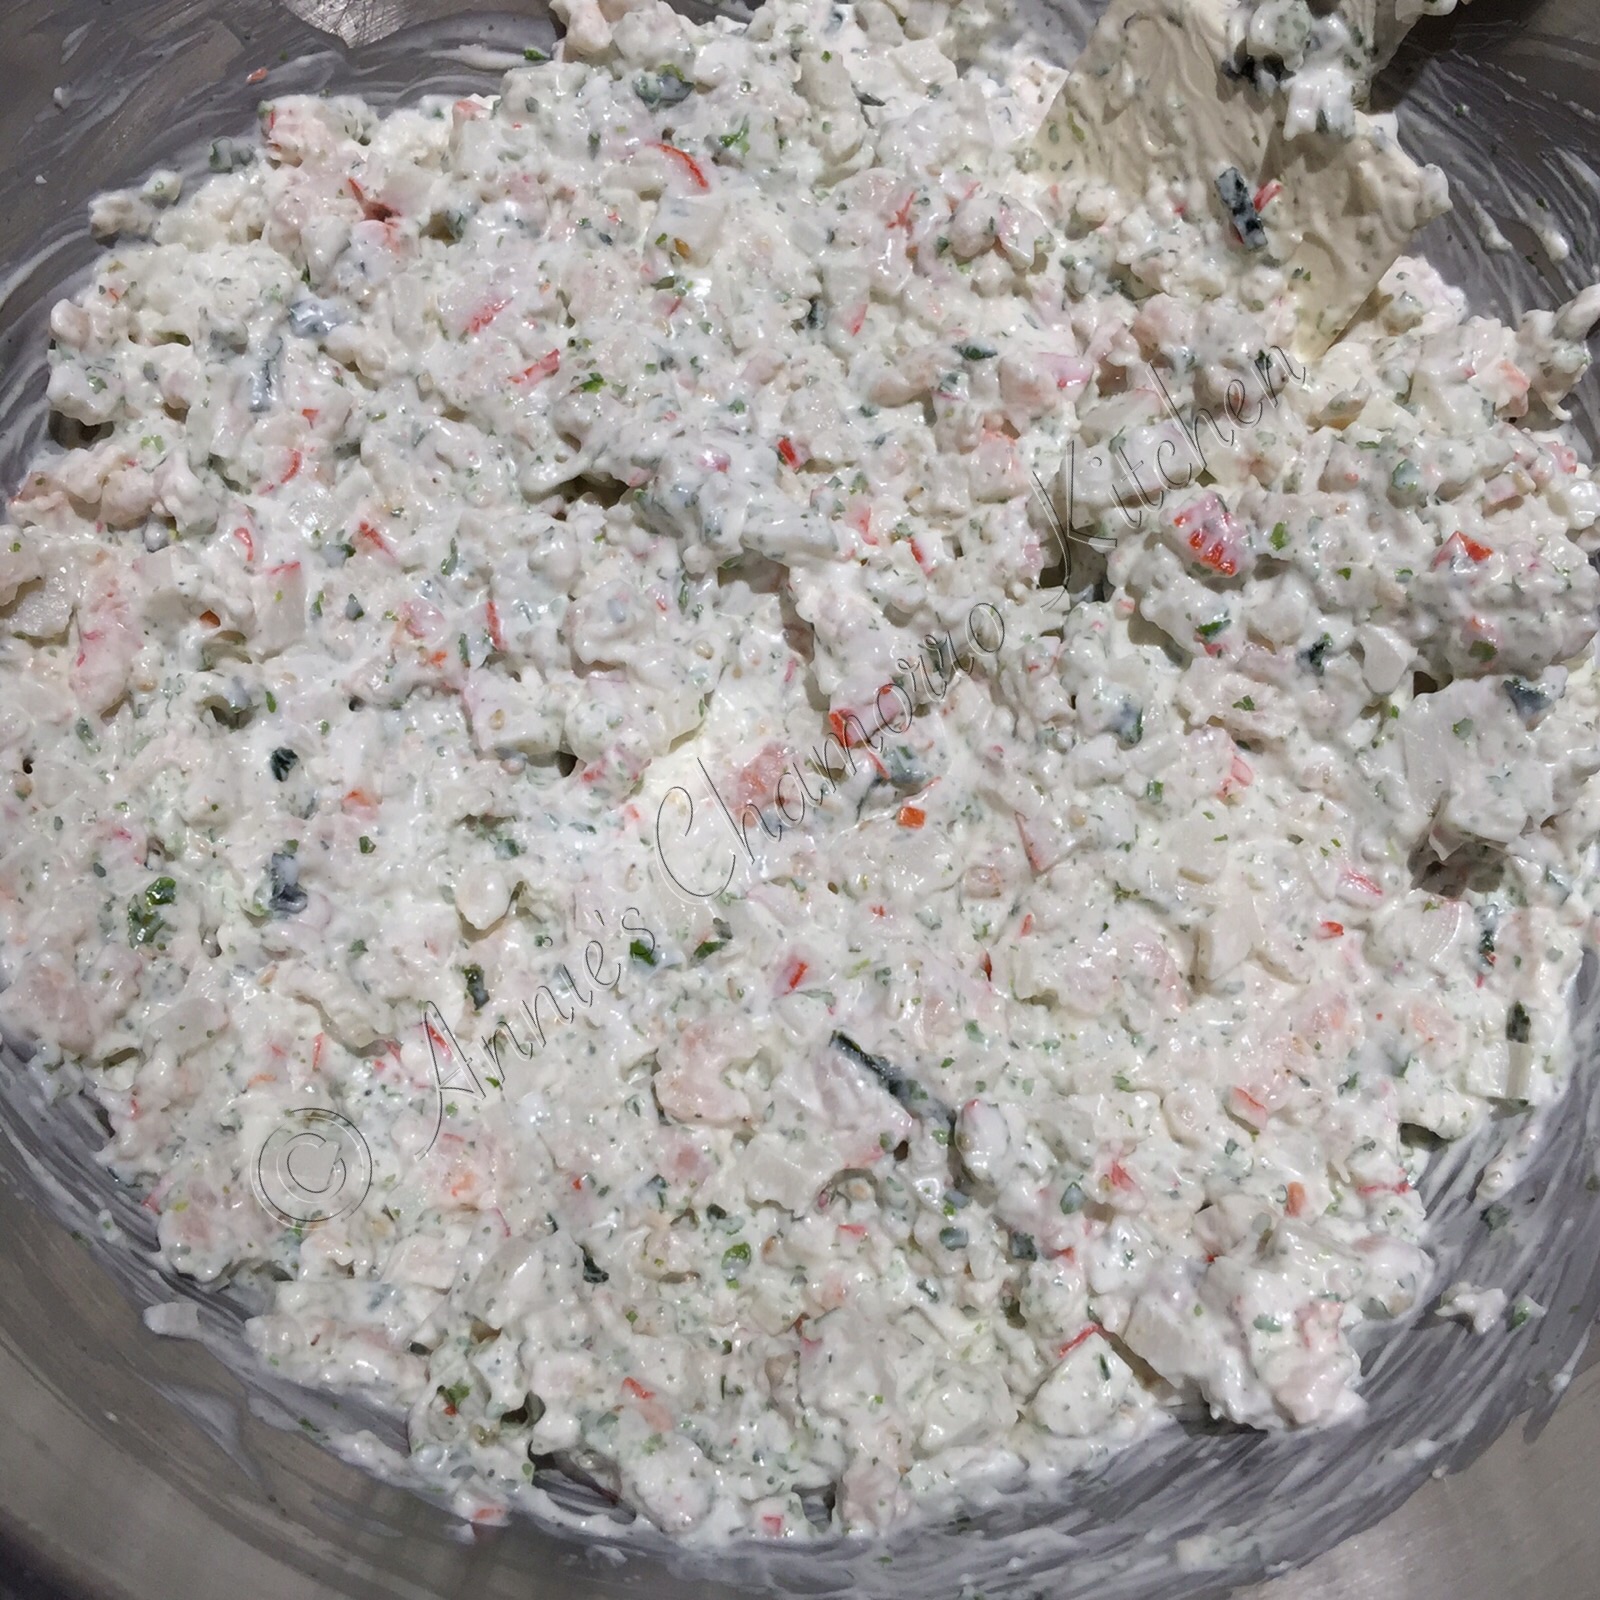
Stir to combine the ingredients for the shrimp and imitation crab mixture.  This is good just as it is, but sometimes I mix in a little squeeze of Sriracha sauce, or if you have it, some Kimchee Base as well to kick it up a notch.

image

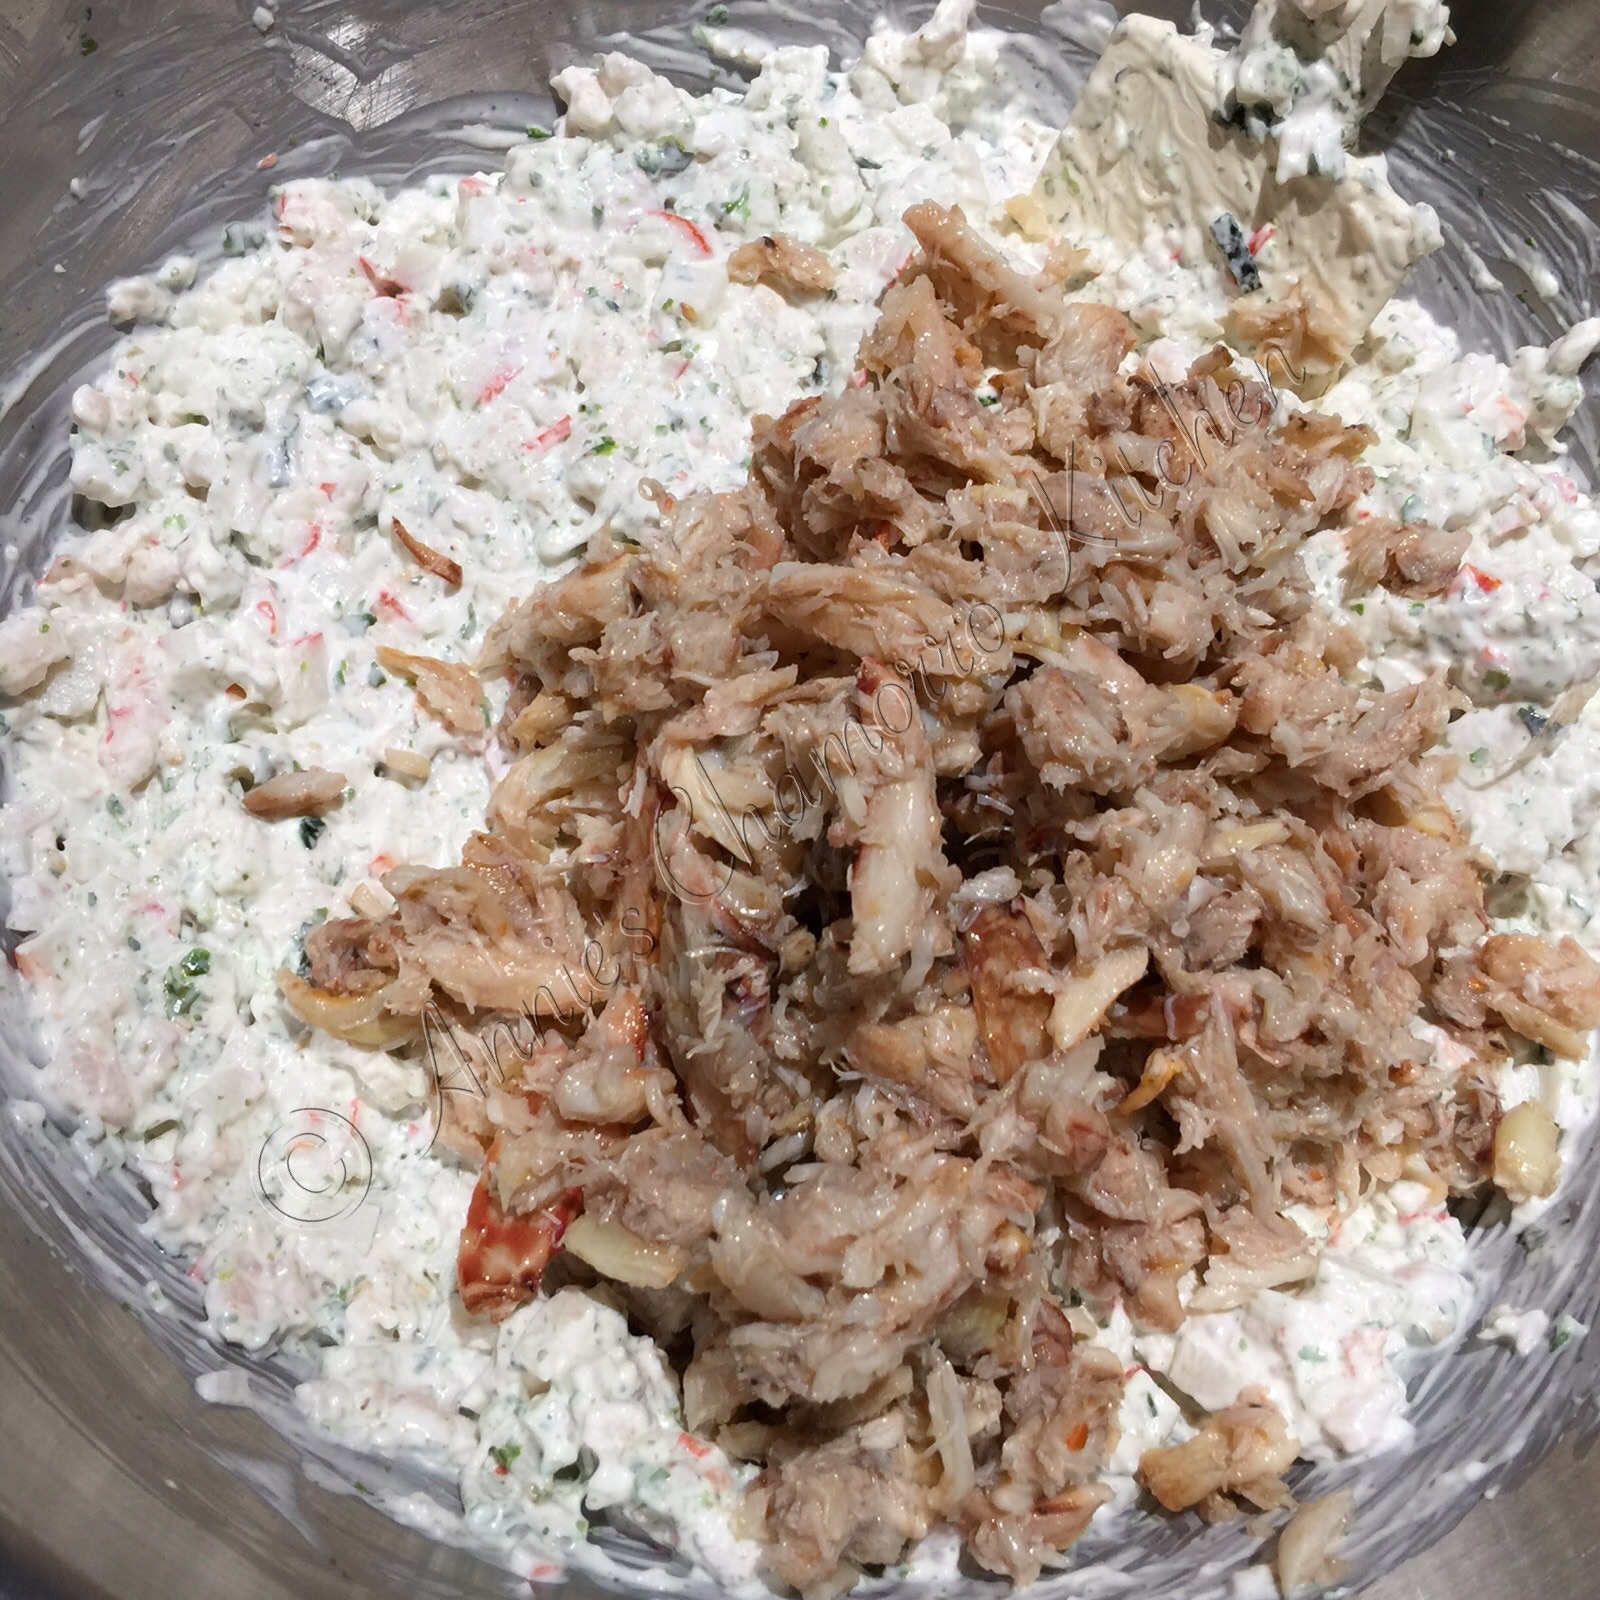
I love a lot of “meat” in this dish, so into the bowl goes real lump crab meat.  Sometimes the can of crab meat has a few crab shells in it, so if you see any, be sure to pick them out and discard them.

Fold the crab meat into the shrimp and imitation crab mixture.

image

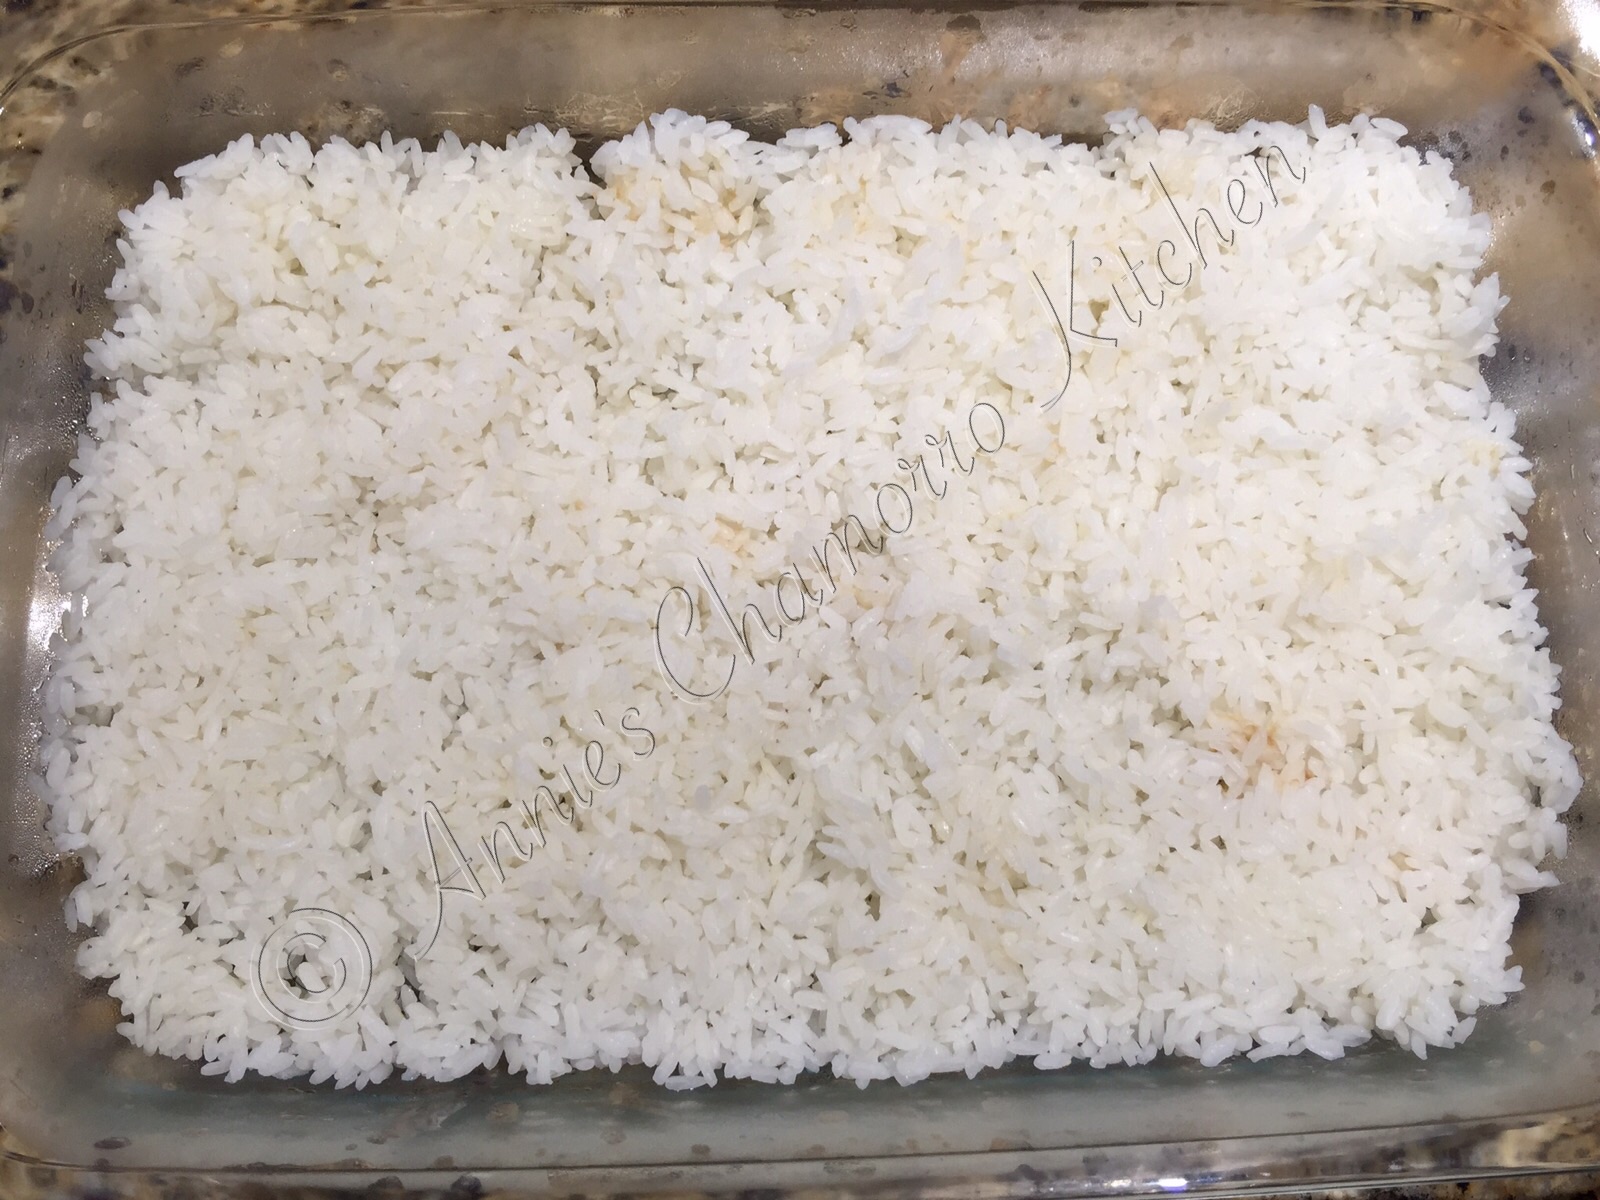
As I mentioned above, I love a lot of filling in this dish.  I don’t like using too much rice as I think it detracts from the deliciousness of the filling.

I cooked just two cups of rice for this recipe then spread it in the bottom of a 9×13 pan.  The rice layer is pretty thin — just how my family likes it.  If you like having more rice, by all means, cook more, and create a thicker layer.

image

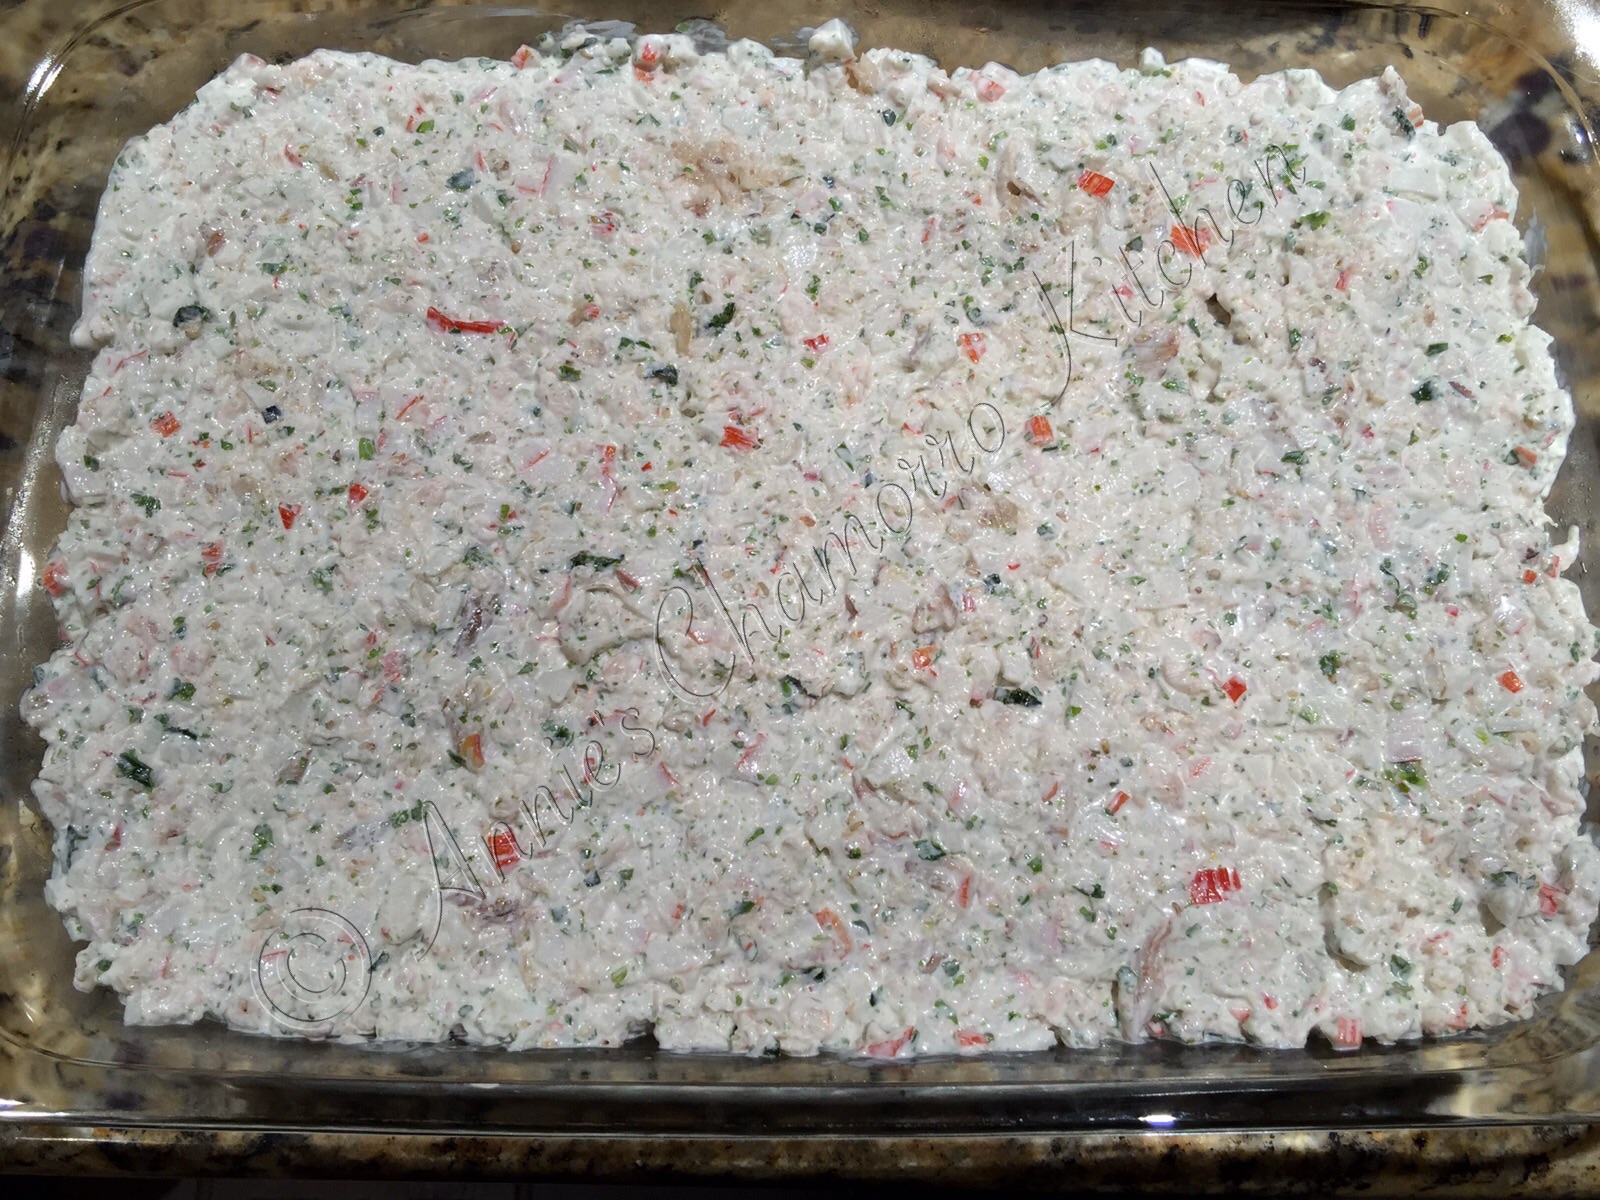
The entire bowl of the shrimp and crab mixture gets spread on top of the rice.  It may seem like too much, but trust me, it’s the PERFECT amount.

image

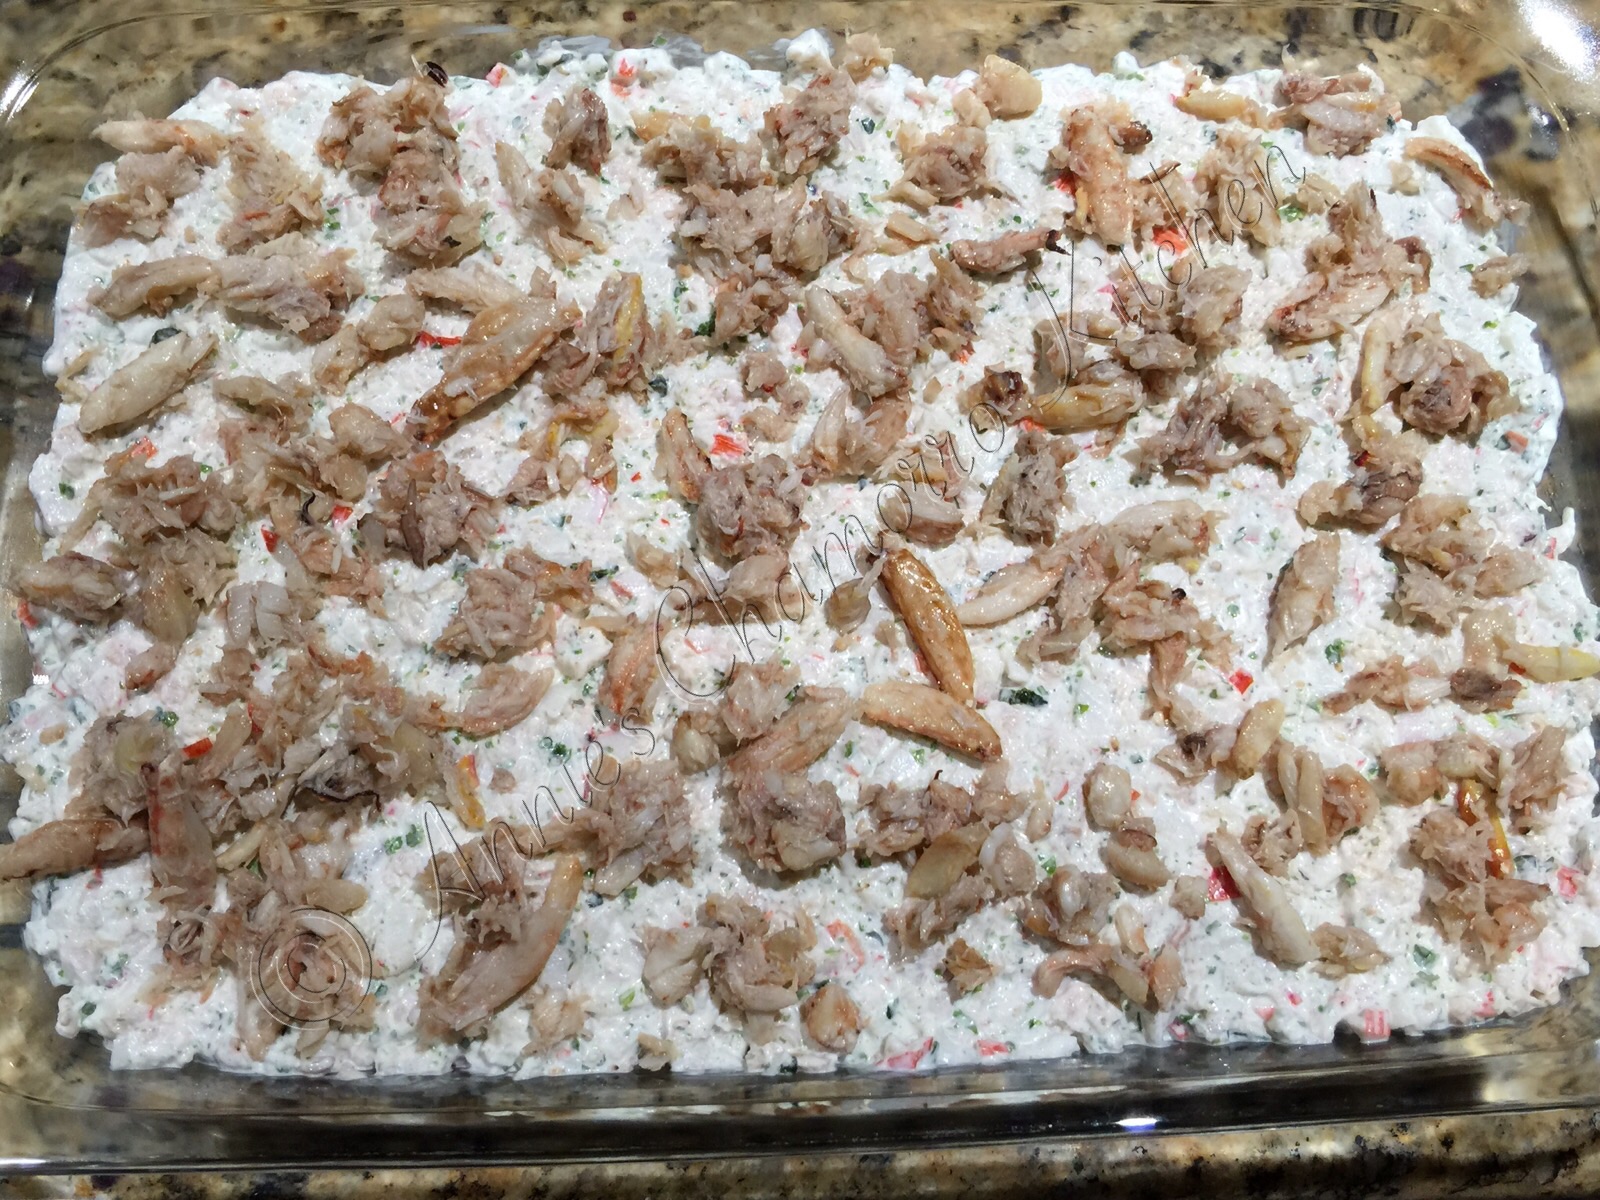
Add more real crab meat to the top of the shrimp and crab mixture.  Hey, I did say I loved a lot of “meat” in this dish. 😉

If you prefer, you can add more salad shrimp instead of crab meat, or splurge and use both! 😀

image

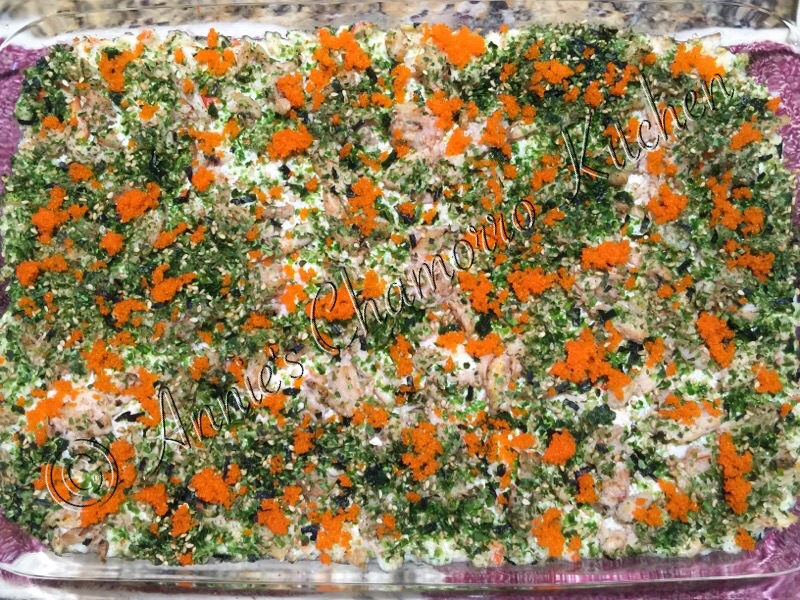
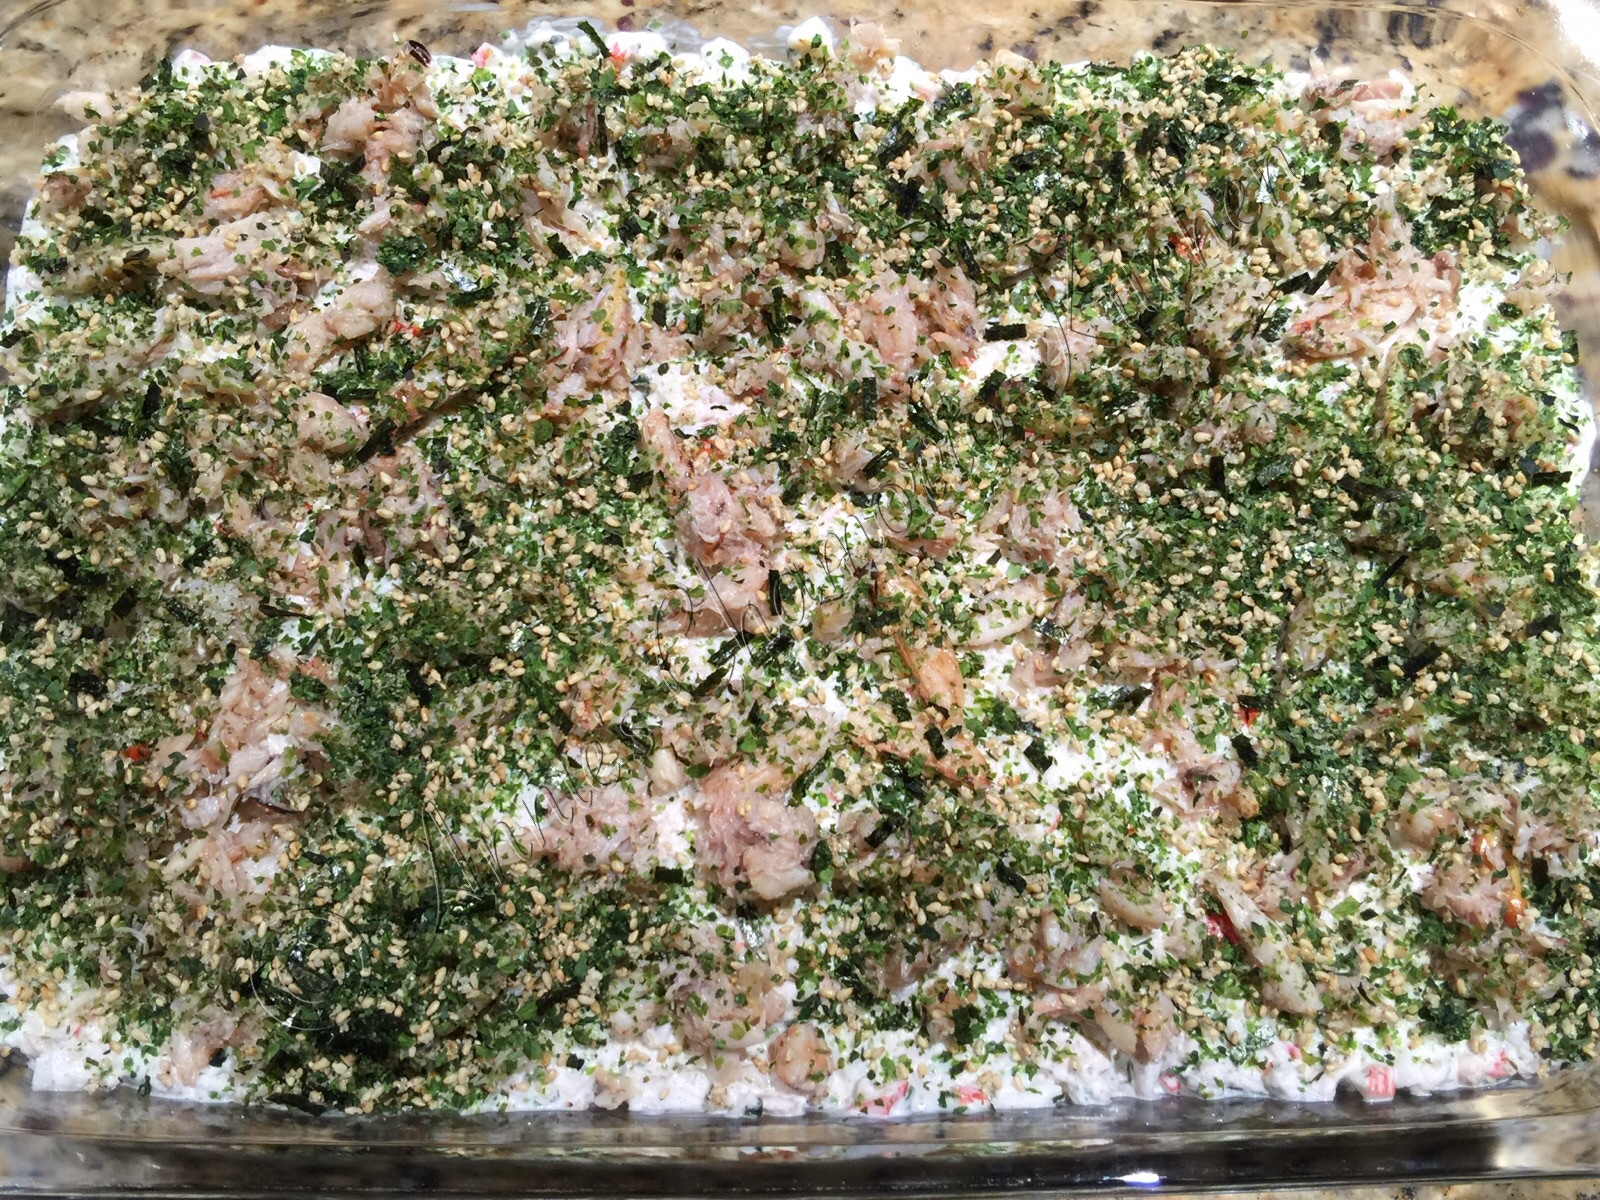
More furikake goes on top of everything.  Because I didn’t season the rice or shrimp-crab mixture, the seasoned furikake is where most of the flavor and seasoning comes from.  Do not skimp on this or your casserole will taste quite bland.

Bake for 20 minutes in a 375-degree oven.

image

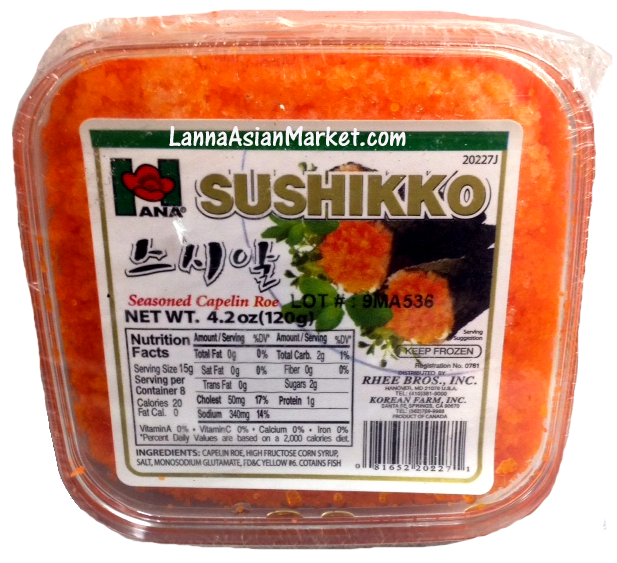
After baking, add as much or as little roe as you like.  We use capelin roe, or masago.  One of my children LOVES extra roe on hers.  She loves it so much that her serving looks completely orange with all the roe she adds.

image

This is the brand of Capelin roe or Masago that I buy.  It’s sold frozen in our local Asian supermarket.

Masago

Serve the piping hot casserole with seasoned seaweed and ENJOY!

image


Baked Sushi Casserole
 
Cook time
Total time
 
Author:
Serves: 8
Ingredients
Crab Mixture:
  • 12 oz imitation crab meat, finely chopped
  • 12 oz cooked salad shrimp, chopped
  • 1 cup mayo
  • 1 cup sour cream
  • ¼ cup furikake
  • 1 cup real lump crab meat (I use lump claw meat)
Other Ingredients:
  • 2 cups medium grain rice, cooked
  • ½ cup real crab meat (I use lump claw meat)
  • ¼ cup furikake
  • ¼ cup seasoned capelin roe
  • Packages of seasoned seaweed wrappers, for serving with the casserole
Instructions
Make the Crab Mixture:
  1. Place the chopped imitation crab meat and chopped shrimp into a large mixing bowl. Add the mayo, sour cream, and furikake to the bowl. Stir the ingredients together.
  2. Fold the lump crab meat into the shrimp mixture. Set aside.
Layer the Sushi Casserole:
  1. Spread the cooked rice in the bottom of a 9x13 pan.
  2. Spread the crab and shrimp mixture on top of the rice.
  3. Spread the remaining lump crab meat on top of the crab-shrimp mixture.
  4. Sprinkle more furikake on top of the lump crab meat.
Finish it up:
  1. Bake the casserole for 20 minutes in a 375 degree oven.
  2. Top with roe.
  3. Serve with seasoned seaweed wrappers.
ENJOY!


Garlic Ginger Vinaigrette

Good salad dressings are quite simple to make.  One of the simplest to make is a vinaigrette, of which the basic components are vinegar and oil.

You can be very creative with this versatile dressing.  Use different flavors of balsamic vinegars, champagne vinegar, or for an oriental flair, try rice vinegar.  If you’d rather have a citrus base for your dressing, try lemon, orange, or grapefruit juice instead of vinegar.

image

Various oils can give your vinaigrette a whole new dimension.  Use classic olive oil, or try truffle, sesame, avocado, or spicy chile oil.

Now here’s where you can go wild with the depth favors you can create for your vinaigrette.  Add optional ingredients such as crushed garlic, honey, dried or fresh herbs, fruit purées, or grated cheese.

image

If you’d like a creamy vinaigrette, add Dijon mustard, mayo, or try a bit of mashed avocado.  The variations are virtually endless.  Use your creative imagination and go wild.  Who says salad dressings have to be boring?  An added bonus ~ by making it yourself, you know that you’re putting wholesome, natural, quality ingredients into your body.

The inspiration for this vinaigrette is from a favorite Japanese restaurant. To give it that oriental flavor, I use sesame oil, rice vinegar, aji mirin and honey for some sweetness, and for that flavor punch, I add lots of crushed garlic and grated ginger. I also added grated carrots for a bit of added sweetness, and salt and pepper to taste.

imageYou can find my complete recipe below.  Here’s how to make it.

In a small mixing bowl, whisk together rice vinegar, aji mirin, honey, garlic, ginger, carrots, salt and pepper.  You can add as much — or as little — garlic and ginger as you like.  If you like your dressings sweeter, by all means, add more honey.  That’s the beauty about this type of recipe.  It’s all up to you to add/decrease ingredients to suit your taste.

image

What you do need to remember is that basic vinaigrettes contain a ratio of 1 part vinegar to 3 parts oil. I actually prefer less oil in my vinaigrettes so I use a 1:2 ratio instead.  My recipe uses a one-part mixture of rice vinegar and aji mirin with a two-part mixture of sesame and vegetable oil.

Sesame oil has a very intense flavor and can taste a tad bitter if you use too much of it. I don’t want the bold flavor of the sesame oil to overpower the other flavors in this vinaigrette so I use half sesame and half vegetable oil.

Once you mix your vinegar base together, slowly drizzle the oil into the vinegar mixture, vigorously whisking as you pour in order to emulsify the oil into the dressing.

image

It’s the vigorous whisking that breaks down the fat molecules in the oil and allows the vinegar to mix with them, creating a smooth dressing that doesn’t separate. You’ve seen those dressings in the store before, the one where all the vinegar and spices have sunk to the bottom of the bottle and all the oil is floating on top.

TIP: To help with the emulsification, whisk in a spoonful of mustard or mayo.

image

That’s it!  You now have a delicious vinaigrette in minutes!  This recipe makes a little more than 1 1/2 cups of dressing.  Refrigerate any unused dressing

Pour over your favorite salad greens and ENJOY!

image


Garlic Ginger Vinaigrette
 
A vinaigrette packed full of the bold flavors of garlic, ginger and sesame oil. Delicious on salads, this dressing is also good as a marinade for your favorite cuts of meat.
Author:
Recipe type: Sauces & Marinades
Ingredients
  • ¼ cup rice vinegar
  • ¼ cup aji mirin
  • 1 tablespoon raw honey
  • 1 tablespoon crushed garlic
  • 1 teaspoon grated fresh ginger
  • ¼ cup grated carrots
  • ½ teaspoon salt, more or less, to taste
  • ¼ teaspoon black pepper
  • ½ cup sesame oil
  • ½ cup vegetable oil
Instructions
  1. In a small bowl, whisk together the rice vinegar, aji mirin, honey, garlic, ginger, carrots, salt and pepper.
  2. Slowly drizzle the oil into the vinegar mixture, vigorously whisking as you pour in order to emulsify the oil into the dressing.


Robot Snack Packs

My niece, Chrystina, is always looking for creative ways to make snack time fun for her children.  This time, she and her son, Damian, made Robot Snack Packs for Damian to share with his kindergarten class.

You’ll  need:

  • Applesauce cups for the robot head
  • Juice boxes for the robot body
  • Snack-sized boxes of raisins for robot feet
  • Smarties or Sweet Tarts for robot arms
  • Googly eye stickers
  • Hot glue gun and glue sticks (see note)

NOTE:  Parents or adults must supervise and help with this project so that little ones do not get burned with the hot glue gun or glue.  You can use heavy-duty double-sided tape for this project if you’d rather not use hot glue.

To to assemble the robots:

Make the robot head:

Flip up the two side flaps or “wings” of the juice box so that they are laying on top of the box.  Add a small line of glue to each flap.  Turn the applesauce upside down and stick the top to the juice box flaps.

Make the robot feet.

Glue the boxes of raisins to the bottom of the juice box “robot body” to make feet.

Make the robot arms.

Glue one end of the Smarties to the sides of the juice box to make robot arms.

Lastly, stick the eyes on the side of the applesauce “robot head.”

Damian had fun making these.  I’m sure you’ll have fun with your little ones too!  Enjoy!image


« Older Entries Recent Entries »