I love salmon, and this is one of my favorite ways to prepare it. I first had this dish at a popular chain restaurant. I wanted to recreate it at home, and luckily the basic recipe could be found all over the internet (I’m not sure who the original source is).
Give it a try. I think you’ll like it. 🙂
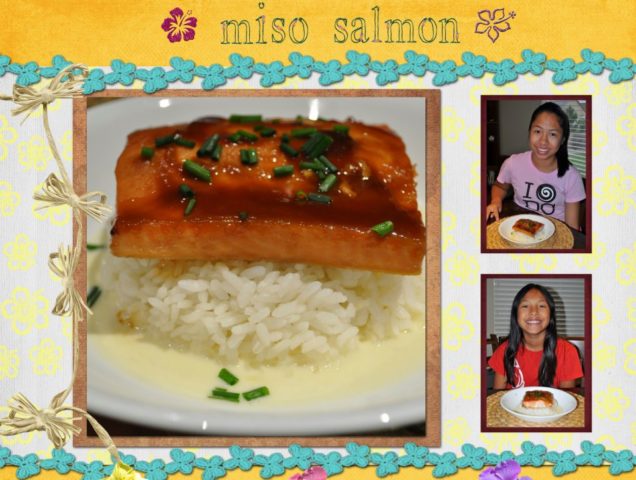
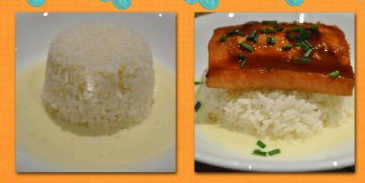
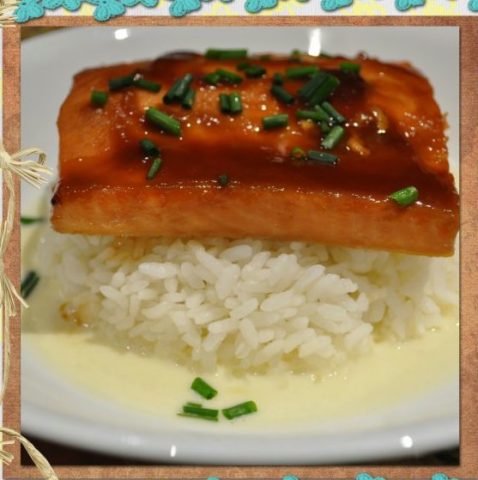
Miso Salmon with Sake Butter Sauce
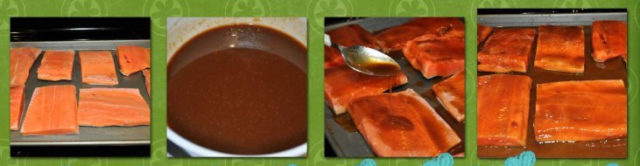
In a shallow baking pan, place the salmon filets, skin side down.
In a small bowl, whisk together the ingredients for the miso sauce. Pour the sauce over the salmon filets, covering each filet entirely. Bake at 475 degrees for 12-15 minutes.
In a small saucepan over medium high heat, saute the ginger and shallots in two tablespoons of butter. Cook for about two minutes.
Add one cup of sake; bring to a boil and cook until the sake has reduced by about half.
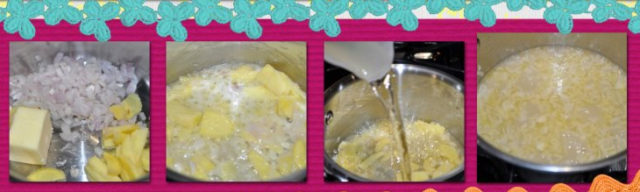
Add the heavy cream to the reduced sake mixture. Bring to a boil and cook for two minutes.
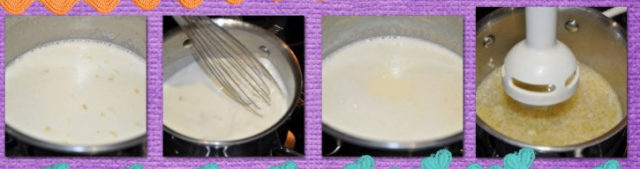
Whisk in the remaining pieces of butter, one piece at a time. Once all of the butter has been incorporated, whisk in the remaining sake, lime juice, and honey. Add salt to taste.
Optional: Use an immersion blender to puree the bits of shallots and ginger for a smooth sauce.
Spoon some sake butter sauce into a shallow dish.
Using a small bowl as a mold, fill with cooked rice. Unmold the rice on top of the sake butter sauce.
Place one salmon filet on top of the rice. Sprinkle chopped chives on top of the salmon.
Serve and enjoy!
- 8 salmon filets, about one inch thick
- Cooked (steamed) white rice
- 2 tablespoons chives, sliced
- ½ cup brown sugar
- 4 tablespoons soy sauce
- 4 tablespoons hot water
- 4 tablespoons miso paste
- 1 one-inch piece ginger, peeled and julienned
- 2 tablespoons minced shallots
- 2 tablespoons butter for sauteing
- 1 cup plus 1 tablespoon sake
- ¼ cup heavy cream
- 8 tablespoons cold butter, cut into pieces
- 1 teaspoon lime juice
- 2 tablespoons honey
- Salt, to taste
- In a shallow baking pan, place the salmon filets, skin side down.
- In a small bowl, whisk together the ingredients for the miso sauce. Pour the sauce over the salmon filets, covering each filet entirely. Bake at 475 degrees for 12-15 minutes.
- Set aside.
- In a small saucepan over medium high heat, saute the ginger and shallots in two tablespoons of butter. Cook for about two minutes.
- Add one cup of sake; bring to a boil and cook until the sake has reduced by about half.
- Add the heavy cream to the reduced sake mixture. Bring to a boil and cook for two minutes.
- Whisk in the remaining pieces of butter, one piece at a time. Once all of the butter has been incorporated, whisk in the remaining sake, lime juice, and honey. Add salt to taste.
- Optional: Use an immersion blender to puree the bits of shallots and ginger for a smooth sauce.
- Spoon some sake butter sauce into a shallow dish.
- Using a small bowl as a mold, fill with cooked rice. Unmold the rice on top of the sake butter sauce.
- Place one salmon filet on top of the rice. Sprinkle chopped chives on top of the salmon.
- Serve and enjoy!
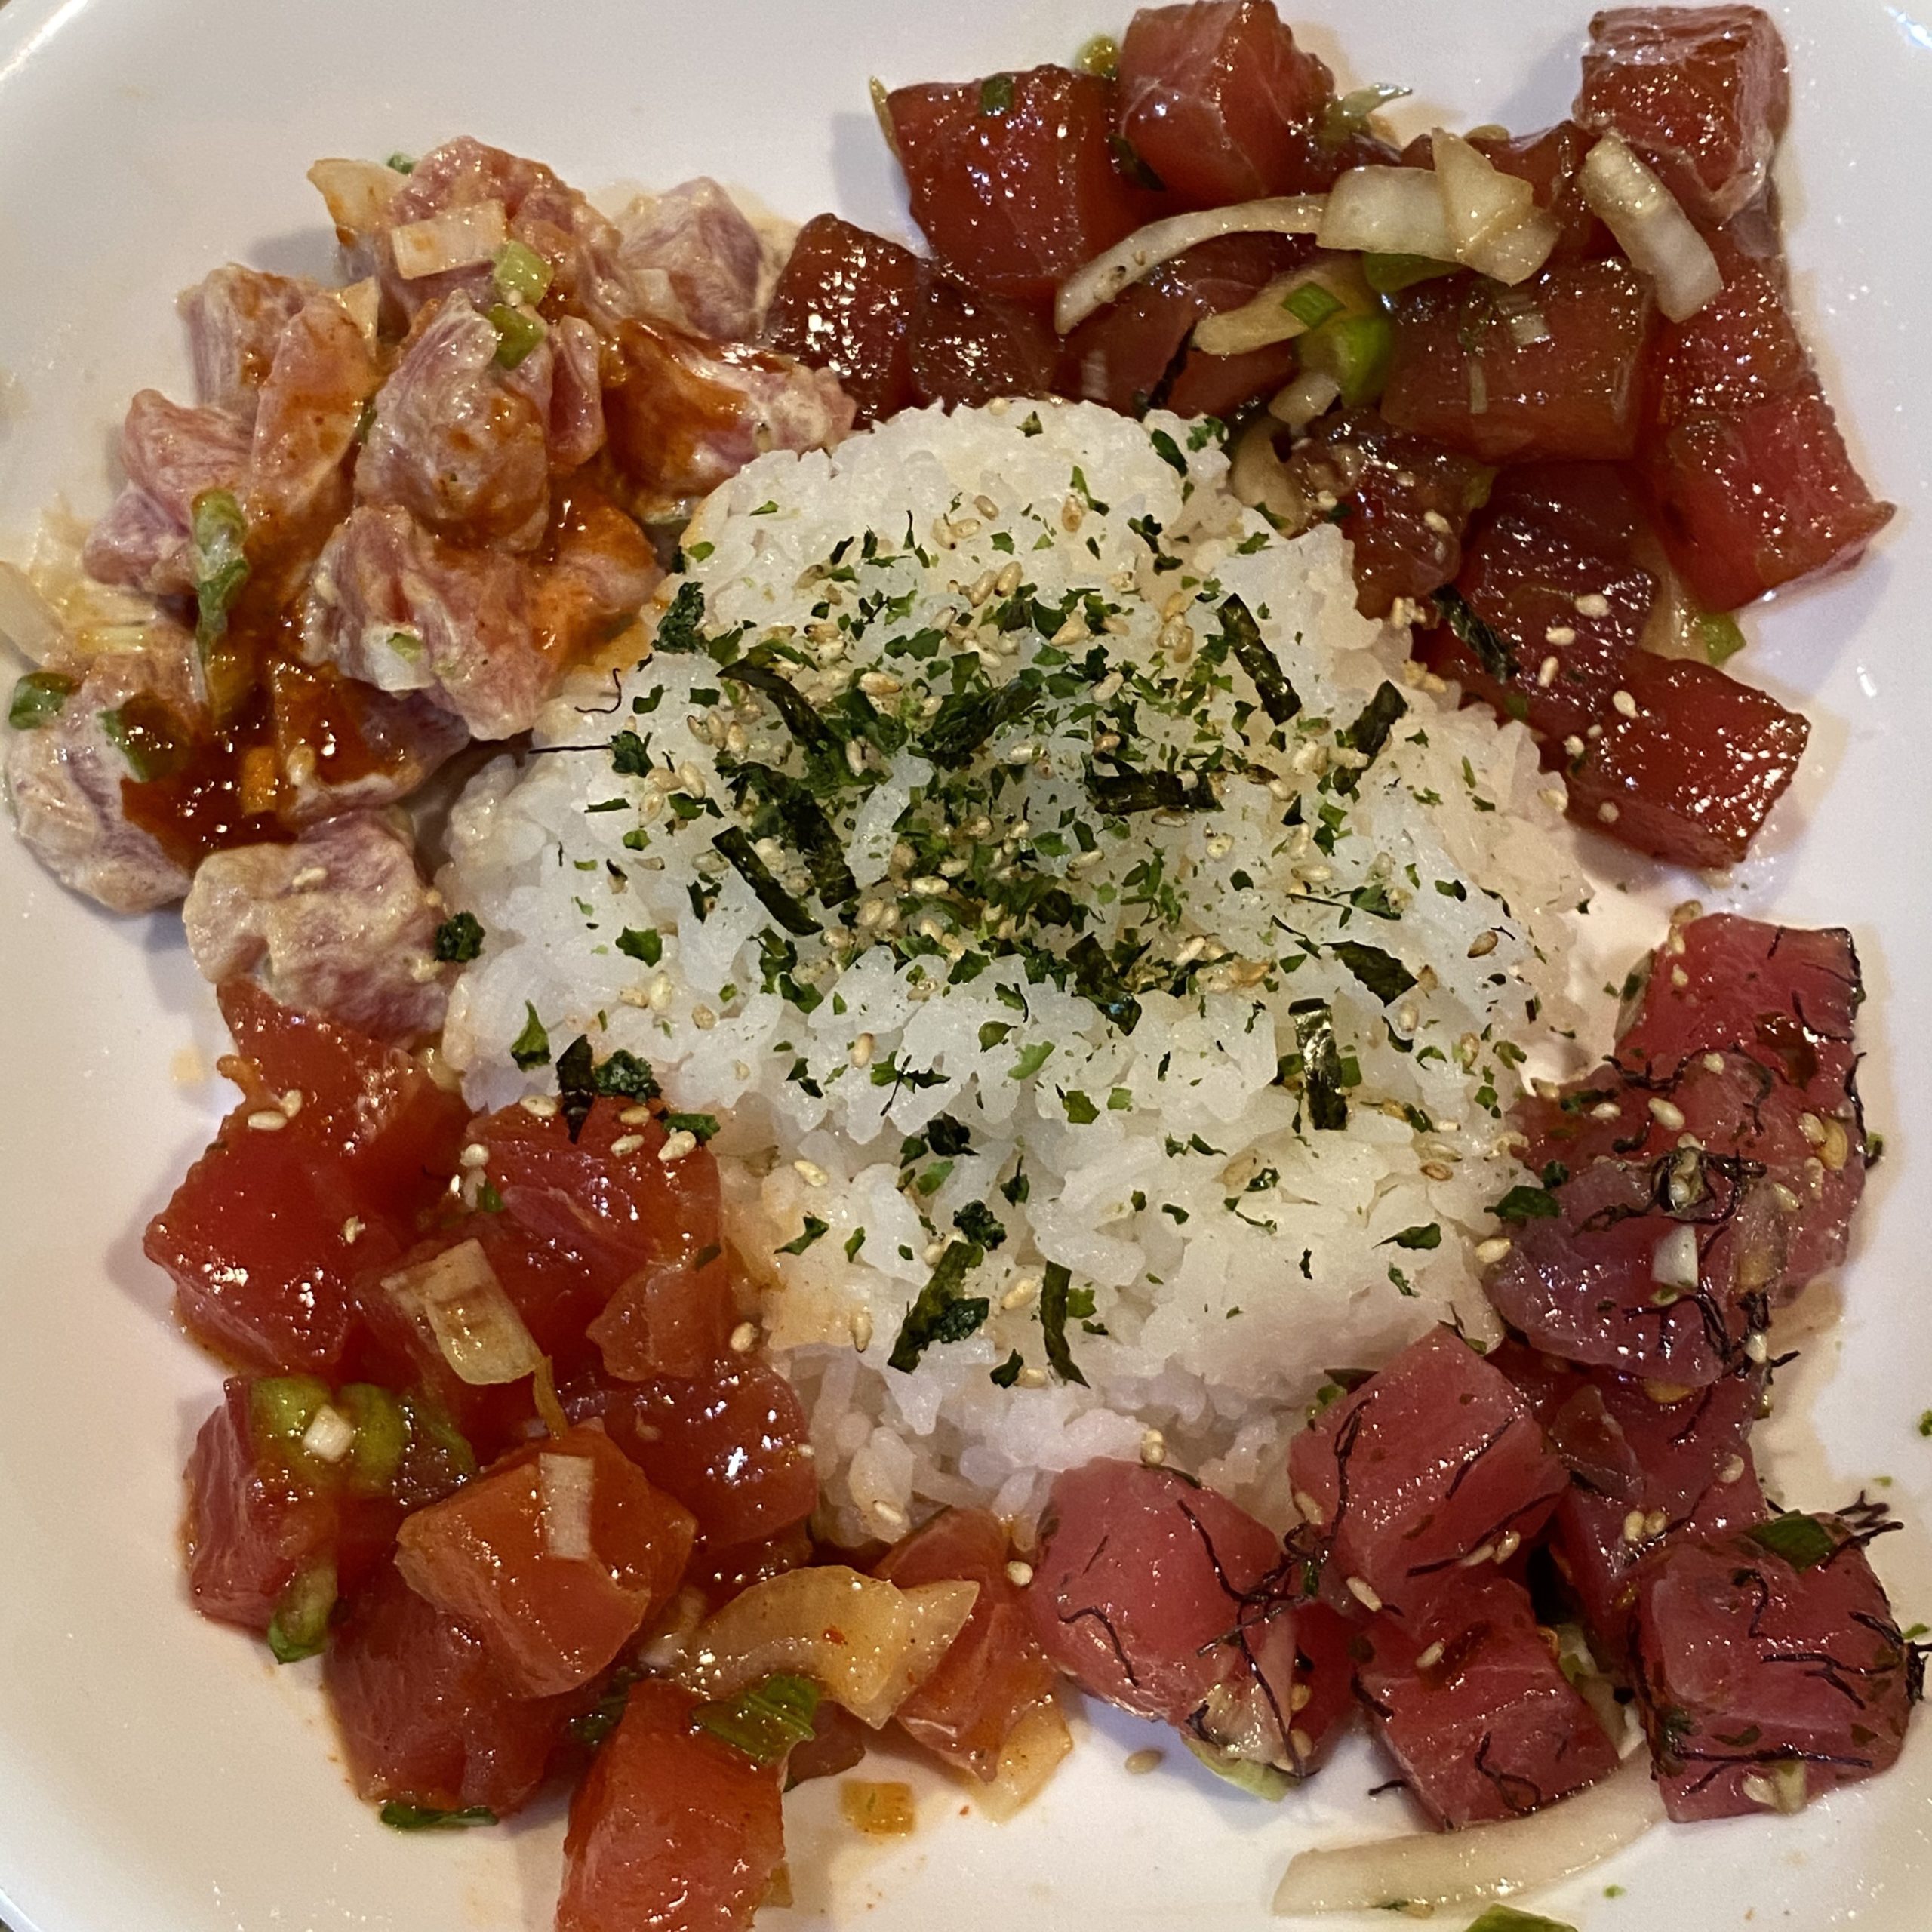
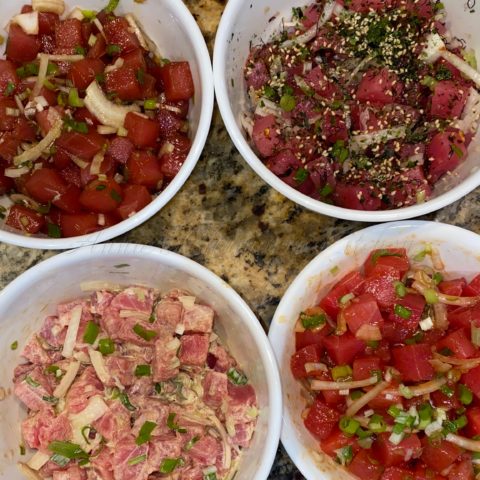
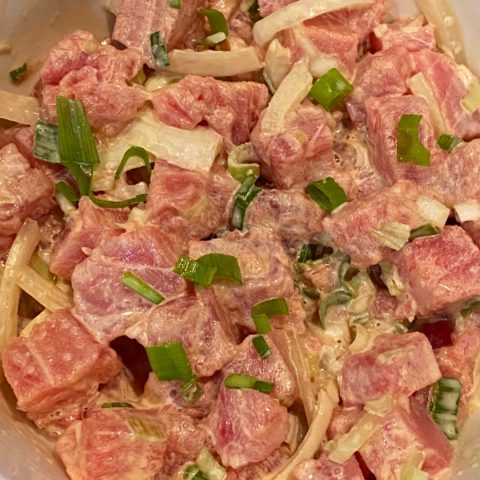
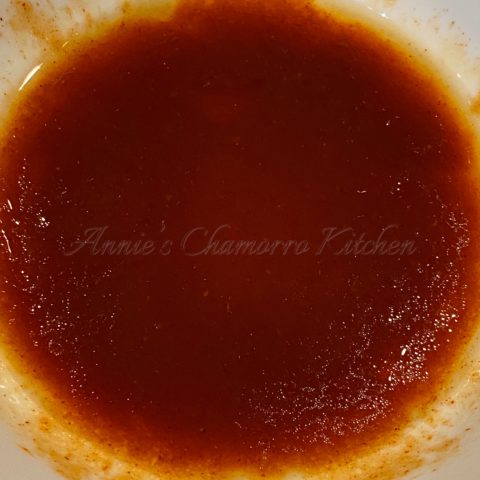
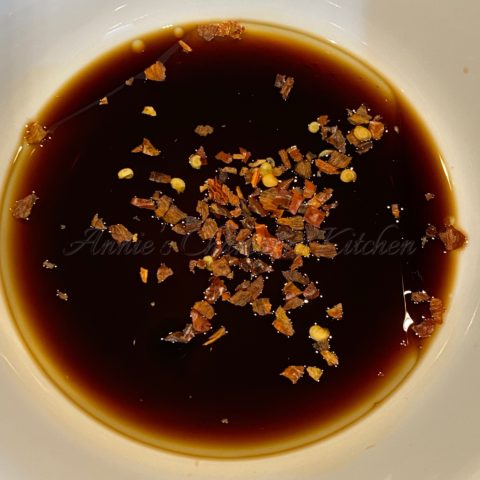 Pour the Shoyu mixture over the ahi.
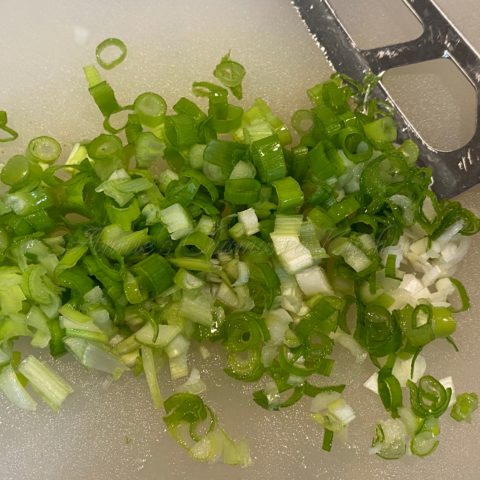
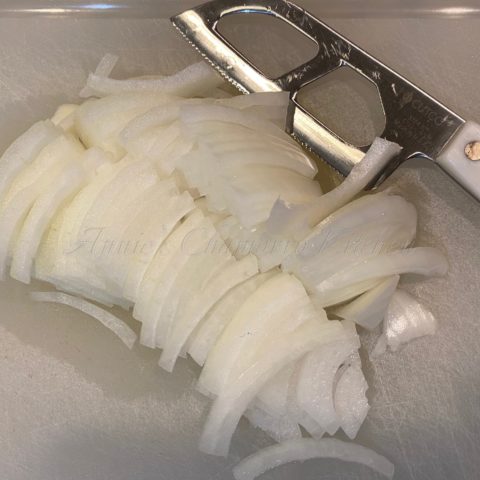
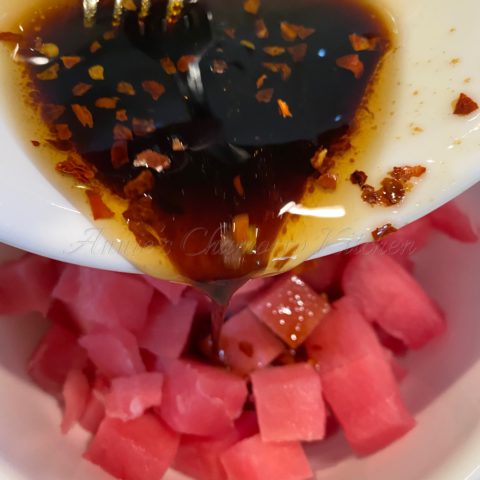 Add green and yellow onions. Stir to combine.
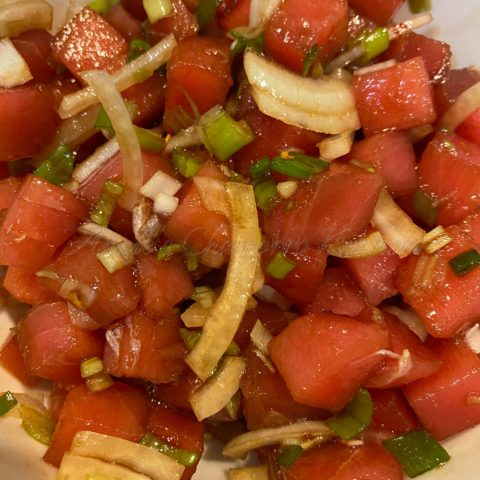
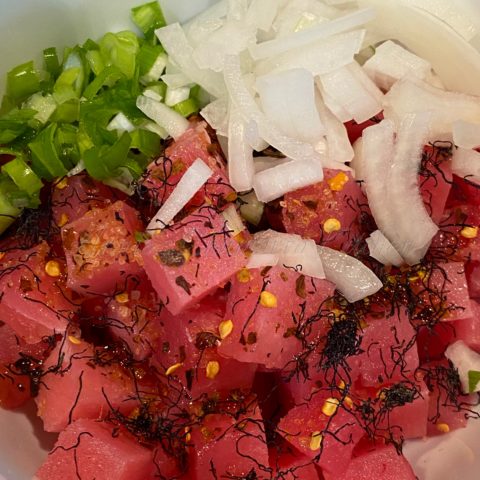
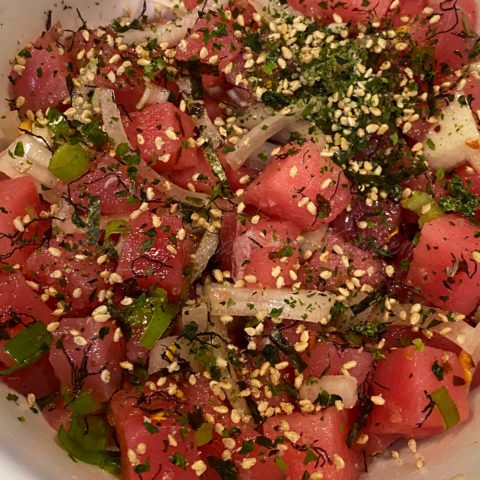
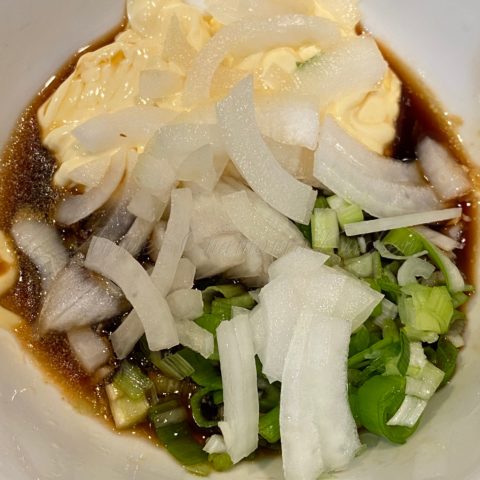 Stir to combine.
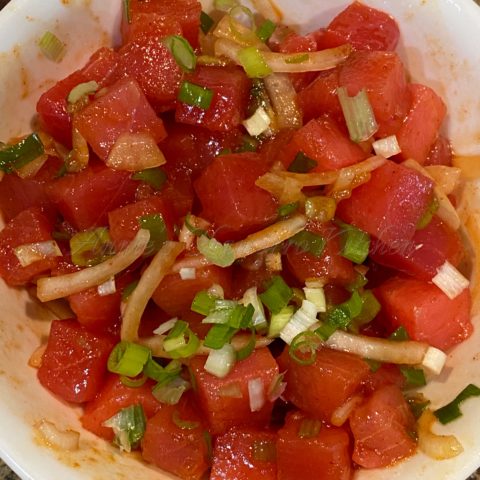
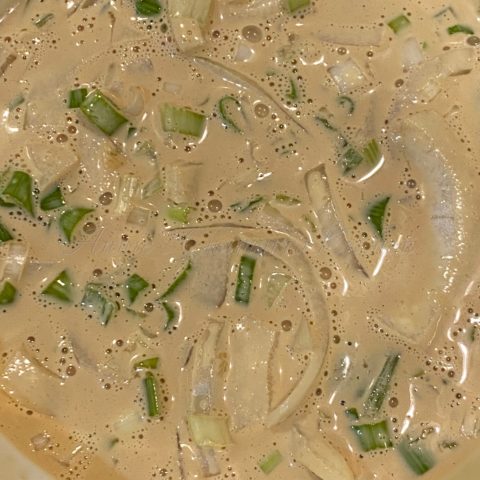 Pour the mixture over the ahi.
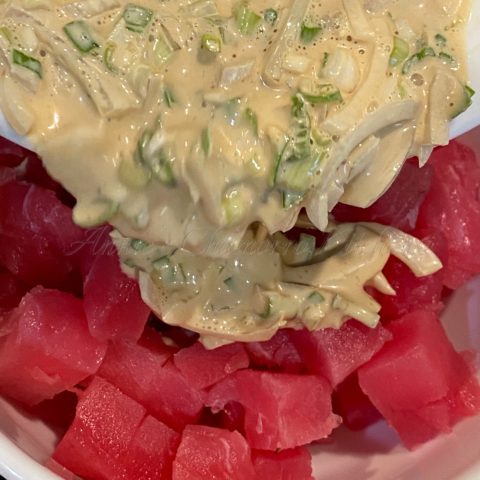 Stir to combine.