Chocolate Chip, Walnut, Oatmeal Cookies

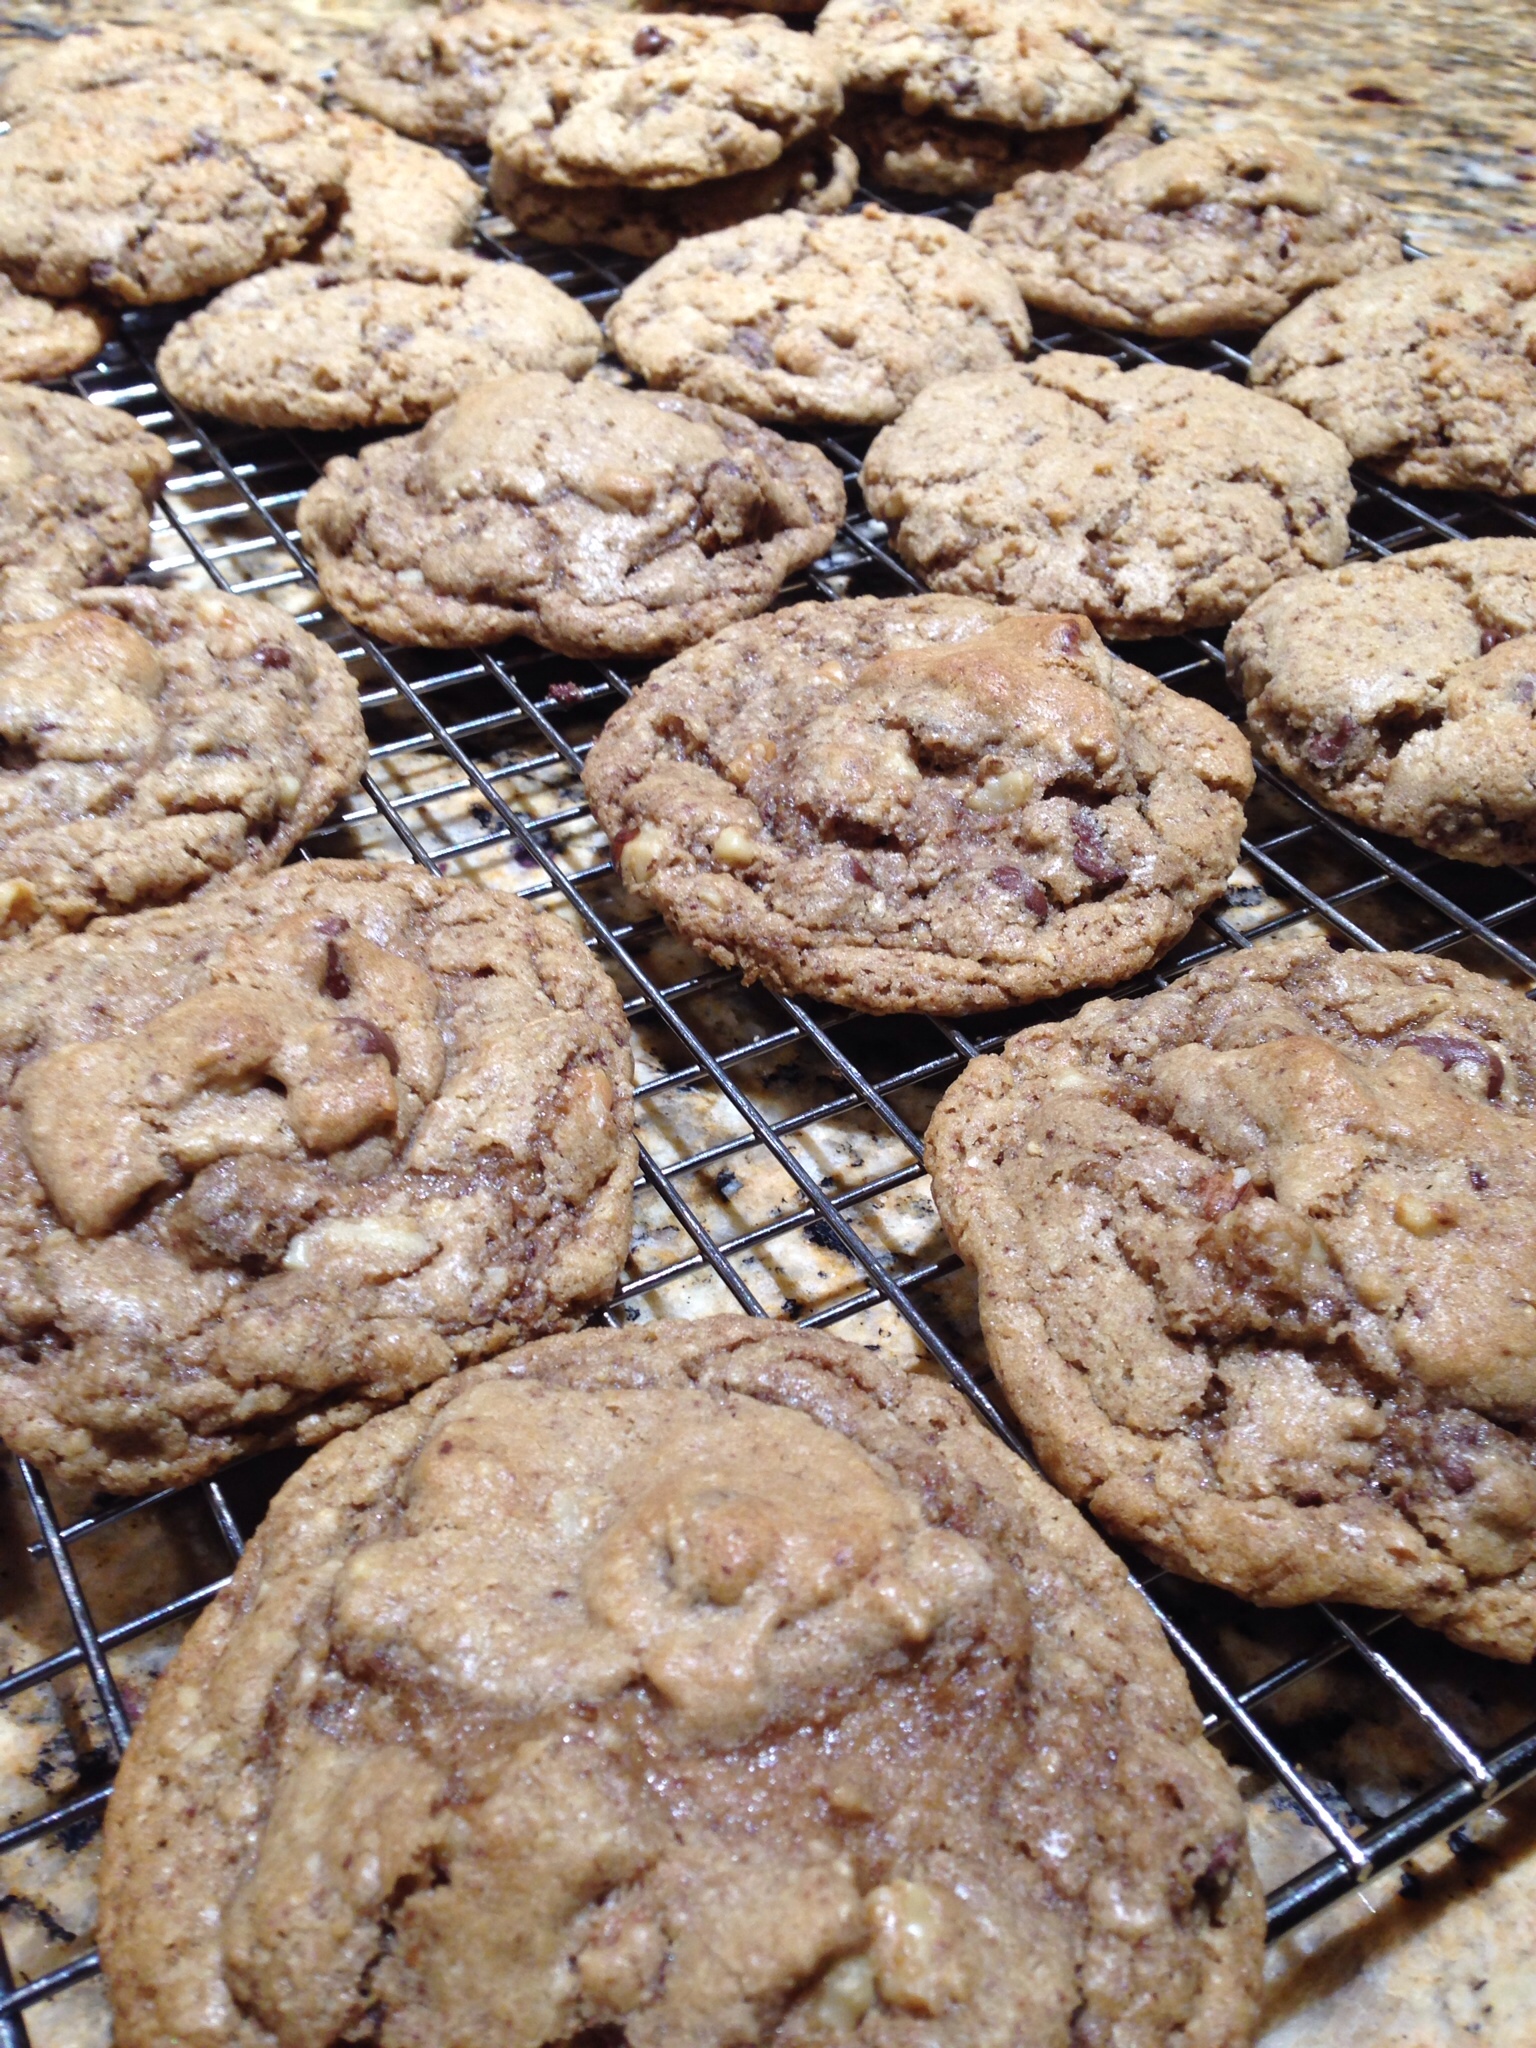
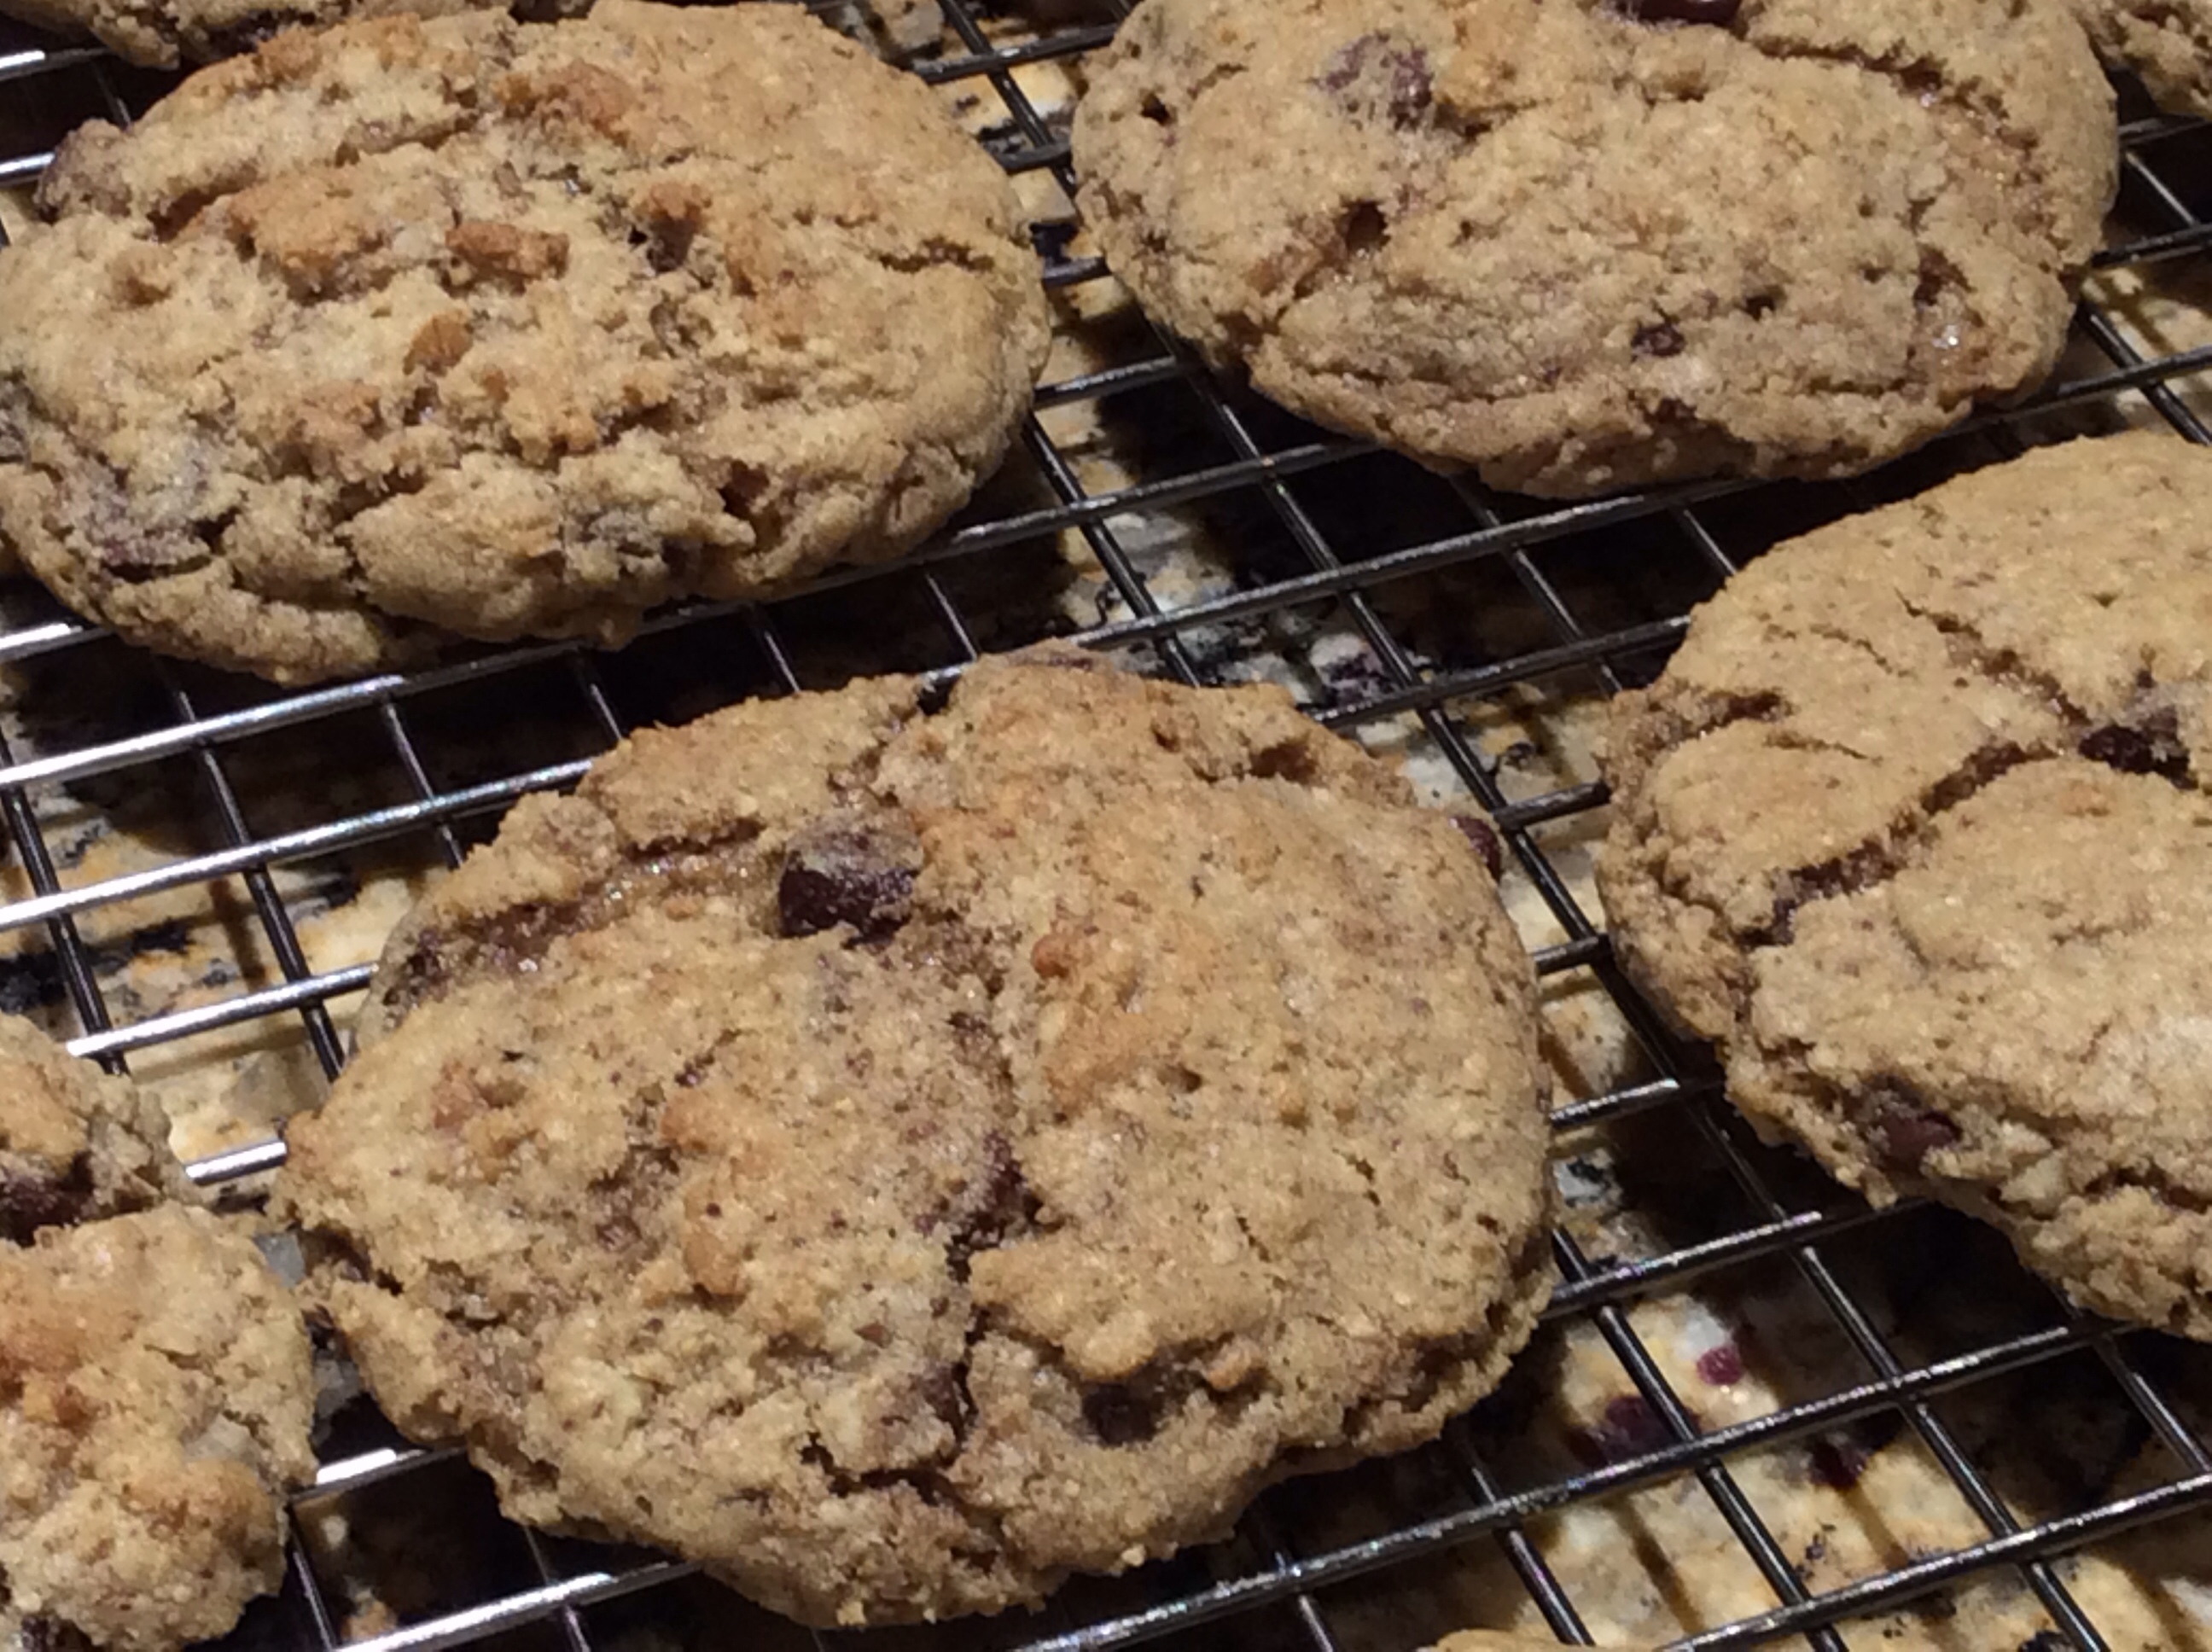
These have got to be the best cookies…EVER. Soft, chewy, and full of chocolaty goodness, it’s like Heaven in your mouth when you bite into this cookie.

This recipe is actually something I’ve seen circulating the internet for years. You may have heard of it — it’s called the Nieman Marcus $250 Cookie Recipe.

According to urban legend, someone bought a cookie at a Nieman Marcus store. He (or it could have been a “she”) liked the cookie so much that he asked the cafe clerk for the recipe. The clerk replied that the customer could have the recipe, but he had to purchase it. The customer agreed to pay for the recipe, only he did not look too closely at his receipt when he paid for it. Later, the customer realized that he paid $250 for the recipe. From that day on, the customer vowed to share the recipe with everyone so that his $250 purchase would be worth it.

I don’t know how true that story is, but whomever the real author of this cookie recipe is, I want to say a huge THANK YOU for creating and sharing a treasure!

Here’s the recipe. It’s a bit of a process, but it’s well worth it, I guarantee. You can easily halve this recipe. I make it as-is and give some to friends and neighbors. We make rather large cookies, and we’re still able to get about 5 dozen cookies out of this recipe.

Give it a try. I know you’ll love it as much as my family and I do. 🙂

The $250 Cookie Recipe

Ingredients:

  • 5 cups oatmeal
  • 1 (8-oz.) Hershey bar
  • 4 sticks (or 2 cups) unsalted butter, softened
  • 2 cups packed brown sugar
  • 2 cups white sugar
  • 4 large eggs
  • 2 teaspoons vanilla extract
  • 4 cups all-purpose flour
  • 2 teaspoons baking soda
  • 2 teaspoons baking powder
  • 1 teaspoon salt
  • 3 cups chopped nuts (I like walnuts)
  • 24 ounces semi-sweet chocolate chips

Directions:

1. Measure out the oatmeal then place in a blender or food processor. Grind the oatmeal until you get a fine flour-like consistency. Set it aside.

2. In a large mixing bowl, cream together the butter, brown sugar and white sugar.

3. Mix in the eggs and vanilla to the butter-sugar mixture.

4. Add half of the gound oatmeal, half of the flour, the baking soda, baking powder, and salt to the egg-butter mixture. Mix on low speed just until combined. Add the rest of the oatmeal and flour; mix to combine.

5. Mix in the nuts and chocolate chips. You can omit the nuts if you don’t like nuts in your cookies.

6. Form balls of dough (about two tablespoons of cookie dough per ball); place the balls of dough roughly 2 inches apart on a cookie sheet.

7. Bake for 10 minutes at 375 degrees. Let the cookies sit on the cookie sheet for about 5 minutes after you take them out of the oven, then remove the cookies to a wire rack to cool.

8. Serve with a tall glass of milk and ENJOY!

Cheese-Stuffed Omelets

These omelets are a tribute to my mom. She used to whip these up for breakfast when I was growing up. She’d go outside to the chicken coop and get some fresh eggs. Then she’d head to our backyard garden and pick some green onions and cherry tomatoes. Mom would cut up some spam or ham, open a can of corn, mix all of the ingredients together and we’d have yummy omelets in just minutes!

Mom always added cheese to my omelets. If you don’t want to stuff the omelet with cheese, you can just sprinkle the cheese on top then allow it to melt over the cooked omelet, which is how mom did it. I like to stuff mine with cheese–the more the better! 😀

Give my recipe a try. I think you’ll like it. 🙂

Cheese-Stuffed Omelets

wpid-Photo-Nov-8-2013-645-AM.jpg

Ingredients:

  • 4 stalks green onions, thinly sliced
  • 5 large eggs
  • 1 cup diced ham or Spam
  • 2 teaspoons Dashida beef flavored soup seasoning
  • 1 teaspoon garlic powder
  • 1/2 teaspoon black pepper
  • 1/2 teaspoon accent (optional)
  • 1 can sweet kernel corn, drained
  • Shredded cheese (I used a triple cheddar cheese blend)
Optional Ingredients:
  • 1/4 cup diced bell pepper
  • 1/4 cup diced tomatoes

Directions:

Place the green onions in a small mixing bowl. Add the eggs.

Add the diced ham to the bowl.

Add the seasonings.

Add the drained corn.

Mix all the ingredients together.

Place a skillet over medium heat. I use a cast iron skillet. Once the skillet is heated, spray with cooking spray. Pour about 1/4 cup of the egg mixture onto the skillet. I like to spread it out into somewhat of a rectangular shape so that it’s easier to fold the sides over.

Sprinkle some shredded cheese down the middle.

Let the omelet cook for a minute or so. Once the bottom has browned a bit and the edges are beginning to dry, it’s time to fold the sides over to the middle, covering the cheese. Gently fold one side over toward the middle, over the cheese.

Gently fold the other side over.

Now carefully flip the omelet over so that the folded edges are on the bottom. Cook for another minute or so.

Serve and enjoy!

Look at the yummy melted cheese!

How to Roast a Fresh Pumpkin — a Pedro “PoP” Aguon Tutorial

Pedro “PoP” Aguon was a chef in the Navy. PoP passed down to his family his extensive knowledge of cooking, and his daughter, Arlene Sablan Aguon, is kind enough to share some of PoP’s recipes and cooking tips with us. That was PoP’s way, sharing with the younger generations in order to keep the knowledge of our Chamorro culture and heritage alive. Rest in peace, PoP…your family and friends miss you terribly.

From Arlene:
“My PoP’s taught me how to roast a fresh pumpkin. It makes the best pies, Buchi Buchi & Turnovers. It makes the home smell like Thanksgiving too. ENJOY. ” ~ @untie R

Freshly roasted pumpkin tastes better than any canned pumpkin you buy in stores. Try roasting pumpkins PoP’s way. You’ll be glad you did. 🙂

Roasted Pumpkins ~ A Pop Aguon Tutorial

20131103-053555.jpg

20131103-053608.jpg

20131103-053619.jpg

20131103-054810.jpg

20131103-054822.jpg

20131103-054829.jpg

20131103-054842.jpg

Roast the pumpkins at 350 degrees.  The roasting time varies based on the size of your pumpkins.  Medium pumpkins can take between 45 minutes to one hour.  Check at the 45-minute mark; the pumpkin flesh should be tender when pierced with a fork.  Continue to roast until tender.

20131103-054849.jpg

20131103-054902.jpg

20131103-054913.jpg

20131103-054925.jpg

20131103-054934.jpg

20131103-054942.jpg

20131103-054949.jpg

20131103-054955.jpg

Fruit Pizza with a Sugar Cookie Crust

One of my favorite desserts is a fruit pizza.  My recipe uses a soft sugar cookie crust with a creamy vanilla filling.  Top this delectable dessert with your favorite fruit and voila! ~ you’ll have a dessert that will keep you coming back for more!

Give my recipe a try.  I know you’ll love it! 🙂

Fruit Pizza with a Sugar Cookie Crust

DSC_0076

Ingredients:

Cookie Crust:

Note: This dough makes enough for two pizzas, OR one pizza and a dozen sugar cookies, OR you can make two dozen sugar cookies.

  • 2 1/4 cups all purpose flour
  • 1/2 teaspoon baking soda
  • 1 teaspoon baking powder
  • 1/2 teaspoon salt
  • 1 1/2 cups white, granulated sugar
  • 2 ounces cream cheese
  • 6 tablespoons butter
  • 1/3 cup vegetable oil
  • 1 large egg
  • 1 tablespoon milk
  • 2 teaspoons vanilla extract
Filling:

*Note: double the following ingredients for the filling if you are making two pizzas

  • 8 ounces cream cheese
  • 1 cup white, granulated sugar
  • 1 large box instant vanilla pudding mix
  • 1 cup milk
  • 1 teaspoon vanilla extract
Topping:
  • Any fruit of your choosing, sliced.
  • For this particular pizza (see the photo), I used:
  • 1 can strawberry pie filling (use only the strawberries, not the thick sauce)
  • 2 cans mandarin slices, drained
  • 1 container fresh blueberries
  • 1 container fresh blackberries
Other items needed:
  • Parchment paper, cut to fit the size of your pizza or baking pan (go to Tips & Things for my instructions on how to cut parchment paper to fit your round baking pan)

Directions:

Make the crust:

In a small bowl, mix together the flour, baking soda, baking powder, and salt. Set aside.

Place the sugar in a large mixing bowl. Break the cream cheese into small pieces then add to the mixing bowl.

Melt the butter; pour into the mixing bowl while still hot. Using a whisk, mix the sugar, cream cheese and butter together until somewhat creamy (the hot butter will melt the cream cheese this is what you want to happen).

Next, add the oil; continue whisking until the mixture is nice and creamy.

Add in the egg, milk, and vanilla extract. Whisk until all ingredients are thoroughly combined and the mixture is smooth and creamy.

Using a spatula or large mixing spoon, fold in the dry ingredients. Stir only to the point where you don’t see any large clumps of the flour mixture.

Line your pizza pan with parchment paper. Using either your fingers or a rolling pin, press the dough onto the parchment paper lined pan, stopping when the dough is about 1 1/2 inches from the edge of the pan. Bake at 350 degrees for 15 minutes or until the crust starts to become very lightly browned. Set the crust aside to cool then top with the filling then fruit.

Make the filling:

In a small mixing bowl, use a hand mixer to beat the cream cheese and sugar together until creamy. Mix in the box of instant vanilla pudding mix. Slowly mix in the milk and vanilla extract. Mix on medium speed until there are no lumps from either the cream cheese or pudding mix. Set aside.

Top the pizza:

Spread the filling on top of the cooled cookie crust. Top with your desired fruit slices. Serve chilled or at room temperature.

DSC_0079

NOTE: DIRECTIONS FOR SUGAR COOKIES:

Make small balls (about the size of a ping pong ball) with the dough. Place onto a parchment paper lined baking sheet about 2 inches apart. Using a small spatula, slightly flatten the balls of dough (don’t flatten too much; the dough will expand during baking). Sprinkle different colored sugar sprinkles on top. Bake at 350 degrees for 13 minutes or until the edges of the cookies start to brown lightly. After baking, leave the cookies on the baking sheet for 5 minutes then remove to a cooking rack to finish cooling.

Sugar Cookies 2

Enjoy!

Hannah’s Teriyaki Burgers

My daughter is quite the budding chef.  She whipped these burgers up from some ingredients she found in the fridge and pantry.  She calls them “Hannah’s Teriyaki Burgers” — I must say, they are yummy! Pair it with a side salad and hot rice and you’ve got yourself a fantastic meal!

HANNAH’S TERIYAKI BURGERS

Teriyaki Burgers

Mix together:

  • 2 pounds lean ground beef
  • 3/4 cup teriyaki sauce (I used Yoshida brand sauce)
  • 1 small bell pepper, diced small
  • 1 medium onion, chopped
  • 1 large egg
  • 2 tablespoons Dashida seasoning
  • 1 teaspoon black pepper
  • 4 large cloves garlic, minced

Directions:

Form into patties and pan-fry over medium-high heat, about 5 minutes on each side (for medium well burgers). These also taste great served on toasted hamburger buns. Makes 14 small or 7 large burgers.

« Older Entries Recent Entries »