Archive for Author AnniesChamorroKitchen

About the Author: AnniesChamorroKitchen
Hafa adam means "hello" in Chamorro, the native language of my island home, Guam U.S.A. Guam is the proverbial melting pot, abounding with cultural diversity that is aptly displayed in the variety of food we eat and share. The focal point of most Chamorro families centers around family gatherings and cooking. In my home, most of my guests congregate in my kitchen. It is where we do our best catching up, and whee lasting emories aremade. Browse through my selection of Chamorro and other recipes m and please leave me a comment if you try my recipes to let me know what you think of them. I hope you enjoyed your time in my kitchen. Come back soon! This site is work-in-progress, so please bear with me as I grow this site to a place where you'll love to visit. Happy Cooking! ~ Annie

Easy Homemade Chorizos

I made pancakes for my kids’ breakfast this morning, but the hubby and I wanted something heartier. Here’s my version of homemade chorizo. It’s delicious with eggs and rice!

Here’s how it’s done:


Brown the ground beef and drain off excess fat.

Add all the remaining ingredients. Stir to mix well.  Cook an additional 5 minutes.


Add more hot pepper to taste.


Stir to combine.


Serve and enjoy!  I especially love this with hot steamed white rice and a fried egg.


Easy Homemade Chorizos
 
Author:
Ingredients
  • 1 lb ground beef
  • 1 tablespoon onion powder
  • 2 tablespoons garlic powder
  • 1 packet achote powder
  • ¼ teaspoon paprika
  • 1 teaspoon cayenne pepper
  • 1 teaspoon salt
  • 2 tablespoons vinegar (Apple Cider vinegar or white distilled vinegar)
  • ⅓ cup water
  • 1 teaspoon Donne dinanche (crushed pepper), more or less to taste
  • *I also added 1 teaspoon fennel seed, and 1 teaspoon ajinomoto, but this can be omitted.
Instructions
  1. Brown the ground beef and drain off excess fat.
  2. Add all the remaining ingredients. Stir to mix well.
  3. Serve and enjoy!


Shrimp Pasta in Sundried Tomato Cream Sauce

Hafa adai, everyone!  It’s been quite a while since I added a new recipe.  What can I say?  Life happens. 🙂  Let’s see…since my last post, I retired from the Army (after 23 years and some change), my oldest graduated from high school and went off to college, my youngest started high school and is a budding artist, I got a new full-time job as a defense contractor, and I’ve re-discovered an old passion for knitting and crocheting.  See–my creativity doesn’t just reside in the kitchen. 😀

Despite all that, I’ve been accumulating a lot of recipes to share, so be on the lookout for new posts.  This is the first of many new favorites that I’m sure you’ll enjoy as much as my family does.

Let’s get to it then, shall we?

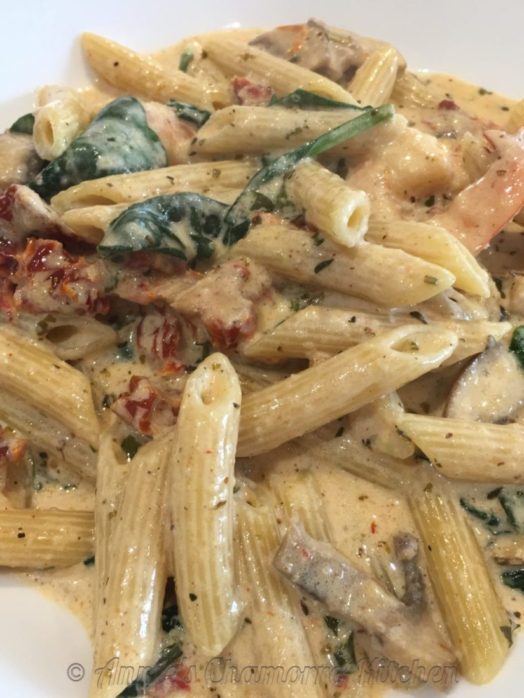
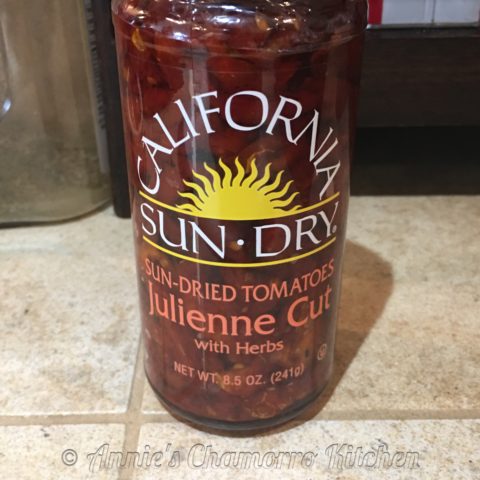
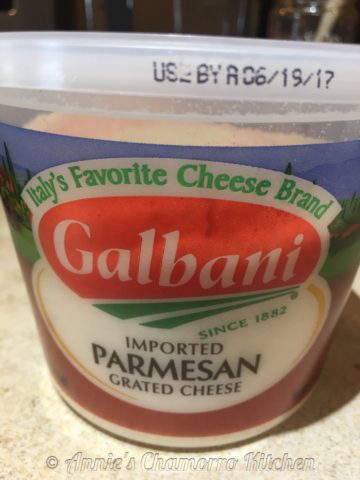
As you probably know from some of my other recipes, my family loves pasta.  This is a super easy dish to make.  While we love traditional spaghetti sauce, I love making a sauce using cream, sun-dried tomatoes, and Parmesan cheese.  You can add a variety of other ingredients such as mushrooms, basil, and spinach leaves to take it to a whole new level.  The possibilities are only limited by your imagination.

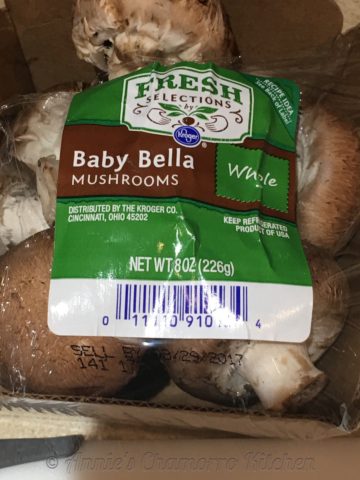
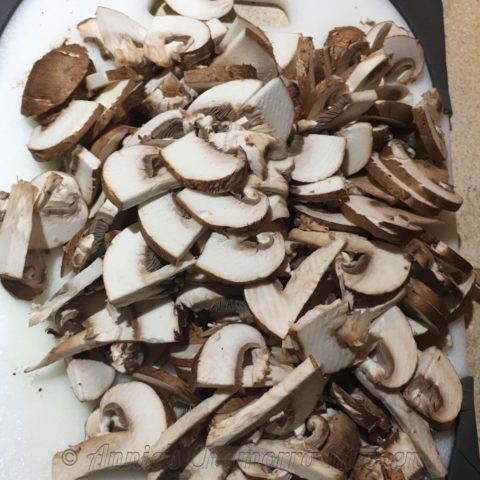
I added baby portobello mushrooms, basil paste and fresh spinach leaves to this recipe.  See below for the type of sun-dried tomatoes I used.  I use the ones packed in oil.  I use the flavored oil to saute the mushrooms, which enhances the flavor of the whole dish.

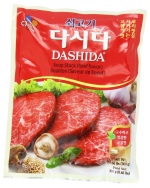
If you’re a follower of my recipes, you know one of my signature ingredients is a powdered beef seasoning called Dashida.  You can find this any Korean market (or most Asian markets).  If you can’t find Dashida, use beef bouillon, or add salt to taste.

Start by slicing the mushrooms. Set them aside for now.

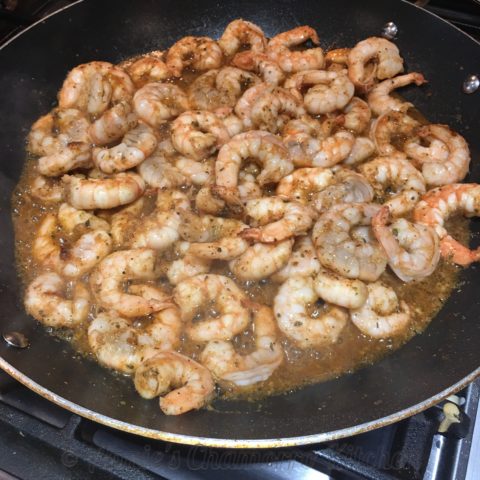
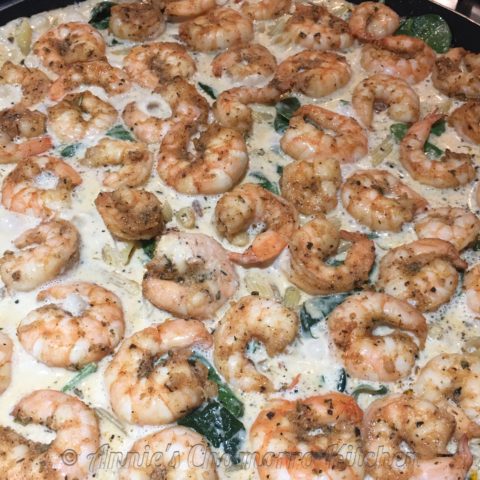
In a LARGE skillet over medium high heat, saute the shrimp with the seasonings (see my full recipe below).  I use a 17-inch skillet; if you don’t have one this large, you may want to use a large pot as we make the sauce and add the pasta and shrimp all together midway through.

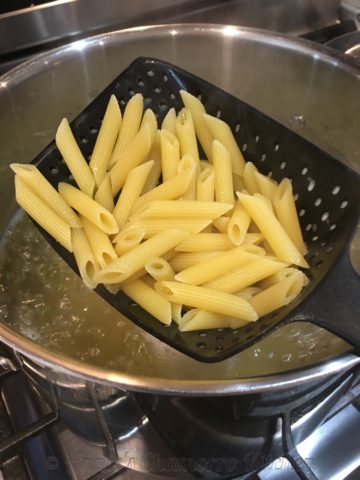
Set a pot of water to boil while you prepare the shrimp. When the water is boiling, add the pasta to the pot (you can a couple of teaspoons of salt to the water as well). Only cook the pasta partway, about half the recommended cooking time suggested on the package.  The pasta will finish cooking in the sauce later, so you want to make sure you don’t overcook it now.

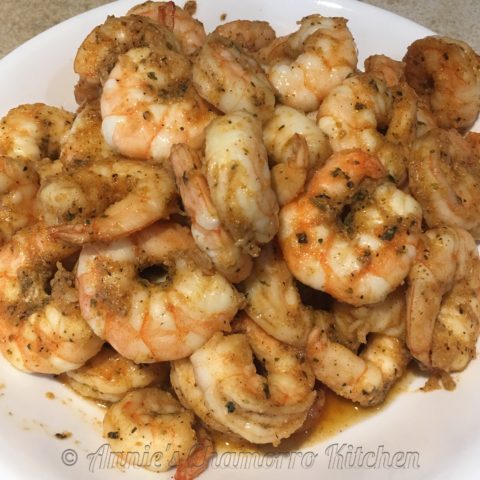
Cook the shrimp for about 5 minutes, stirring to ensure even cooking on both sides.  Remove the shrimp from the pan and set them aside for now.

To the same pan, add the mushrooms and some of the oil from the sun-dried tomatoes.

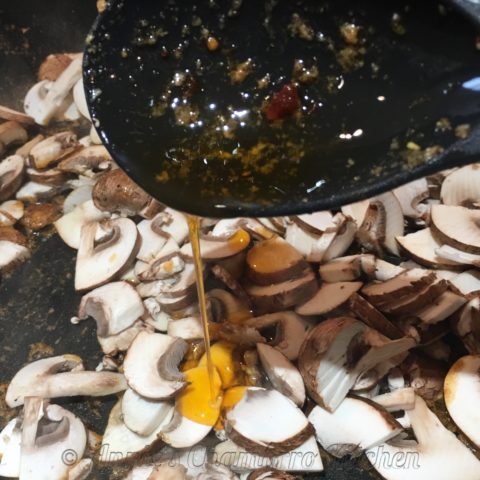
Cook the mushrooms until they reduce in volume, then add the sun-dried tomatoes to the pan.  Cook for another 2 minutes or so.

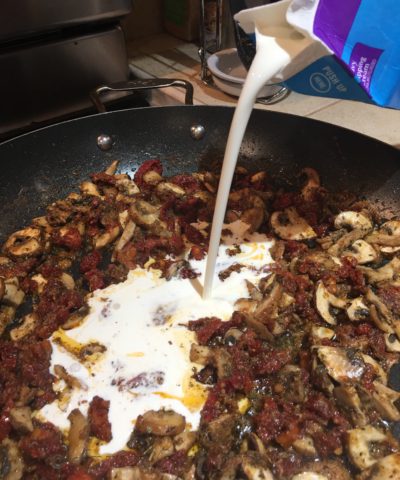
Add the remaining seasonings to the pan as well as the heavy cream.

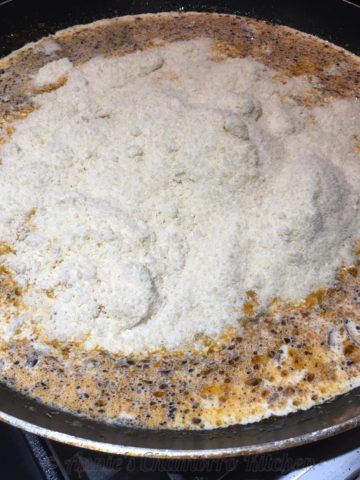
Add the grated cheese to the pan.  Stir to combine all the ingredients.

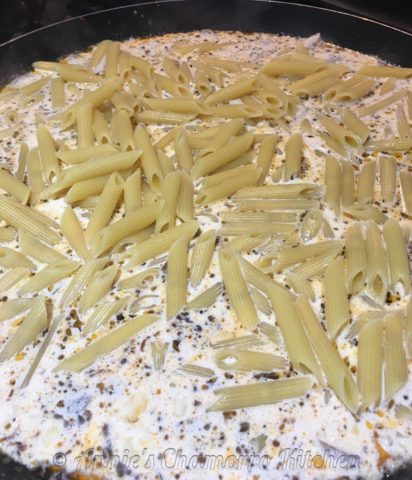
The pasta should be ready by now.  Drain the pasta then add it to the sauce.

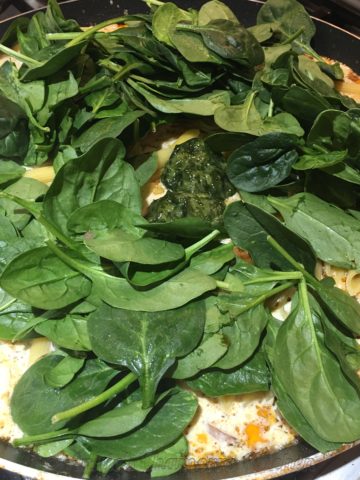
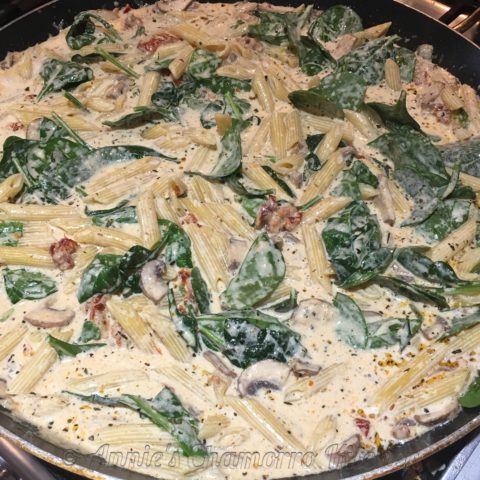
Add the basil paste and spinach leaves to the sauce.

Stir to combine all the ingredients.  The heat up to medium high; cook for a few more minutes, just until the pasta is done.  Look how good it looks already, and we haven’t even added the shrimp back in yet. 😀

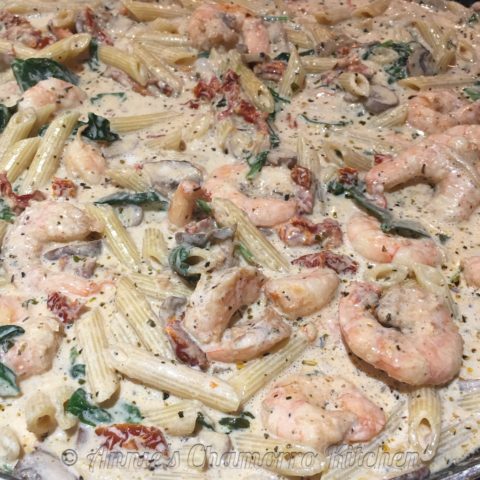
Add the shrimp and any liquid that may have accumulated in the dish back to the pan.

Stir to get all that delicious shrimp mixed in.  Cook for a minute or two to reheat the shrimp.  Oh my….are you drooling yet?
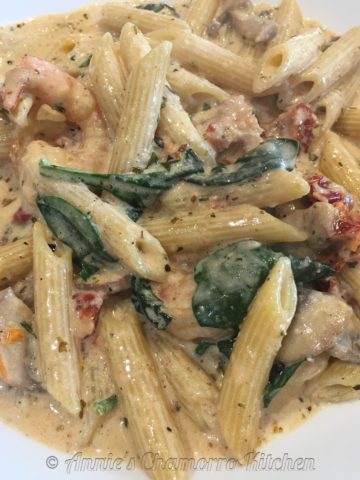
Serve and enjoy!!

<span class="mceItemHidden" data-mce-bogus="1"><span></span>Shrimp Pasta in Sundried Tomato Cream Sauce</span>
 
Author:
Ingredients
For the Shrimp:
  • 2 pounds shrimp, shelled and deveined
  • 1 teaspoon Dashida
  • 1 teaspoon garlic powder
  • 1 teaspoon onion powder
  • 1 teaspoon paprika
  • 1 teaspoon Italian seasoning
  • 1 teaspoon black pepper
For the Sauce:
  • 8 oz. baby portobello mushrooms, sliced
  • 8.5 oz. sun-dried tomatoes in oil, chopped
  • ¼ cup oil from the sundried tomatoes
  • 1 Tablespoon garlic powder
  • 1 teaspoon Italian seasoning
  • 1 Tablespoon Dashida beef seasoning (you can sub with salt, to taste)
  • 2 pints heavy whipping cream
  • 8 oz. grated Parmesan cheese
  • 2 Tablespoons basil paste
  • 5 cups baby spinach leaves
Pasta:
  • 1 pound box uncooked penne pasta
Instructions
Cook the Shrimp:
  1. In a large skillet, saute the shrimp with seasonings.
  2. Cook over medium high heat for 5 minutes. Remove from the pan and set aside.
Cook the Pasta:
  1. Place a pot of water to boil according to the instructions on the box of pasta.
  2. Cook the pasta for half of the recommended cooking time. The pasta will finish cooking in the sauce.
Make the Sauce:
  1. Turn the heat to medium high.
  2. Add the mushrooms and sun-dried tomato oil to the same pan used to cook the shrimp. Cook until the mushrooms soften and reduce in volume.
  3. Add the chopped sundried tomatoes. Cook an additional 2 minutes.
  4. Add the remaining seasonings to the pan; stir to combine.
  5. Pour in the heavy whipping cream.
  6. Stir in the grated Parmesan cheese.
  7. Reduce the heat to medium low.
Finishing:
  1. Add the partially-cooked pasta to the sauce.
  2. Turn the heat back up to medium-high. Cook for a few more minutes, just until the pasta is done.
  3. Add the basil paste and spinach leaves to the pan. Stir to combine.
  4. Add the cooked shrimp to the pan. Stir to combine. Cook for 1-2 minutes to reheat the shrimp.
Serve and enjoy!


Ahi Tuna Poki Salad

image

This is a new twist on Ahi Tuna Poki. Marinate good quality cubes of ahi tuna in my Japanese Vinaigrette dressing and serve with your favorite salad greens and diced cucumbers.

It’s oh-so-good, trust me.  🙂

You can find my Japanese Vinaigrette recipe here.

Give it a try. I think you’ll like it. 🙂

image


Ahi Tuna Poki Salad
 
A new take on Ahi Tuna Poki that's served in my tangy and slightly sweet dressing with your favorite salad vegetables
Author:
Recipe type: Seafood, Salad
Cuisine: Japanese
Serves: 1 serving
Ingredients
  • Lettuce leaves (I like hearts of Romaine), as much as you like
  • ½ cup diced cucumbers
  • ½ cup diced red onions
  • ½ cup julienned carrots
  • 1 cup diced ahi tuna
  • ½ cup Japanese Vinaigrette
Optional:
  • Red pepper flakes
Instructions
  1. Make my Japanese Vinaigrette as directed in my recipe (see the link above).
  2. Marinate the ahi tuna in the vinaigrette for 10-15 minutes. Pour the tuna and dressing over the salad greens and other vegetables. Sprinkle red pepper flakes over the salad (optional).
Serve and enjoy!


Japanese Vinaigrette

I love salads, but it’s all about the dressing for me. I’ve been experimenting with various salad dressings but I always seem to migrate toward vinegar and oil mixtures.

I call this a Japanese vinaigrette because of the addition of rice wine vinegar and aji mirin seasoning. Traditional Japanese dressings, however, usually use plain vegetable oil, but I love the flavor sesame oil imparts, so that’s my oil of choice in this version.

This is a quick and easy recipe. Throw all of the ingredients into a bowl, whisk, and serve.

This dressing is delicious with mixed salad greens, over cucumbers, or use it to make one of my many versions of Ahi Tuna Poki.

image

Give it a try. I think you’ll like it. 🙂

Japanese Vinaigrette
 
A tangy and slightly sweet dressing perfect for salads, seafood, or used as a marinade.
Author:
Recipe type: Sauces and Dressings
Cuisine: Japanese
Serves: 2.5 cups
Ingredients
  • 1 cup rice vinegar
  • ½ cup aji mirin sweet cooking rice seasoning
  • ¼ cup white, granulated sugar
  • ¼ cup sesame oil
  • ¼ cup finely chopped onions
  • ¼ cup soy sauce
  • 1 teaspoon salt
  • 1 tablespoon chopped garlic
Instructions
  1. Place all ingredients into a small bowl. Whisk to combine.
  2. Pour over salad greens, cucumbers, or use as a marinade. This is also a delicious dressing for my version of Ahi Tuna Poki.


Crepes

Life is short…have dessert for breakfast.  😀

Okay, this is not really a dessert, but it could be.  In fact, crepes are one of those versatile foods that can be sweet OR savory (cheese, mushroom, spinach, and chicken crepes are a favorite!).

My family loves fruit-filled crepes with a sweet cream filling.  We have it for breakfast, as snacks, and they’re a special treat for dessert.

image

My youngest loves filling hers with Nutella and strawberries, but add some sliced bananas (oooh, and maybe some peanut butter too) for an Oh-My-Goodness flavor experience!

image

These crepes and tender and sweet all on their own, and do not taste eggy like the ones served in some restaurants.

Speaking of restaurants, I used to think that crepes were an indulgence we could only have at those popular breakfast restaurants.  Not anymore.  Crepes are really quite simple to make.

image

Have I tempted you enough to make some for yourself?  No?  How about now? 😀

image

So what are you waiting for?  Head into that kitchen and get started.  Here’s how to make it.  (If you’re new to my blog, you will always find my complete recipe at the bottom of my post.)

For the batter, you’ll need the same basic ingredients you use to make pancakes — eggs, sugar, butter, milk, and flour.  I also add a pinch of salt and vanilla extract my batter.

Place the eggs into a large mixing bowl.  Beat it slightly with a whisk.

image

Add sugar to sweeten it a bit.  If you plan on making savory crepes, I recommend decreasing the amount of sugar or omitting it completely.

image

Vanilla extract gets mixed in next.  You could also use lemon extract, or some lemon zest instead of vanilla extract, but remember that a little goes a long way.

image

Add a pinch of salt to the mixture.  Did you know that salt is a natural antioxidant?  Salt also adds taste and helps bring out the flavors present in the flour and other ingredients.

image

Melted butter gets mixed in next.  The butter serves two purposes in this recipe.  It adds flavor, but it also helps the crepes not stick to the pan during cooking.

image

Whisk in the milk.

image

Next comes the flour.  It may seem like you’re adding way too little flour for the amout of liquid.  However, unlike pancake batter, the ratio of milk to flour is 2:1 for crepe batter, which makes a very thin batter.

image

Whisk until you get a smooth batter.  A few tiny lumps of flour left in the batter are okay.

image

Set the batter aside while you heat up your pan.  I recommend using a non-stick skillet.  I use a well-seasoned cast iron skillet.

Lightly spray the pan with butter-flavored cooking spray (just to be on the safe side to ensure your crepes don’t stick to the pan).  Pour 1/2 cup of batter onto the heated skillet.

image

Cook the crepe over medium-low heat; you may need to adjust the heat as you go along, turning it down or up, depending on how quickly the crepes cook.

Use a spatula to gently lift the edges. If the crepe feels like it is still stickng to the pan, let it cook for a little while longer.  A telltale sign the crepe is ready to be flipped over is when you see it start to “wrinkle.”

image

Flip the crepe over to lightly brown the other side; this should only take a minute or less.

image

Continue making crepes until all of the batter is used up.  This recipe makes 8 crepes (more if you use less than 1/2 cup of batter per crepe).

image

So now that the crepes are done, it’s time to make the filling.  This recipe is for a sweet filling.

Cream together softened cream cheese and a bit of powdered sugar.

image

It should resemble cream cheese frosting at this point.

image

To lighten it up, mix in whipped cream.  I use Cool Whip to make things easier.  Hey, I’m all about making things from scratch, but sometimes semi-homemade is just fine. 🙂

image

Okay, so let’s see where we are in this endeavor.

Crepes — CHECK.

Sweet cream filling — CHECK.

All that’s left to do is fill the crepes with filling and your favorite fruit.  We like — okay, we LOVE — fresh berries in ours.

image

Spread some filling down the middle of a crepe.

image

Add fruit, as much as you like.

image

Fold each side over the middle, sprinkle with powdered sugar, and ENJOY! 😀

image

Scroll down for my complete recipes.


Crepes
 
Tender crepes filled a sweet cream; it's perfect for breakfast or served as a dessert.
Author:
Ingredients
Crepe batter:
  • 3 eggs
  • 3 tablespoons sugar
  • 2 tablespoons butter, melted
  • 1 teaspoon vanilla extract
  • ½ teaspoon salt
  • 2 cups milk
  • 1 cup flour
Filling:
  • 8-oz cream cheese
  • 3 tablespoons powdered sugar
  • 8-oz cool whip
  • Fresh berries
Other:
  • Powdered sugar
  • Butter-flavored cooking spray
Instructions
Make the crepes:
  1. Place the eggs in a large mixing bowl; beat slightly with a whisk.
  2. Mix in the remaining ingredients for the batter. Whisk until smooth.
  3. Pour ½ cup of batter onto a heated skillet. Cook over medium-low heat until lightly browned on one side. Flip the crepe and cook the other side until lightly browned.
Make the filling:
  1. Place the cream cheese and powdered sugar into a small mixing bowl. Use a hand mixer to mix until creamy.
  2. Mix in the Cool Whip.
Assemble the crepes:
  1. Spread some cream filling down the middle of a crepe.
  2. Top with fresh fruit.
  3. Fold the sides over the middle. Sprinkle with powdered sugar.
ENJOY!

« Older Entries Recent Entries »