
Authentic Korean Cabbage Kimchi
My Korean sister-in-law, Min, is an excellent cook. She’s the one who taught me how to make all my favorite Korean dishes, like Jap Chae, Bulgogi, Denjang Chigae, Kimchi Chigae, Kim Bap, Kimchi Fried Rice and lots more!
This is Min’s cabbage kimchi recipe. She makes different kinds of kimchi — cabbage, radish (my personal favorite), and cucumber — and they are all better than the cheap jarred stuff you buy in your grocery store.
It’s a bit labor-intensive, but it’s worth it in the end. Eat it as a side dish with your favorite meals, or let it ferment a little longer and use it in Kimchi Chigae. A small note about kimchi fermentation — kimchi stored at room temperature will ferment faster than refrigerated kimchi. Refrigerated kimchi still ferments, but at a slower rate.
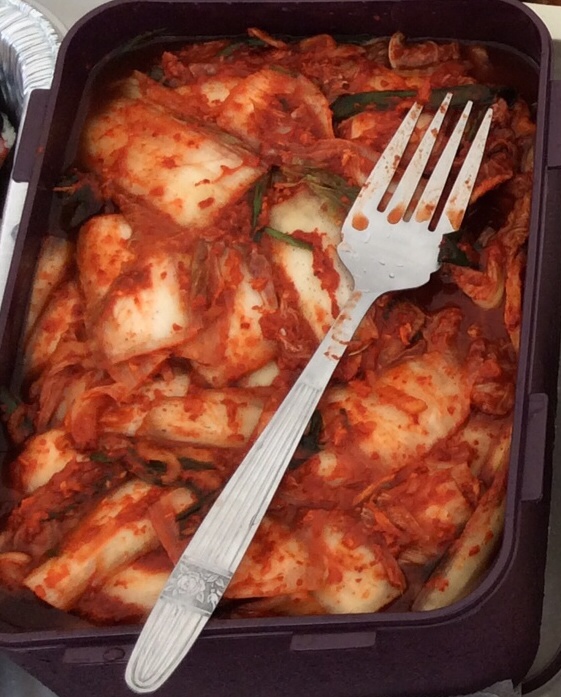
The photos below make it appear that this makes a ton of kimchi. Once the leaves wilt, however, you’ll end up with enough kimchi to fill a large bowl or jar (like the size of large pickle jars that are sold in wholesale grocery stores such as COSTCO). There is a Korean store here that sells homemade kimchi in those large jars, but they are so expensive! It’s so much more economical to make your own at home.
Don’t worry about the quantity this makes. The great thing about kimchi is that it lasts a long time (just keep it stored in an airtight container)! 😉 Or, you can be a nice friend, family member or neighbor and share some!
Give Min’s recipe a try. I think you’ll like it. 🙂
Authentic Korean Cabbage Kimchi

Ingredients:
Rice Glue:
- 2 cups sweet rice grains
- 4 cups water
Cabbage plus brine:
- 3 large heads nappa cabbage
- 4 cups coarse sea salt
- 8 cups water
Kimchi sauce:
- 4 bunches green onions (about 12-16 stalks), cut into pieces about 1 1/2″ long
- 1 bunch chives, cut the same size as the green onions (1 1/2″ long)
- 3- or 4-inch piece of ginger, peeled and grated
- 18 cloves fresh garlic, mashed or very finely minced
- 6 tablespoons anchovy sauce
- 6 tablespoons salted shrimp or shrimp sauce
- 6 cups Korean red pepper flakes
This is what the salted shrimp and anchovy sauce look like:

Directions:
Place the grains of rice in a small bowl. Cover the rice with water (use 2 cups of water; save the other 2 cups for later). Let the rice soak for several minutes while you prepare the cabbage. Eventually you’ll make a rice paste or glue of sorts with the soaked rice grains. This is a necessary ingredient to help the kimchi sauce ingredients stick to the cabbage leaves.


Separate and rinse the cabbage leaves. Remove the core at the bottom of each head of cabbage. Cut the leaves into pieces about 2″x4″.

Generously salt the cabbage leaves with the coarse sea salt. Pour the water over the salted cabbage leaves. Soak the leaves in the brine for about 30 minutes until the leaves wilt. After the leaves have wilted, drain out all of the water. Place the cabbage in a large strainer basket and rinse thoroughly.


Now, let’s get back to making the rice glue. Place the rice and water into a blender. Min uses a VitaMix, but you can use any blender. Here’s a tip: if your blender can grind ice (for slushy drinks), then it can probably grind rice with no issues.
You will need to add about 2 more cups of water to the blender.


Grind the rice-water mixture until you get a smooth consistency. Pour the rice mixture back into the bowl.


Microwave the rice mixture for 2 minutes on High. Set it aside to cool. The rice paste will thicken slightly as it cools.


Place the onions, chives, garlic and ginger into the bowl of drained and rinsed cabbage leaves.

Sprinkle the ground pepper flakes into the bowl.

Add the anchovy sauce and salted shrimp paste.


Min also adds some ajinomoto (MSG), but this is optional. If you choose to add it, sprinkle about 2 tablespoons into the bowl.

Add the cooled rice paste to the bowl.

Now this is important: Put on a pair of CLEAN plastic gloves. Don’t even think about using the same gloves you use to wash dishes with! Buy a new pair or better yet, buy a box of disposable cooking gloves. You are going to mix this by hand and you don’t want to get any hot pepper on your hands (trust me). Mix it thoroughly, ensuring each piece of cabbage is covered with the kimchi sauce.


Place the kimchi into a resealable container. Let the kimchi ferment for at least a day and a half before serving. Remember, kimchi ferments faster at room temperature than if refrigerated. The longer the fermentation time, the more sour the kimchi becomes. I like my kimchi on the sour side, so I let mine ferment for about a week before eating.
This will keep for several weeks in the refrigerator.
ENJOY!

Annie, thank you so much for your detailed instructions. I learn so much from your post. Homemade is always best than the commercially bought kimchee which doesn’t even come close to the taste I remember from back home. Keep it coming and thank you for sharing 🙂
You’re welcome, Carol. Thanks for stopping by, and visit again soon! 🙂
Didn’t know part of the ingredient was rice, I can try and make it, but without the fishy stuff, thank you for sharing
How about instead of adding shrimp paste and anchovy oil, use a seafood stock to soak the rice and make a rice paste. You can make a homemade seafood stock by boiling dried fish in water. I think the addition of some sort of seafood in kimchi is one those essential ingredients.
Hafa dai Ms Annie, Enjoyed the recipe for this kimchee, cuz I’ve been adding vinegar when I make this, now I’m doing it the rite way, chelu. thx again. oh, U mention other Korean menu U make. Is their a way U would share yur recipe for theses ones too! Buen yan Agradesimiento.
Especially comsamida, to yur sister Ms Min too!
Thanks! I’ll pass that on to Min, and I’m sure she’ll want me to tell you, 천만에요 (cheonman-eyo) or “you’re welcome!” 🙂
Hafa Adai! I have a few Korean recipes already posted on my website. Look under Ethnic then under Korean. I’ll also be posting a few more of my sister-in-law’s recipes, so be checking back for them. 🙂
Thanks for this recipe, Annie. I’ve been looking for a good kimchi recipe, and the ones I’ve seen online weren’t specific enough or were too intimidating. This explains everything so well (including the pictures of those ingredients and the explanation for why we need to use the rice glue). Wow! You’ve thought of everything in this tutorial. So when is your hard-copy book coming out?
Hi Ramona! I wish I could take the credit for this recipe, but the thanks go to my amazing cook of a sister-in-law, Min. All I did was format the tutorial for her. :). I’ll pass along your comments…I’m sure she’ll appreciate it. Thanks!