Archive for Author AnniesChamorroKitchen

About the Author: AnniesChamorroKitchen
Hafa adam means "hello" in Chamorro, the native language of my island home, Guam U.S.A. Guam is the proverbial melting pot, abounding with cultural diversity that is aptly displayed in the variety of food we eat and share. The focal point of most Chamorro families centers around family gatherings and cooking. In my home, most of my guests congregate in my kitchen. It is where we do our best catching up, and whee lasting emories aremade. Browse through my selection of Chamorro and other recipes m and please leave me a comment if you try my recipes to let me know what you think of them. I hope you enjoyed your time in my kitchen. Come back soon! This site is work-in-progress, so please bear with me as I grow this site to a place where you'll love to visit. Happy Cooking! ~ Annie

Panko Crusted Fried Fish & Shrimp

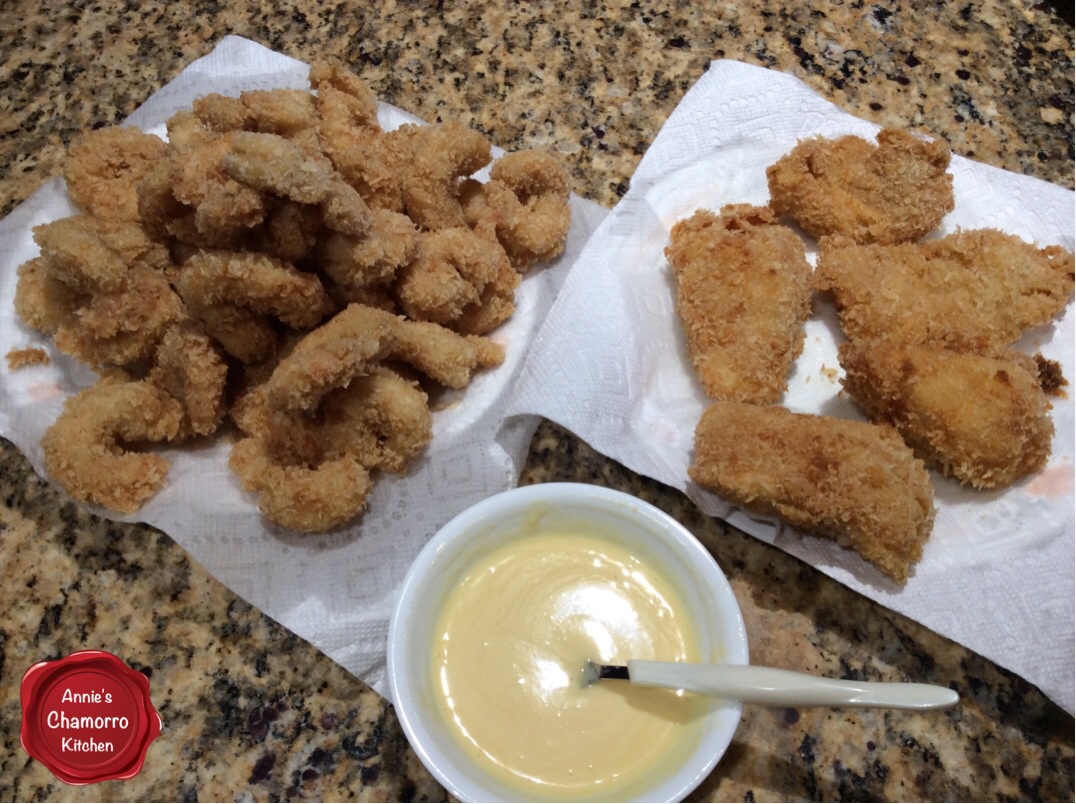
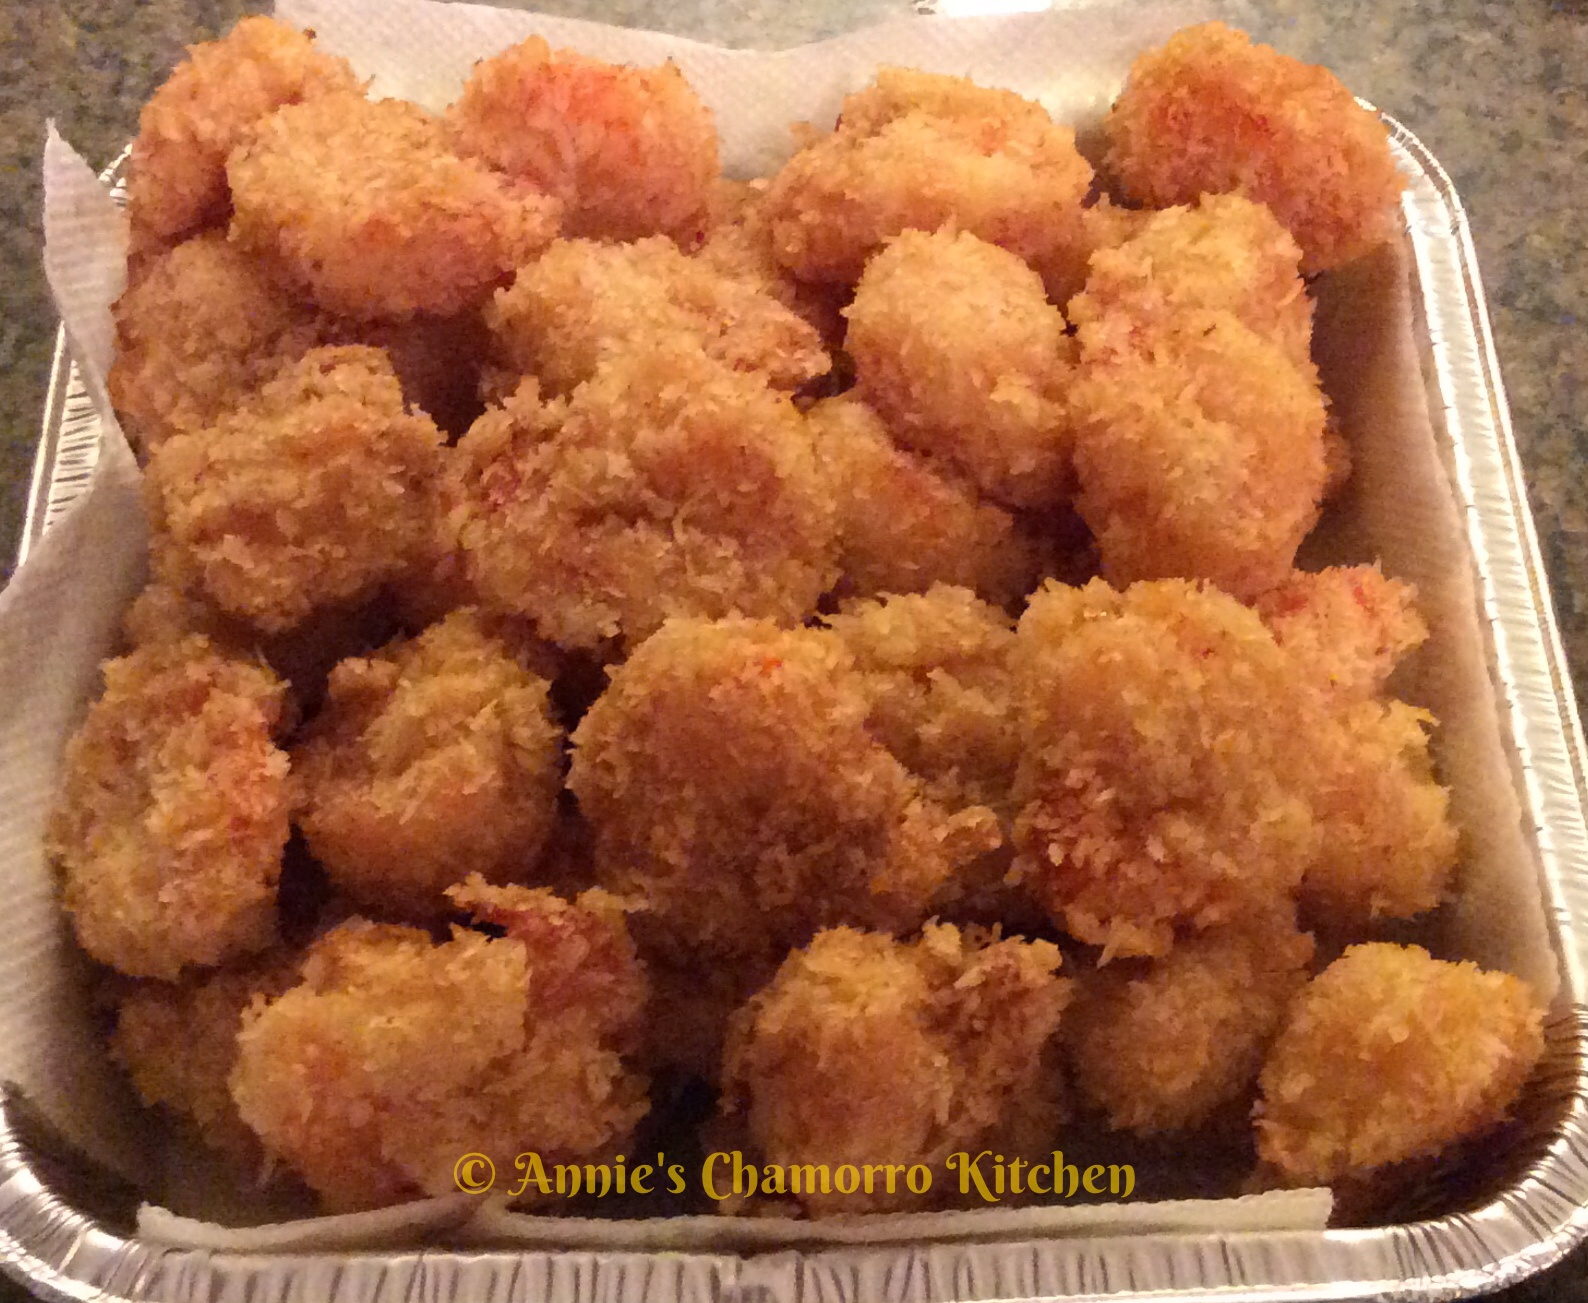
Our family loves seafood.  One of our favorite ways to serve fish and shrimp is to coat them in panko breadcrumbs and fry them until golden brown and crispy.

Serve this with hot steamed rice, some sweet dipping sauce (similar to honey walnut shrimp sauce), and fina’denne’ and you’ve got yourself an amazing seafood meal.

Give my sister-in-law Min’s recipe a try.  I think you’ll like it. 🙂

This recipe makes enough for a family of 4 plus leftover for lunch the next day.

Panko Crusted Fried Fish & Shrimp

Last Import - 112  Last Import - 120

Ingredients for the Fried Shrimp:

  • 1 cup Korean batter mix (Tuigim or Twigim Garu); see photo below
  • 1 tablespoon Dashida Korean seasoning
  • 1 tablespoon onion powder
  • 1 tablespoon garlic powder
  • 1 teaspoon black pepper
  • 1/2 cup milk
  • 30 ounces raw shrimp, peeled and deveined
  • 1 bag panko crumbs


Ingredients for the Fried Fish:

  • 1 cup Korean batter mix (Tuigim or Twigim Garu); see photo below
  • 1 tablespoon Dashida Korean seasoning
  • 1 tablespoon onion powder
  • 1 tablespoon garlic powder
  • 1 teaspoon black pepper
  • 1 cup milk
  • 24 ounces fish filets (tilapia, basa, and orange roughy work well)
  • 1 bag panko crumbs


Ingredients for the Dipping Sauce:

  • 2 tablespoons sweetened condensed milk
  • 3 tablespoons pineapple juice
  • 2 tablespoons kewpie mayo


Other Ingredients:

  • Oil, for frying


Tuigim Garu, Korean batter mix, is used to make a batter to coat the shrimp and fish for frying.  This is what the package looks like (the bag on the left).

The bag on the right is called Pang Garu, and is a type of panko breadcrumbs.  The shrimp and fish are coated in breadcrumbs after coating it in the batter.  You can use this or any other brand of panko breadcrumbs.

Directions:

Rinse and clean the shrimp and fish filets, then set them aside in separate, shallow dishes.  I like using meaty white fish such as  basa or tilapia; orange roughy is good too.

Add the dry batter mix and seasonings directly over the shrimp.  Toss the shrimp and dry ingredients together then add the milk.  Keep tossing it all together until the dry ingredients are no longer lumpy and a thick batter coats the shrimp.  Set aside.

  Last Import - 034

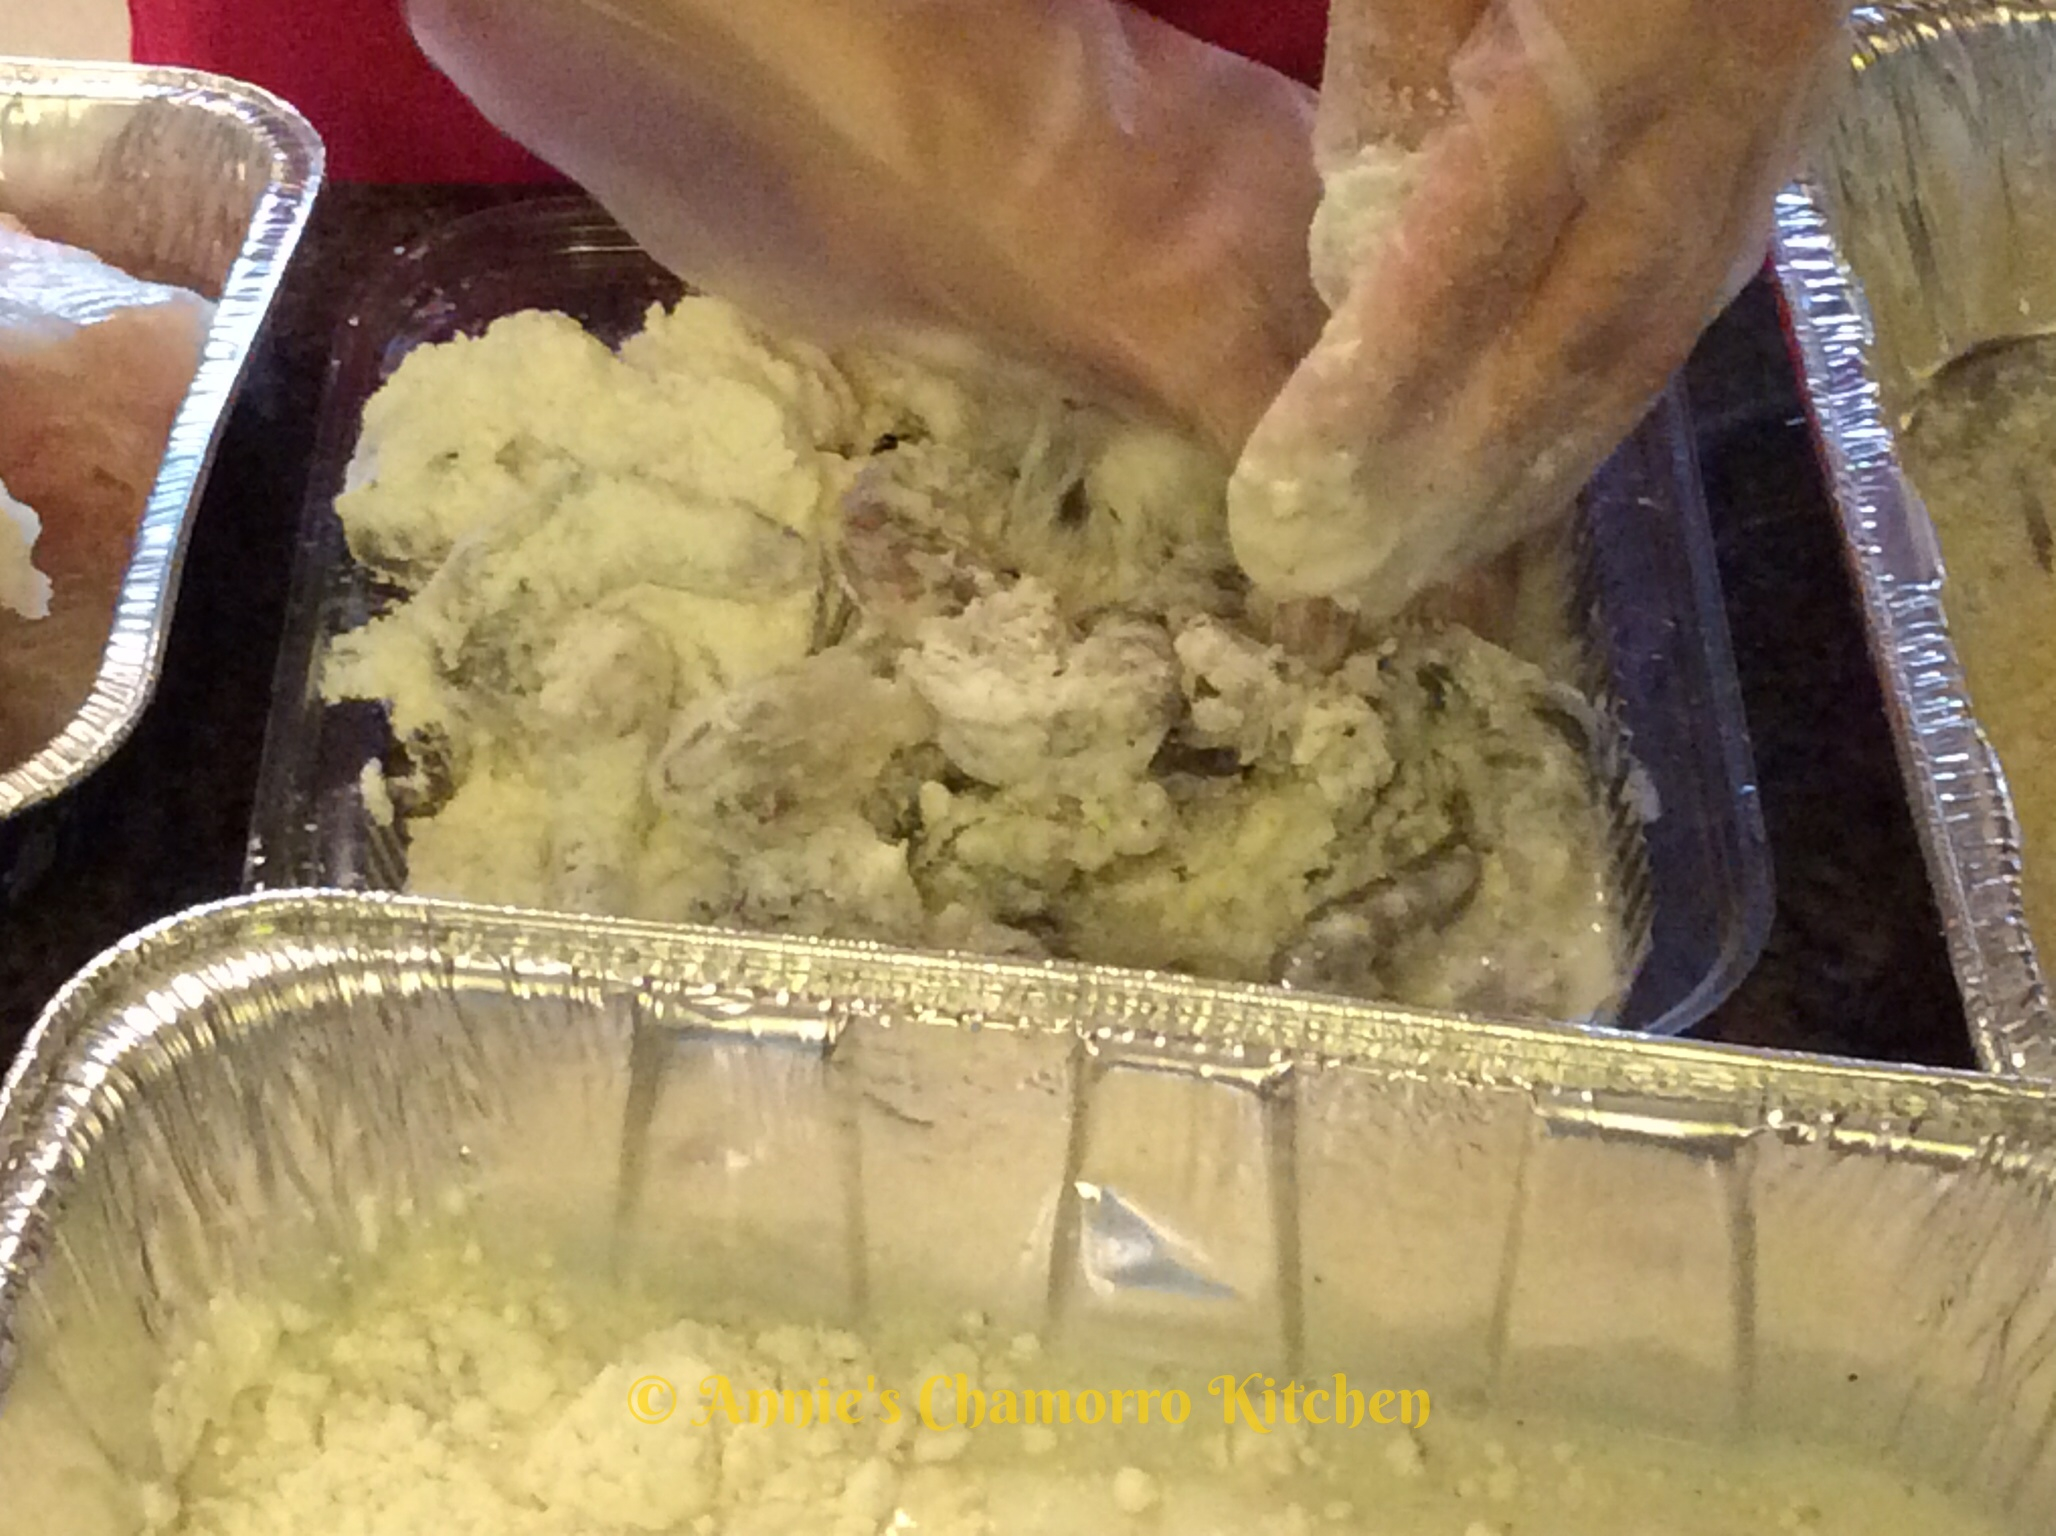
In another pan, place the remaining batter mix and dry ingredients; this will be mixed into a batter to coat the fish filets.  You don’t want to create the batter WITH the fish as you do with the shrimp because you don’t want to break up the fish filets.  Instead, mix the batter in a separate pan and dip the fish into the batter before coating with panko.

Add the milk to the dry batter mixture, mixing until you get a smooth batter.

  Last Import - 042

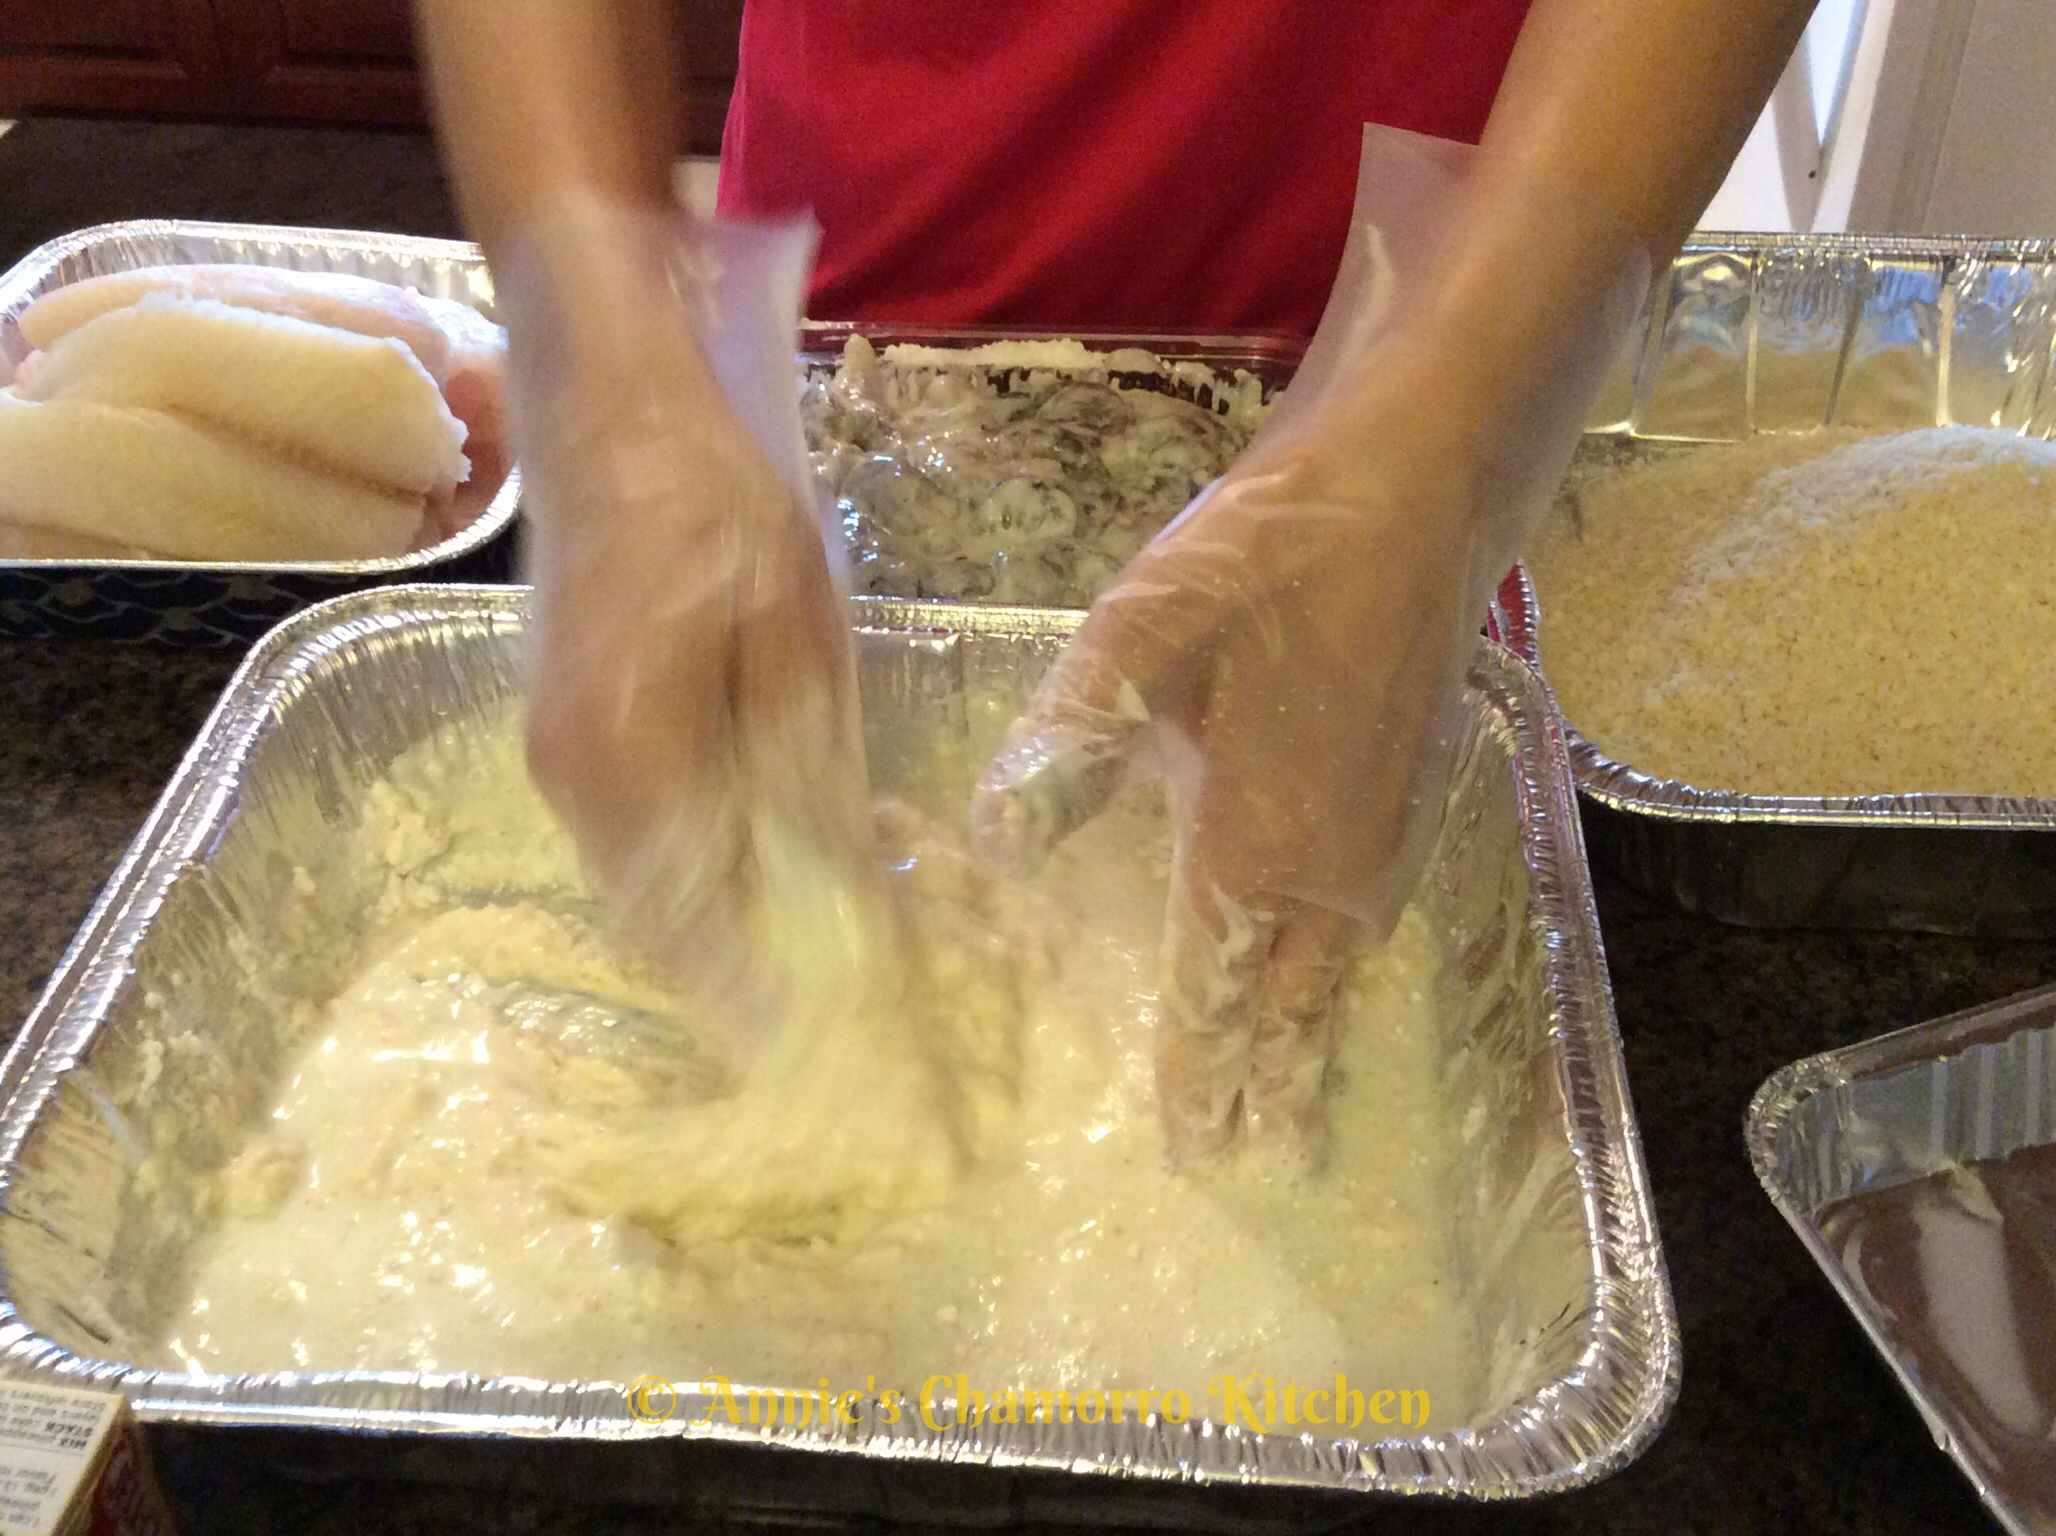
Place the fish filets into the batter.  Ensure each filet is coated with batter.

Last Import - 048

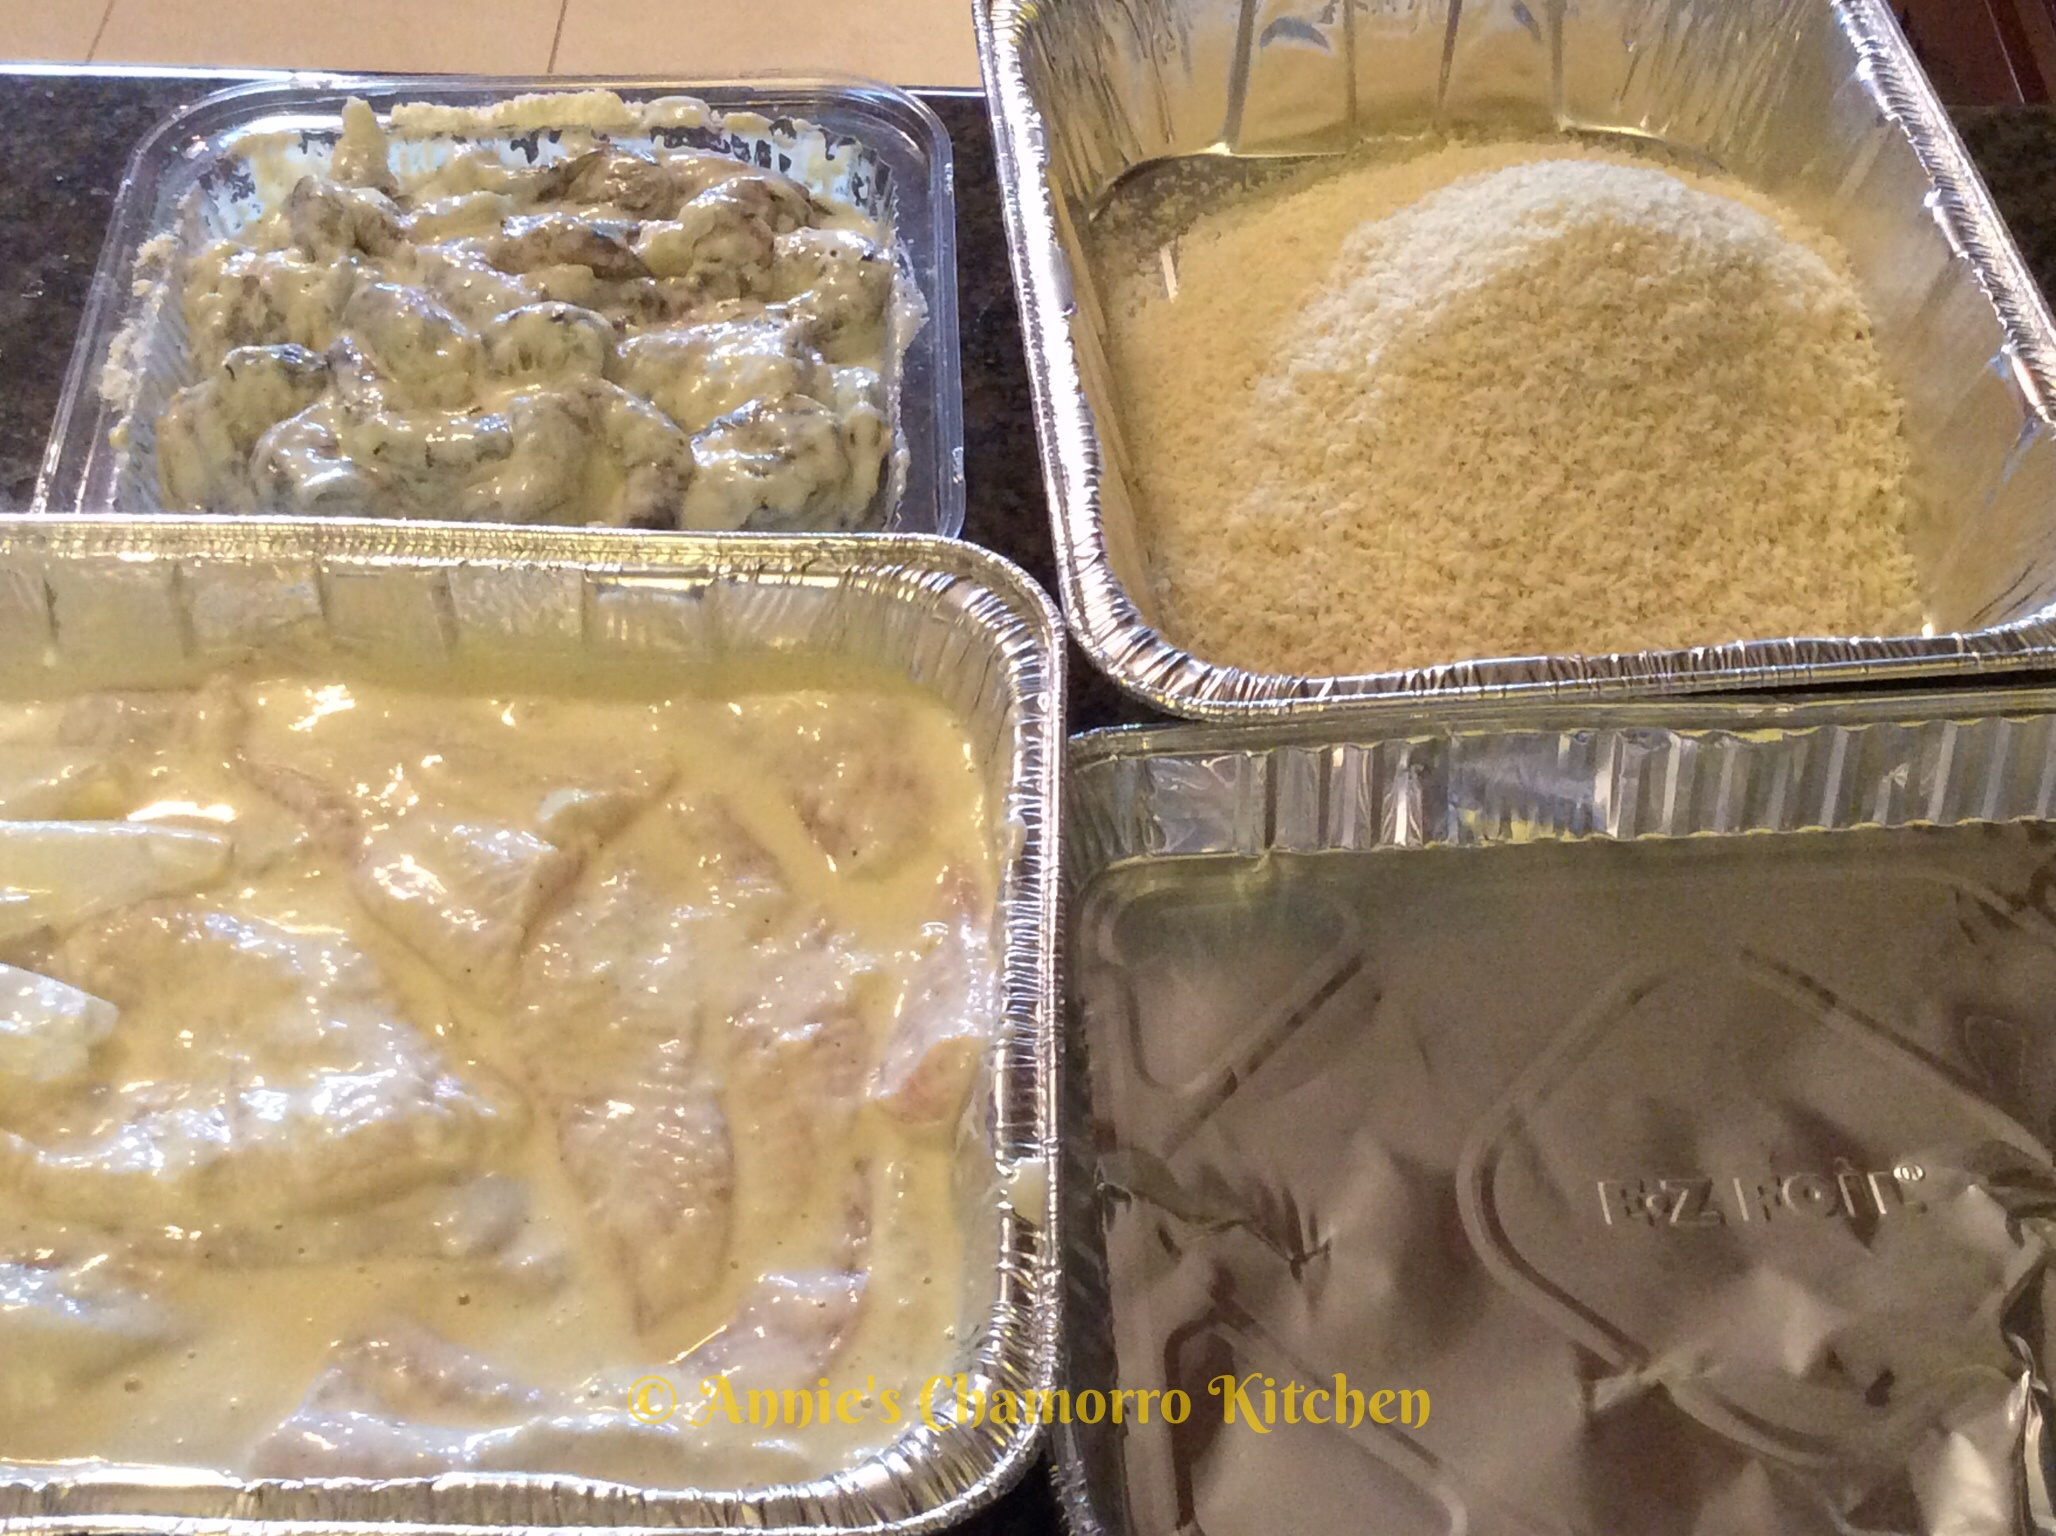
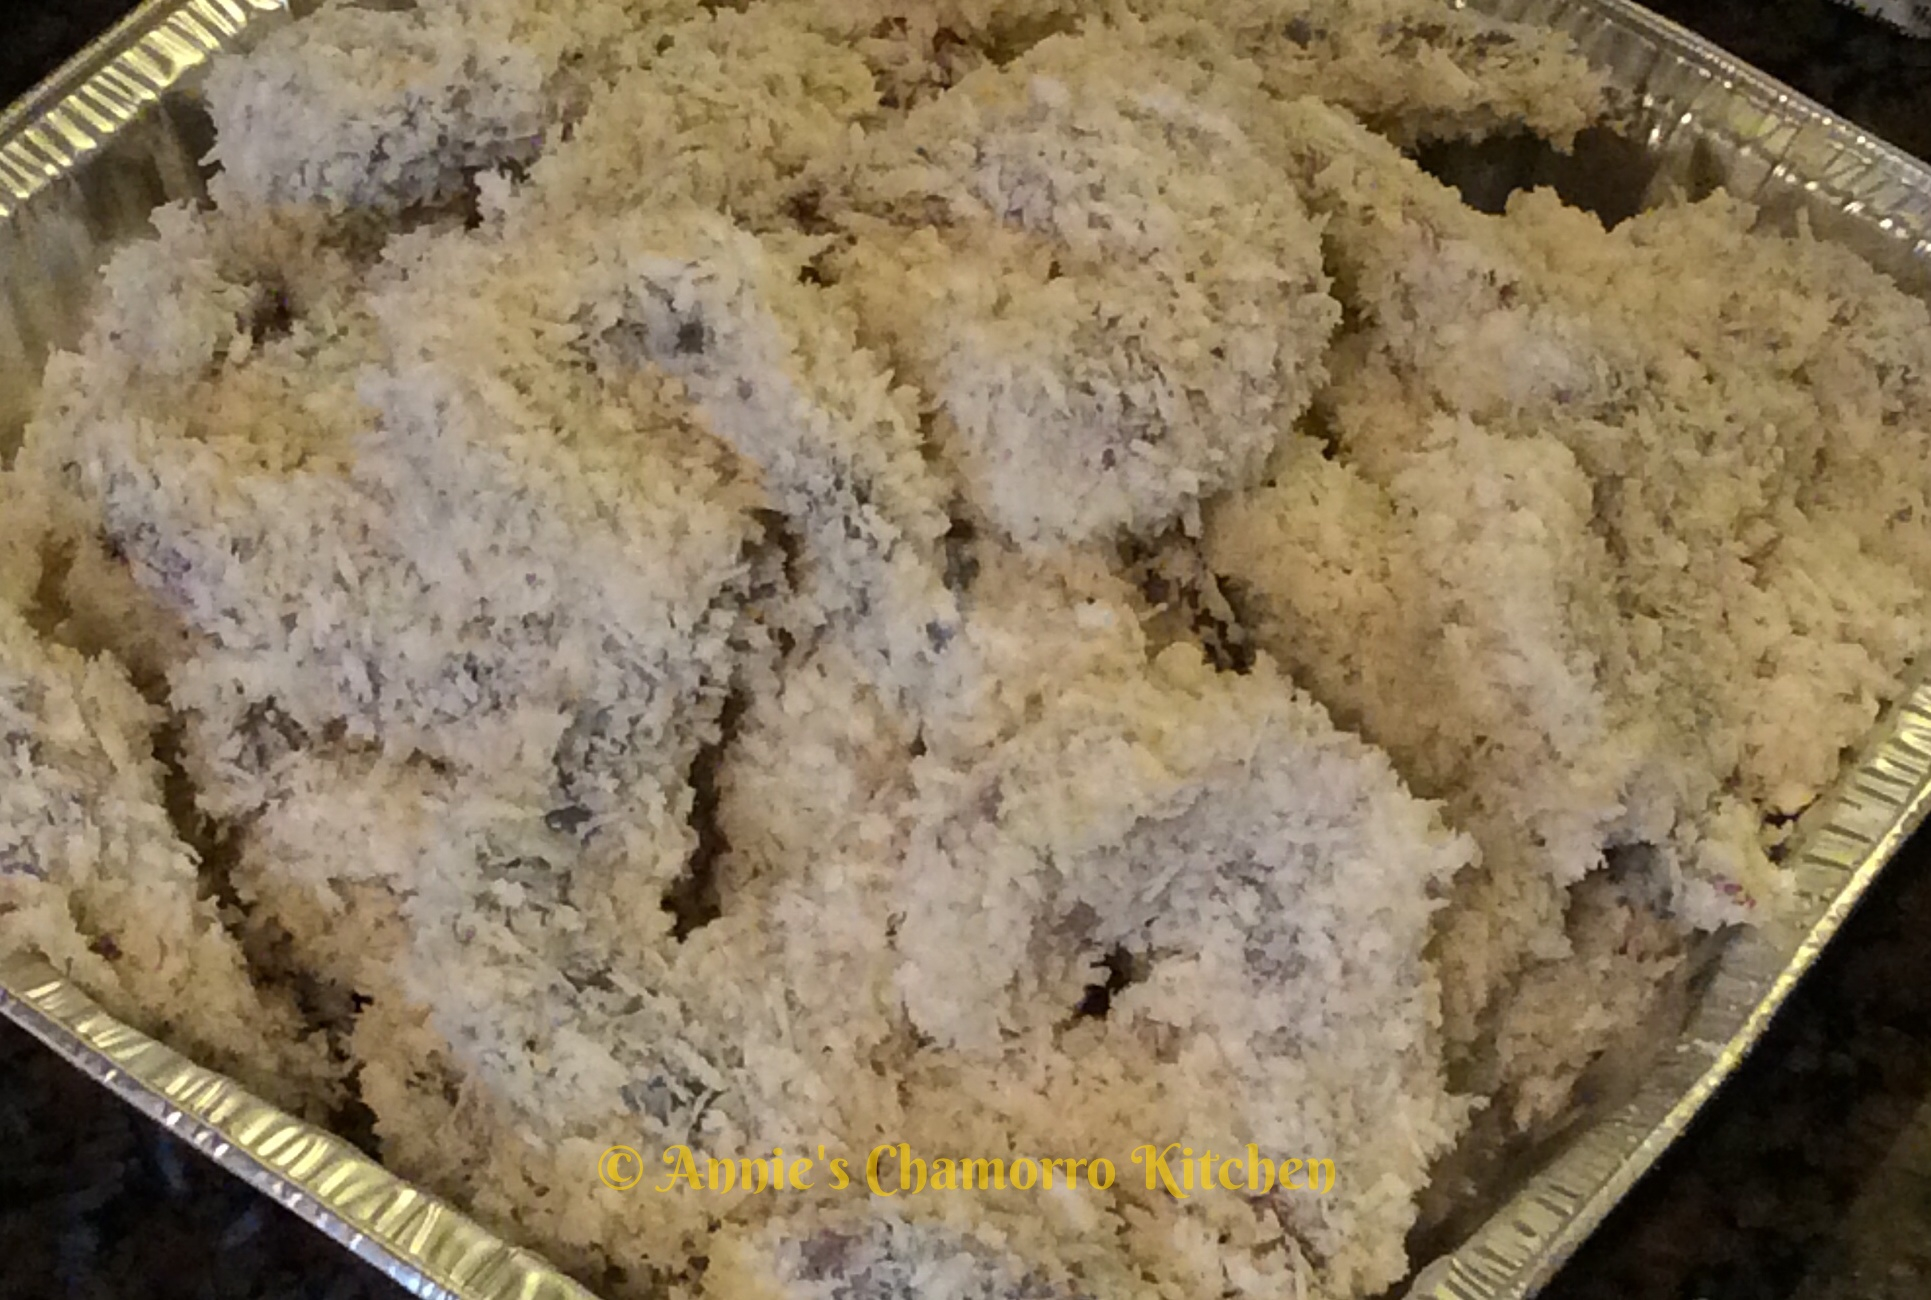
Create an assembly line with the shrimp, fish, and the breadcrumbs.

Last Import - 076

Designate one hand as the “wet hand” and the other as the “dry hand.”  Use the wet hand to place the shrimp and fish into the pan of breadcrumbs.  Use the dry hand to cover the shrimp and fish with breadcrumbs.

Last Import - 084  Last Import - 088

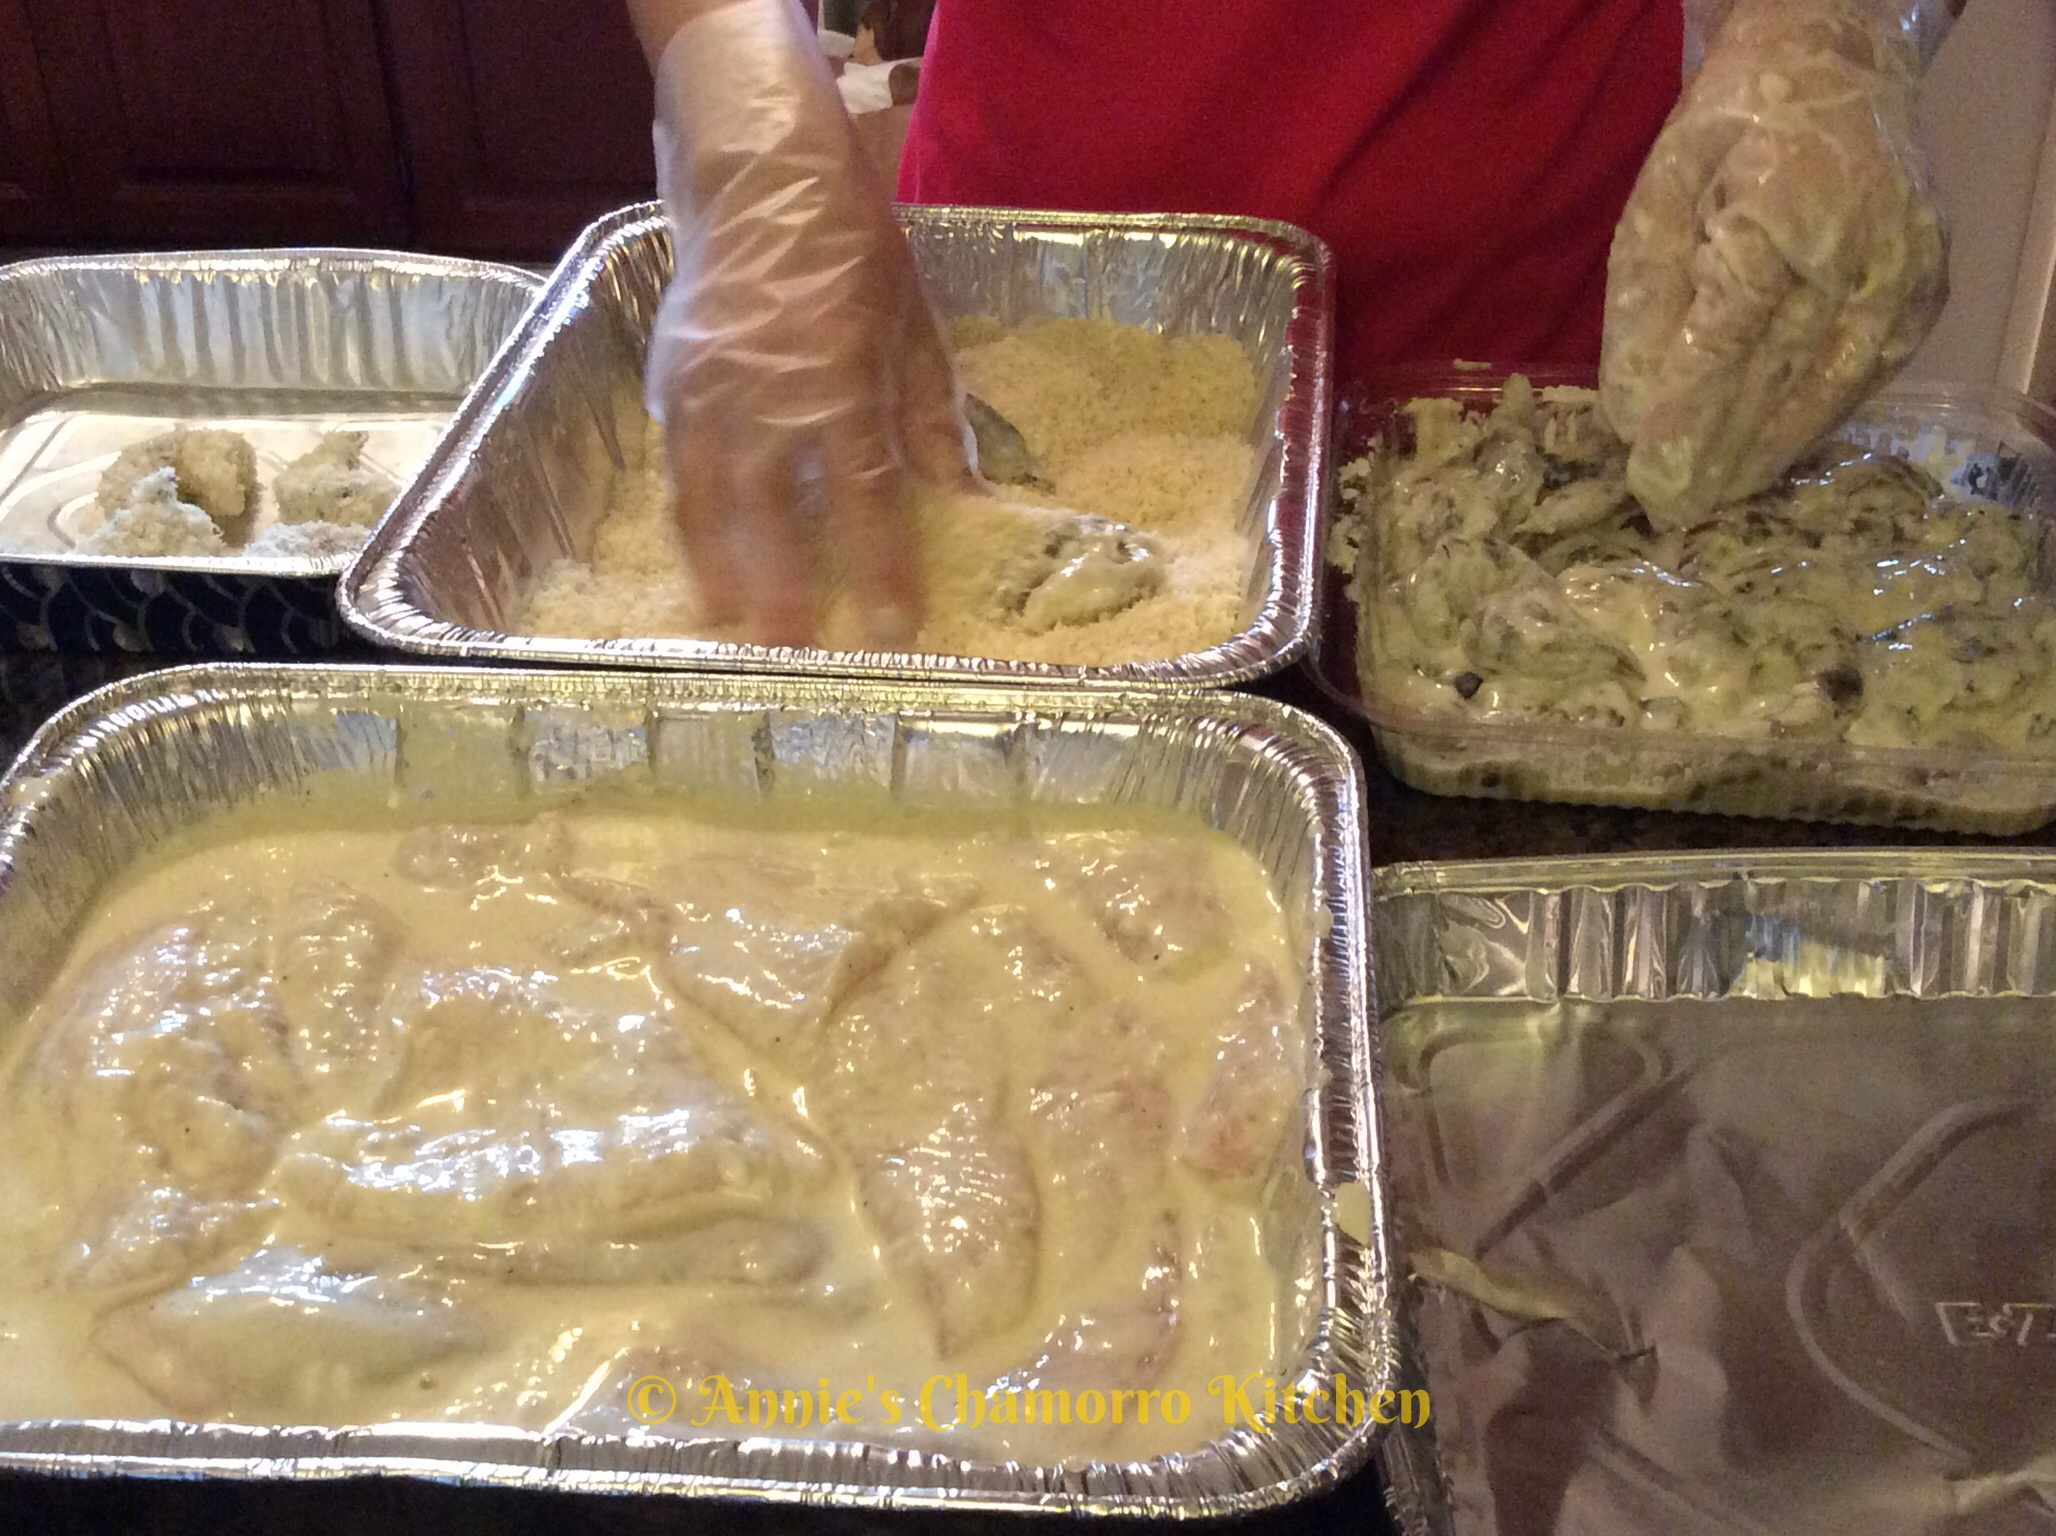
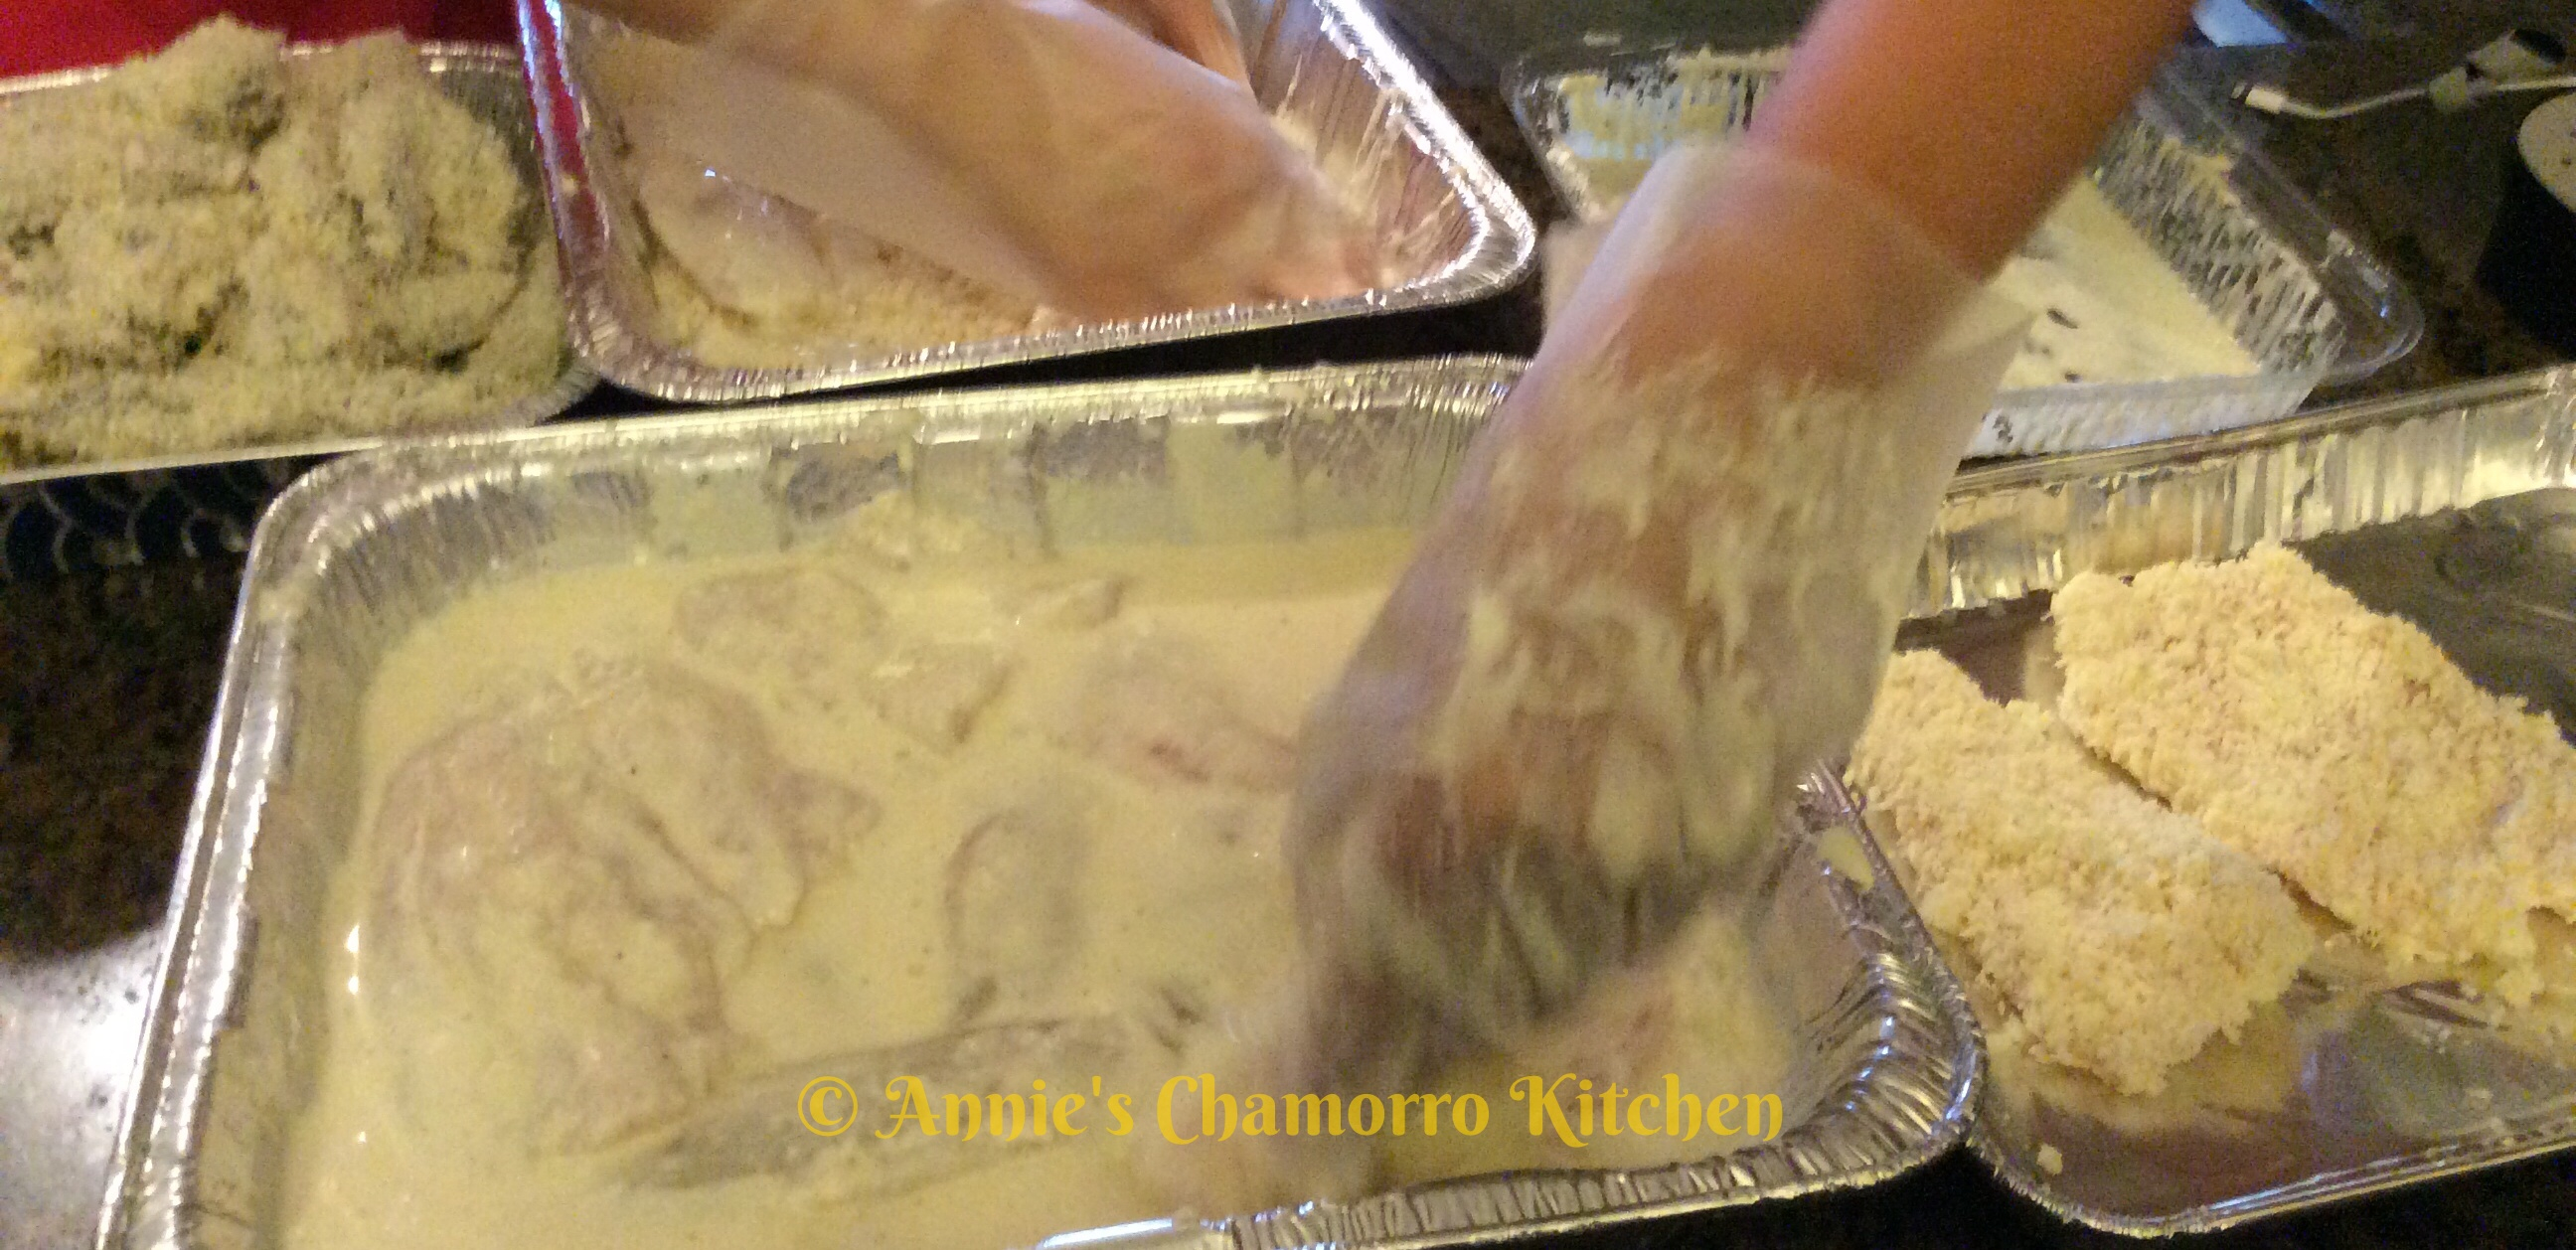
Be sure to generously pat the breadcrumbs into the batter-covered fish and shrimp.

Last Import - 094  Last Import - 098

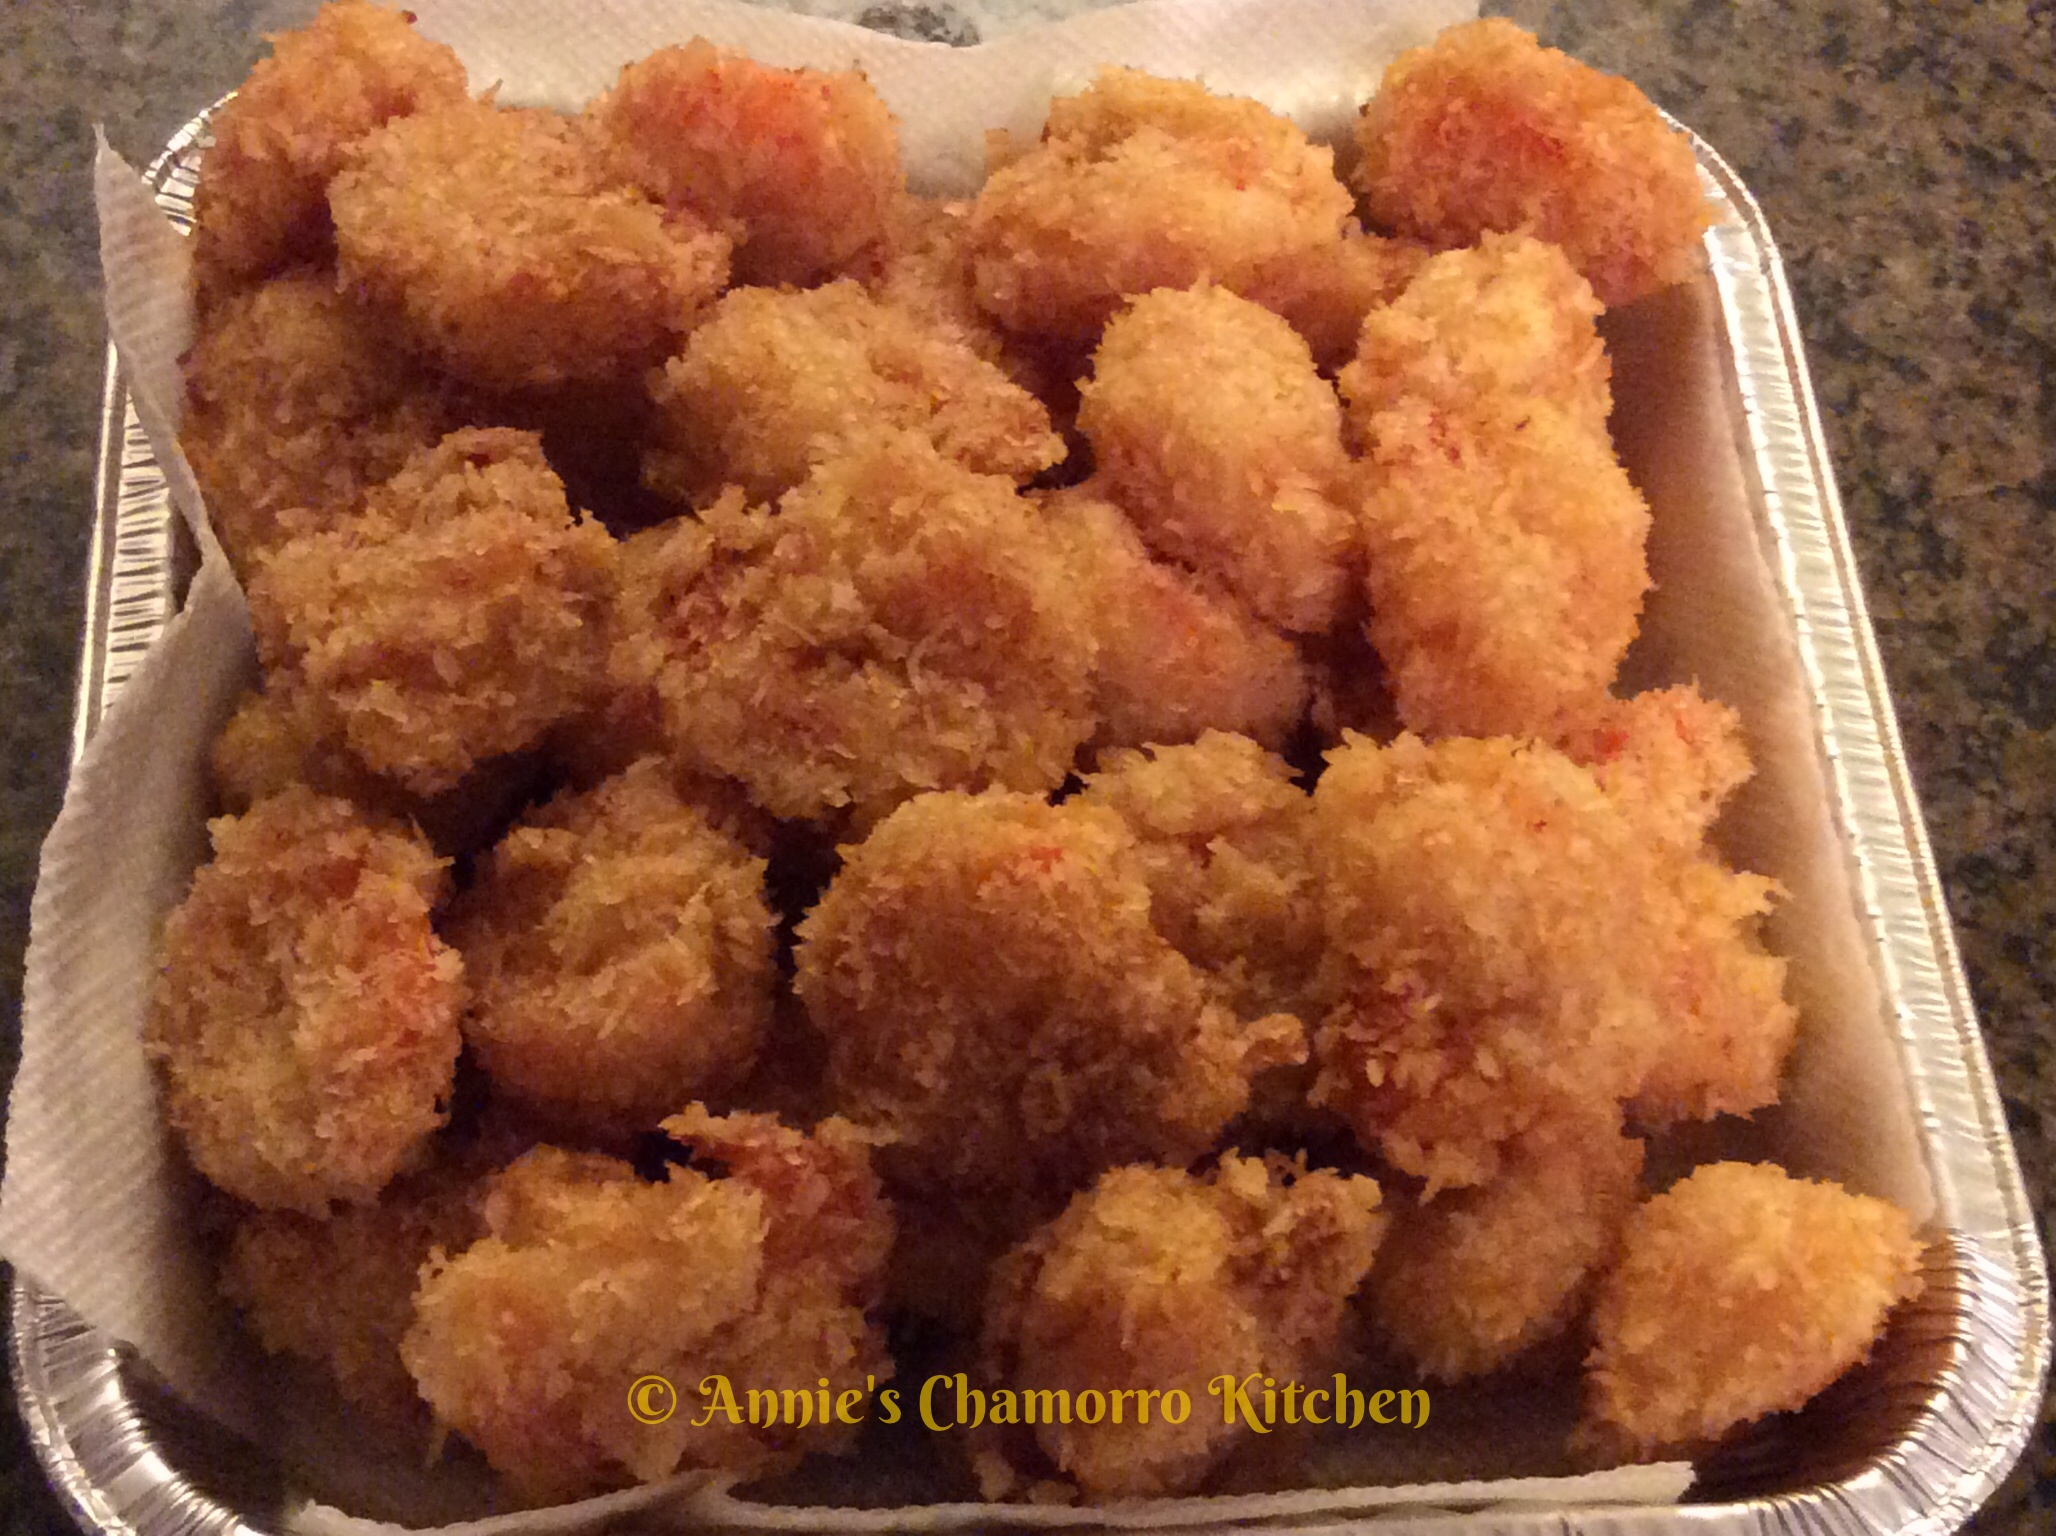
Carefully drop the coated fish and shrimp into hot oil.  Do not overcrowd the pan.

Last Import - 104

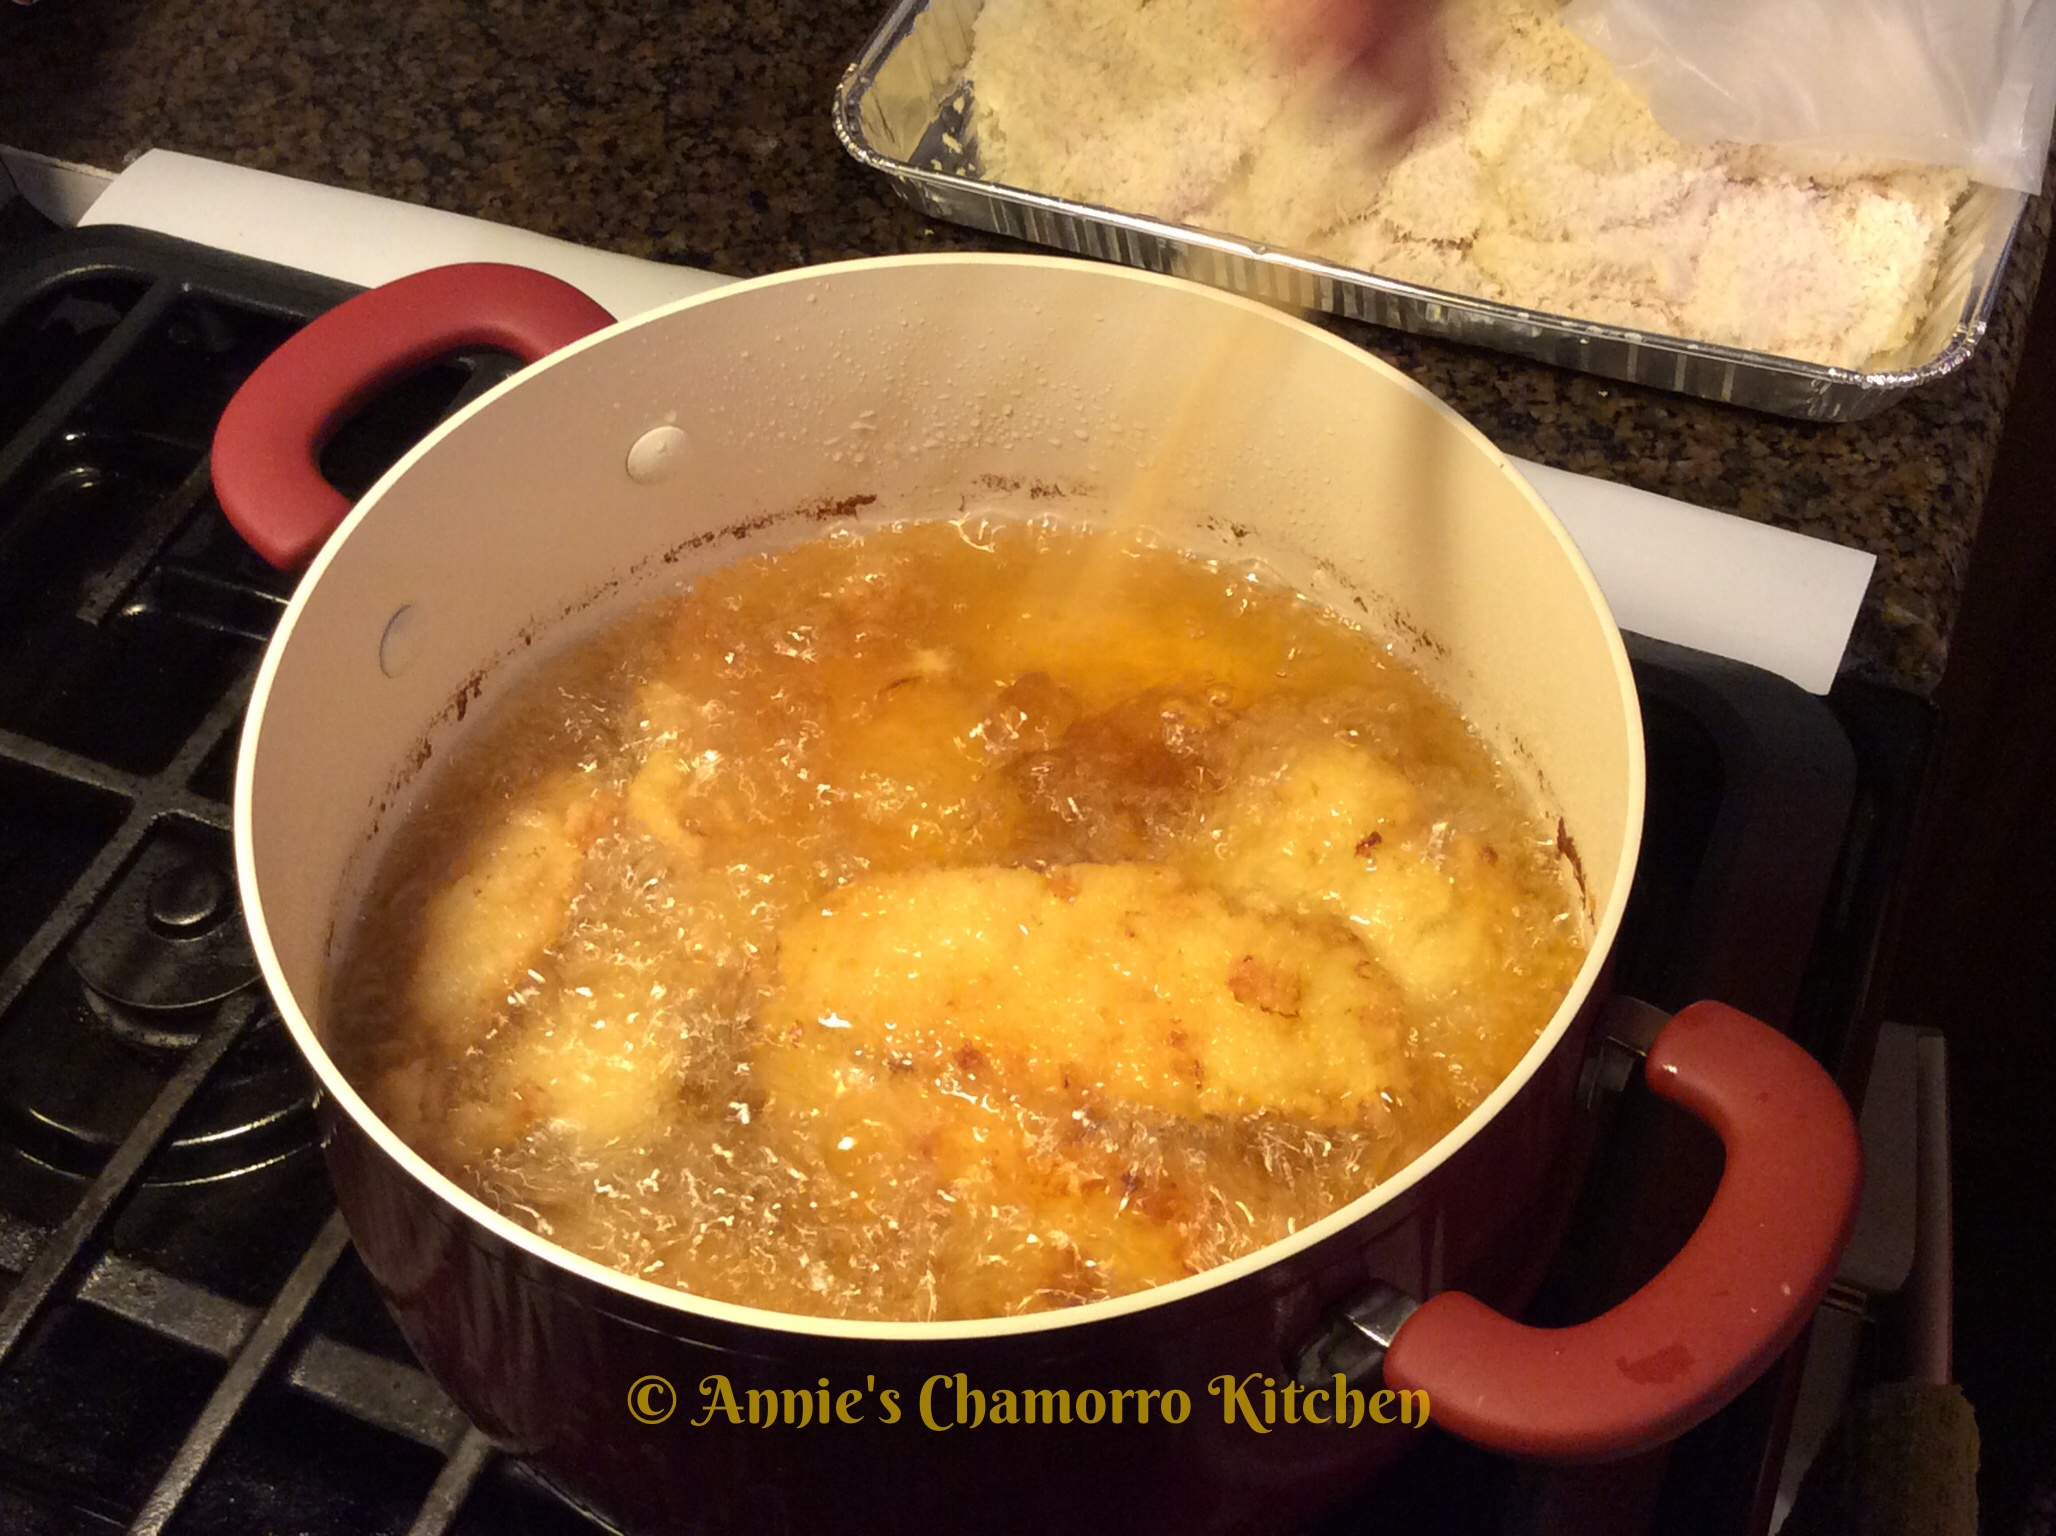
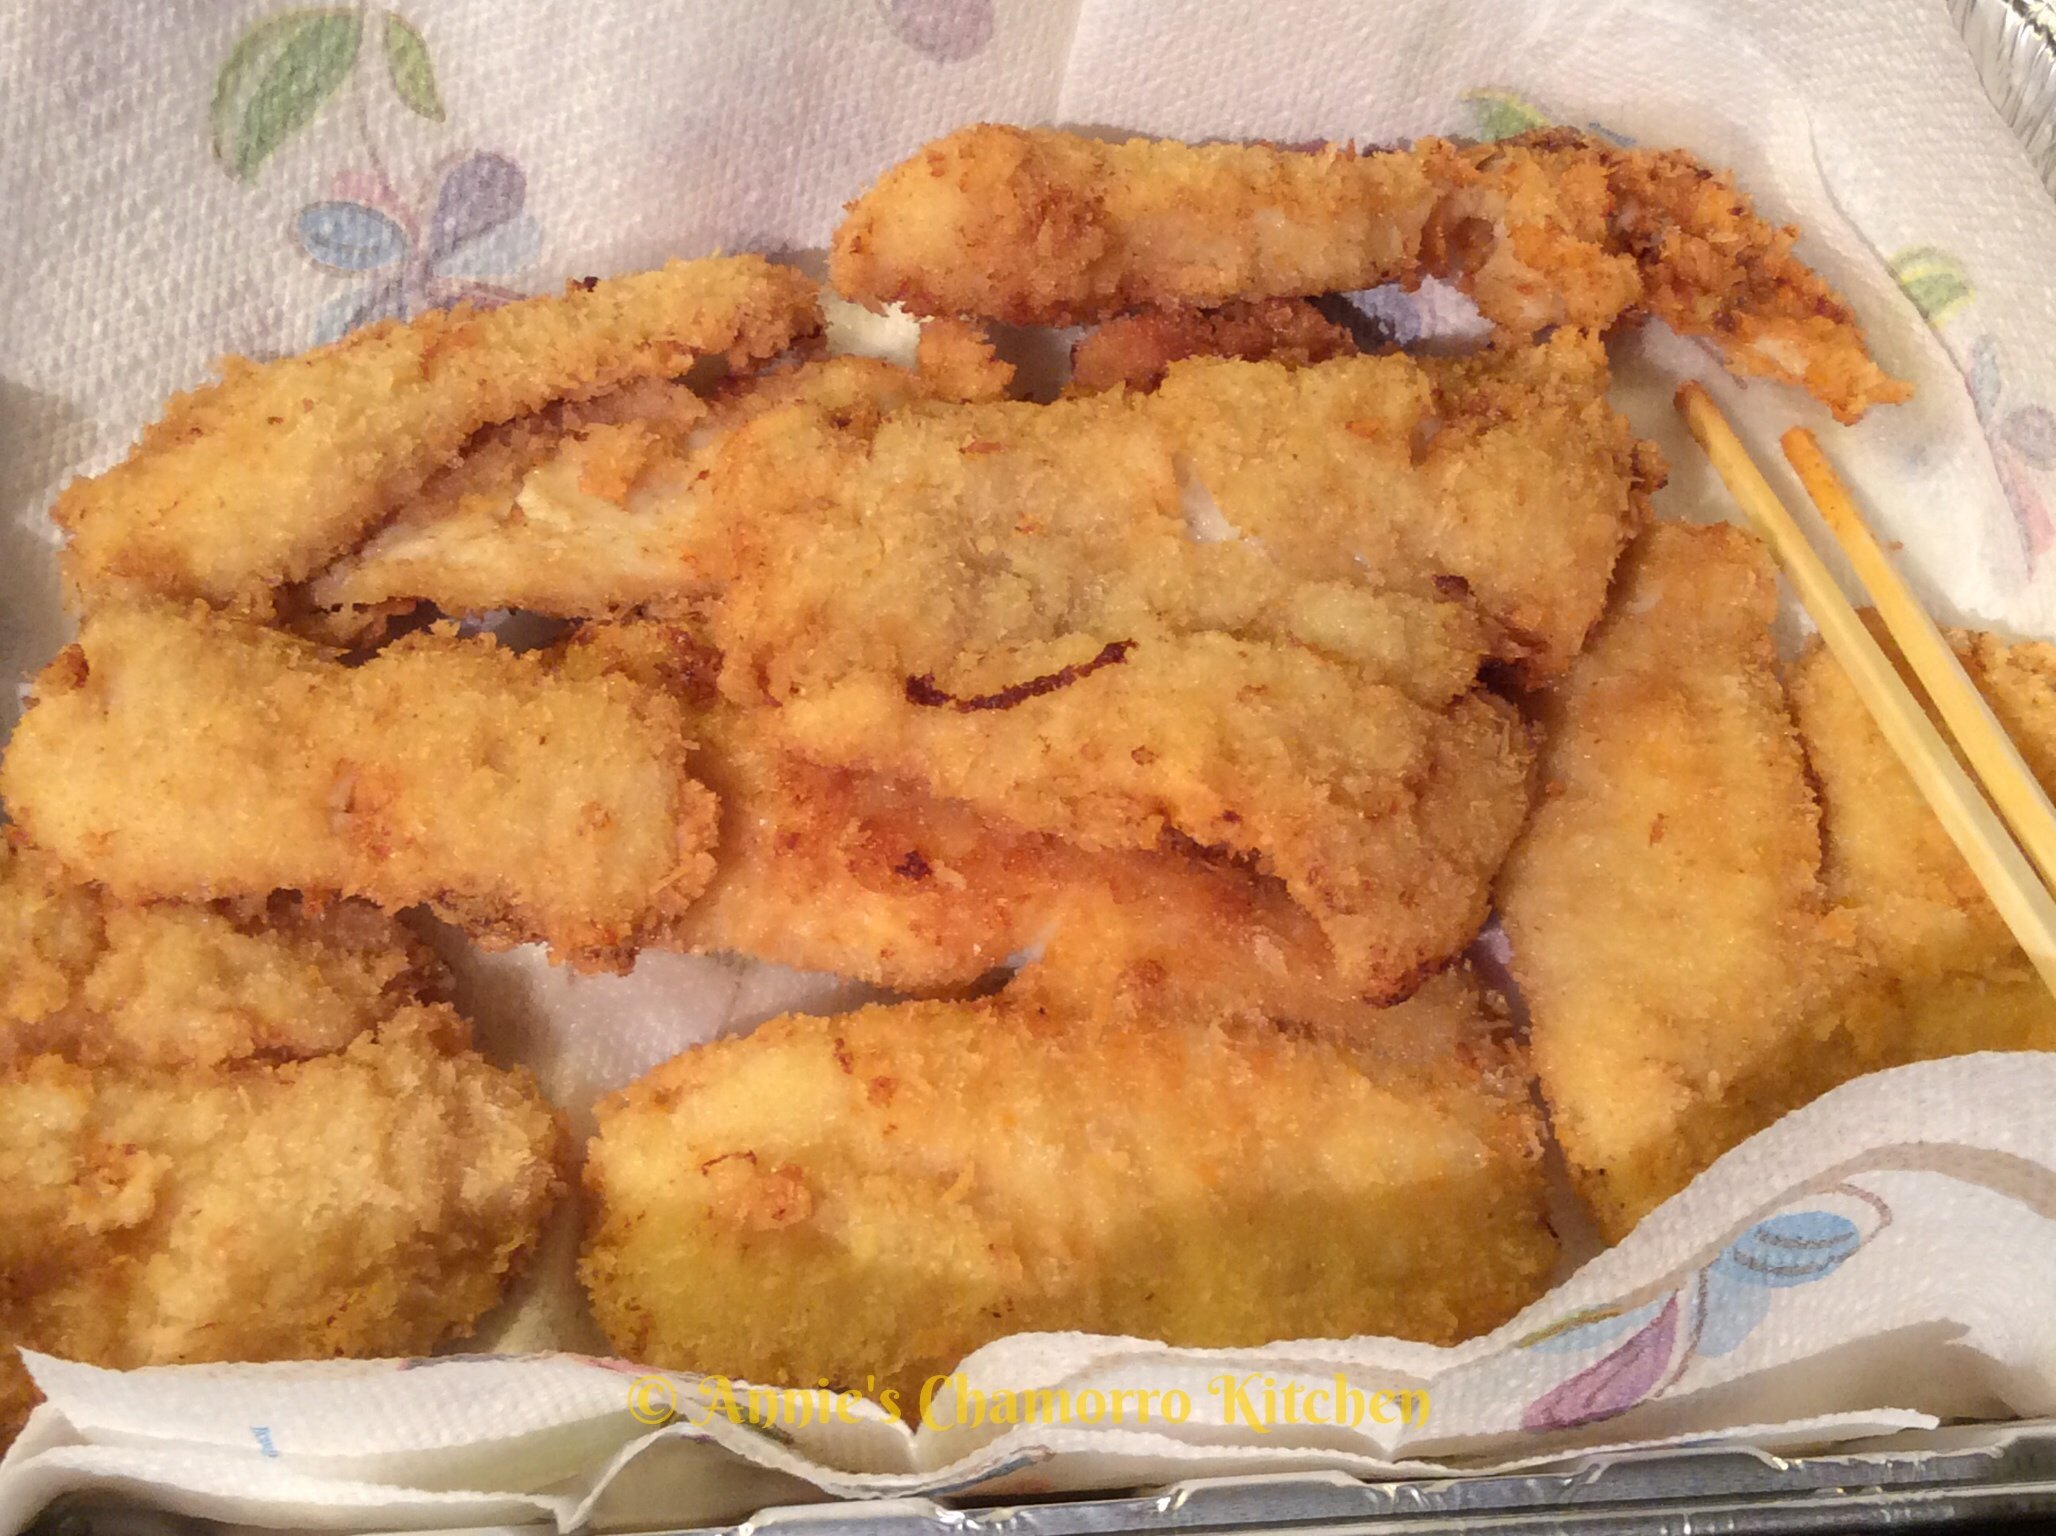
Fry the fish about 3 minutes on each side or until golden brown.  Fry the shrimp until golden brown all over.

Last Import - 112  Last Import - 116

Make the dipping sauce.

In small microwave-safe bowl, mix together the sweetened condensed milk, pineapple juice and kewpie mayonnaise.  You can use regular mayonnaise if you don’t find any kewpie.

image

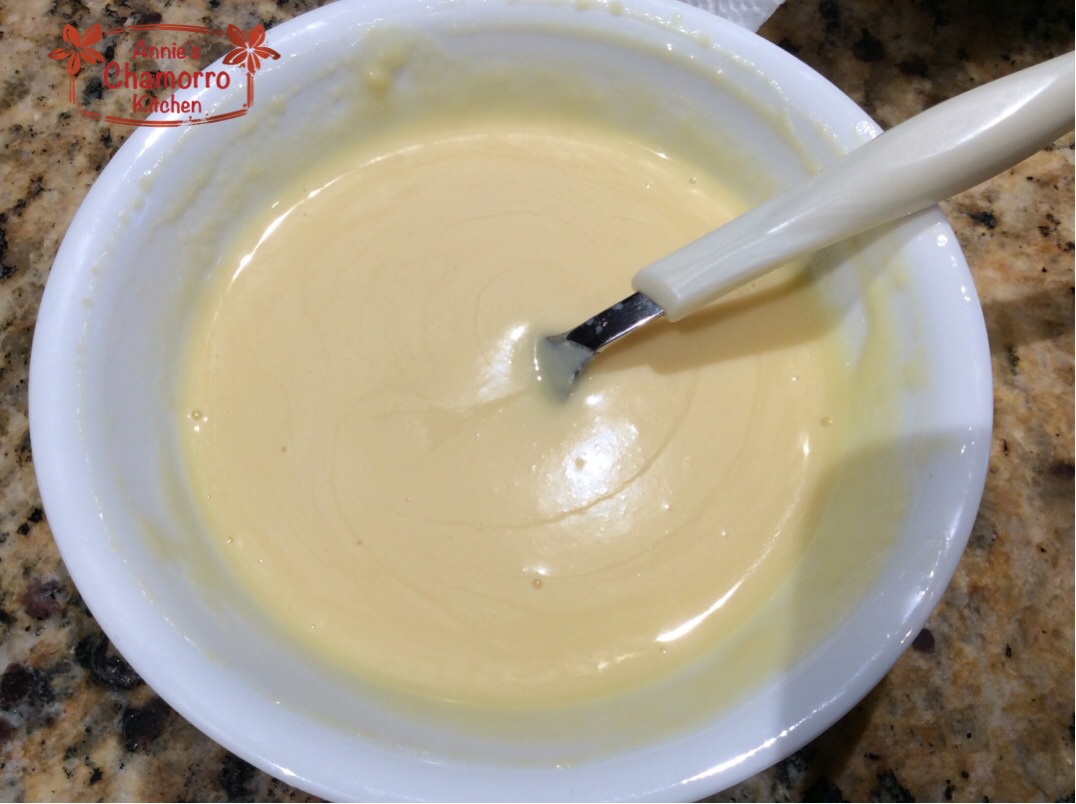
Heat the mixture in the microwave for 20 seconds or until it starts to bubble.  Remove from the microwave and stir until creamy.  Serve with fried shrimp and fish.

ENJOY!

image


Authentic Korean Cabbage Kimchi

My Korean sister-in-law, Min, is an excellent cook.  She’s the one who taught me how to make all my favorite Korean dishes, like Jap Chae, Bulgogi,  Denjang Chigae, Kimchi Chigae, Kim Bap, Kimchi Fried Rice and lots more!

This is Min’s cabbage kimchi recipe.  She makes different kinds of kimchi — cabbage, radish (my personal favorite), and cucumber — and they are all better than the cheap jarred stuff you buy in your grocery store.

It’s a bit labor-intensive, but it’s worth it in the end.  Eat it as a side dish with your favorite meals, or let it ferment a little longer and use it in Kimchi Chigae.  A small note about kimchi fermentation — kimchi stored at room temperature will ferment faster than refrigerated kimchi.  Refrigerated kimchi still ferments, but at a slower rate.

The photos below make it appear that this makes a ton of kimchi.  Once the leaves wilt, however, you’ll end up with enough kimchi to fill a large bowl or jar (like the size of large pickle jars that are sold in wholesale grocery stores such as COSTCO).  There is a Korean store here that sells homemade kimchi in those large jars, but they are so expensive!  It’s so much more economical to make your own at home.

Don’t worry about the quantity this makes.  The great thing about kimchi is that it lasts a long time (just keep it stored in an airtight container)! 😉 Or, you can be a nice friend, family member or neighbor and share some!

Give Min’s recipe a try.  I think you’ll like it. 🙂

Authentic Korean Cabbage Kimchi

Ingredients:

Rice Glue:

  • 2 cups sweet rice grains
  • 4 cups water

Cabbage plus brine:

  • 3 large heads nappa cabbage
  • 4 cups coarse sea salt
  • 8 cups water

Kimchi sauce:

  • 4 bunches green onions (about 12-16 stalks), cut into pieces about 1 1/2″ long
  • 1 bunch chives, cut the same size as the green onions (1 1/2″ long)
  • 3- or 4-inch piece of ginger, peeled and grated
  • 18 cloves fresh garlic, mashed or very finely minced
  • 6 tablespoons anchovy sauce
  • 6 tablespoons salted shrimp or shrimp sauce
  • 6 cups Korean red pepper flakes

This is what the salted shrimp and anchovy sauce look like:

salted shrimp and anchovy sauce

Directions:

Place the grains of rice in a small bowl. Cover the rice with water (use 2 cups of water; save the other 2 cups for later). Let the rice soak for several minutes while you prepare the cabbage.  Eventually you’ll make a rice paste or glue of sorts with the soaked rice grains.  This is a necessary ingredient to help the kimchi sauce ingredients stick to the cabbage leaves.

sweet rice  sweet rice

Separate and rinse the cabbage leaves.  Remove the core at the bottom of each head of cabbage.  Cut the leaves into pieces about 2″x4″.

Generously salt the cabbage leaves with the coarse sea salt.  Pour the water over the salted cabbage leaves.  Soak the leaves in the brine for about 30 minutes until the leaves wilt.  After the leaves have wilted, drain out all of the water.  Place the cabbage in a large strainer basket and rinse thoroughly.

salt the cabbage  cabbage brine

Now, let’s get back to making the rice glue.  Place the rice and water into a blender.  Min uses a VitaMix, but you can use any blender.  Here’s a tip: if your blender can grind ice (for slushy drinks), then it can probably grind rice with no issues.

You will need to add about 2 more cups of water to the blender.

soaked rice  rice and water

Grind the rice-water mixture until you get a smooth consistency.  Pour the rice mixture back into the bowl.

grind the rice  rice puree

Microwave the rice mixture for 2 minutes on High.  Set it aside to cool.  The rice paste will thicken slightly as it cools.

cook the rice  cook rice

Place the onions, chives, garlic and ginger into the bowl of drained and rinsed cabbage leaves.

add onions chives garlic ginger

Sprinkle the ground pepper flakes into the bowl.

pepper

Add the anchovy sauce and salted shrimp paste.

anchovy sauce  shrimp paste

Min also adds some ajinomoto (MSG), but this is optional.  If you choose to add it, sprinkle about 2 tablespoons into the bowl.

ajinomoto

Add the cooled rice paste to the bowl.

add the rice paste

Now this is important:  Put on a pair of CLEAN plastic gloves.  Don’t even think about using the same gloves you use to wash dishes with!  Buy a new pair or better yet, buy a box of disposable cooking gloves.  You are going to mix this by hand and you don’t want to get any hot pepper on your hands (trust me).  Mix it thoroughly, ensuring each piece of cabbage is covered with the kimchi sauce.

mix  mix

Place the kimchi into a resealable container.  Let the kimchi ferment for at least a day and a half before serving.  Remember, kimchi ferments faster at room temperature than if refrigerated.  The longer the fermentation time, the more sour the kimchi becomes.  I like my kimchi on the sour side, so I let mine ferment for about a week before eating.

This will keep for several weeks in the refrigerator.

ENJOY!

finished product


How to Cut Open Månha (Young Coconuts)

Månha is the Chamorro word for young coconuts.  The sweet juice (commonly called “coconut water) and tender coconut meat are used to make delicious Chamorro dishes — desserts, mainly — such as månha pie, sweet tamåles, apigigi’, månha titiyas and åhu.

Click on the video link below for a demonstration of cutting open the young coconuts to extract the juice and meat.


Chicken Drumstick Motsiyas

Motsiyas (pronounced mot-see-jas) is a delicacy on Guam.  It consists of a basic mixture of finely chopped or ground chicken (traditional recipes include most of the chicken parts, but I like just the meat, no organs), hot pepper leaves, tomato leaves, green beans, mint, lemon juice, salt and pepper.  You can also add other leafy greens to the mixture, as my friend, Arlene Sablan Aguon does (see her list of ingredients below).  To spice it up, add chopped chili peppers.  

The ingredients are then mixed together then wrapped in banana leaves and steamed in either water or chicken broth, and sometimes even in coconut milk.  

The recipe below is one of PoP Aguon’s treasured recipes, and the technique used to make them is a PoP Aguon original.  Wrapped in around the bone of a Chicken Drumstick with the skin surrounding it, this is a LABOR INTENSIVE recipe that requires that you de-bone and remove the meat and tendons of the chicken drumsticks, mix the multiple ingredients, then fill it back into the drumstick cavity.  It’s all worth it in the end, trust me.

Give PoP’s recipe a try.  I think you’ll like it. 🙂

Chicken Drumstick Motsiyas

Recipe adapted by Annie Merfalen
Original recipe by Arlene Sablan Aguon (as taught by PoP Aguon)
Photos by Arlene Sablan Aguon

Chicken Drumstick Motsiyas 1


Ingredients:

  • 4 pounds Chicken Drumsticks with Skin intact and not torn
  • 2 pounds boneless, skinless chicken thighs
  • 2 pounds boneless, skinless chicken breasts
  • Salt and Pepper, to taste
  • Freshly squeezed lemon juice, about 3/4 cup
  • 2 cups minced fresh mint
  • 2 cups thinly slices long beans or green beans
  • 2 cups diced baby bok choy
  • 4 cups diced mustard greens or spinach leaves
  • 1 cup diced white onions
  • 1 cup thinly diced green onions
  • 1/3 cup diced fresh Guam donne’ or Thai bird pepper (optional)
  • 4 cups chicken broth

Directions:

Debone the Drumsticks:
  1. Cut the chicken around the meaty part at the top of the drumstick (at the joint where the drumstick joins the thigh), loosening the meat from the bone in that area. Insert a pair of kitchen scissors or a small sharp knife as close to the bone as possible, cutting away the meat.  Be careful not to cut the skin around the drumstick.
  2. Slowly work your way down the drumstick, cutting and separating the meat from the bone.
  3. When you get to the bottom of the drumstick, turn the meat and skin inside out (be careful not to pull or cut the skin off!), then cut off the meat at the bottom, leaving the skin attached to the bone.
  4. Carefully pull your drumstick skin over the cleaned bone away from the knuckle. Place the drumstick meat in a resealable bag for later use.  You will not use the drumstick meat because of the tendons and ligaments (reserve and use for Kådun Pika later).
  5. Refrigerate the drumsticks (with skin intact) until you’re ready to stuff them.
Prepare the Motsiyas filling:
  1. Place the mint, beans, bok choy, mustard greens or spinach leaves, white onions, and green onions into a large mixing bowl.  Add the hot pepper if you want it spicy.
  2. Coarsely grind the chicken thigh and breast meat in a meat grinder, if you have one.  You can also coarsely chop or grind the chicken meat in a food processor.
  3. Mix the ground chicken and chopped vegetables together. Refrigerate the mixture overnight so the flavors can mix and marinate together.
The Next Day:
  1. Place the chicken broth into a rice cooker (placed on the “warm” setting).  You can also this on the stove top with a pot that has steaming baskets (heat the broth over medium-low heat).
  2. Add the salt, pepper and freshly squeezed lemon juice to the chicken mixture.
  3. Carefully pull back the drumstick chicken skin away from the knuckle. Shape your Motsiyas around the drumstick bone, carefully packing the filling into the skin and shaping it back into drumstick form.  Insert a wooden toothpick into the skin at the top of the drumstick to secure the skin while it cooks.
Cook the Motsiyas:
  1. Place the Motsiyas drumsticks into the steaming basket that comes with your rice cooker or steaming pot.
  2. If using a rice cooker, set it on COOK – the chicken broth will steam the Motsiyas.  If using a stove top steamer, turn the heat to medium-high, bringing the broth to a boil.  Place the steamer basket into the pot.  Cover the pot (or rice cooker) and steam for 20 minutes.
  3. Note: If you like your Motsiyas WET, you can place the drumsticks directly into the broth.
  4. If you like a crisp texture to the skin, bake the Motsiyas drumsticks at 375° F. until the skin begins to turn light golden brown (about 25 minutes).  Turn up the heat to 500° F. (or place it on Broil) and cook until the skin is a medium golden brown and the skin is crisp.
Serve and Enjoy!

Serve while still hot with a side of mint, donne’ (pepper) and lemon wedges.

As Arlene says, this is Munngi’-licious!

Other ways to prepare PoP’s Chicken Motsiyas:
Motisiyas 3 - stuffed neck

The traditional way: Stuffed Chicken Neck

Motsiyas 4 - ready for steaming

Fill silicone cups for steaming

Motsiyas 5 - steamed

Steamed Motsiyas

Motsiyas 7 - rice paper 2

Wrap the filling in Rice Paper

Motsiyas 10 - rice paper 5

Steamed Rice Paper Rolls

Motsiyas 11 - rice paper 6

Fried Rice Paper Rolls

Motsiyas 12 - pop 1

+PoP, enjoying his Rice Paper Motsiyas Rolls


Siopao

Siopao is a favorite snack on Guam that is of Chinese (Cha Siu Bao, or Chinese BBQ Pork Buns) or Philippine origin (Siopao Asado).  The Philippine version of these buns are normally steamed, while the Chinese version of these delicious snacks are also baked.

You can prepare siopao COMPLETELY from scratch, but there are a couple of shortcuts I take to make the preparation quicker and easier.  I do make the dough from scratch, but I save a whole lot of time by using leftover pulled pork from my Hawaiian Pulled Pork recipe.  Unless you are feeding a large crowd, you will most certainly have enough pulled pork leftover to make siopao (I use a 9-10 pound pork shoulder to make my pulled pork).  All I do is add a few more ingredients to the pulled pork to turn it into a sweet pork filling for my siopao. 

Give my recipe a try.  I think you’ll like it. 🙂

Pork Siopao

Siopao - 16   Siopao - 18

Dough:

  • A doubled batch of my yeast donuts dough recipe (find it here)

Filling:

  • About 4 cups leftover Hawaiian Pulled Pork (find my recipe here)
  • NOTE:  To make chicken siopao, use shredded cooked chicken (I like to use a rotisserie chicken) instead of pulled pork
  • 1 tablespoon chopped garlic
  • 1/4 cup sugar
  • 1/4 cup soy sauce
  • 2 tablespoons oyster sauce
  • 1 tablespoon hoisin sauce
  • 1/4 cup water mixed with 2 tablespoons corn starch
  • Optional:  6 hard boiled eggs, quartered (so you have 24 pieces of boiled eggs)

Materials:

  • Parchment paper, cut into 3-inch squares, 24-36 pieces (amount depends on the size of your siopao)
  • Steamer basket or pot

Directions:

Make my Hawaiian Pulled Pork recipe, then set aside about 4 cups of pulled pork.  Enjoy the rest of the pulled pork for your dinner.  In the next day or two, used the leftover pulled pork to make siopao. 🙂

IMG_4657

Prepare the dough using my yeast donuts recipe.  Ensure you double all of the ingredients required for my yeast donuts recipe.  Follow the directions up to step number 5 (letting the dough rise).

Siopao - 05

While you’re waiting for the dough to rise, prepare the filling.  Place the leftover pulled pork into a medium sized pot.  Add the garlic, sugar, soy sauce, oyster sauce and hoisin sauce.  Bring the mixture to a boil then quickly stir in the water-corn starch mixture.  Return the mixture to a boil, cooking until it thickens.  Set the pork filling aside to cool (I placed the filling into a bowl and placed it in the freezer to cool while my dough was rising).

Siopao - 07

Cut the dough into 24 pieces (for larger siopao) or 36 pieces (for smaller siopao).  I made 24 larger pieces that measured about 4 inches in diameter after it was cooked/steamed.

Siopao - 10

Use a rolling pin to flatten each piece of dough into a circle about 6 inches in diameter.  Keep the center of the circle slightly thicker than the edge.  Place two tablespoons of filling in the middle of the dough.  Optional:  Add a piece of egg on top of the filling.

Siopao - 11

Pull the dough up around the filling, pinching to seal.  The sealed part becomes the bottom of the siopao.

Siopao - 12

Place the siopao on a piece of parchment paper, pinched side down.  Continue filling the remaining pieces of dough.

Siopao - 13

After all the dough is filled, place in your steamer basket.  I can fit about 6 large siopao in mine.  Don’t let the siopao touch the sides of the steamer, and leave about an inch or two between each one.  Place a clean kitchen towel between the steamer pot and the lid to prevent the condensation from dripping back onto the siopao.  Steam for 20 minutes then remove from the steamer to cool.

Siopao - 14

Enjoy while still warm. 🙂

Siopao - 20   Siopao - 19

Freeze any uneaten (and already steamed) siopao.  To reheat, defrost the siopao in the refrigerator then reheat in the microwave for 30 seconds.

« Older Entries Recent Entries »