Archive for SNACKS

Paranormal Pretzels

My niece, Chrystina and her son, Damian have so much fun making snacks together.

Damian shared these cute pretzel snacks with his friends at school, but they’d be perfect for a kid’s party or for Halloween (being that they look like aliens or bugs). 🙂

image

Chrystina adapted this recipe from one she found in Parent magazine.  Here’s how she and Damian made them.

You’ll need to buy pretzels already covered in yogurt, but you can buy plain pretzels and coat them with white candy melts.

Use candy melts and multi-colored sprinkles for the eyes. Melt the candy melts in the microwave in 30-second intervals then pour into a frosting bag fitted with a small tip to do the eyes.  If you don’t have a frosting bag, you can also use a resealable bag, cutting a tiny piece off one corner.

NOTE: You need a helper to be putting the sprinkles on because the candy melts settle real quick!

From Chrystina:  “A lot of our little paranormal friends ended up looking like their eyes were gorged out and left empty and bloody — which is ok too.  Damian went as fast as he could. ☺️”

Have fun making these cute snacks.  Chrystina and Damian sure did. 🙂

Print Friendly, PDF & Email

Spicy Crackers

This is a quick and easy snack to make.  My kids love to munch on these after school or while watching their favorite television show.  You can use any size crackers, but I like using either miniature saltines or oyster crackers since they’re small enough to pop a handful into your mouth.

Give my recipe a try.  I think you’ll like it.

spicy crackers


spicy crackers 2

Print Friendly, PDF & Email

Judy’s Empanadas

Chamorro empanadas are high up on the list of my favorite snacks, but they can easily be a meal in and of themselves.  In fact, when I was on Guam recently, I would visit the village store and buy empanadas, fresh out of the fryer, for breakfast.

My mom taught my sisters and me how to make empanadas years and years ago.  It’s quite the labor of love, although you can make the filling ahead of time, thereby cutting back on the actual preparation of the empanada.

A tortilla press, while not essential, is a great tool to have when making empanada.  While you’re at it, a bunch of kitchen helpers is good too. 😉  I remember when I was younger, we only had one tortilla press to share among my three sisters and mom; someone usually got stuck with using the much slower rolling pin.  We did it assembly-line style, with a couple of us flattening the dough, another couple of us filling it, and then someone sealing it tightly.

I’ve had a lot of requests for my empanada recipe, but my good friend, Judy Fernandez Dillinger, has an amazing recipe and she was gracious enough to allow me to feature it here.

As a side note, this is the packet of achote powder used in Judy’s recipe below.  Each packet contains 1/3 ounce of powdered achote, which is roughly 2 teaspoons.  Use this as a guide.  Some people like more or less achote to make the crust lighter or darker.  I also know someone who doesn’t use achote at all.

So, without further ado, here is Judy’s empanada recipe.  Give it a try.  I KNOW you’ll love it. 🙂

Judy's Empanadas
 
Author:
Recipe type: Snack
Cuisine: Chamorro
Serves: 2 dozen
Ingredients
Filling:
  • ½ cup cream of rice mixed with ½ packet of achote powder*
  • 2 cups of chicken broth (you can use water but will have to season with salt)
  • ½ onion, minced
  • 3 cloves garlic, minced
  • ½ cup chopped chicken or imitation crab meat
  • black pepper to taste
  • hot pepper (optional)
Crust:
  • 2 cups masa harina
  • 1 packet achote powder*
  • ½ cup corn starch
  • ½ teaspoon salt
  • 3 teaspoons oil
  • 1½ - 1¾ cups chicken broth or water (if using water, increase salt to 2 teaspoons) - warm
*If you don't use achote powder, just make sure you soak achote seeds in the broth or water for color.
Instructions
For the filling:
  1. Saute onions and garlic in a large pot. Cook till onion becomes transparent. Add chicken and saute for about 2 minutes.
  2. Add chicken broth or water. Remember, if you use water you'll have to season it with salt (to taste). Bring to a boil.
  3. Using a whisk, gradually add the cream of rice. Keep stirring so that there are no lumps. Bring heat to medium and cook for about 3-4 minutes.
  4. Add hot pepper (as hot as you want it) and then remove from heat.
  5. Completely cool before filling the shells.
For the crust:
  1. Mix masa harina, corn starch, salt and achote powder in a bowl. Add oil and broth or water to the flour mixture. Kneed with hands until dough is pliable.
  2. Roll dough into 1 inch balls. Use a tortilla press to flatten to form a circle. Be sure that you press the dough between 2 sheets of wax paper.
  3. Fill the bottom half of the circle with the cooled filling. Fold over the top of the dough to meet the bottom and press to seal the edges.
  4. Deep fry until nice and crispy. The trick is to fry at a very low heat. I like to set my dial at the 4th interval, right below the middle. If you fry it at high heat it will burn and the crust will not be crunchy but stale.
Enjoy!


Print Friendly, PDF & Email

Siopao

Siopao is a favorite snack on Guam that is of Chinese (Cha Siu Bao, or Chinese BBQ Pork Buns) or Philippine origin (Siopao Asado).  The Philippine version of these buns are normally steamed, while the Chinese version of these delicious snacks are also baked.

You can prepare siopao COMPLETELY from scratch, but there are a couple of shortcuts I take to make the preparation quicker and easier.  I do make the dough from scratch, but I save a whole lot of time by using leftover pulled pork from my Hawaiian Pulled Pork recipe.  Unless you are feeding a large crowd, you will most certainly have enough pulled pork leftover to make siopao (I use a 9-10 pound pork shoulder to make my pulled pork).  All I do is add a few more ingredients to the pulled pork to turn it into a sweet pork filling for my siopao. 

Give my recipe a try.  I think you’ll like it. 🙂

Pork Siopao

Siopao - 16   Siopao - 18

Dough:

  • A doubled batch of my yeast donuts dough recipe (find it here)

Filling:

  • About 4 cups leftover Hawaiian Pulled Pork (find my recipe here)
  • NOTE:  To make chicken siopao, use shredded cooked chicken (I like to use a rotisserie chicken) instead of pulled pork
  • 1 tablespoon chopped garlic
  • 1/4 cup sugar
  • 1/4 cup soy sauce
  • 2 tablespoons oyster sauce
  • 1 tablespoon hoisin sauce
  • 1/4 cup water mixed with 2 tablespoons corn starch
  • Optional:  6 hard boiled eggs, quartered (so you have 24 pieces of boiled eggs)

Materials:

  • Parchment paper, cut into 3-inch squares, 24-36 pieces (amount depends on the size of your siopao)
  • Steamer basket or pot

Directions:

Make my Hawaiian Pulled Pork recipe, then set aside about 4 cups of pulled pork.  Enjoy the rest of the pulled pork for your dinner.  In the next day or two, used the leftover pulled pork to make siopao. 🙂

IMG_4657

Prepare the dough using my yeast donuts recipe.  Ensure you double all of the ingredients required for my yeast donuts recipe.  Follow the directions up to step number 5 (letting the dough rise).

Siopao - 05

While you’re waiting for the dough to rise, prepare the filling.  Place the leftover pulled pork into a medium sized pot.  Add the garlic, sugar, soy sauce, oyster sauce and hoisin sauce.  Bring the mixture to a boil then quickly stir in the water-corn starch mixture.  Return the mixture to a boil, cooking until it thickens.  Set the pork filling aside to cool (I placed the filling into a bowl and placed it in the freezer to cool while my dough was rising).

Siopao - 07

Cut the dough into 24 pieces (for larger siopao) or 36 pieces (for smaller siopao).  I made 24 larger pieces that measured about 4 inches in diameter after it was cooked/steamed.

Siopao - 10

Use a rolling pin to flatten each piece of dough into a circle about 6 inches in diameter.  Keep the center of the circle slightly thicker than the edge.  Place two tablespoons of filling in the middle of the dough.  Optional:  Add a piece of egg on top of the filling.

Siopao - 11

Pull the dough up around the filling, pinching to seal.  The sealed part becomes the bottom of the siopao.

Siopao - 12

Place the siopao on a piece of parchment paper, pinched side down.  Continue filling the remaining pieces of dough.

Siopao - 13

After all the dough is filled, place in your steamer basket.  I can fit about 6 large siopao in mine.  Don’t let the siopao touch the sides of the steamer, and leave about an inch or two between each one.  Place a clean kitchen towel between the steamer pot and the lid to prevent the condensation from dripping back onto the siopao.  Steam for 20 minutes then remove from the steamer to cool.

Siopao - 14

Enjoy while still warm. 🙂

Siopao - 20   Siopao - 19

Freeze any uneaten (and already steamed) siopao.  To reheat, defrost the siopao in the refrigerator then reheat in the microwave for 30 seconds.

Print Friendly, PDF & Email

Berry-licious Blueberry Muffins

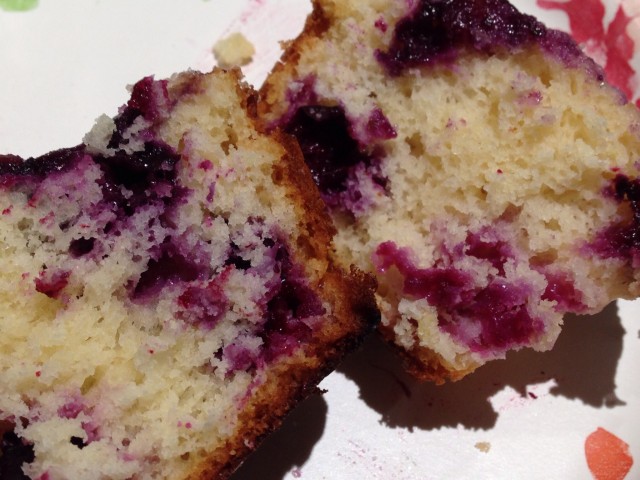
I love blueberry muffins, but I absolutely hate the packaged blueberry muffin mix which turns the batter a bluish-purple after you add canned (and tiny) blueberries.

Blueberries are my favorite when it comes to fruit muffins, but you can easily make this into a loaded berry muffin by mixing you favorite berries — a combination of raspberries, cranberries, and of course, blueberries are delicious too.

I use frozen berries for this recipe. While fresh berries are delicious, frozen sweet berries are always available and “in season.”

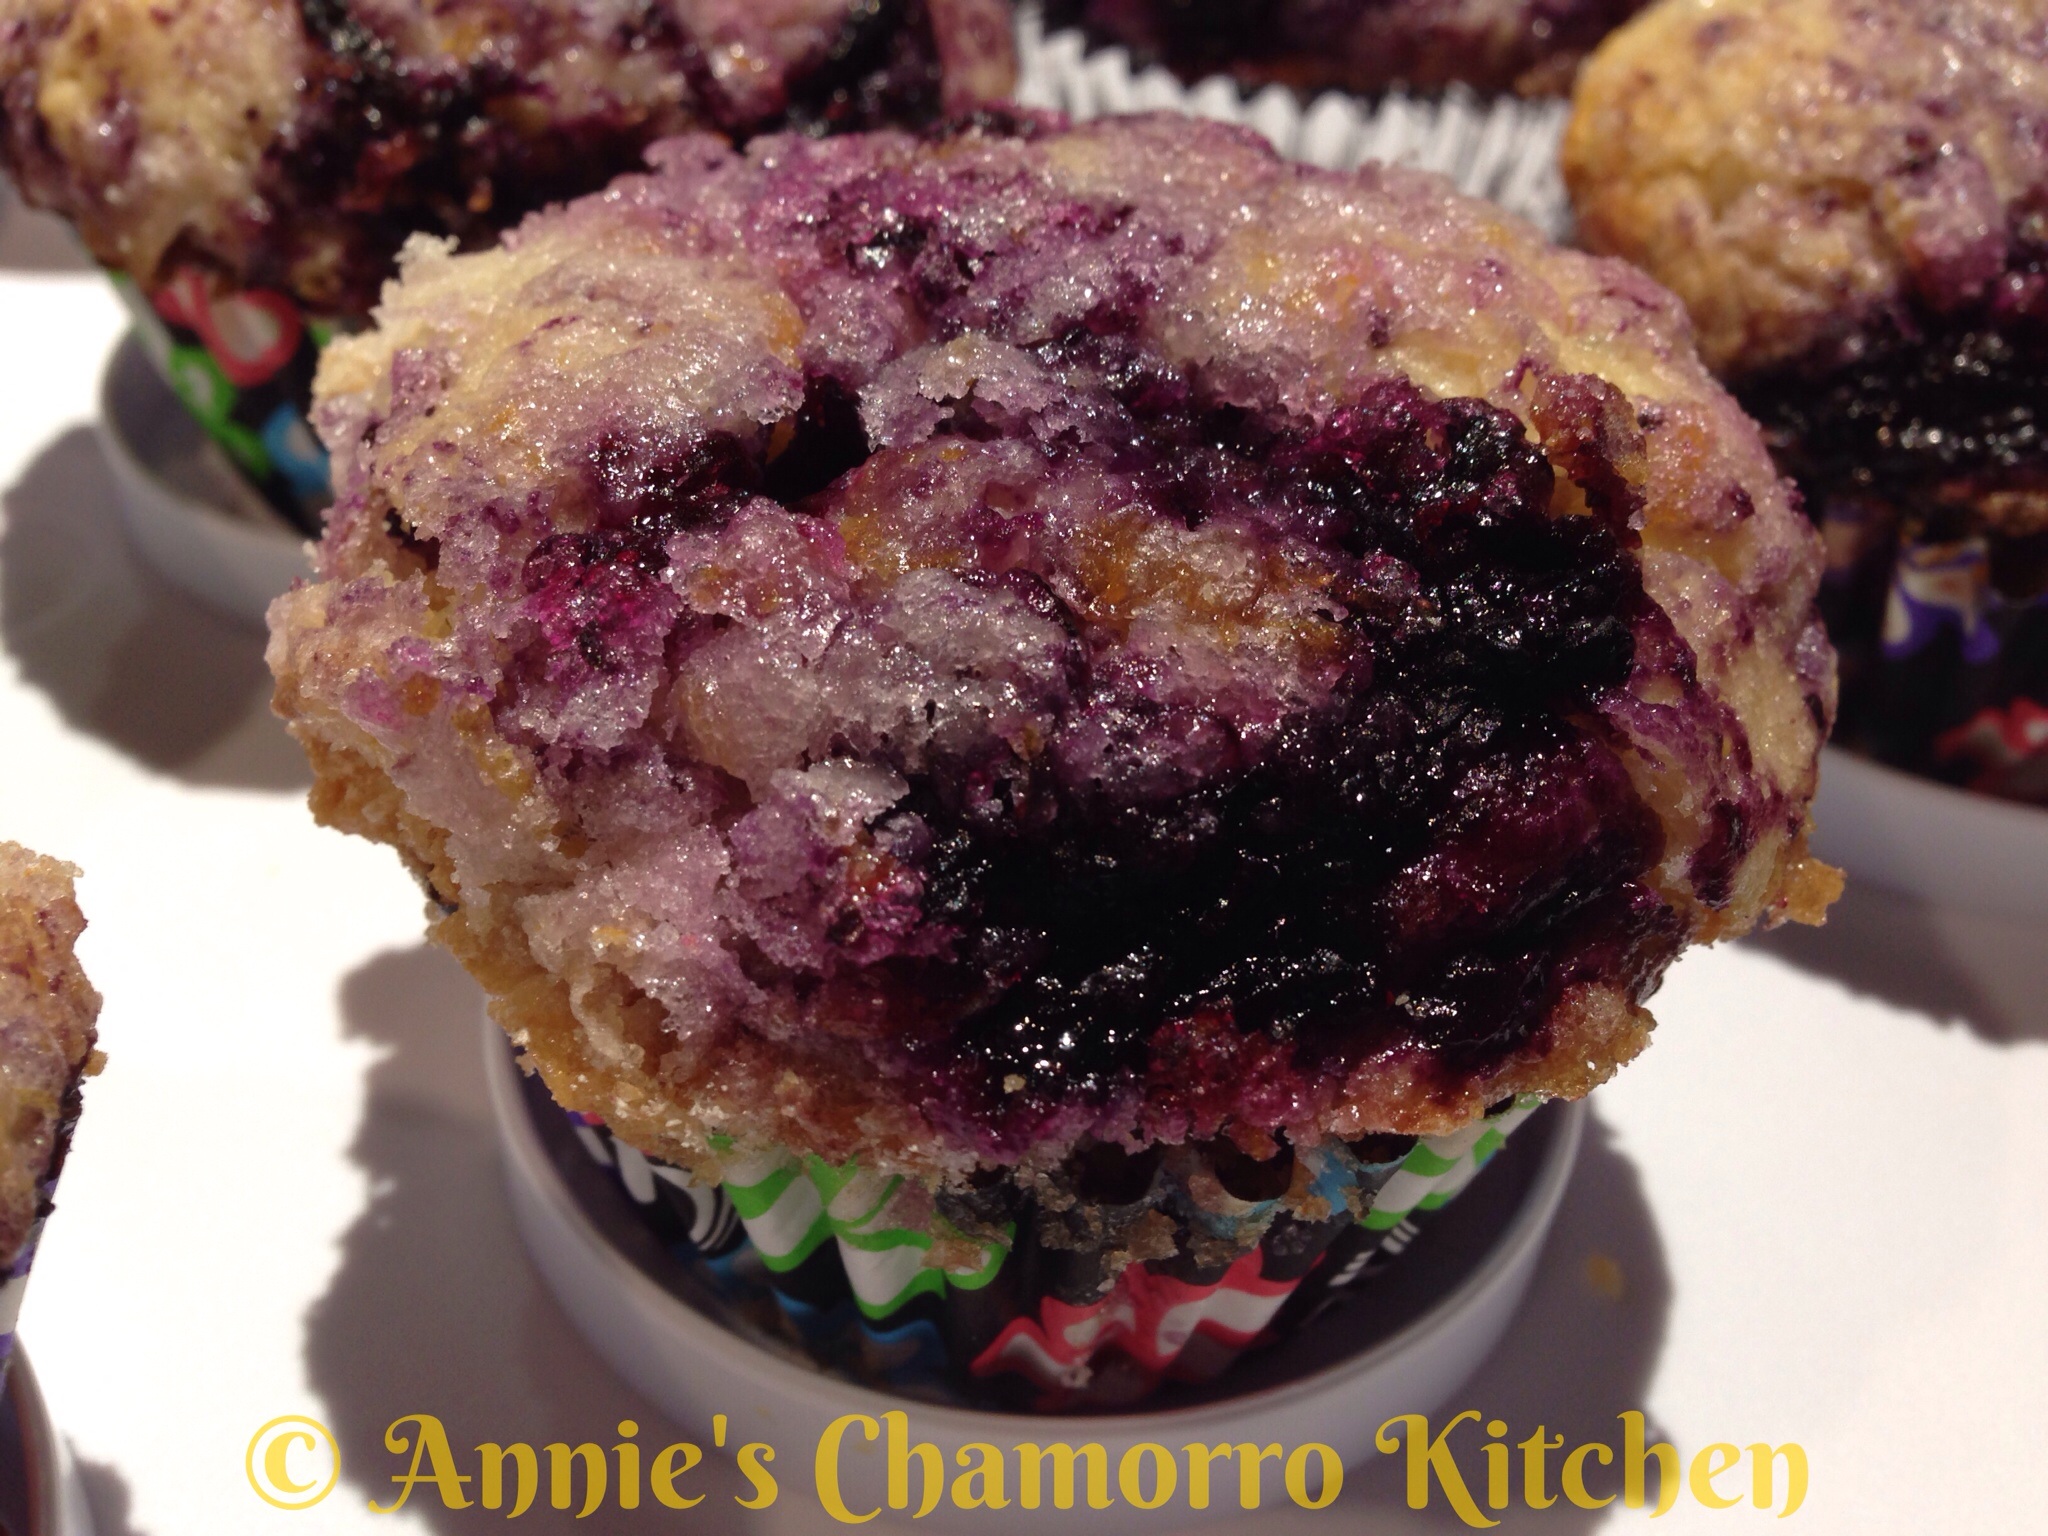
I also top these muffins with a sweet mixture of lemon zest and sugar. The perfumy, aromatic oils in the lemon zest gives these muffins a hint of lemon flavor that compliments the berries so well.

This recipe makes a little more than a dozen muffins. You’ll have just a bit of batter leftover after filing the muffin tin. Make mini loaves or use a second muffin tin to use up the extra batter.

Berry-licious Blueberry Muffins

image

Ingredients for the Muffins:

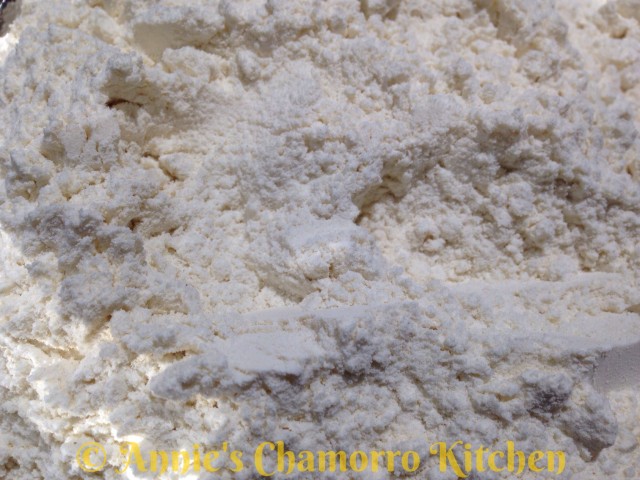
  • 2 1/2 cups all-purpose flour
  • 2 1/2 teaspoons baking powder
  • 1 teaspoon salt
  • 2 tablespoons dry Buttermilk Powder (you can find this in the baking section of your grocery store)
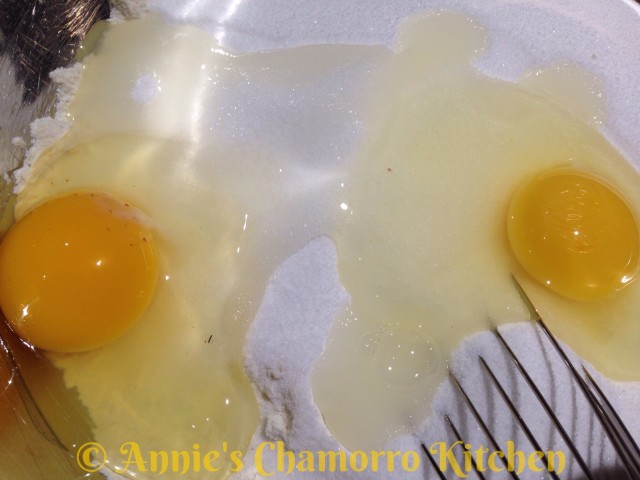
  • 2 large eggs
  • 1 cup plus 2 tablespoons white, granulated sugar
  • 1 stick unsalted butter, melted
  • 1/4 cup vegetable oil
  • 1 cup water
  • 1 1/2 teaspoons vanilla extract
  • 2 cups frozen blueberries

Ingredients for the Topping:

  • 1 cup frozen blueberries plus 1 teaspoon white, granulated sugar
  • The zest of one large lemon plus 1/2 cup white, granulated sugar

Directions:

Make the toppings:

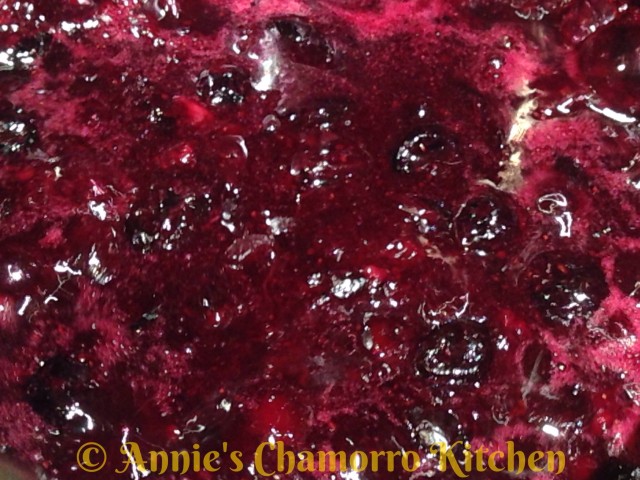
1. Make a blueberry sauce by placing 1 cup of frozen blueberries with 1 teaspoon sugar in a small saucepan over medium heat. Bring the berries to a simmer. As the berries begin to soften, use the back of a cooking spoon to slightly mash the berries. Cook the mixture for about 5-8 minutes, or until the sauce reduces and thickens. Remove the pan from the heat and set aside.

image

image

2. In a small bowl, mix the lemon zest and 1/2 cup sugar together. Set aside.

When you zest the lemon, make sure to get only the yellow lemon rind, not the white pith. After zesting the lemon, chop the zest into smaller pieces then mix with the sugar.

image

image

Mix the batter:

1. Pre-heat the oven to 425 degrees. Spray a muffin tin with baking spray or non-stick (butter flavored) cooking spray. Or, line each cup with a muffin liner.

2. In a large mixing bowl, mix together the dry ingredients (flour, baking powder, salt, buttermilk powder).

image

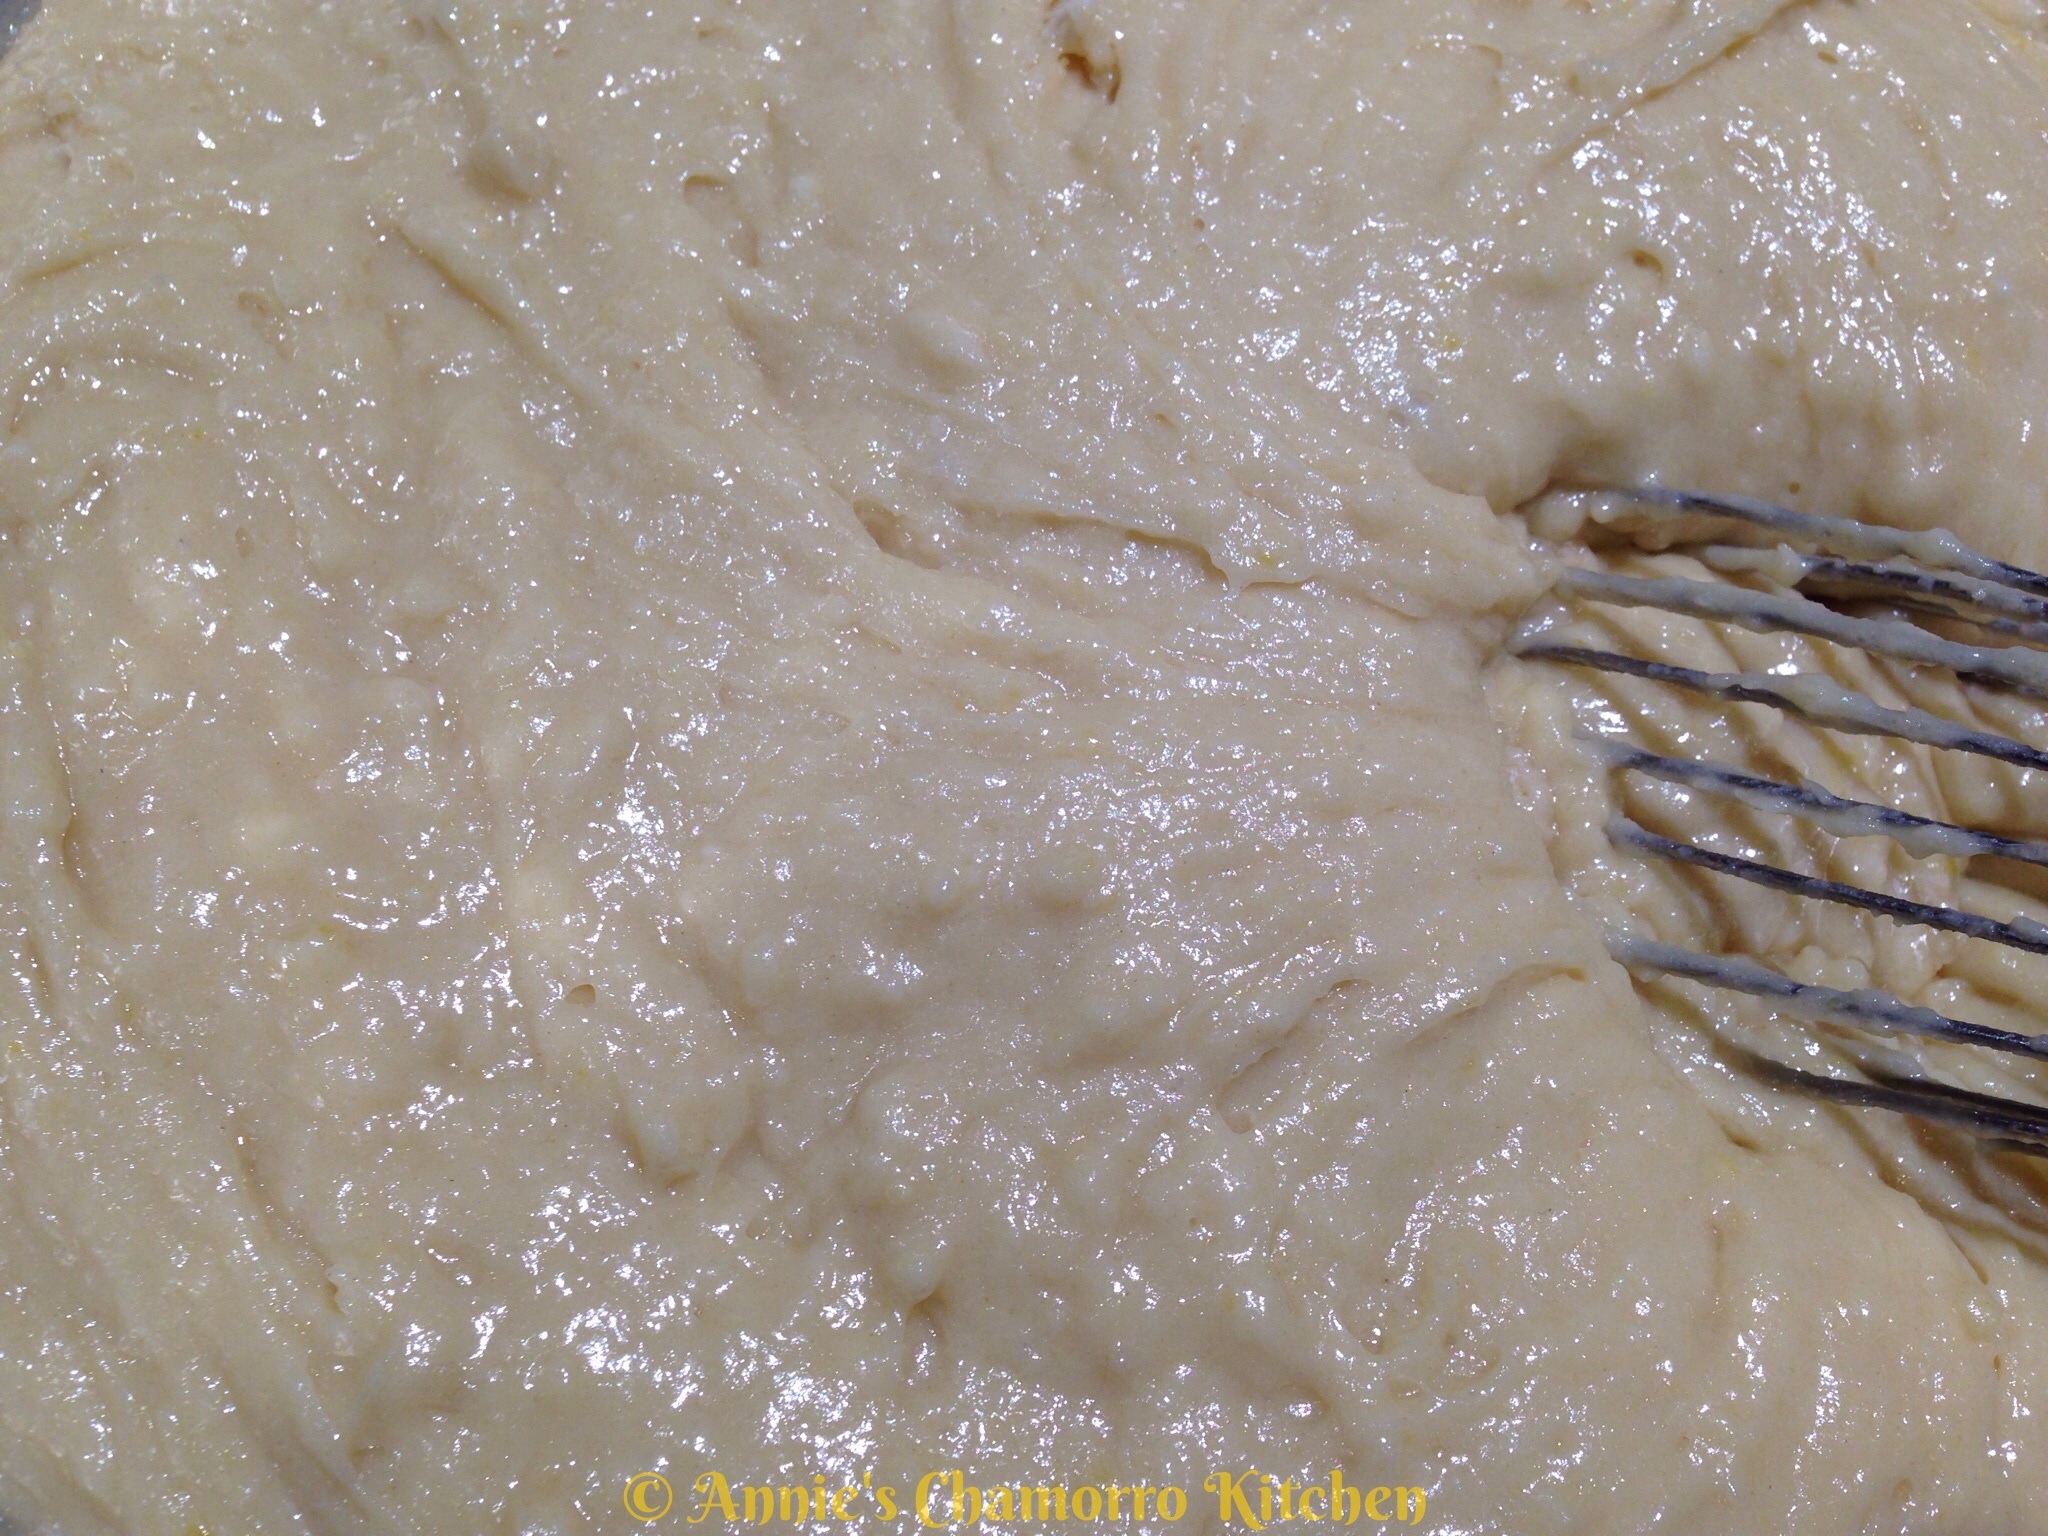
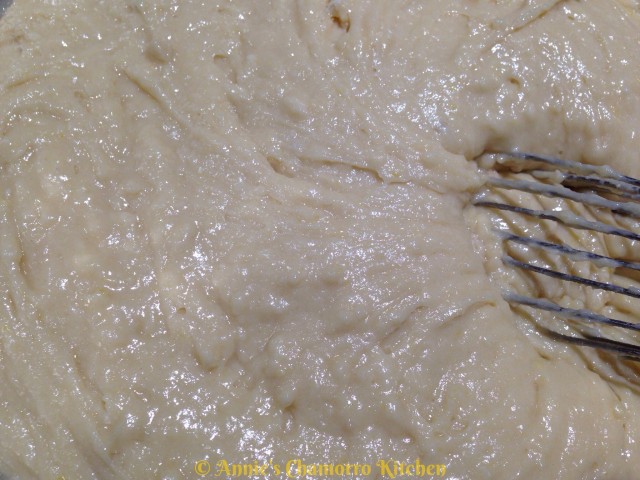
3. In another mixing bowl, place the eggs and sugar. Using a hand mixer on medium speed, beat the eggs and sugar until creamy. Mix in the butter, oil, water and vanilla extract.

image

4. Mix the wet ingredients with the dry ingredients, mixing only until the batter is moistened (a few lumps are okay). Do not overmix.

image

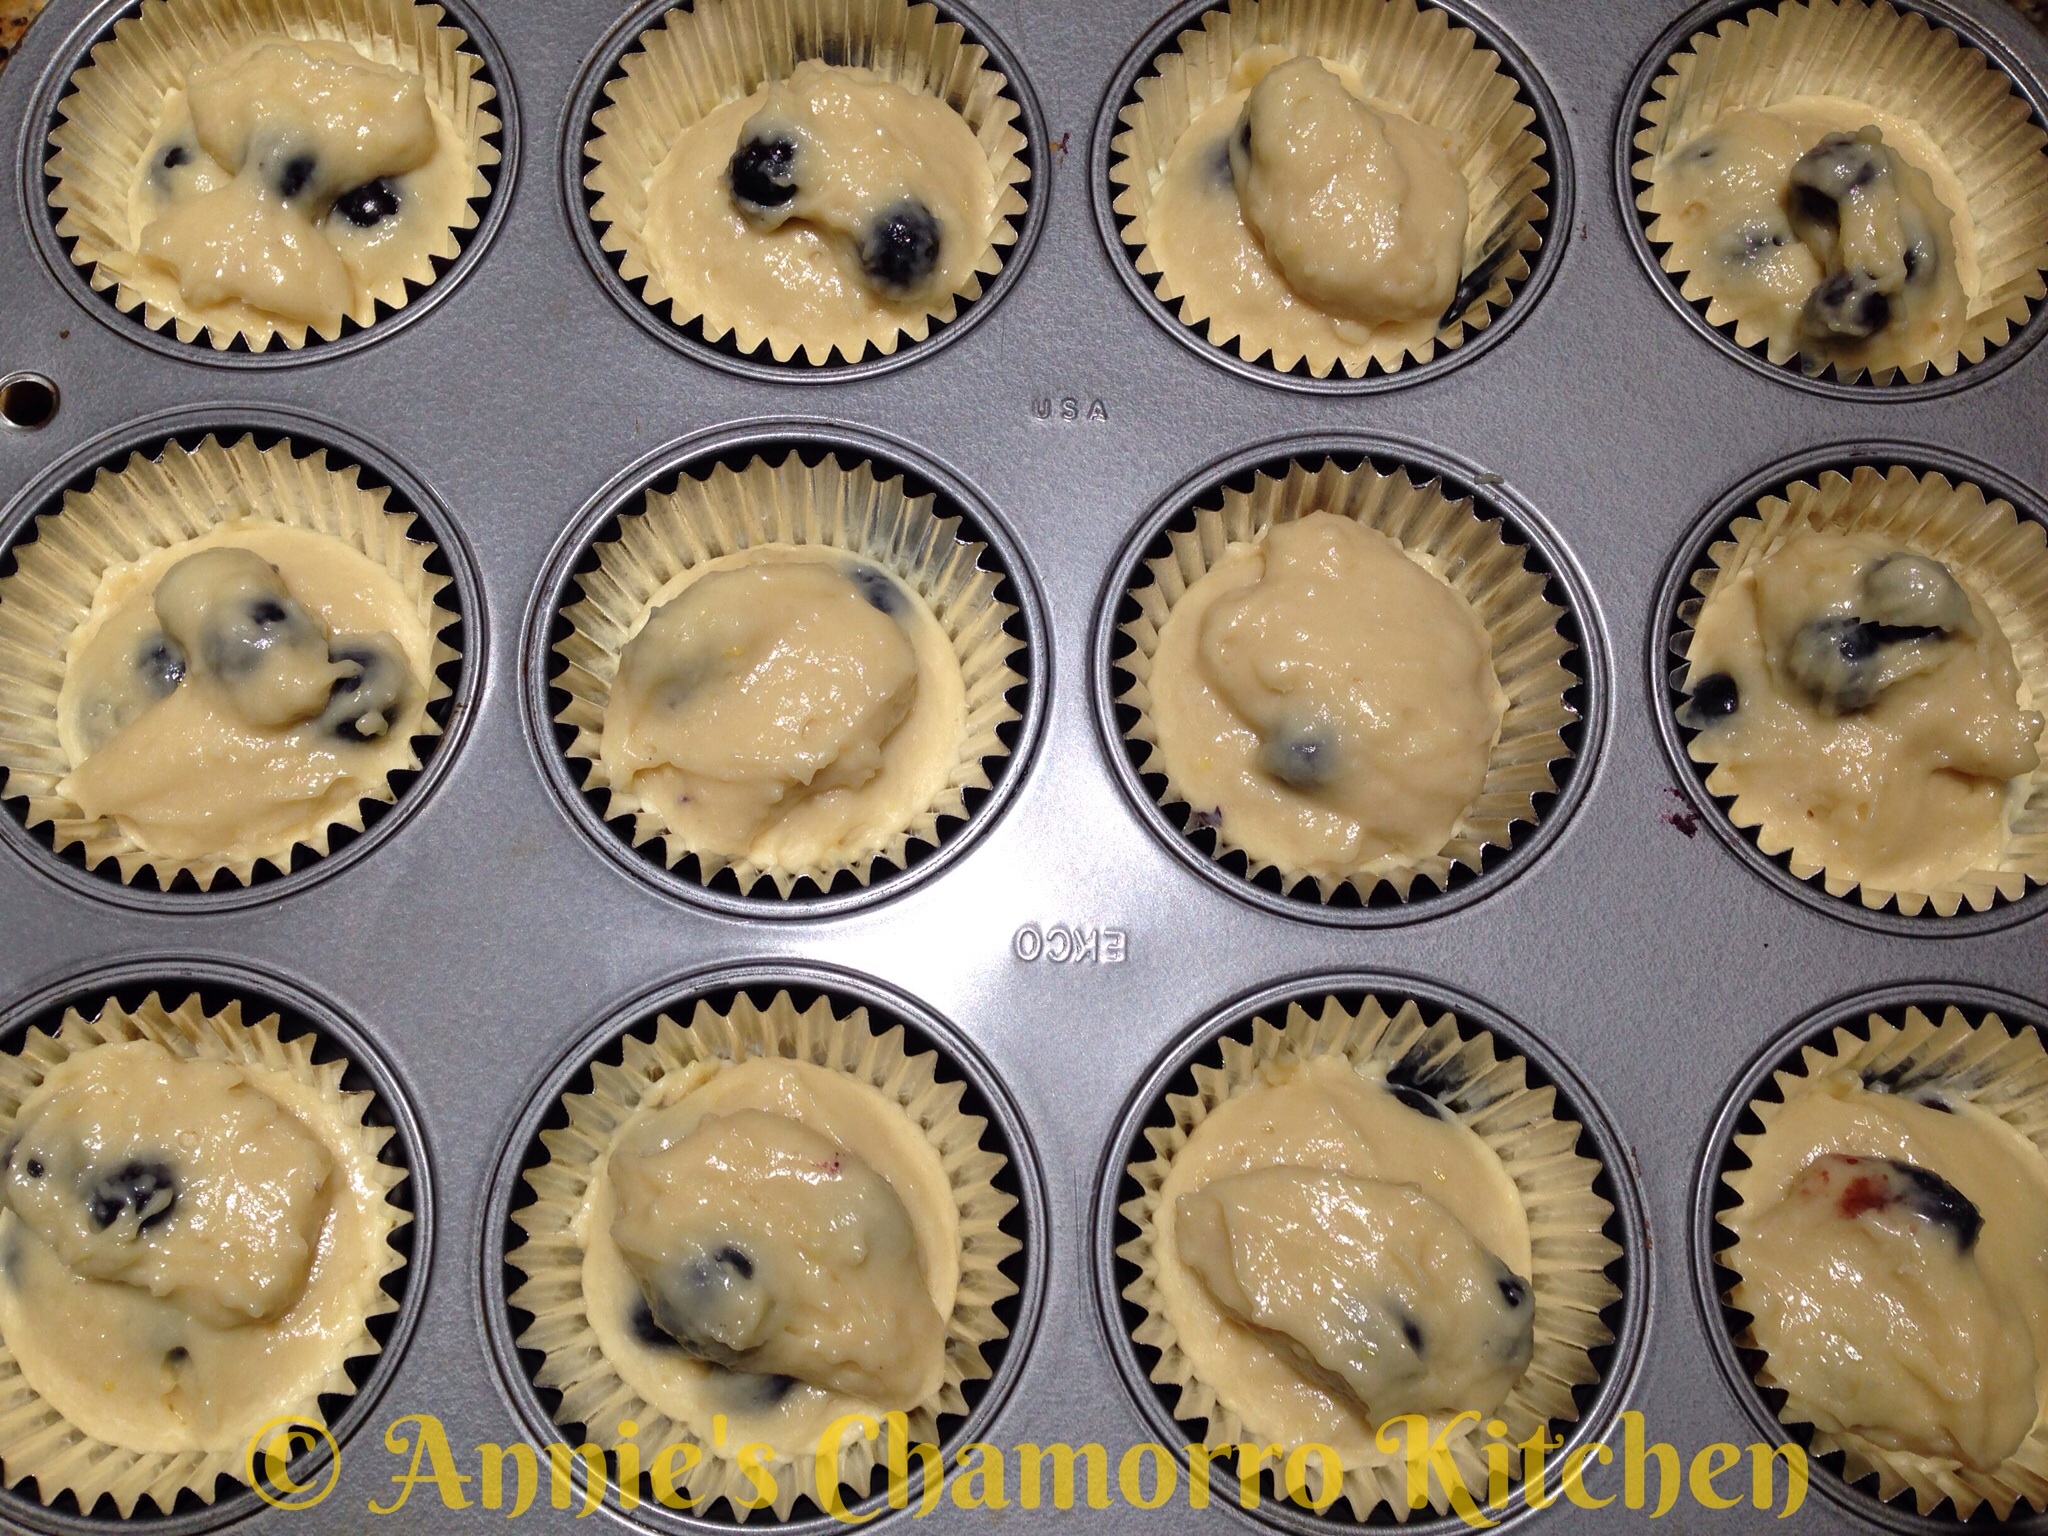
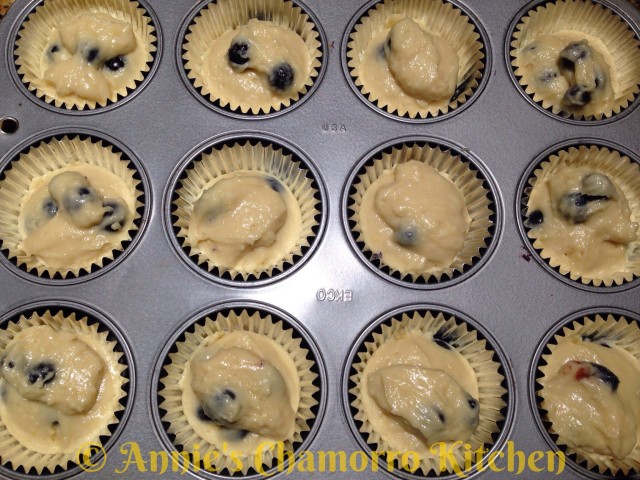
5. Fold in the blueberries.

image

image

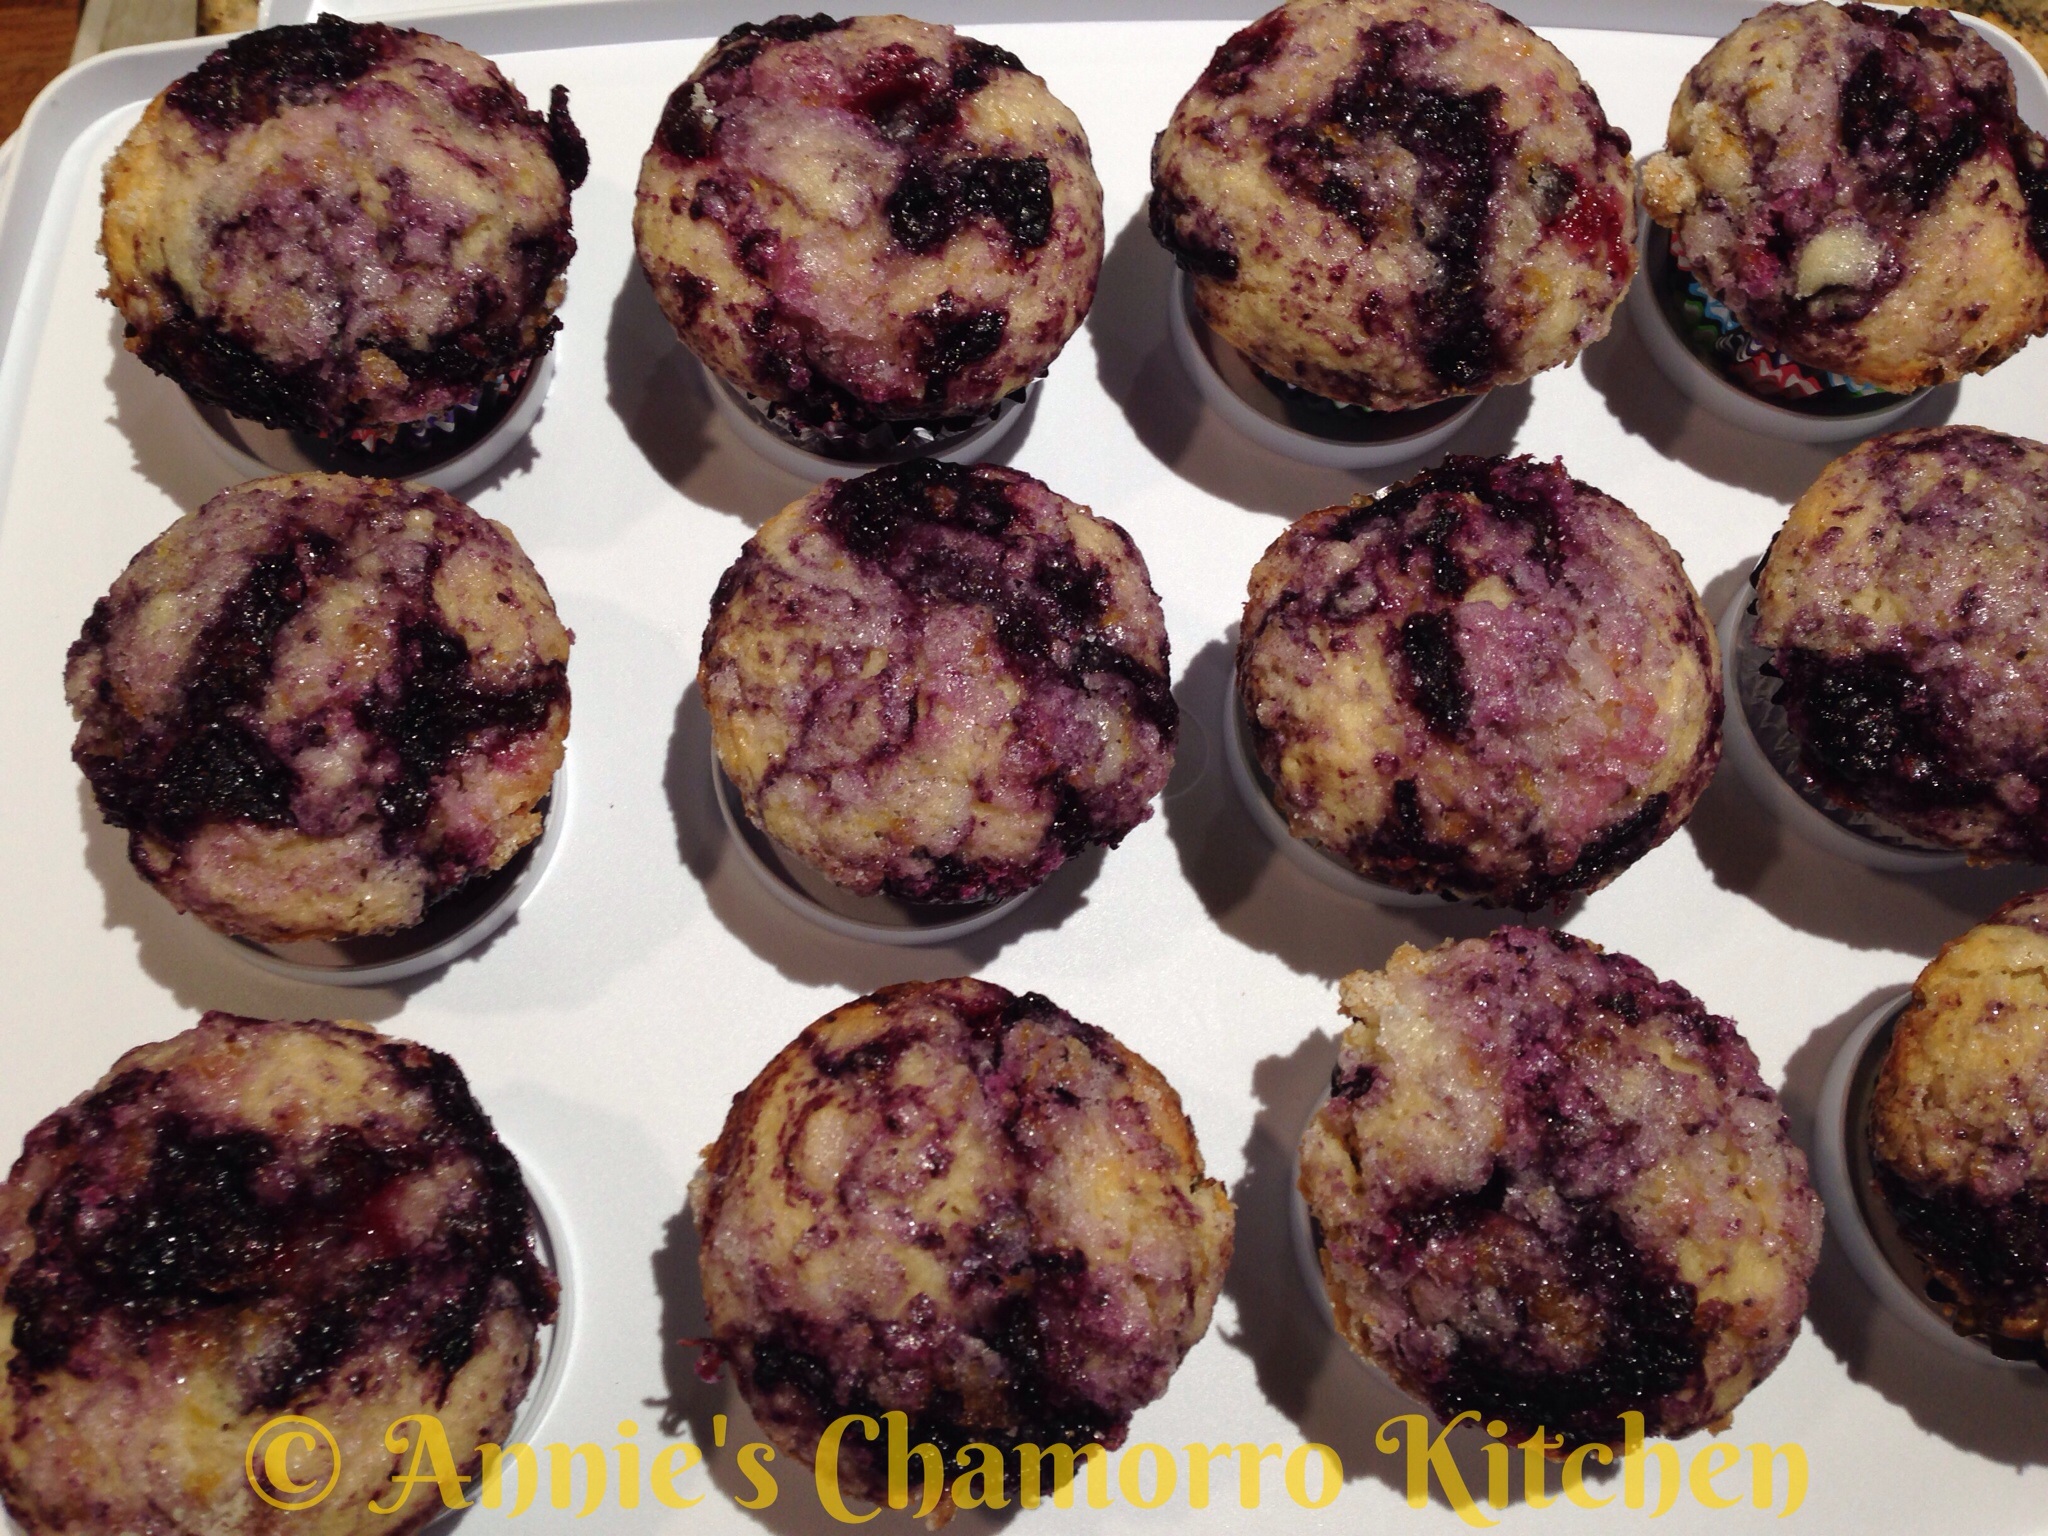
6. Fill each muffin cup 3/4 full. These muffins really rise high, so don’t overfill each muffin cup.

image

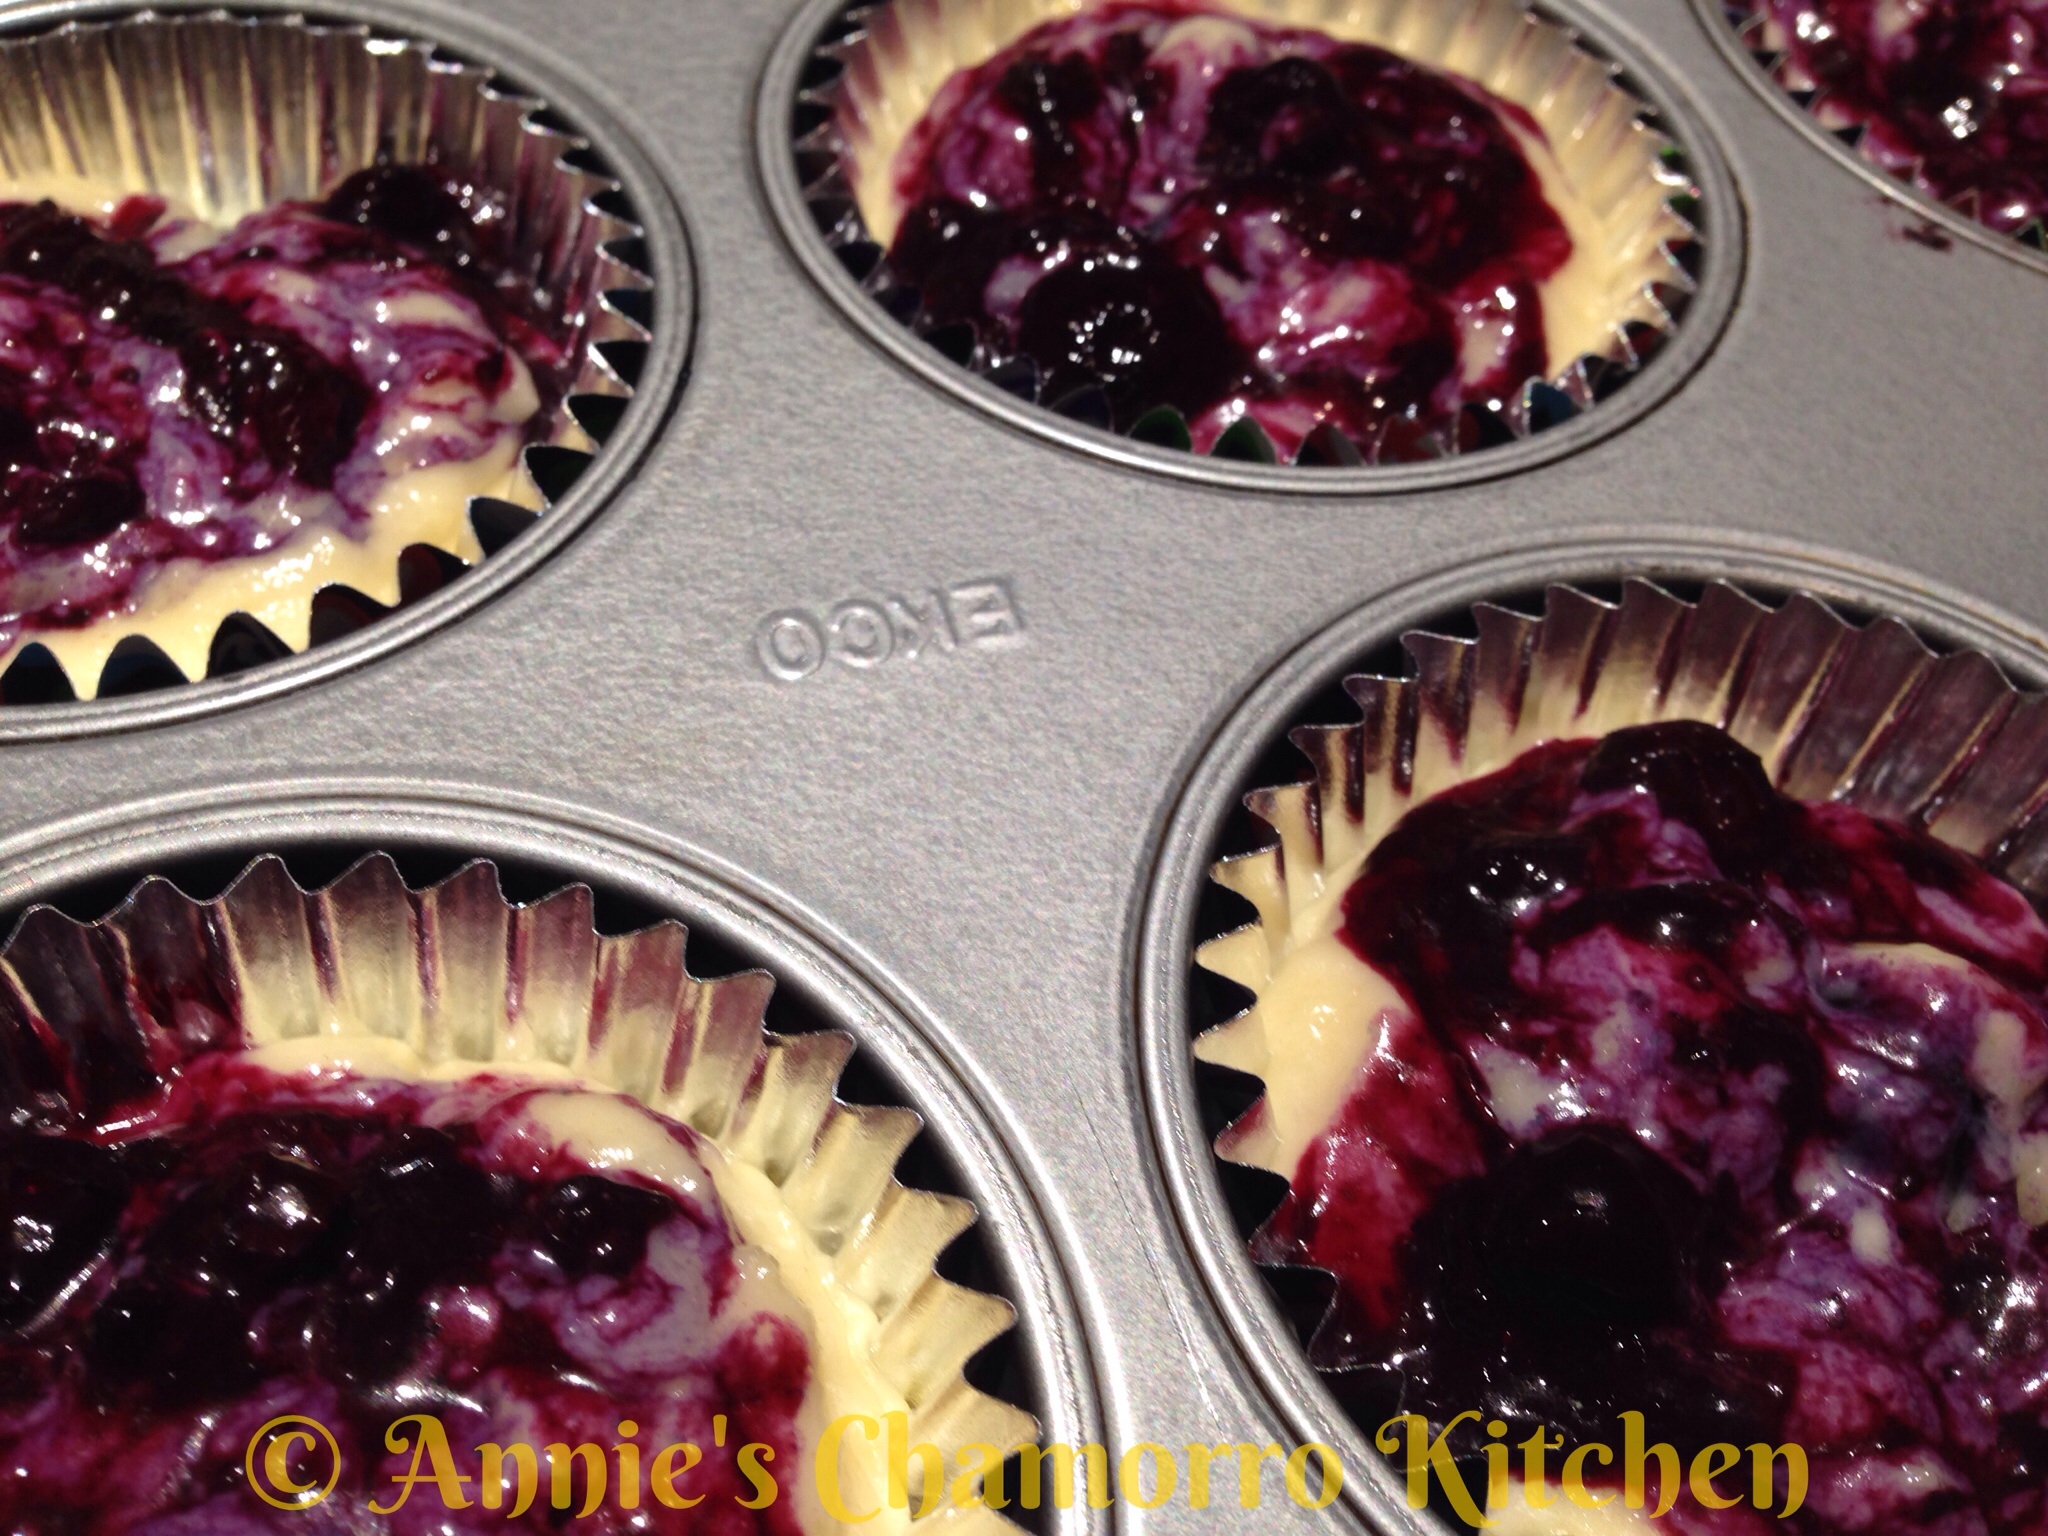
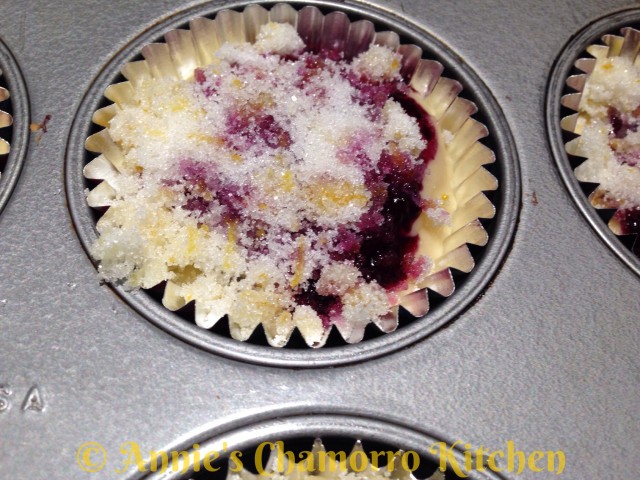
7. Place a heaping teaspoonful of the blueberry sauce on top of the batter in each muffin cup.

image

8. Using the handle of a spoon (a chopstick works really well here), swirl the blueberry sauce into the batter.

image

9. Evenly sprinkle the lemon-sugar mixture over each muffin.

image

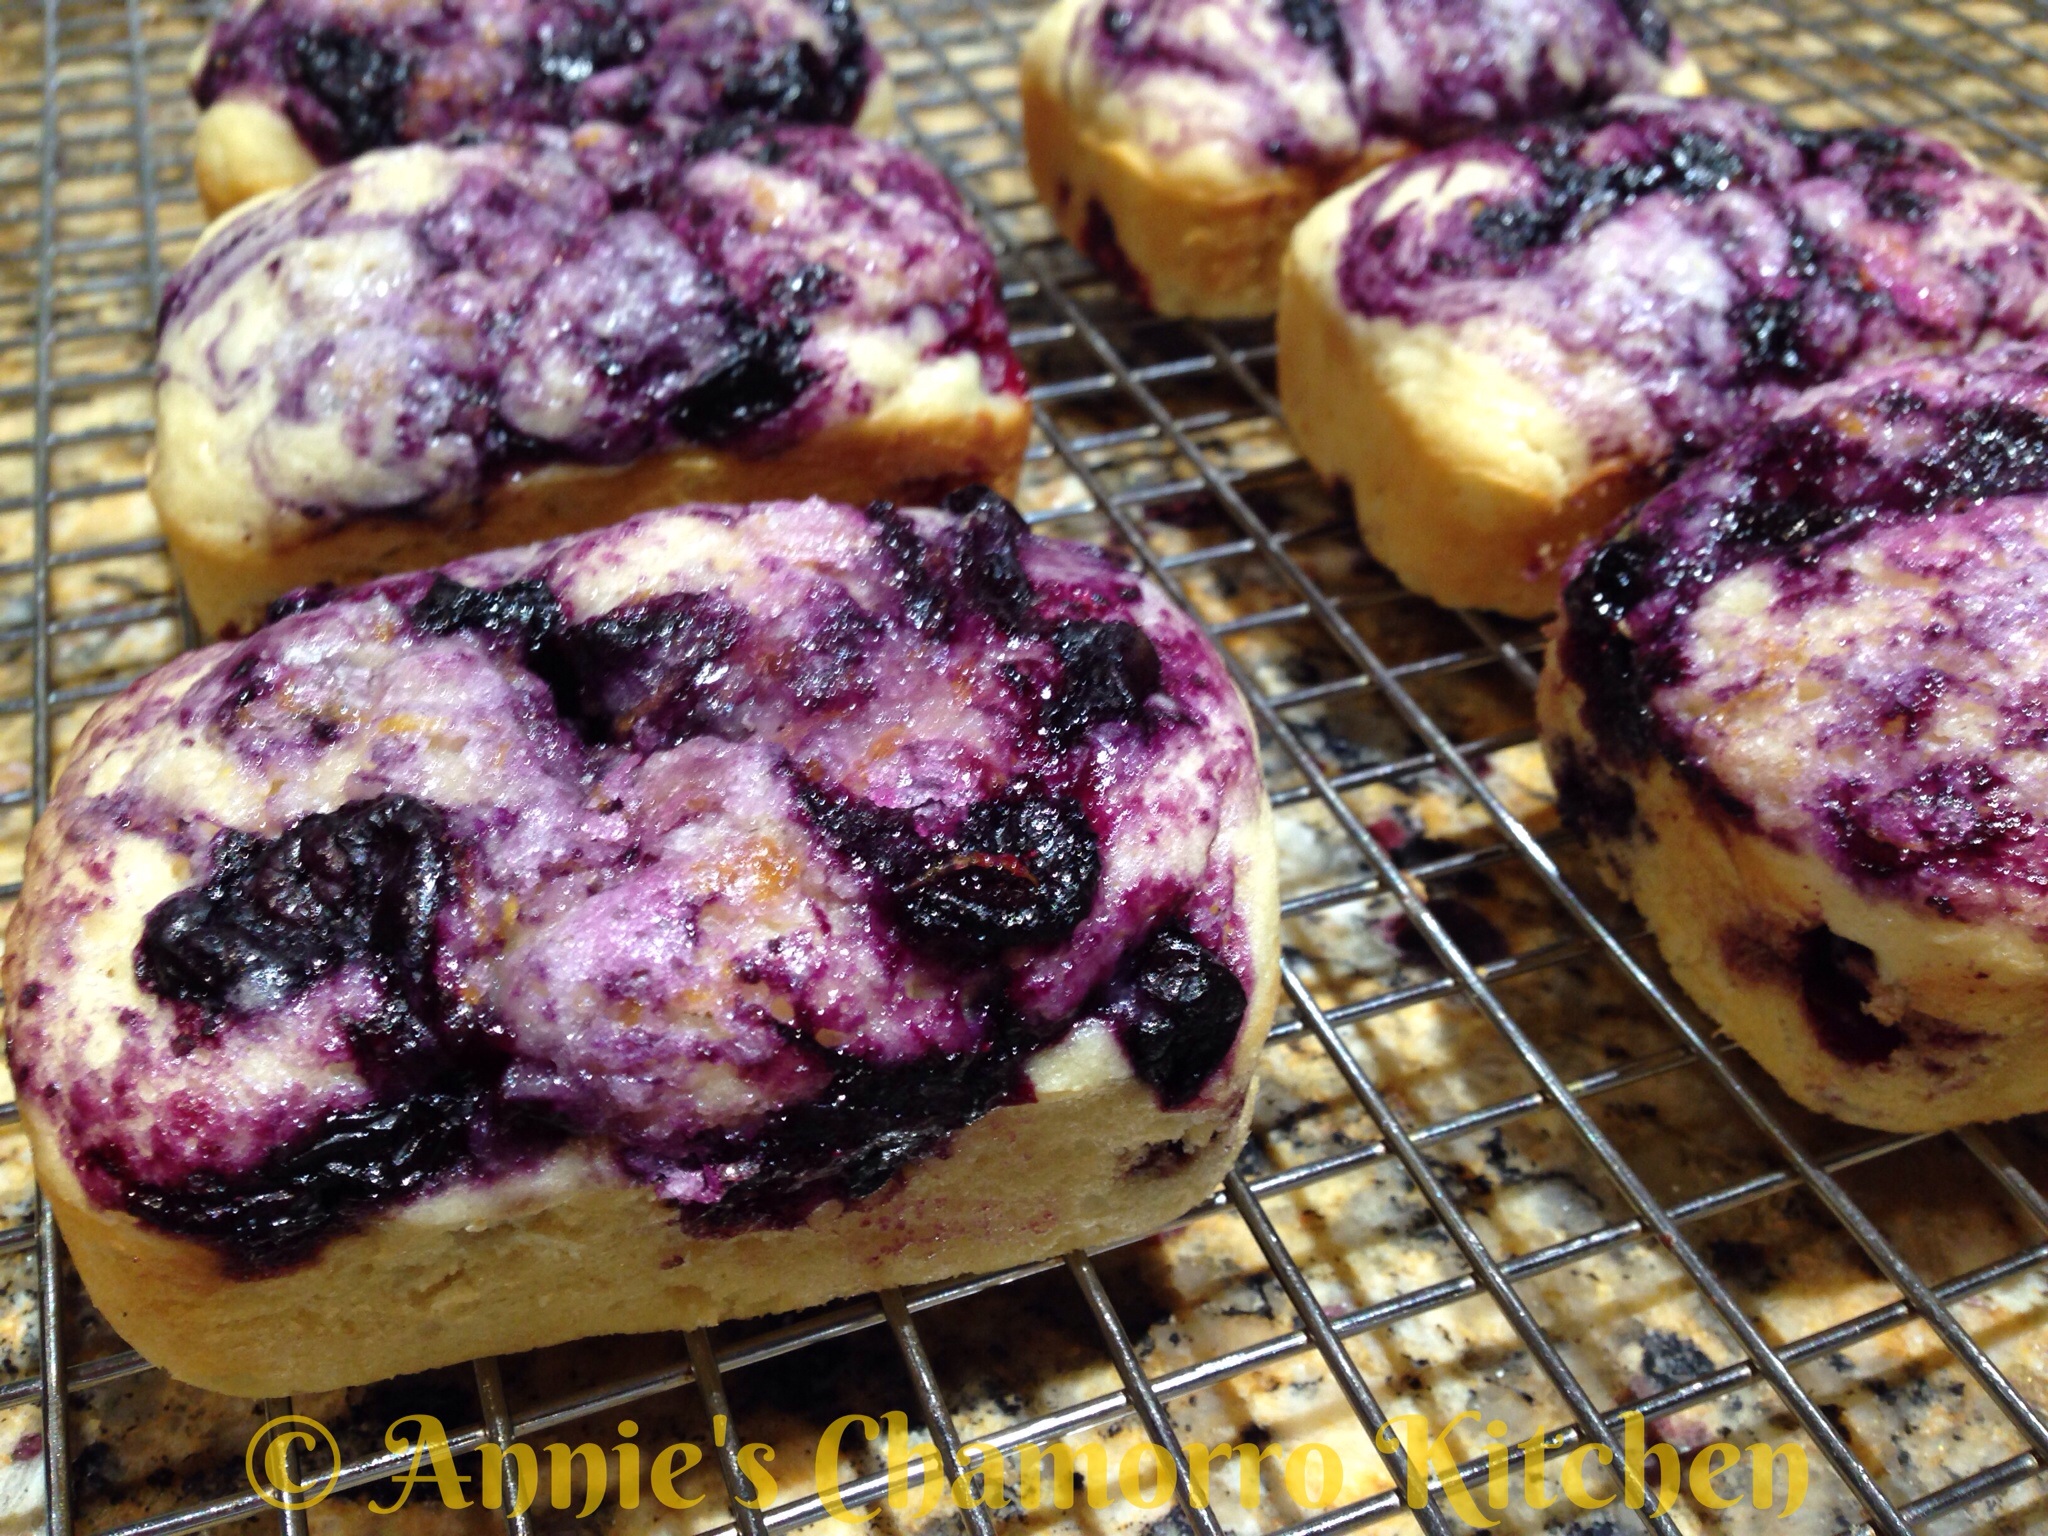
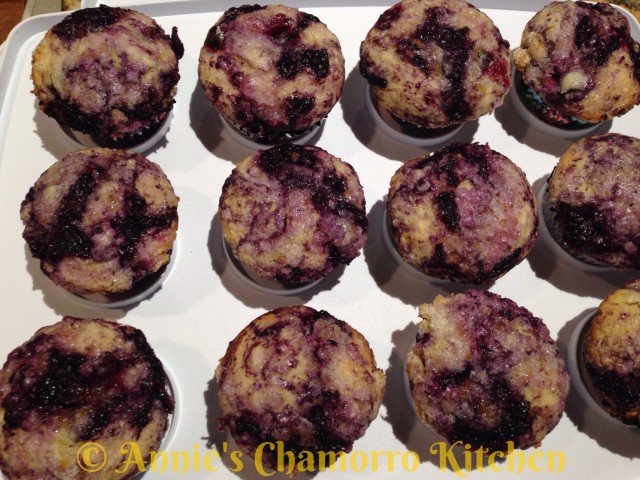
10. Bake at 425 degrees for 18-20 minutes or until golden brown. A toothpick inserted into the center should come out clean (a few crumbs sticking to the toothpick is okay). Let the muffins cool in the tin for 5 minutes then transfer to a wire rack to finish cooling.

image

If you have a mini loaf pan, you can make mini loaves with the extra muffin batter. You should have enough batter left (after filling the muffin tin) to make 3 mini loaves. I doubled this recipe so I made 6 mini loaves with the extra batter (after filling 2 muffin tins).

image

Serve and ENJOY!

image

image

Print Friendly, PDF & Email
« Older Entries Recent Entries »