Archive for Beef

Chamorro Bistek (or Bisteak)

Bistek (or Bisteak) is a favorite Chamorro dish.  The addition of achote (or annatto) gives a unique flavor, along with the tanginess of the added vinegar.  

image

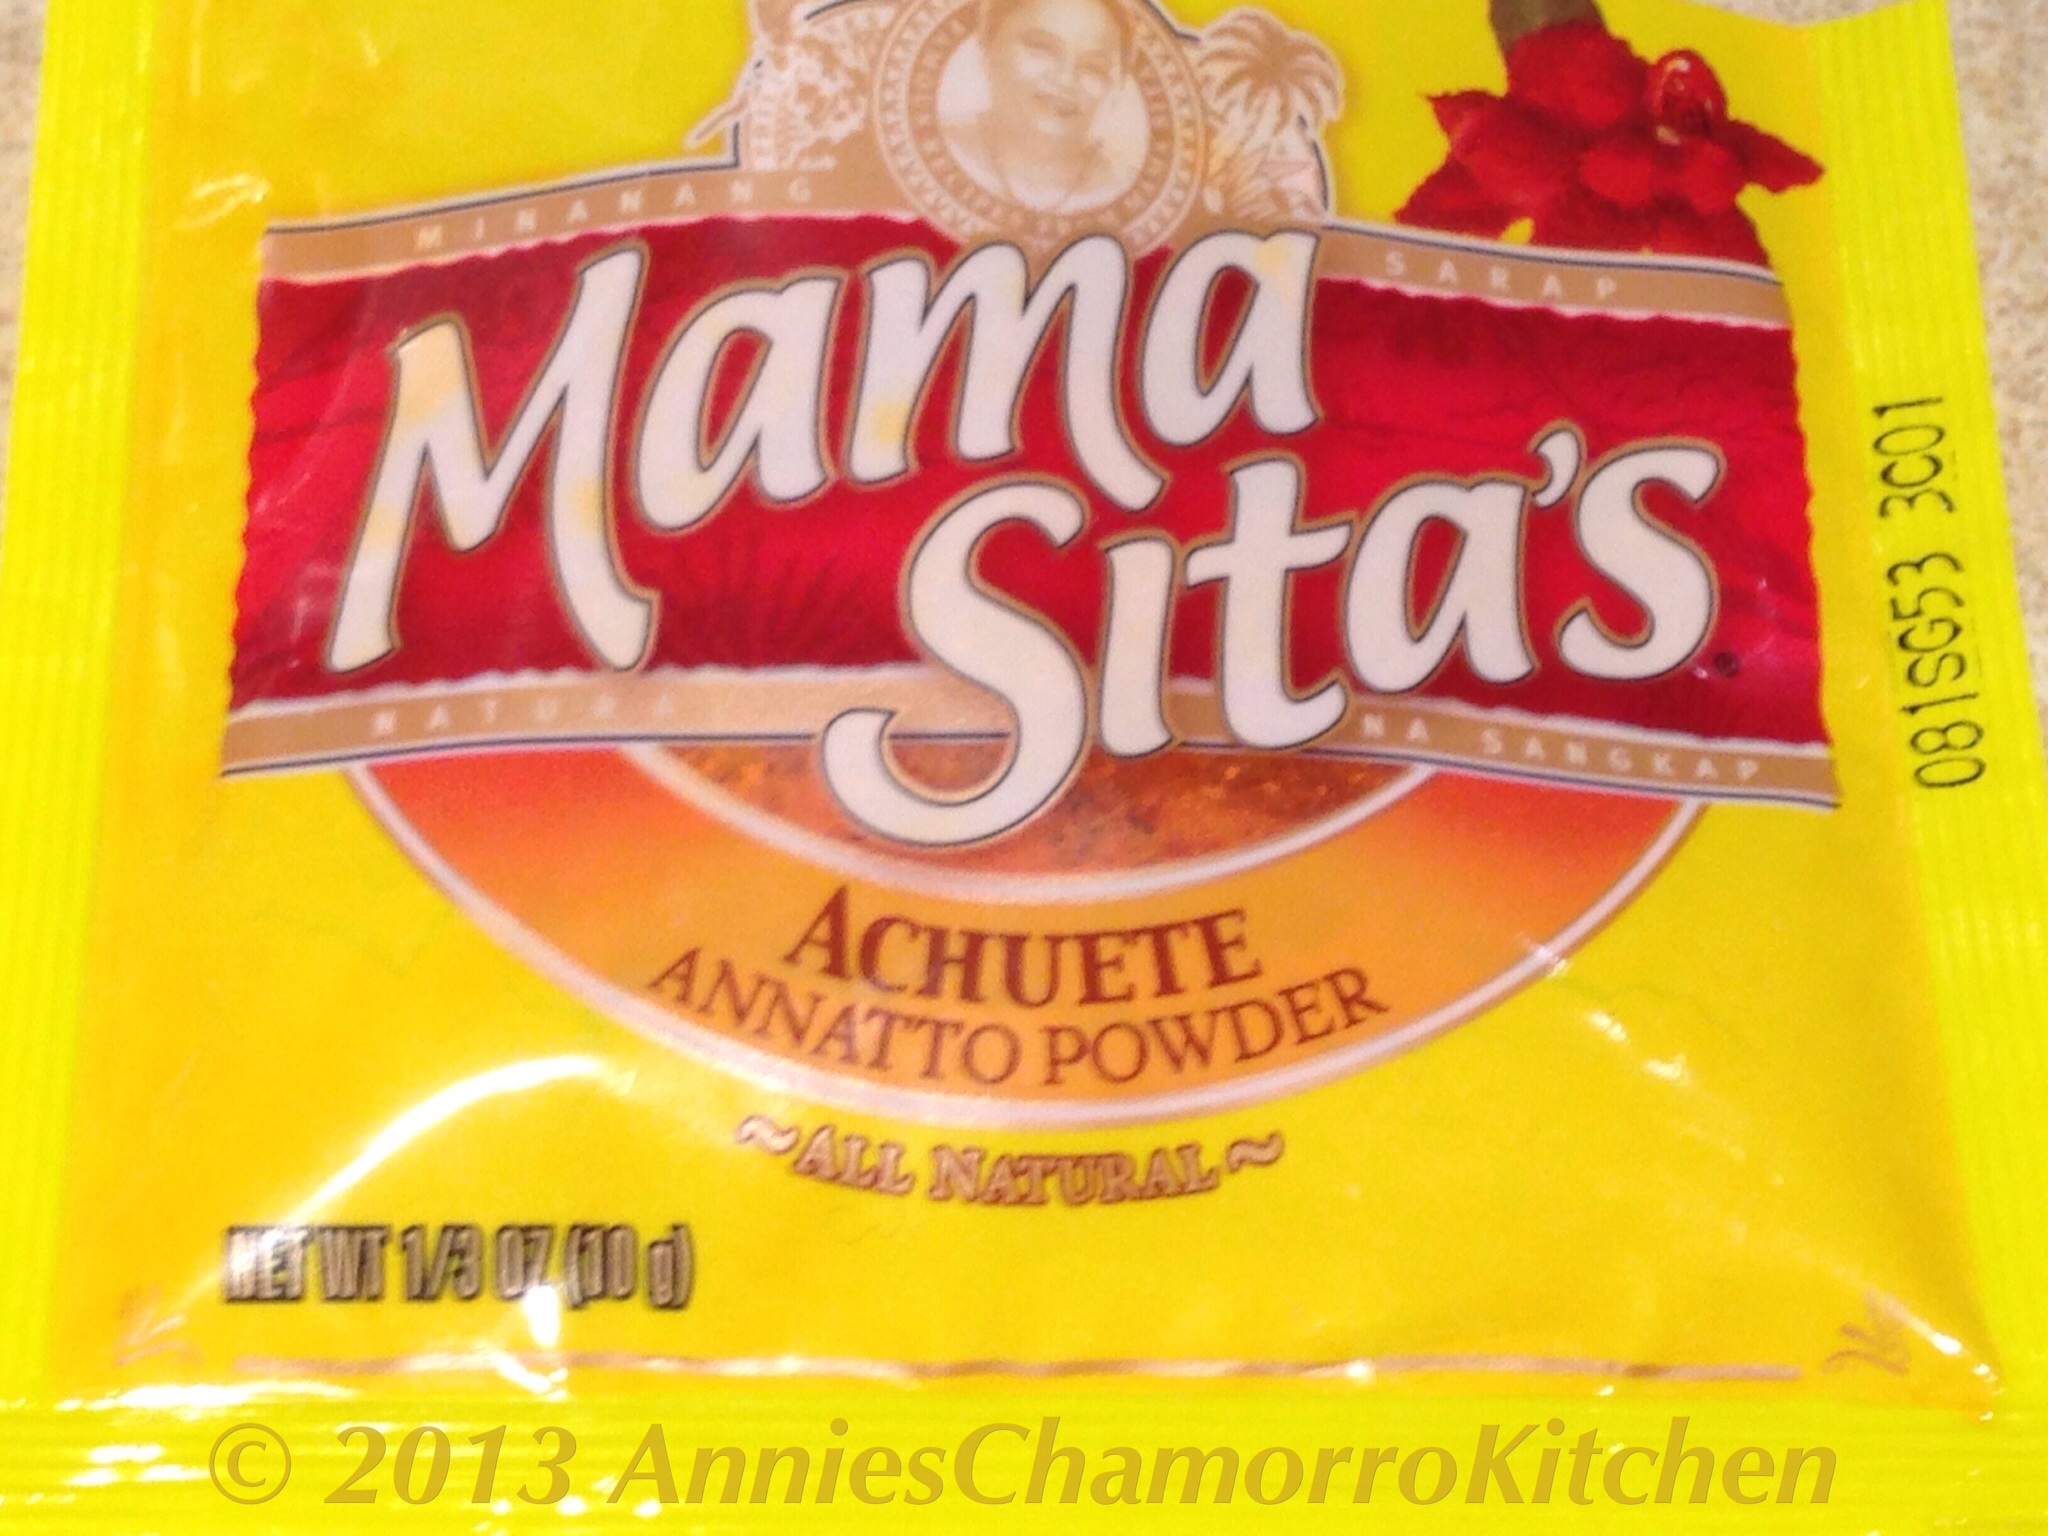
If you have it, I prefer using achote water made with fresh achote seeds.  Fresh is always best, but of course, using achote powder works quite well too.  This is what the packet of achote powder looks like.  As with the Sazon Goya seasonings, achote powder is another item that is commonly found in either the Asian aisle of most grocery stores.  If your local store doesn’t carry it, try looking for it in your local Asian supermarkets.


goya achote
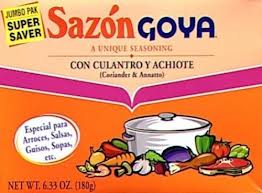
If you don’t have fresh achote seeds or achote powder, you can substitute with Sazón Goya seasoning that contains achote.  This is what the packaging looks like.  It’s a common item in the Hispanic aisle in most grocery stores.


This dish usually includes peas as a main ingredient.  Some think that if you DON’T add peas, it isn’t Bistek, but my family prefers this dish made WITHOUT peas.  We like using fresh or steamed green beans or sugar snap peas instead.  It’s all up to you, really.  With peas (or vegetables, for that matter) or without, it’s still a very tasty dish that is a must-add to your list of menu choices.

Scroll all the way to the bottom to find my recipe.  Give it a try.  I think you’ll like it.  🙂

Chamorro Bistek (or Bisteak)

image


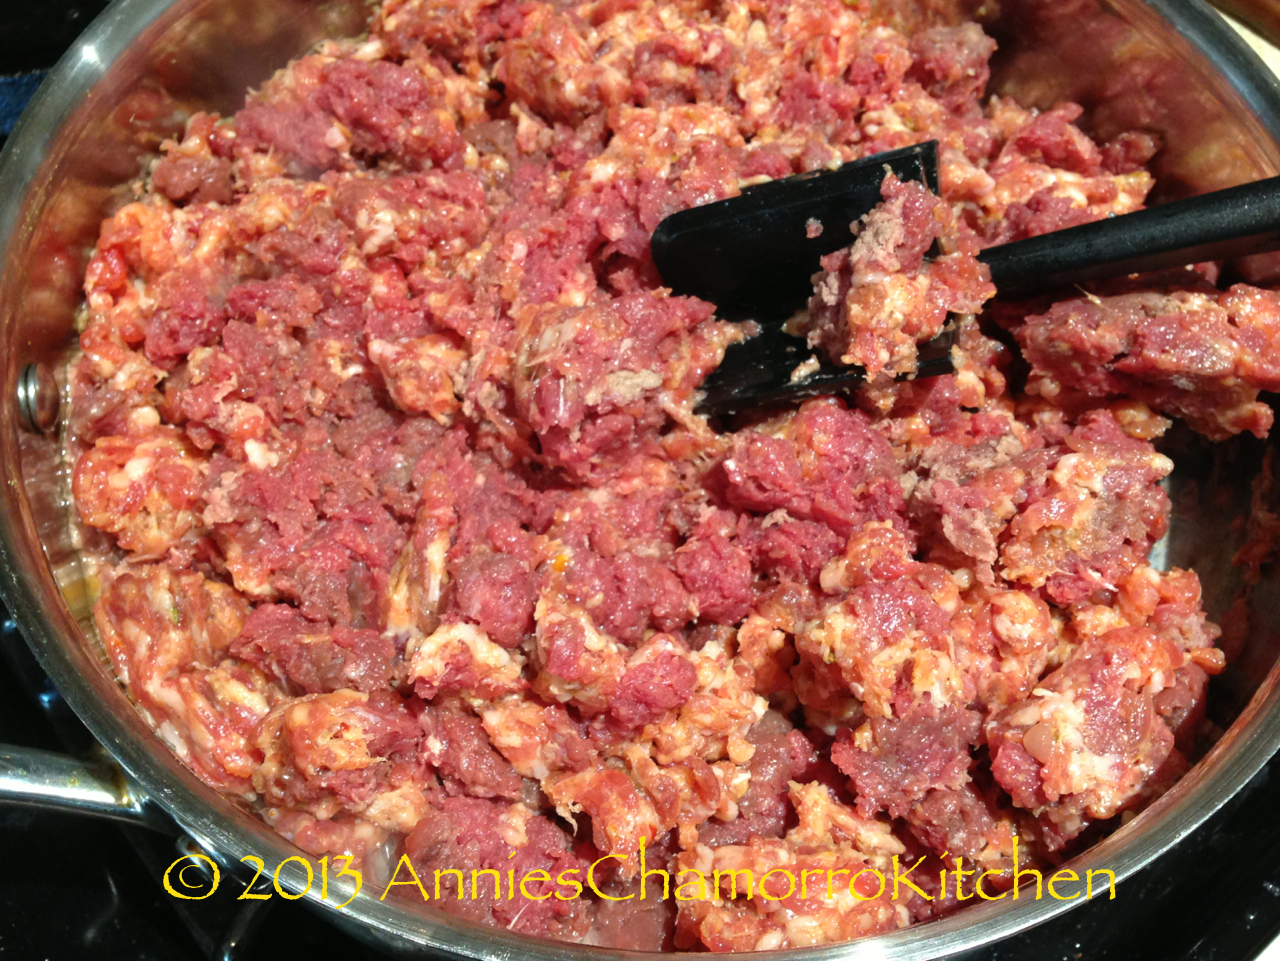
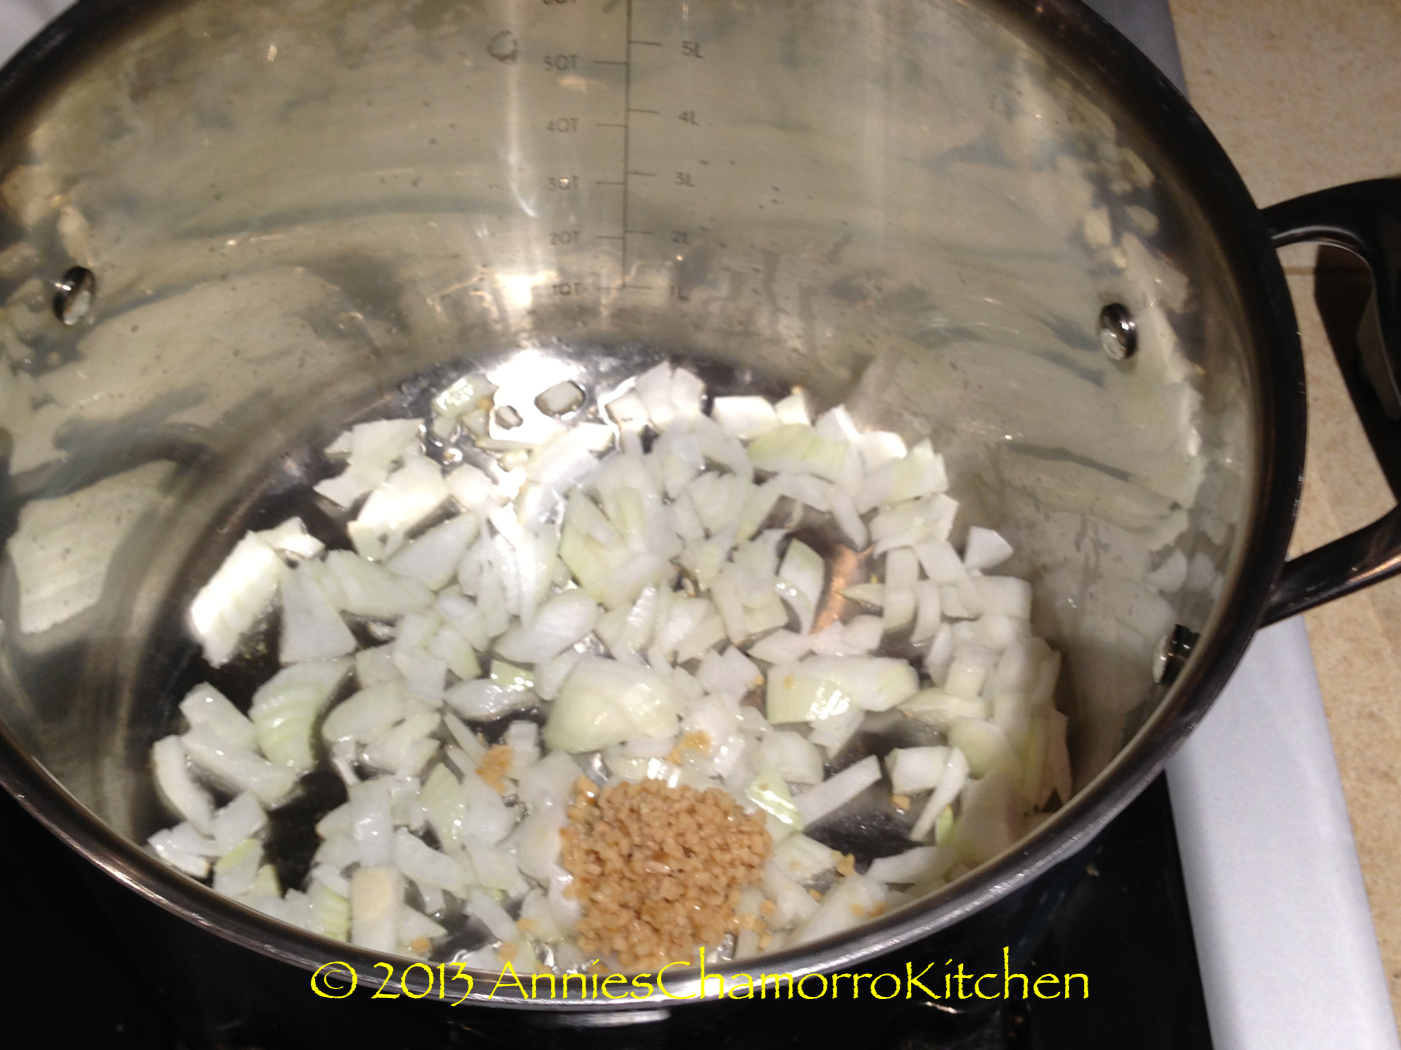
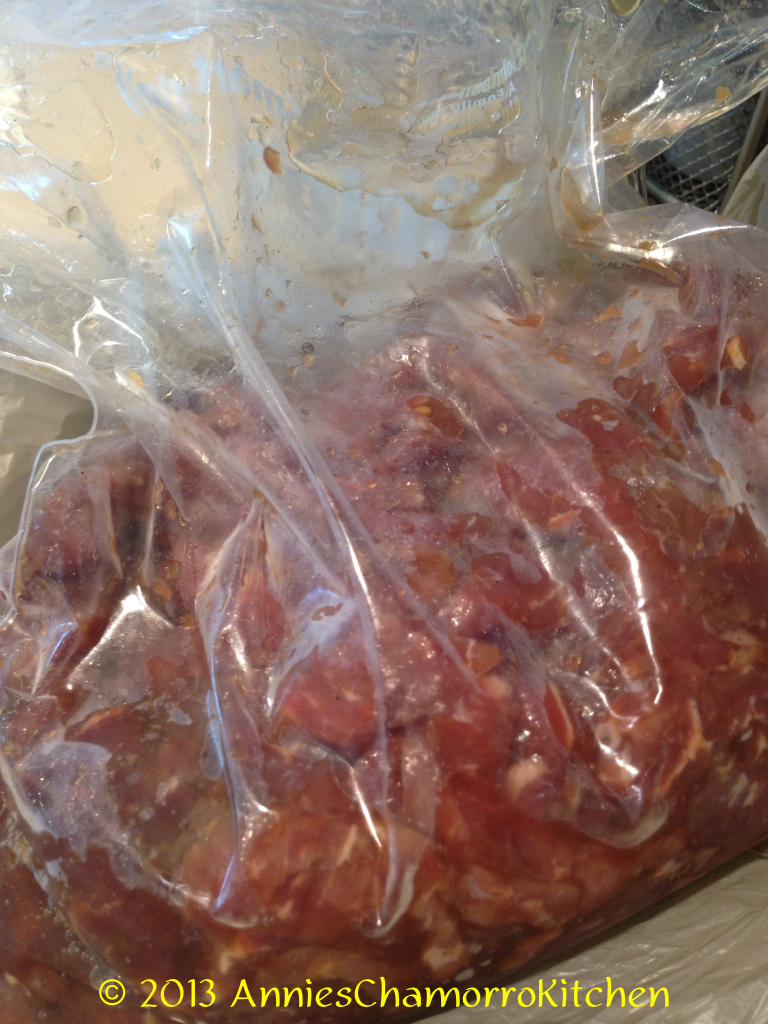
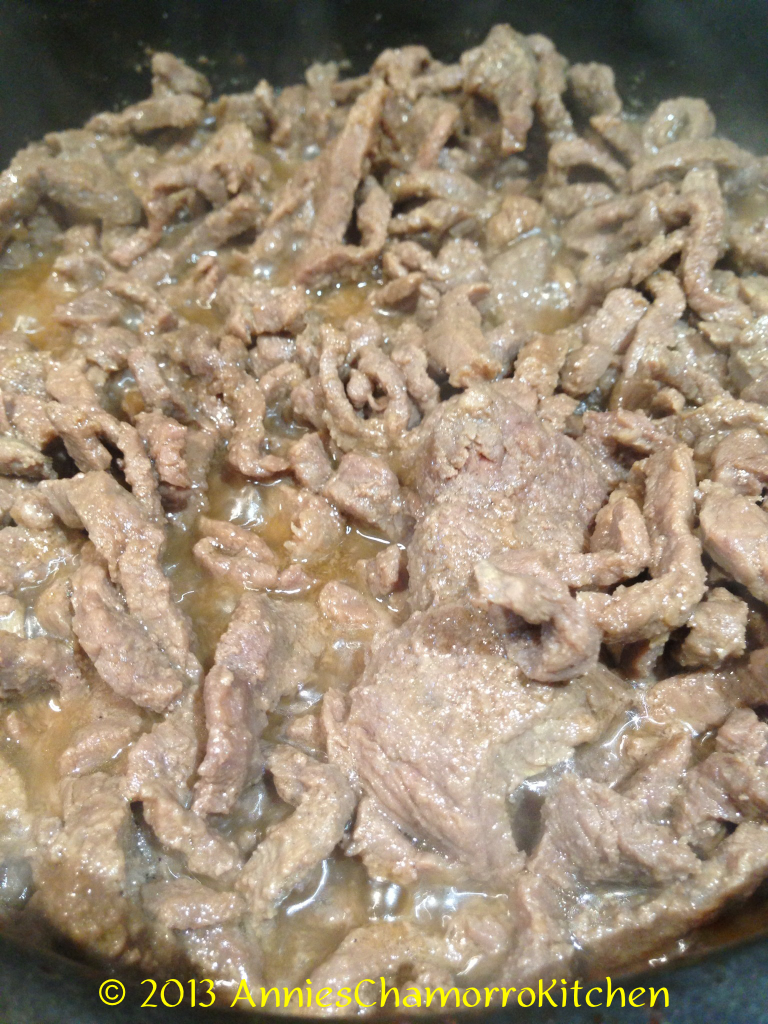
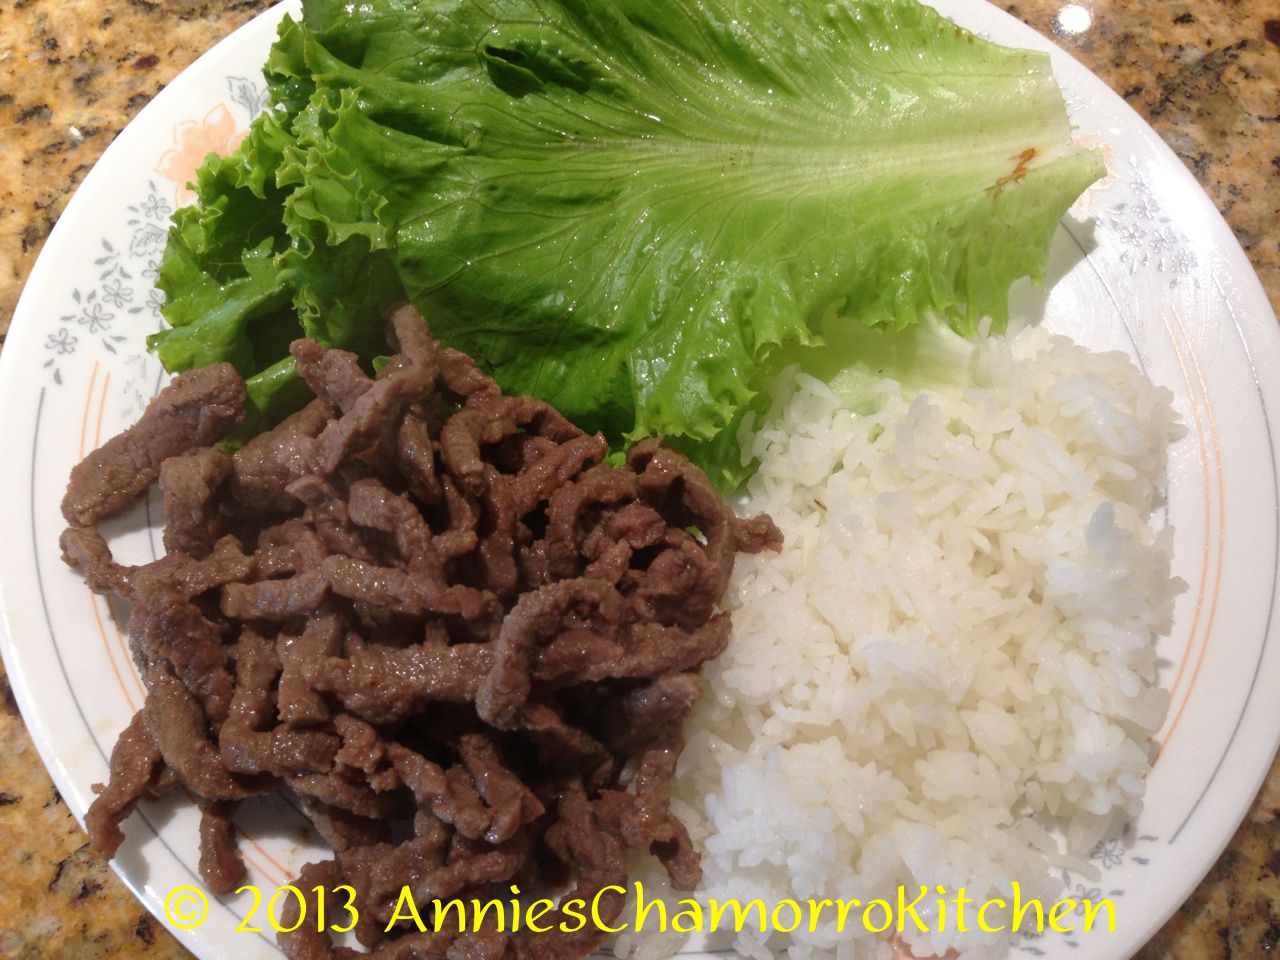
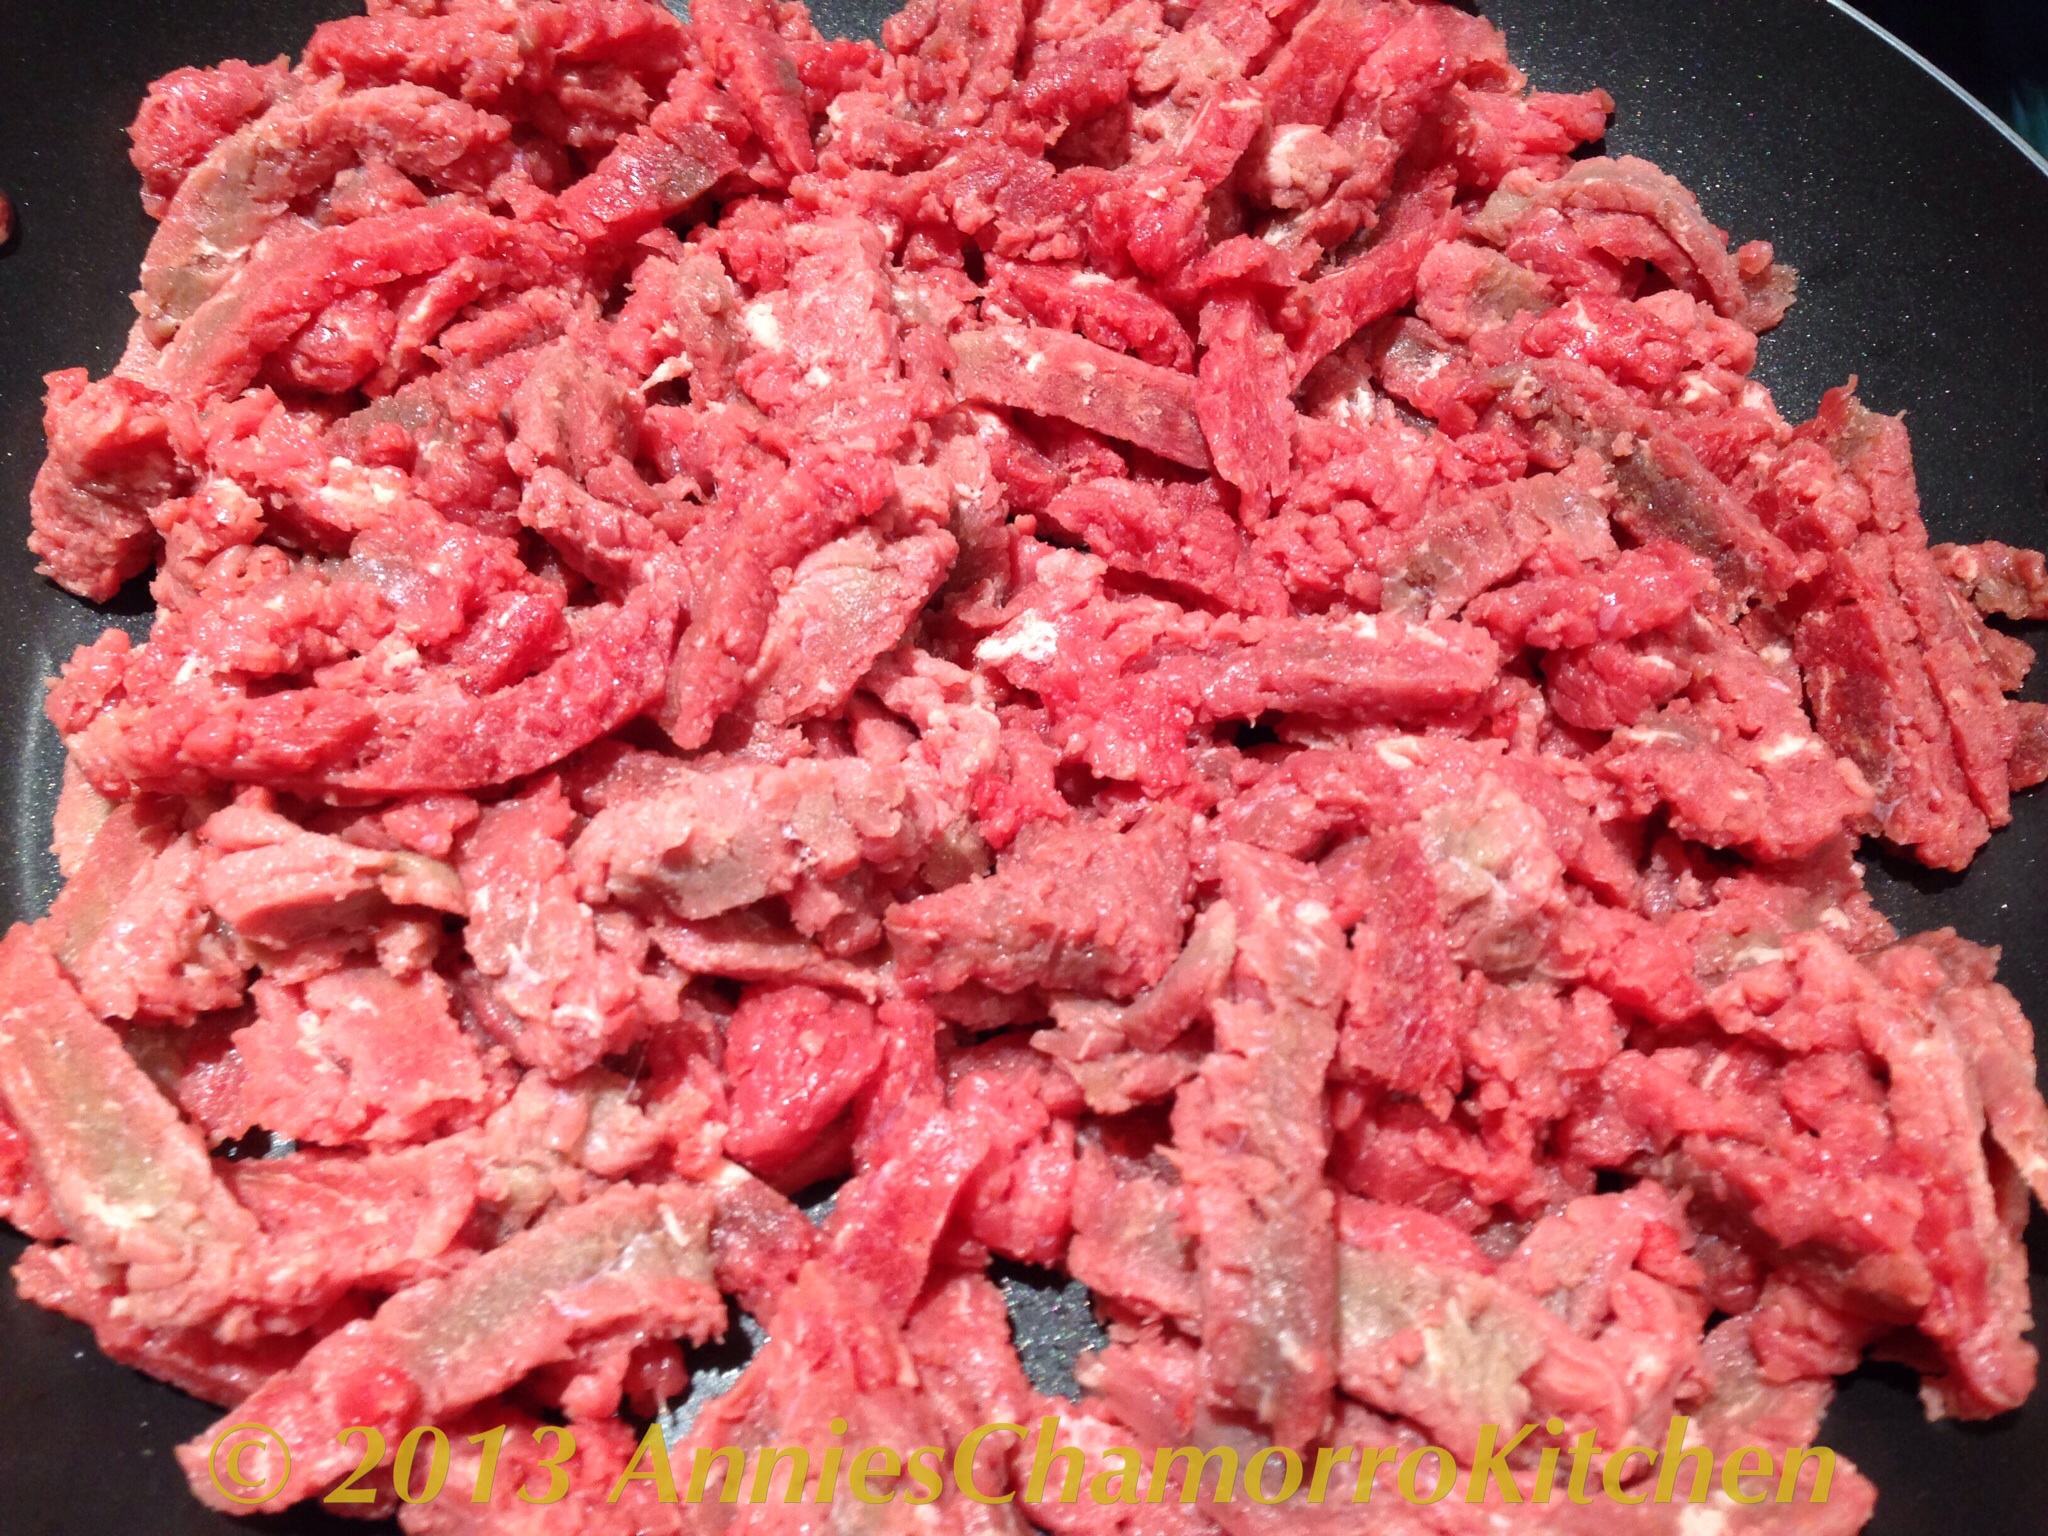
Place thinly sliced beef into a large frying pan.  I like to use minute steak for this.

image


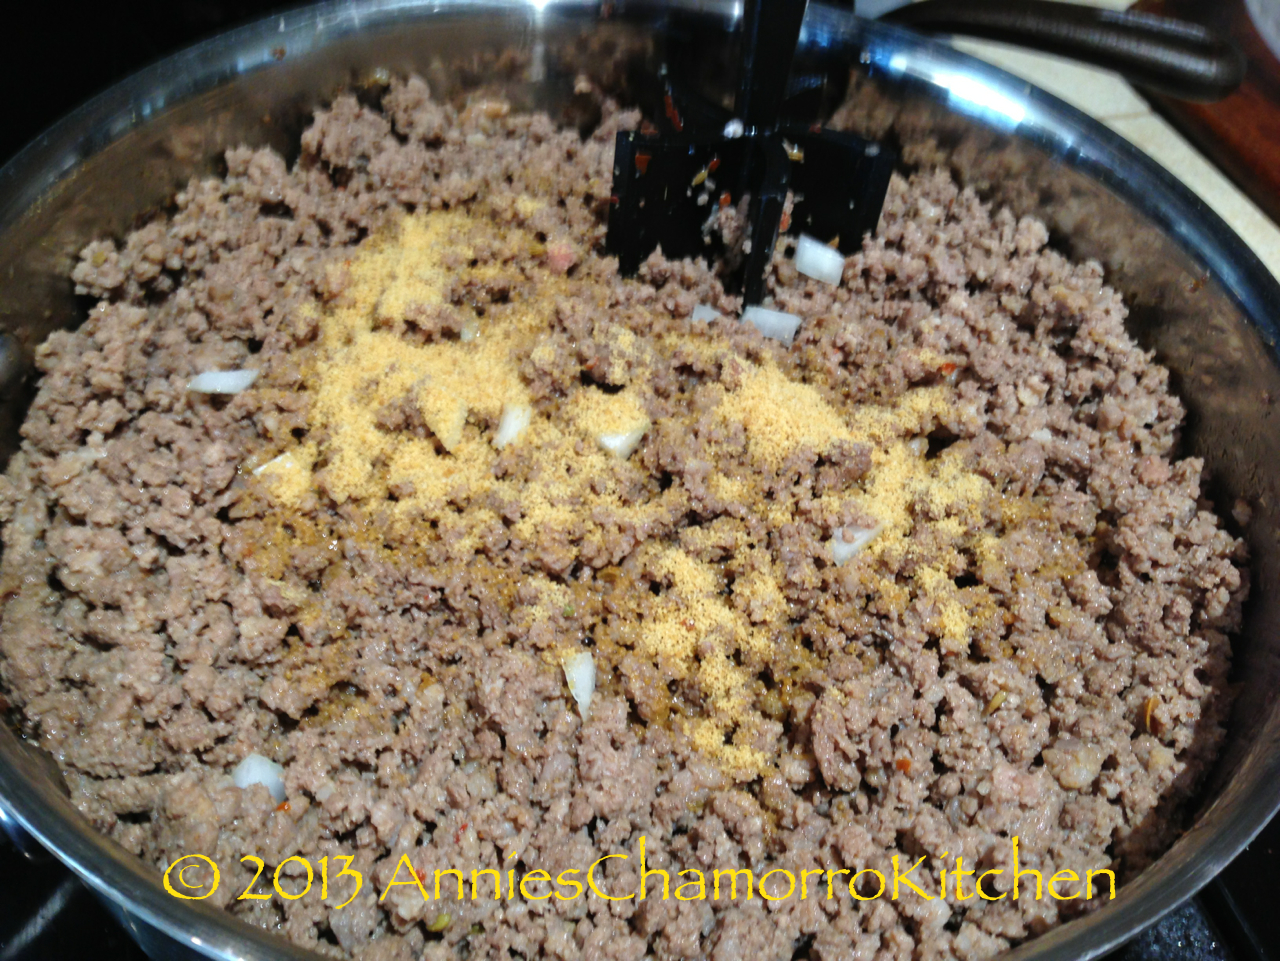
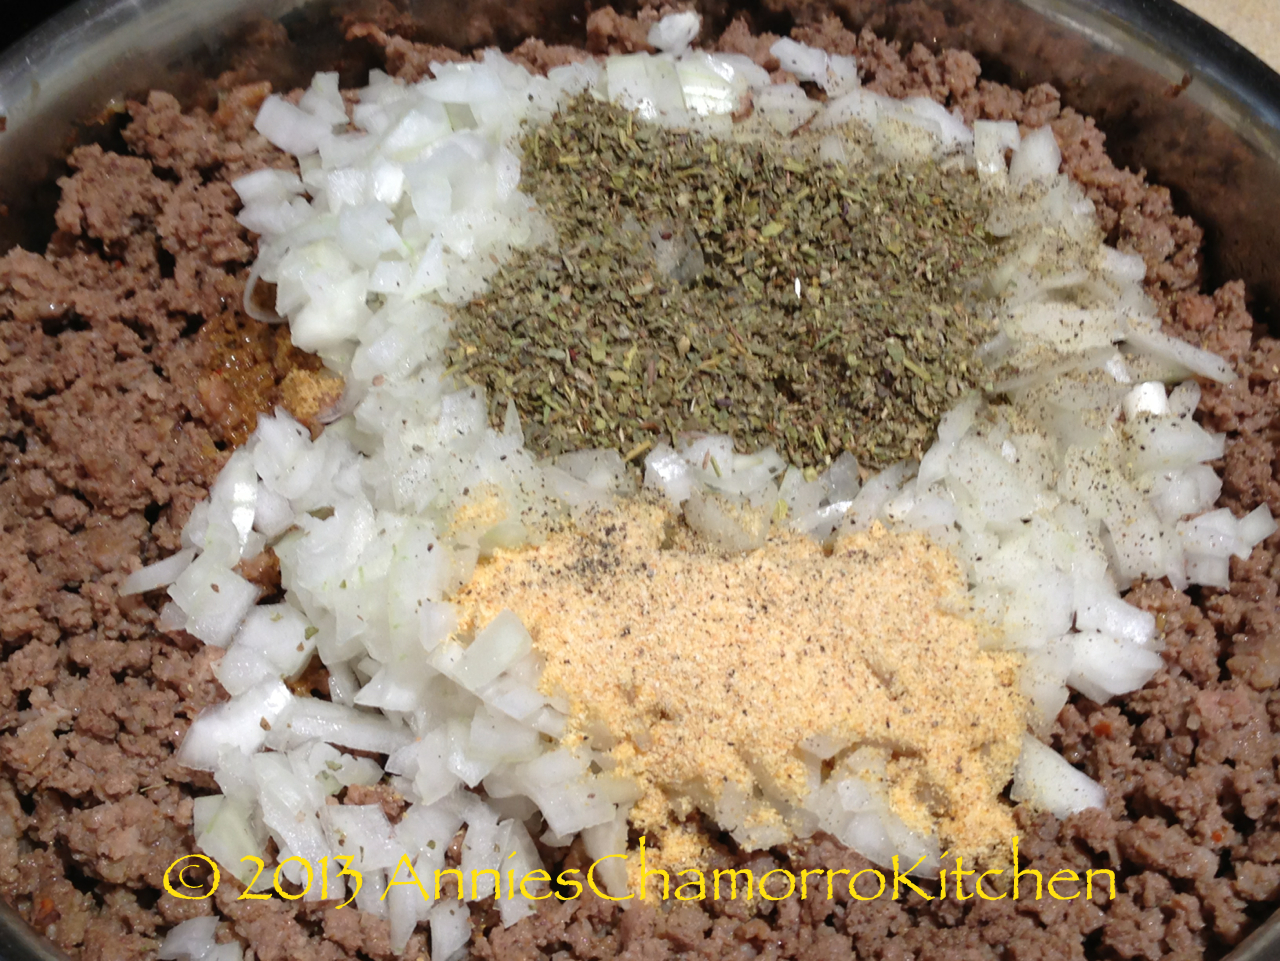
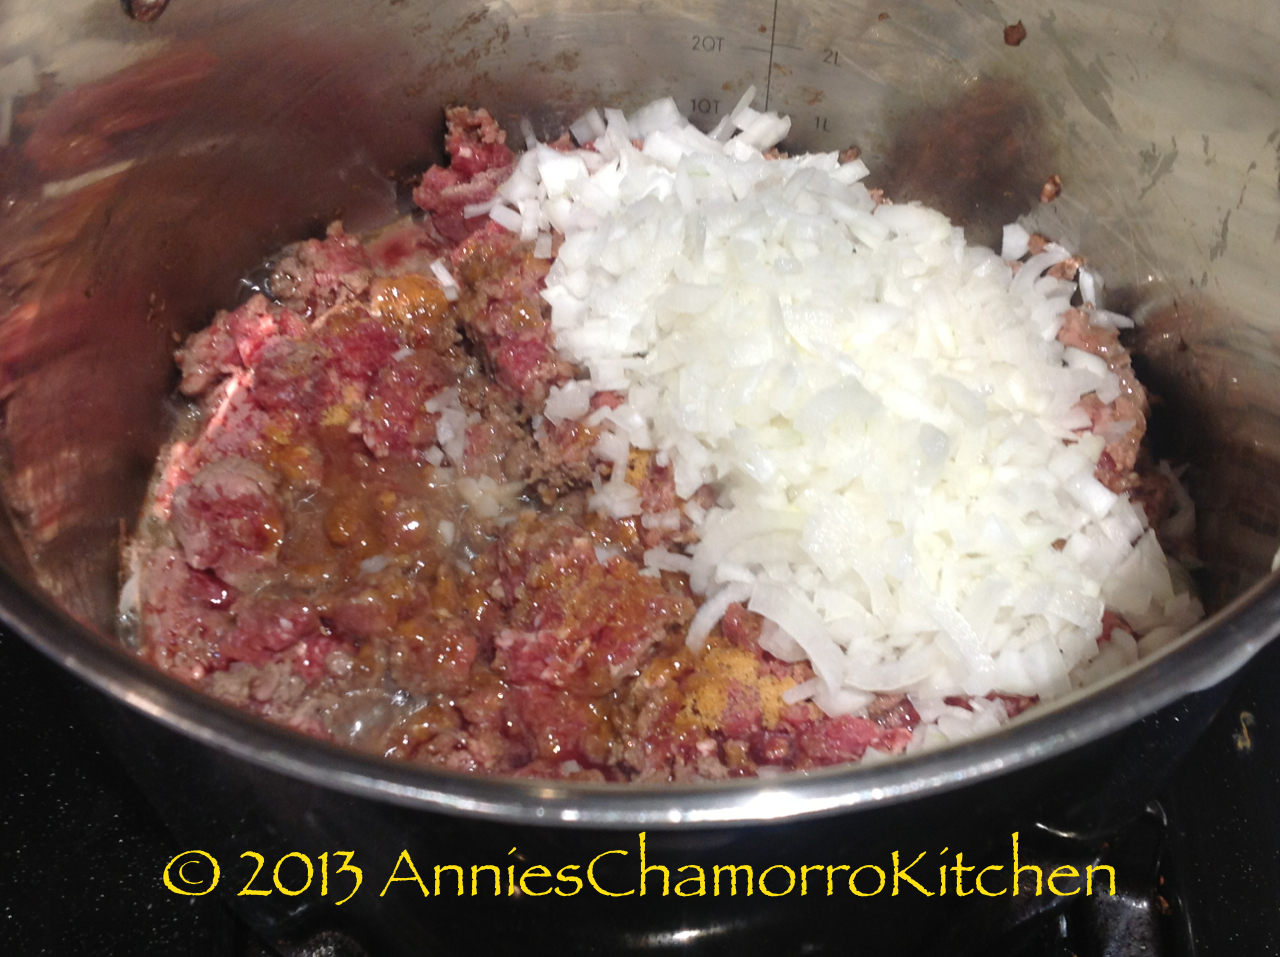
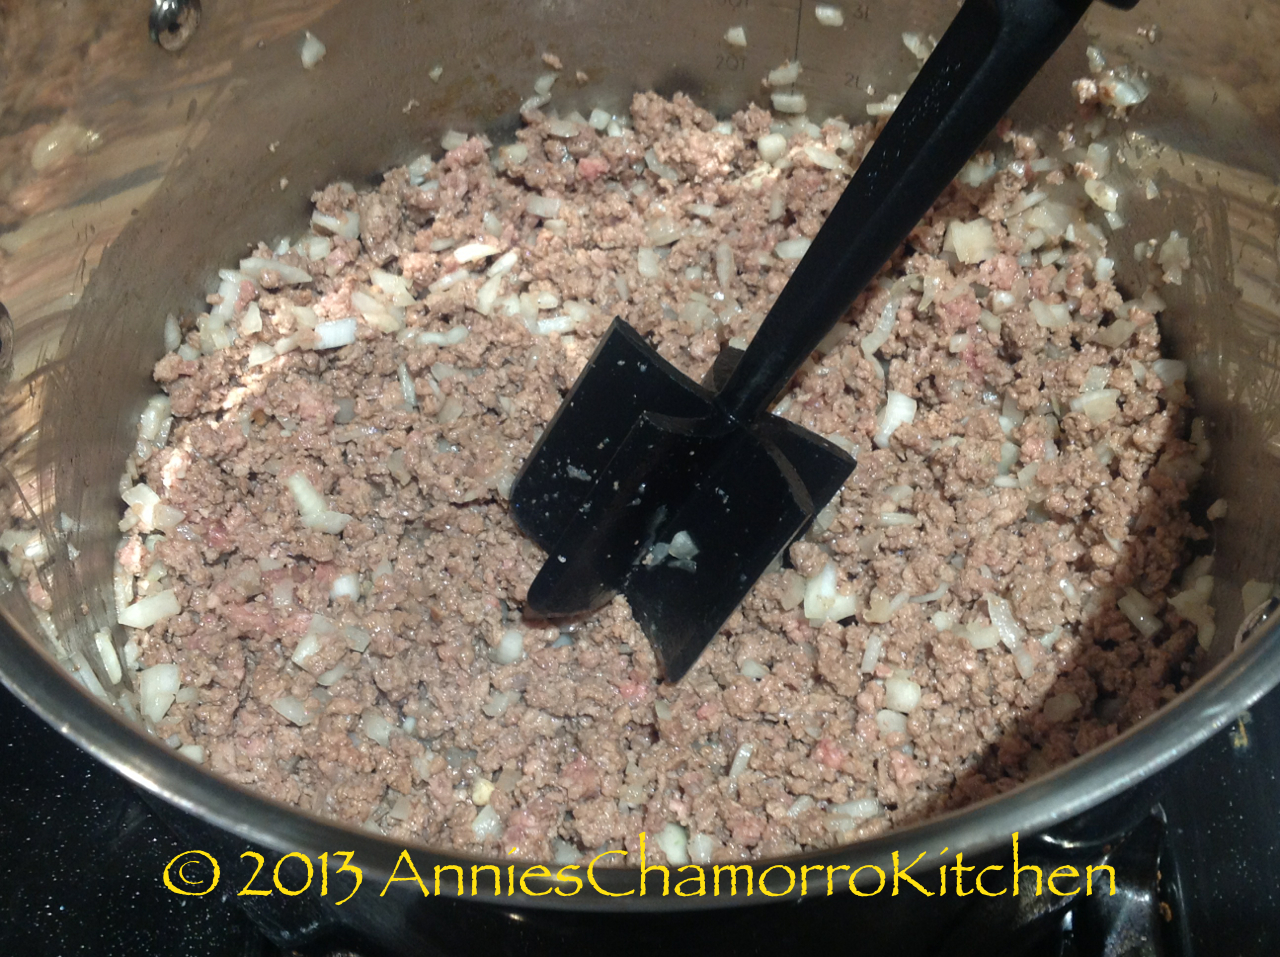
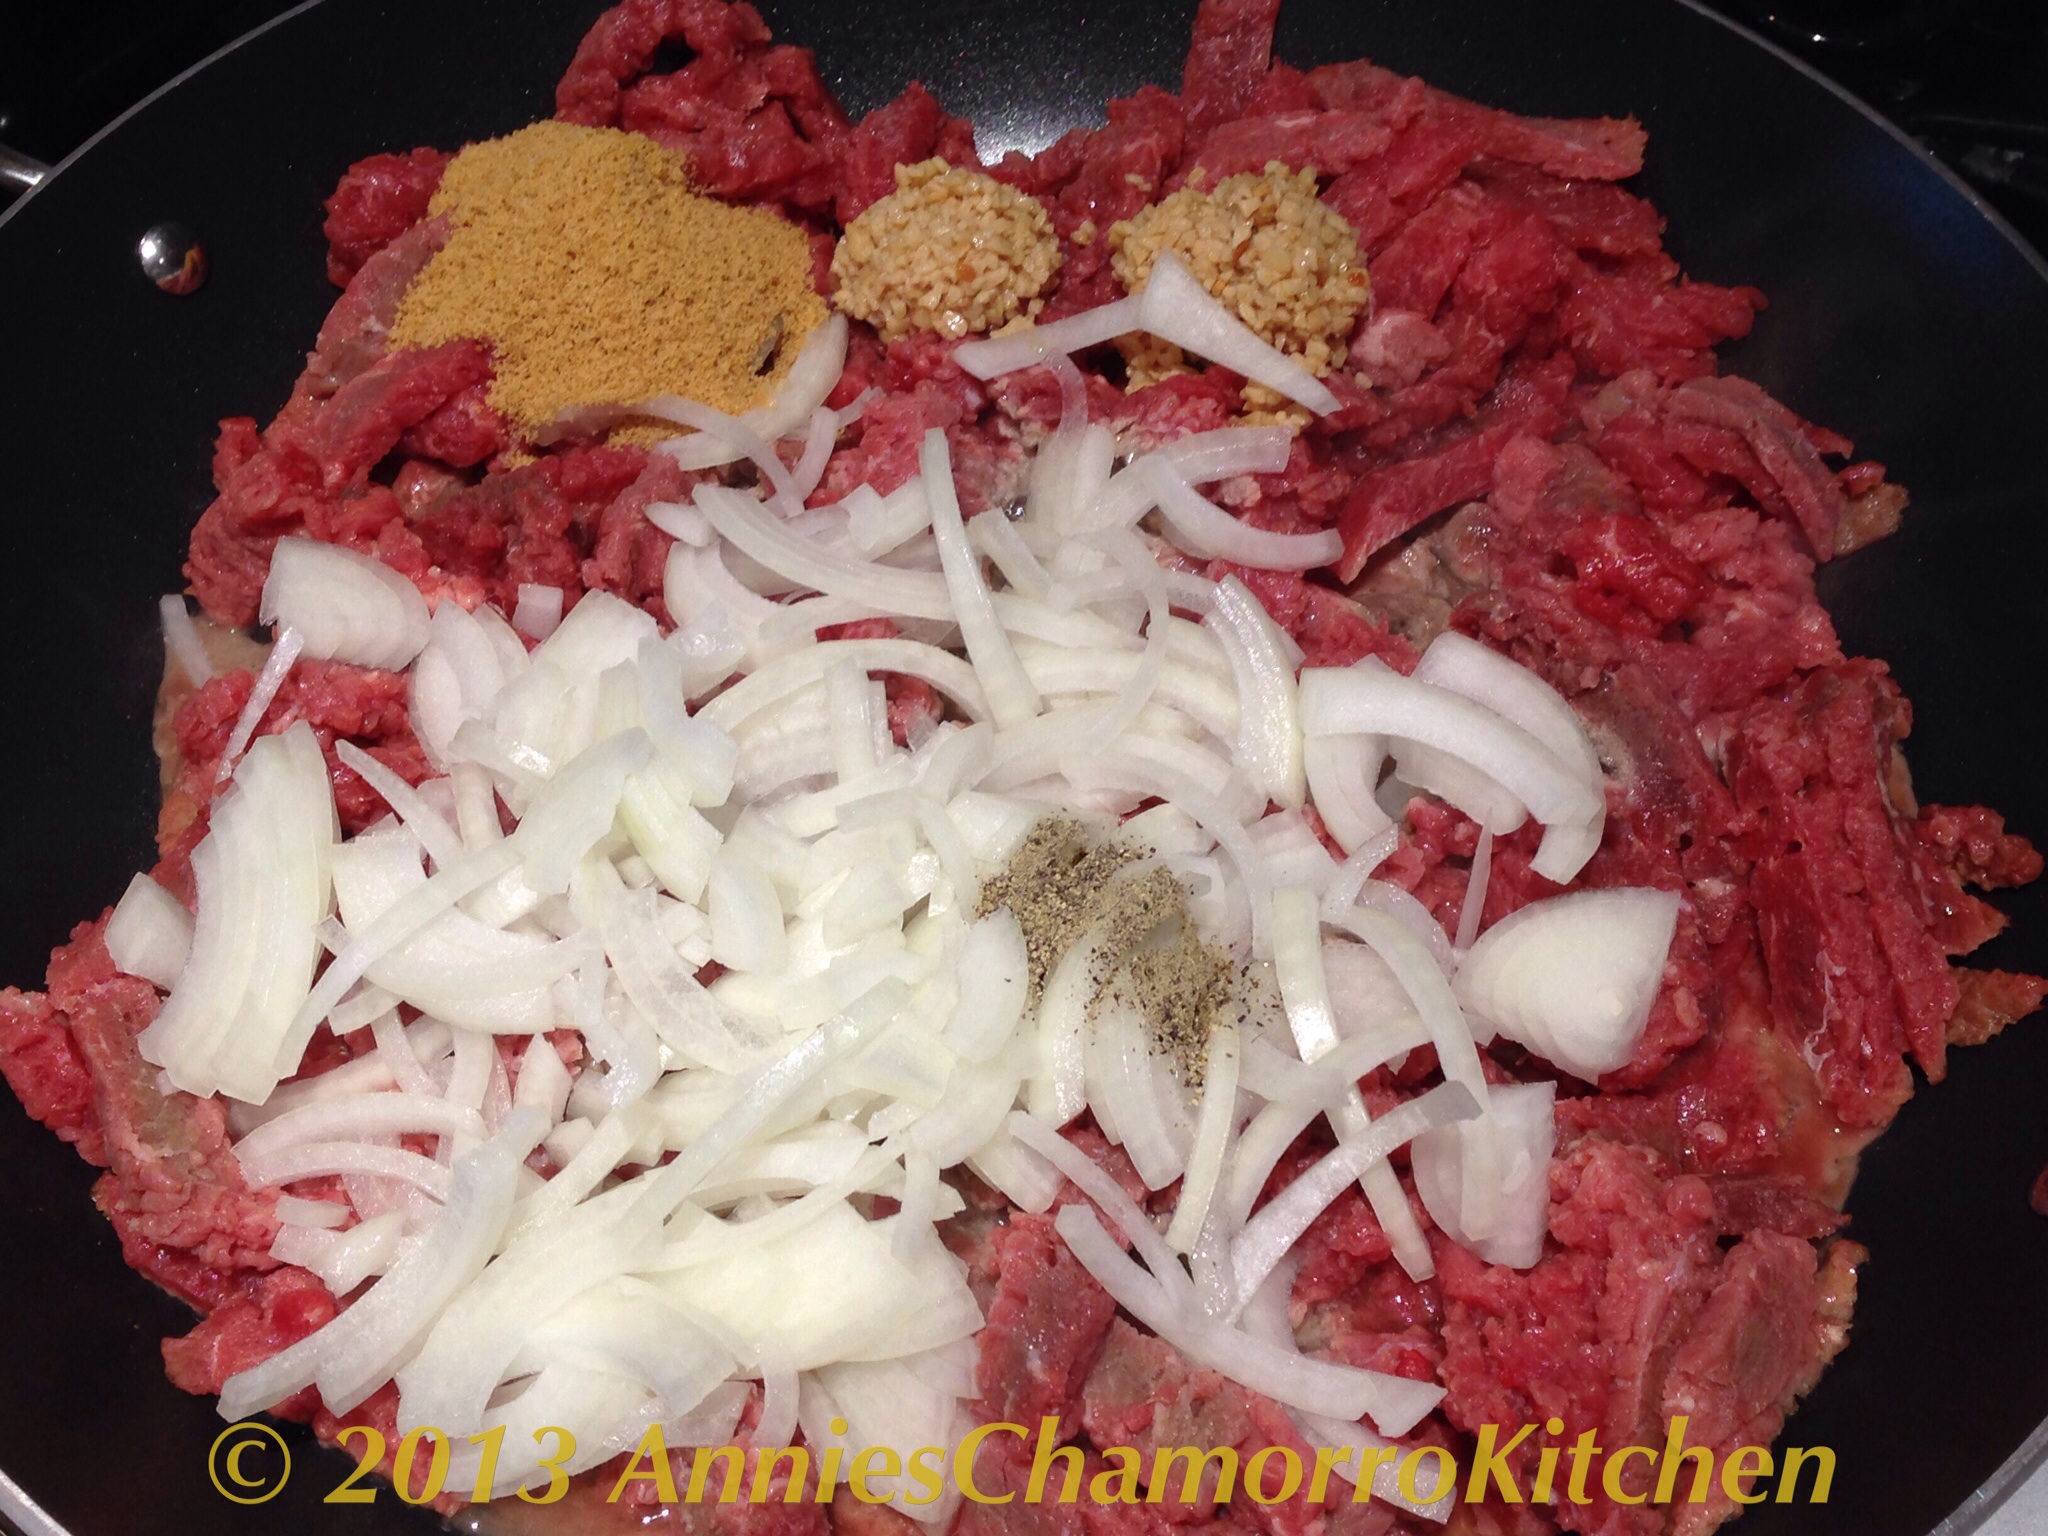
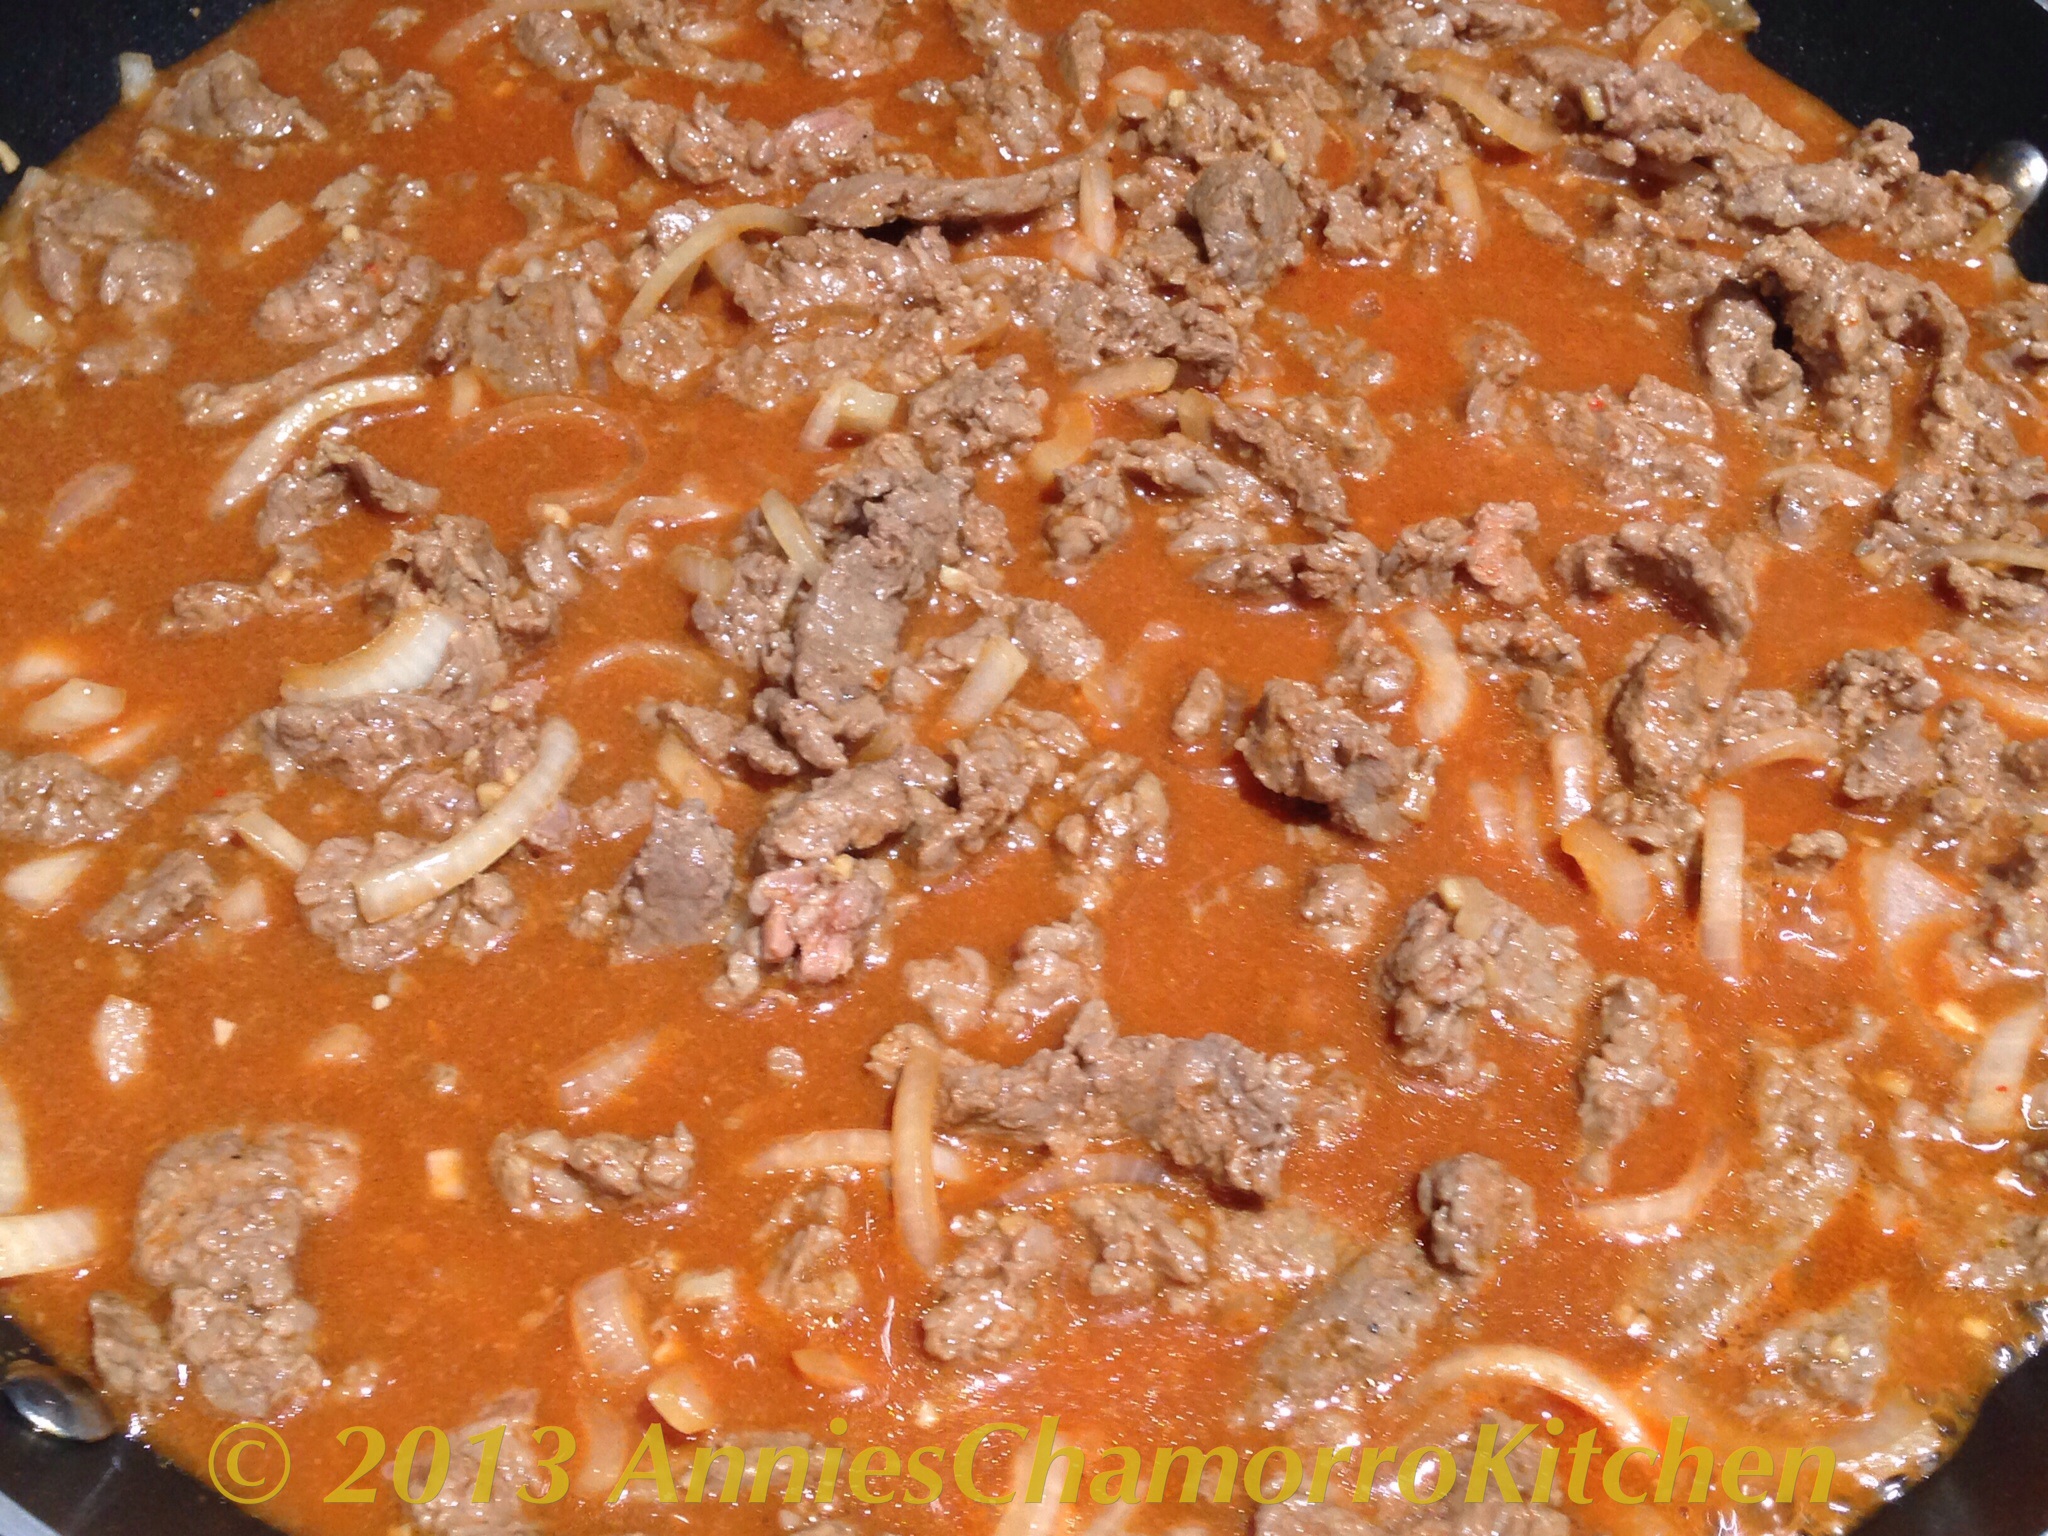
Add Dashida seasoning, minced garlic, black pepper, and thinly sliced onions.  Stir to combine all the ingredients.  Cook over medium high heat until the meat is browned.

image


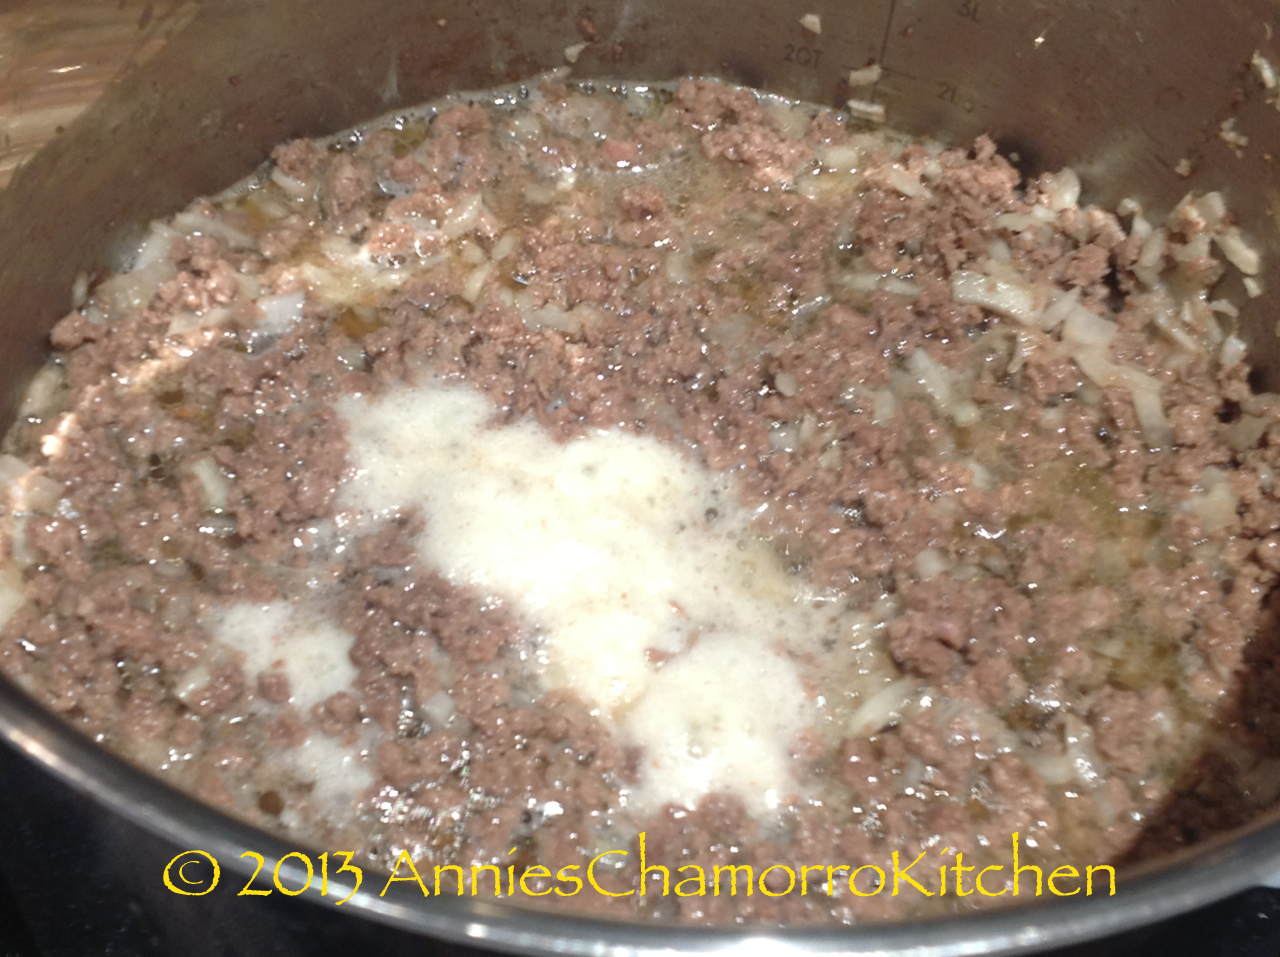
Add to the pan white vinegar and soysauce.  Stir to combine.

image

image


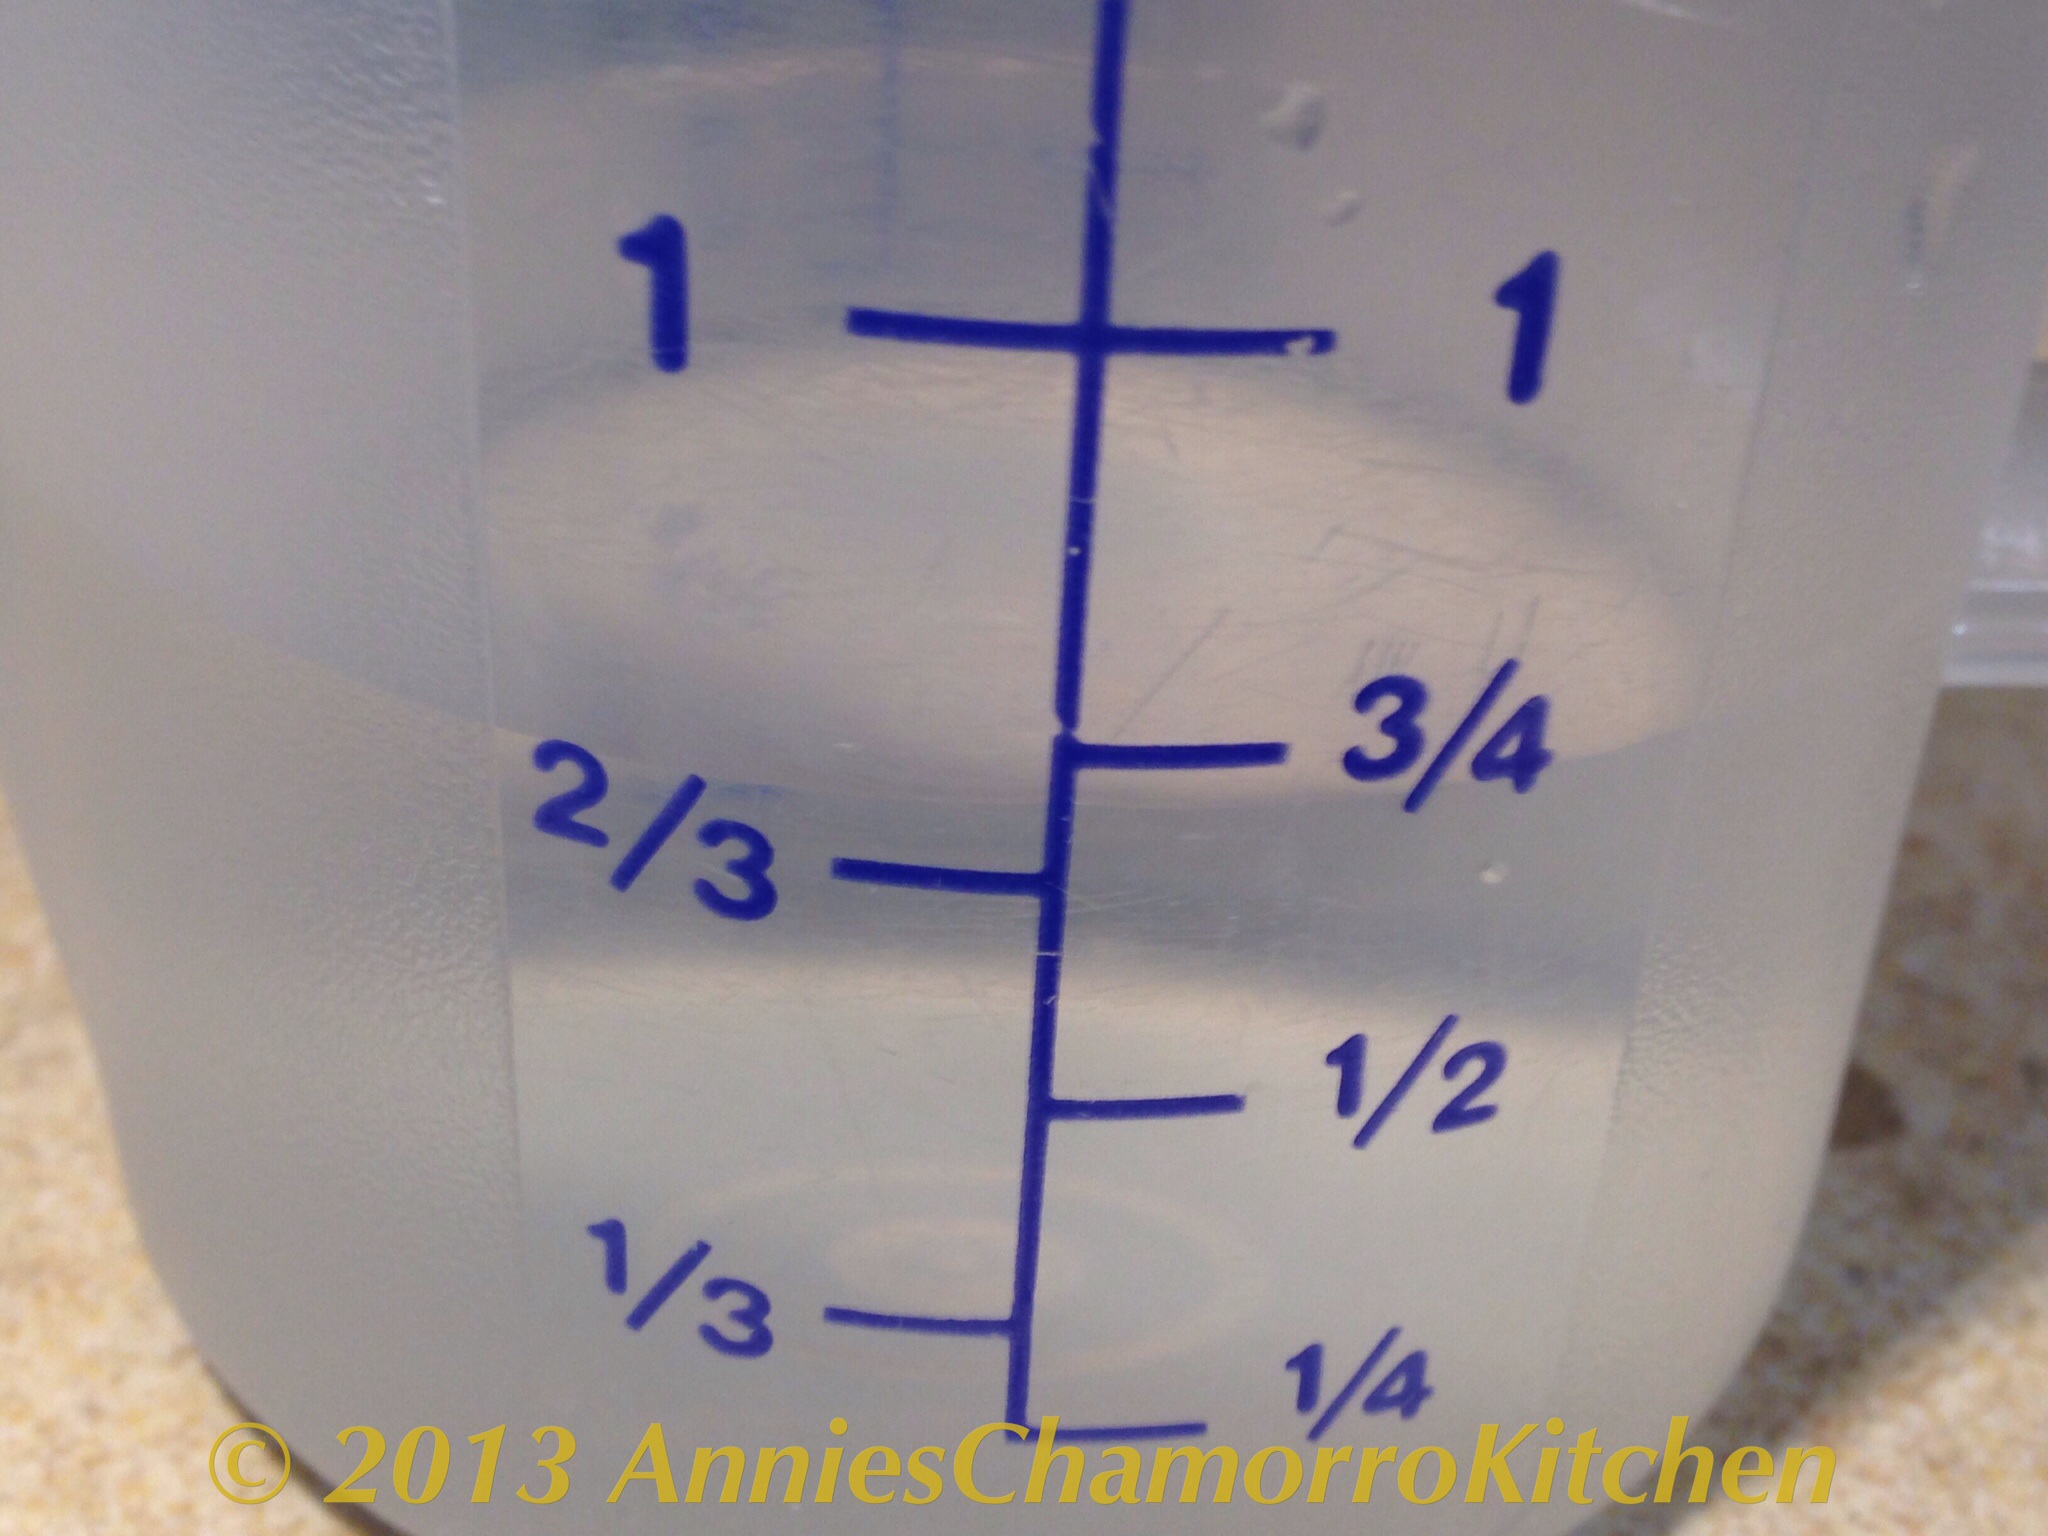
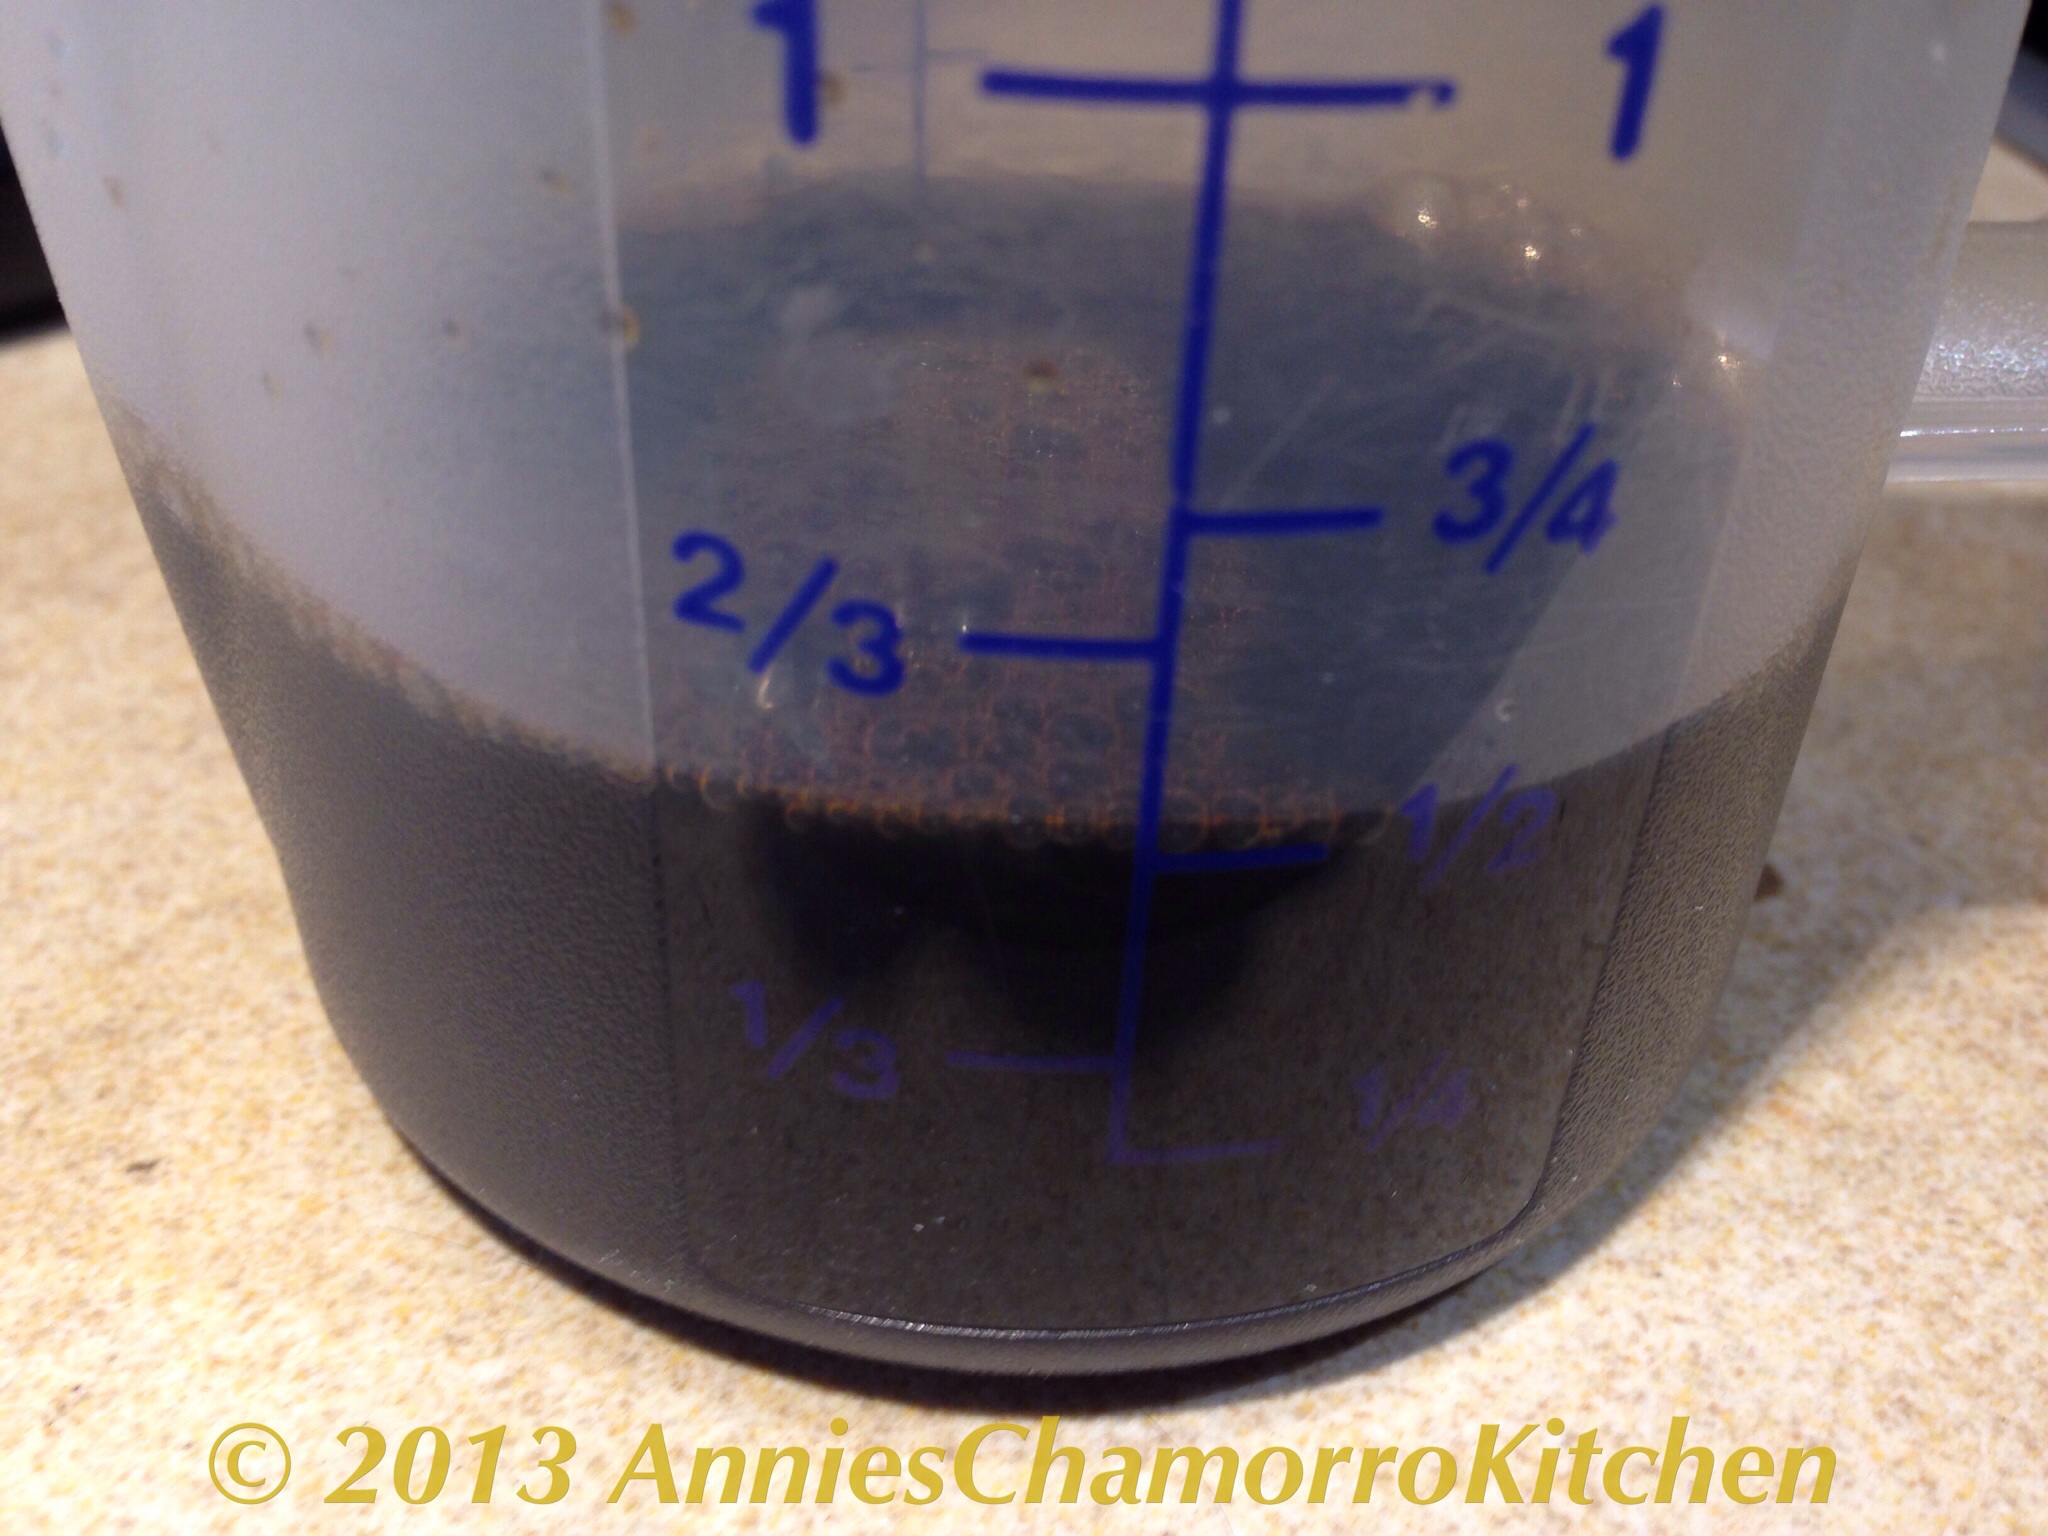
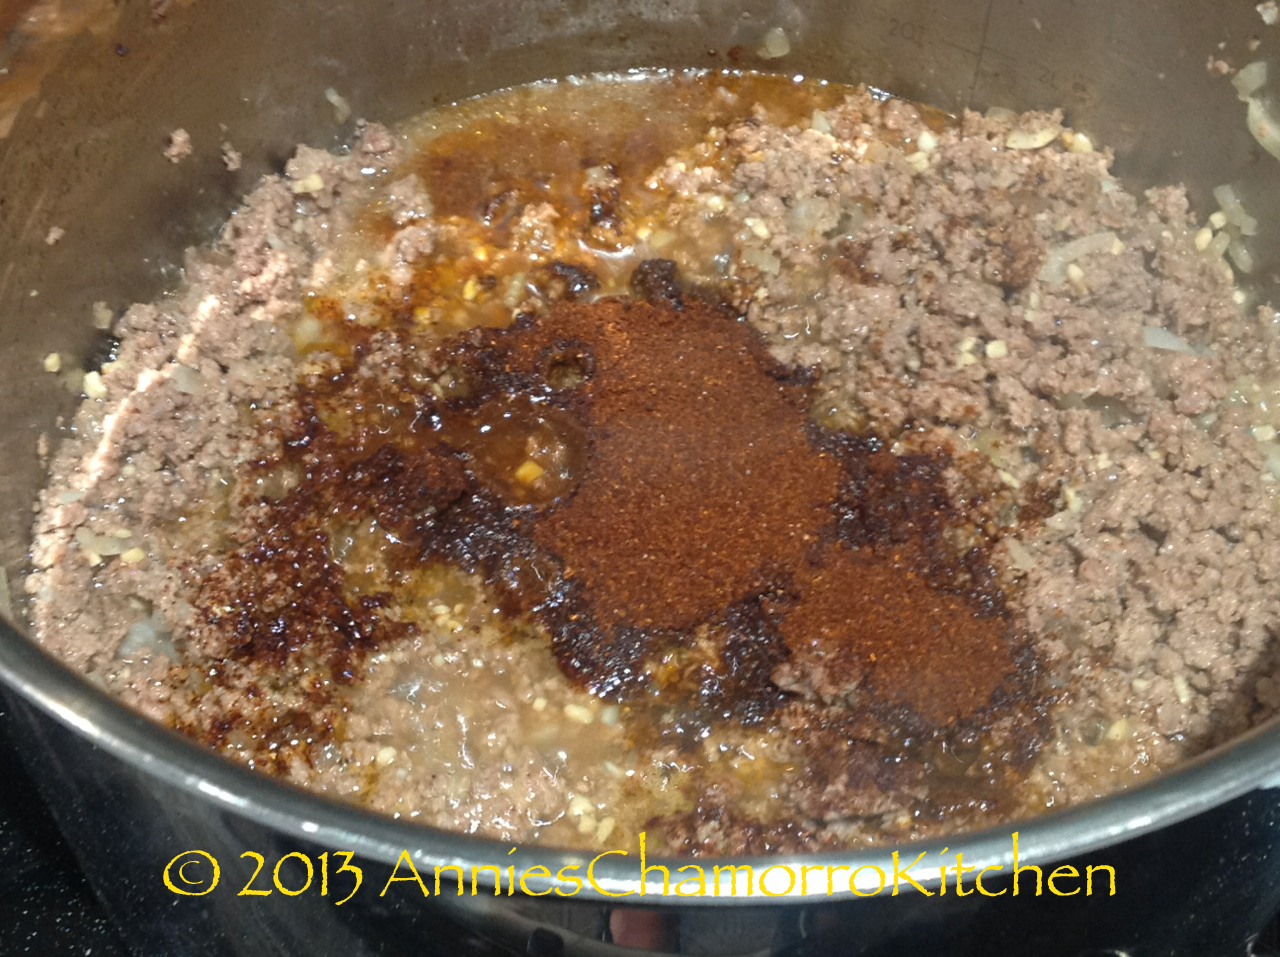
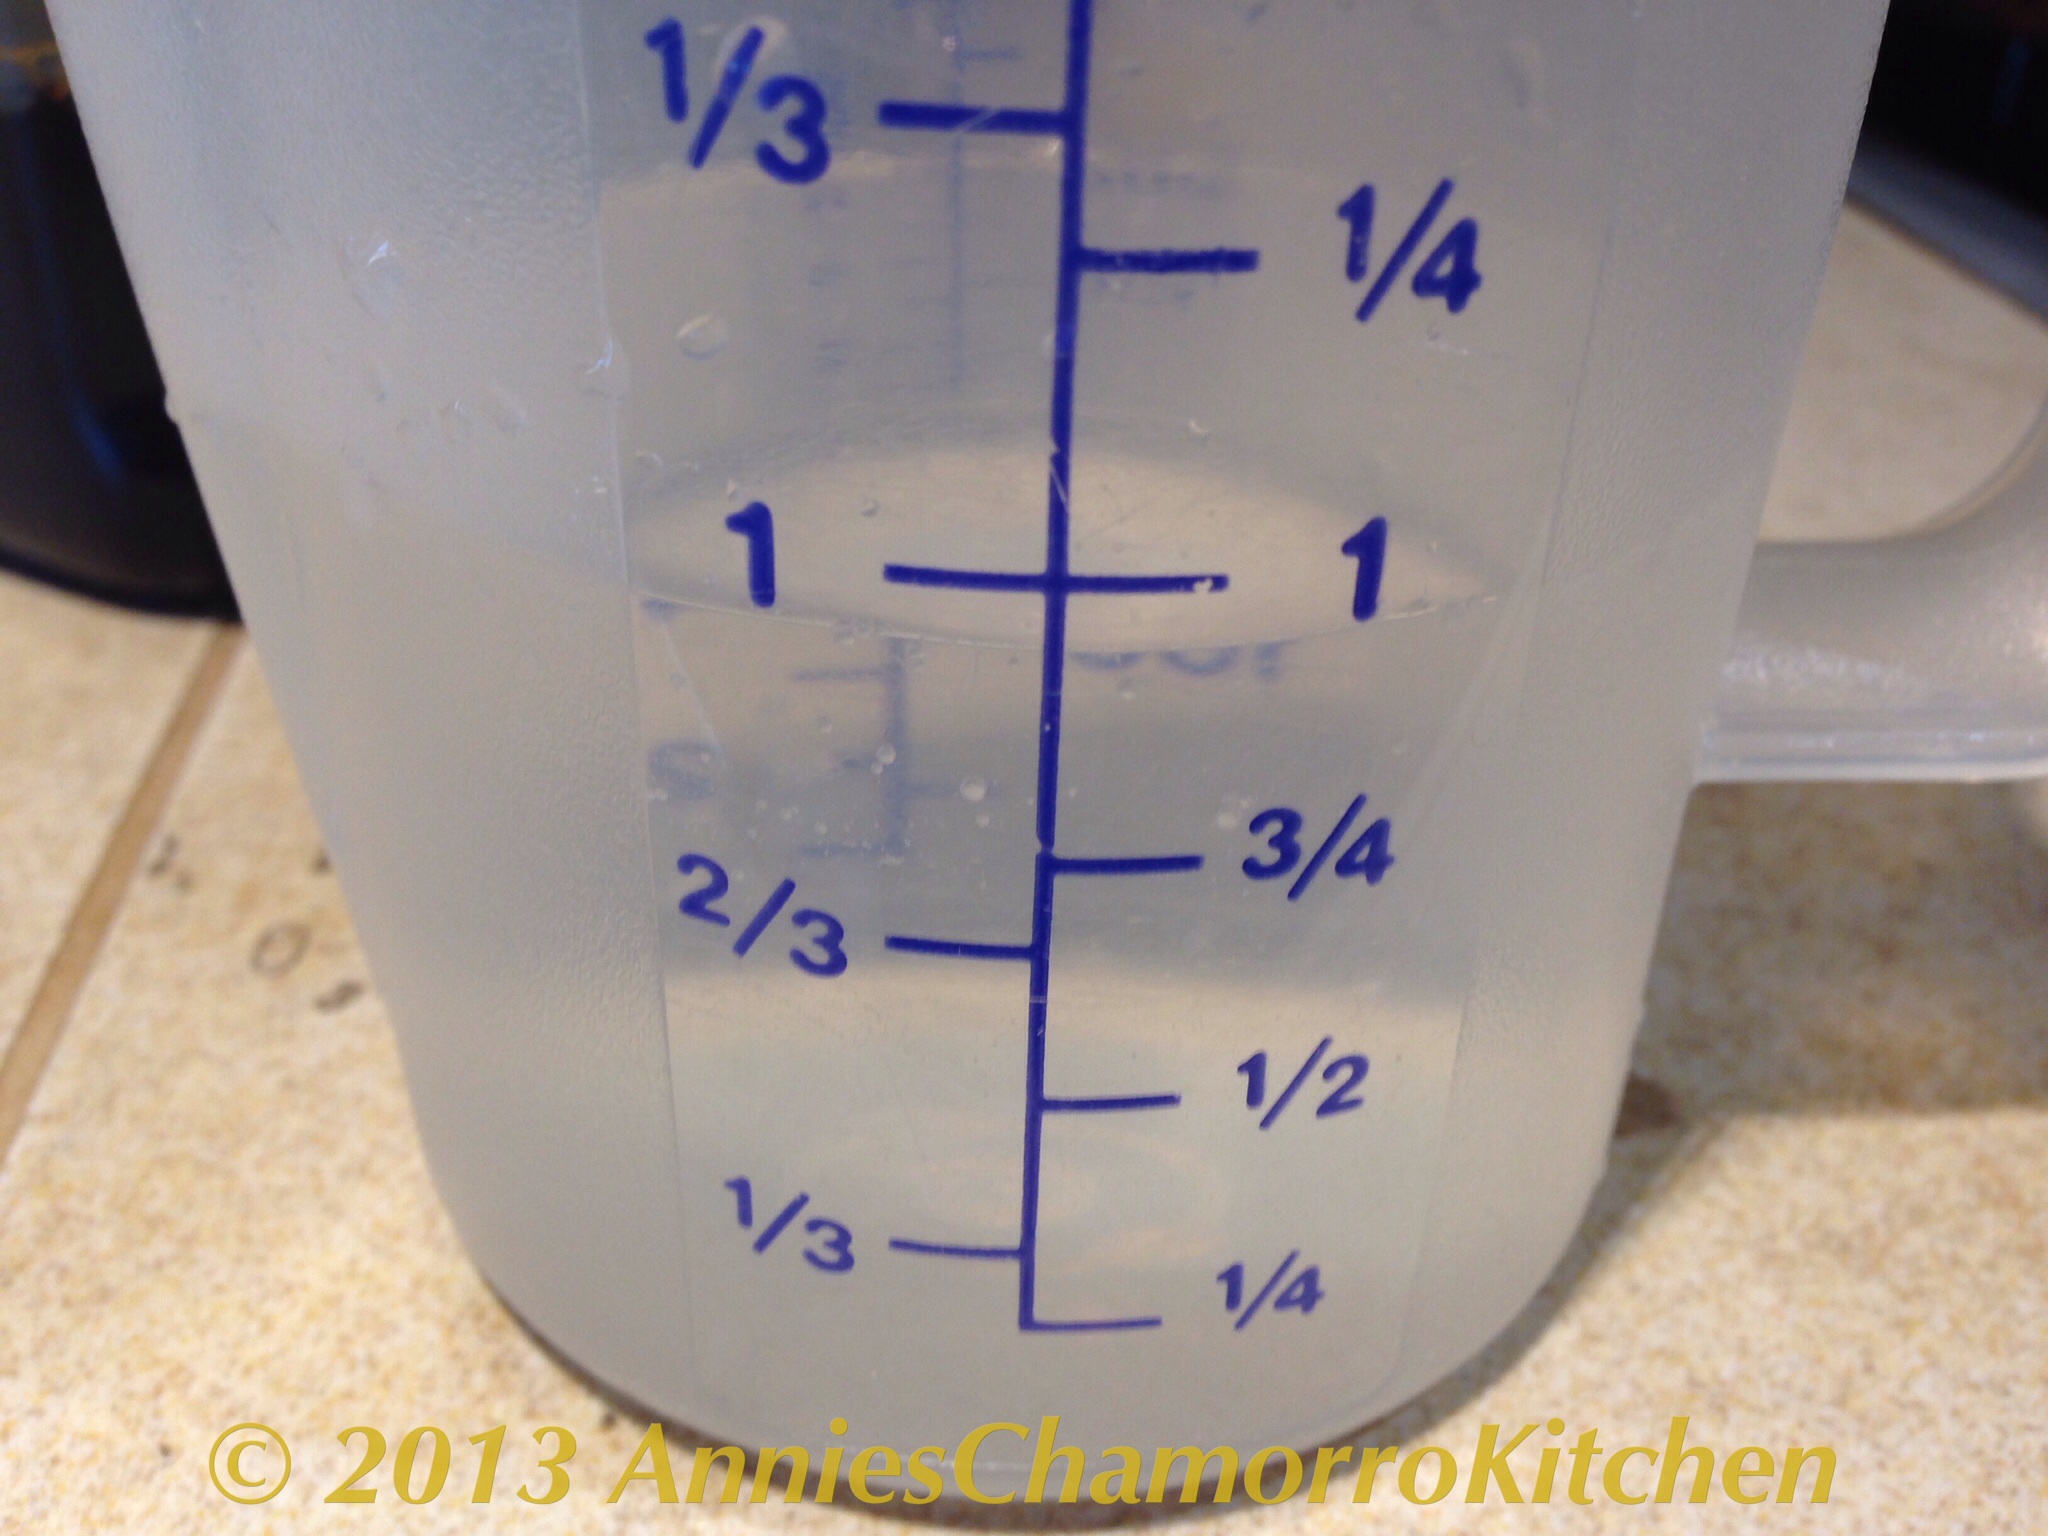
Add water to the pan.  Add more or less water, depending on how much gravy you like.  We like a lot of kådu (gravy)–adding about a cup of water will yield a lot of kådu.  Cook for a couple of minutes–just long enough to reheat the gravy–then stir in achote powder (the achote powder will dissolve better if the liquid is HOT). 

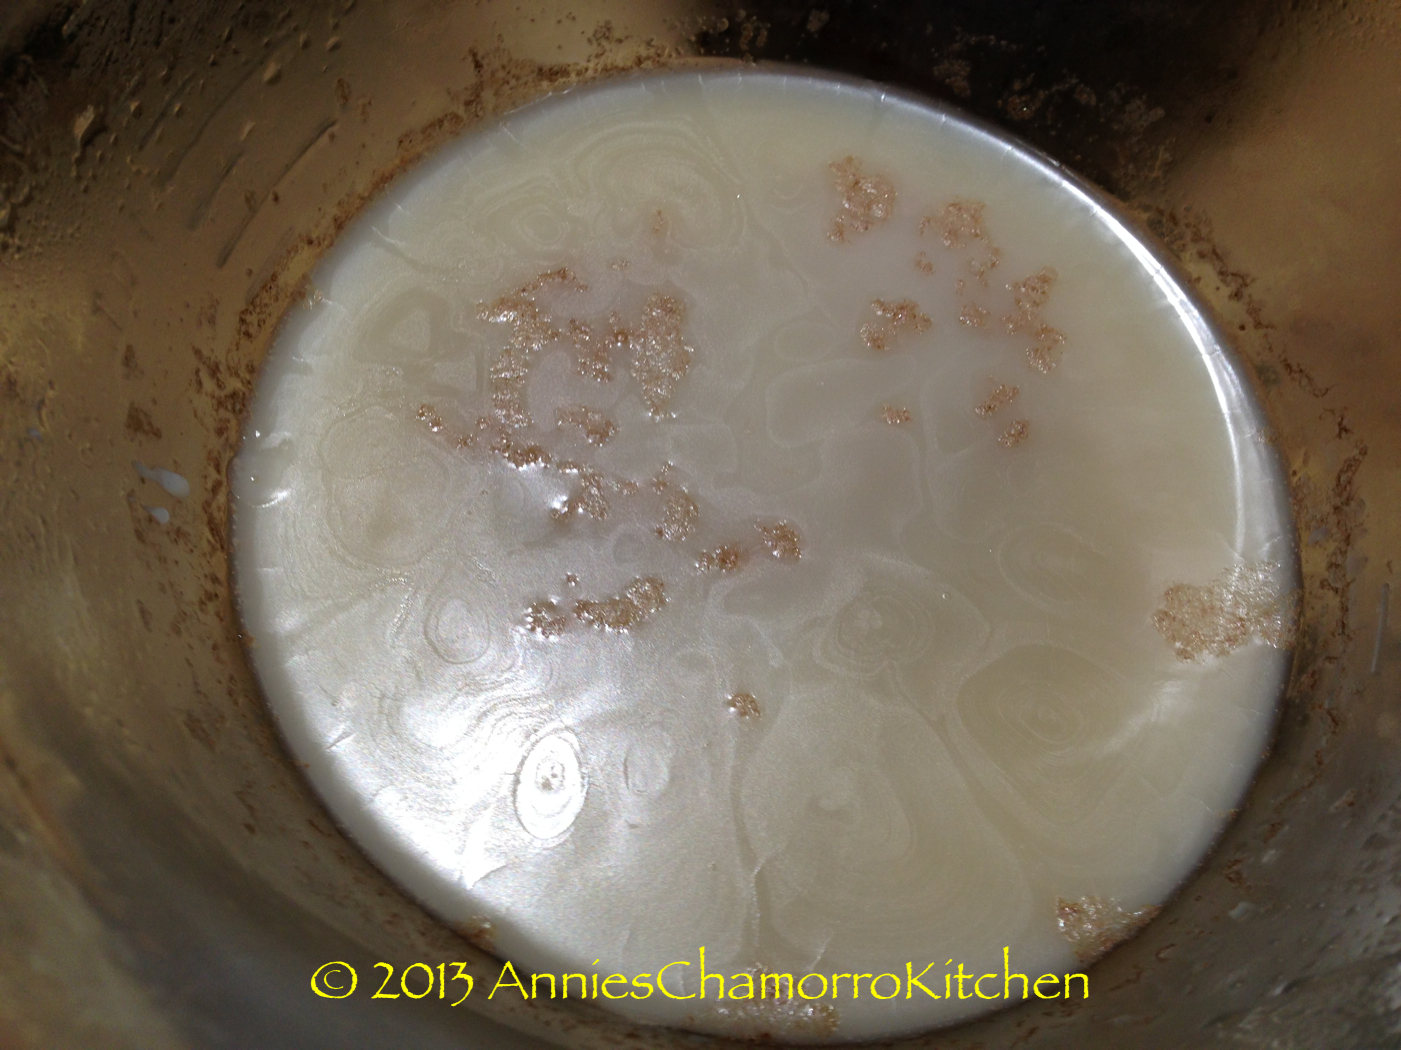
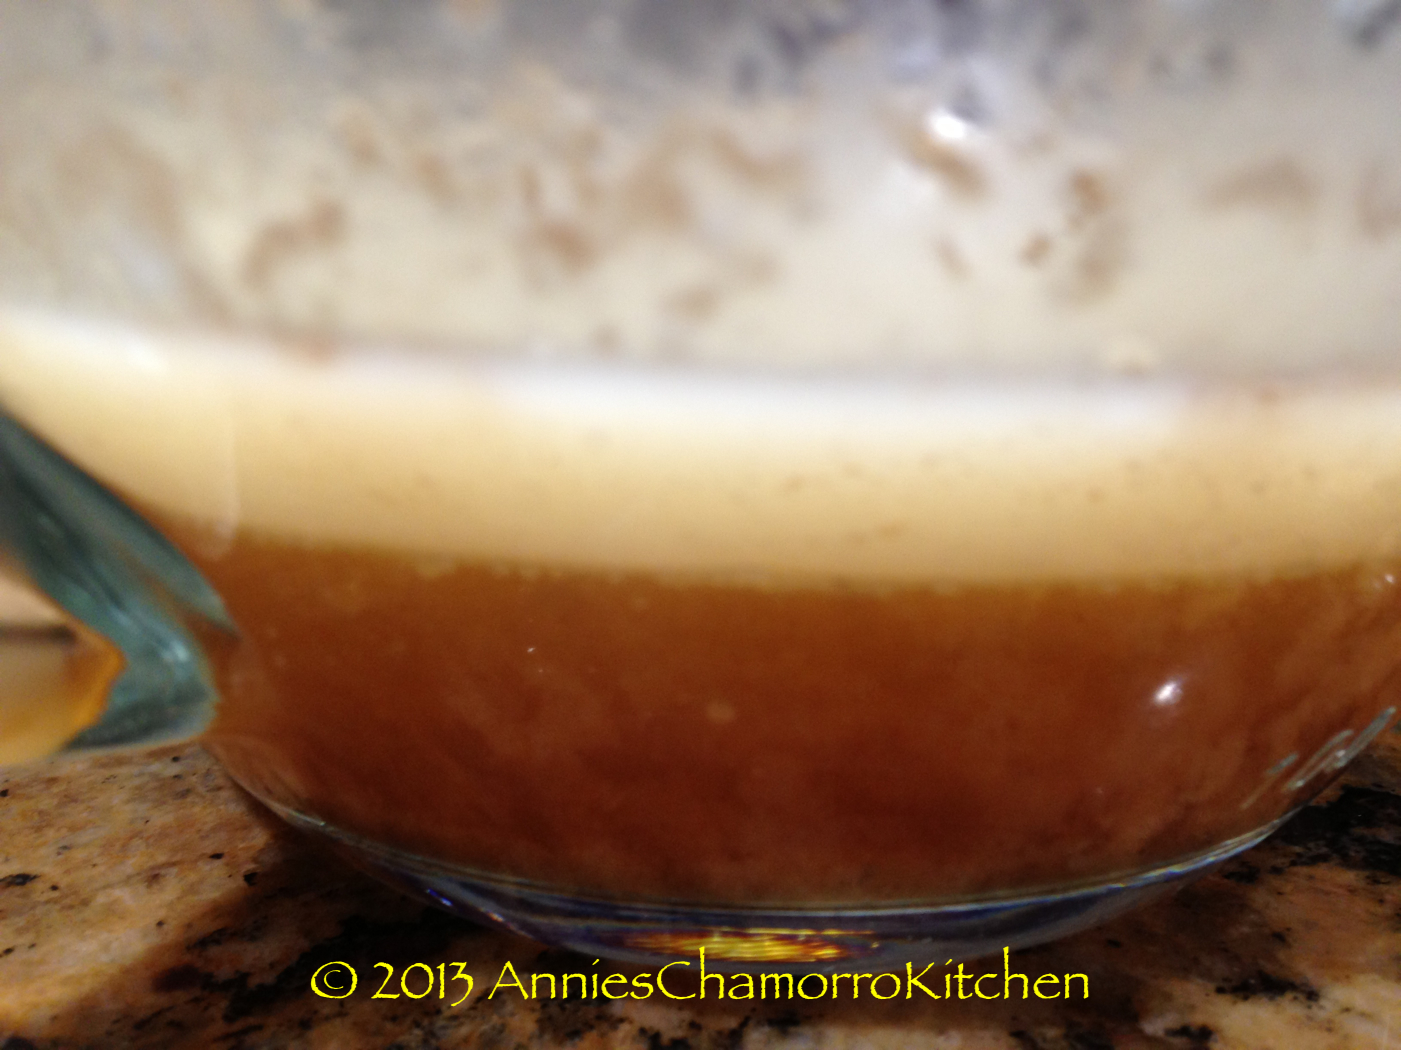
NOTE:  You can substitute the water and achote powder with achote water made using achote seeds.

image

image


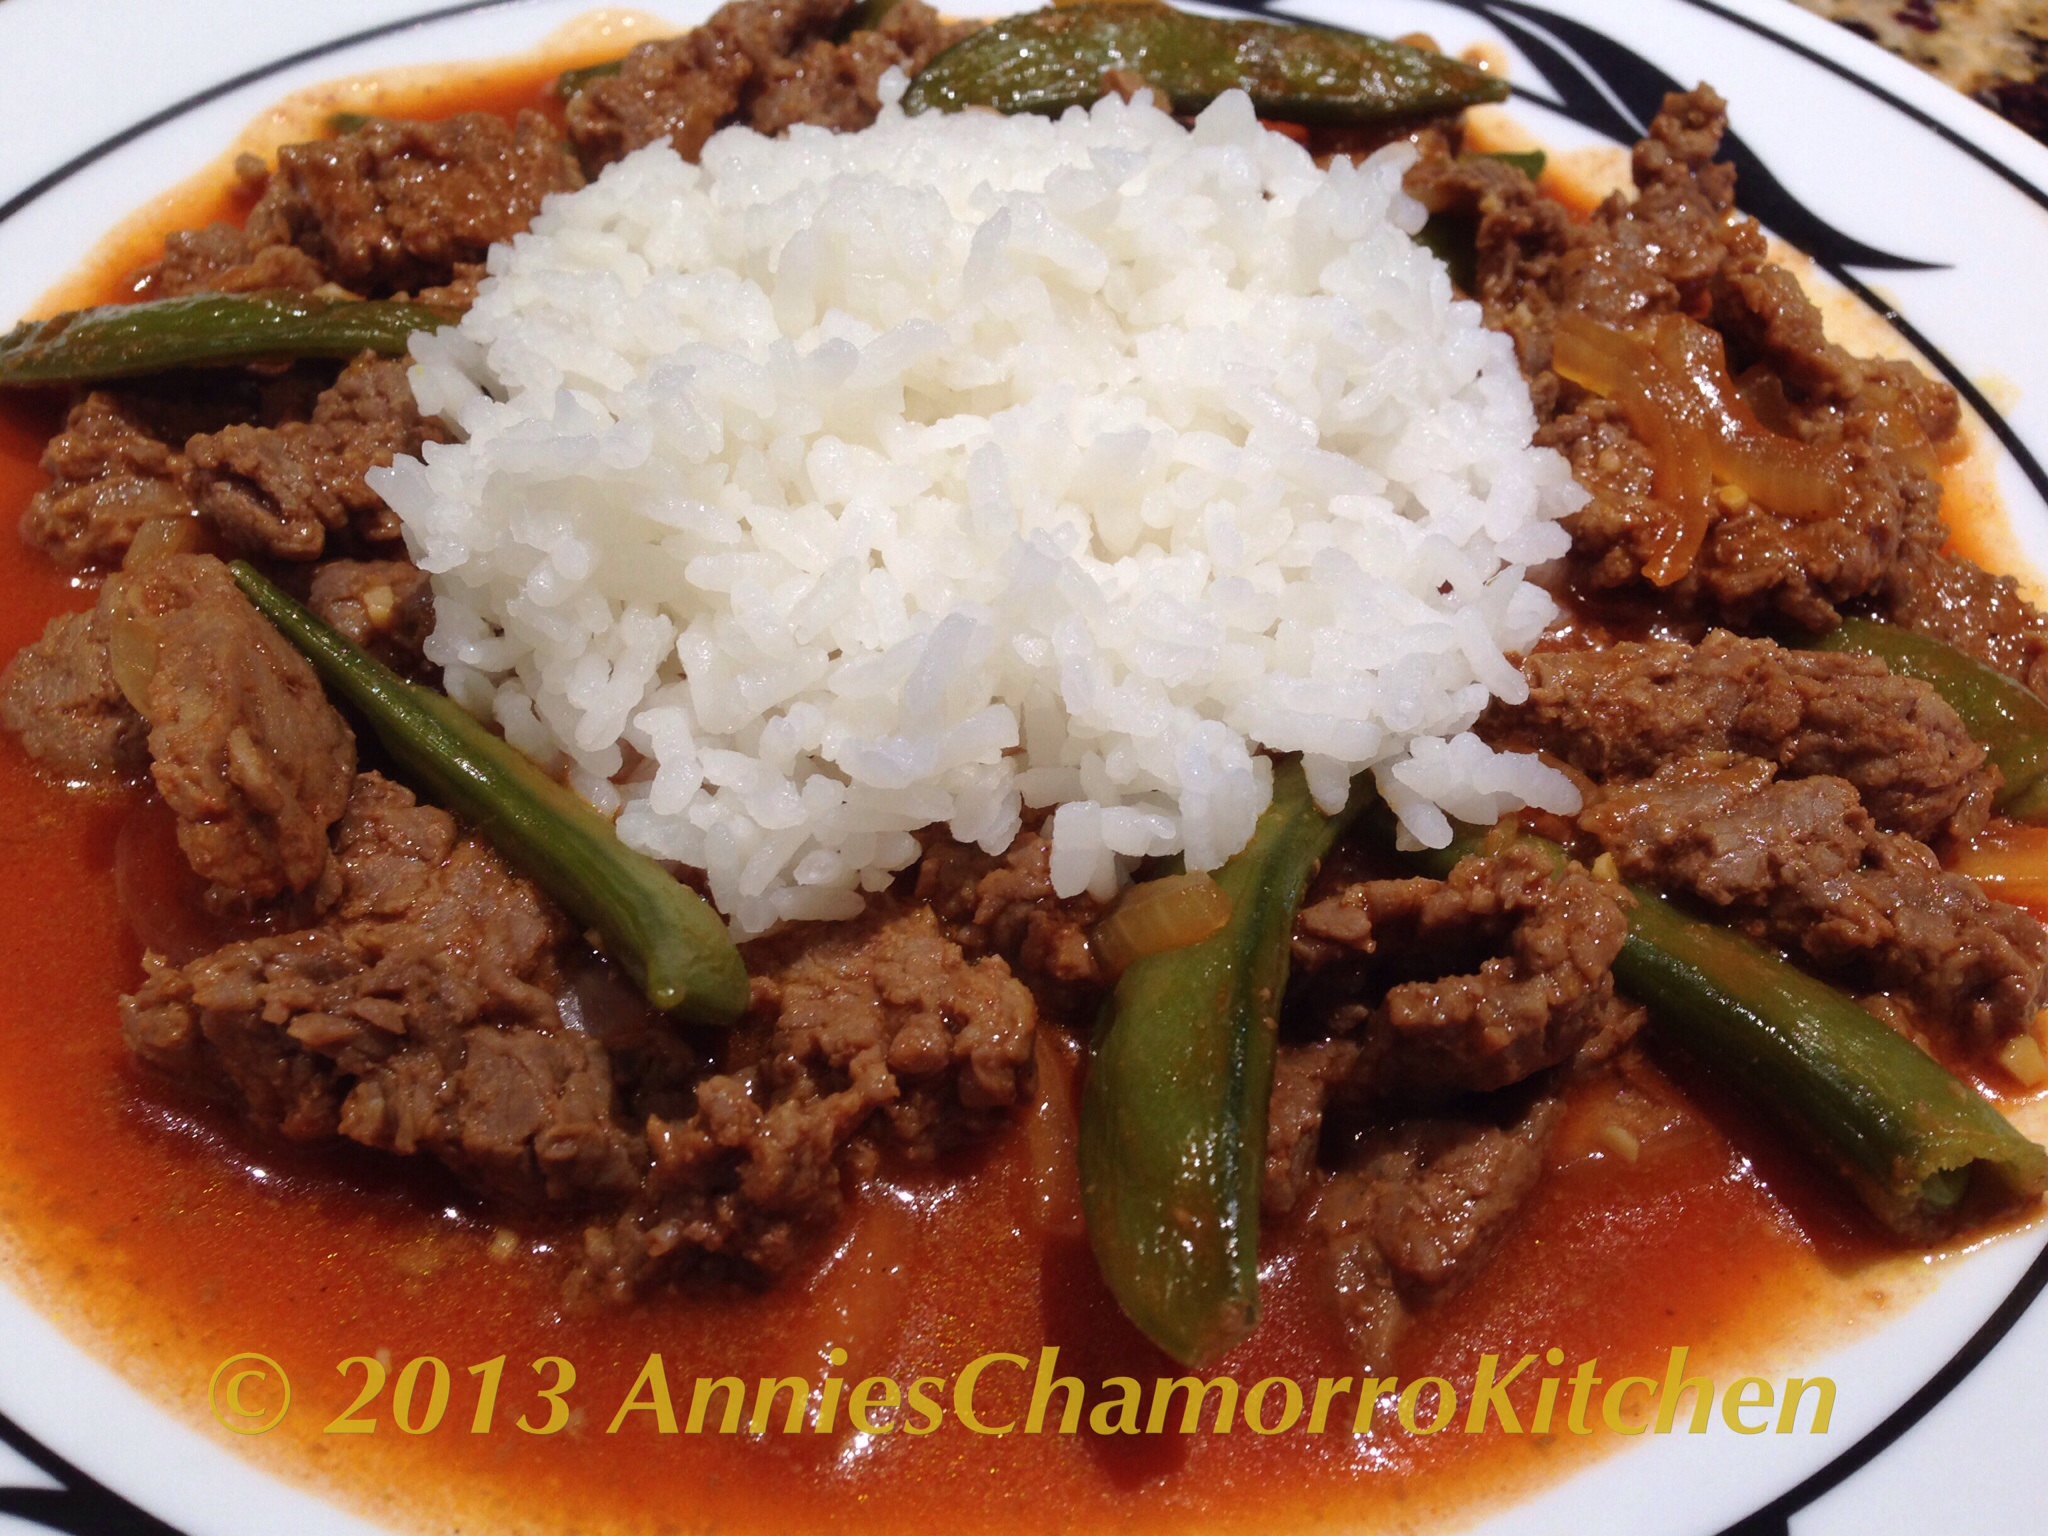
Cook for another couple of minutes then stir in fresh or frozen peas (OPTIONAL).  My family actually prefers to use fresh sugar snap peas.  Cook for a few more minutes, or just long enough to either reheat the frozen peas, or to cook the sugar snap peas to your liking (we like it al dente, or cooked but still crisp).  You can also use fresh green beans instead of peas.  In the photo below, I used steamed sugar snap peas.

image

image

image


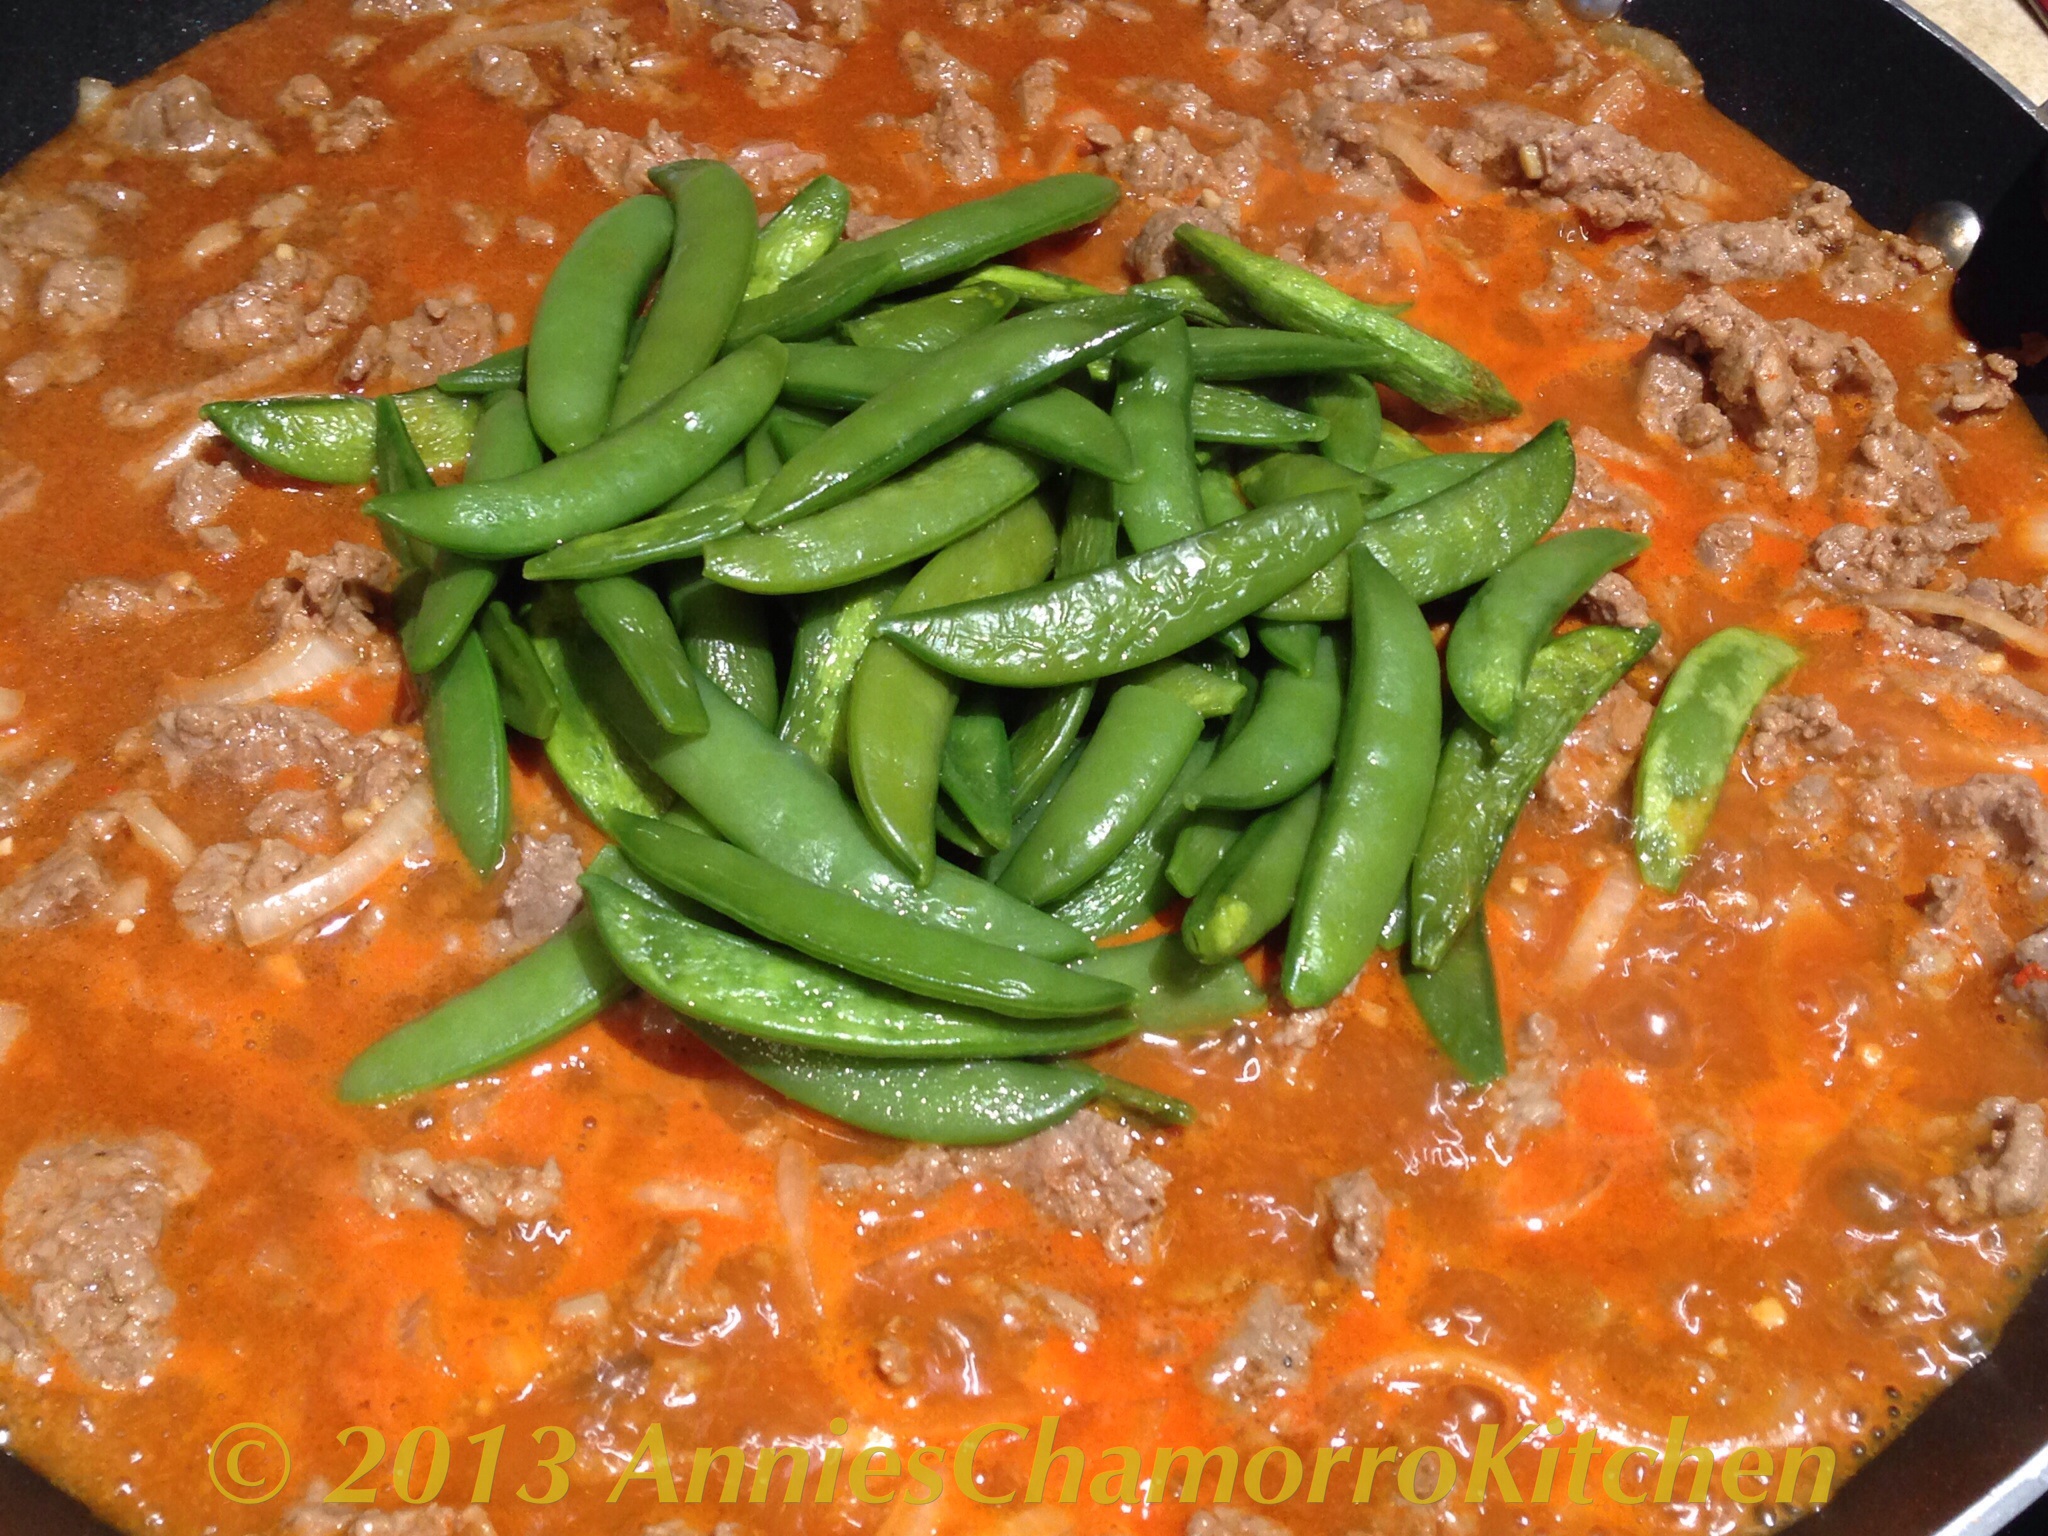
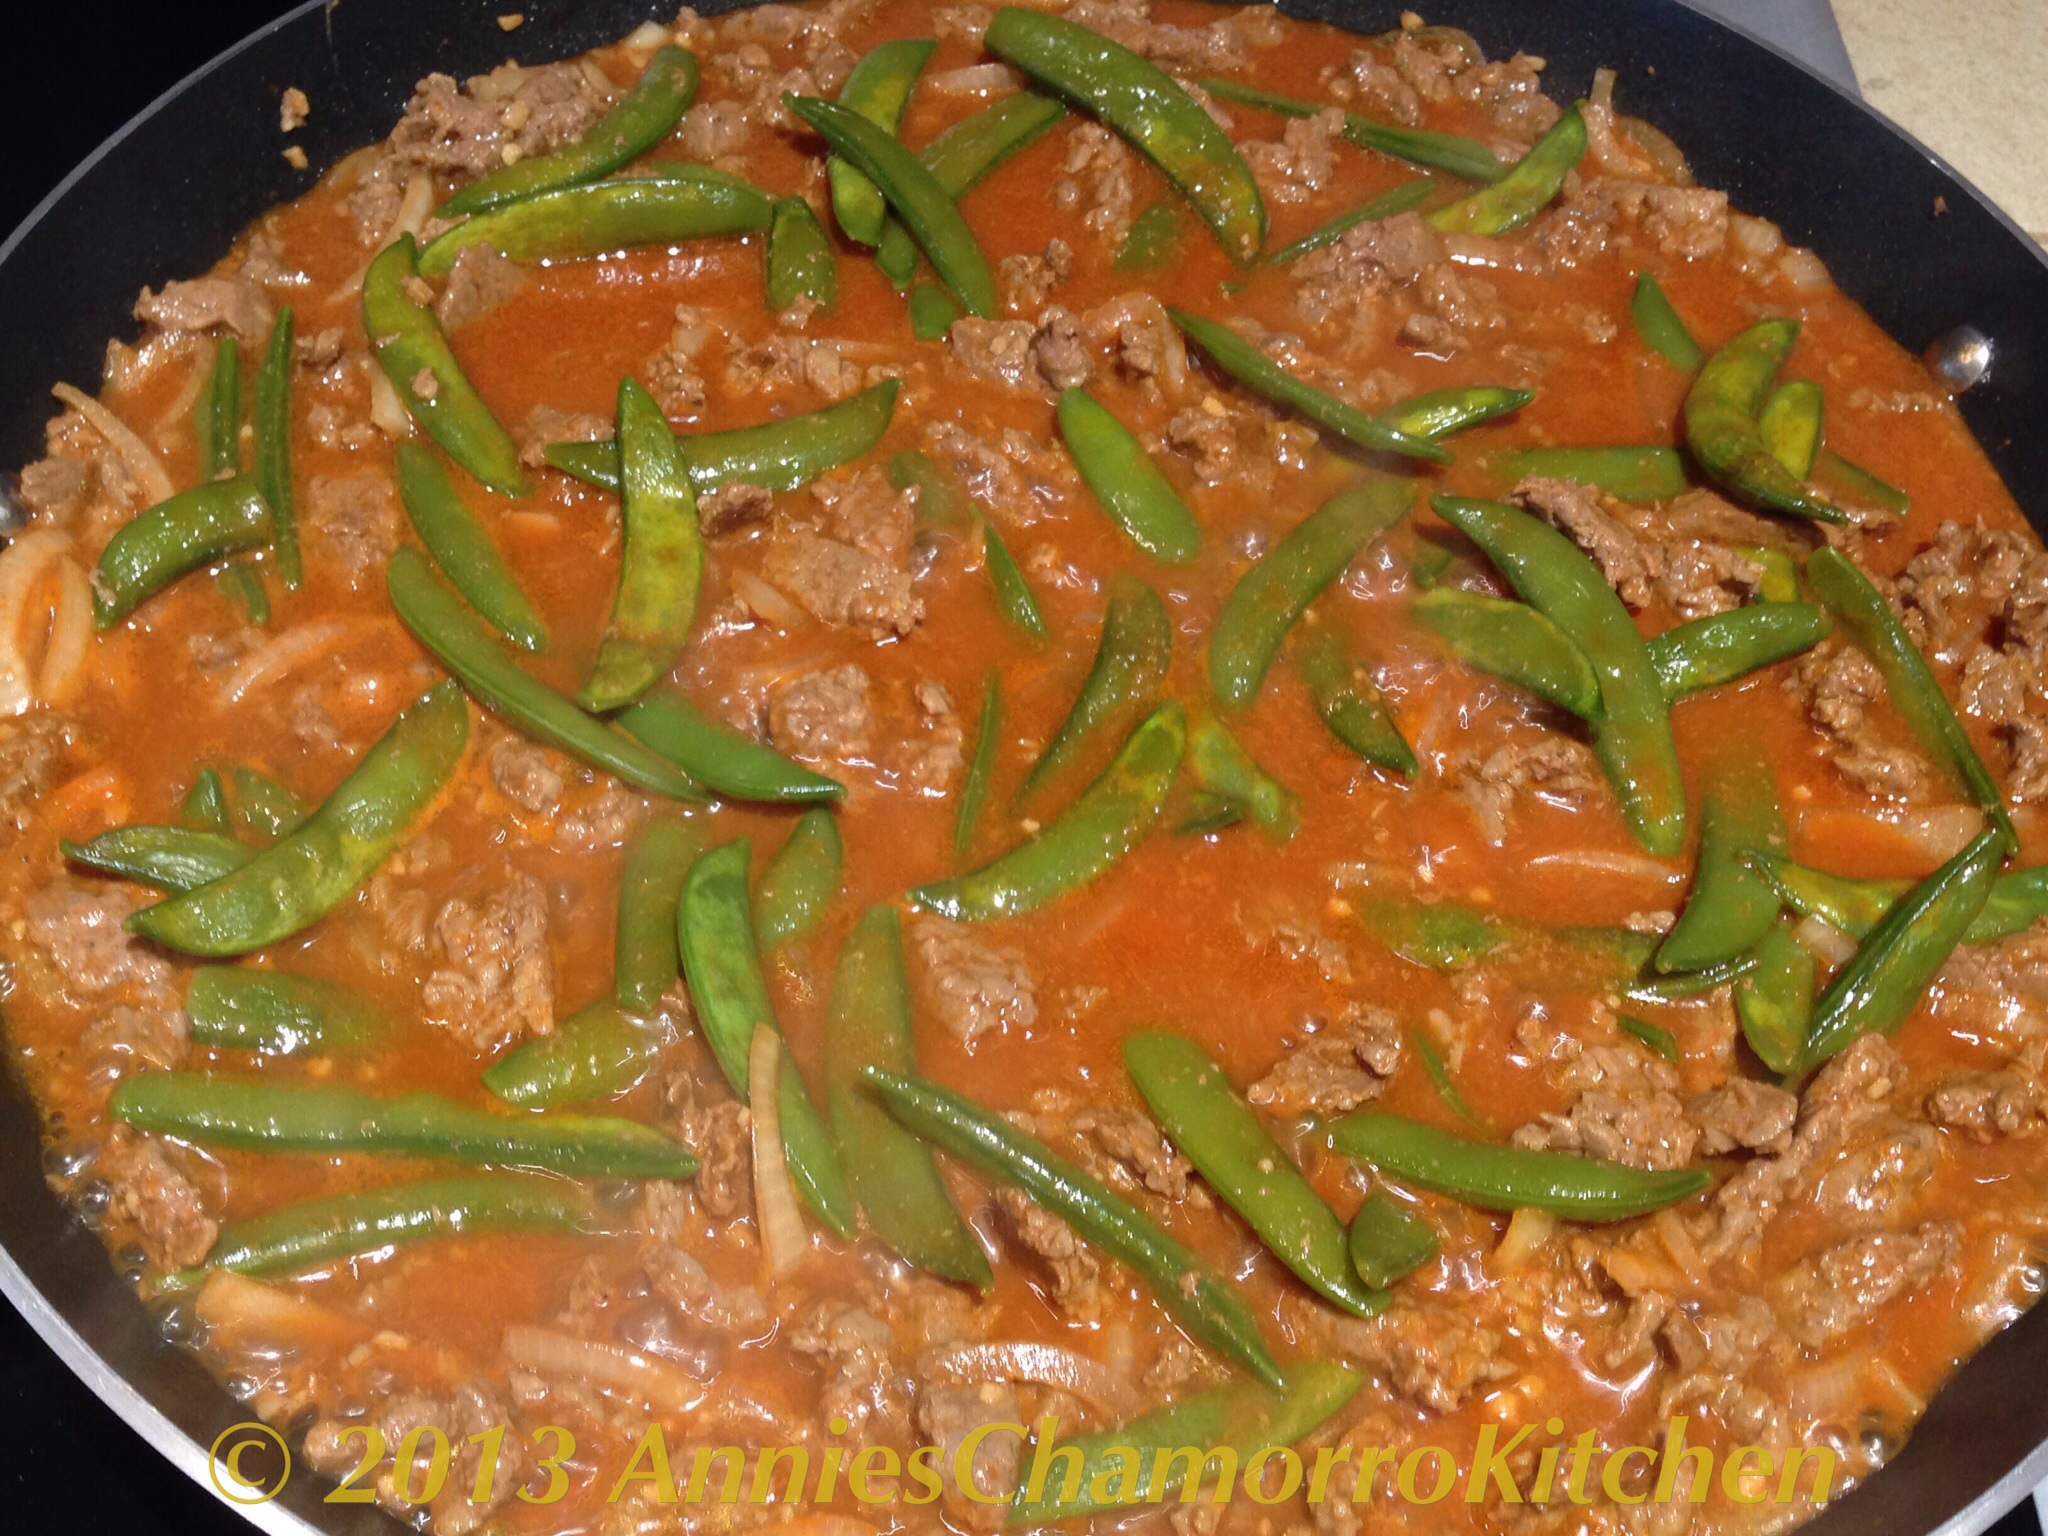
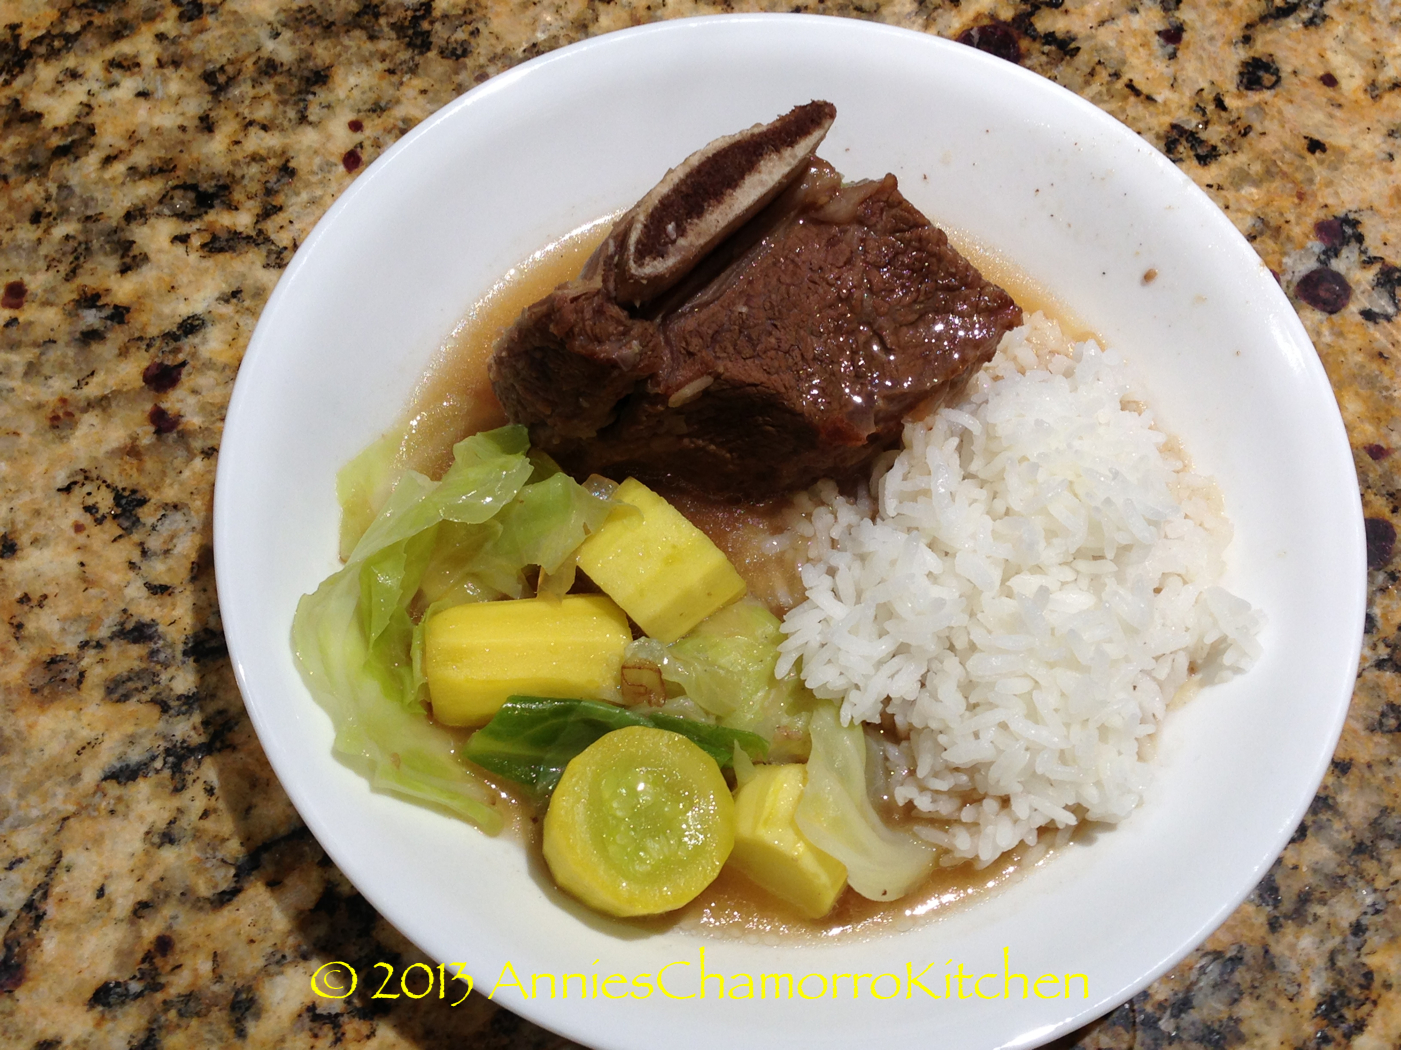
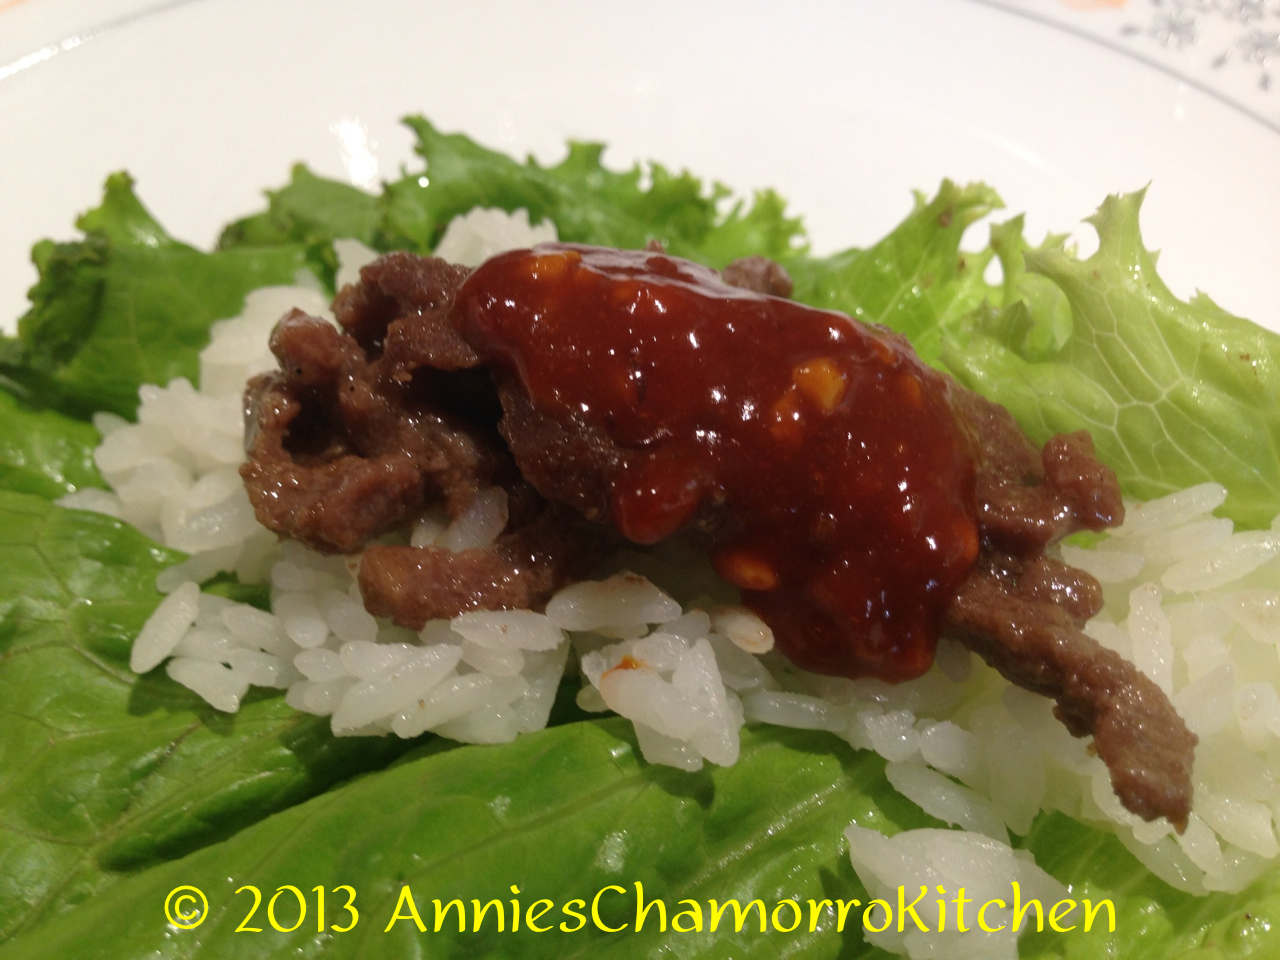
After the vegetables are cooked/reheated to your liking, remove the Bistek from the heat and serve with steaming hot white rice.  ENJOY!

image


Chamorro Bistek (or Bisteak)

Ingredients:

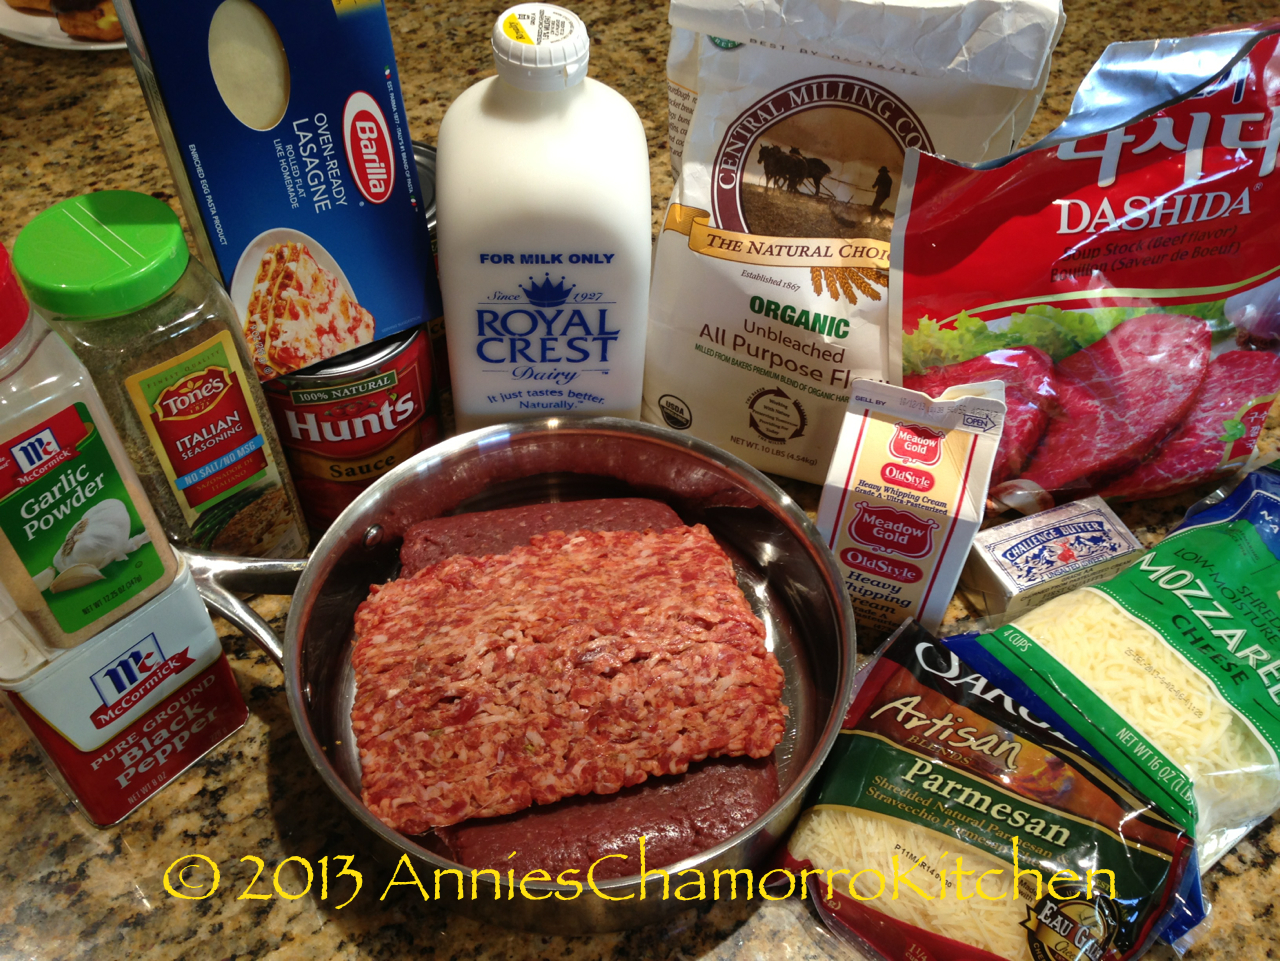
  • 2 pounds thinly sliced beef
  • 4 tablespoons Dashida beef flavored seasoning
  • 2 tablespoons minced garlic
  • 1/2 teaspoon black pepper
  • 1 large onion, thinly sliced
  • 3/4 cup white vinegar
  • 1/4 cup soy sauce
  • 1 cup water*
  • 1 packet achote powder*
  • *If using achote seeds, make enough achote water to yield 1 cup
  • Optional:  1 cup frozen or fresh peas, sugar snap peas, or green beans

Directions:

1.  Place the beef, Dashida, garlic, black pepper, and onions in a large pan.  Cook until the beef is browned.

2.  Stir in the vinegar, soy sauce, water and achote powder.  Cook for about 5 minutes.

3.  Stir in your vegetables.  Cook long enough to reheat the vegetables (if frozen), or until the fresh vegetables are cooked to your liking.

4.  Serve with hot white rice and ENJOY!  🙂


Print Friendly, PDF & Email

Lasagne al Forno

I first made this lasagne years ago, when I lived in Germany (yes, Germany, not Italy).  There was this small family run Italian restaurant in the little German town we lived in.  Aside from the restaurants and cafés in Italy, that little Italian restaurant in Germany is the best I’ve ever been to.  It’s been over 15 years since I’ve been there, yet I have not yet found any Italian restaurant to compare to that one in Germany.

This recipe is my take on one of my favorite dishes served there.  The blend of the tomato and bechamel sauces take this pasta dish to a whole new level.  Give my recipe a try.  I think you’ll like it.  🙂 

LASAGNE AL FORNO

IMG_1045 

INGREDIENTS:

  • 1 box no-bake lasagne noodles (have a 2nd box on hand in case you use a large pan)
  • Meat sauce (see below)
  • Bechamel sauce (see below)
  • 1 bag (1 pound) shredded mozzarella cheese
  • 1 cup grated Parmesan-Romano cheese blend

Lasagne al Forno ingredients

Meat Sauce:
    • 1 pound mild Italian sausage
    • 1 pound lean ground beef (you can omit this if you want your sauce less meaty)
    • 1 medium onion, chopped
    • 2 teaspoons garlic powder
    • 2 tablespoons Dashida beef flavored seasoning
    • 2 tablespoons Italian seasoning
    • 6 leaves fresh basil, chopped into small pieces
    • Black pepper, to taste
    • 2 29-ounce cans tomato sauce
Directions to make the Meat Sauce:

1.  Brown the sausage and ground beef.  Drain any excess fat and liquid.

IMG_0982

 2.  After the meat has browned, add the Dashida, onions, garlic powder, Italian seasoning and basil.

IMG_0983

IMG_0987

3.  Cook until the onions are translucent. 

IMG_0991

4.  Add the tomato sauce to the ground meat mixture.  Stir to combine.  Simmer for 5 minutes then turn off the heat.  Set aside.

IMG_0995

IMG_1002

 
Bechamel Sauce:
  • 4 tablespoons butter
  • 6 tablespoons flour
  • 2 cups milk
  • 3 cups heavy cream
  • 1/2 teaspoon salt
  • 1 teaspoon grated nutmeg
  • Black pepper, to taste
  • 1 5-ounce bag grated Parmesan cheese
Directions to make the Bechamel Sauce:

1. In a medium sauce pan, melt the butter.

IMG_0988

2.  Add the flour (all at once) to the melted butter.

IMG_0998

3.  Use a whisk to mix the flour and butter together.  Cook over medium low heat for about 2-3 minutes.  Whisk constantly to prevent burning.

IMG_1003

4. Slowly whisk in the milk and cream.  Whisk vigorously to ensure there are no lumps. 

IMG_1009

5.  Add the grated Parmesan cheese to the milk mixture.  Turn the heat up to medium high. Continue whisking; cook until the cheese melts and the sauce thickens.

IMG_1020

You know the sauce is thick enough when you dip a spoon into it, run your finger down the spoon, and you leave a line down the spoon that doesn’t disappear with runny sauce.

IMG_1024

6.  Add the grated nutmeg, and salt and pepper to taste.  Turn the heat off and set the sauce aside.  NOTE:  This sauce is EXCELLENT for fettuccine alfredo.  🙂

IMG_1023 


Assemble the Lasagne al Forno:

1. Using a large lasagne pan, or a deep dish baking/roasting pan, spread a thin layer of meat sauce on the bottom of the pan.

IMG_1021

2.  Add a layer of noodles.  Don’t worry about filling in the spaces with noodles; these no-cook noodles will expand during the baking process.

IMG_1022

3.  Pour some bechamel sauce over the noodles, just enough to cover the noodles.

IMG_1027

4.  Sprinkle shredded and grated cheese over the bechamel sauce.  Top with another layer of noodles.

IMG_1028

5.  Repeat the layering process — meat sauce, noodles, bechamel sauce, cheese, noodles — until you’ve used up all of your sauce and/or noodles.  The last layer (on top) should be bechamel sauce topped with cheese.

IMG_1033

6.  Heat the oven to 375 degrees.  Place the pan of lasagne on top of a large baking sheet.  Cover the pan of lasagne with aluminum foil.  Bake at 375 degrees for 25 minutes. 

IMG_1038

IMG_1039

7.  After 25 minutes, remove the aluminum foil.  Turn the oven to Broil — continue to bake the lasagne for 5 more minutes to brown the cheese on top.

IMG_1044

8.  Once the cheese has browned, remove the pan from the oven.  Before serving, let the lasagne sit for at least 15 minutes (don’t worry, it will still be hot) to allow the sauces to set.  If you serve immediately after removing the lasagne from the oven, the sauces will run all over the place (it will still taste delicious, but your presentation won’t be as “pretty”).  Serve with your favorite crusty bread and ENJOY!  🙂

IMG_1045


Print Friendly, PDF & Email

Short Ribs Soup (Kådun Kåtne)

It’s cold and rainy right now in the Colorado Rockies…perfect weather for Short Ribs Soup.  We call this Kådun Kåtne in Chamorro.  You can substitute short ribs with your favorite cut of beef–other favorites are oxtails (don’t knock it ’till you try it) and beef shanks.

You can even change this up further by adding your favorite vegetables–potatoes, taro, other types of squash, and baby bok choy are delicious in this recipe too!

Give my recipe a try.  I think you’ll like it.  🙂


SHORT RIBS SOUP (KÅDUN KÅTNE)

IMG_0841

INGREDIENTS:

  • 3 packages (9 pieces) thick cut short ribs (rinse each piece well)
  • 1 large onion, diced
  • 2 tablespoons minced garlic
  • 8-10 cups water
  • 6 tablespoons Dashida beef flavored seasoning
  • Black pepper, to taste
  • 1 small head cabbage, cut into small pieces
  • 4 small yellow squash, peeled and cubed

DIRECTIONS:

1.  Place half of the diced onions in a large soup pot.  Add the short ribs and garlic.  Brown the ribs on all sides over medium high heat.

IMG_0411 IMG_0415 IMG_0424

2.  After the ribs are browned on all sides, add 8 cups of the water, the remaining onions and Dashida.  Place a lid on the pot and bring to a boil.  Every now and then, skim off and discard any scum that rises to the surface.

IMG_0433

3.  Cook the ribs for 45 minutes to an hour over medium high heat.  Keep the lid covered while cooking; uncover only to skim off any scum on the surface then replace the lid.  If you need to, add the remaining water (keep the ribs submerged in liquid during cooking).  After an hour, the ribs should be tender.  If the ribs are not as tender as you’d like, cook for 15-20 more minutes.

This is what the scum looks like — you want to scoop this out and discard it.

IMG_0834

4.  When the ribs are done (and as tender as you’d like them), add the vegetables.  First, layer the cabbage on top of the ribs.  Press down on the cabbage, just slightly so that the leaves are moistened with the broth.  Layer the squash on top of the cabbage leaves, also pressing them into the broth (do not stir the vegetables into the soup–they will cook ON TOP of the ribs).  Cook for 5 minutes then turn off the heat.

IMG_0835 IMG_0836 IMG_0838

NOTE:

Before serving, I usually scoop out a good amount of kådu (soup broth) into a freezer-safe bowl, then place the bowl in the freezer for several minutes.  All of the fat will rise to the surface and harden.  After the fat solidifies, I scoop it out and discard it, then reheat the kådu.

IMG_0846 IMG_0848

5.  After the kådu is reheated, remove the pot from the heat.  Taste the broth; re-season if necessary with Dashida and pepper.  Serve with hot white rice and fina’denne’.  Enjoy!

IMG_0844

Print Friendly, PDF & Email

Homemade Beer Chili

Homemade chili such a versatile dish that can be changed up depending on the ingredients you add.

My family’s favorite is chili made with ground beef, but we also love white chicken chili and chili made with ground chuck (or cut into small pieces) and cooked in a pressure cooker.

It’s not only versatile in how it’s prepared, but how you serve it too.  Of course, being Chamorro, we love eating steaming hot chili with freshly cooked white rice.  We also love it served with chips–our favorites being Doritos or Fritos–or heaped onto a baked potato with a generous amount of shredded cheddar cheese sprinkled on top.

However you serve it, it’s delicious.

My recipe contains some unusual ingredients–my “secret” ingredients.  (Shhhh….don’t tell anyone.)  🙂

Among my treasure trove of secrets in this recipe, I add an entire 12-ounce bottle of beer–YES, BEER.  I like using ale in this recipe, but by all means, use your favorite beer or whatever you have on hand.  Don’t worry, though–all of the alcohol gets cooked out, leaving behind only a hint of beer, imparting a new dimension of flavor that will leave your friends wondering what you put in it.

IMG_1028

I also add about a cup of crushed tortilla chips.  This serves as a thickening agent without adding flours or starches to the chili.  Add more chips for a thicker chili.  I think I used about 5 or 6 handfuls of chips to get a cup’s worth of crushed chips.  Just put the chips in a bowl and smash it with your hands.

IMG_1038

Give my recipe a try–I think you’ll like it.  🙂

Click on the thumbnail photos below to open up a full-sized photo.

Homemade Beer Chili
 
This is a hearty and very tasty chili that contains my "secret" ingredients that are sure to make you come back for more!
Ingredients
  • 2 lb ground beef
  • 6 tablespoon Dashida beef flavored seasoning
  • 1 medium onion
  • 2 tablespoon minced garlic
  • 12 oz beer
  • 3½ tablespoon chili powder
  • 1 tablespoon smoked paprika
  • 1 can (28-oz) crushed tomatoes
  • 1 can (28-oz) diced tomatoes
  • 1 cup crushed tortilla chips
  • 2 can (15.5-oz) white kidney beans
  • 2 can (16-oz) dark red kidney beans
  • 4 tablespoon grated Parmesan cheese
  • 1 tablespoon brown sugar
  • salt and black pepper
  • jalapeño peppers
Instructions
  1. Place the ground beef in a large pot. Add the Dashida; stir.
  2. Add the onions to the pot.
  3. Cook over medium high heat until the meat has browned. I like using this utensil from Pampered Chef -- it's used to break up the ground beef into smaller pieces as you cook it (I switch to a cooking spoon after the meat has browned).
  4. Pour in the beer. I like using a good ale, but you can use your favorite beer. Turn the heat up to high and bring to a boil. Stir occasionally. Keep the heat on high until the liquid in the pot has dried down and the alcohol has cooked out.
  5. Add the chili powder. Stir to combine.
  6. Add the paprika. Stir to combine.
  7. Add both cans of tomatoes (crushed and diced) to the pot. Stir to combine. Reduce the heat to medium.
  8. Add the crushed tortilla chips to the pot. Stir to combine.
  9. Add the beans and stir. Keep the heat at medium; cook, uncovered, until the mixture returns to a boil. The crushed chips should have softened and dissolved into the mixture by now, thickening it up quite a bit.
  10. Add the Parmesan cheese; stir. I like adding grated cheese to this recipe. It adds a bit of saltiness and gives it added depth of flavor.
  11. Add the brown sugar; stir. The brown sugar adds another layer of flavor in my recipe. I find it also balances the saltiness from the Dashida and grated Parmesan cheese, as well as compliments the spiciness from any added chili peppers (optional).
  12. At this point, you can stir as much hot chili peppers you like. My kids don't like spicy chili so I don't add it.
  13. Serve over hot rice, or in a bowl with a side of your favorite chips (we like Fritos or Doritos with this). Enjoy!


Print Friendly, PDF & Email

Korean Lettuce Wraps (Ssambap)

When my family and I lived in Seoul, we had a favorite restaurant that was nestled along the Han River.  Like many Korean BBQ restaurants, this one served the popular dishes, Ssamgyeopsal (BBQ pork belly), Bulgogi, Galbi, Denjang Chigae, Yukejang, Kimchi Chigae, and another one of my favorites — Ssambap, or lettuce wraps, or what foreigners call Beef and Leaf.

This is delicious with just the lettuce leaf stuffed with rice, the meat of choice (I’m using bulgogi in this recipe), and ssamjang, but it’s also delicious with a piece of grilled garlic, a slice of grilled hot green peppers, and a piece of kimchi all wrapped in a neat little package — or as little as you can make it with all of that stuffed into the lettuce leaf.

During my first tour to Korea over a decade ago, a Korean officer told me that to be “polite”, one must never wrap more than what can be stuffed into your mouth in one bite-sized serving.

But to do that, you can’t wrap as much “stuff” (kimchi, garlic, pepper, meat, rice, etc) into it without having your cheeks bulge out for being so full.

Try as I might to make these into small lettuce wraps, I always end up taking two or three bites with one little package.  I guess this is okay if you’re making this at home.  And make this at home is a must — it’s so delicious that you cannot overlook this dish.  A word or warning, though.  If you add grilled garlic to this, I advise you to make this on a Friday so that you have all weekend to get the smell out of your pores by the time you have to go to work on Monday.

It’s either that or invite your entire office staff to your house for dinner so that you can ALL smell the same for the next couple of days!  🙂

All kidding aside, this is a very simple dish to make.  Give it a try — I know you’ll like it.  🙂

Enjoy!


KOREAN LETTUCE WRAPS (SSAMBAP)

Beef and Leaf - 15

INGREDIENTS:

Bulgogi:

  • 2 pounds lean beef, cut into strips
  • 1 cup soy sauce
  • 1/4 cup vinegar
  • 1/4 cup honey
  • 1 tablespoon minced garlic

Ssamjang:

  • 1/2 cup Korean pepper paste, or Gochujang
  • 2 tablespoons soy sauce
  • 1 tablespoon sesame oil
  • 1 tablespoon minced garlic
  • 1 tablespoon sugar
  • Sesame seeds
  • Optional:  1 stalk green onions, sliced thinly

 Other Ingredients:

  • 1 head of green, leafy lettuce
  • 2 tablespoons sesame oil, for stir frying the bulgogi
  • Cooked white rice
DIRECTIONS:

1.  Place the beef into a ziplock bag.  Add the rest of the ingredients.  Seal the bag; allow the meat to marinate for a couple of hours.

Beef and Leaf - 03

2.  Place 2 tablespoons sesame oil into a large skillet.  Add the contents of the ziplock bag — the meat and marinade together.  Cook over medium high heat until the meat is done and the sauce has thickened.

Beef and Leaf - 01

Beef and Leaf - 07

3.  In a small bowl, mix together all of the ingredients for the ssamjang.  Set aside.

Beef and Leaf - 11 Beef and Leaf - 12

4.  Separate and rinse the lettuce leaves.  Dry with a paper towel.

Beef and Leaf - 10

5.  Assemble the lettuce wraps.  Place a lettuce leaf on a plate.  Add rice, bulgogi, and ssamjang.  Optional:  add a piece of kimchi.  Roll up into a little package or wrap, eat, and ENJOY!

Beef and Leaf - 13 Beef and Leaf - 14 Beef and Leaf - 15 Beef and Leaf - 17

Beef and Leaf - 16

Beef and Leaf - 09 

Print Friendly, PDF & Email
« Older Entries Recent Entries »