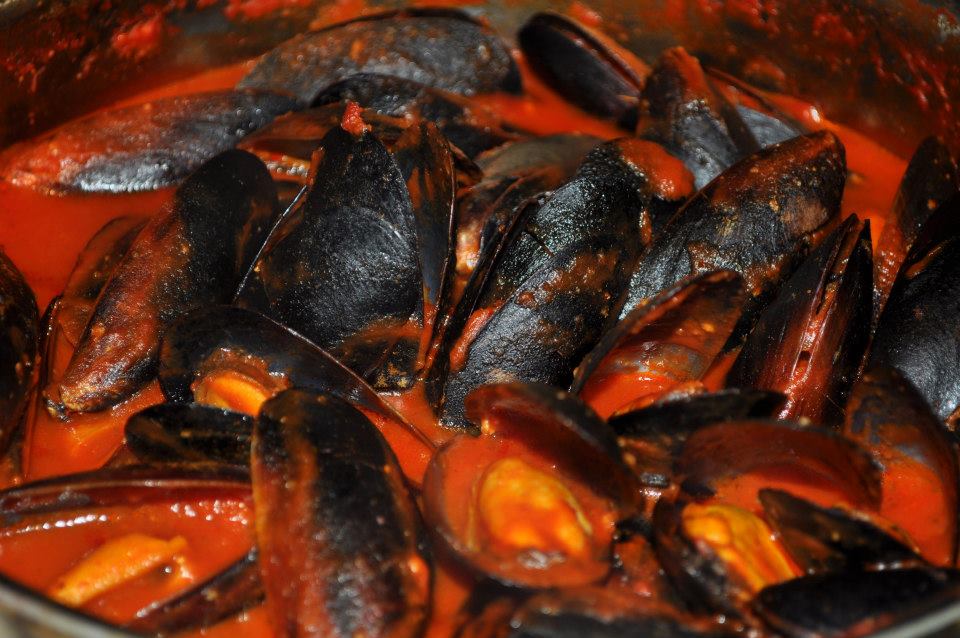
This is a very simple recipe that my daughter, Hannah, created for dinner one evening. (Have I mentioned that she’s a natural in the kitchen? Proud mama moment.) 😀
Hannah did not measure her ingredients as she just threw everything together. Luckily, you can “taste your way through this one.” 🙂
You’ll need a box of frozen mussels (thawed out), two large cans of tomato sauce, garlic (as much as you like), and some Dashida seasoning (or use salt), to taste.
Place the tomato sauce and garlic in a large pot over medium heat. Season the sauce with Dashida (or salt). Once the sauce is seasoned to your liking, add the thawed mussels. Cook for a few minutes until the mussels are no longer raw.
Serve as-is or over a bed of cooked spaghetti noodles.
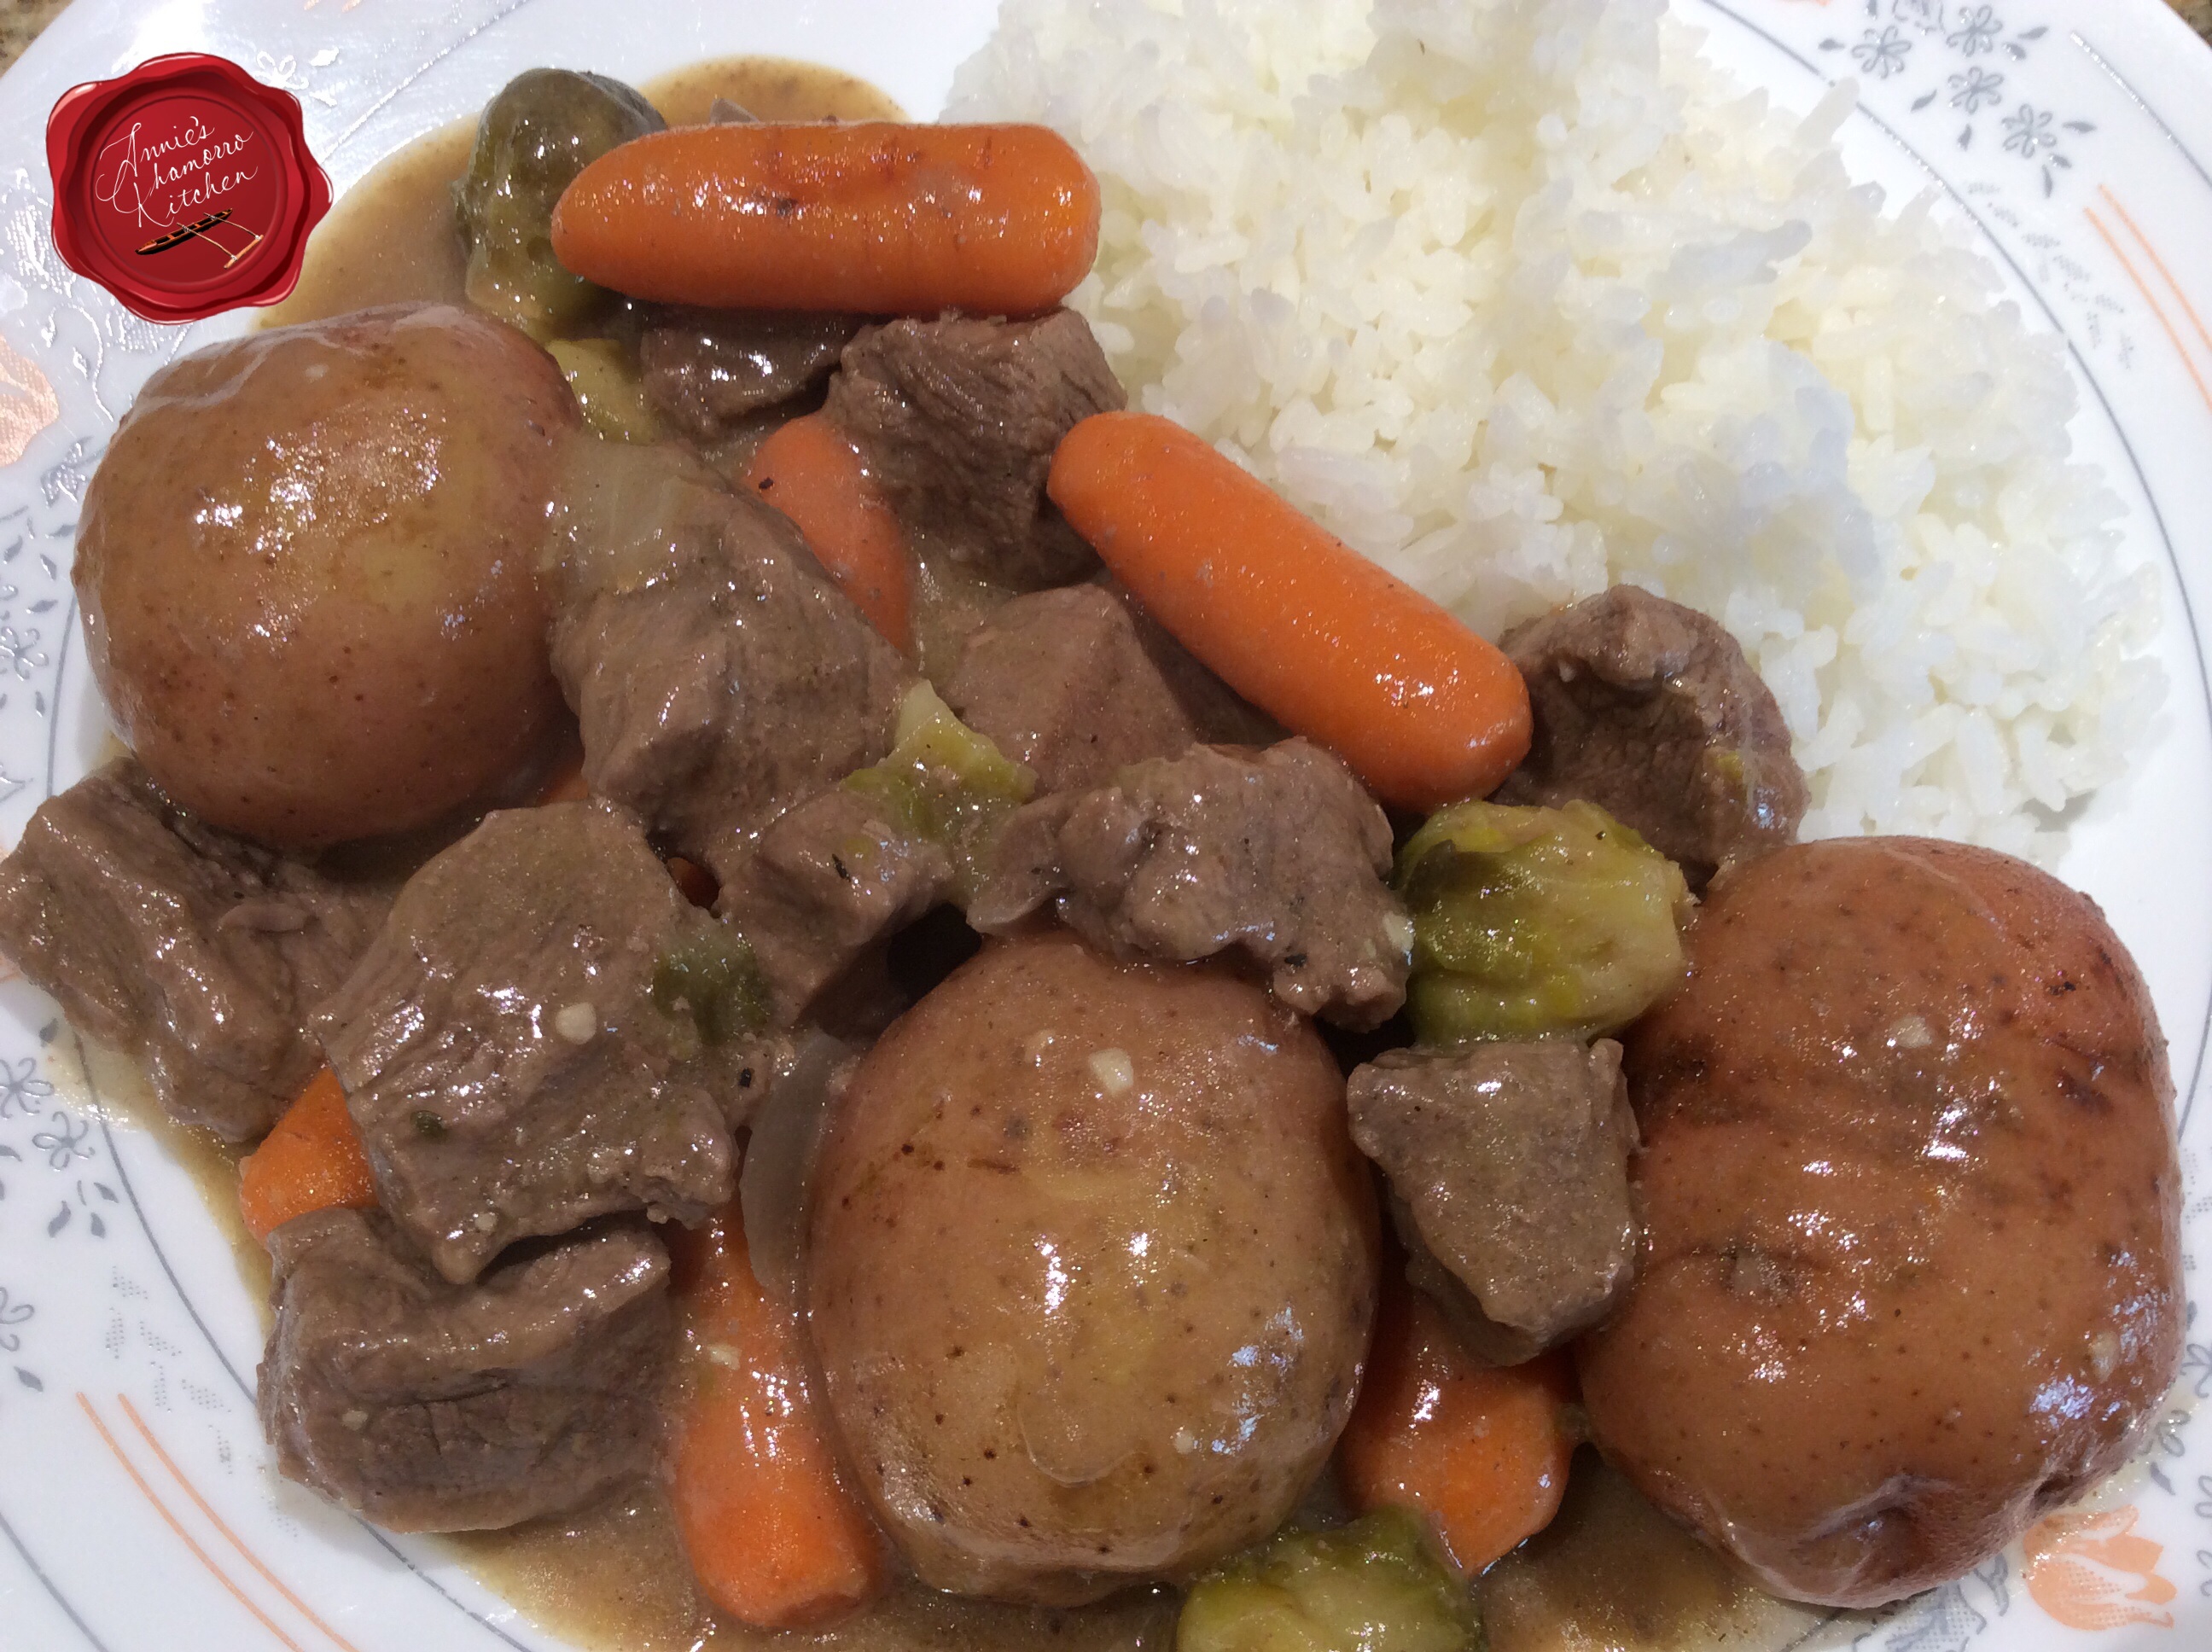
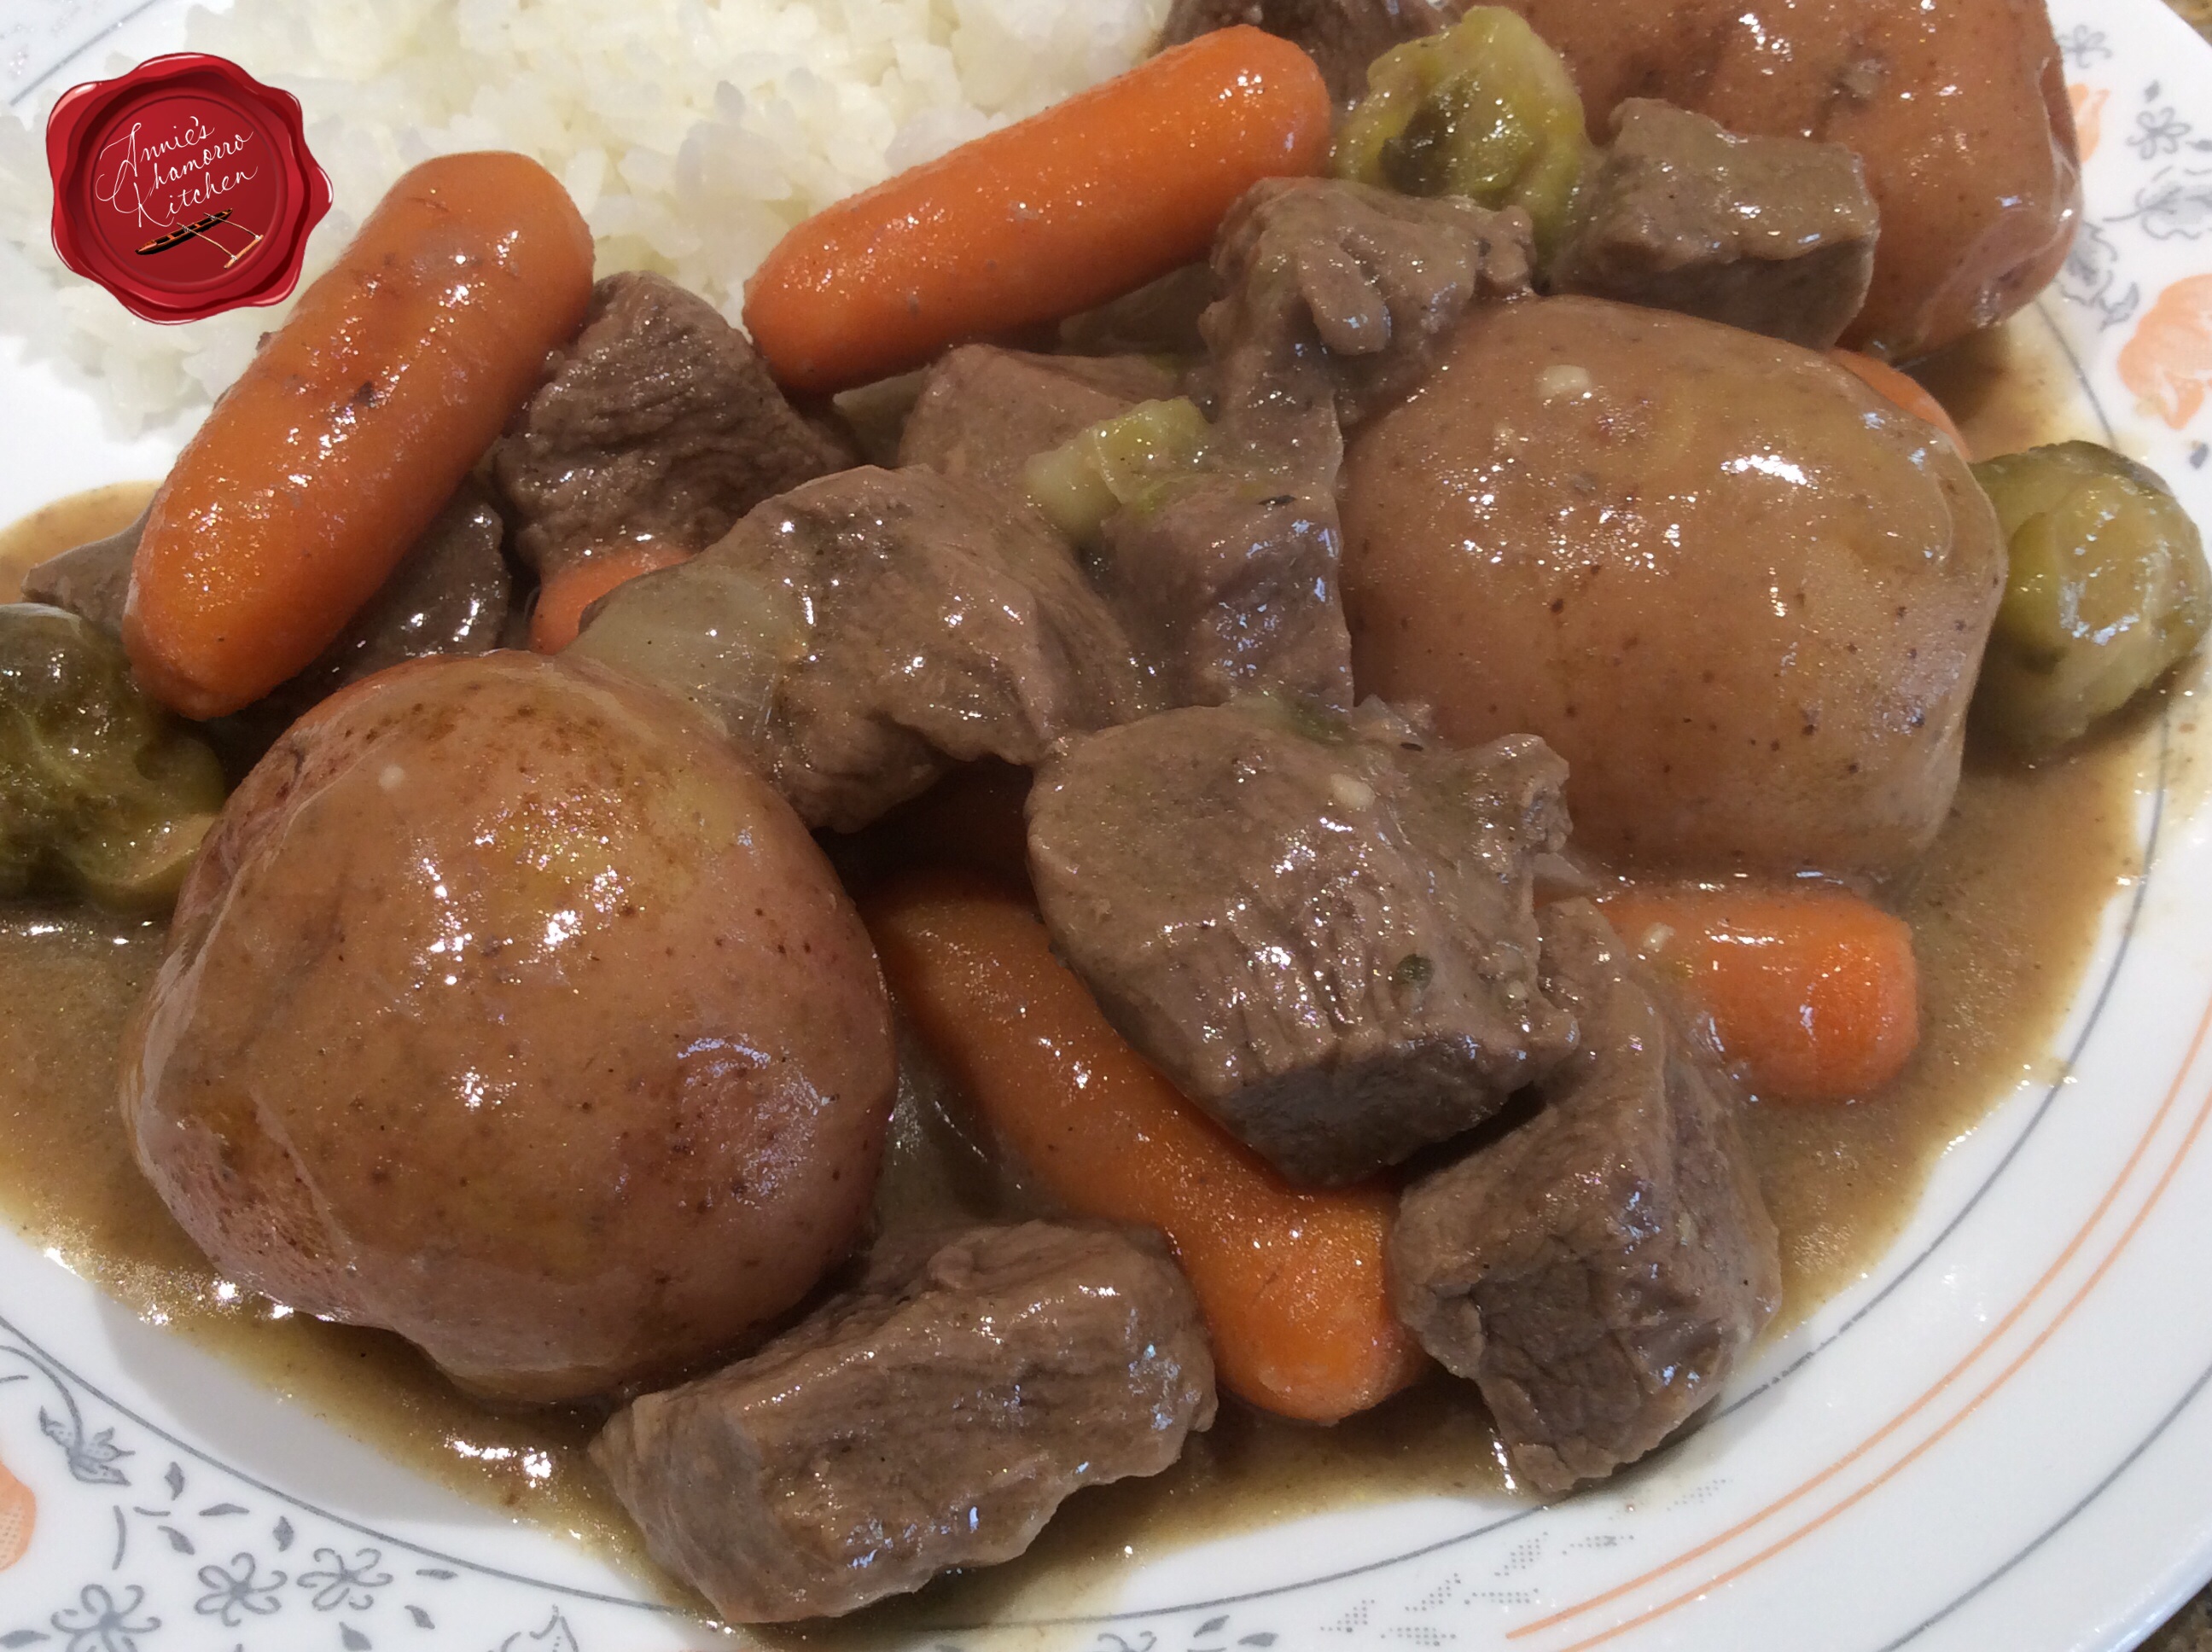
Beef stew is a comfort dish that everyone should know how to make. That and chicken soup — both are recipes you should have in your cooking repertoire. It’s not that difficult to put a beef stew together — you just brown some meat and throw in some vegetables, right? Wrong.
While not difficult to make, the order in which you cook your stew, and the seasonings and flavorings you add make the difference between a “WOW” and an “EHH” stew.
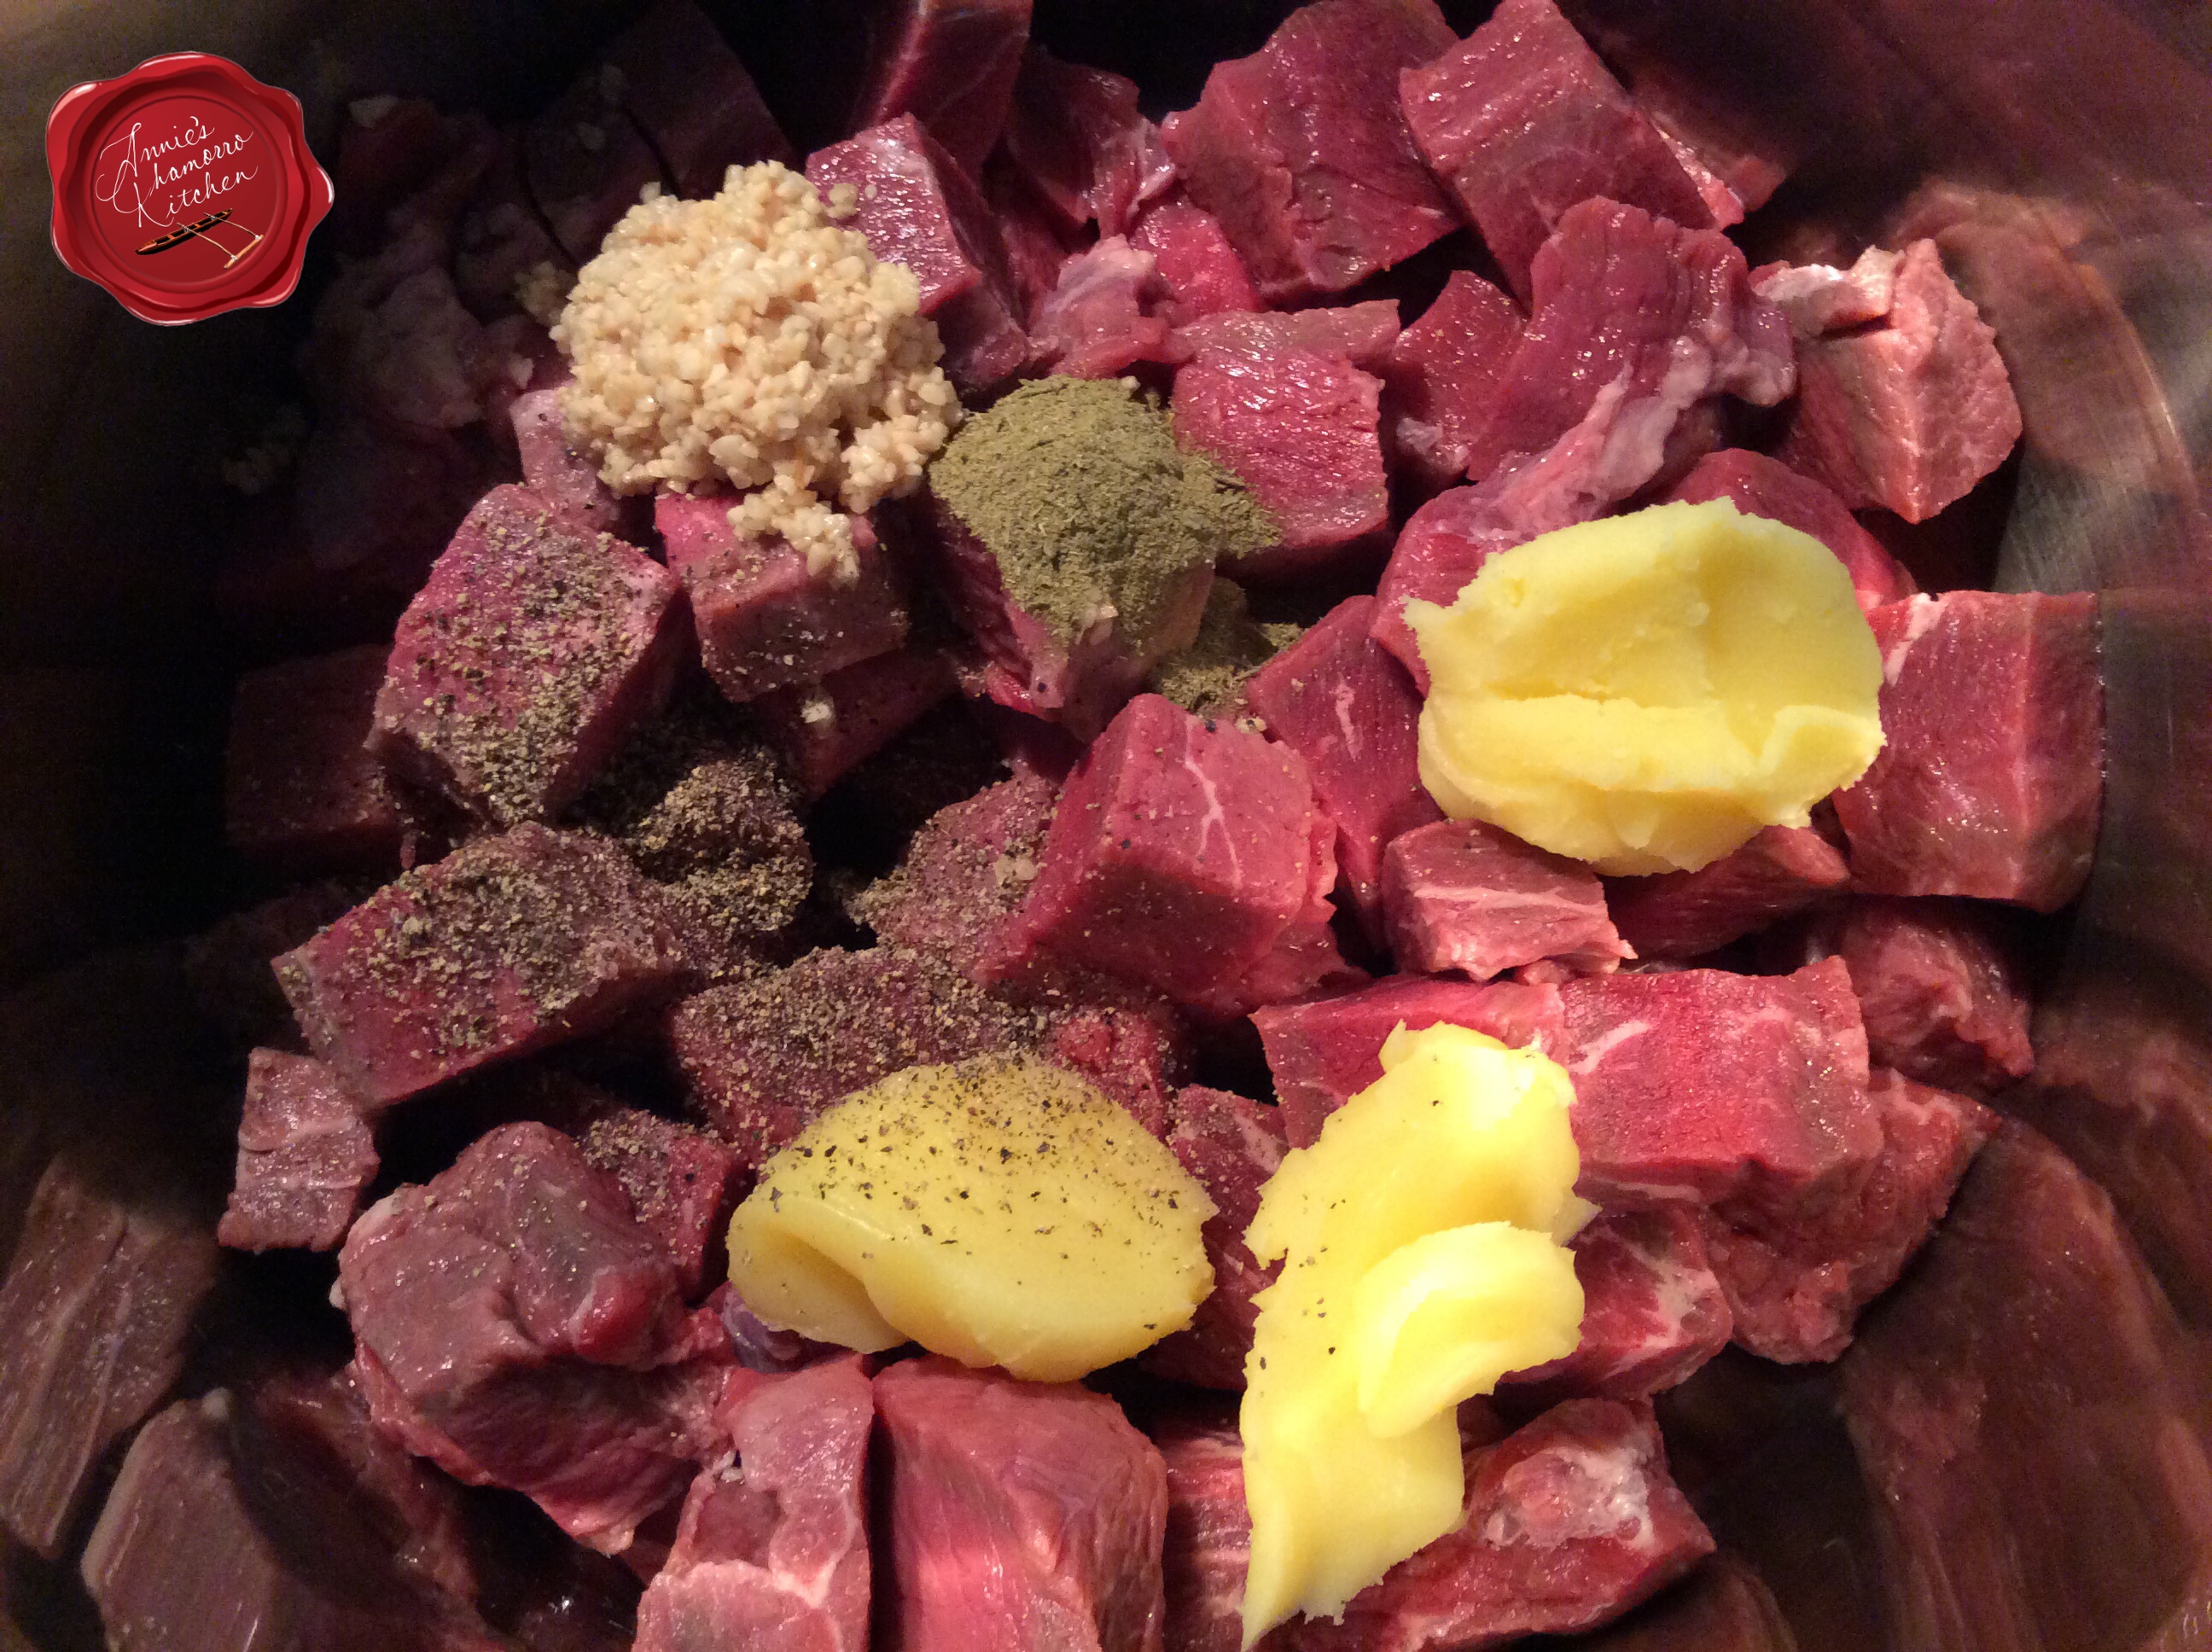
The first layer of flavor comes from browning good quality beef. I like using a top sirloin, but any good lean beef (a bit of marbling is okay) will do. Don’t just throw the meat into the pot and crank up the heat. Think of this as building a masterpiece. Right from the get-go, you’re building up the flavorful dimensions in this classic comfort dish.
Add the meat to the pot, along with some aromatics…in this case, garlic, freshly ground black pepper, salt, ground thyme and butter. Give the mixture a stir then let the meat and aromatics cook for 5 minutes over high heat. The browning of the meat also adds great depth of flavor, which is what you want. Do not add the liquid right away or you’ll have boiled meat soup instead of a rich and hearty stew.
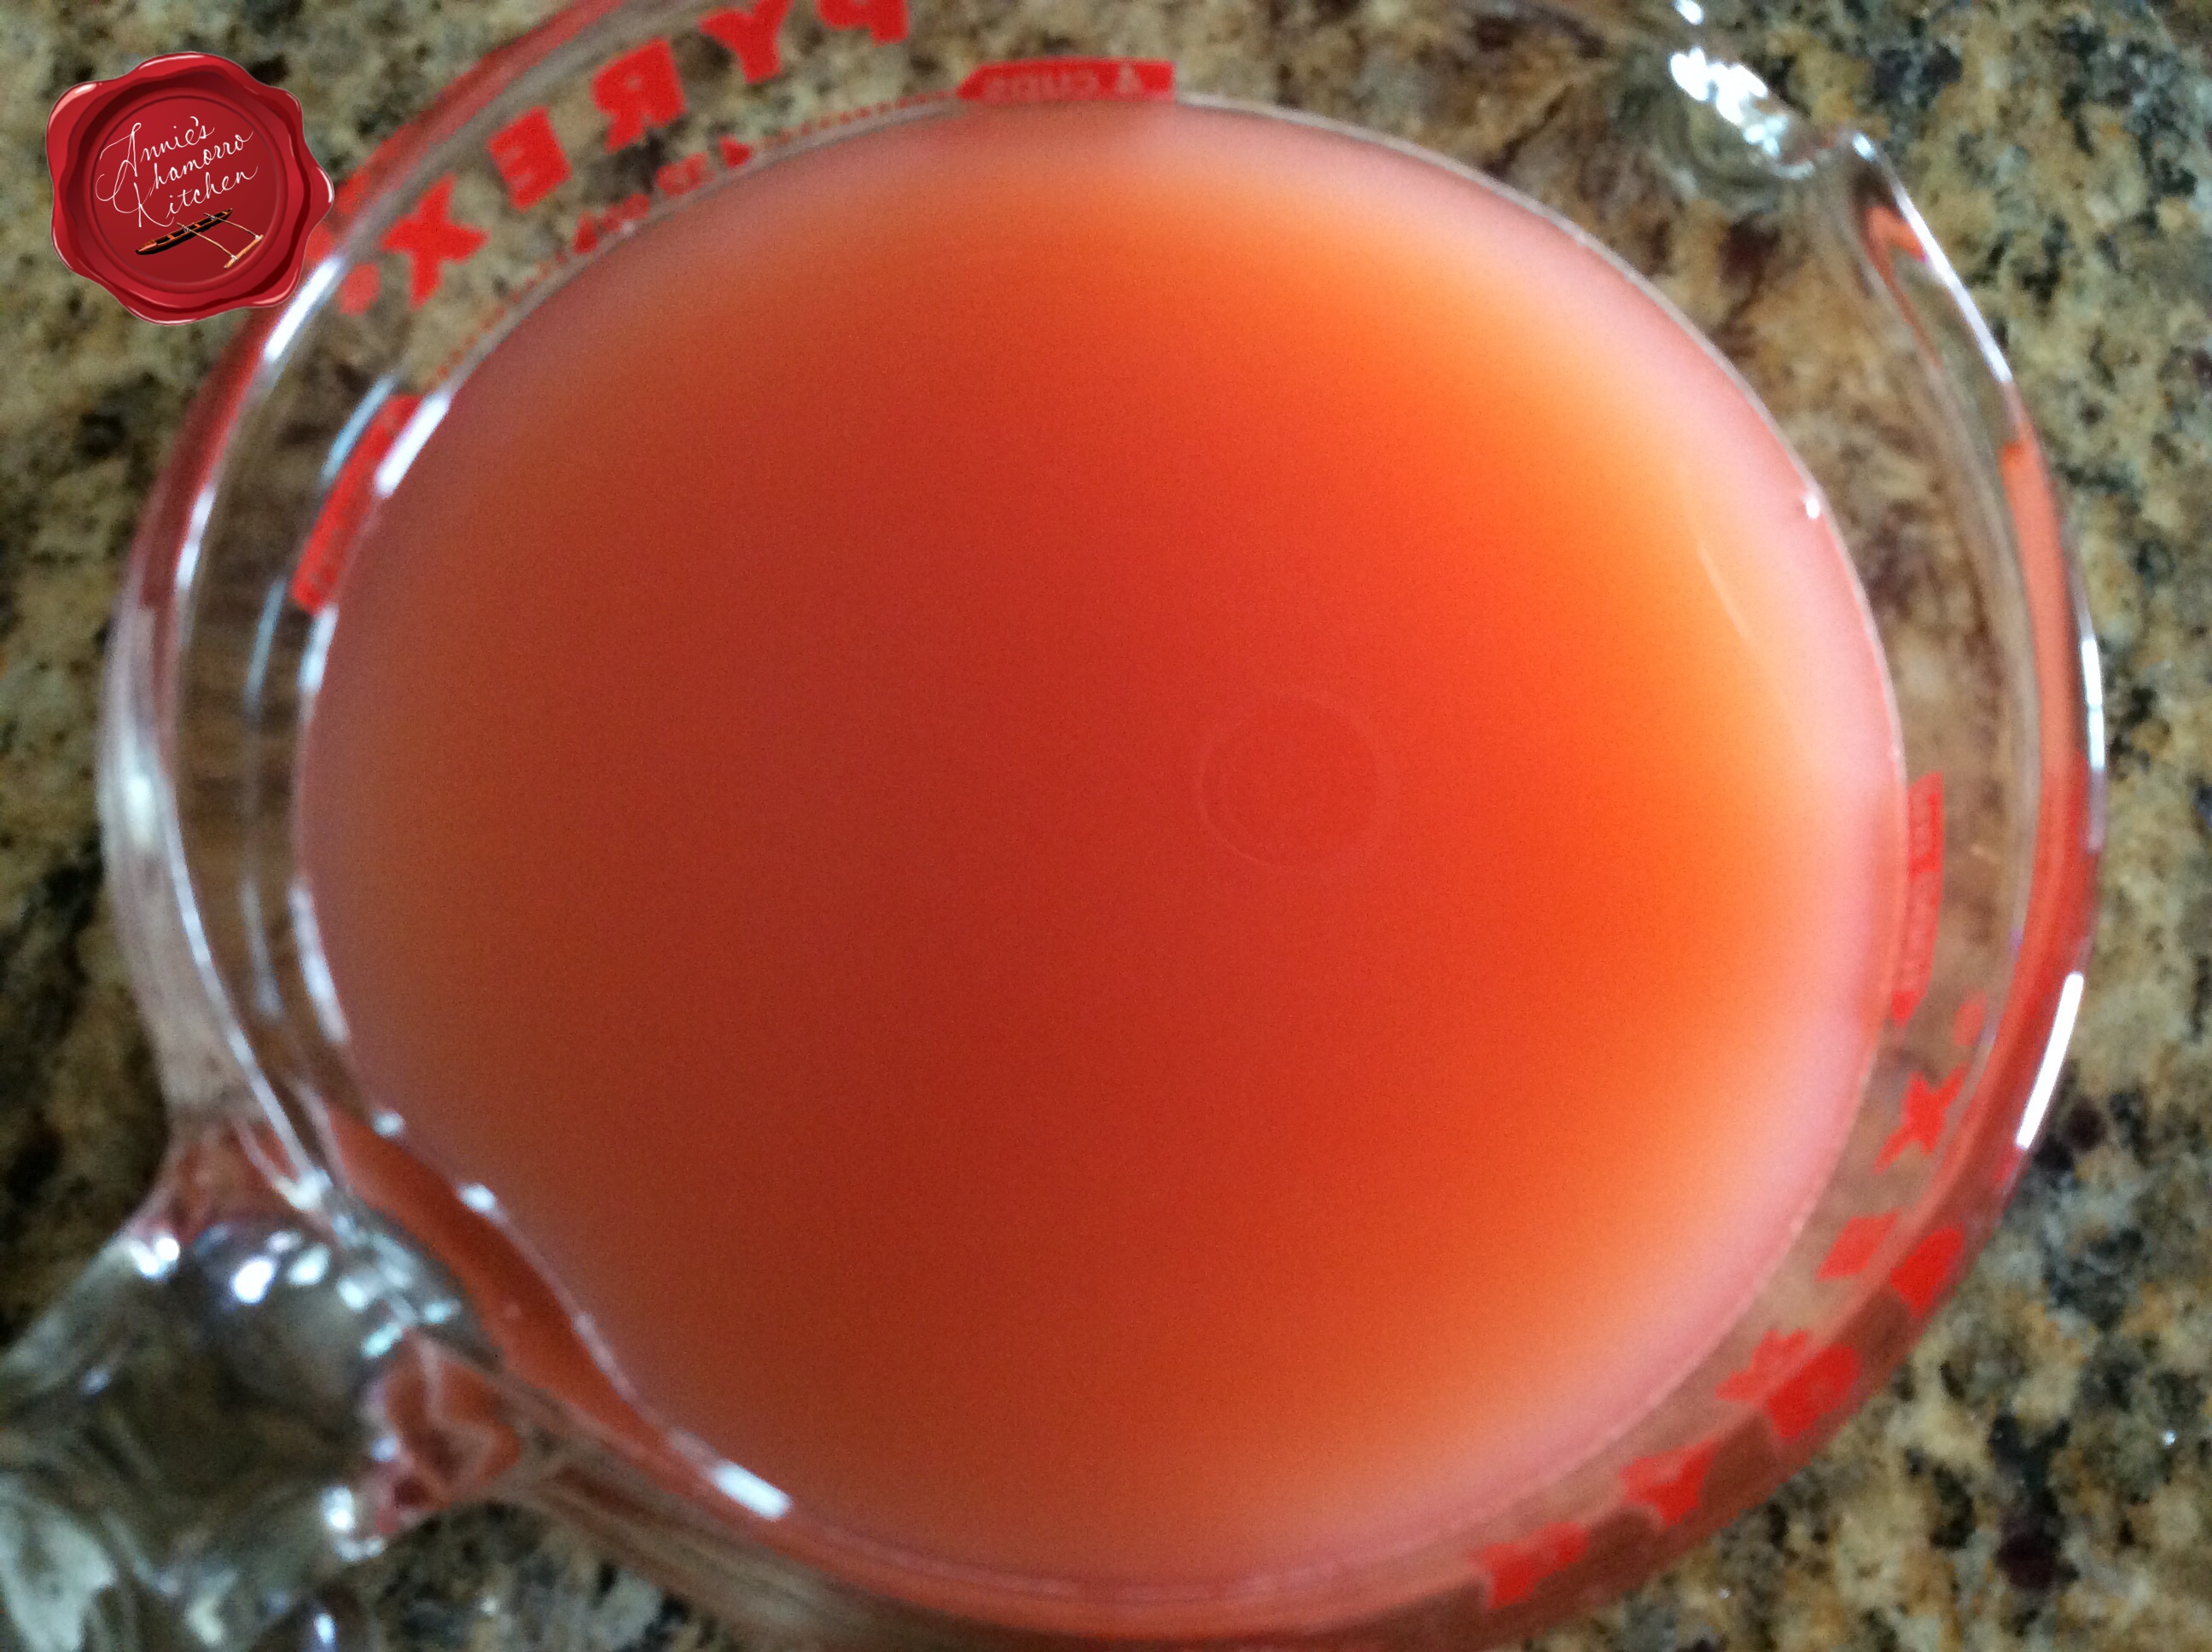
After the meat is nice and brown, and you’ve begun to build you base flavor, it’s time to add the liquids. A good beef stew uses some sort of wine. I recommend using a good quality red wine, burgundy if you have any. Don’t use the “cooking wine” you find in the salad dressing section of your grocery store. A good rule of thumb for cooking with wine is to use wine you like to drink out of a glass. Mix together some water, wine, and my secret ingredient (shhhh…don’t tell anyone), orange juice. See the flavor combinations going on here? I like adding orange juice to cut back on the strong flavor of the wine (my kids don’t like too much wine in my cooking). Add the wine mixture to the pot.
Now it’s time to create even more layers of flavor that will deepen with prolonged simmering. Turn your heat down to low, place a lid on the pot, and go away for two hours. Read a book. Catch up on your favorite television shows. Walk the dog. Do something but do not uncover that pot. Let the meat, liquid, and aromatics simmer happily, undisturbed. In two hours, the meat will get nice and tender.
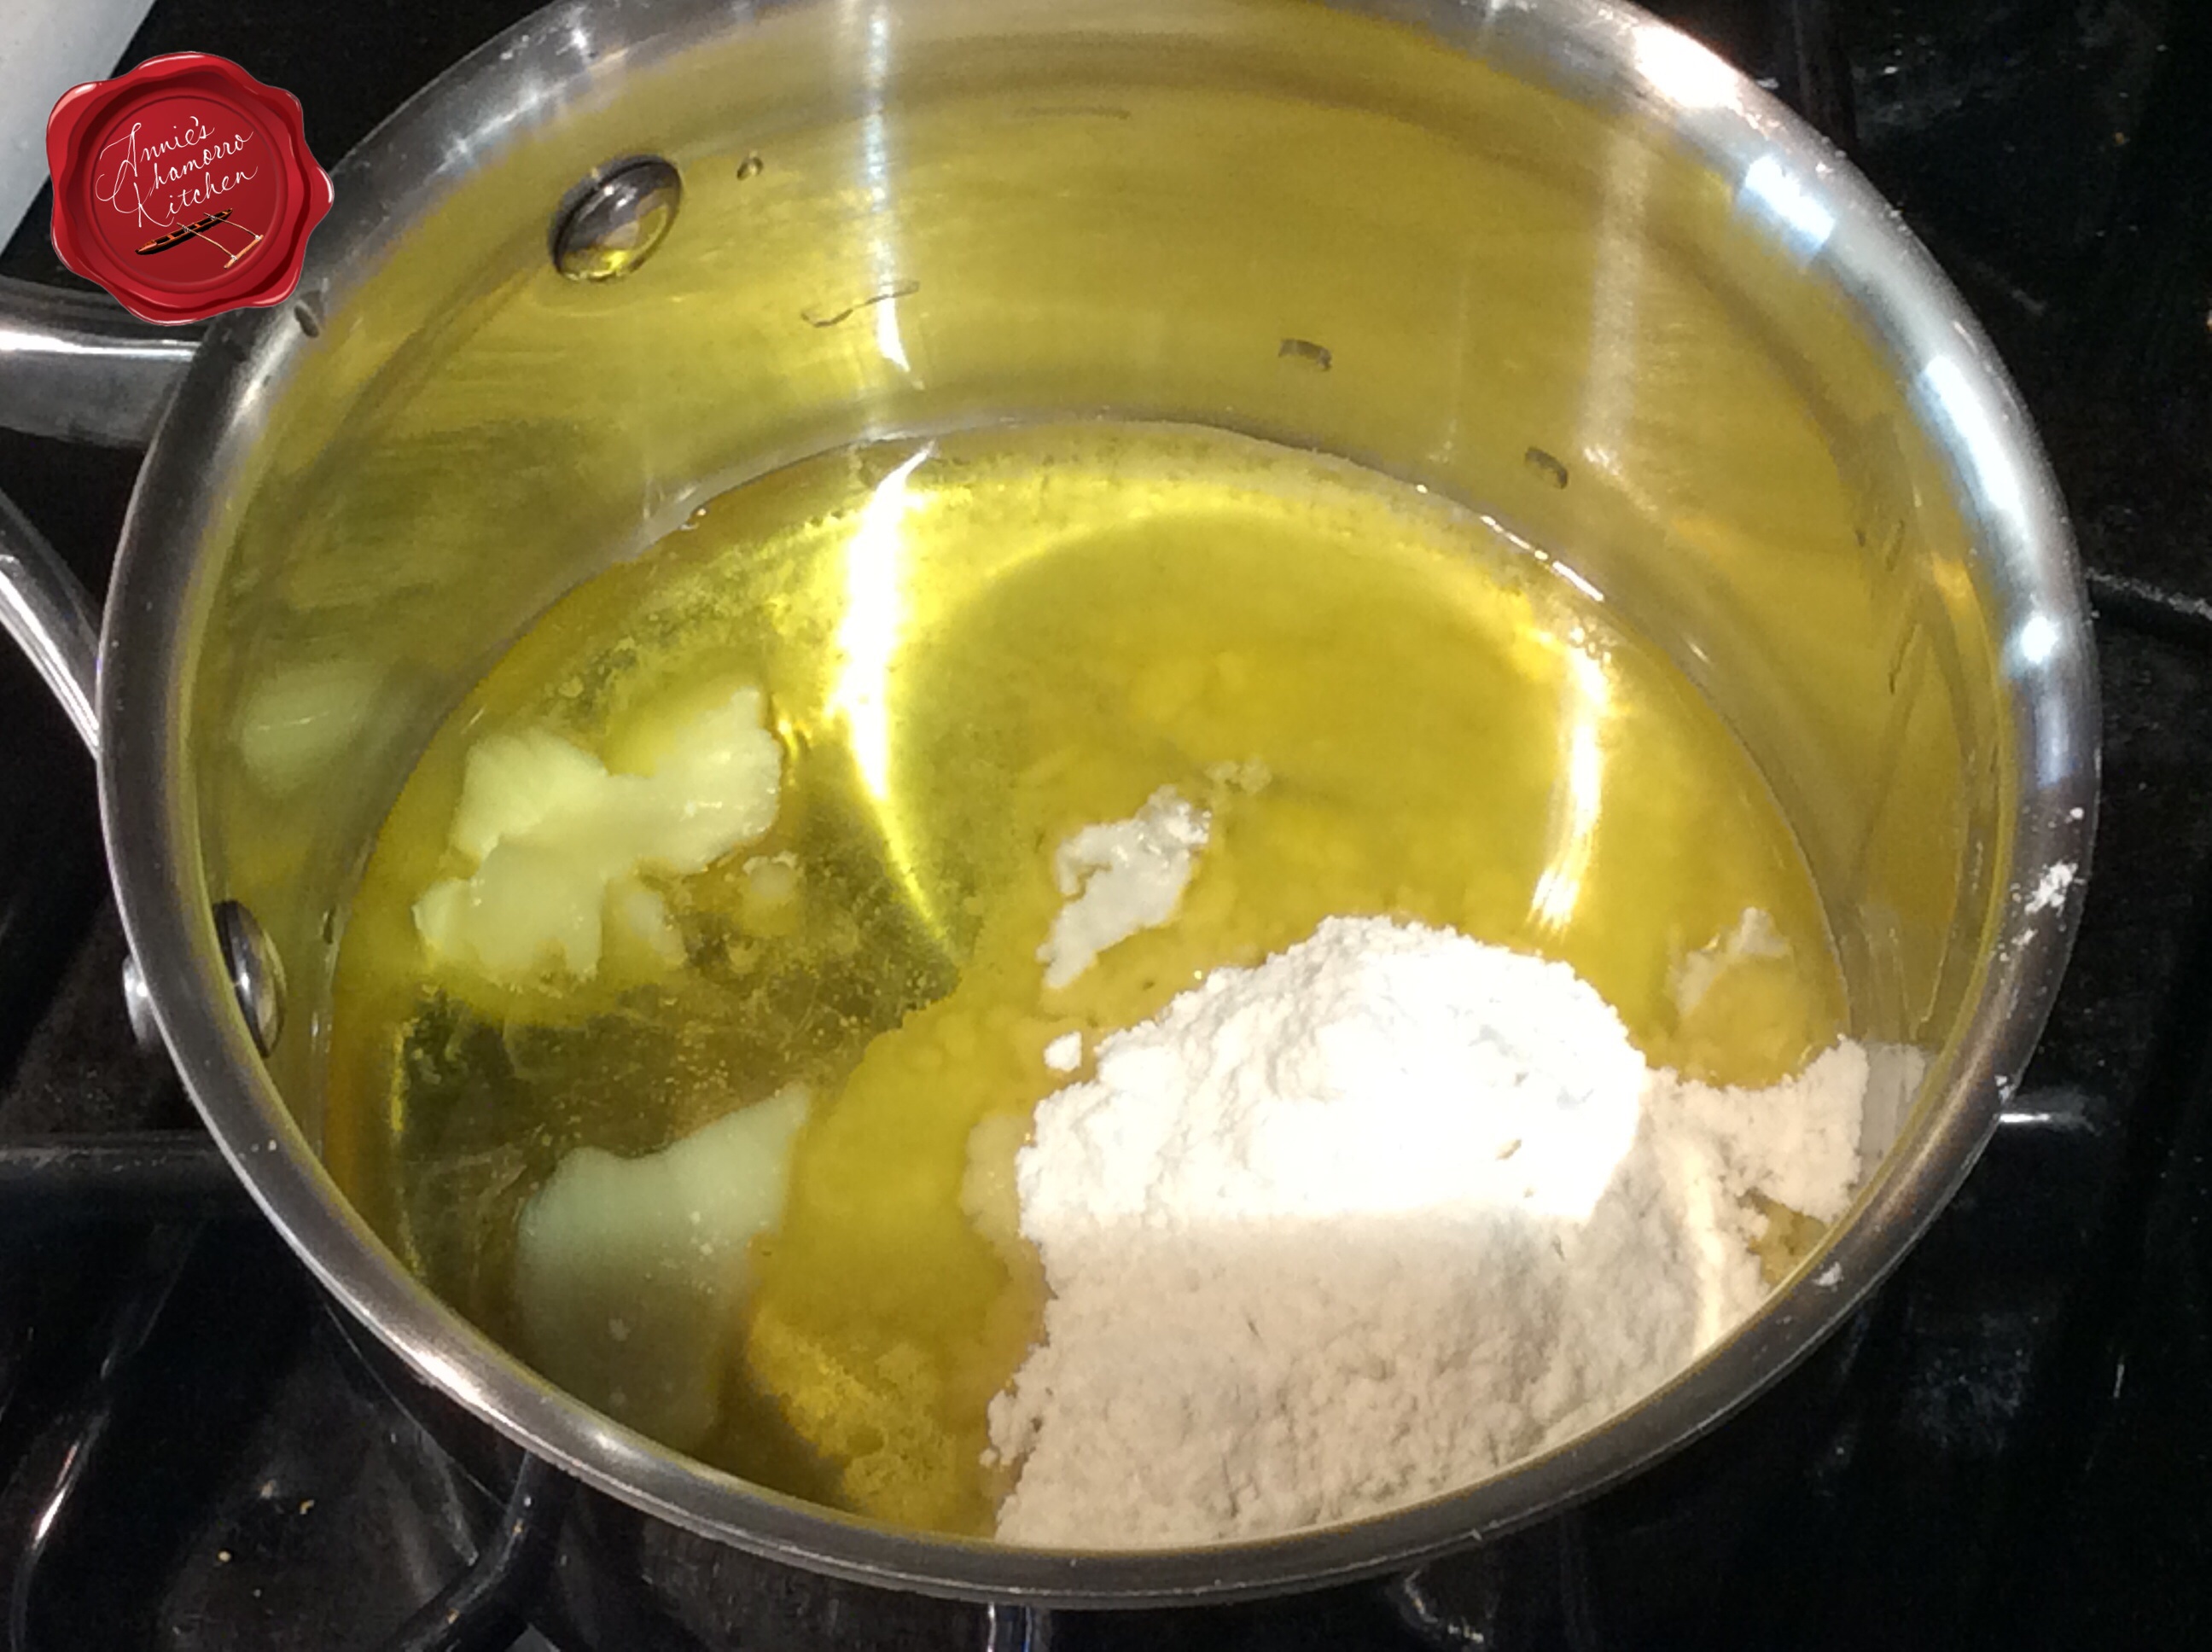
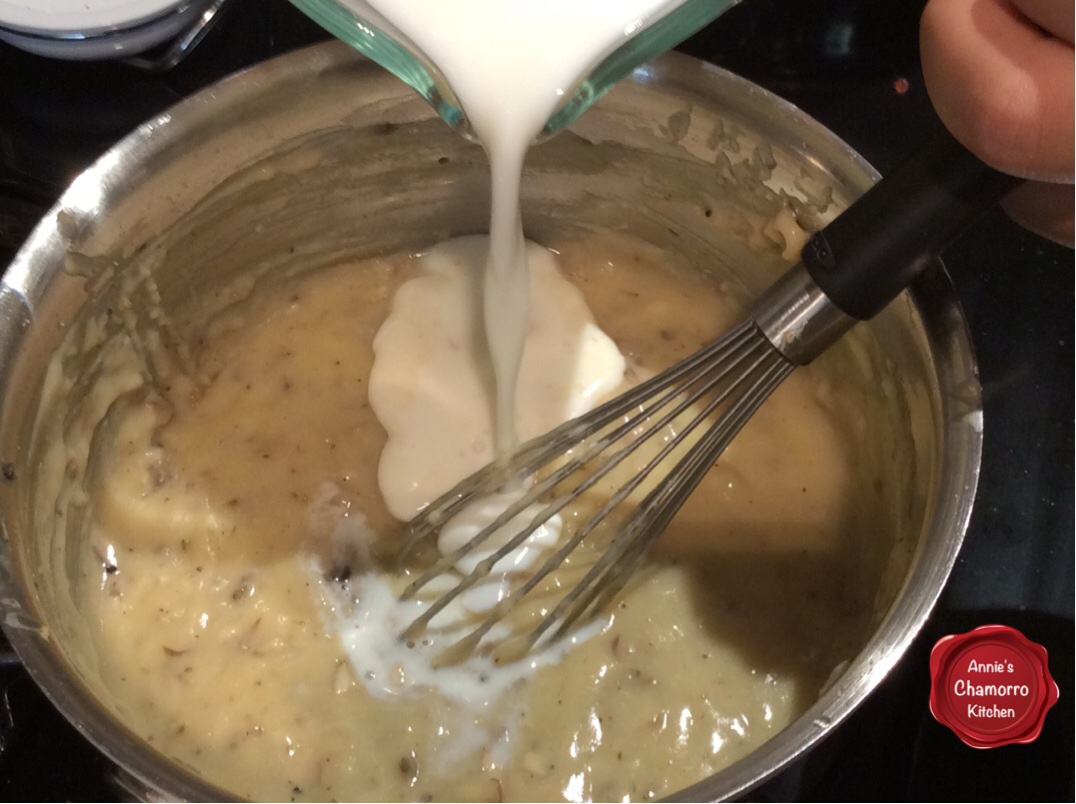
Right about the two hour mark, make the roux. This butter-flour mixture works to thicken the broth and add a richness because of the butter. Butta is betta. ‘Nuff said.
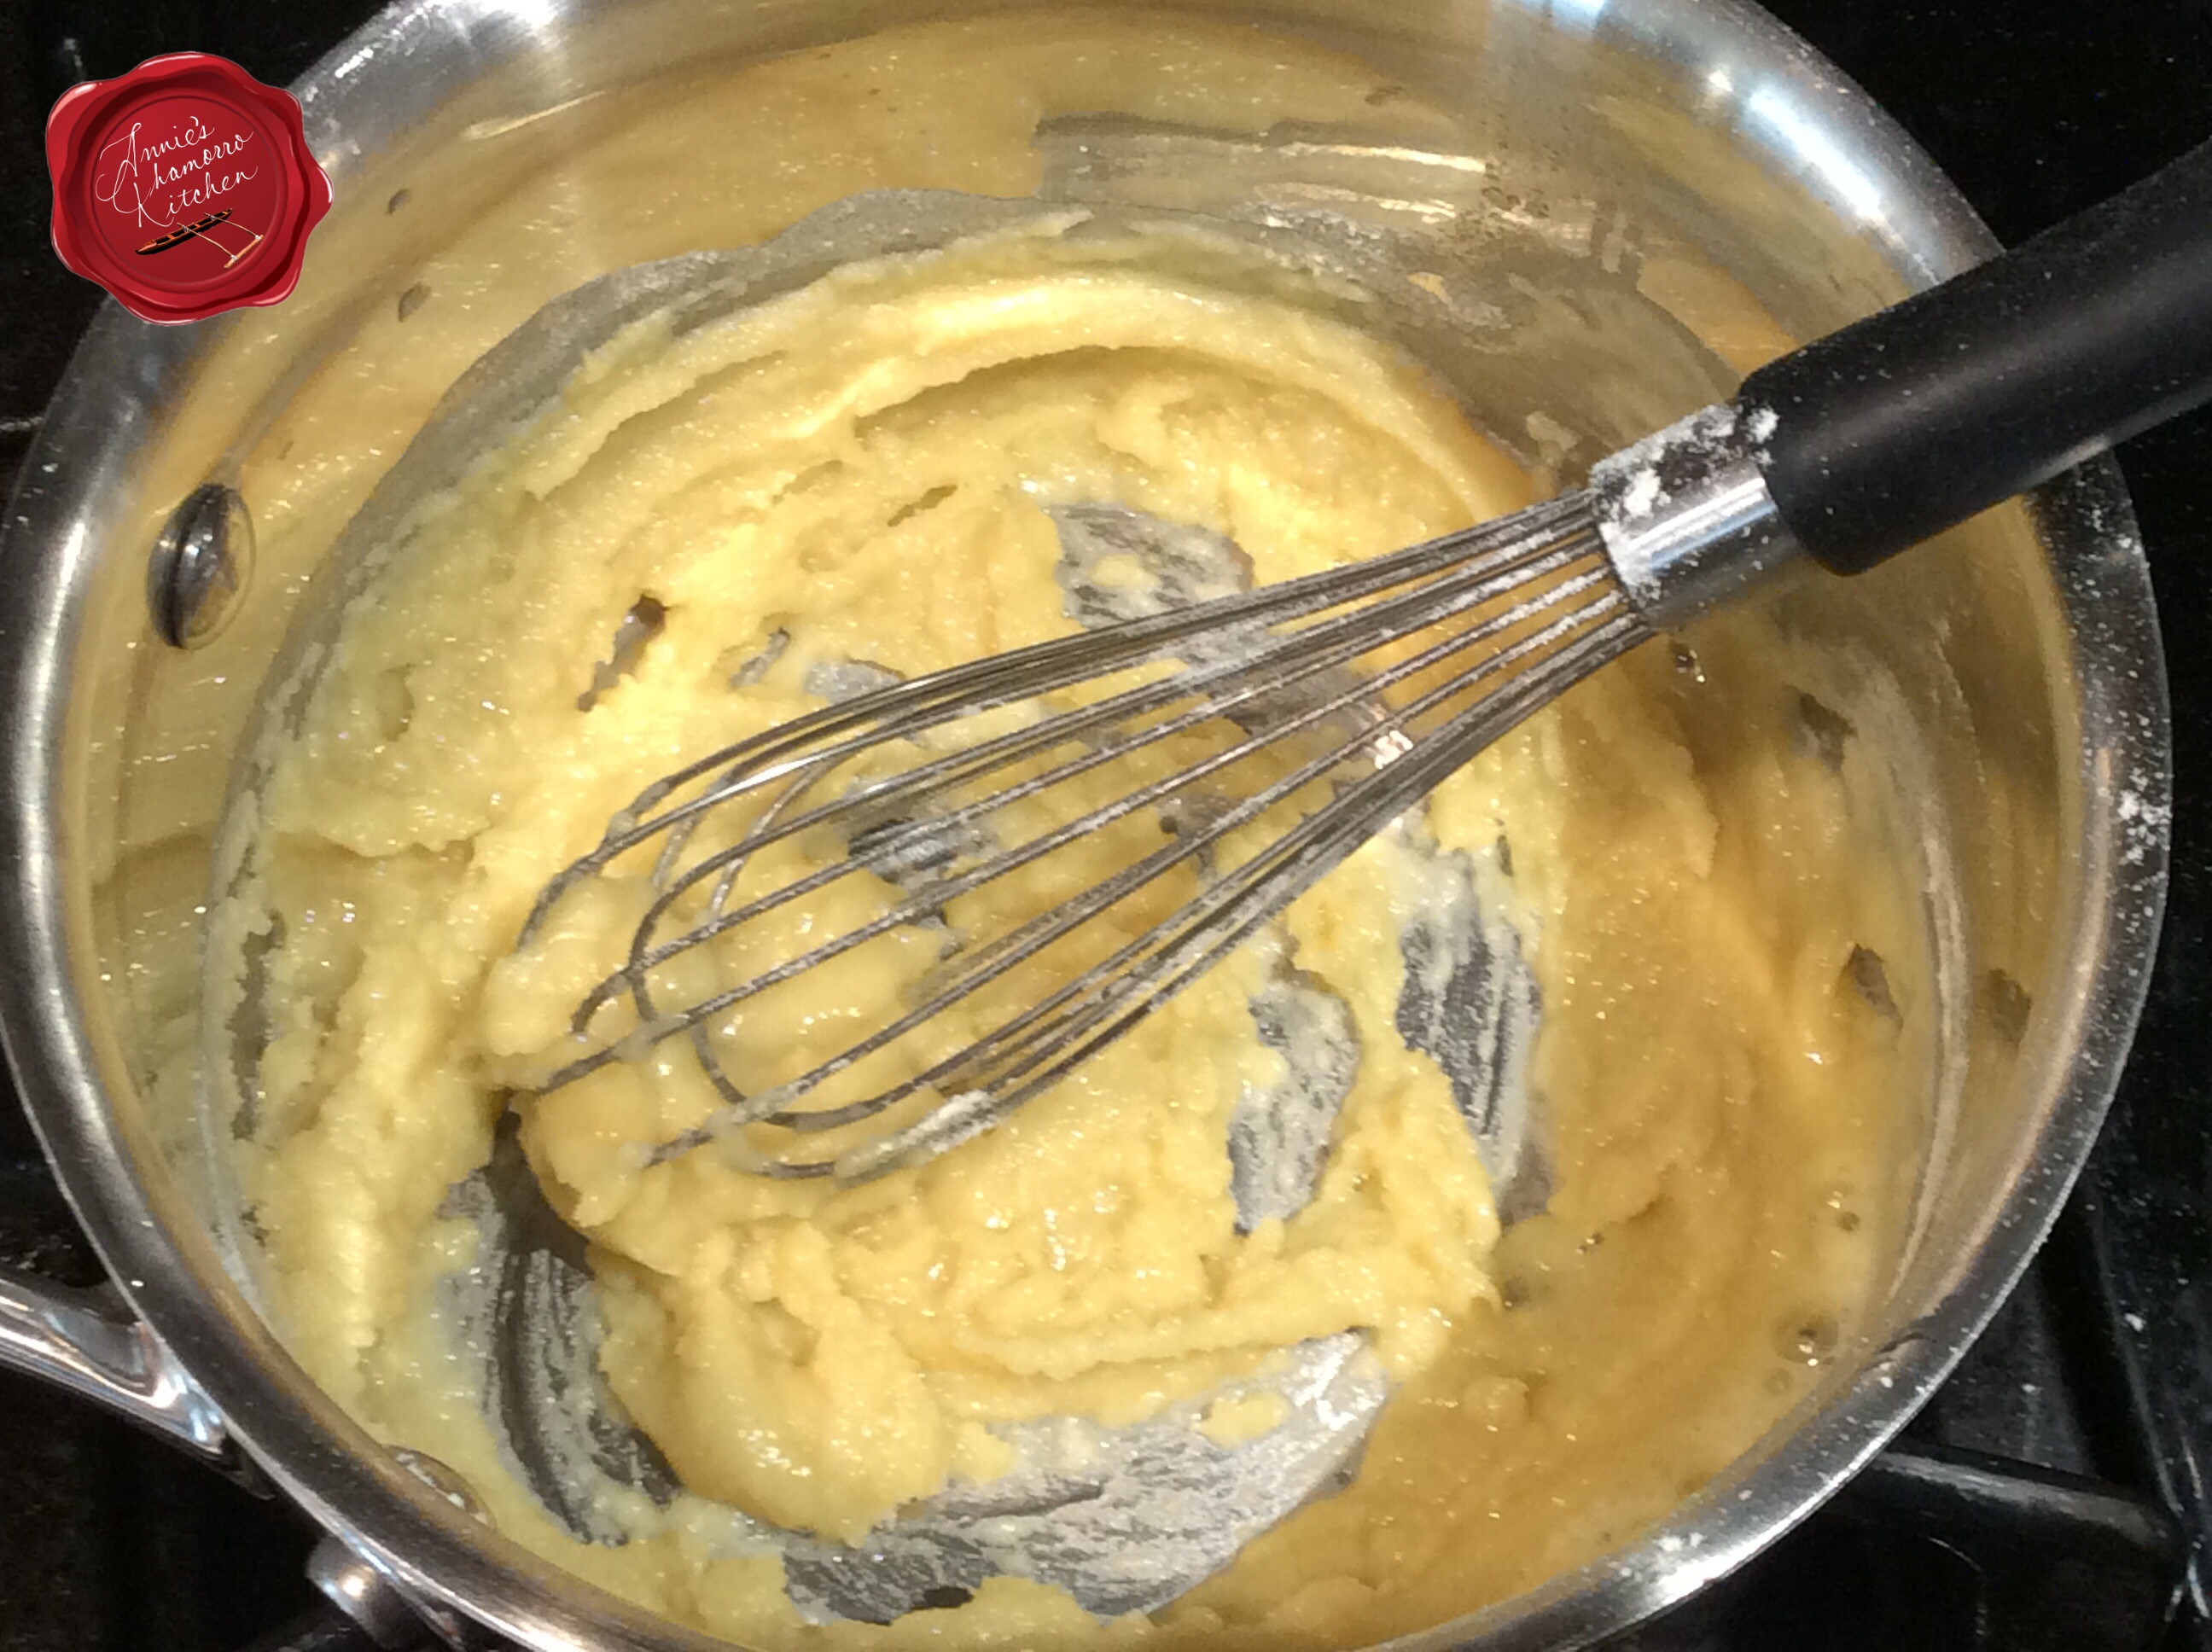
Melt some butter in a small sauce pan then add a few spoonfuls of flour. Cook over medium-low heat, stirring constantly until the mixture begins to turn a golden brown. Pour in some of the broth from the pot — about 1 to 2 cups will suffice — whisking constantly to prevent lumps from forming. If the mixture seems too thick, add more broth until you get a relatively creamy mixture (the photo below, on the right, needs more broth). Add the roux to the pot, stirring to dissolve the roux into the broth. Add the additional beef broth.
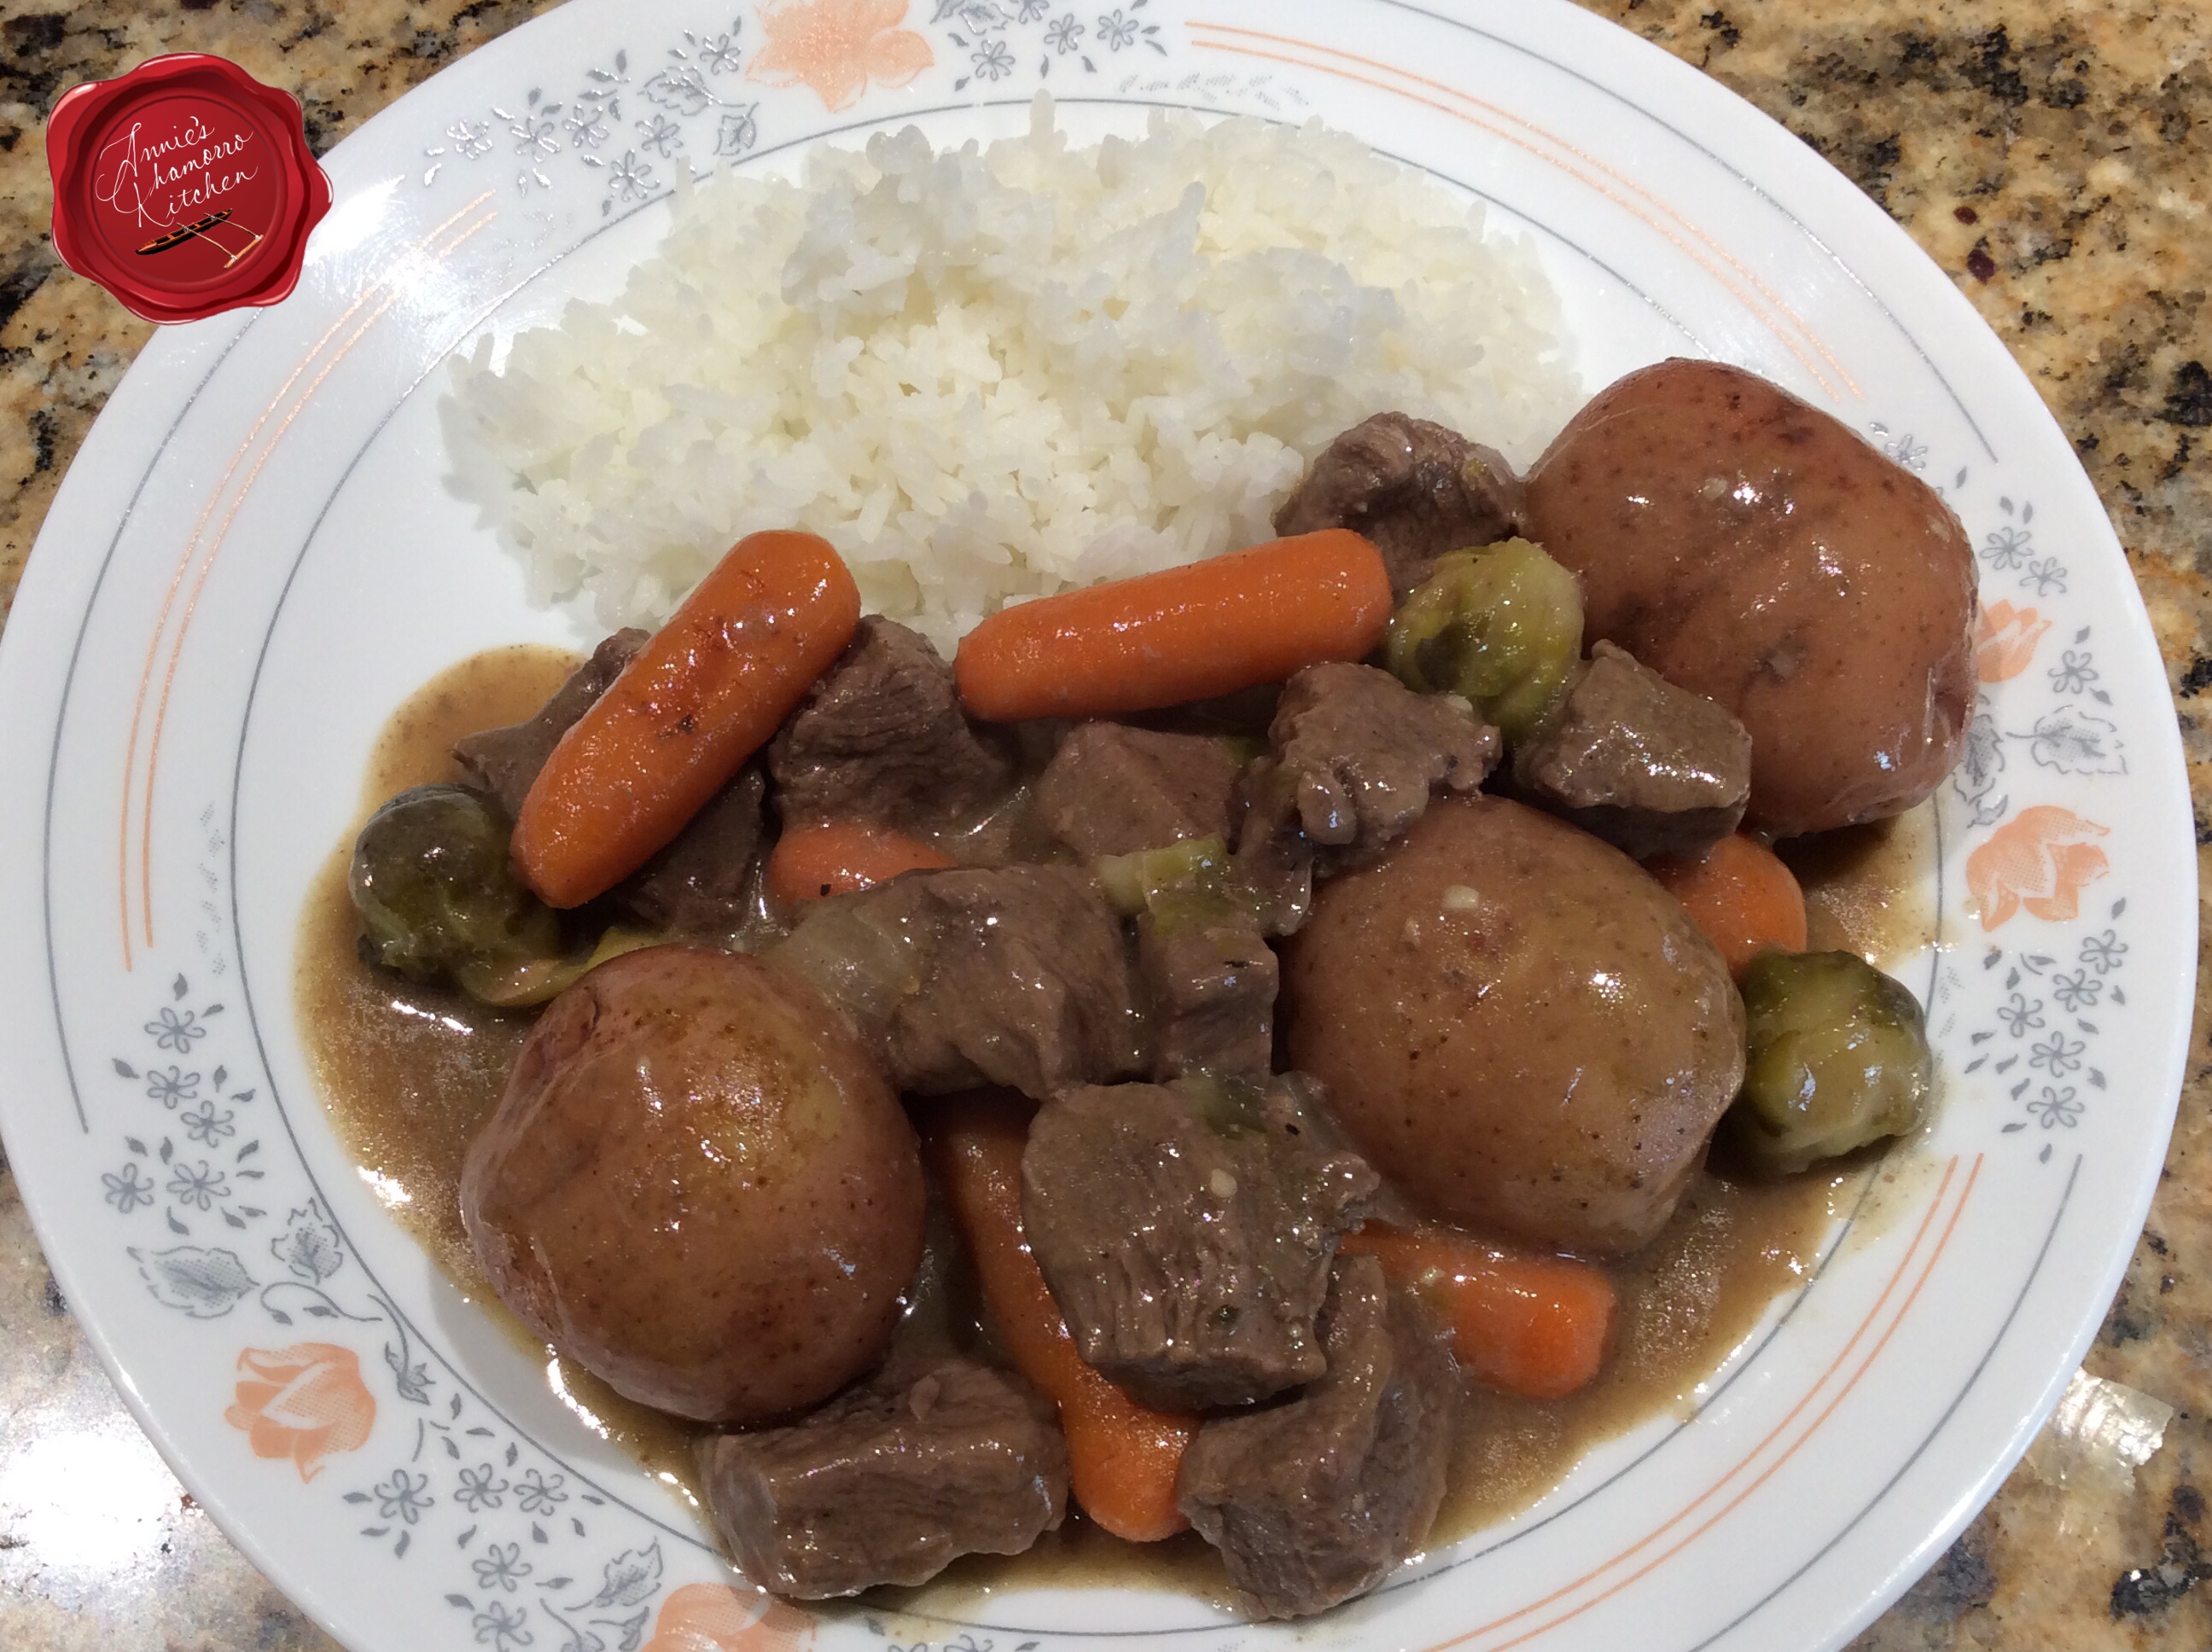
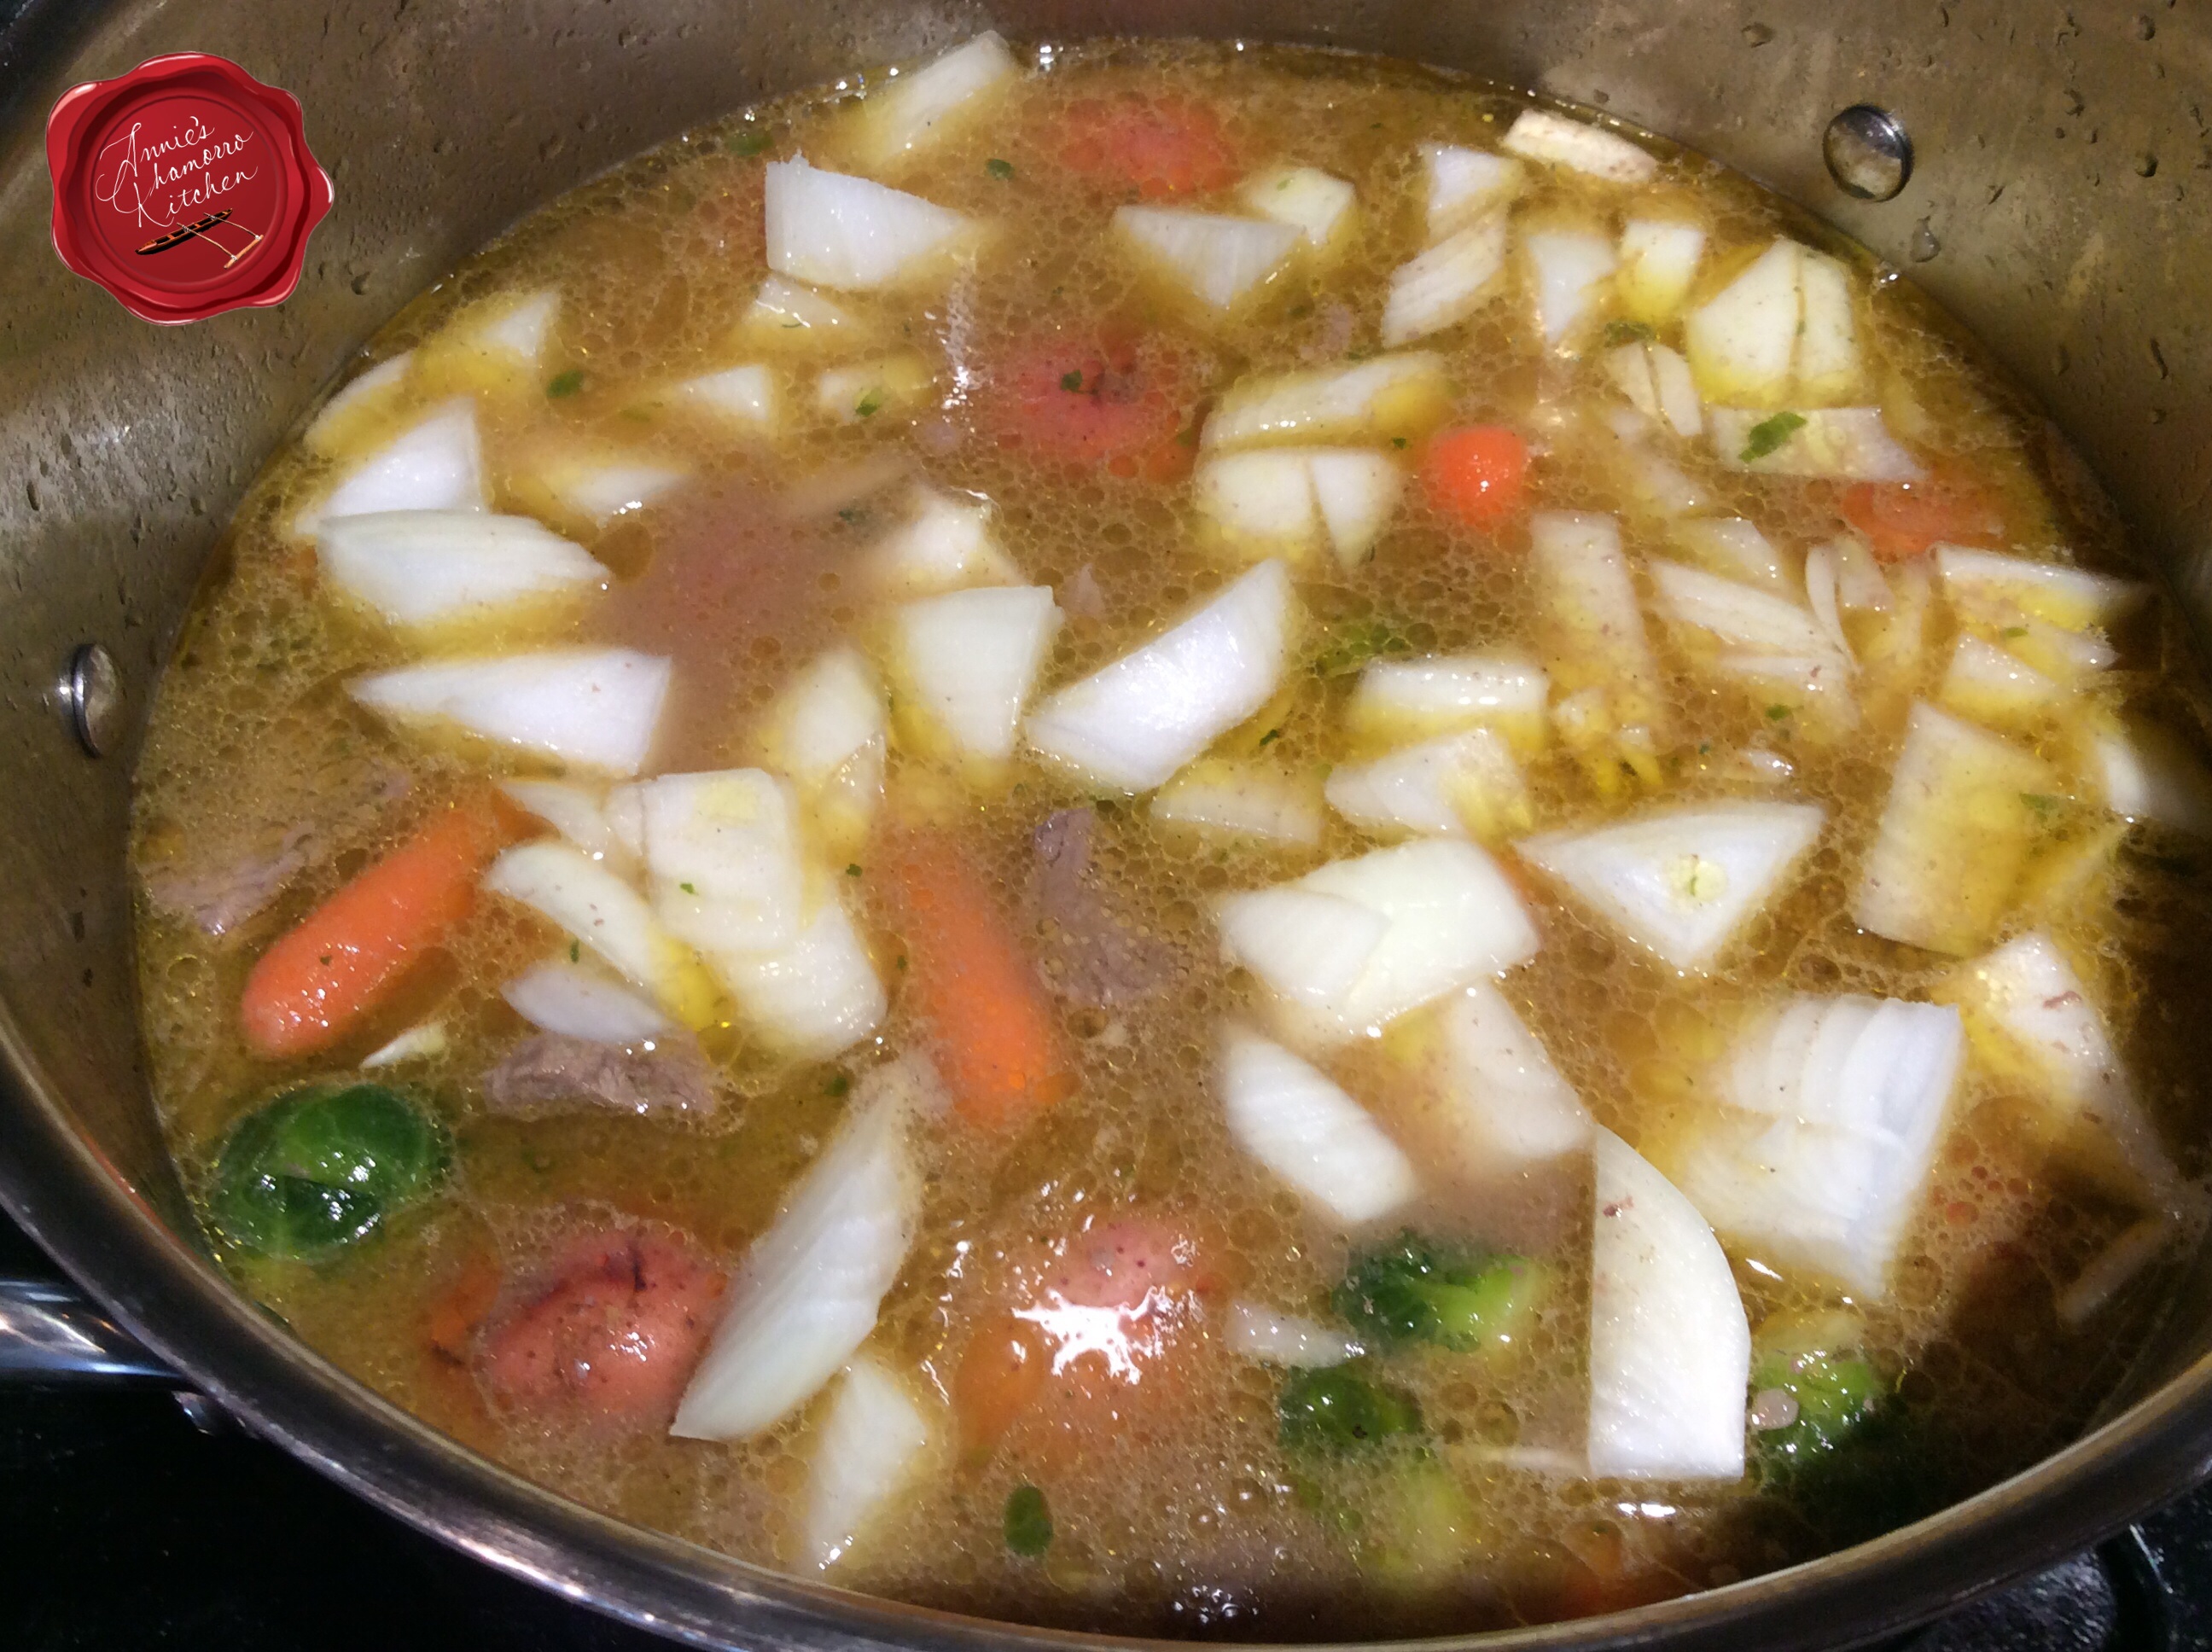
Add your vegetables to the pot. All at once. Go ahead. Don’t be skurred. Well, I take that back. Add the root vegetables first (potatoes, carrots) and let them cook for a few minutes before adding any other vegetables that cook quickly, like onions and in my recipe below, brussels sprouts.
Turn the heat back up to high and cook for about 10 more minutes, or until the potatoes and carrots can be pierced easily with a fork. I like using petite red potatoes because they are small enough that I just have to wash them then throw them into the pot. You can cut them in half if you want to cut down on the cooking time, but after two hours of simmering, what’s another five minutes of cooking?
Stir occasionally; the broth should be a nicely thickened gravy by now with the addition of the roux. Taste the gravy; add salt and pepper to taste. I like adding Dashida beef flavored seasoning instead of salt.
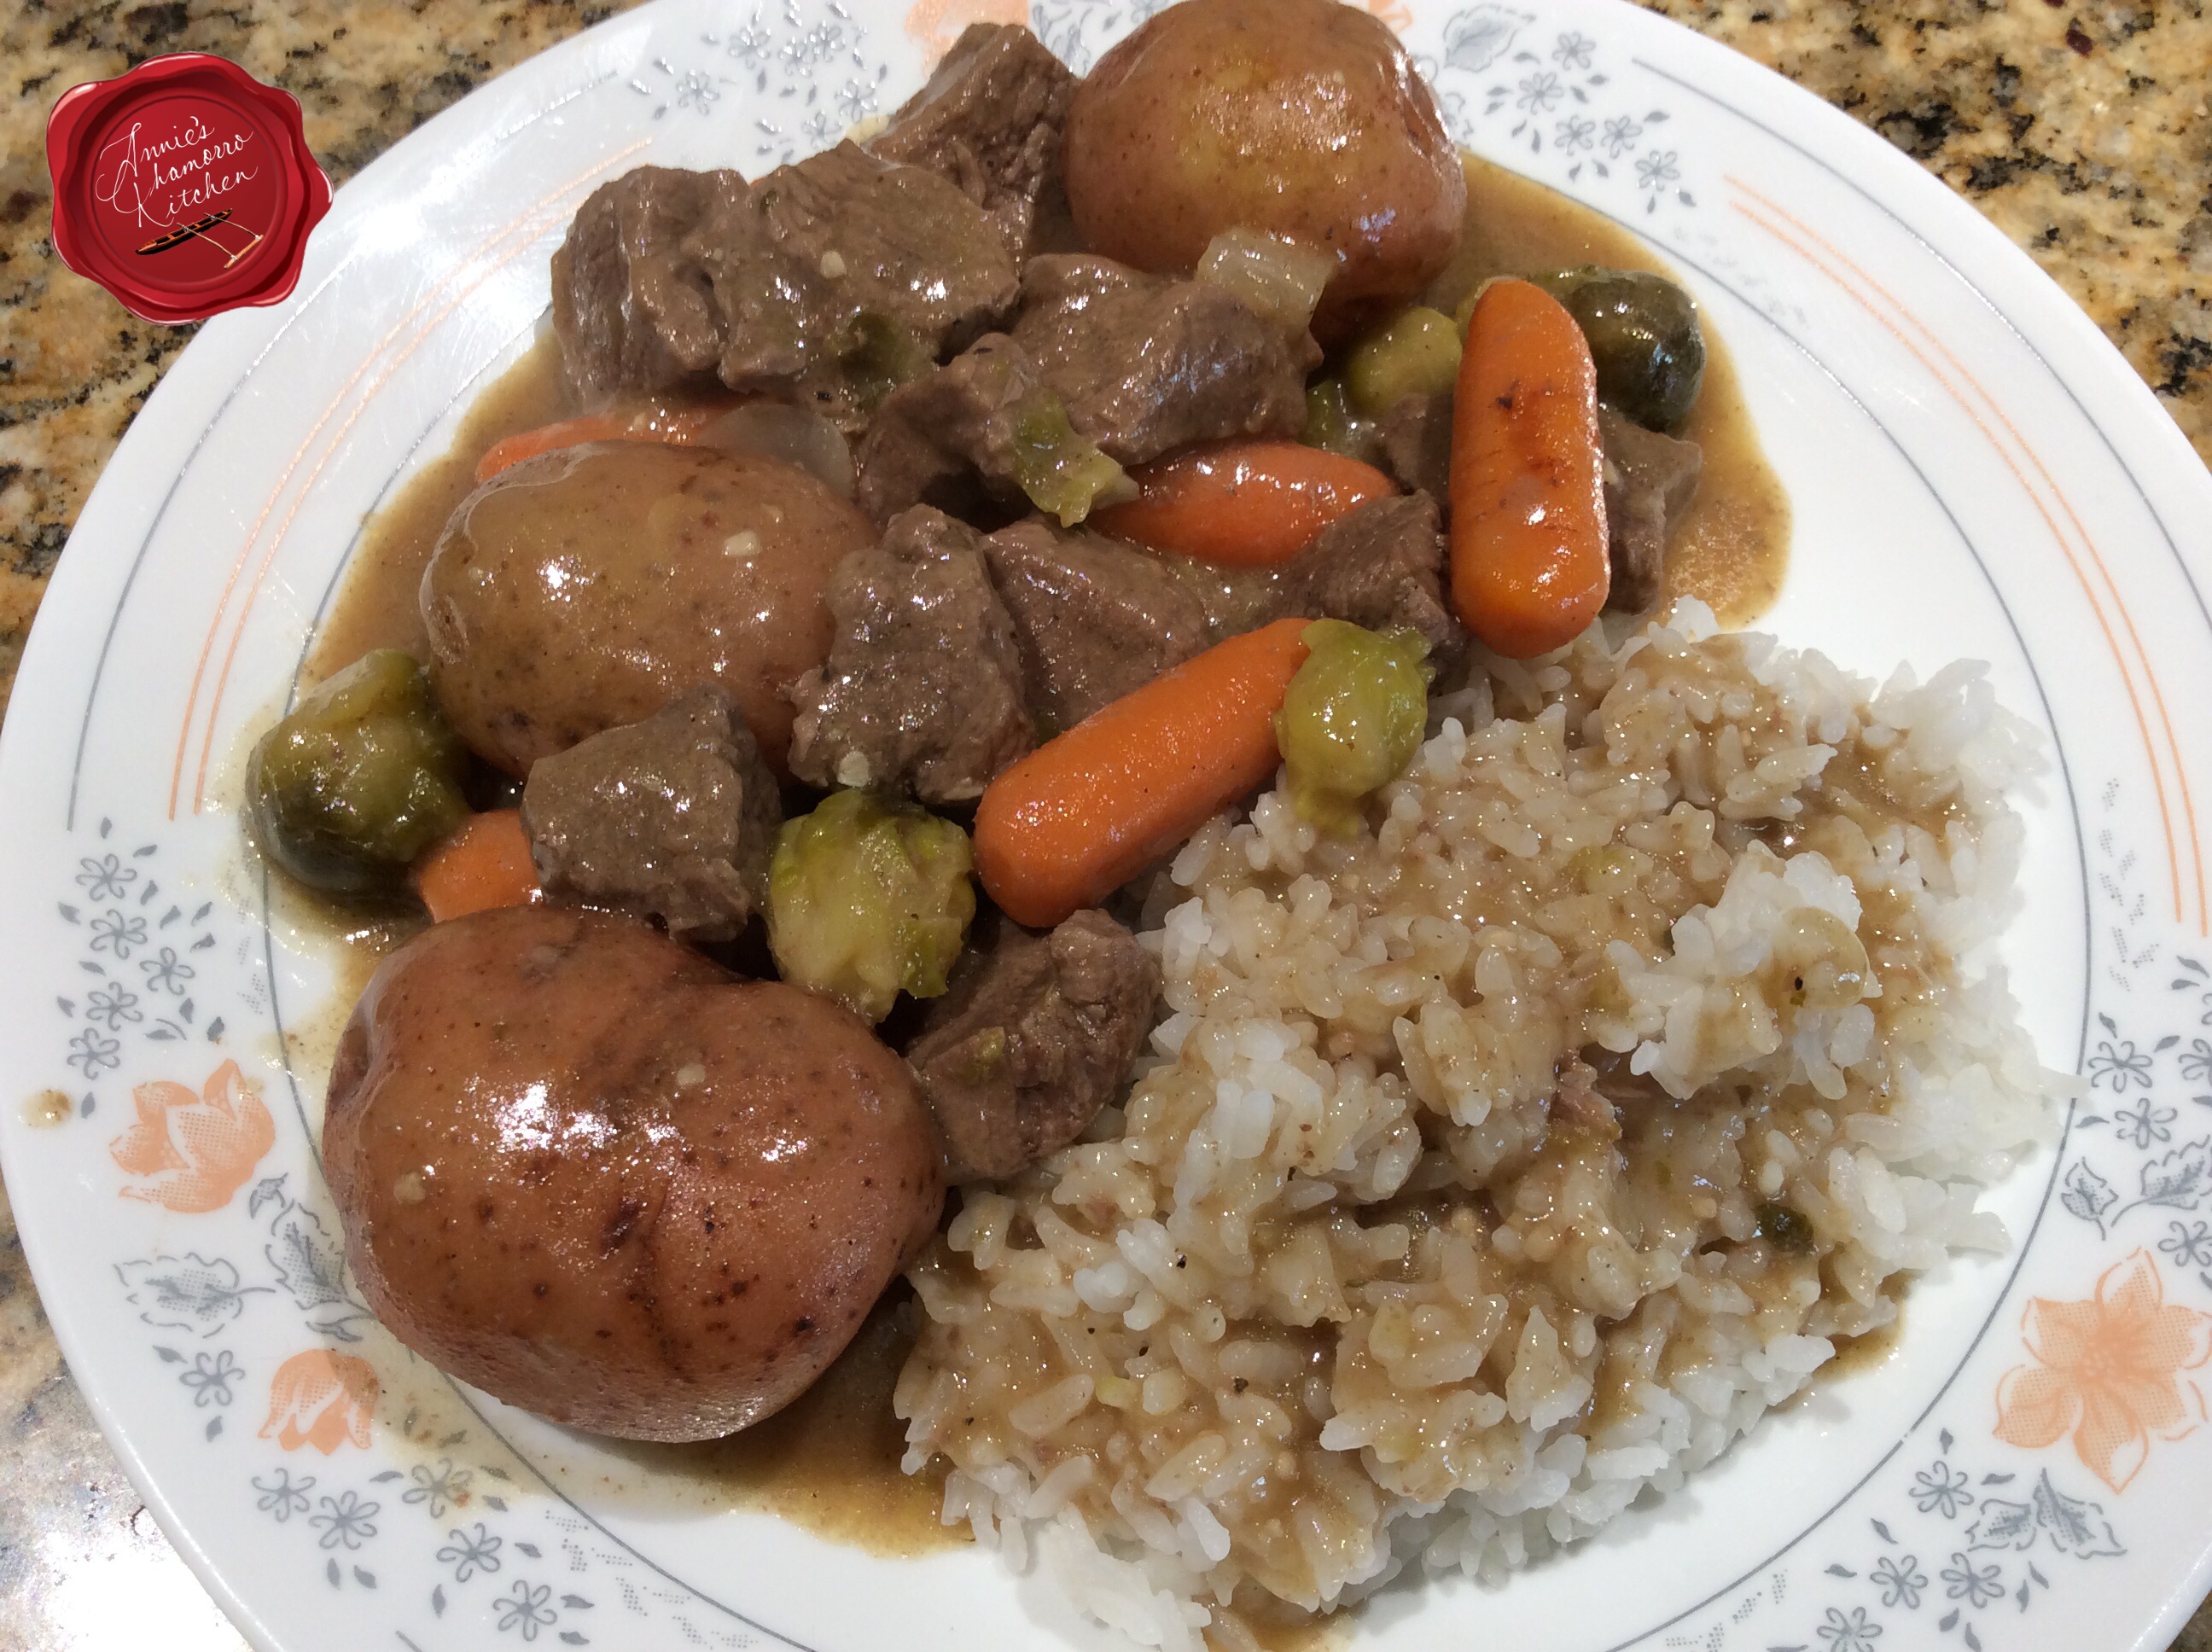
Serve with hot steamed white rice. If you’re like me, you’ll need to drown your rice in some of the delicious gravy.
Place the meat, butter, chopped garlic, ground thyme, black pepper and salt into a large pot. Cook over high heat until the meat browns, about 5 minutes.
Add the water, orange juice, and wine; reduce the heat to low and simmer for 2 hours.
After 2 hours, prepare the roux. In a small saucepan, melt the butter and add the flour. Stir constantly while cooking over medium heat until the mixture begins to brown. Whisk in the broth from the pot of stew. Turn the heat off; whisk the roux into the remaining broth in the pot.
Add the beef broth; stir.
Add the carrots, potatoes and onion. Let this cook for a few minutes then add the brussels sprouts.
Return the heat to high and cook for 10 minutes or until the potatoes are easily pierced with a fork.
Taste the gravy and add salt and pepper to taste, or add Dashida.
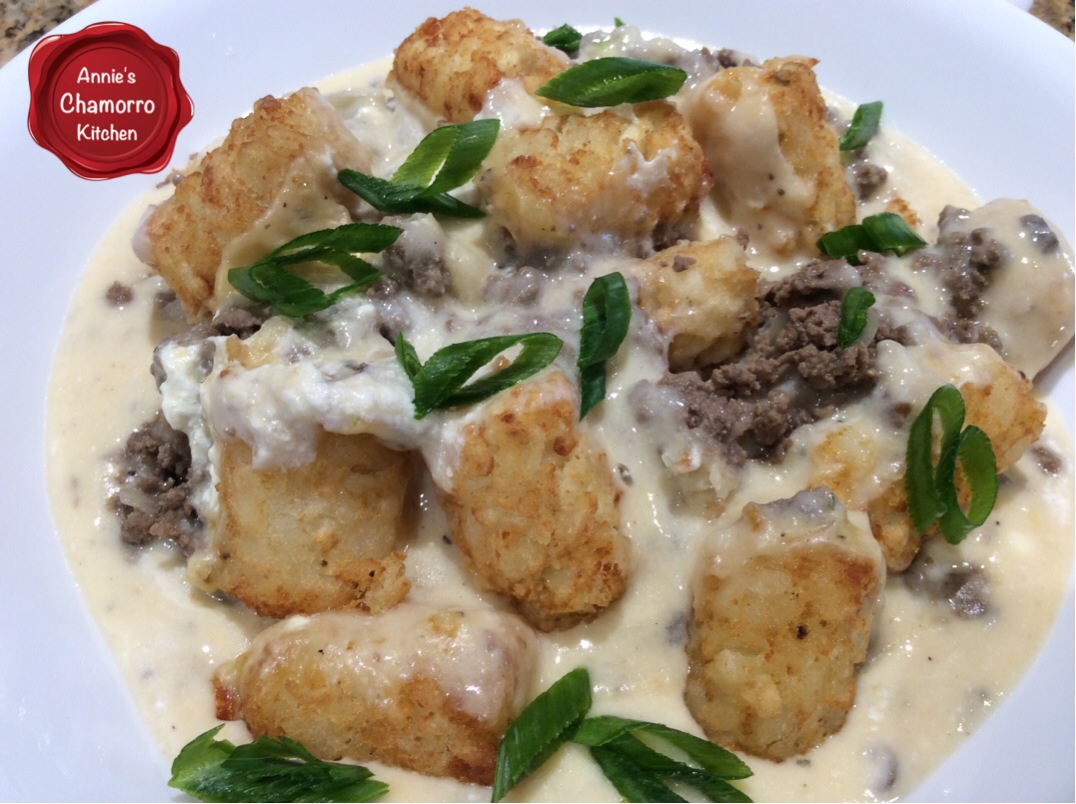
If you’re looking for a stick-to-your-ribs comfort dish, this one is it. Tater tots, seasoned ground beef and cheese sauce are all baked into a casserole that will make your tummy and taste buds happy, happy, happy.
My complete recipe is located at the bottom of this post. Give it a try. I think you’ll like it. 🙂
Tater Tot Casserole
Although the name of this dish is “Tater Tot Casserole,” the real star is the cheese sauce that ties it all together. If you do an online search, you’ll find that quite a few tater tot casserole recipes call for cream of mushroom or chicken soup.
While I do like the canned condensed soup, I thought I’d make my own for this recipe, and I’m glad I did. Not only can you control the quality of ingredients that go into the dish, you can also control the amount of sodium as well.
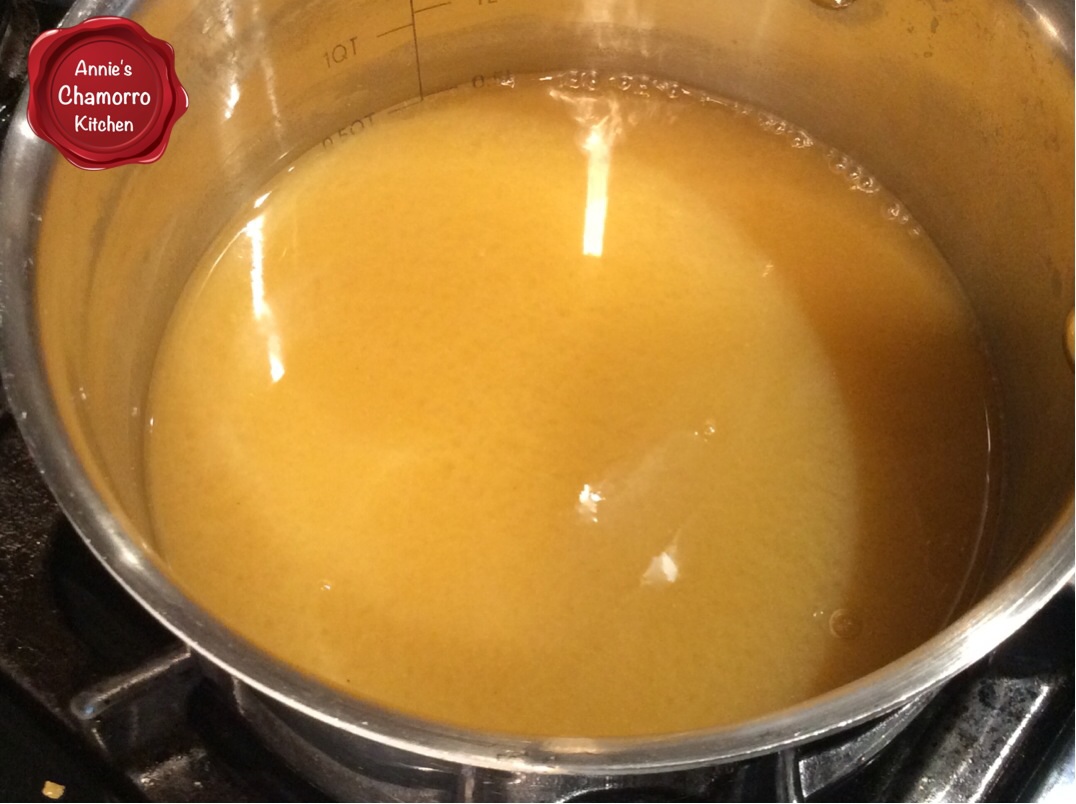
Start by placing vegetable broth into a large pot. You’ll use this same pot to eventually make the cheese sauce, so make sure your pot is big enough to fit the sauce base and all of the cheese and other delicious ingredients that go into it.
Bring the broth to a boil over medium-high heat.
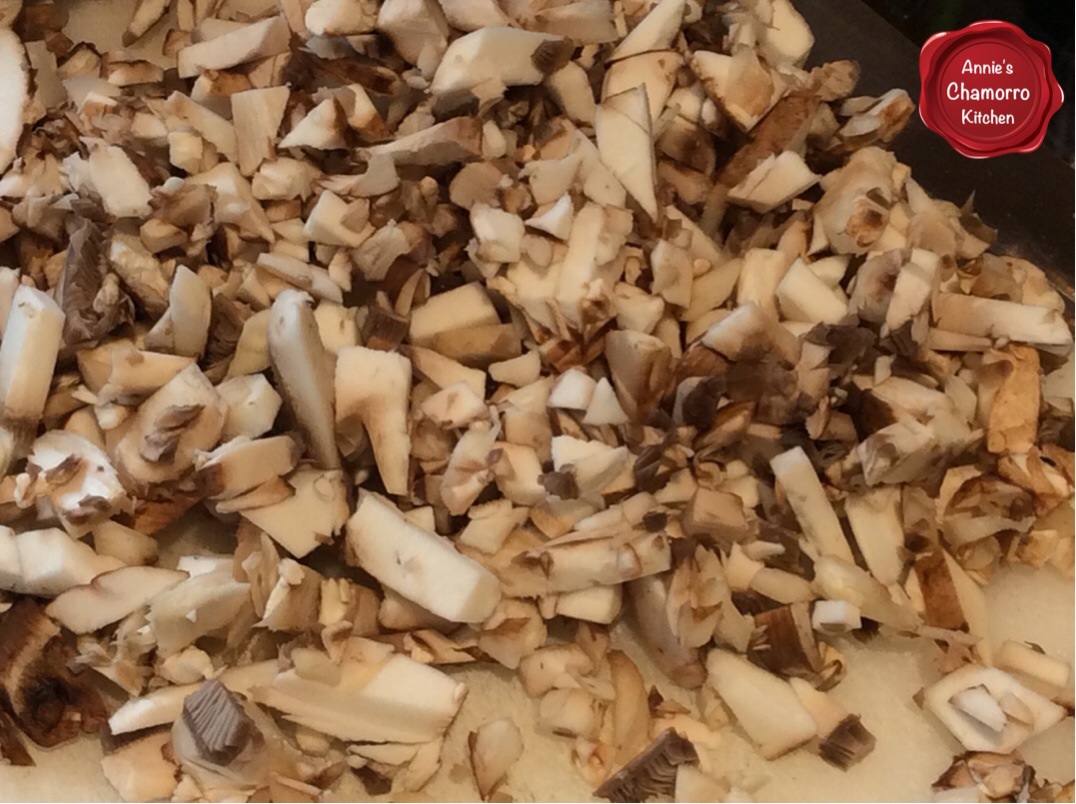
Add chopped mushrooms, Dashida, garlic powder, black pepper, onion powder, and thyme to the pot. Stir to combine, then place a lid on the pot. Reduce the heat to medium and cook until the mixture returns to a boil.
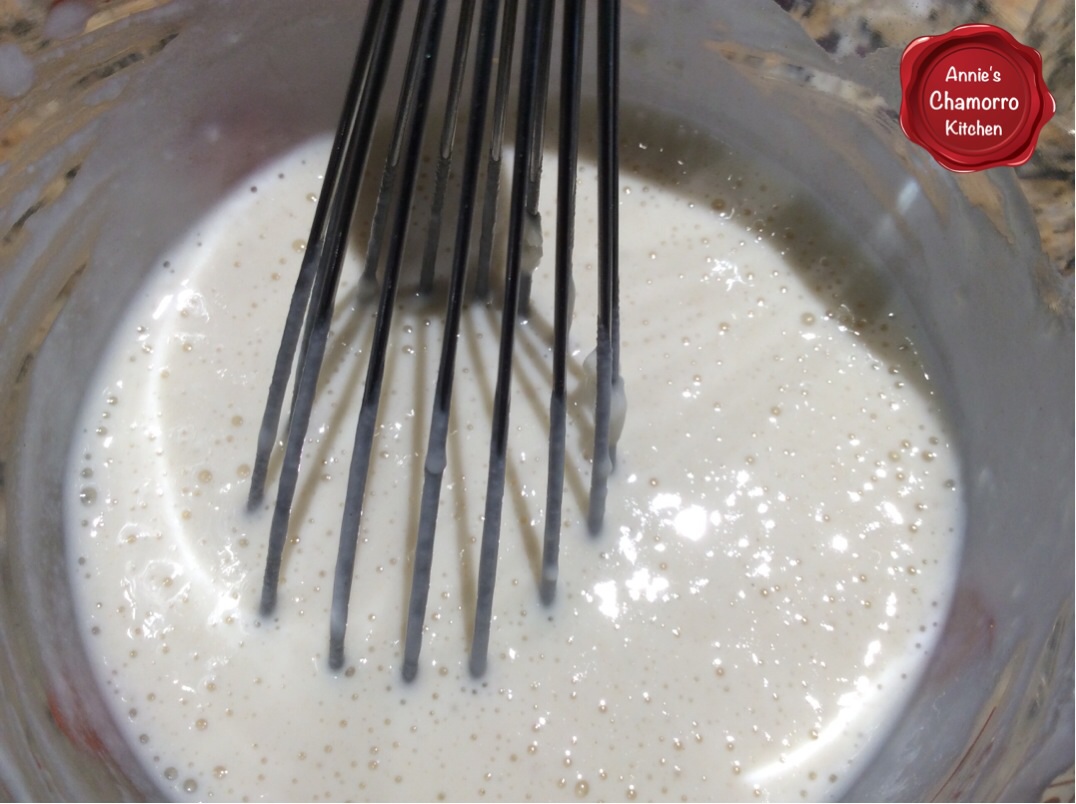
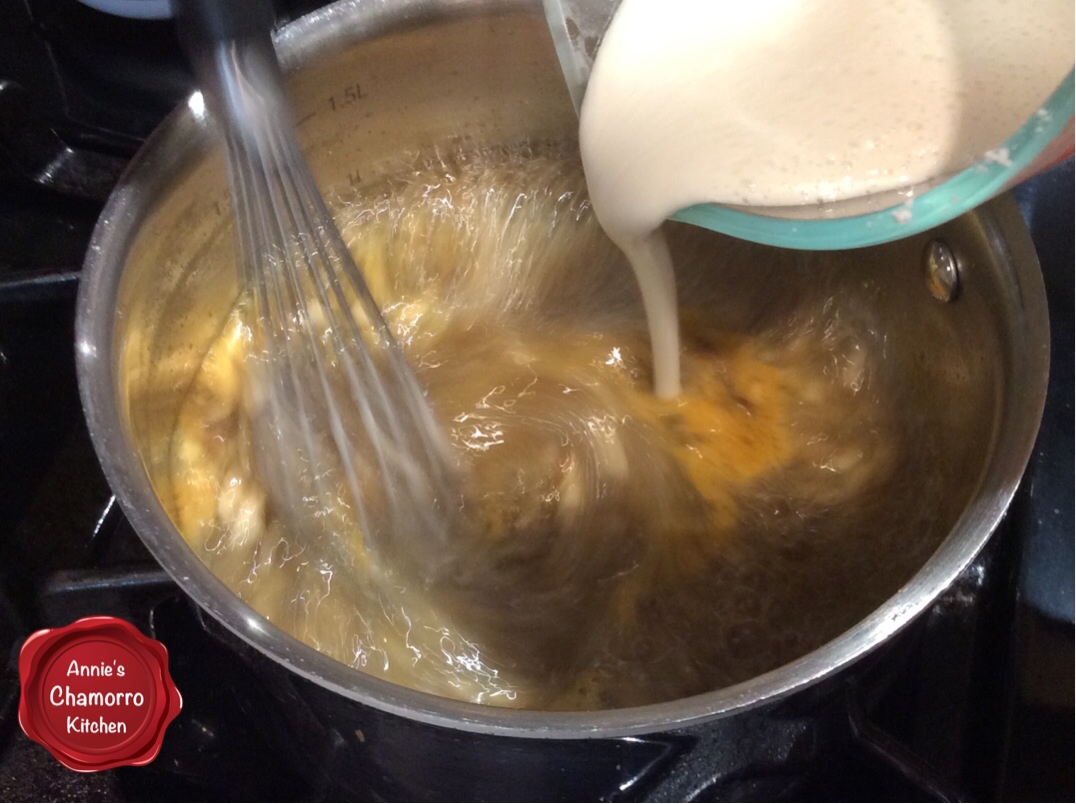
While the broth is simmering, whisk some flour and milk together.
Pour the flour mixture into the boiling liquid, whisking as you pour so as to prevent lumps from forming.
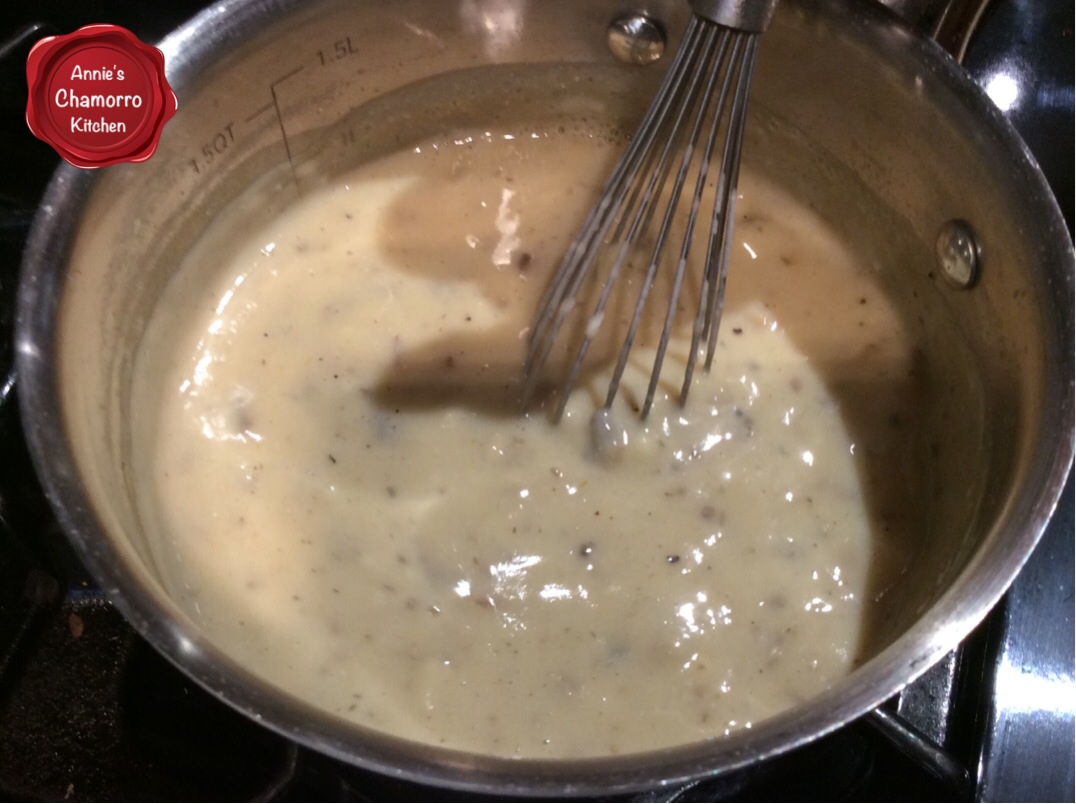
Turn the heat down to medium-low. Cook for a couple of minutes to allow the base to thicken. See, doesn’t this look better than the canned condensed soup?
It tastes better too. 🙂
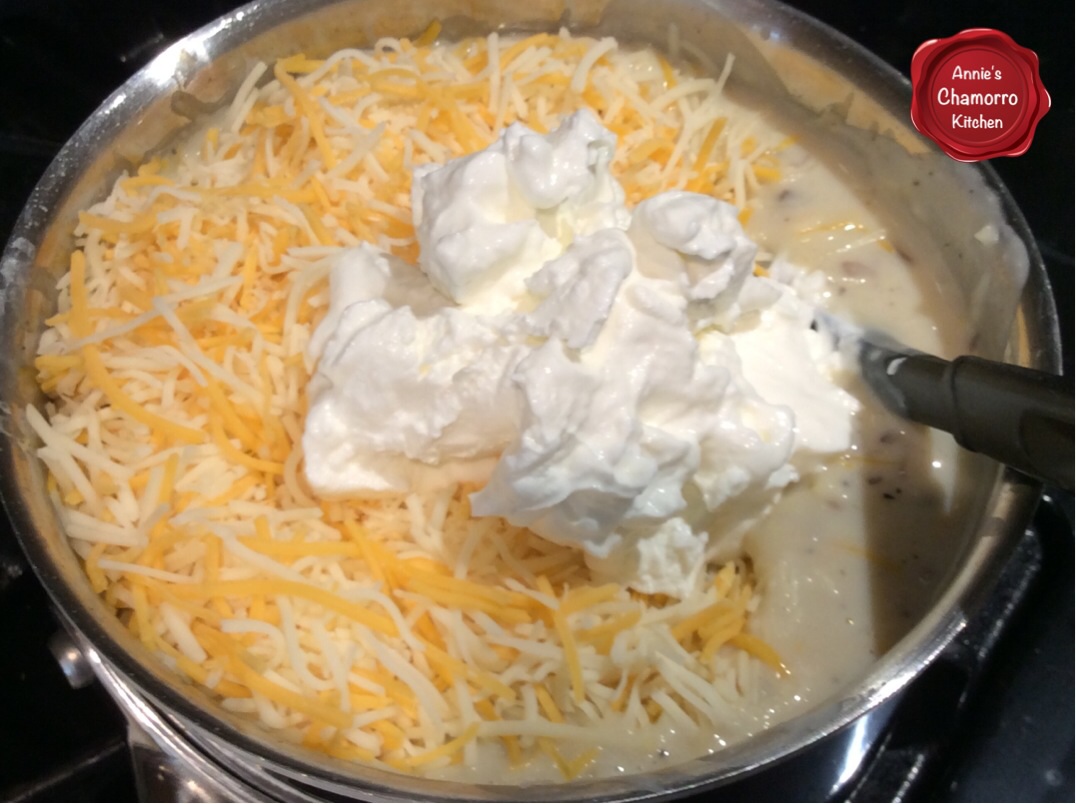
Once you’ve got the base done, you can finish up the cheese sauce.
Whisk in some milk.
Add shredded cheese and sour cream to the pot. Stir the mixture until the cheese melts. Turn the heat off and place a lid on the pot. Set the cheese sauce aside for now while you cook the ground beef.
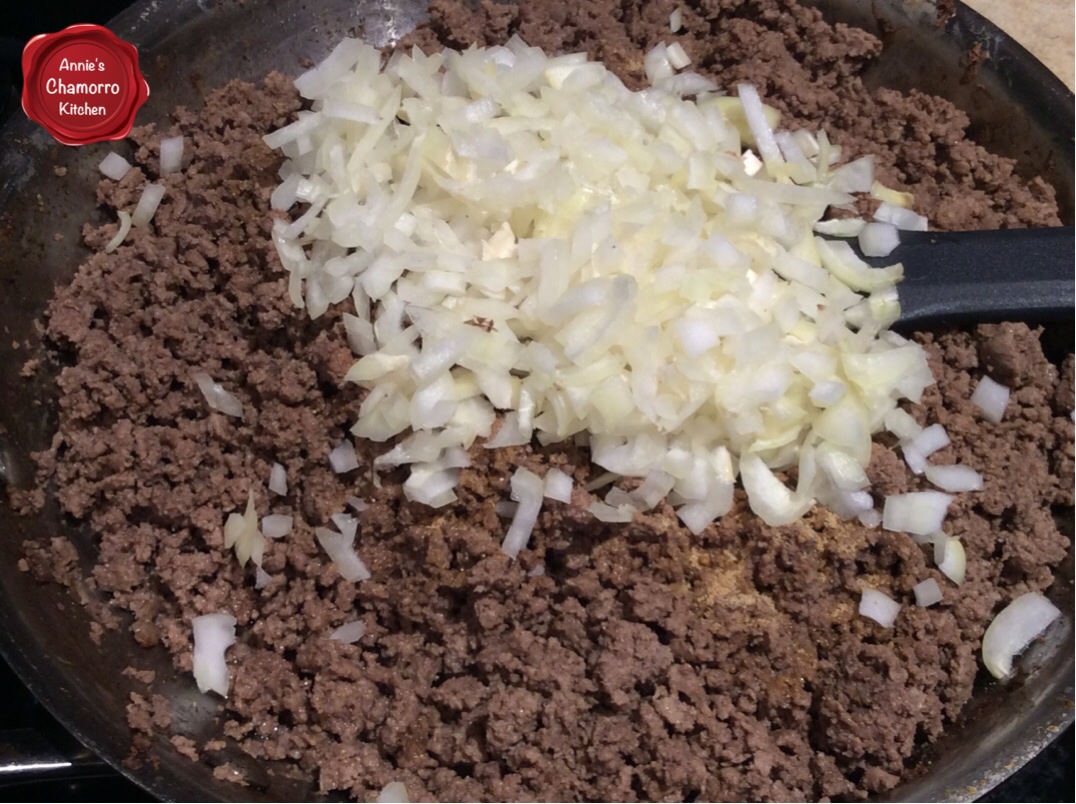
Brown lean ground beef in a skillet over medium-high heat. Add onions, garlic powder and Dashida; cook for 5 minutes or until the onions become translucent.
Preheat the oven to 400 degrees.
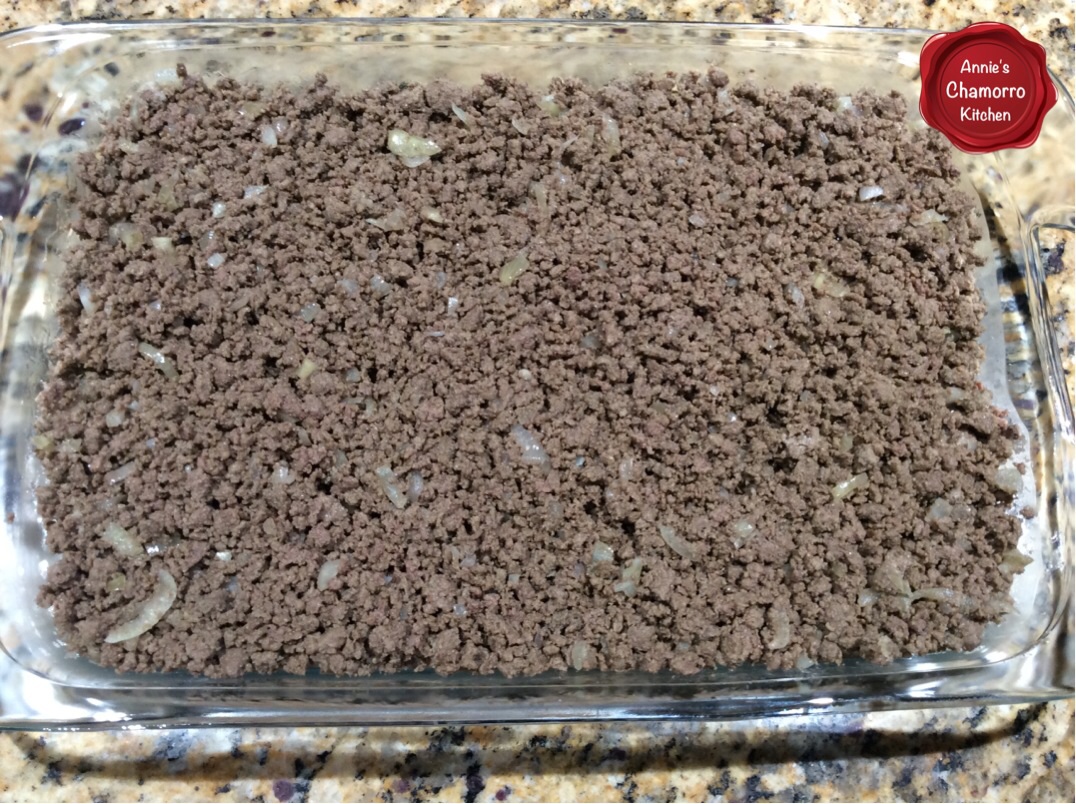
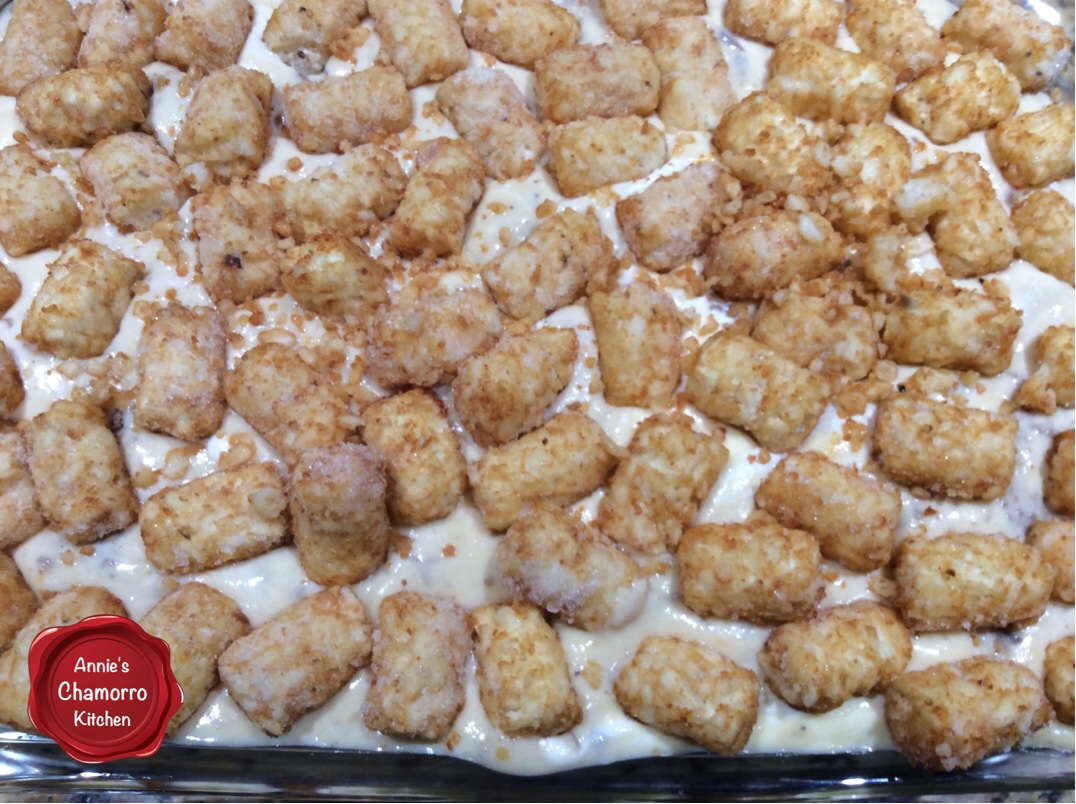
Place a layer of frozen tater tots in the bottom of a DEEP baking dish. A deep roasting pan works well.
Pack those babies in there!
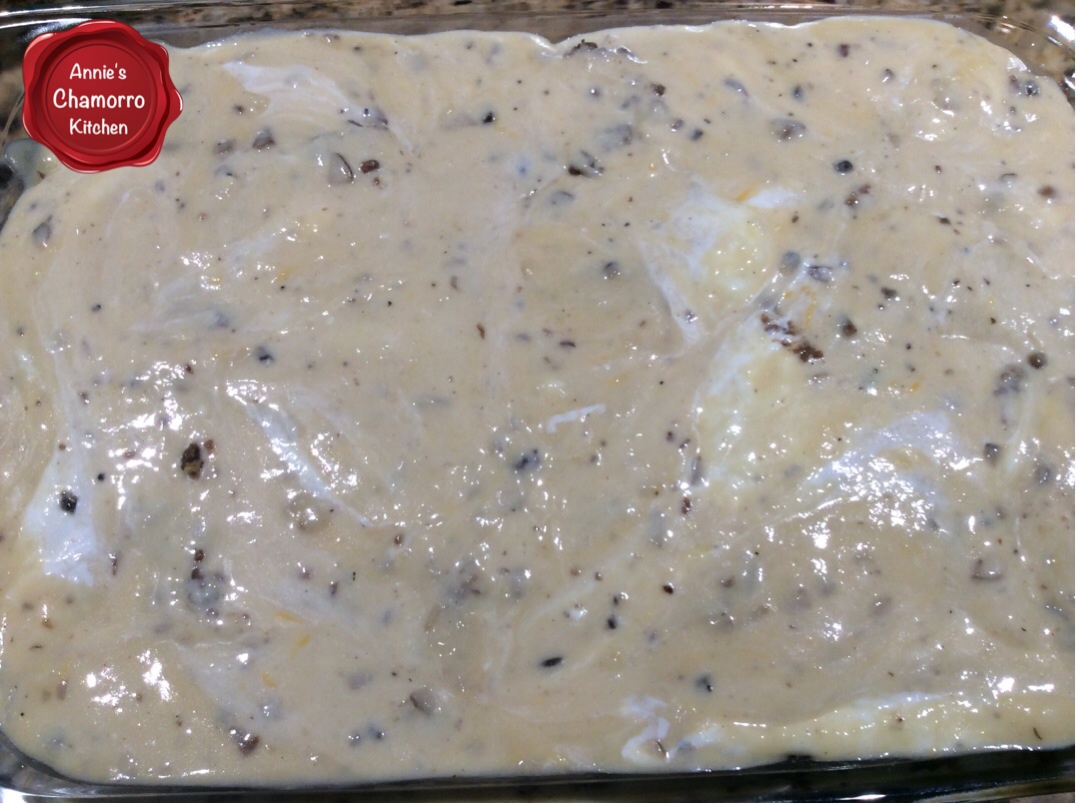
I don’t show it here, but add half of the cheese sauce to the pan, on top of the tater tots.
Add all of the ground beef to the pan, on top of the cheese sauce.
Pour the remaining cheese sauce over the ground beef.
Top with more tater tots. Bake for 25 minutes, or until the tater tots are golden brown and crispy on top and the sauce is bubbly.
16 ounces shredded cheddar cheese (I like to use a Mexican cheese blend)
1 cup sour cream
Instructions
Prepare the Sauce Base:
Bring the broth to a boil over medium-high heat.
Add the mushrooms, Dashida, garlic powder, black pepper, onion powder and thyme. Return the mixture to a boil.
Whisk the milk and flour in a small cup or bowl. Pour the mixture into the boiling liquid, whisking as you pour to prevent lumps from forming. Reduce the heat to medium-low; cook for a couple of minutes to thicken the base.
Make the Cheese Sauce:
Whisk the remaining milk into the sauce base.
Stir in the shredded cheese and sour cream. Set the sauce aside.
Brown the Meat:
Brown the ground beef in a skillet over medium-high heat.
Add the onions and Dashida. Cook for 5 minutes or until the onions become translucent.
Layer the Casserole:
Pre-heat the oven to 400 degrees.
Using a DEEP DISH pan, layer the casserole as follows:
~ Tater tots, half the cheese sauce, meat, remaining sauce, then tater tots.
Bake for 25 minutes or until the top layer of tater tots are golden brown and crispy and the cheese sauce is bubbly.
There are so many varieties of curries — from chicken, to beef, to all vegetable — I haven’t found a curry I didn’t like. 😉
It’s such a versatile dish too. Just find your favorite recipe and modify it to your liking. Use your favorite vegetables and meat and add as much or as little spice as you want and voila!, chicken curry! Serve over hot, steamed white rice and you’ll have yourself a delicious meal.
4 large chicken breasts, cut into small pieces (or a mixture of white/dark chicken meat)
1 tablespoon brown sugar
2 tablespoons green curry paste
2 tablespoons fish sauce
2 cloves garlic, minced
½ cup chopped onion
1 cup sliced carrots
1 medium potato, cubed
1 medium bell pepper, sliced
1 can (10 oz) straw mushrooms or you can use fresh mushrooms, sliced
1 can (15 oz) young corn, sliced into 1½ inch pieces
1 can (8 oz) bamboo shoots
1 can (14 oz) coconut cream or coconut milk *Use 2 cans if you like lots of kadu.
Other vegetables of your choosing
1 tablespoon dried basil or use ½ cup freshly chopped sweet basil leaves
2 tablespoons chicken bouillon or 2 bouillon cubes
Hot chili peppers, sliced, optional
Black pepper, to taste
1 cup water
Instructions
In a medium saucepan, add water, bouillon, onions, garlic, pepper, and chicken pieces; bring to a boil; cook for approximately 10 minutes over mediumhigh heat.
Add potatoes to chicken; continue cooking for 5 more minutes.
Add curry paste, brown sugar, fish sauce, and remaining vegetables to pot; stir well to dissolve curry paste and brown sugar. Reduce heat to medium and continue to cook for 5 more minutes.
Add coconut cream to pot. Turn heat down to low and simmer for 58 minutes, or until potatoes are cooked through.
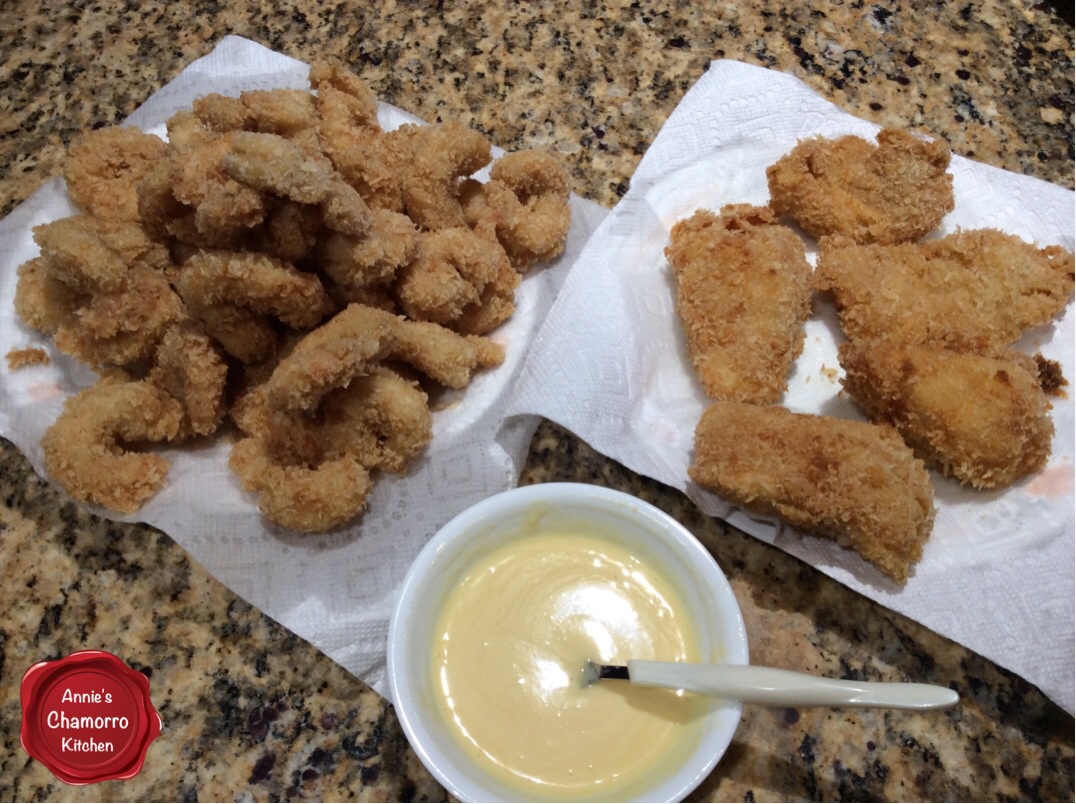
Our family loves seafood. One of our favorite ways to serve fish and shrimp is to coat them in panko breadcrumbs and fry them until golden brown and crispy.
Serve this with hot steamed rice, some sweet dipping sauce (similar to honey walnut shrimp sauce), and fina’denne’ and you’ve got yourself an amazing seafood meal.
Give my sister-in-law Min’s recipe a try. I think you’ll like it. 🙂
This recipe makes enough for a family of 4 plus leftover for lunch the next day.
Panko Crusted Fried Fish & Shrimp
Ingredients for the Fried Shrimp:
1 cup Korean batter mix (Tuigim or Twigim Garu); see photo below
1 tablespoon Dashida Korean seasoning
1 tablespoon onion powder
1 tablespoon garlic powder
1 teaspoon black pepper
1/2 cup milk
30 ounces raw shrimp, peeled and deveined
1 bag panko crumbs
Ingredients for the Fried Fish:
1 cup Korean batter mix (Tuigim or Twigim Garu); see photo below
1 tablespoon Dashida Korean seasoning
1 tablespoon onion powder
1 tablespoon garlic powder
1 teaspoon black pepper
1 cup milk
24 ounces fish filets (tilapia, basa, and orange roughy work well)
1 bag panko crumbs
Ingredients for the Dipping Sauce:
2 tablespoons sweetened condensed milk
3 tablespoons pineapple juice
2 tablespoons kewpie mayo
Other Ingredients:
Oil, for frying
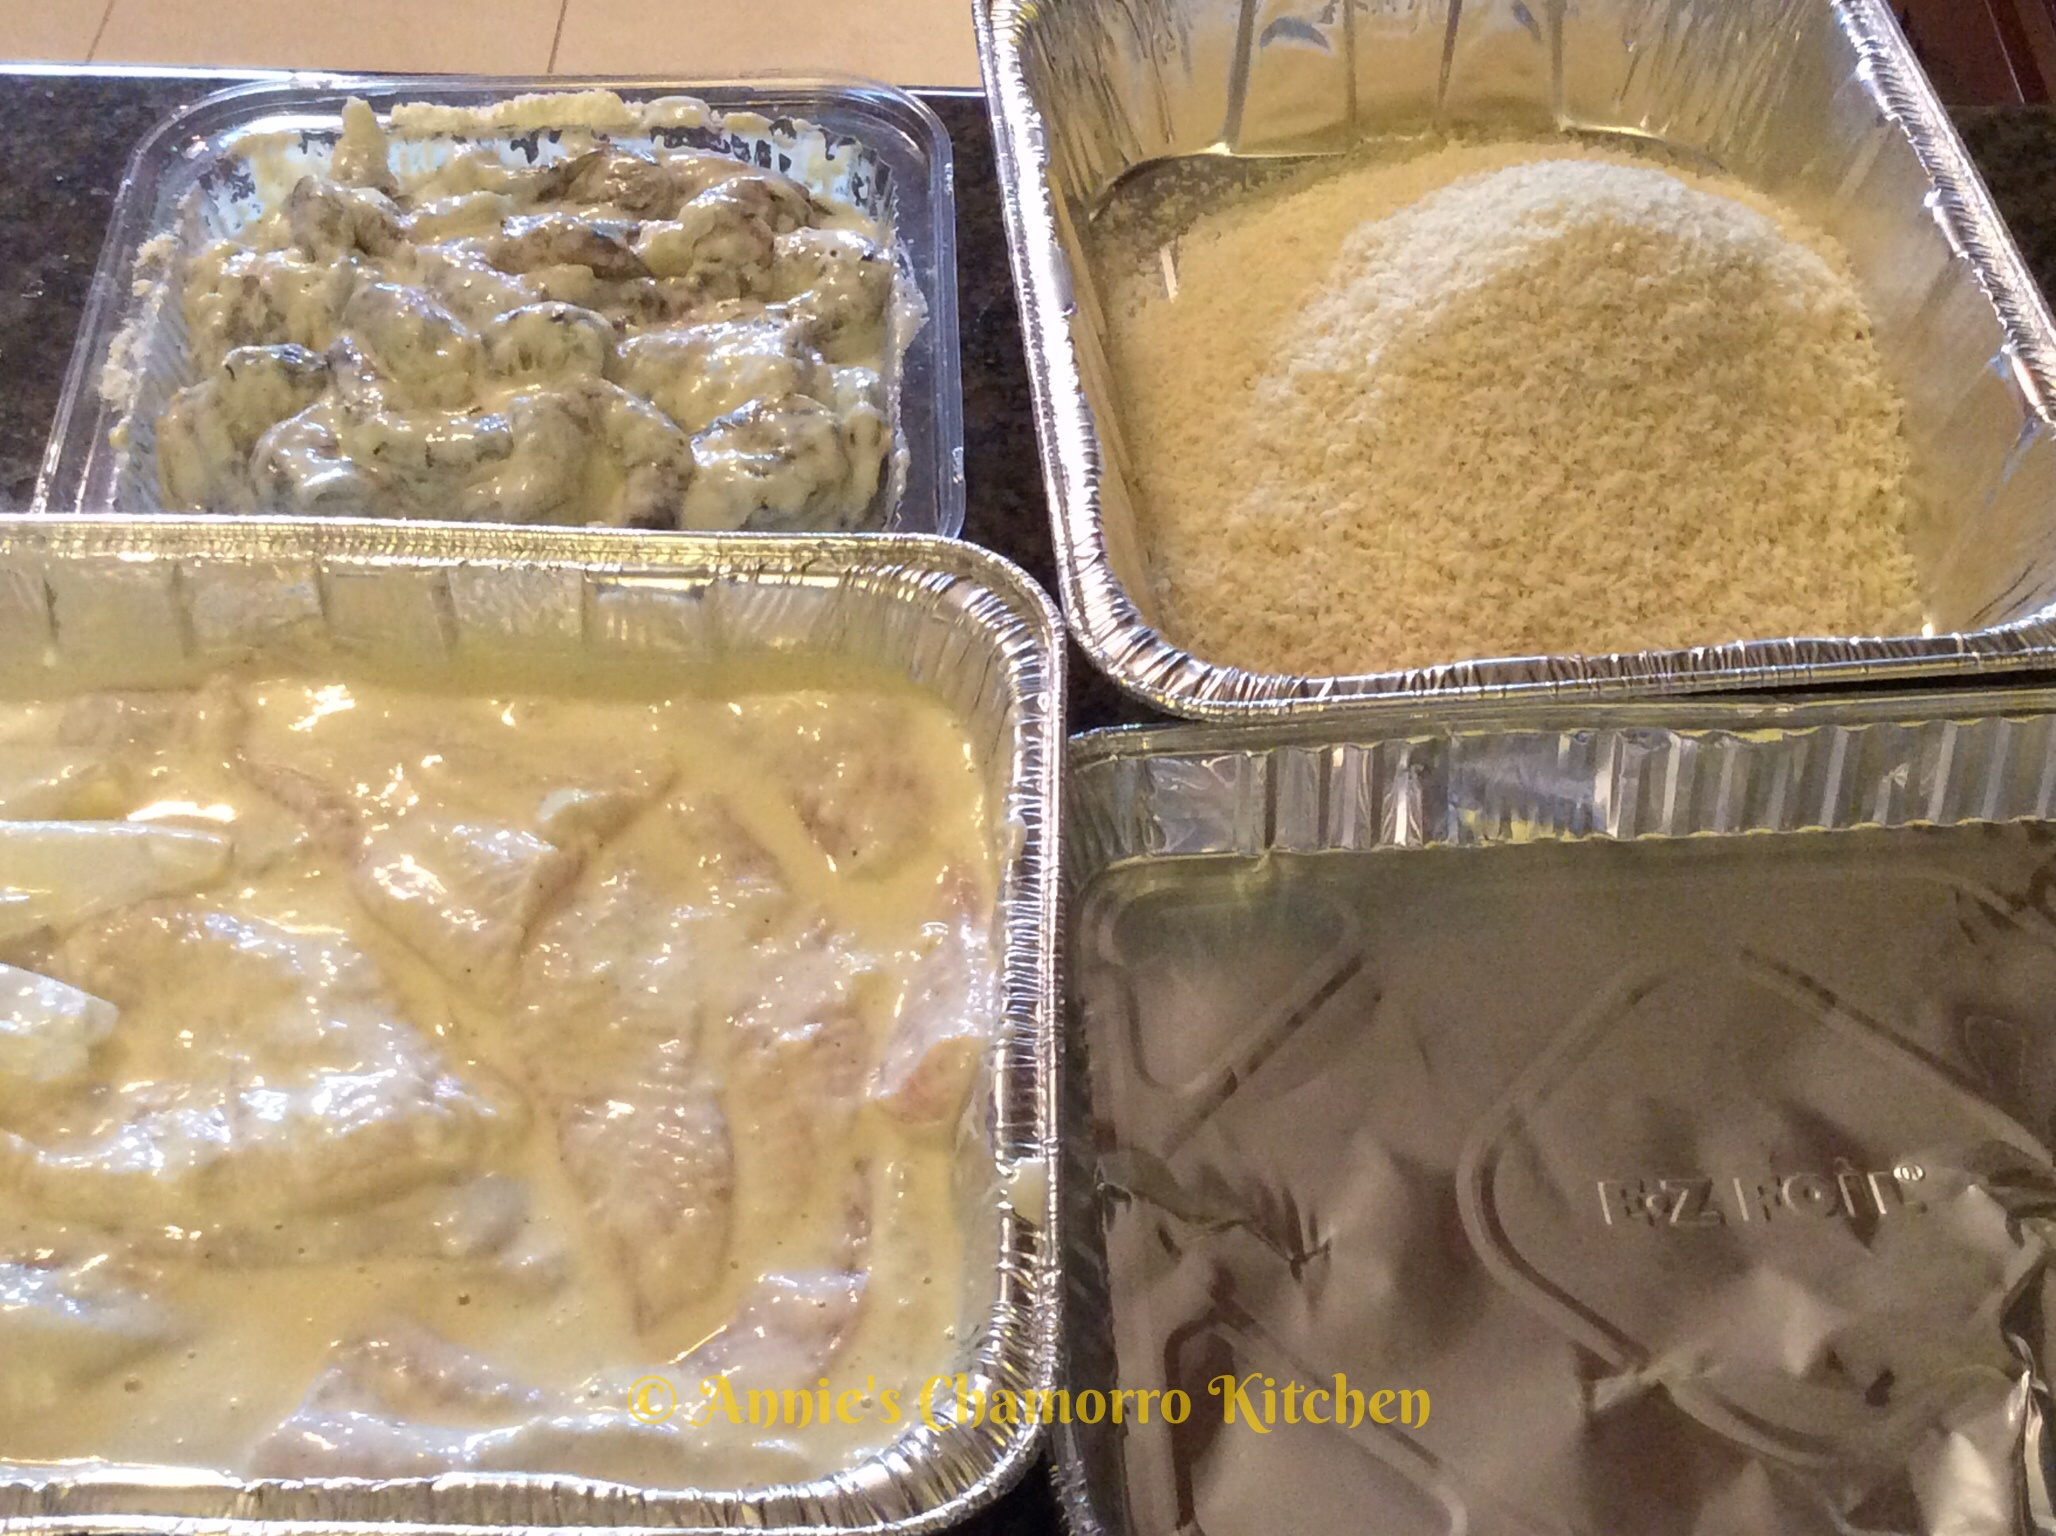
Tuigim Garu, Korean batter mix, is used to make a batter to coat the shrimp and fish for frying. This is what the package looks like (the bag on the left).
The bag on the right is called Pang Garu, and is a type of panko breadcrumbs. The shrimp and fish are coated in breadcrumbs after coating it in the batter. You can use this or any other brand of panko breadcrumbs.
Directions:
Rinse and clean the shrimp and fish filets, then set them aside in separate, shallow dishes. I like using meaty white fish such as basa or tilapia; orange roughy is good too.
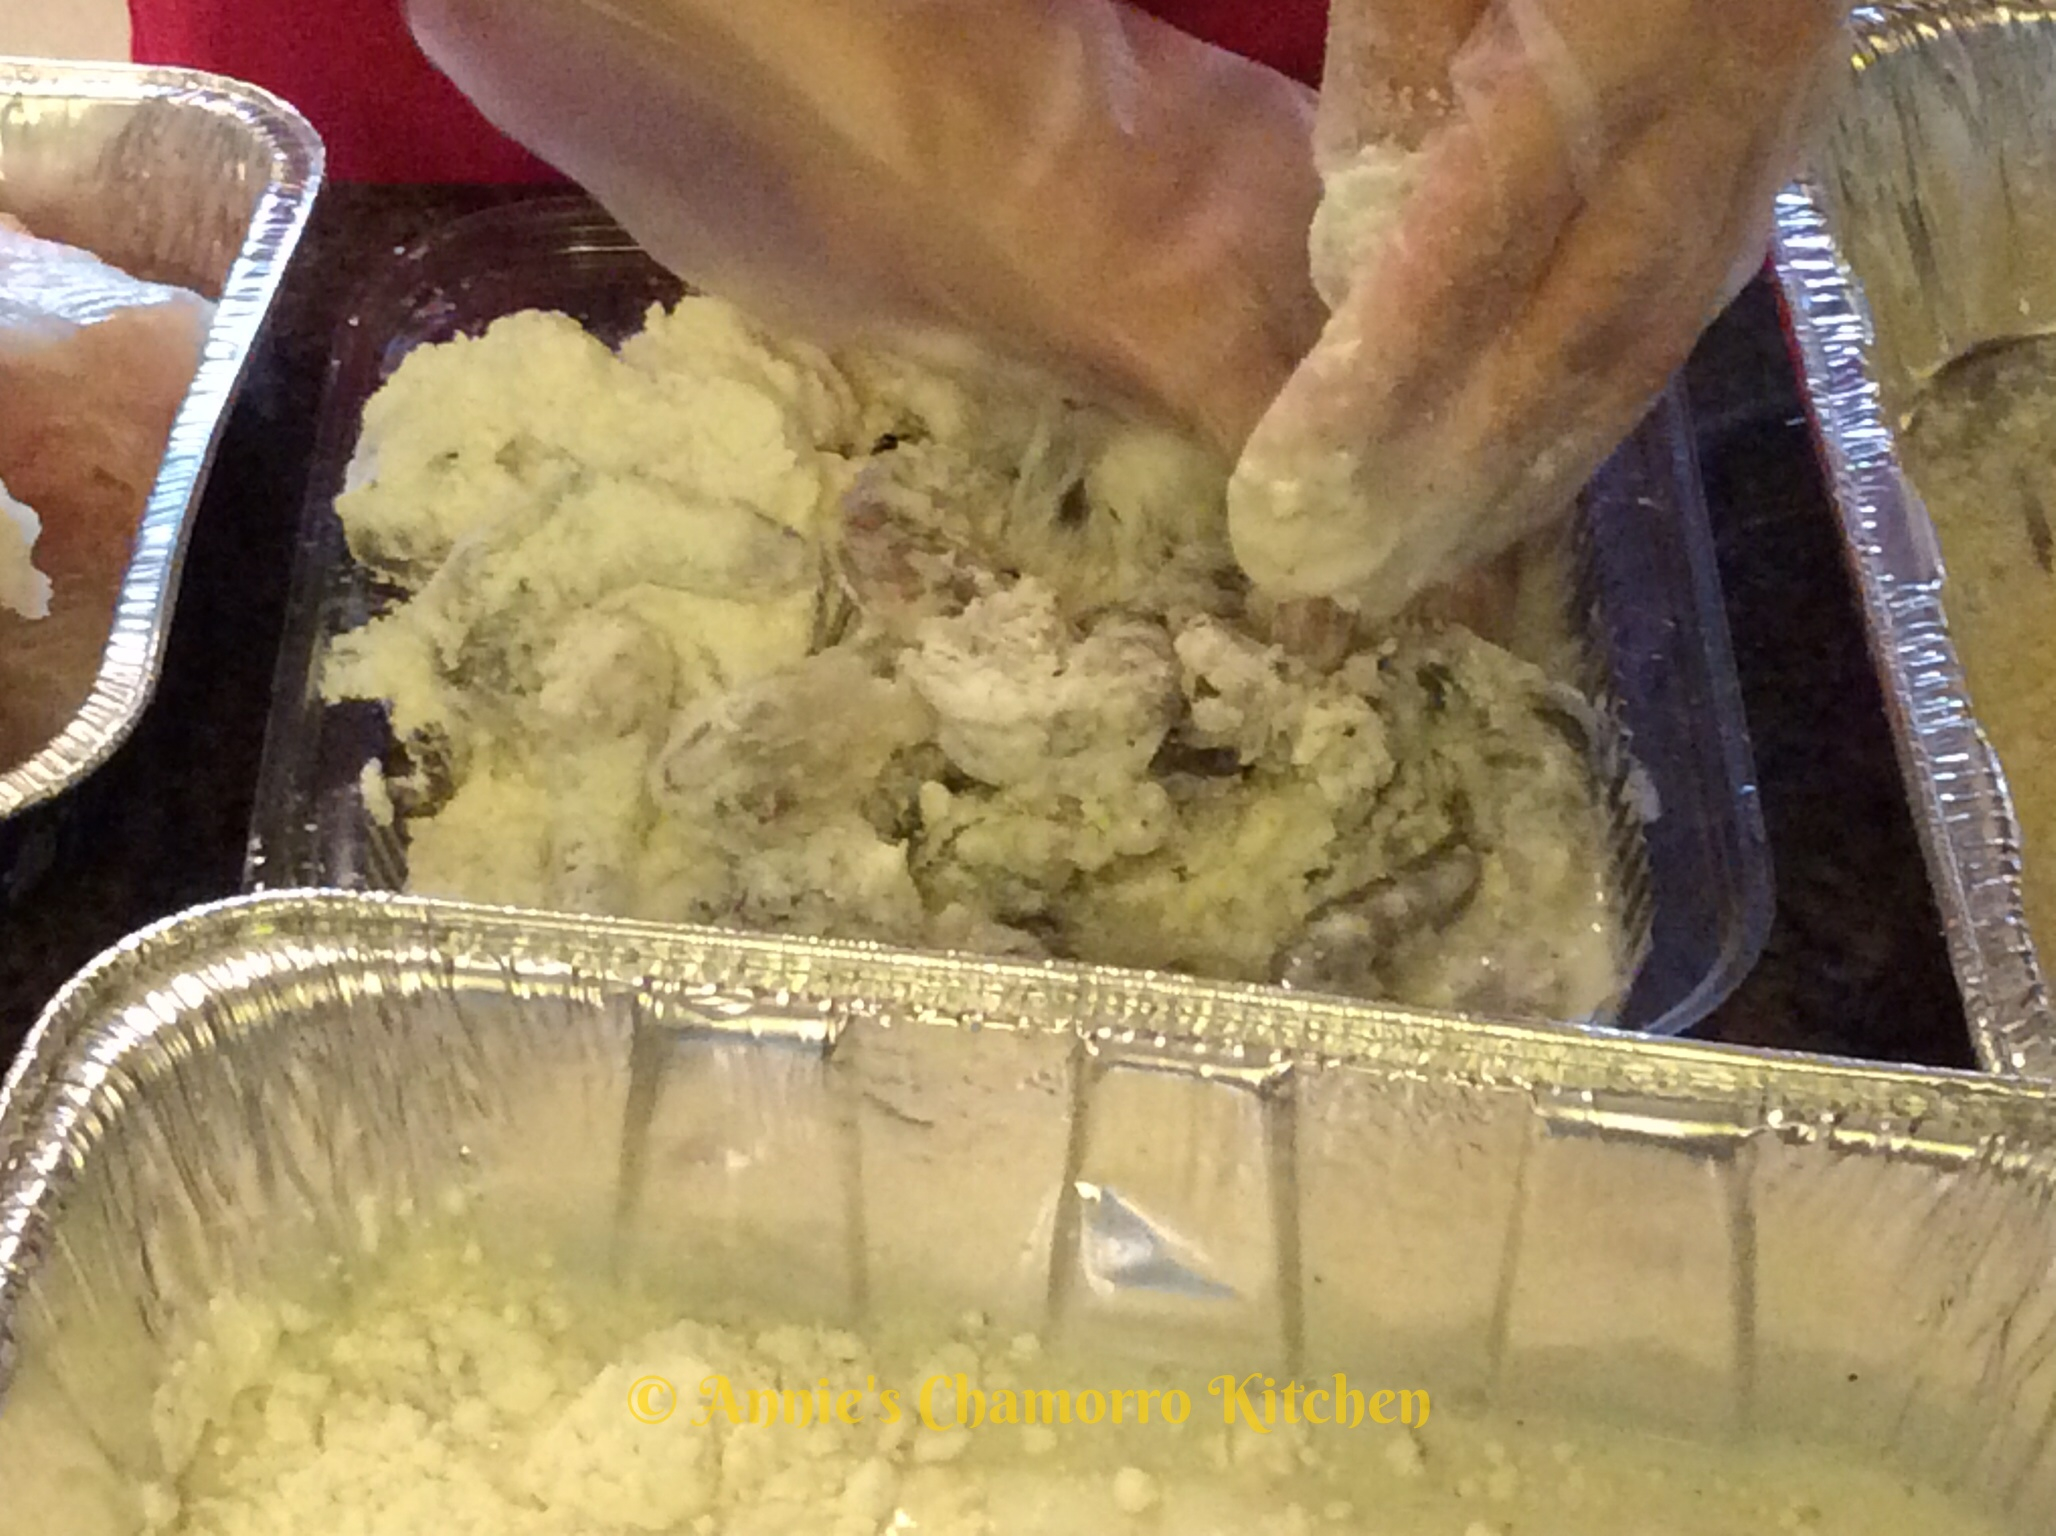
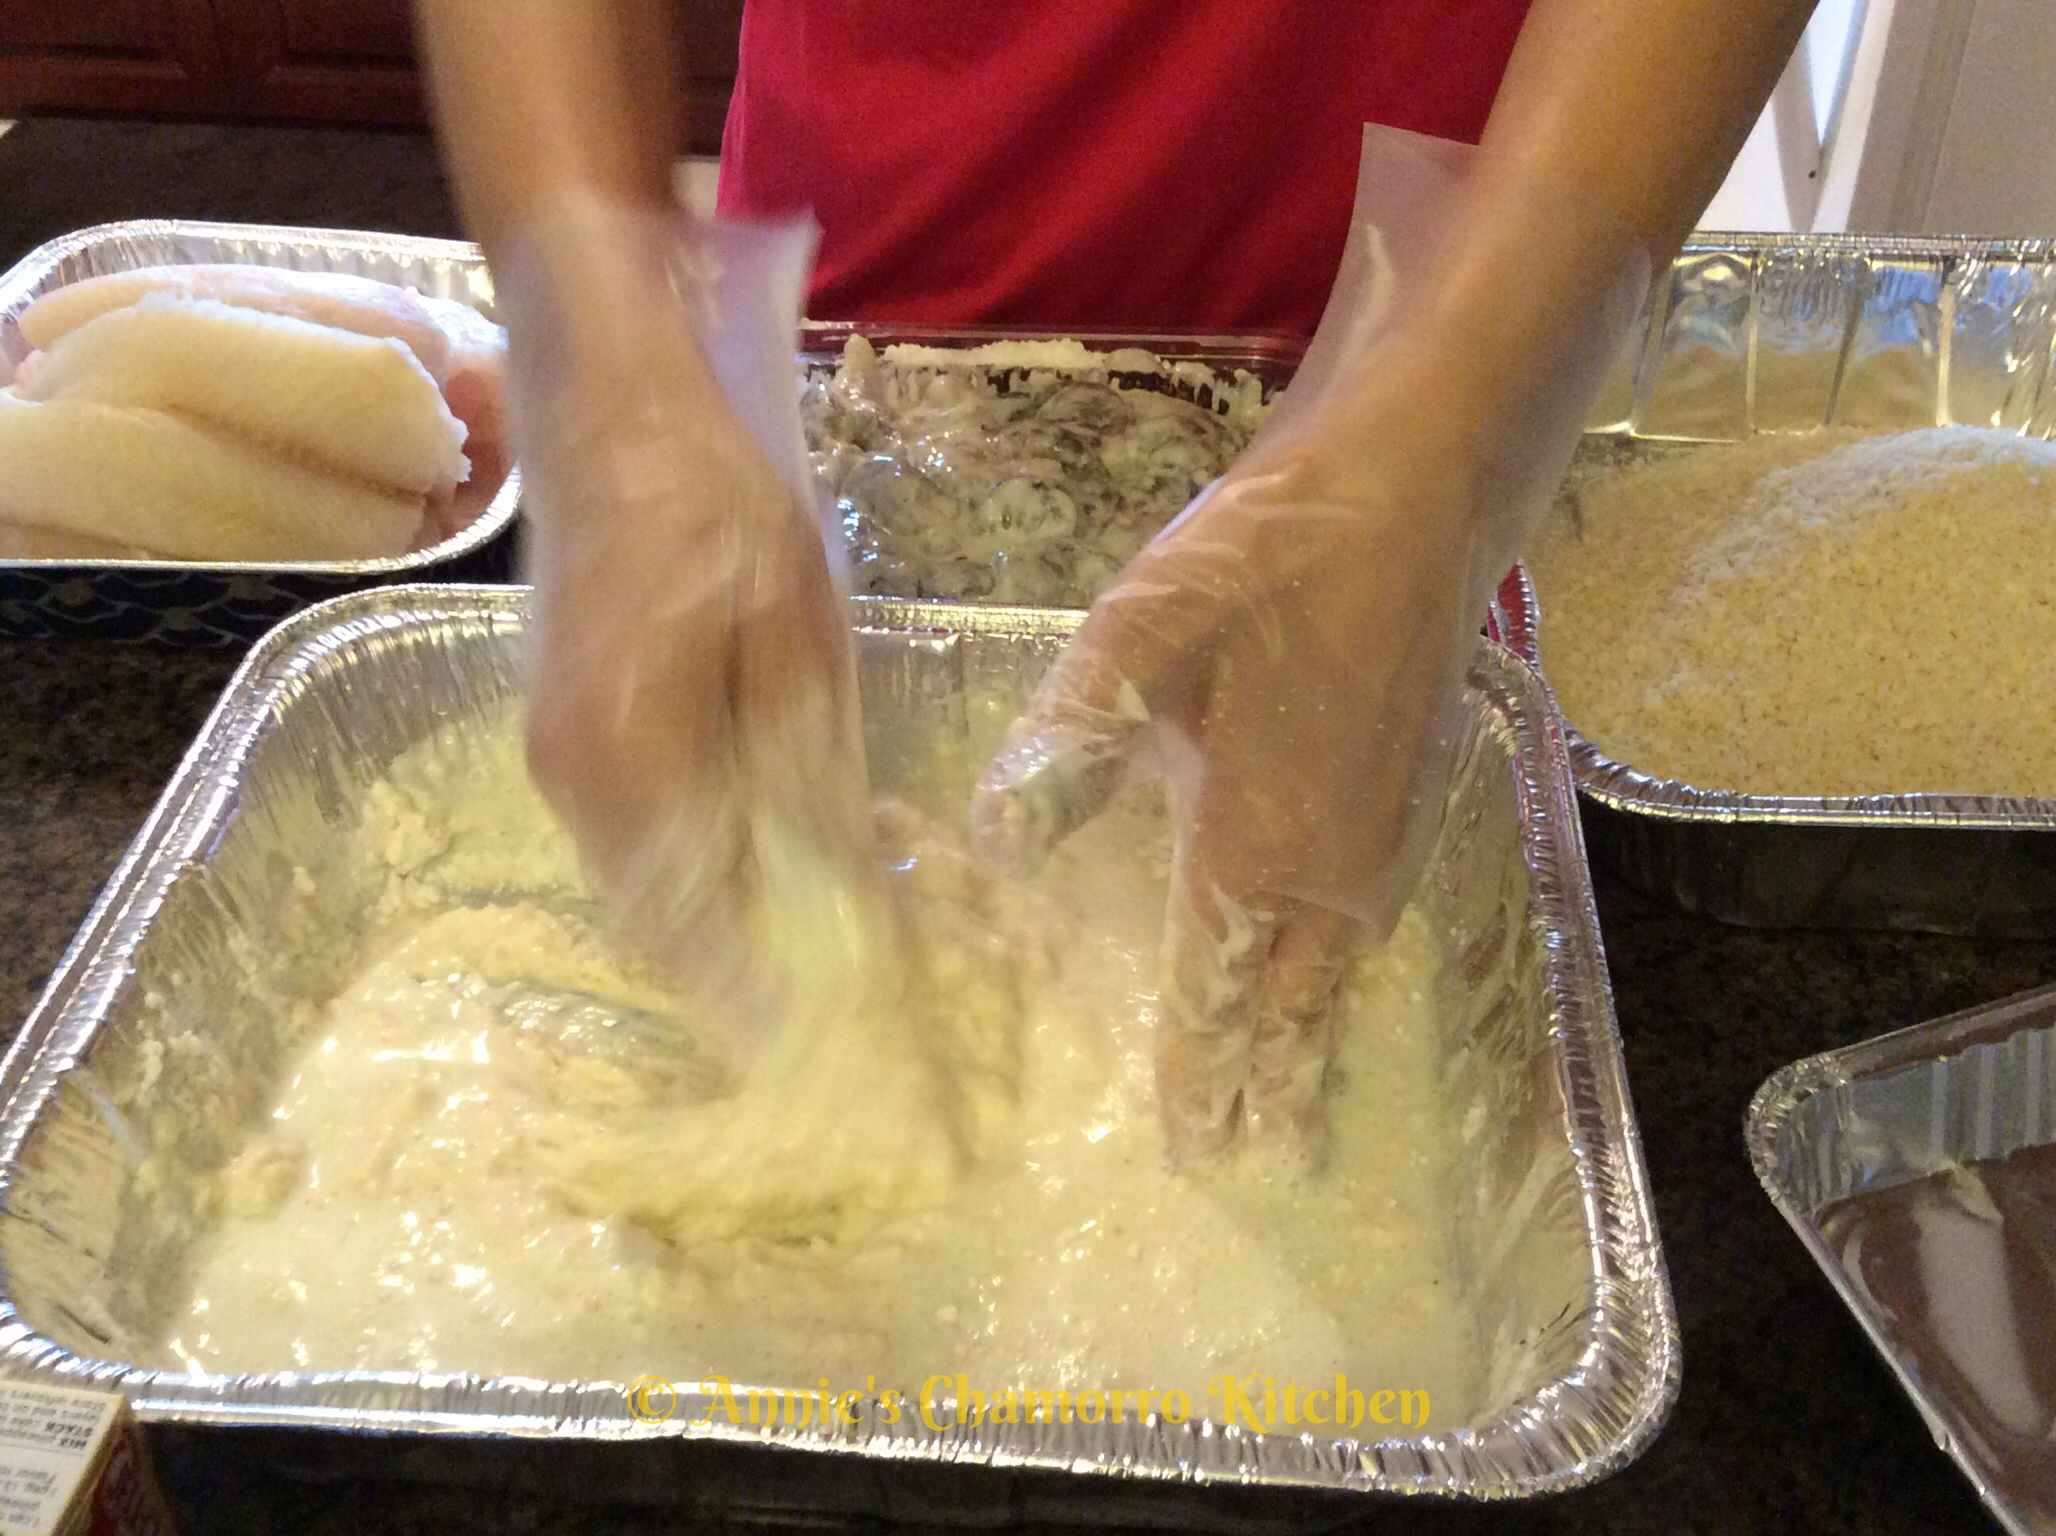
Add the dry batter mix and seasonings directly over the shrimp. Toss the shrimp and dry ingredients together then add the milk. Keep tossing it all together until the dry ingredients are no longer lumpy and a thick batter coats the shrimp. Set aside.
In another pan, place the remaining batter mix and dry ingredients; this will be mixed into a batter to coat the fish filets. You don’t want to create the batter WITH the fish as you do with the shrimp because you don’t want to break up the fish filets. Instead, mix the batter in a separate pan and dip the fish into the batter before coating with panko.
Add the milk to the dry batter mixture, mixing until you get a smooth batter.
Place the fish filets into the batter. Ensure each filet is coated with batter.
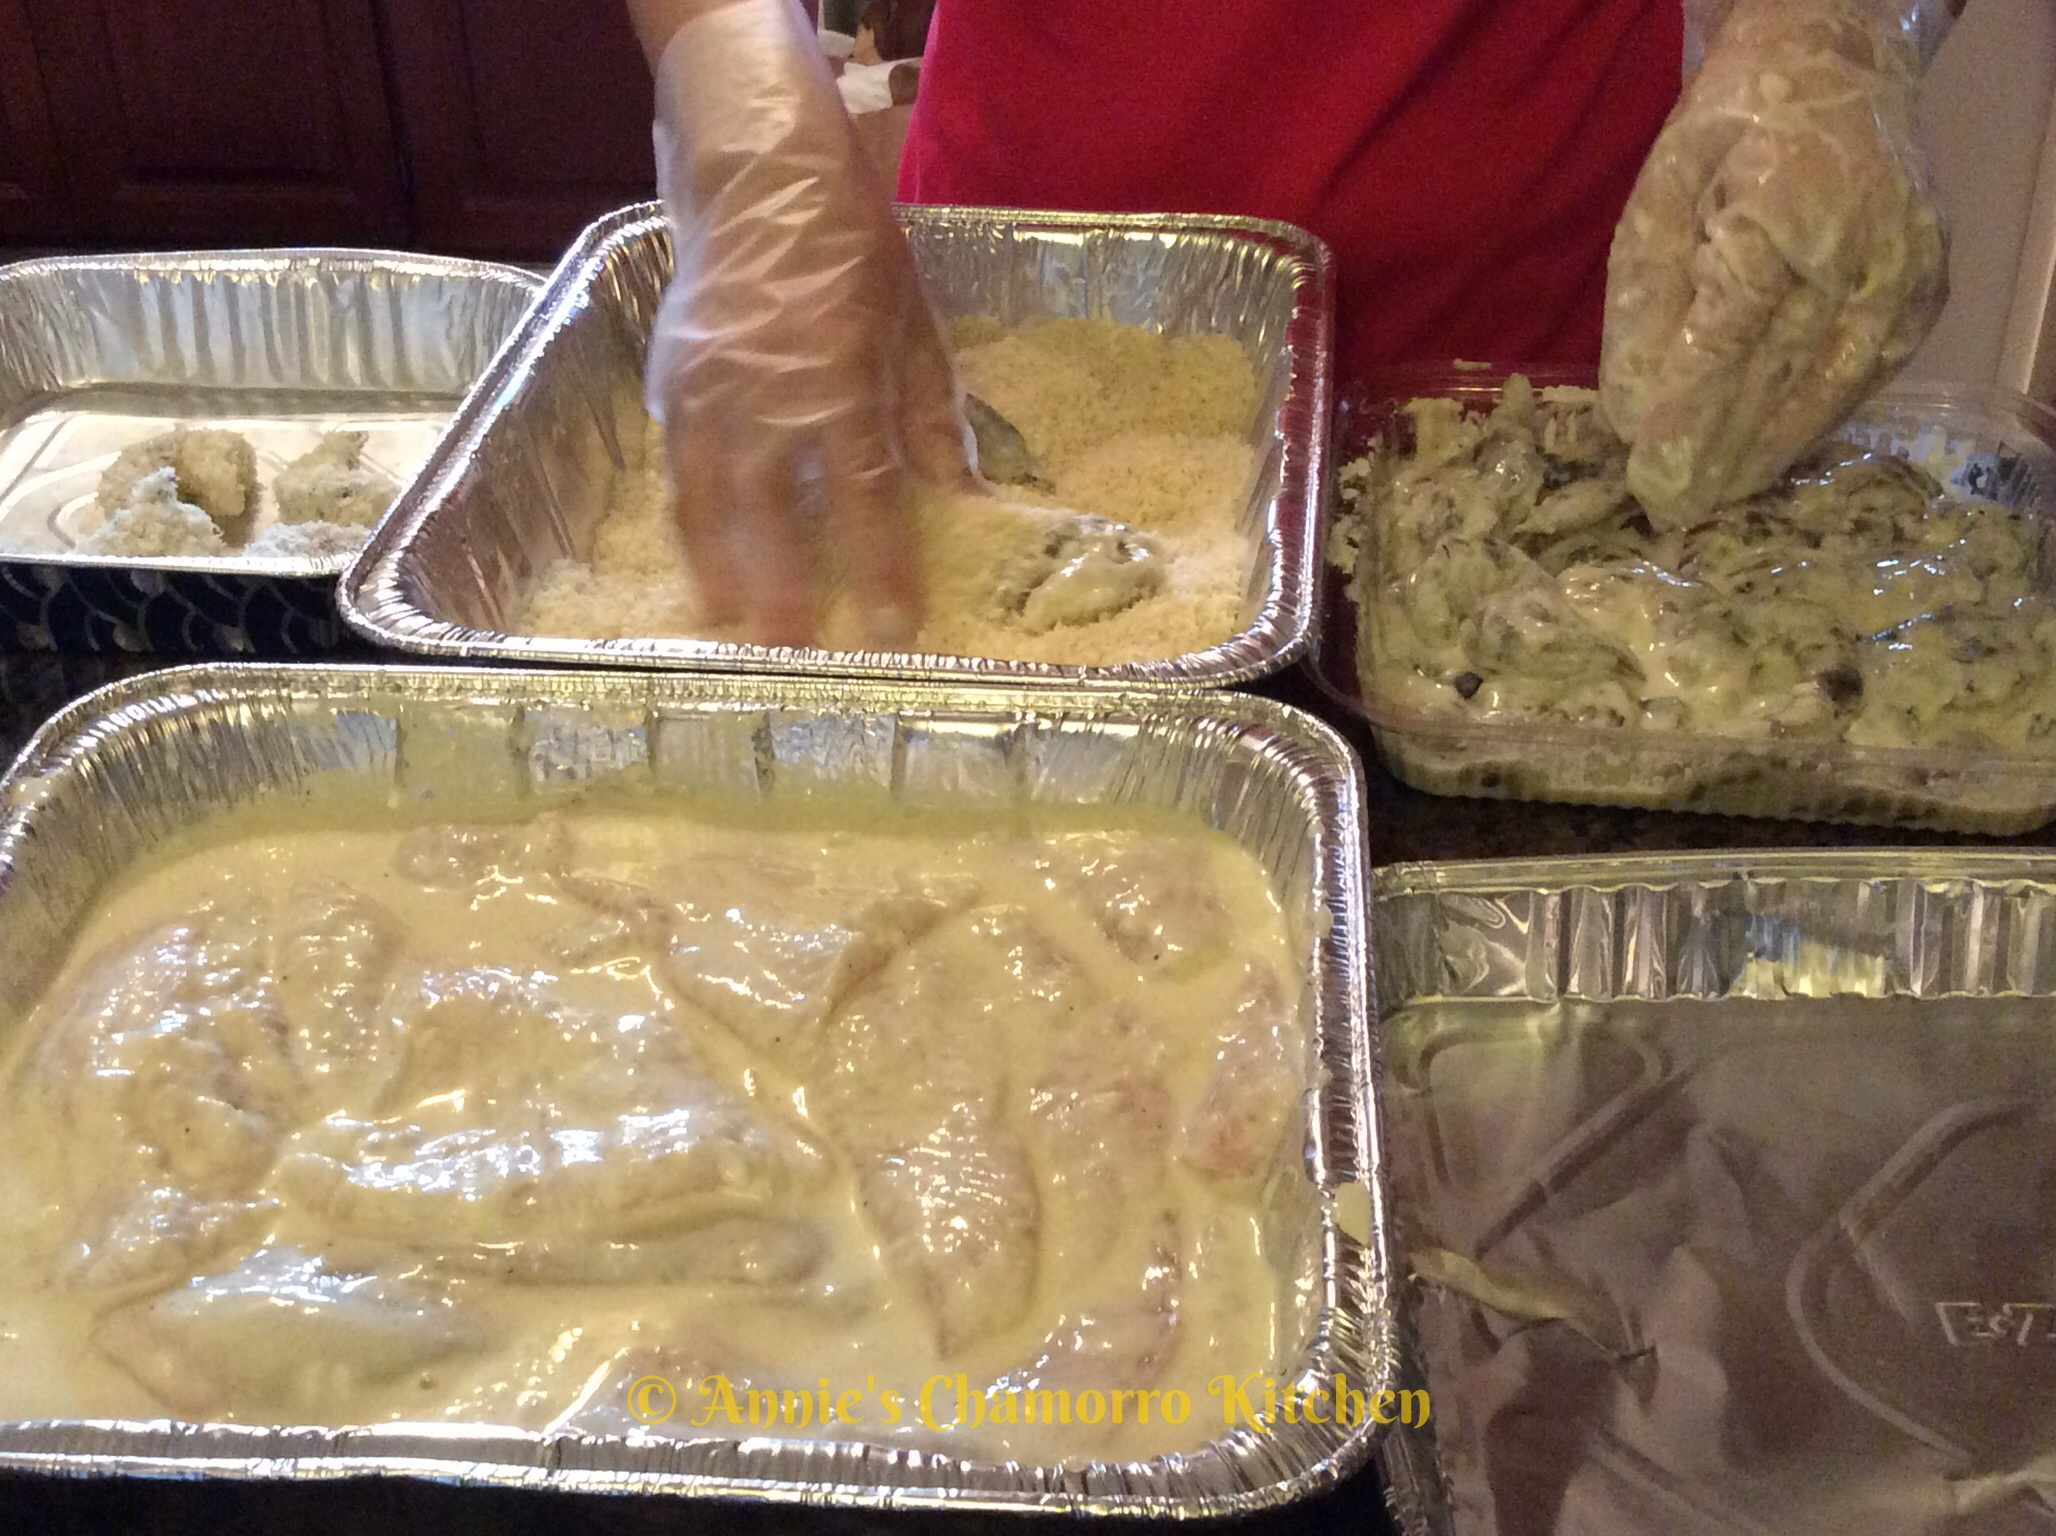
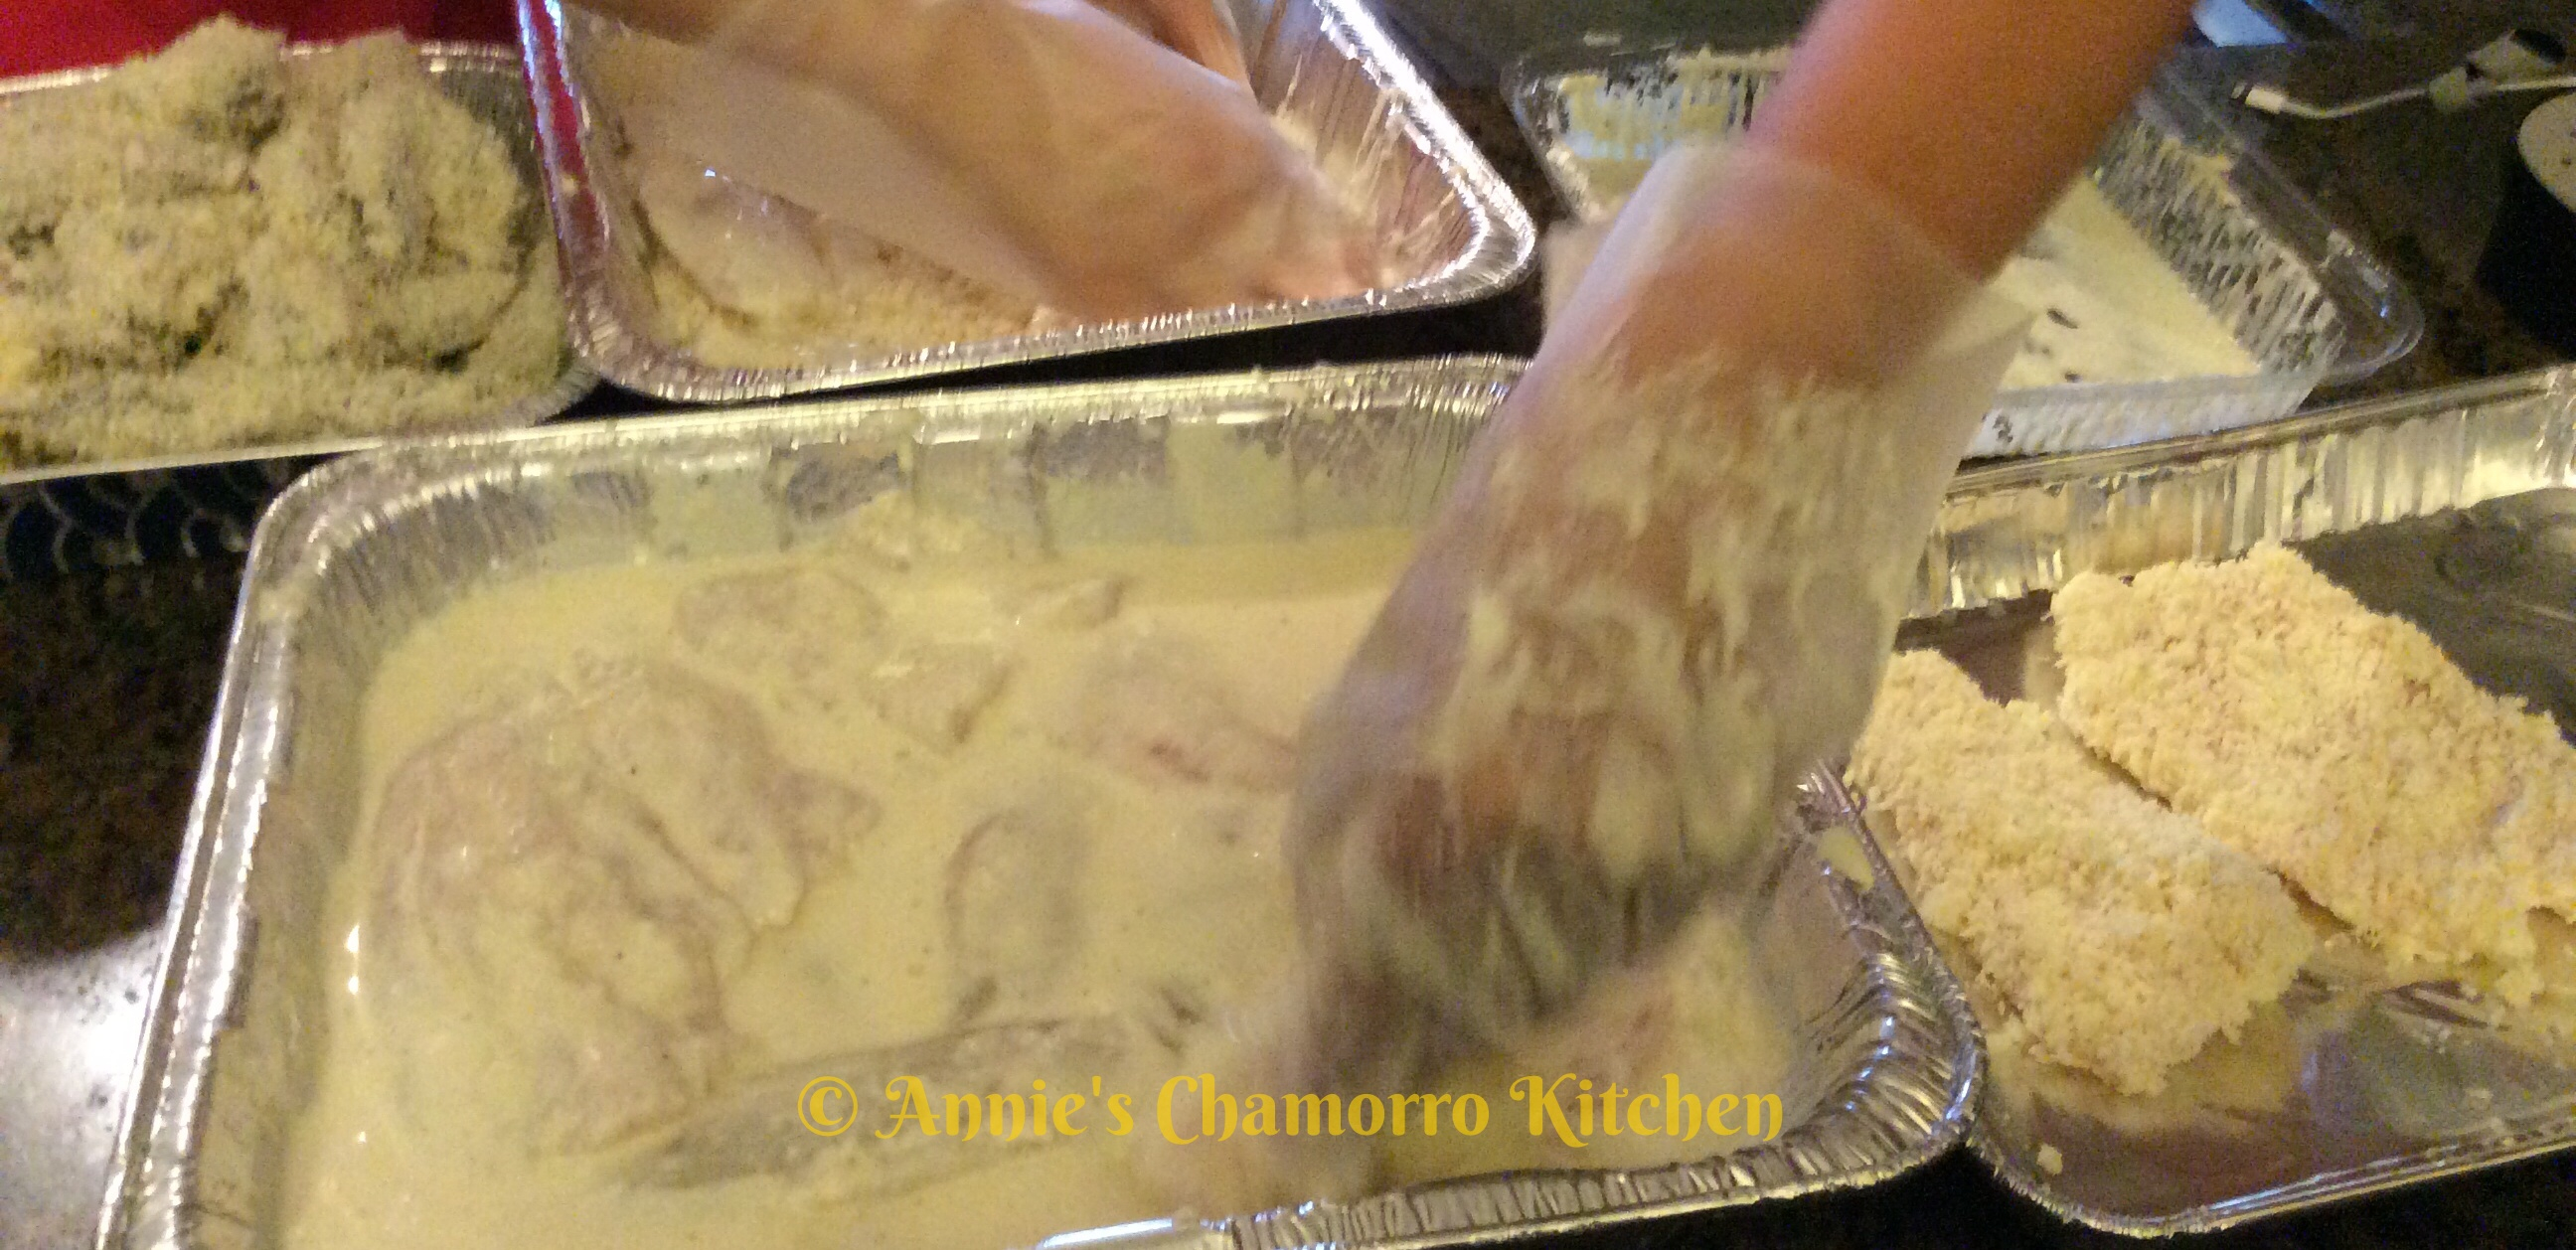
Create an assembly line with the shrimp, fish, and the breadcrumbs.
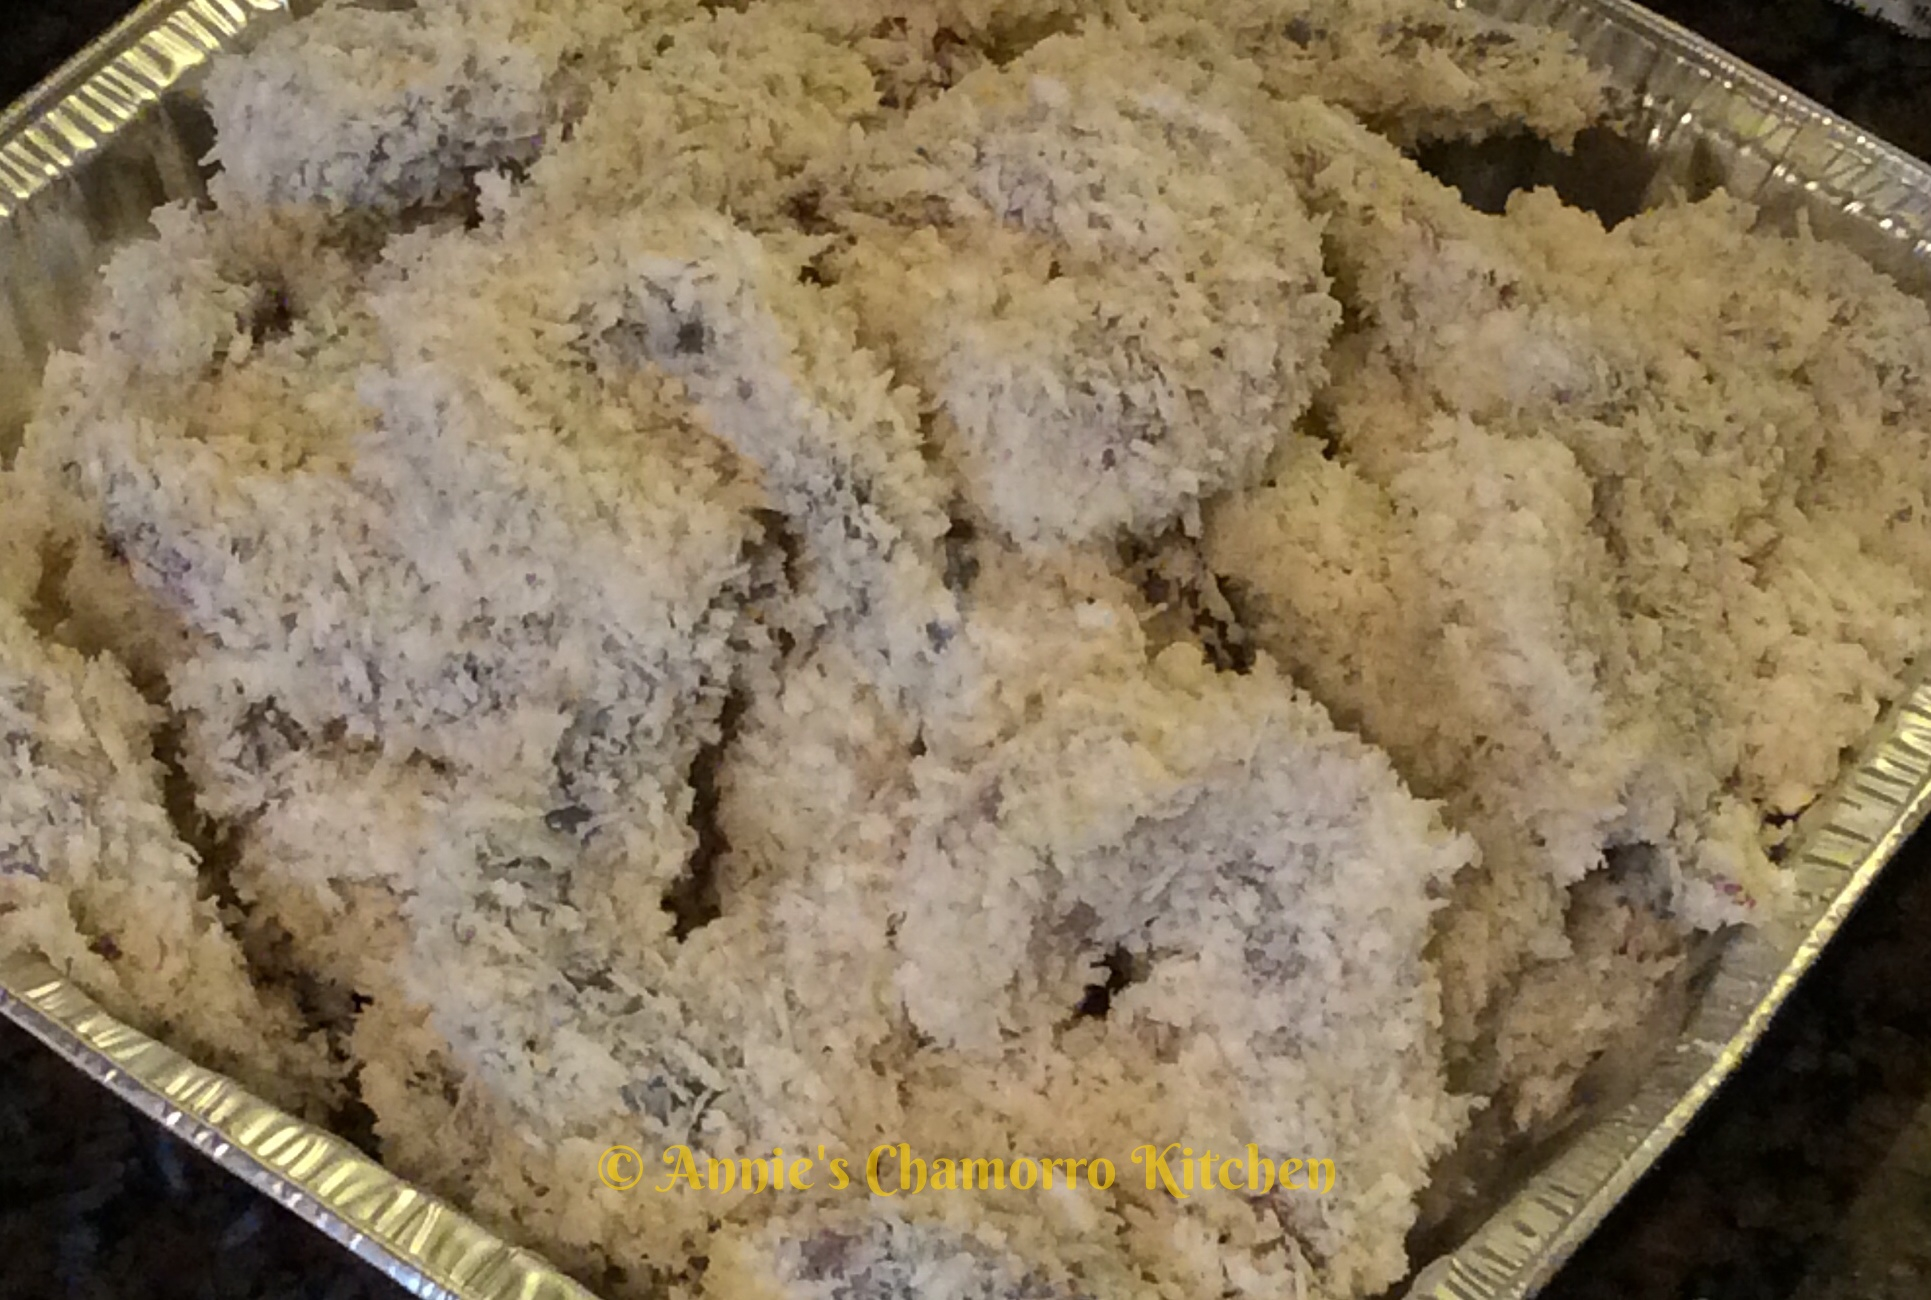
Designate one hand as the “wet hand” and the other as the “dry hand.” Use the wet hand to place the shrimp and fish into the pan of breadcrumbs. Use the dry hand to cover the shrimp and fish with breadcrumbs.
Be sure to generously pat the breadcrumbs into the batter-covered fish and shrimp.
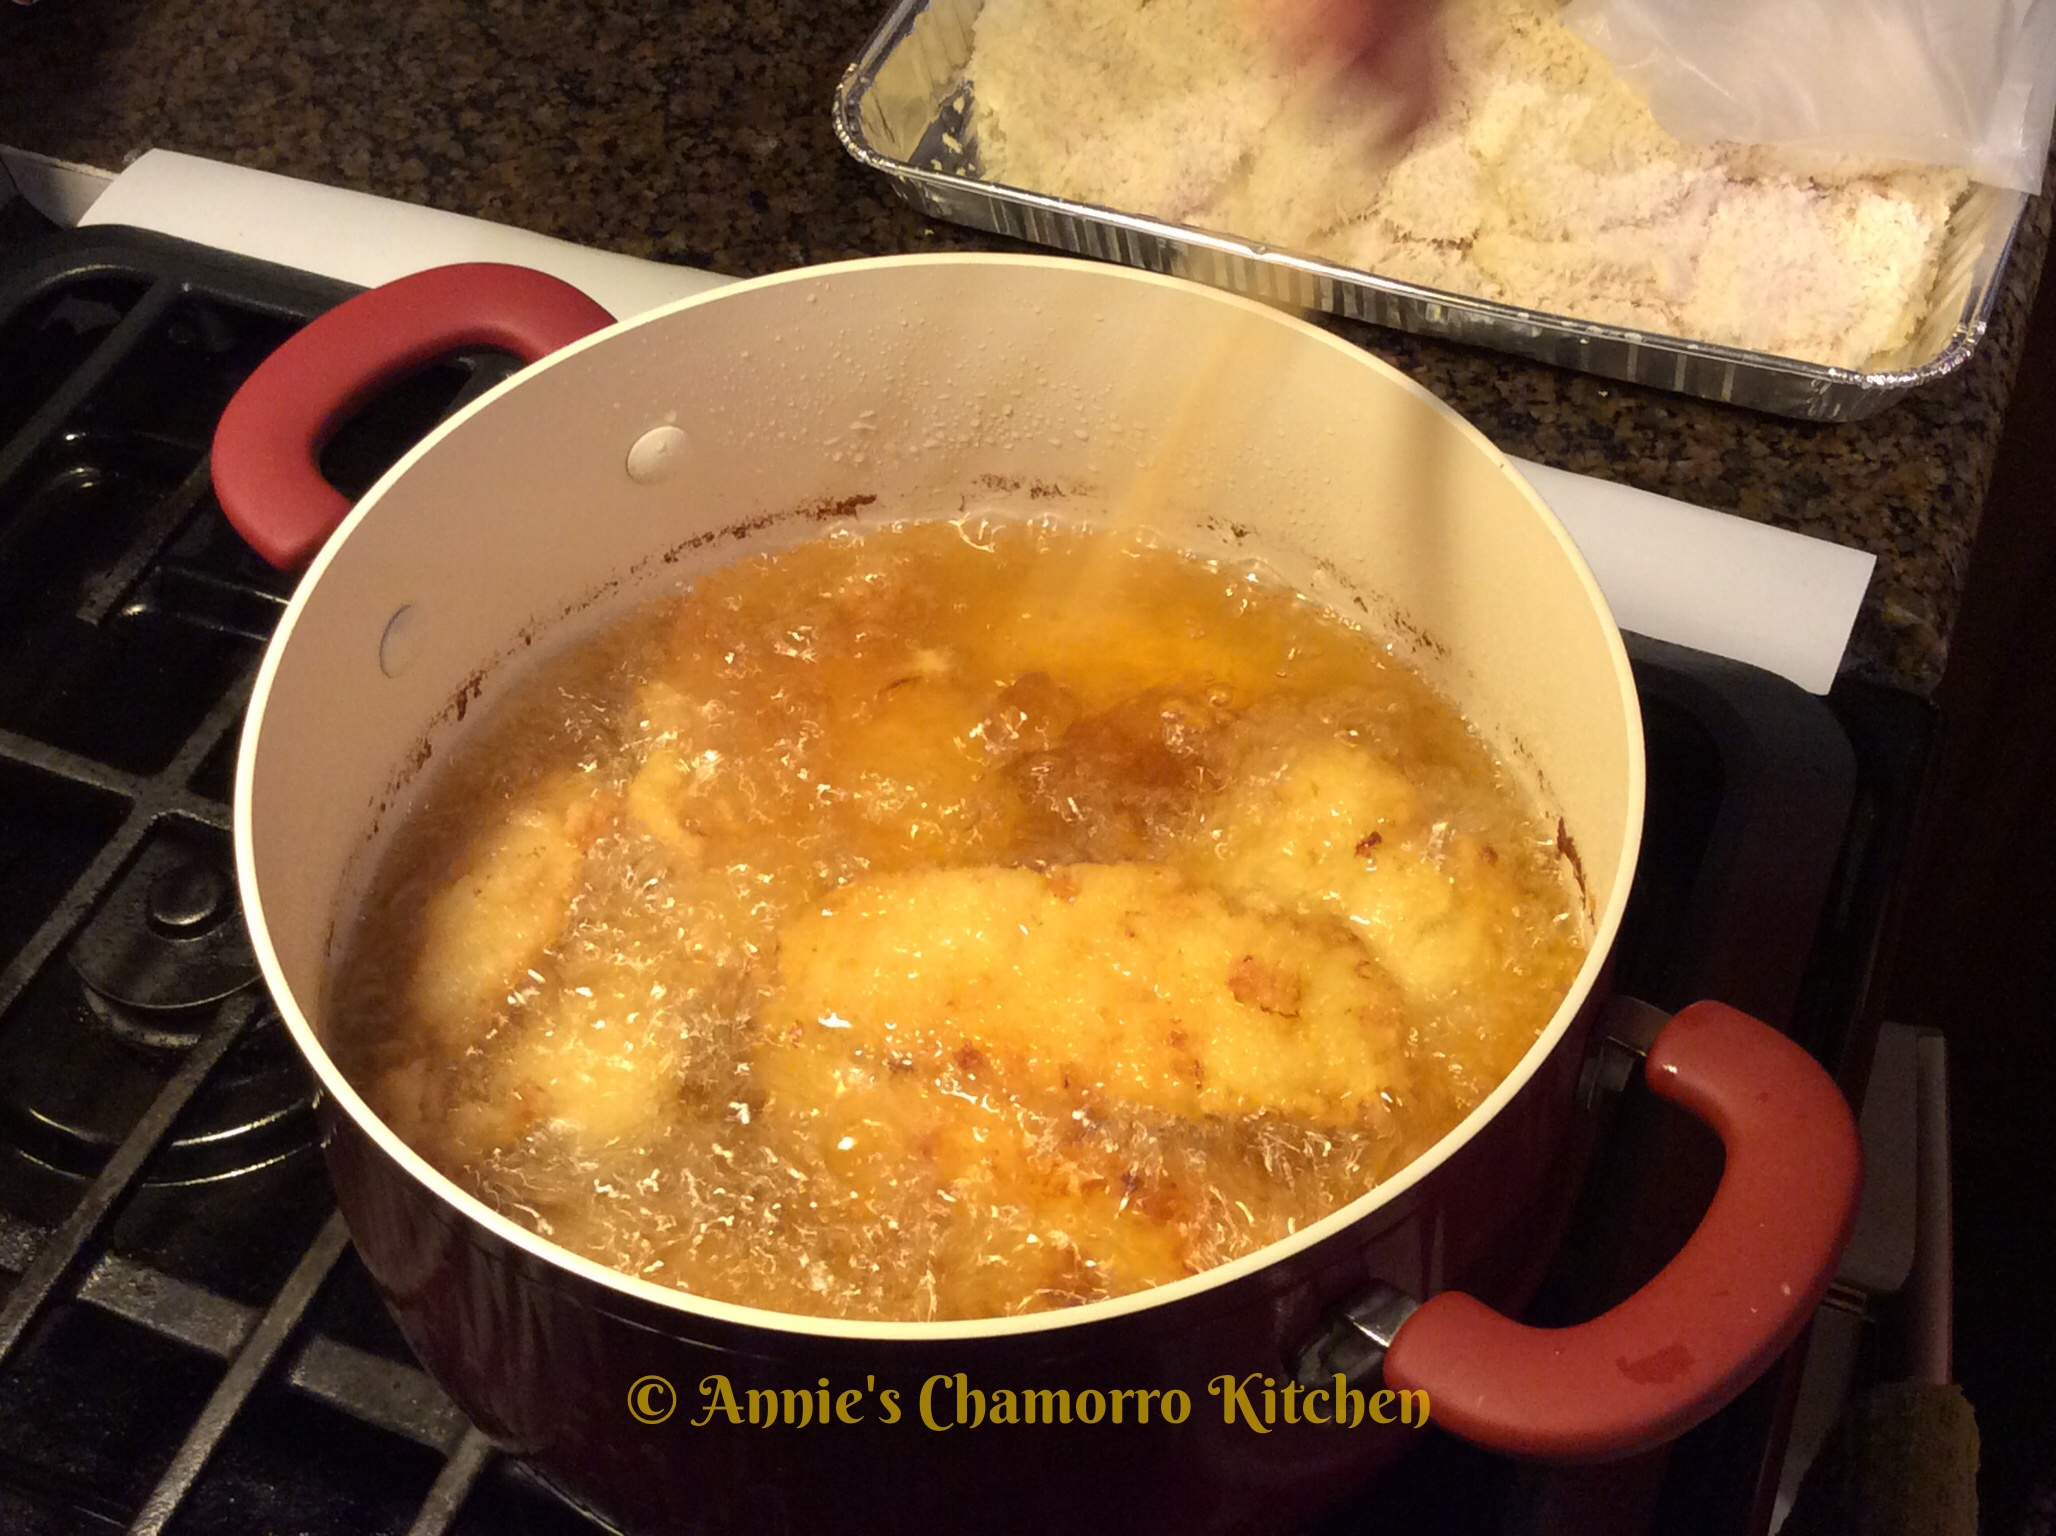
Carefully drop the coated fish and shrimp into hot oil. Do not overcrowd the pan.
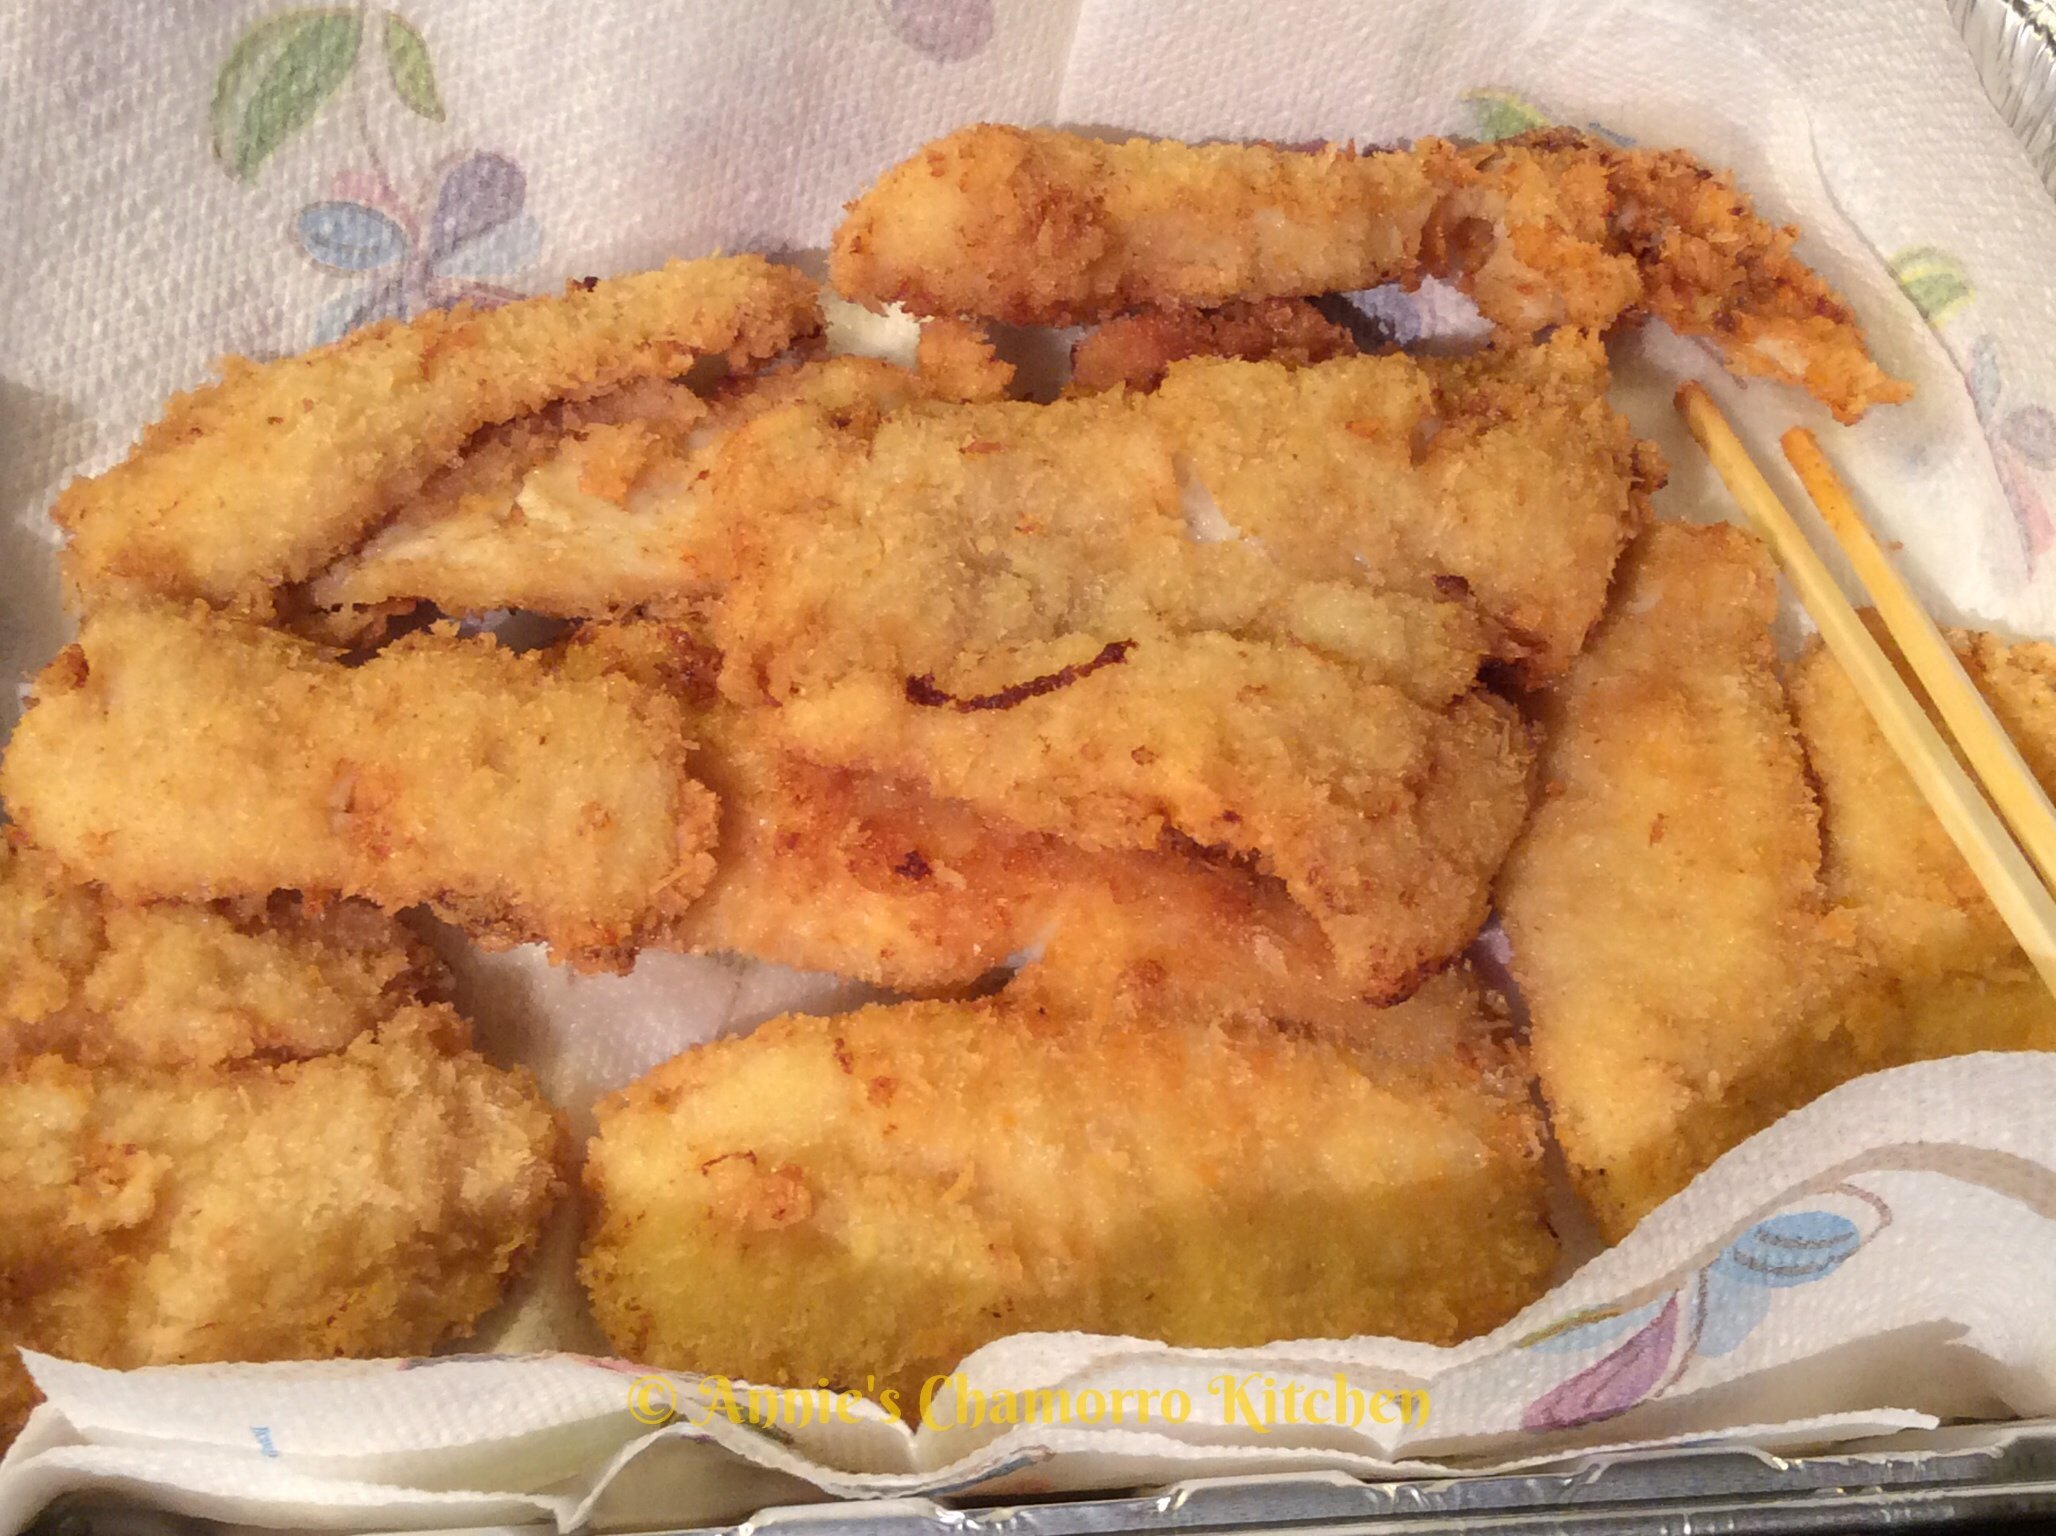
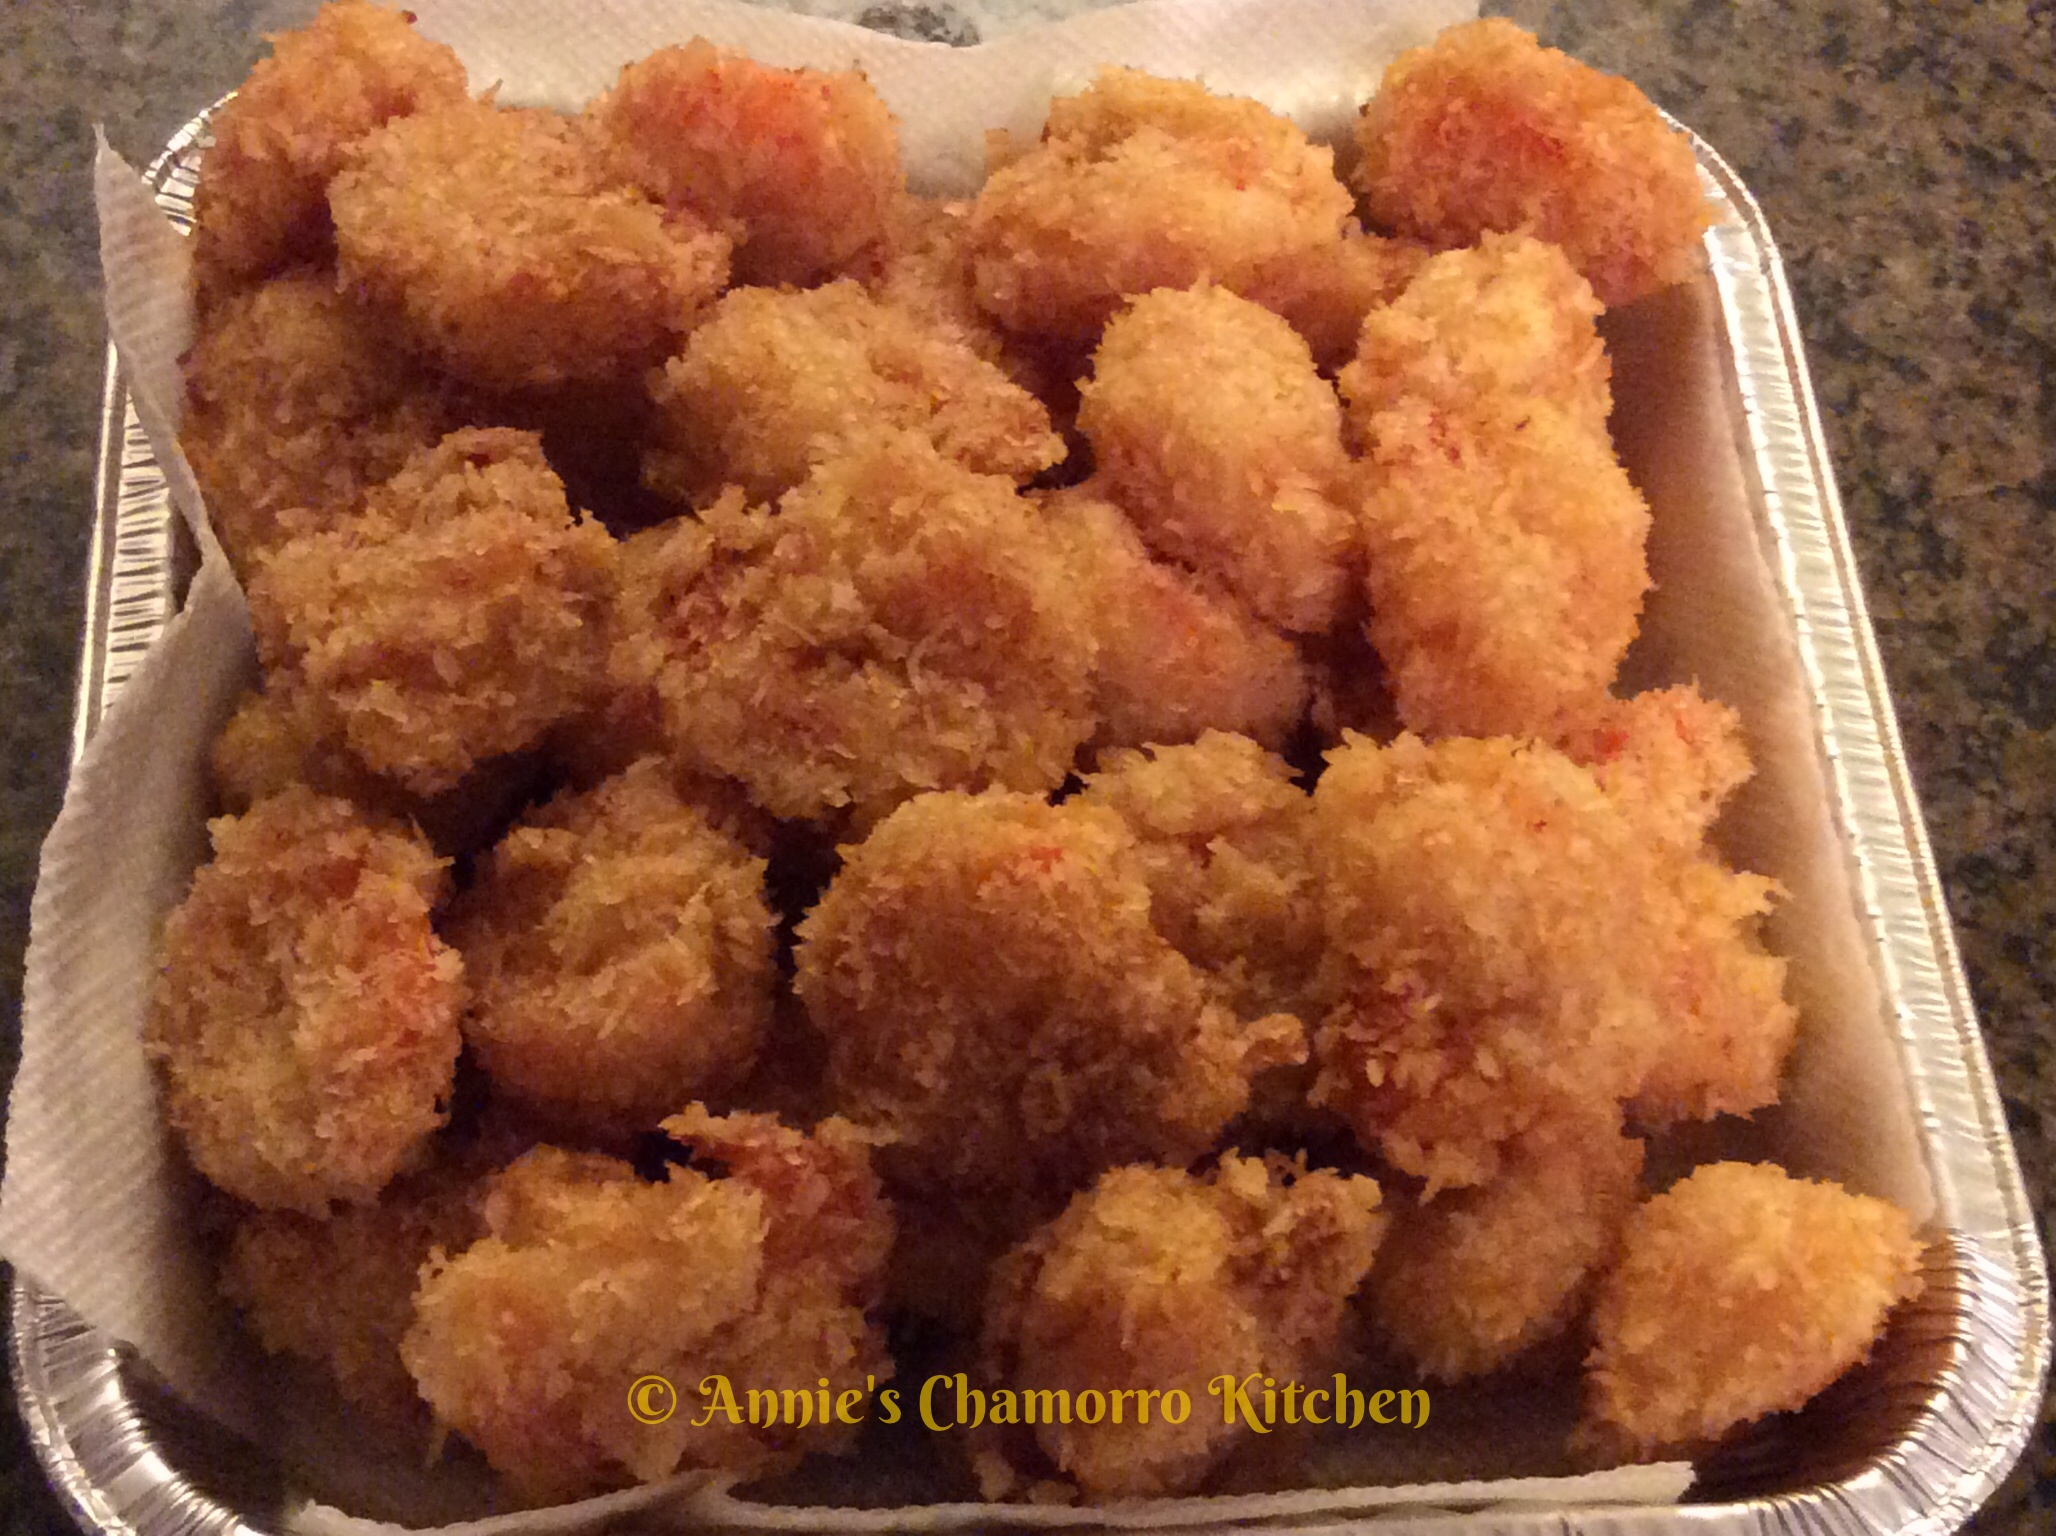
Fry the fish about 3 minutes on each side or until golden brown. Fry the shrimp until golden brown all over.
Make the dipping sauce.
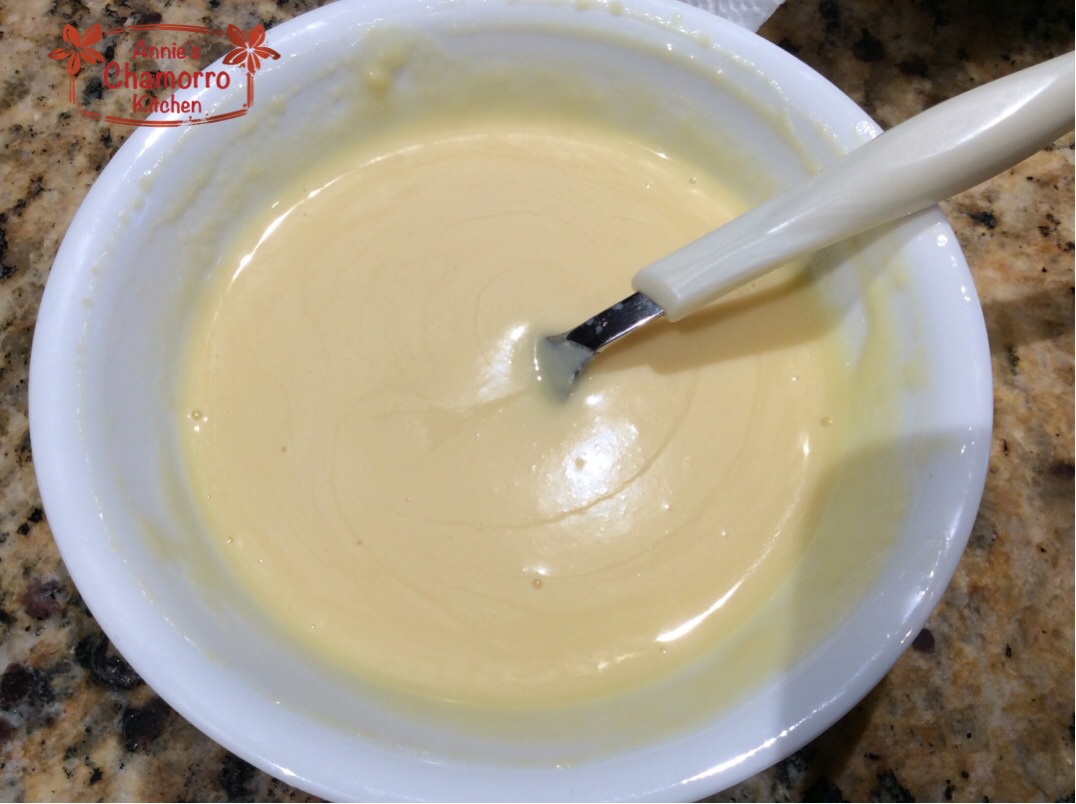
In small microwave-safe bowl, mix together the sweetened condensed milk, pineapple juice and kewpie mayonnaise. You can use regular mayonnaise if you don’t find any kewpie.
Heat the mixture in the microwave for 20 seconds or until it starts to bubble. Remove from the microwave and stir until creamy. Serve with fried shrimp and fish.