Archive for SAUCES & SEASONINGS

Thai Beef Salad

This popular Thai beef salad can serve as an appetizer or a meal.  It’s quick and easy to prepare so you can have it on your table in just a few minutes.  Toss your favorite salad greens together then add thinly sliced grilled beef and a drizzle of my delicious Thai-style dressing for a perfect side salad, quick lunch or light dinner meal.

My complete recipe is located at the bottom of this post.  Give it a try.  I think you’ll like it. 🙂

Thai Beef Salad

image

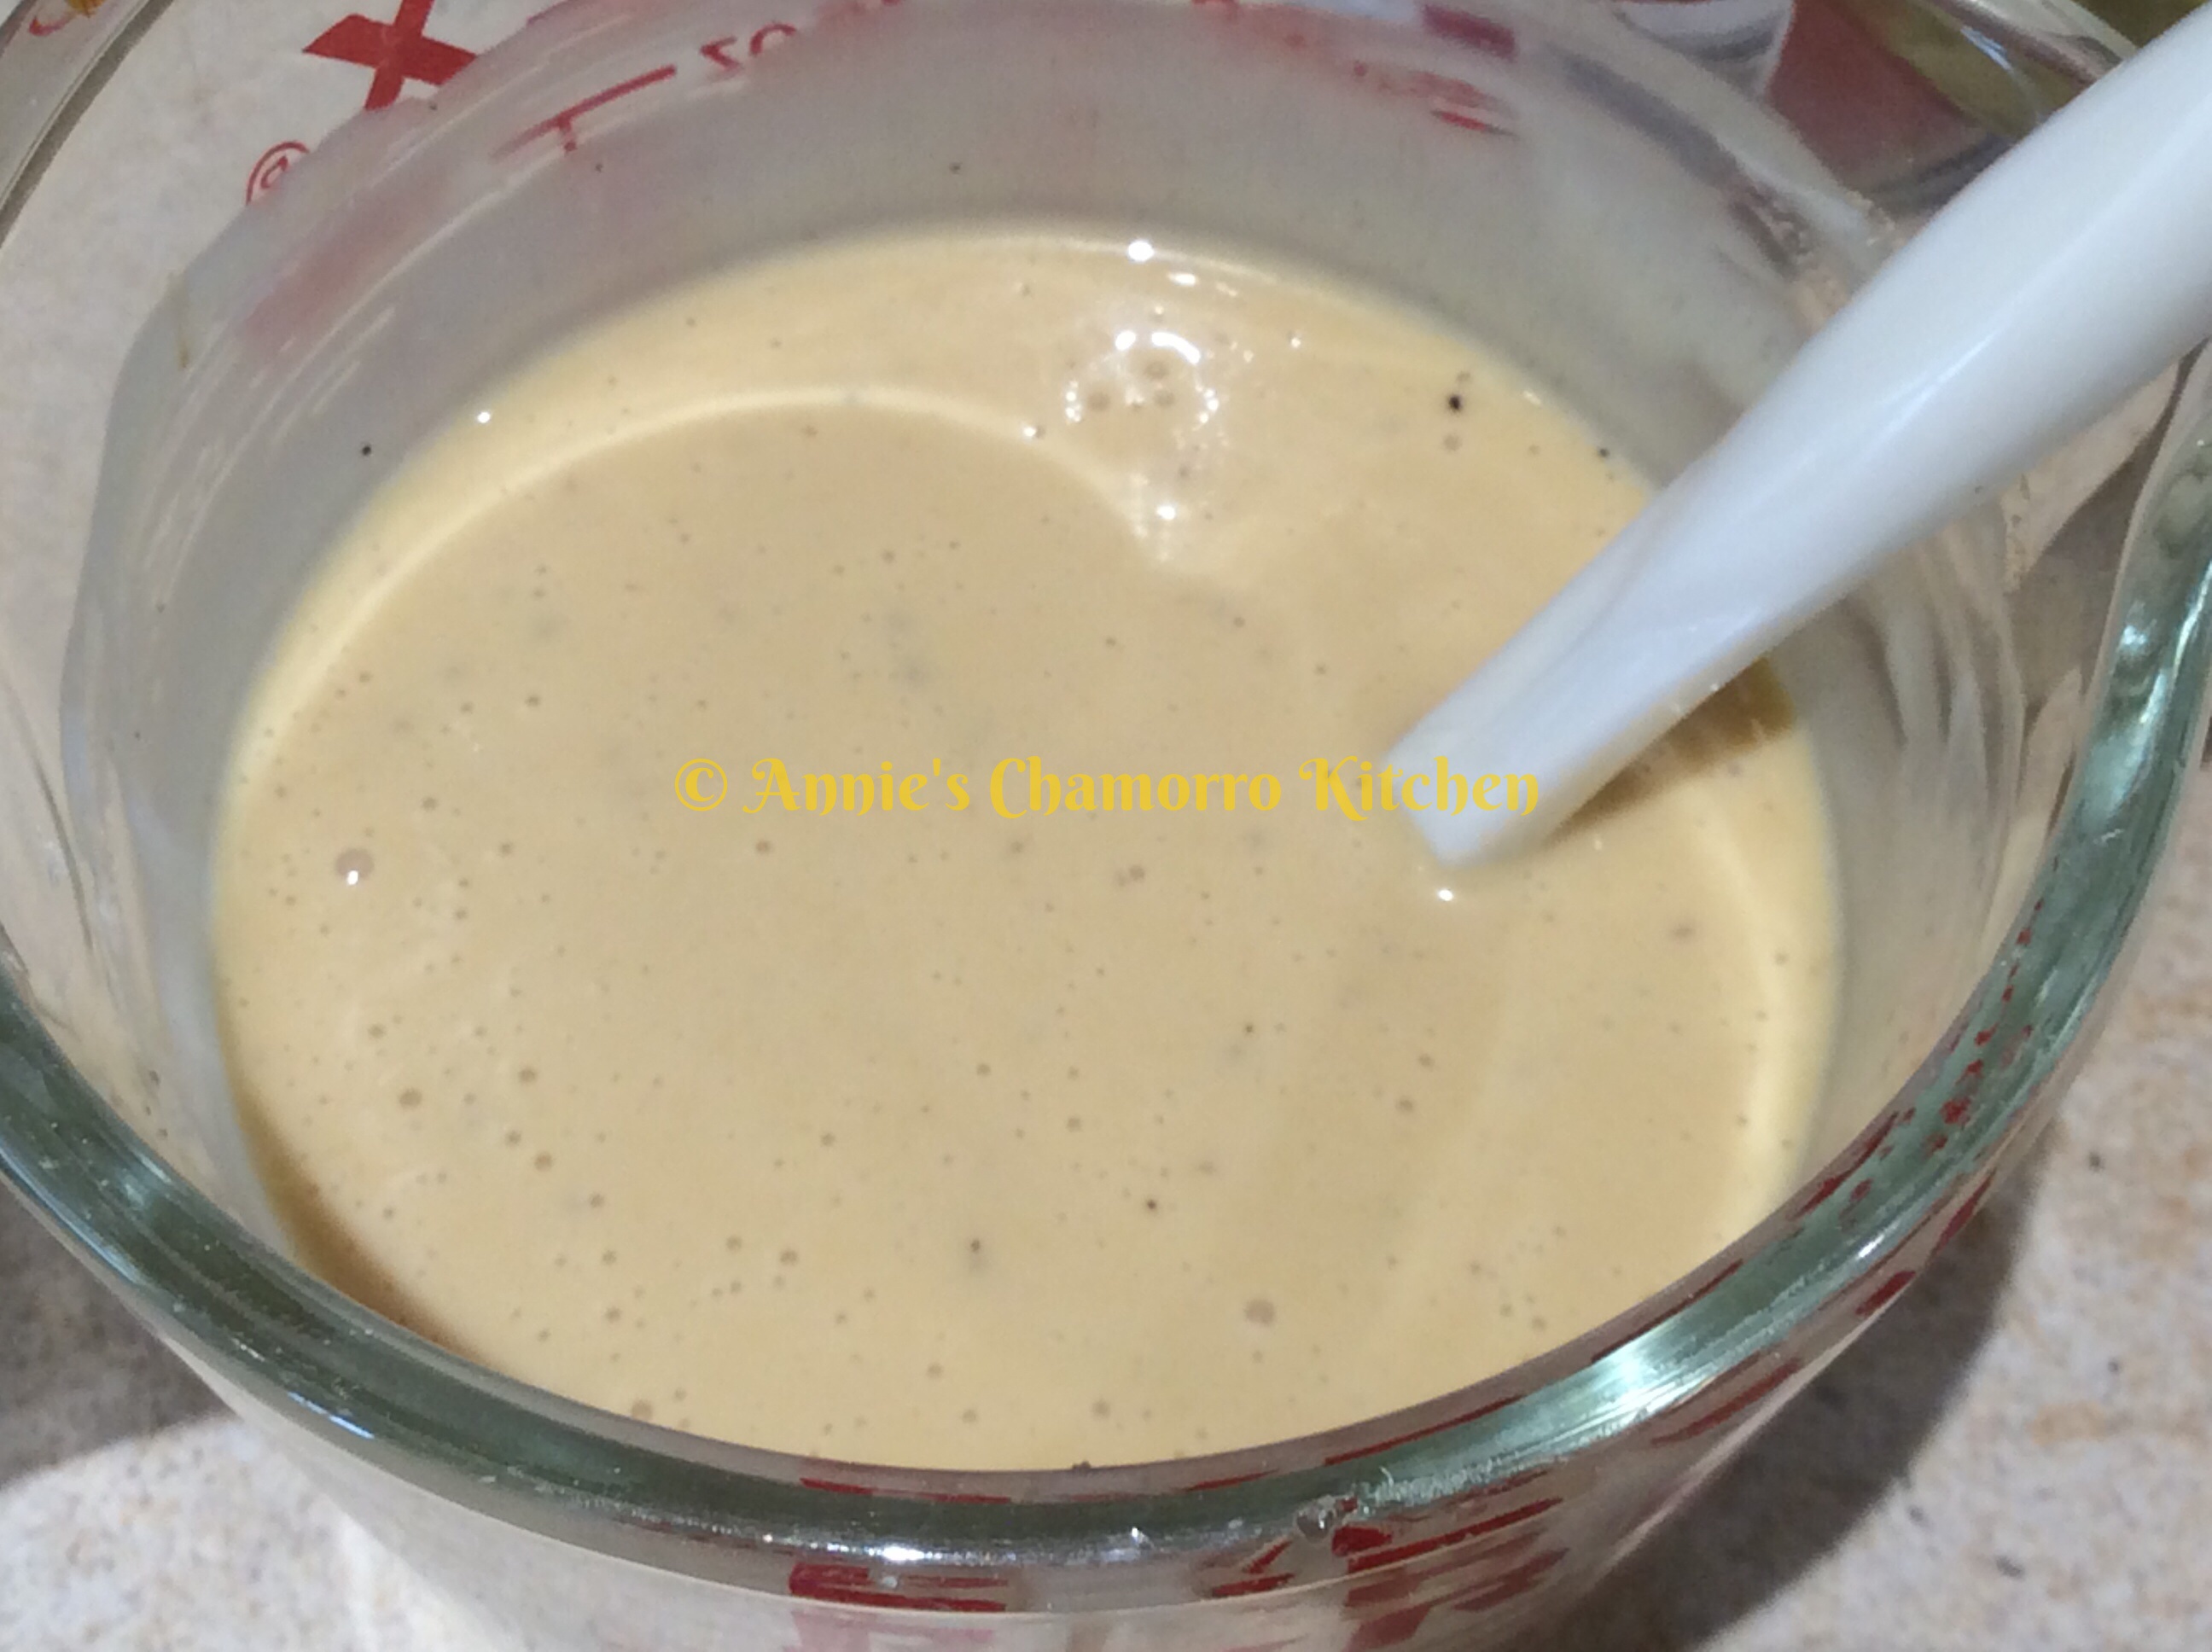
Prepare the salad dressing.  Place all of the dressing ingredients into a small mixing cup, whisking together until you dissolve the sugar.  Set aside.

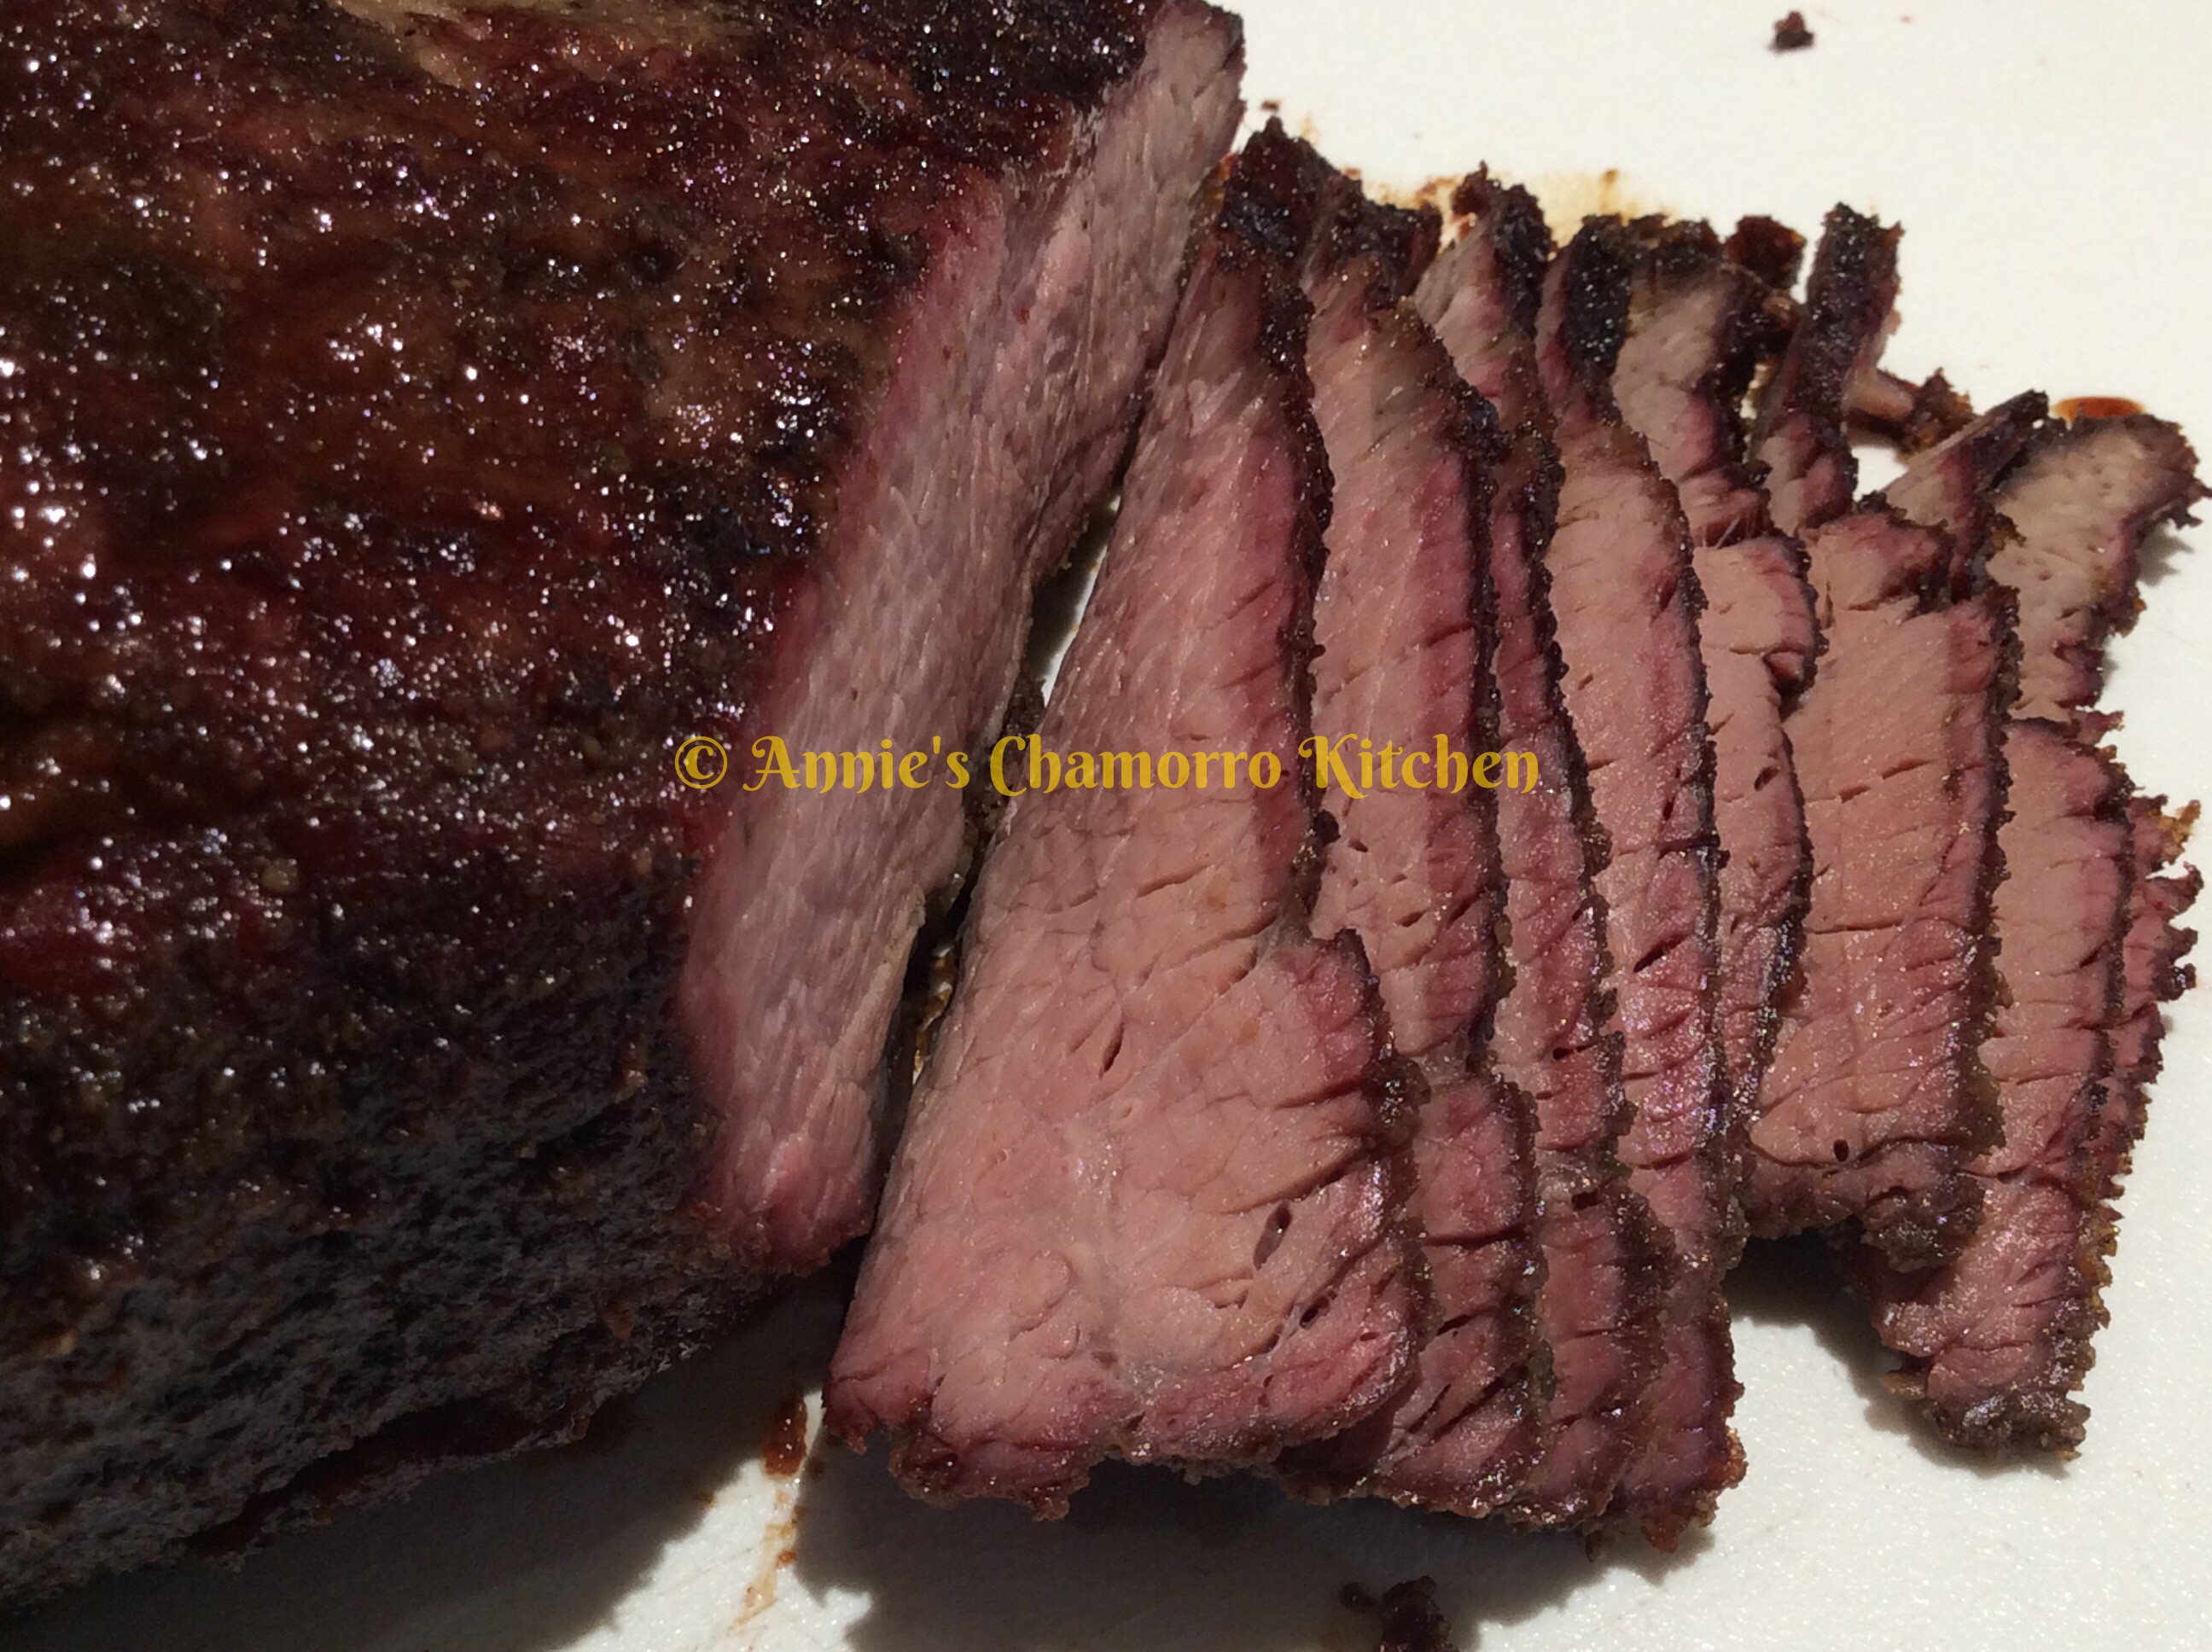
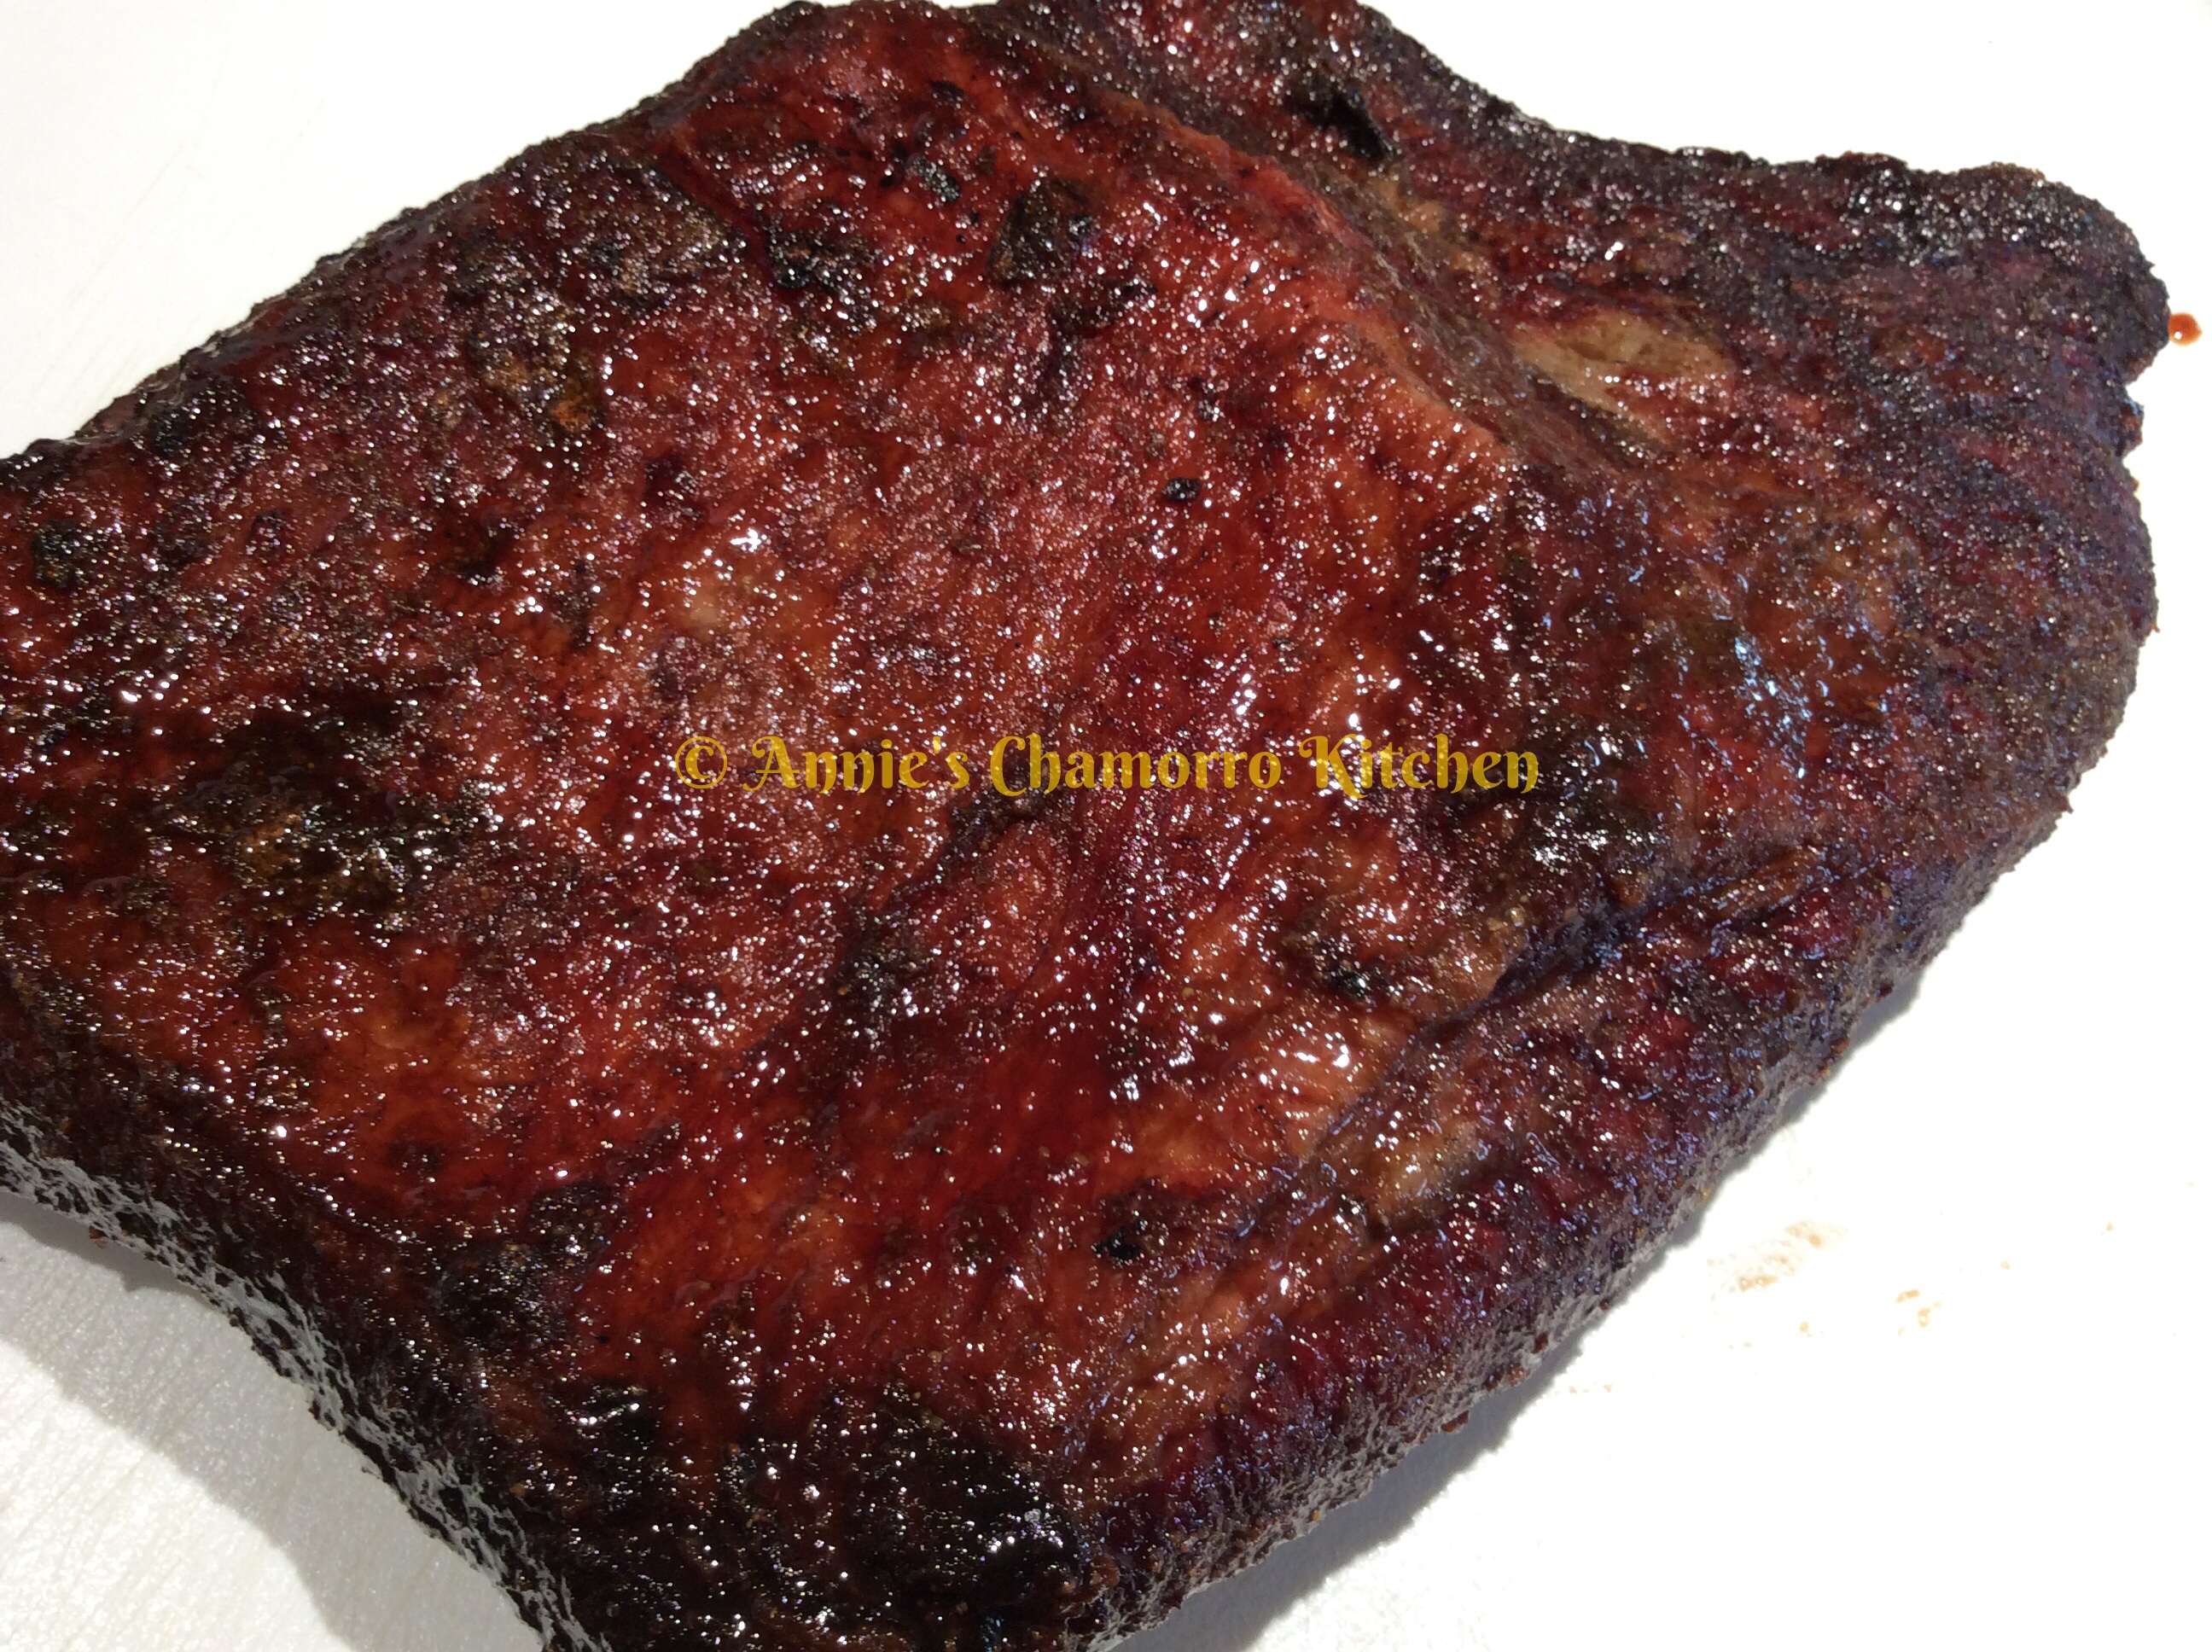
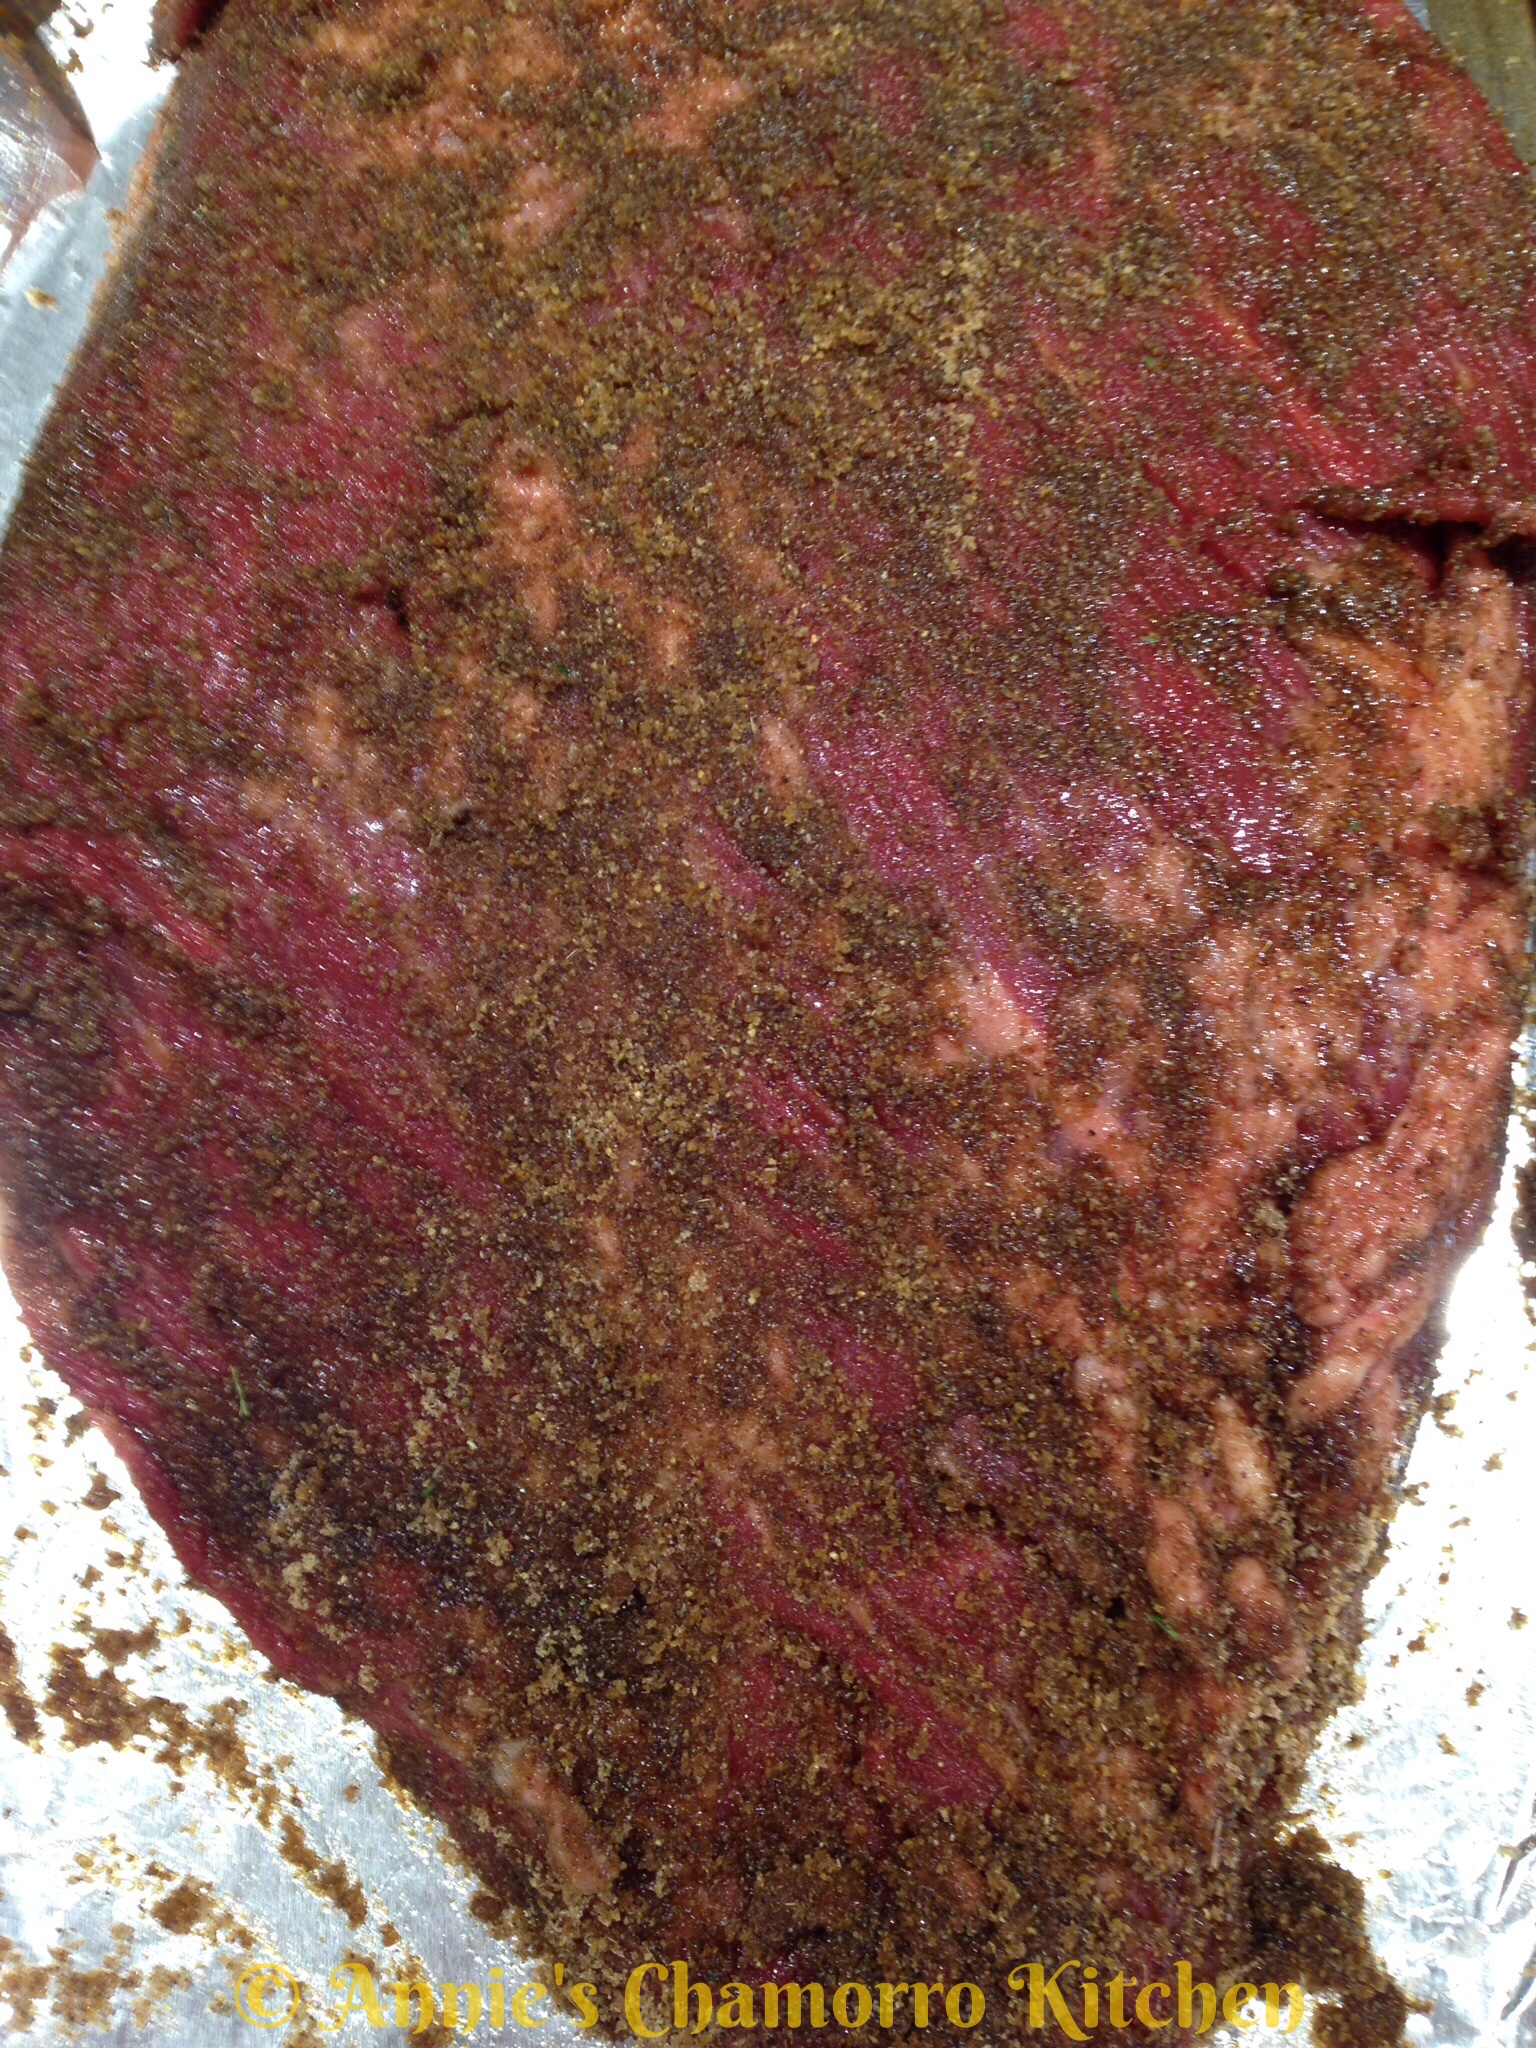
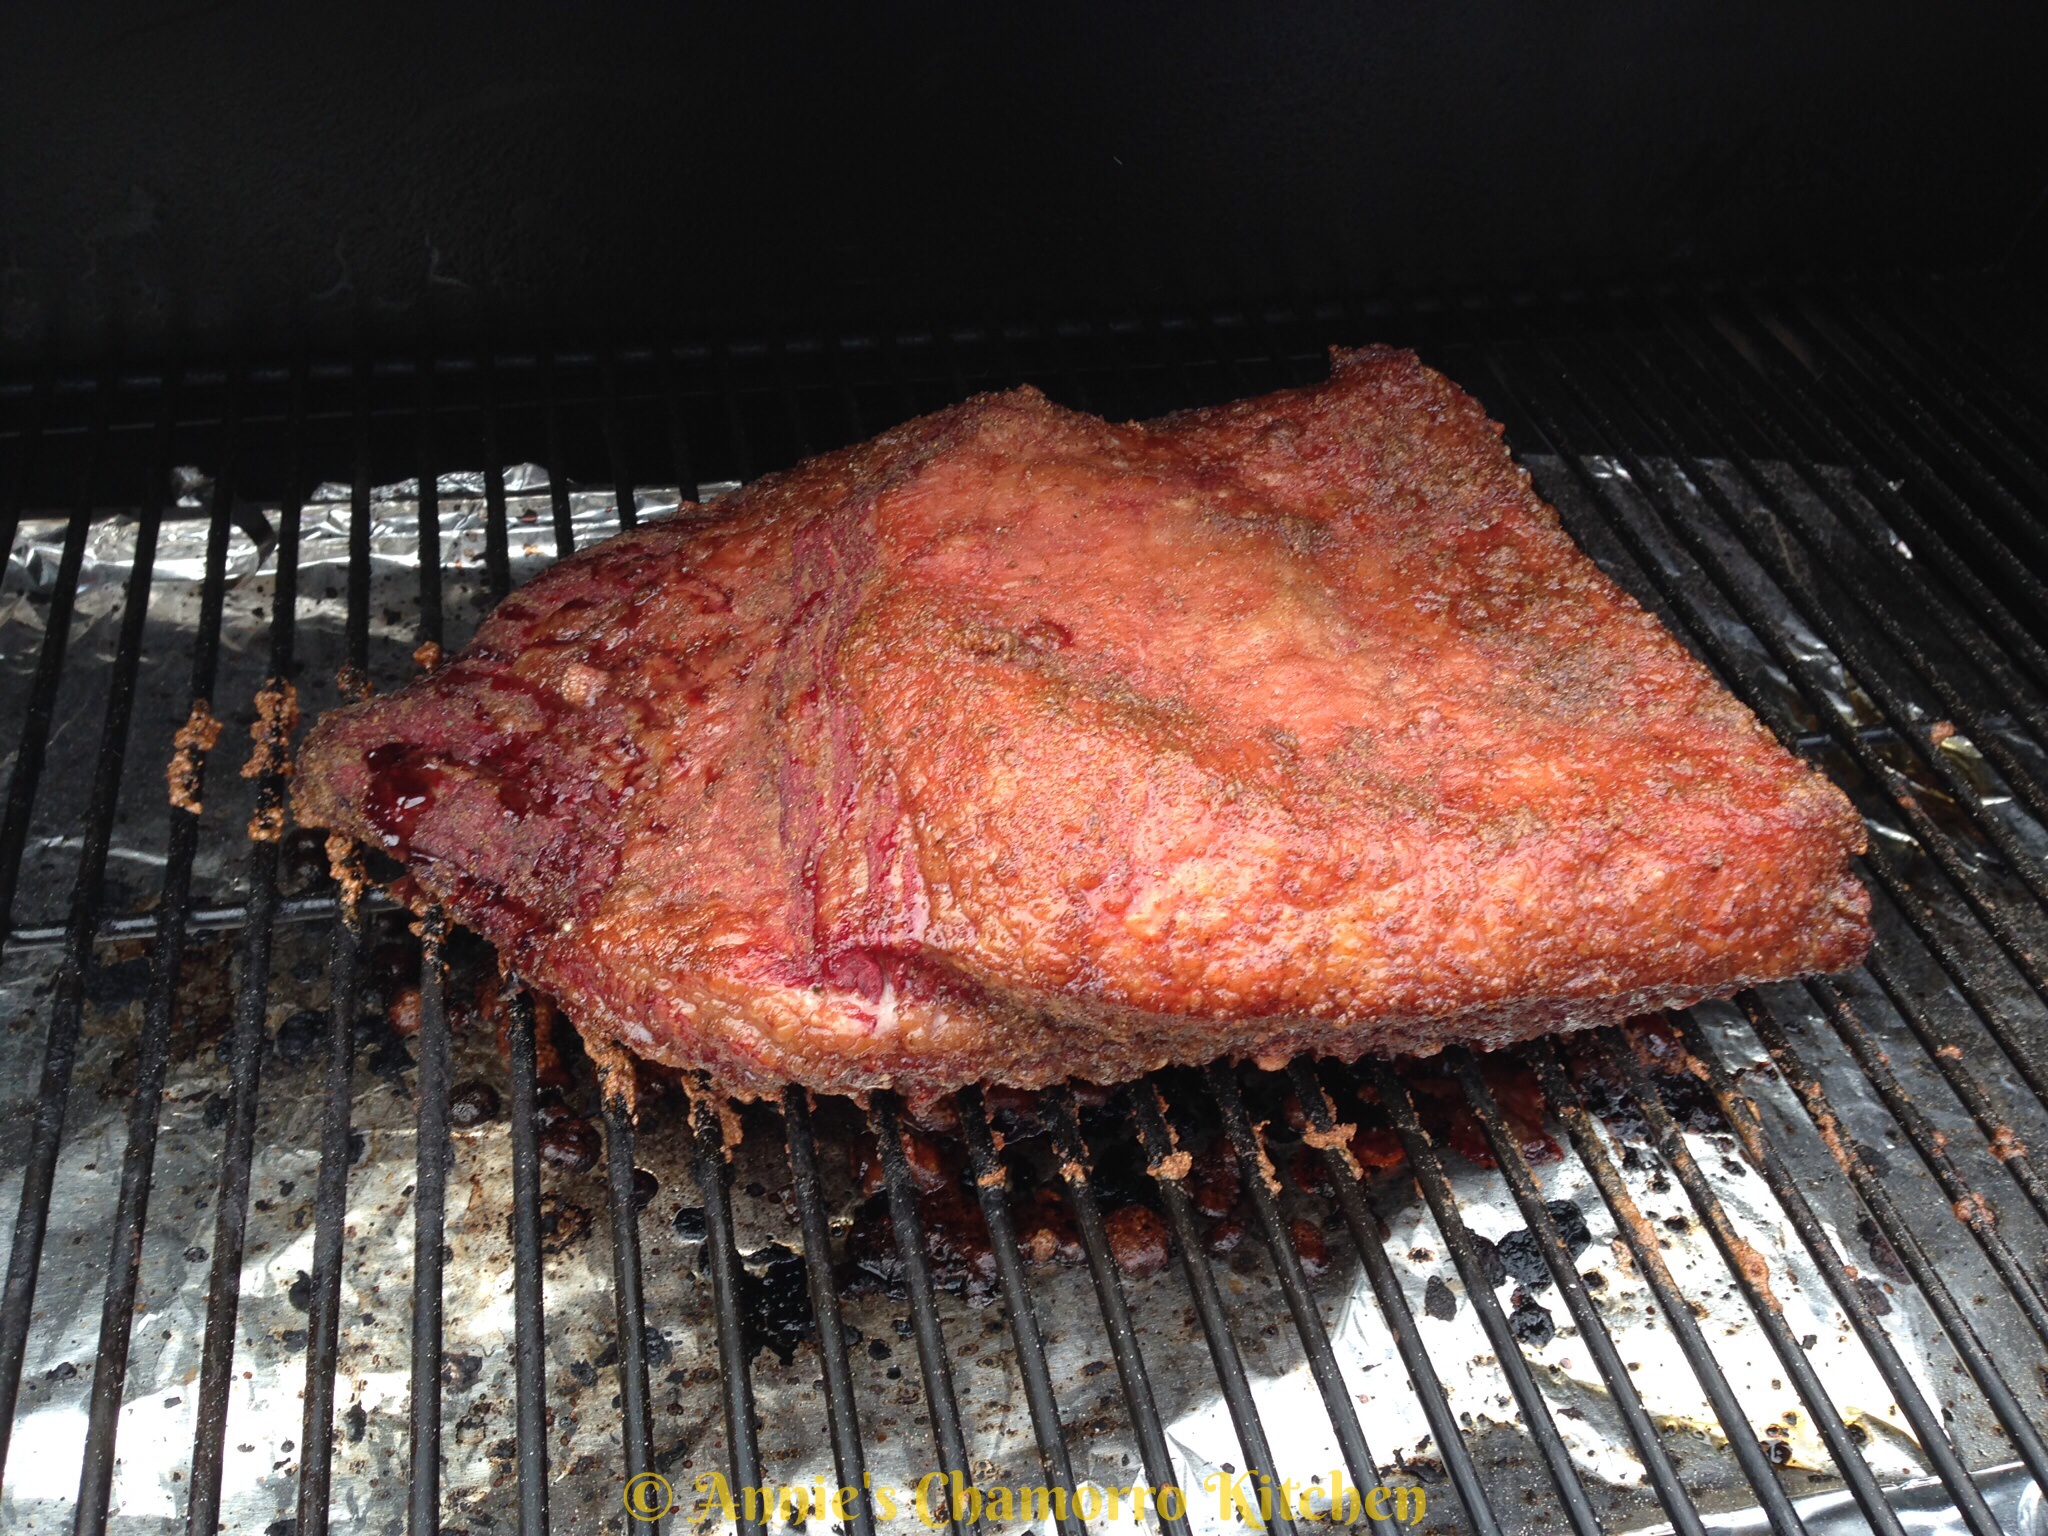
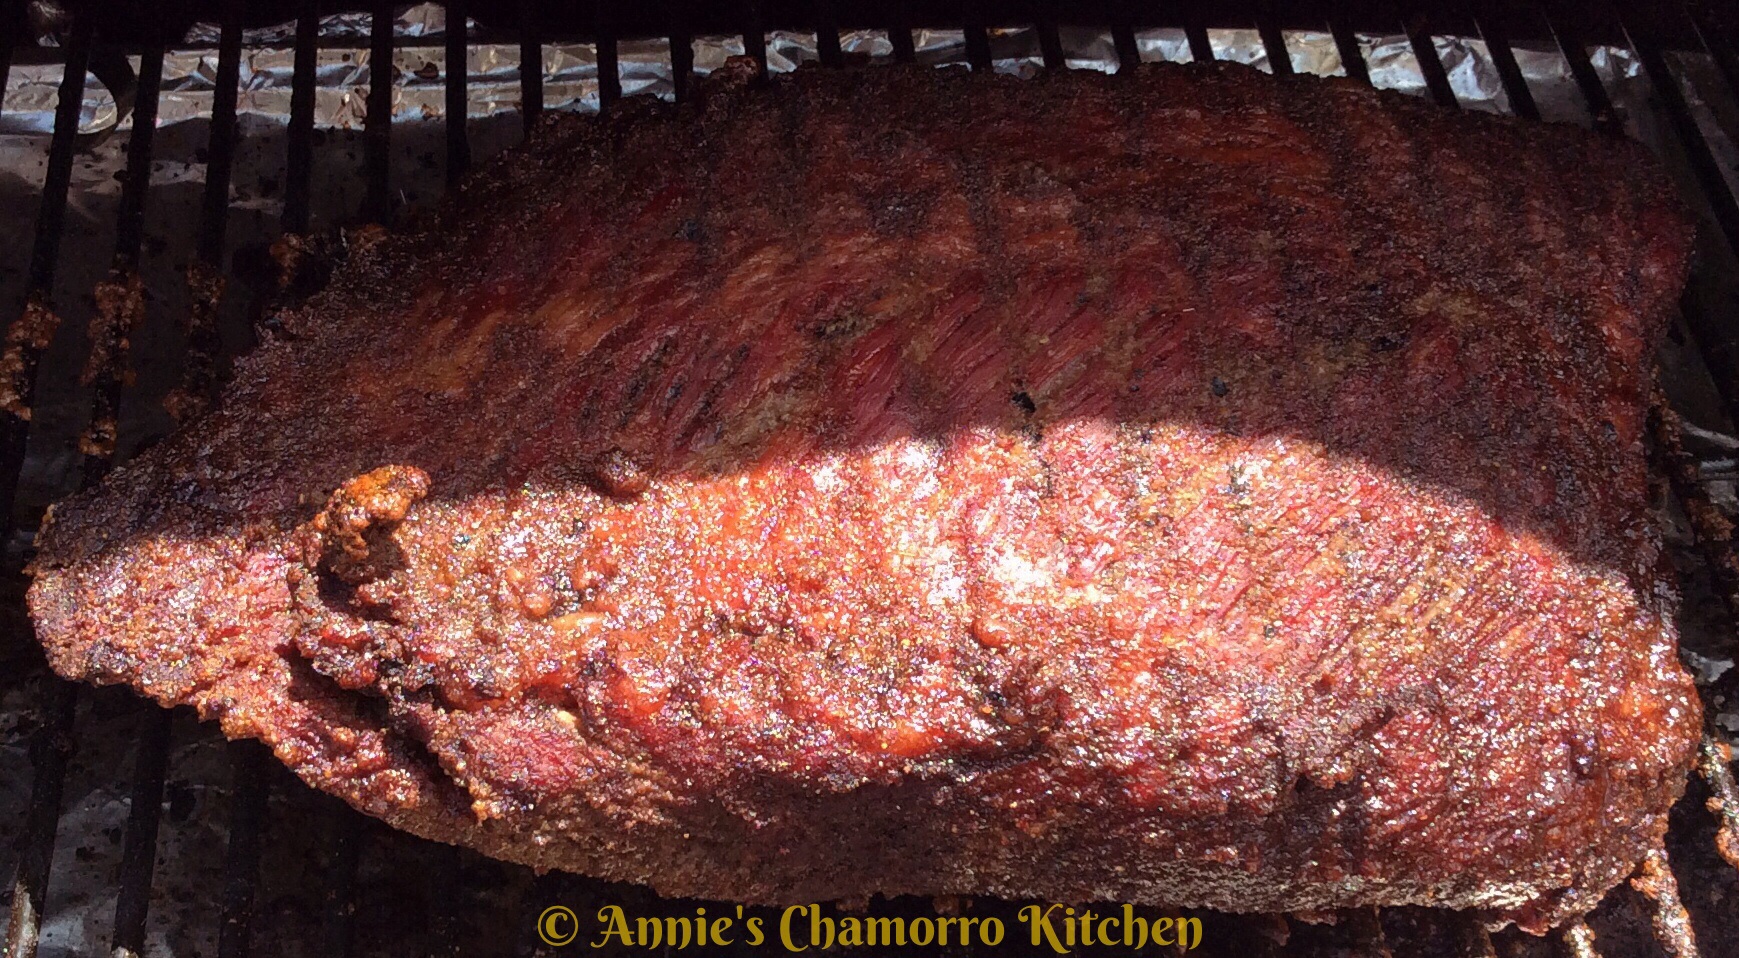
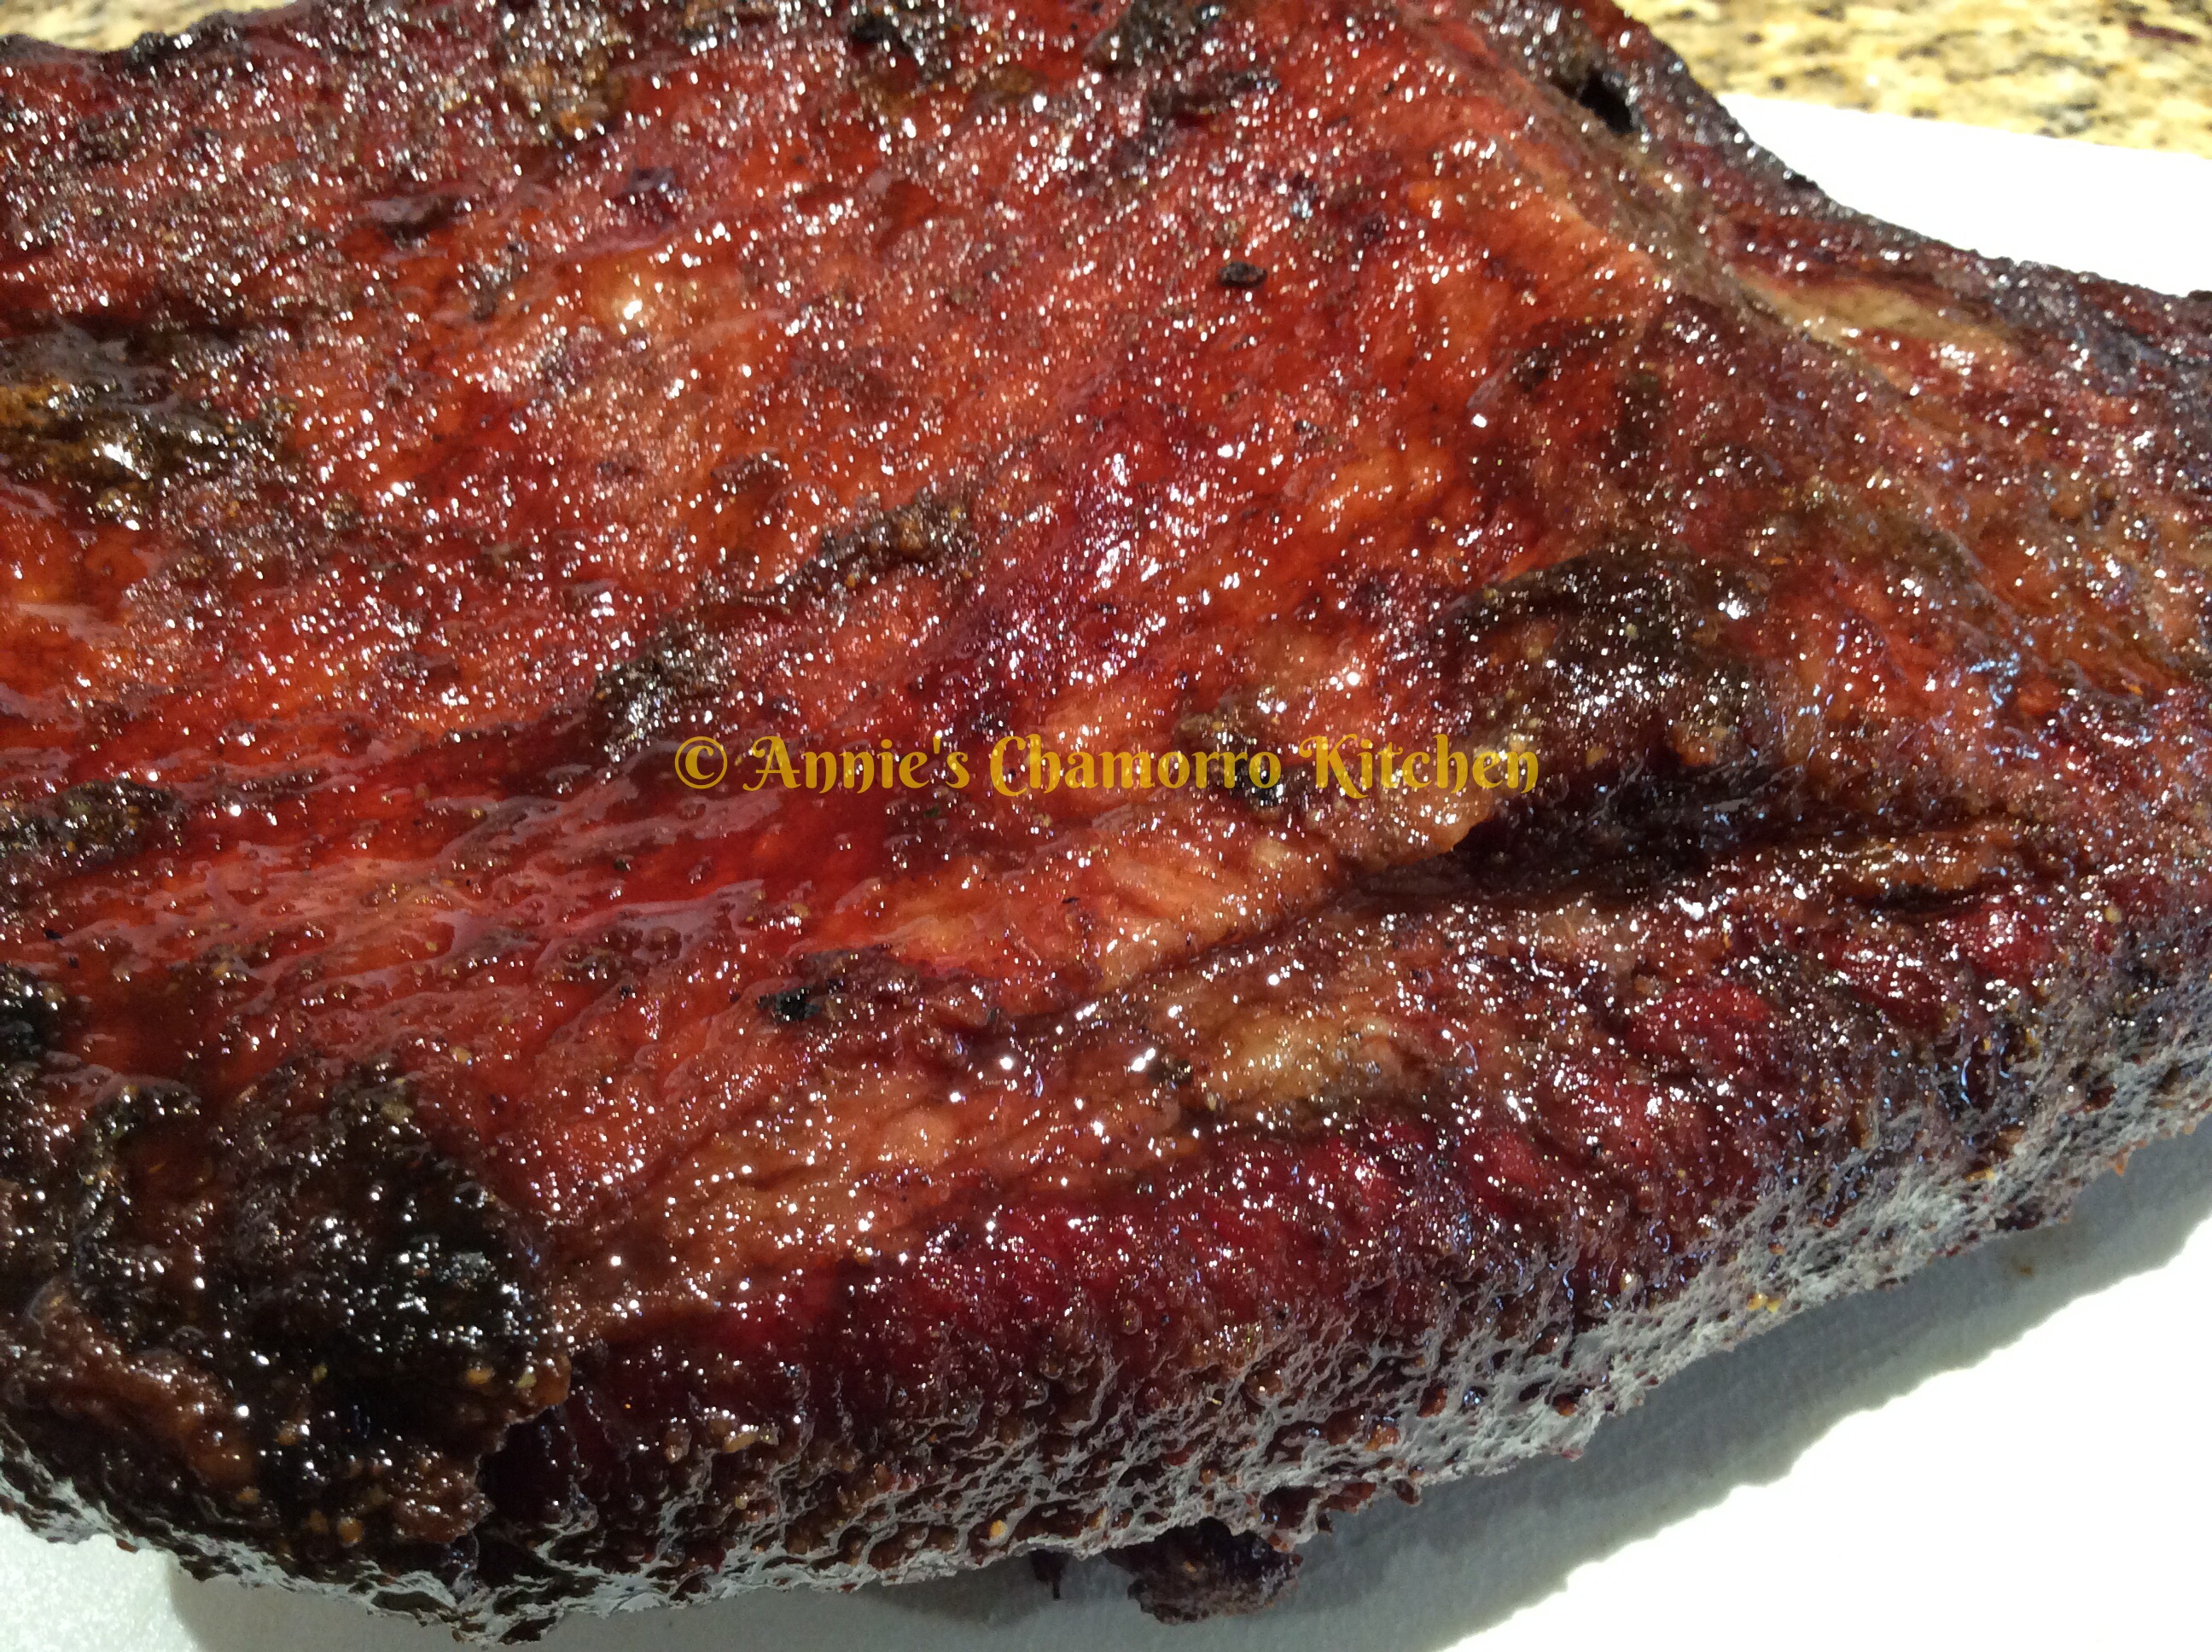
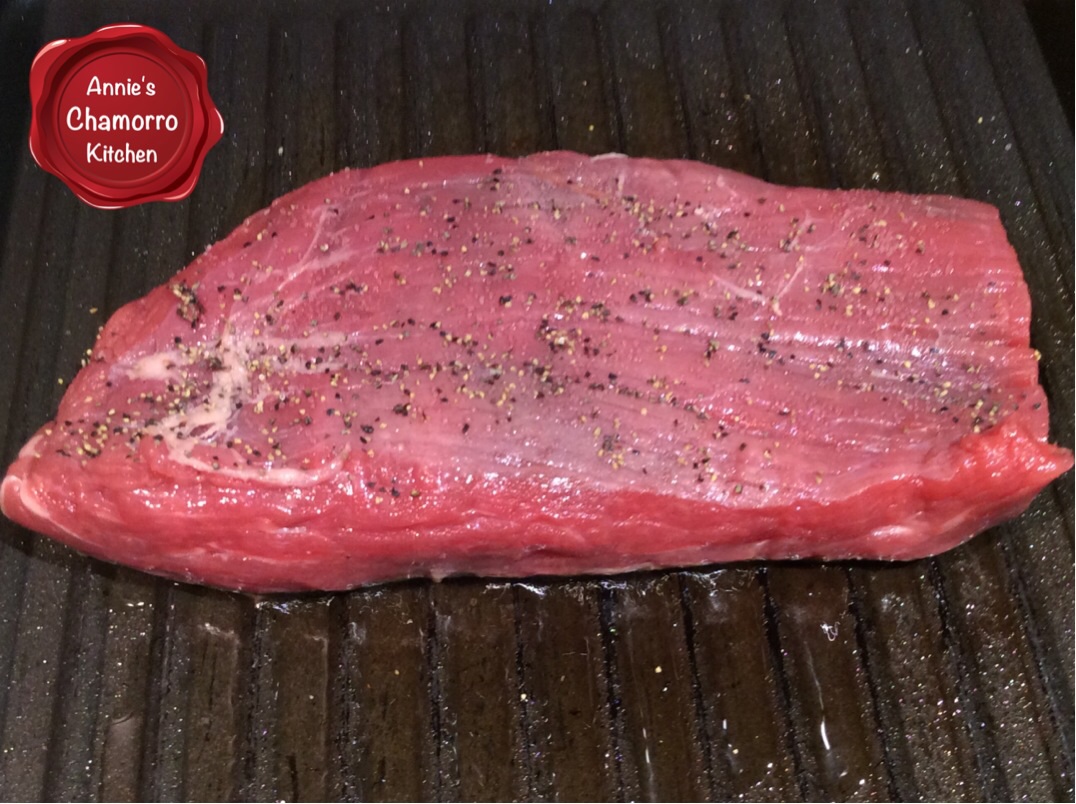
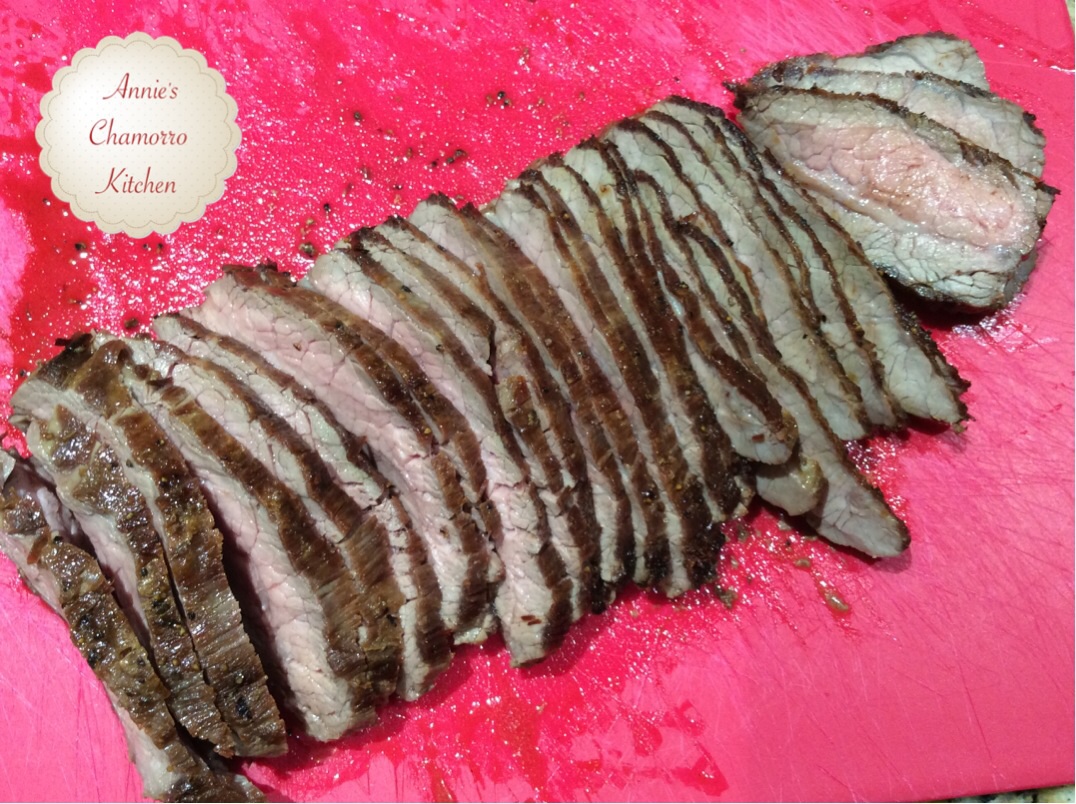
Next, grill your favorite cut of beef.  I like to use flank steak.  It only takes a few minutes to cook this cut of meat to what I consider perfection — slightly pink on the inside.  You can fire up the grill for this, but I usually use a grill pan and cook it on top of the stove over medium heat.  Season both sides of the meat with some salt and pepper.  Sprinkle some oil in the hot pan then cook the meat for 10 minutes on each side.  Once you place the meat onto the grill pan, LEAVE IT ALONE to cook.  Do not stab or poke at it.  The only time your utensils touch the meat is when you flip it.

image

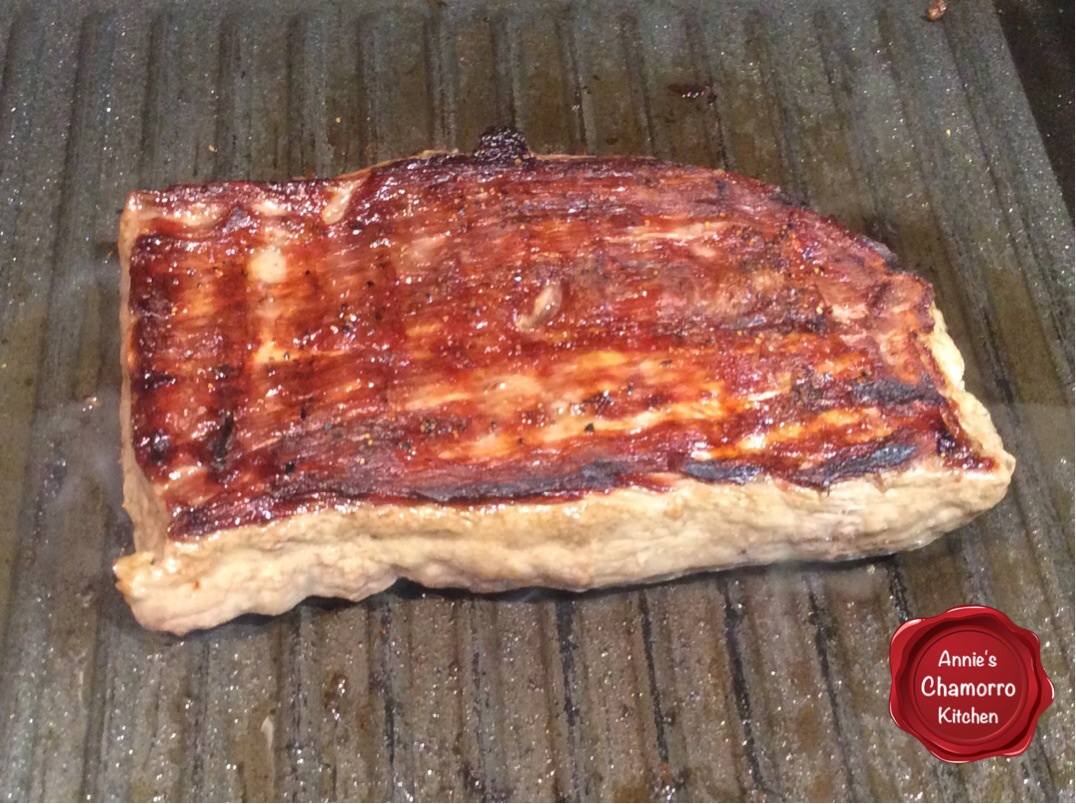
See how nicely browned it got? 🙂

Don’t worry about the sides not being browned.

Don’t slice the meat right away or all the juices will run out and leave the meat dry.  Once done, remove the meat from the pan and let it rest while you prepare the vegetables for the salad.

image
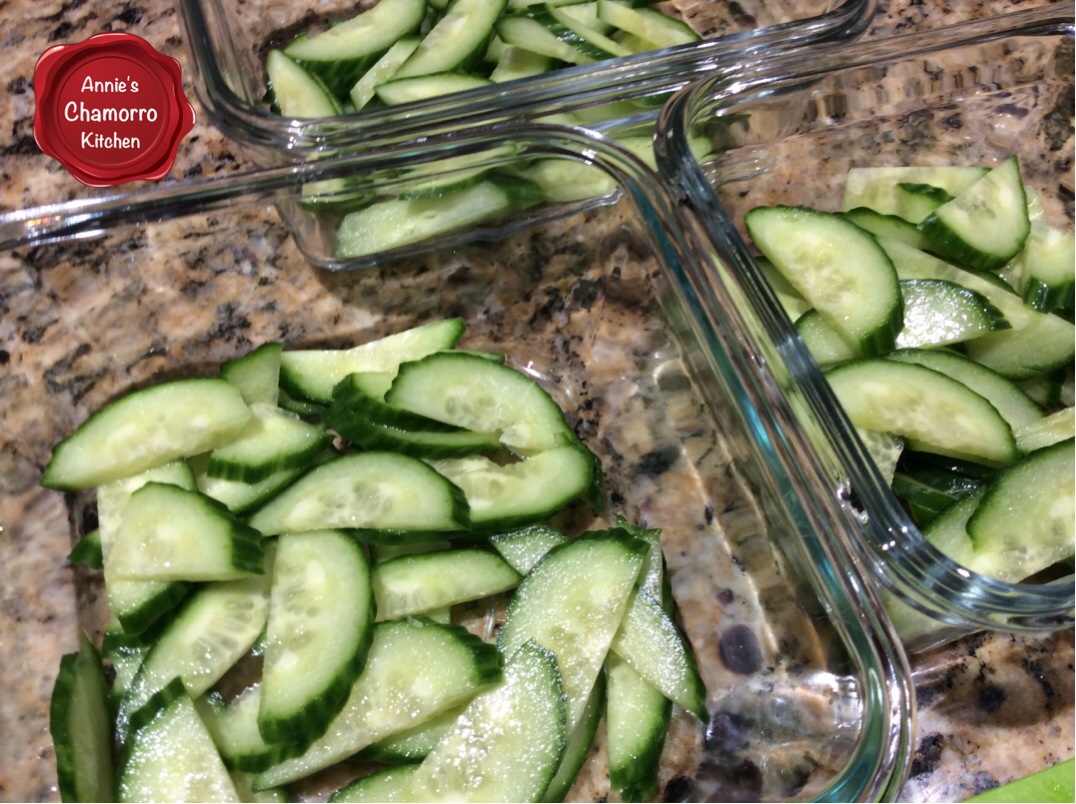
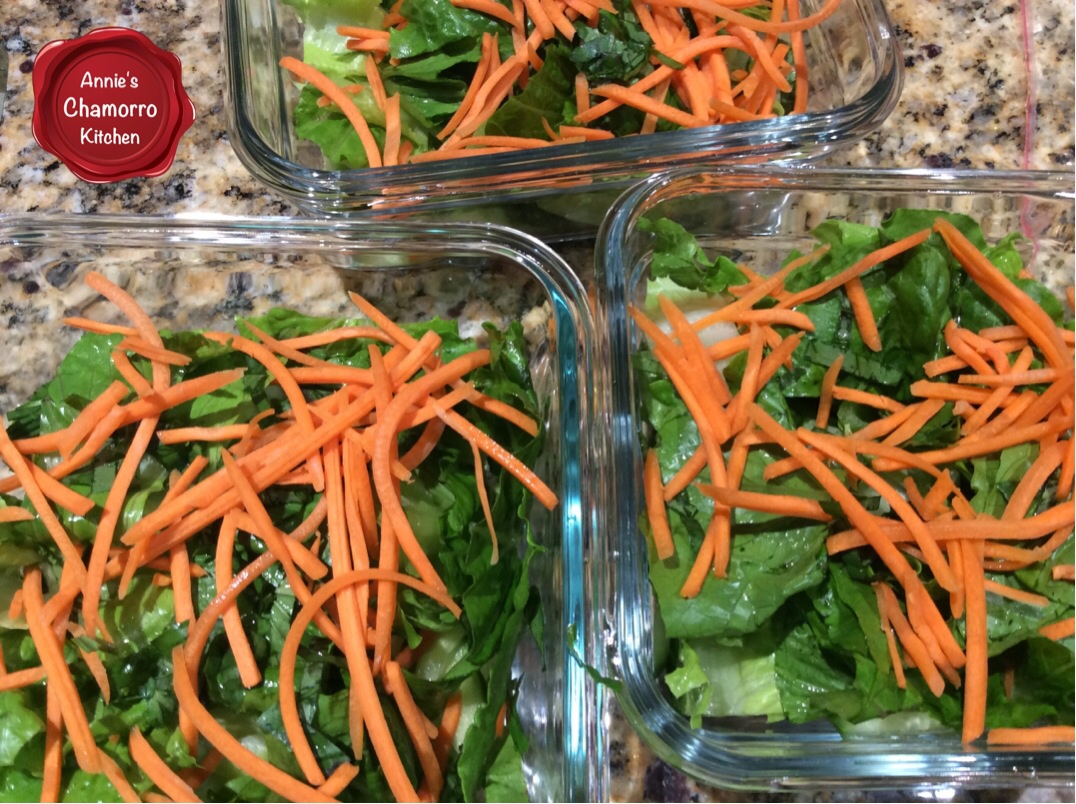
It’s time to layer the vegetables. Place the cucumbers at the bottom.  I do it this way so that the salad dressing can start to pickle the cucumbers.

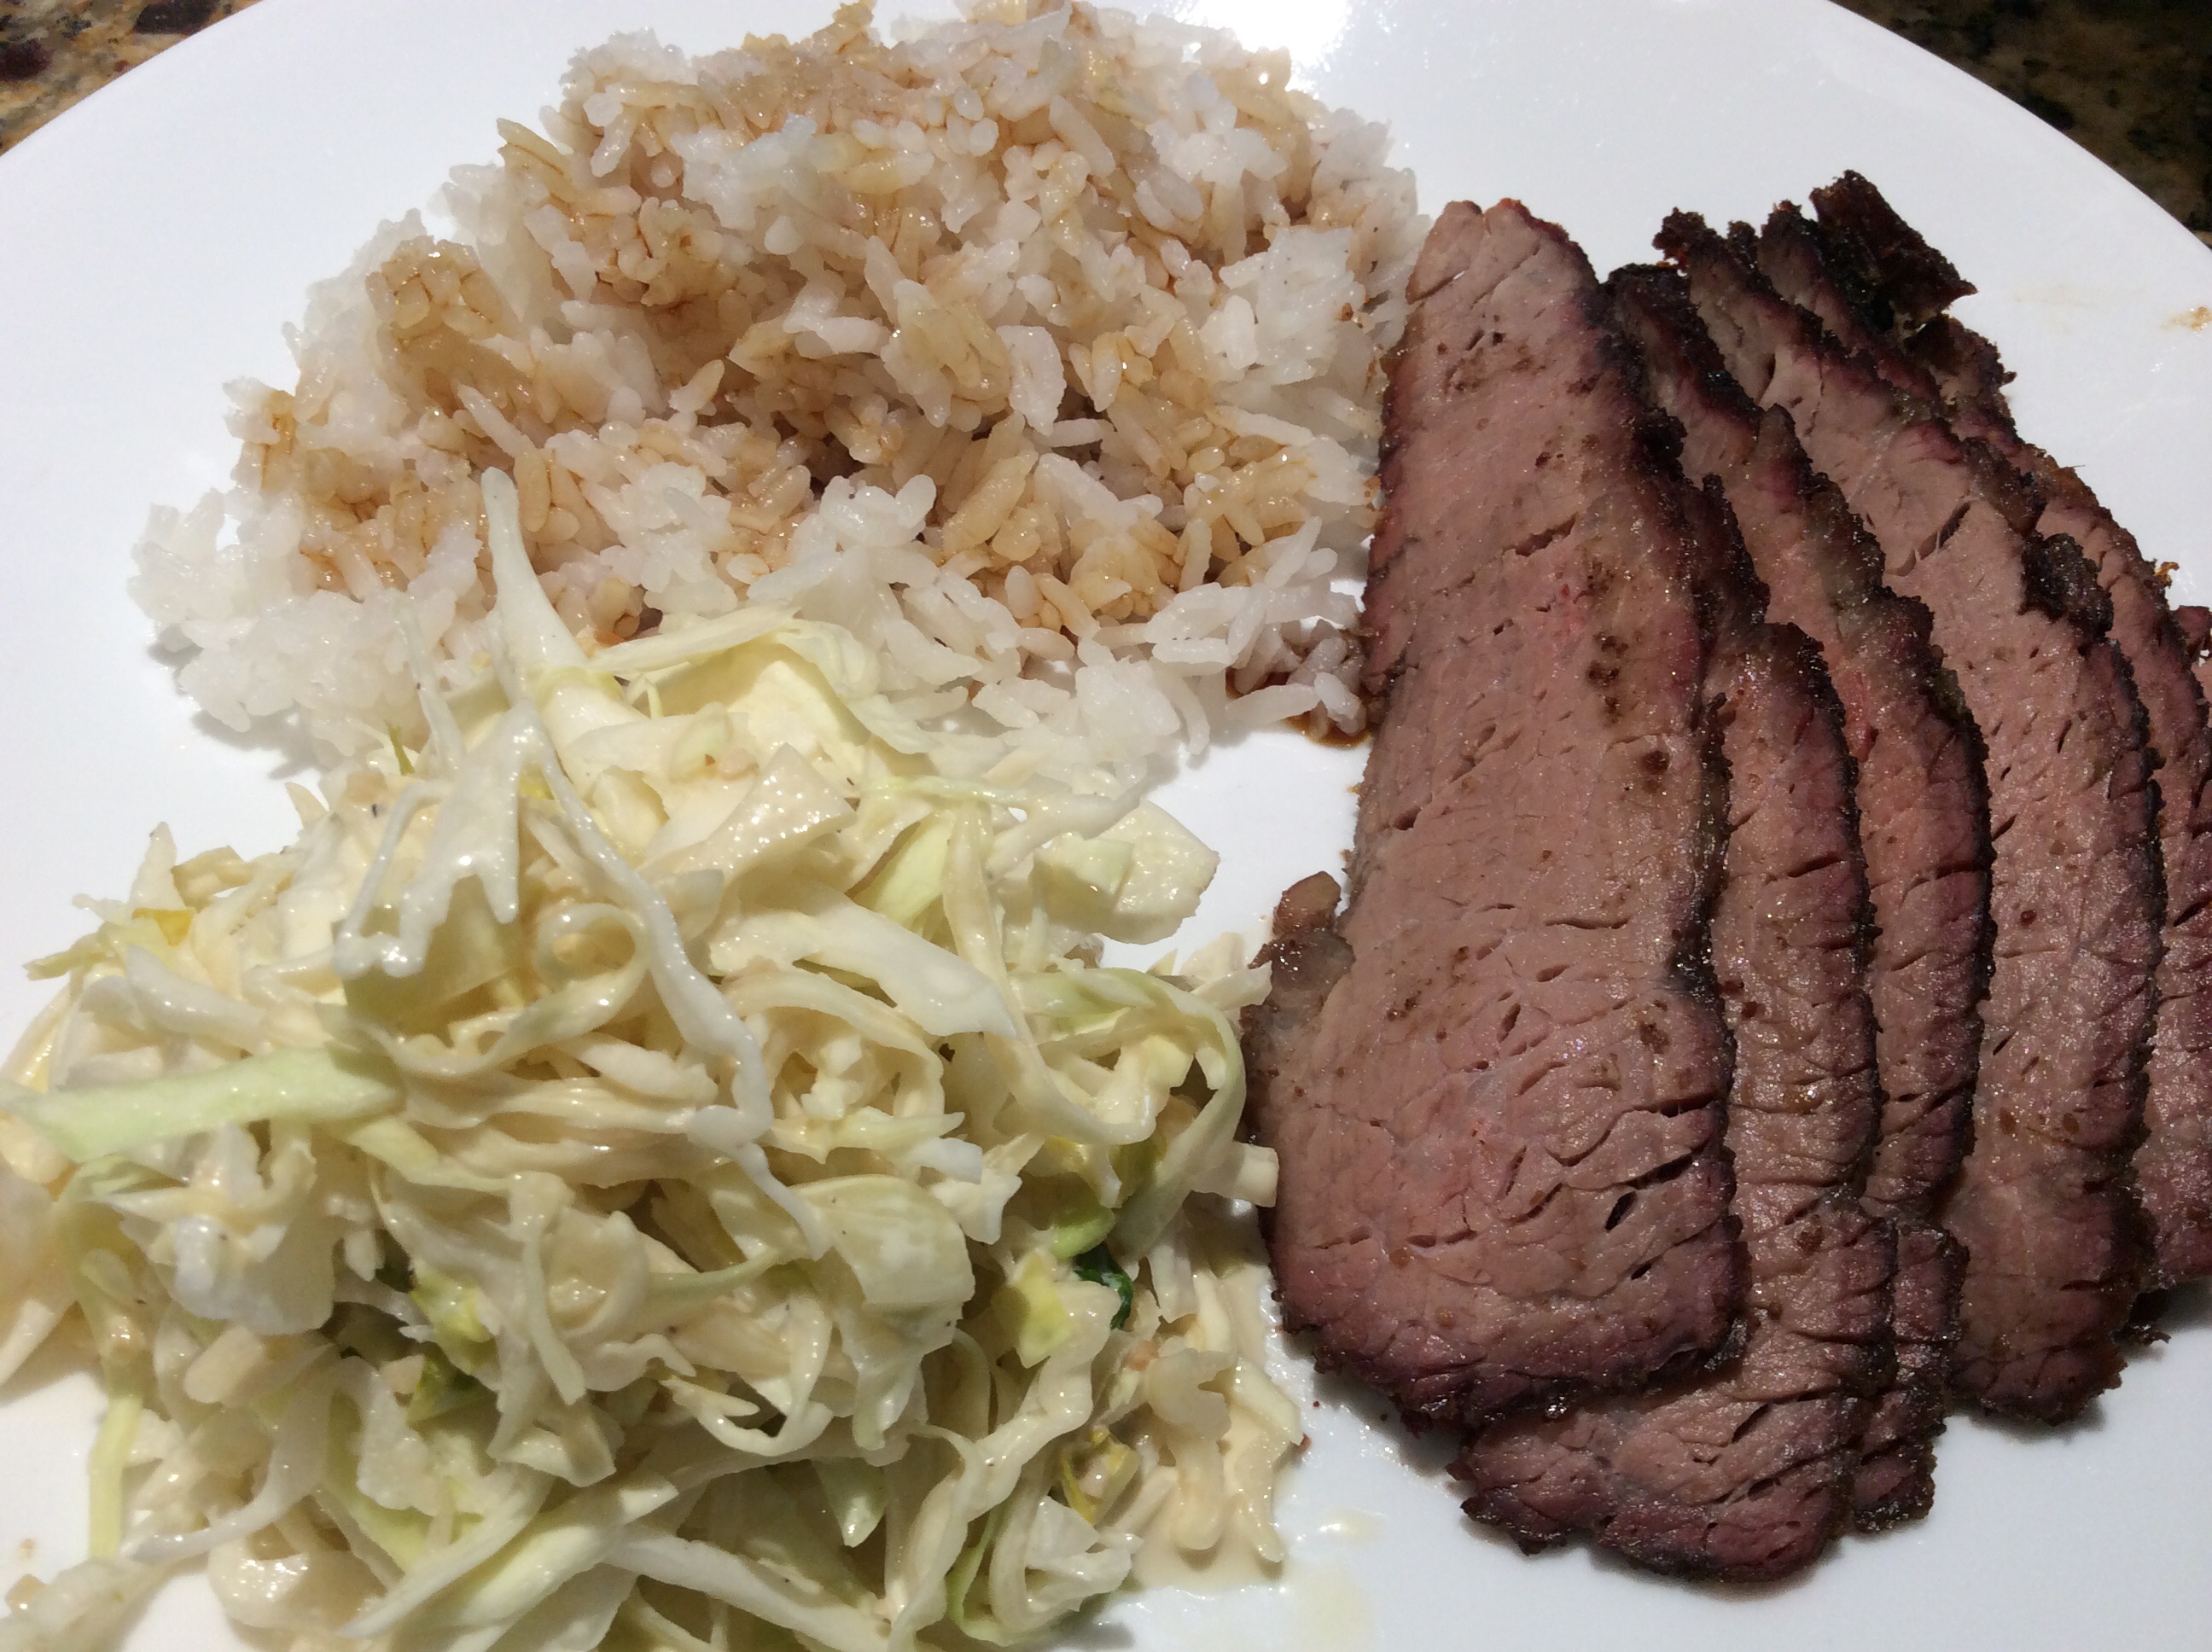
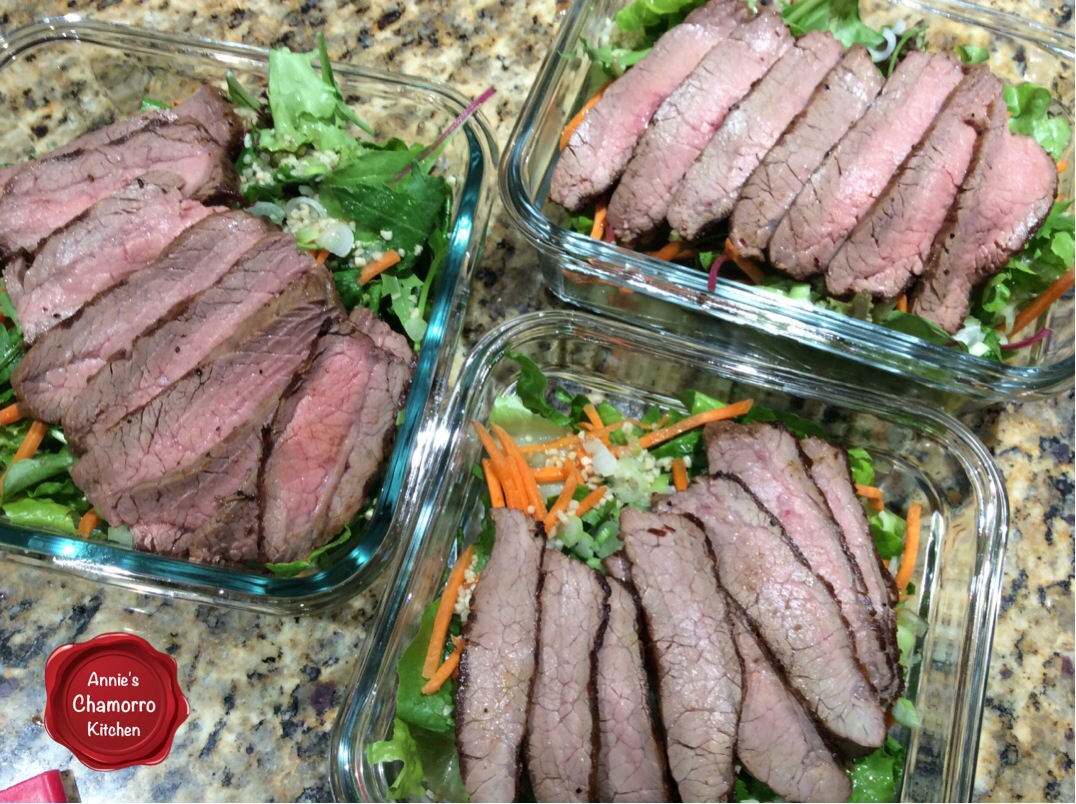
One note about my photos.  As you can see, I’m making individual servings for packed lunches for my husband, daughter and me.

image

Add the leafy greens next.  I like using hearts of romaine, but any mixed leafy greens will do.

image

I like adding pre-sliced carrots to add some color and crunch.  Pre-sliced carrots cost a little more but it saves a lot of time in the kitchen too.  My older daughter loves to cook, and I’m still quite leery about letting her use a sharp knife to cut thin slivers of carrots. Pre-cut carrots saves me from worrying about her losing some fingers!

image

The cilantro leaves get added to the salad next; add as much or as little as you like.  Cilantro is one of those herbs that you either love or hate.  I happen to love it so my salad gets a healthy handful of cilantro. 😉

image

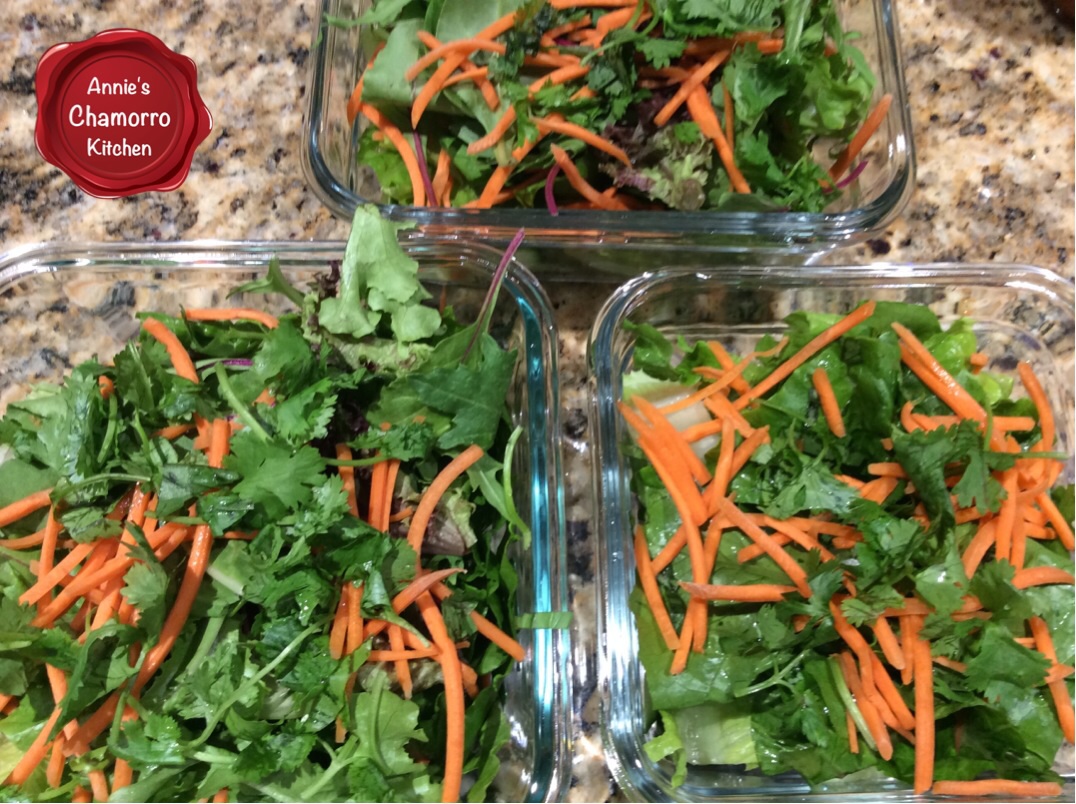
Thinly slice the red onions and add them to the salad.  I didn’t have any red onions on hand when I made these, so I added sliced green onions instead.

image

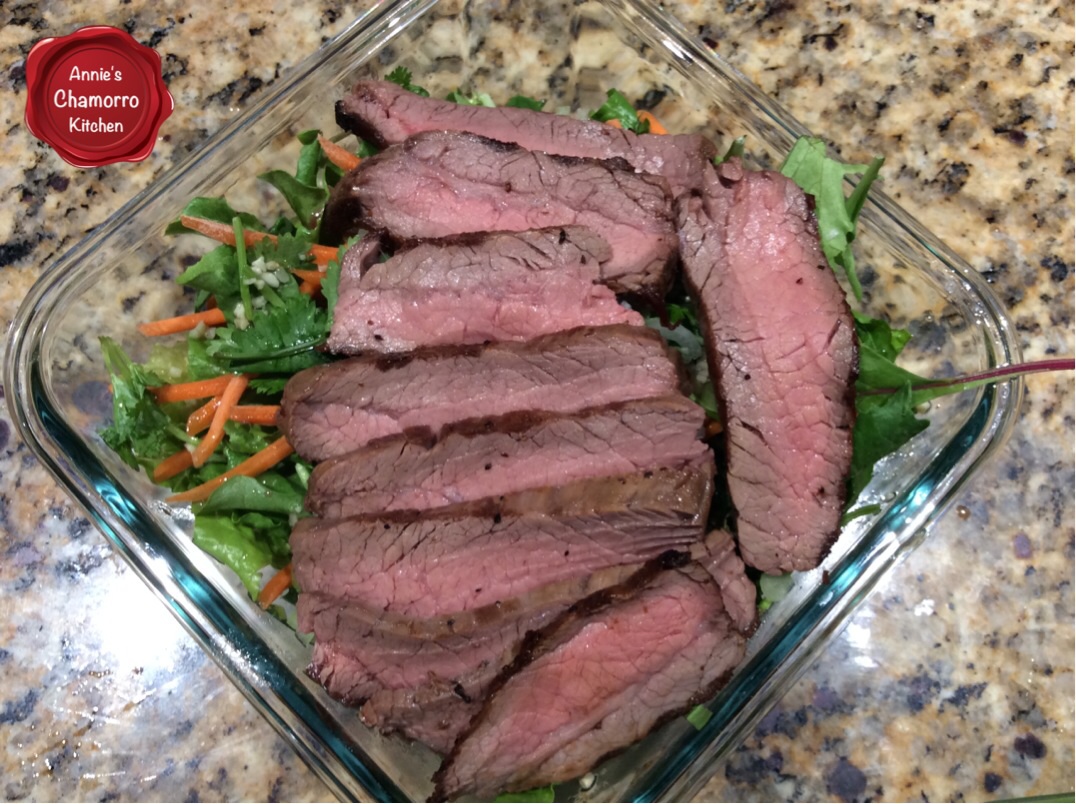
The beef rested long enough by now.  Use a sharp knife to cut thin slices of beef, being sure to cut across the grain.
image

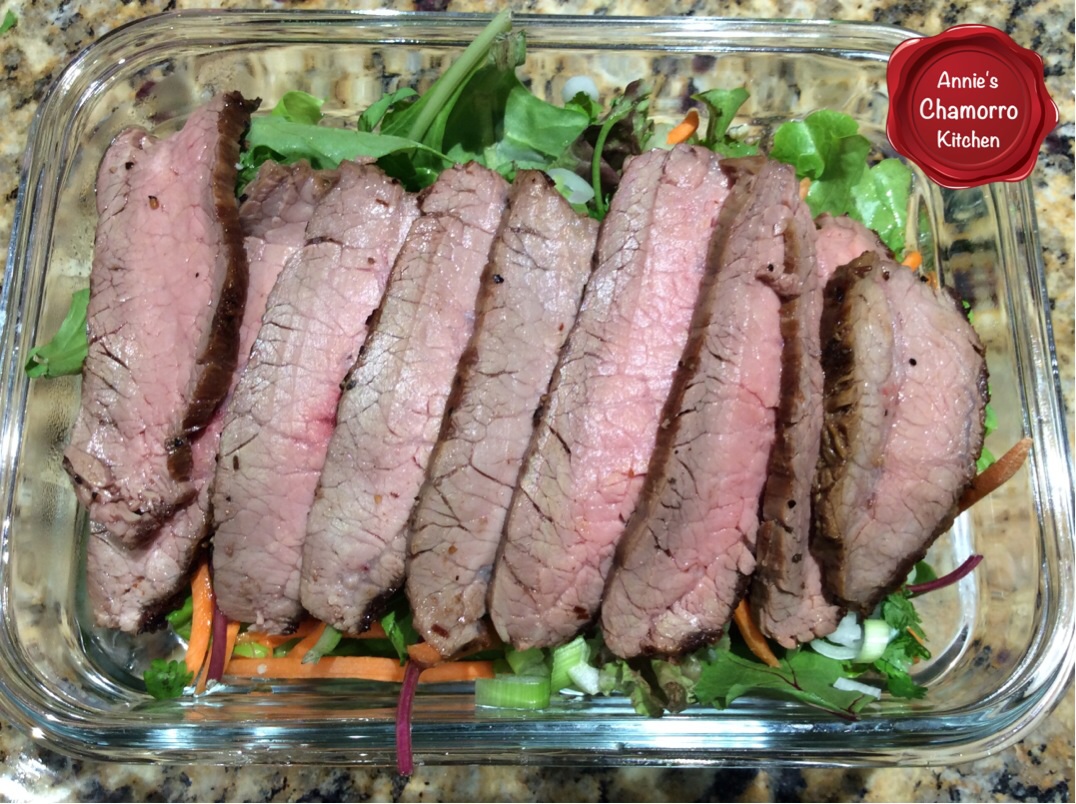
Add the sliced beef to the top of the salad.

ENJOY!
image

image

image


Thai Beef Salad
 
Prep time
Cook time
Total time
 
Fresh salad with a spicy and savory salad dressing. Serve with sliced beef for a complete meal.
Author:
Cuisine: Thai
Serves: 4
Ingredients
SALAD DRESSING
  • The juice of 2 medium limes
  • 4 tablespoons fish sauce (I like the Three Crabs brand)
  • 4 tablespoons water
  • 2 tablespoons sugar
  • 1 teaspoon salt (omit if the fish sauce is salty enough for you)
  • 1 tablespoon chopped garlic
  • 2 hot chili peppers, diced, optional
SALAD GREENS
  • 1½ pound flank steak
  • Salt and pepper, to season the steak
  • 4 tablespoons vegetable oil, for the grill pan
  • 2 English cucumbers, sliced
  • 8 cups mixed salad greens
  • 2 small carrots, julienned
  • 1 bunch cilantro, stems removed
  • 1 small red onion, thinly sliced
  • Any other salad vegetables you like
Instructions
Make the Dressing
  1. Place all of the ingredients for the dressing in a small mixing bowl or measuring cup. Whisk together until the sugar dissolves. Set aside.
Grill the Meat
  1. Season the meat on both sides with salt and pepper. Place a grill pan over medium heat. Add the oil to the heated pan then cook the meat for 10 minutes on each side. Once the meat is done, set it aside to rest before slicing. After resting for about 15 minutes, thinly slice the meat against the grain.
Make the Salad
  1. Layer the cucumbers, salad greens, carrots, cilantro, and any other vegetables you like in a small salad bowl or plate.
  2. Add the thinly sliced beef to the top of the salad.
  3. Drizzle some salad dressing over the beef and salad greens.
Serve and enjoy!


Print Friendly, PDF & Email

In-N-Out Burger Sauce

In-N-Out Is a burger chain in several western states.  It is known for their juicy burgers slathered in their special sauce with optional (though I always get mine this way) grilled onions, called “animal style”.

Whenever I find myself in Nevada, California, and Arizona,  In-N-Out burger restaurants are at the top of the list for where we go to eat.  It’s Americana at its best…an ooey, gooey, cheesy, oniony (is that a word? It is now…),

After many trials and errors trying to replicate the “spread”, I think I finally came up with a sauce as close to the real thing as possible.  It’s not just a mixture of ketchup, mayo and relish like most people think.  It’s also not regular thousand island dressing.  This is my version of the sauce.  Adding a bit of apple cider vinegar, sugar and a pinch of onion powder to the K-M-R mixture did the trick.  Refrigerate the mixture for a good 30 minutes before assembling your burgers to allow the flavors to meld.

I also include a recipe for caramelized onions to go on top of your burgers.  It won’t be “animal style” without the sweet, gooey caramelized onions slathered on top of your burger.

Add your favorite cheese (use American cheese for a true In-N-Out replica) and voila! Homemade In-N-Out Burgers right at home.  Oh yeah, you mustn’t forget the pickles, sliced tomato and crisp iceberg lettuce.  Oh man, I want a cheeseburger now!

Give it a try and let me know what you think of it.  I think you’ll like it. 🙂

In-N-Out Burger Sauce

Ingredients:

  • 3/4 cup plus 2 tablespoons real mayonnaise
  • 1/3 cup ketchup
  • 3/4 cup sweet pickle relish
  • 1 tablespoon sugar
  • 1 tablespoon apple cider vinegar
  • 1/4 teaspoon onion powder

Directions:

1.  Mix all of the ingredients together in a small bowl.

2.  Refrigerate for 30 minutes; set aside until ready to assemble the burgers.

This makes enough for 4-6 burgers.  This sauce is also great on French fries, in a grilled ham and cheese sandwich, and even as a salad dressing.

ENJOY!

“Animal Style” Caramelized Onions

Ingredients:

  • 6 large onions, diced (use sweet onions, like Vidalia or Walla Walla, if you can find them, otherwise yellow Spanish onions will work well)
  • 2 tablespoons vegetable oil
  • 8 tablespoons water (you can use beef stock instead for a richer flavor)
  • 1 tablespoon salt
  • 1 tablespoon sugar

Directions:

1.  Heat the oil in a large pan over medium-high heat.  Add the onions, salt and sugar to the pan.

2.  Reduce the heat to medium-low, cooking the onions and stirring occasionally until they begin to brown, about 20 minutes.

3.  Add four tablespoons of water to the pan, stir, and cook until the onions are dried down and the water evaporates.

4.  Add four more tablespoons of water to the pan, repeating step 2 above. The onions should be a dark brown (not burnt) and soft.  Remove the onions from the pan; set aside until you’re ready to assemble the burgers.

Total cooking time for the onions varies, but it should take about 40-45 minutes of cooking to get soft, sweet, dark brown onions.

This recipe makes enough caramelized onions for 4-6 burgers.


Print Friendly, PDF & Email

Pineapple BBQ Sauce

This sweet and tangy sauce is perfect with pulled pork. Try it on my Hawaiian Pulled Pork. I think you’ll like it. 🙂

Pineapple BBQ Sauce

image

Ingredients:

  • 3/4 cup pineapple juice
  • 1/4 cup soy sauce
  • 1/2 cup ketchup (you can also use chili sauce)
  • 1/4 cup plus 1 tablespoon dark brown sugar
  • 1/2 teaspoon ground ginger
  • 1 tablespoon chopped garlic
  • Pinch of ground black pepper
  • 1/4 cup pineapple juice mixed with 1 tablespoon corn starch

Directions:

1.  Place all of the ingredients into a small sauce pan, EXCEPT FOR the pineapple juice-corn starch mixture.  Bring the mixture to a boil.

image

2.  Whisk in the pineapple juice-corn starch mixture.  Cook for a minute or two, just until the sauce thickens.

image   image

Serve with my Hawaiian Pulled Pork and ENJOY!

IMG_4659

Print Friendly, PDF & Email

Japanese Salad Dressing

There is a sushi restaurant I frequent that serves a creamy white salad dressing with their salads that I just love.  It’s sweet, savory, and slightly tangy, and has a definite sesame flavor that makes this dressing stand out.

This is my version of that dressing.  It’s quick and easy to prepare; you can mix some up in just a few short minutes.  My recipe below makes enough dressing for several servings.  Keep it refrigerated and it can last for about a week.  In addition to tossing salad greens with this dressing, it’s perfect for a Japanese-style cole slaw; just drizzle it over finely shredded cabbage leaves and carrots and you’ll have a delicious and uniquely tasting cole slaw.

I use Kewpie mayonnaise instead of regular mayonnaise because it’s a little sweeter and richer.  You can find kewpie mayo at most Japanese or Asian markets.  However, be forewarned — kewpie mayo contains monosodium glutamate.  If you’re allergic to MSG, use regular mayo when you make this.

If you can interchange the types of mayo, why use kewpie, you may be wondering?  Well,  kewpie is creamier and slightly yellower than mayo brands like Best Foods or Hellman’s. That’s because kewpie mayo is made using only egg yolks — Hellman’s or Best Foods uses whole eggs.  Kewpie is also made with different types of vinegar, whereas the other regular mayo brands use lemon juice.

Give my recipe a try.  I think you’ll like it. 🙂

Japanese Salad Dressing

image

Ingredients:

  • 1 cup kewpie mayonnaise
  • 1 tablespoon soy sauce
  • 1 tablespoon chopped garlic
  • 1 tablespoon sesame oil
  • 2 tablespoons rice wine vinegar
  • 1 tablespoon mirin seasoning
  • 1/2 teaspoon sea salt
  • 3 tablespoons sugar
  • Pinch of black pepper

Optional Ingredients:

  • 1 tablespoon grated onion
  • 1 teaspoon grated ginger root

Directions:

Mix all of the ingredients together until creamy.  Serve over salad greens or shredded cabbage.  Refrigerate any unused dressing.

Enjoy!

image image


Print Friendly, PDF & Email

Smoked Beef Brisket – A slightly sweet, smoky version

I love a good BBQ.  It’s rare that I use a dry rub when we BBQ at our house, especially since my daughter makes excellent marinades.  However, when it comes to brisket, I prefer using a dry rub.

I like to experiment with different spice combinations when coming up with recipes for dry rubs.  This one contains an unusual combination of espresso powder, brown sugar and cumin, among other things.  The sweetness of the sugar goes really well with the smokiness of the espresso and cumin.

I also save some of the dry rub mixture to make a mop sauce to baste the brisket as it smokes.  All that’s needed to make the mop sauce is to mix a bottle of your favorite beer (ale works well with this recipe) with about 1/2 cup of the dry rub mixture.  Don’t worry–the alcohol cooks out by the time the brisket is done.

I own a smoker/grill, which is what I used to smoke my brisket.  You don’t need a smoker to make this, however.  You can bake this long and slow in your oven.  The result will still be finger-licking-good.

Give my recipe a try.  I think you’ll like it. 🙂

Smoked Brisket

image

Ingredients:

  • 1 cup brown sugar
  • 2 tablespoons cumin
  • 1 tablespoon espresso powder
  • 1 tablespoon salt
  • 1 teaspoon black pepper
  • 2 tablespoons garlic powder
  • 1 tablespoon onion powder
  • A nicely marbled brisket, about 7-8 pounds, with a nice layer of fat on one side
  • 1 bottle beer (I used a 12-ounce bottle of Alaskan ale)

Directions:

1.  In a small measuring cup, mix together the brown sugar, cumin, espresso powder, salt, black pepper, garlic powder and onion powder.

image

2.  Save 1/2 cup of the dry rub to make the mop sauce.  Spread the rest of the rub evenly over both sides of the brisket.

image

3.  Mix the beer with the remaining 1/2 cup of the dry rub mixture.  Set this aside.

image     image

4.  If you own a smoker, place the brisket on the grill, fat-side facing up.  Smoke the brisket for one hour, then turn the temperature to 225 degrees to cook for the remaining time.  You’ll smoke/cook the brisket for a total of 6 hours.  Generously baste the brisket once every hour.

image

5.  Mid-way through the cooking time, after about 3 hours or so, flip the brisket over so that the fat is on the bottom.  Continue basting every hour; stop basting one hour prior to the brisket being done.

image

6.  When the brisket is done (after it’s been smoking/cooking for about 6 hours), remove it from the grill or oven.  Wrap the brisket in aluminum foil and let the brisket rest for 30 minutes.

image

7.  After 30 minutes of resting, unwrap the brisket.

image

8.  Thinly slice the brisket, ensuring you cut across the grain of the meat.

image

Serve and ENJOY!

image

Our mini-poodle is waiting patiently for his share! 🙂

image

Print Friendly, PDF & Email
« Older Entries Recent Entries »